Deep Sky Astrophotography Equipment
A basic deep-sky astrophotography equipment setup typically includes an equatorial tracking mount, a camera, and a telescope or lens. Additional accessories may be added to improve tracking (autoguiding) and automate the imaging session throughout the night.
My personal astrophotography equipment profile has evolved substantially over the years (and yours may too). This article is designed to help beginners navigate the process of choosing astrophotography equipment and share what I have learned as an astrophotographer over the past decade.
I have tested over 50 telescopes, including the Apertura CarbonStar 200 in August 2025.
You may choose to mirror one of the equipment profiles I have put together to get a better idea of what’s possible. I personally started my journey using a DSLR camera and a telescope, and some used equipment in the backyard, and things progressed from there. Almost all of the photos of space I take are captured from my backyard in Ontario, Canada.
My “Primary” Deep-Sky Telescope Rig (2026)
- Mount: ZWO AM7
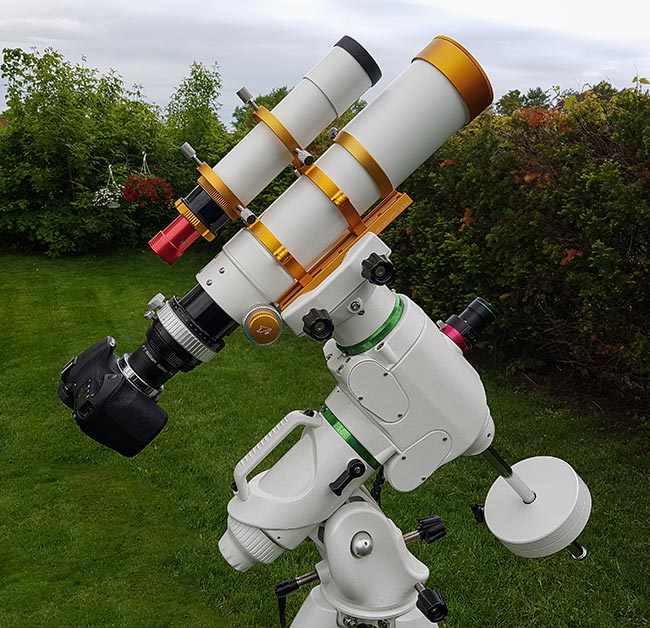
- Telescope: Askar SQA130
- Color Camera: ZWO ASI2600MC Pro
- Mono Camera: ZWO ASI2600MM Pro
- Camera Controller: ZWO ASIAIR Plus
- Color Camera Filters: Optolong L-eXtreme
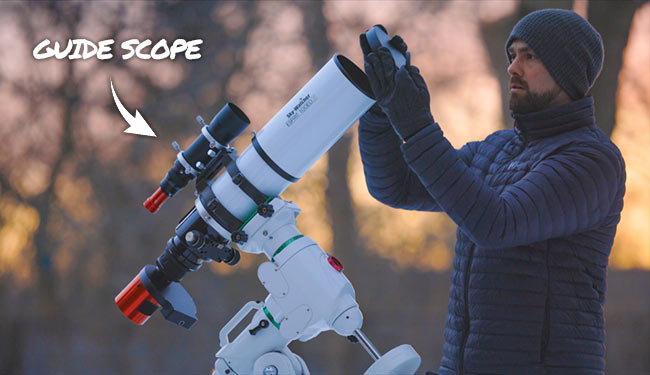
- Guide Scope: William Optics 50mm Guide Scope
- Guide Camera: ZWO ASI290mm Mini
- Autofocuser: ZWO EAF
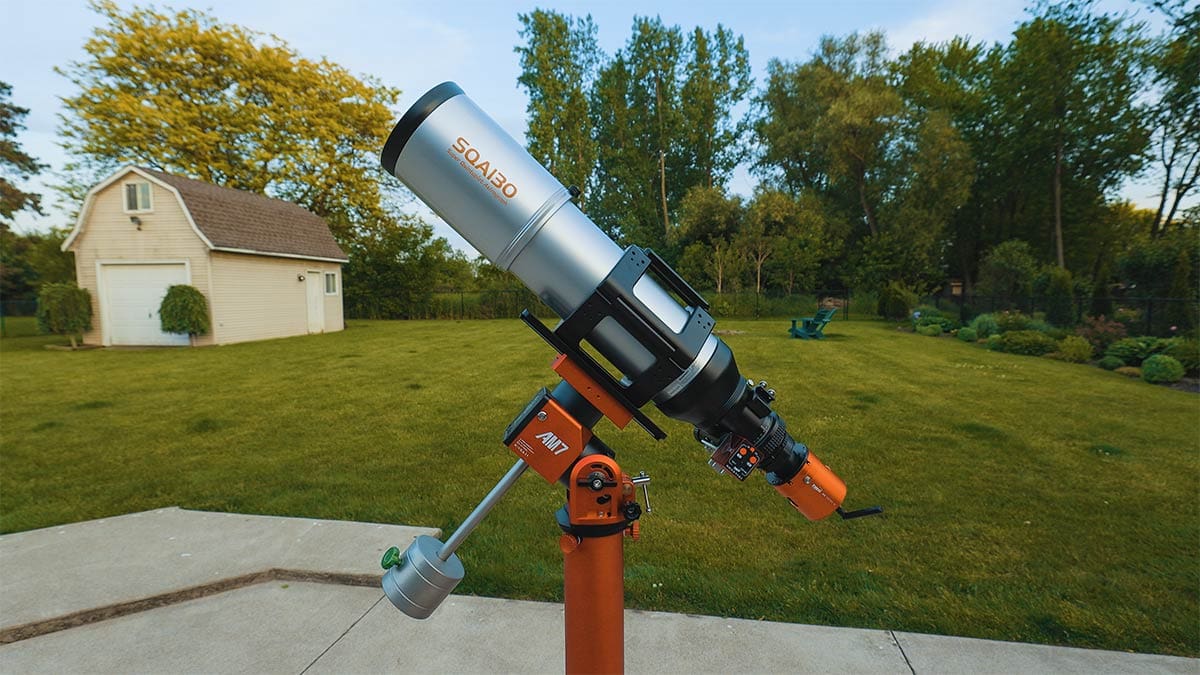
A typical deep-sky astrophotography setup in my backyard. (Askar SQA130)
The astrophotography equipment I use is constantly evolving, and I am able to test many new products soon after they come out. Due to increased popularity, astrophotography has experienced a wave of advancements in equipment over the years. Camera sensor technology has come a long way over the past 10 years, while telescopes remain largely the same (with the exception of a few new optical designs).
Advancements in technology have also changed the way amateur astrophotographers capture images of space. WiFi-controlled devices, Mini PCs, strain wave drive mounts, and multi-bandpass narrowband filters are just a few of the incredible tools amateurs can now enjoy from home.
My goal for this article is to provide you with an overview of the astrophotography equipment needed to capture detailed images of the night sky. I hope that you benefit from my decade of experience in this hobby and that the descriptions of the equipment I use give you a better understanding of the entire process.
Astrophotography Equipment
While all pieces of the puzzle must unite for a successful deep sky image, the undeniable foundation of it all is the equatorial telescope mount. When it comes to astrophotography, it’s the telescope mount that must accurately track the apparent movement of the night sky. This is often the first step beginners take when building their first deep-sky astrophotography rig, and it is an important one.
If you are currently in the process of budgeting and planning your first astrophotography kit, be sure to view the example configurations I have put together here: Building Your First Astrophotography Kit.
Choosing a telescope well-suited for astrophotography using either a DSLR or a dedicated astronomy camera is next, and there are many different types and models to choose from. For the best results early on, I recommend an apochromatic refractor telescope, as they are compact, lightweight, and capable of superb deep-sky images. If I had to pick the ‘perfect’ starter telescope, it would have to be the ultra-compact William Optics RedCat 51.

The William Optics RedCat 51 (WIFD) is the perfect option for beginners. ($888 at High Point Scientific)
If you already own a camera lens, consider using it before investing in a telescope. Believe it or not, a standard kit lens is capable of producing incredible astrophotography images with the right approach. Early on, the key to a successful image of space relies heavily on your ability to properly track the apparent motion of the night sky, not the optical device you’re using.
The camera you use for astrophotography does not matter as much as you probably think. The truth is, almost any modern digital camera with a manual mode can take incredible astrophotography images. The brand of camera you choose (Canon, Nikon, Sony, etc.) has very little impact on your astrophotography potential other than its compatibility with certain software and hardware options.
I started my astrophotography journey using a Canon EOS Rebel DSLR camera back in 2011. I continue to shoot with various Canon camera bodies, whether they are attached to a large telescope or a wide-angle camera lens. The photo of the Andromeda Galaxy shown below was taken with a 10-year-old, entry-level camera. It is proof that your image processing skills are much more important than the camera itself.
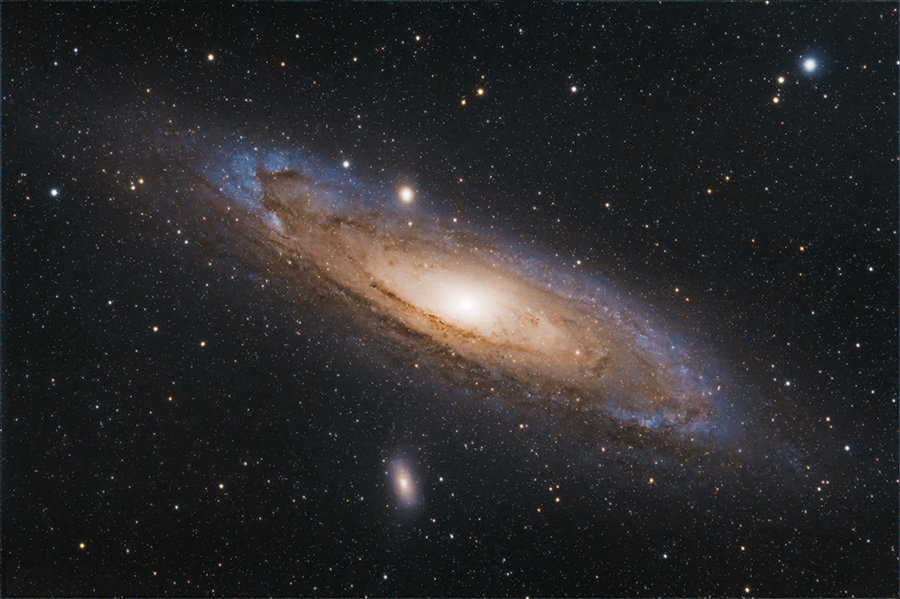
The Andromeda Galaxy. Canon EOS Rebel XSi. William Optics Z73 Telescope.
My first deep-sky astrophotography setup consisted of almost used gear. I used a DSLR camera for each and every project, and it was not astro-modified when I started out. The camera was attached to an Explore Scientific ED80 Triplet APO refractor telescope, riding on a Celestron CG-5 GoTo tracking mount.
Many would consider this to be a budget astrophotography setup, yet the results I achieved were impressive. DSLR astrophotography will always hold a special place in my heart, and it continues to be a relevant approach to the hobby today. Below is a photo of one of my first astrophotography setups in the backyard.
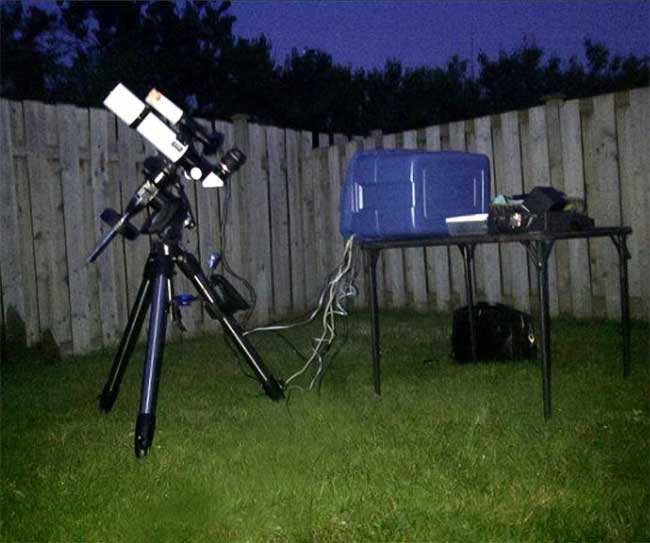
My budget astrophotography setup (2012).
Rather than jumping into a heavy-duty equatorial tracking telescope mount right away, a portable star tracker is often a better place to start. This allows you to understand and apply the importance of polar alignment and balance, and how it affects the quality of your pictures. A system like this is more than capable of producing incredible nightscape images, with a detailed night sky full of stars, nebulae, and galaxies.
The setup shown below is ultra-portable and lightweight. This means it is a great option for those looking to escape the city light pollution and capture better images from a dark sky location. A small camera lens and star tracker can capture detailed portraits of many fantastic deep-sky objects like the Orion Nebula and North America Nebula.
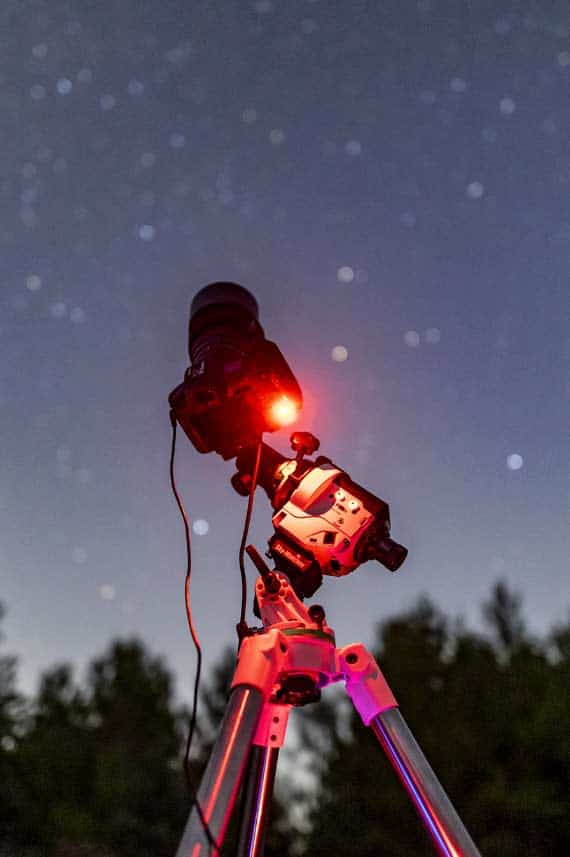
A portable star tracker with a DSLR camera and lens riding on top.
Now that I have given you a brief overview of the core elements of a capable astrophotography system, I will dive deeper into the decision-making process you need to consider before heading down the ‘rabbit hole’.
Types of Equipment for Astrophotography
The astrophotography equipment road you travel down will depend heavily on the type of astrophotography you plan to enjoy. For example, a setup for wide-angle Milky Way photography will look much different than one intended for high-magnification deep-sky imaging.
Some objects (such as the moon) are big, bright, and close. Others are small, dim, and extremely distant. These vast differences mean that there is no ‘one-size-fits-all’ option. For most people, choosing the right telescope is the primary focus in the early stages of their astrophotography journey, but you do not need a telescope to enjoy astrophotography.
In fact, some of my all-time favorite images were captured using a beginner-level DSLR camera and a wide-angle camera lens. As you progress through the hobby, I think you will find that there are endless ways to accomplish your goals. If your passion for astrophotography lies in capturing nightscapes from beautiful locations, you may never need a telescope.
However, if you’re interests are to capture bright nebulae and galaxies up close (deep-sky astrophotography), purchasing a telescope is in your future. If you need some help making this decision, I have published a detailed article outlining 10 of the Best Astrophotography Telescopes Available in 2025.
I believe it is extremely important to consider the overall user experience a particular path will take, before buying your next telescope or camera. The last thing you want to do is to set yourself up for a discouraging night. Remember, astrophotography involves capturing images at night, in the dark.
Choose a kit that you understand, and learn the basics before heading out into the unknown (or your backyard at night).
For example, a traditional Schmidt-Cassegrain Telescope (SCT) may seem like an obvious choice to a beginner because of its impressive aperture and focal length. However, these qualities magnify issues in tracking and autoguiding accuracy, which may be very discouraging and difficult to address early on.
My goal for this article is for you to see the big picture of astrophotography and the many paths you can take to enjoy it. I’ll give you an inside look at the gear amateur astrophotographers are using to photograph the night sky from their own backyards. You don’t need a backyard observatory to capture award-winning space images; what you need is a smart approach to your projects and equipment that never lets you down.
Choosing Equipment for Astrophotography
The type of astrophotography equipment that is right for you depends on the subjects you like to photograph most. I enjoy capturing deep-sky objects like nebulae and bright galaxies, and most of my astrophotography equipment reflects this.
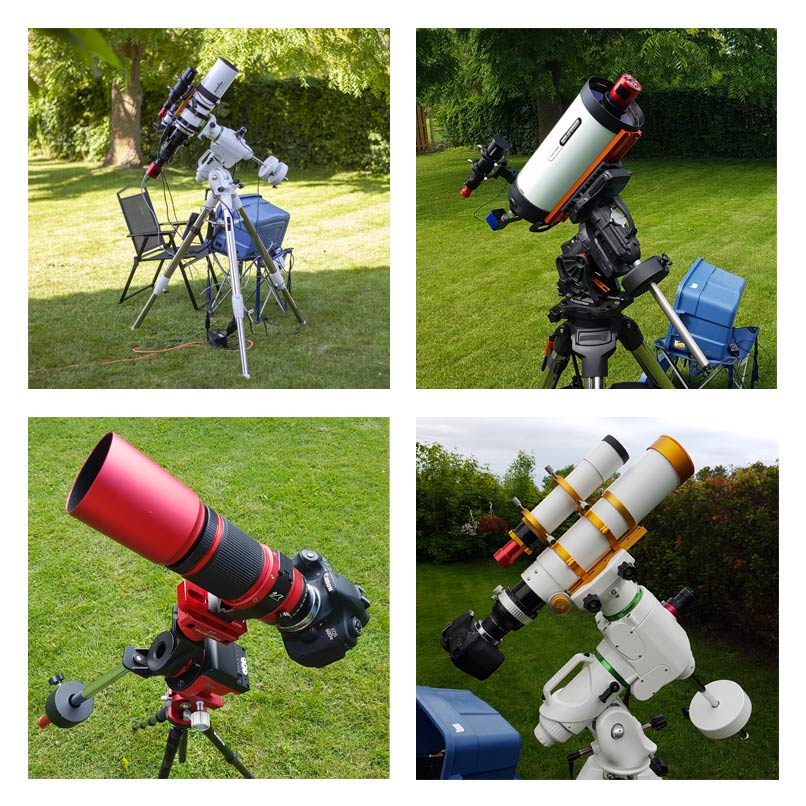
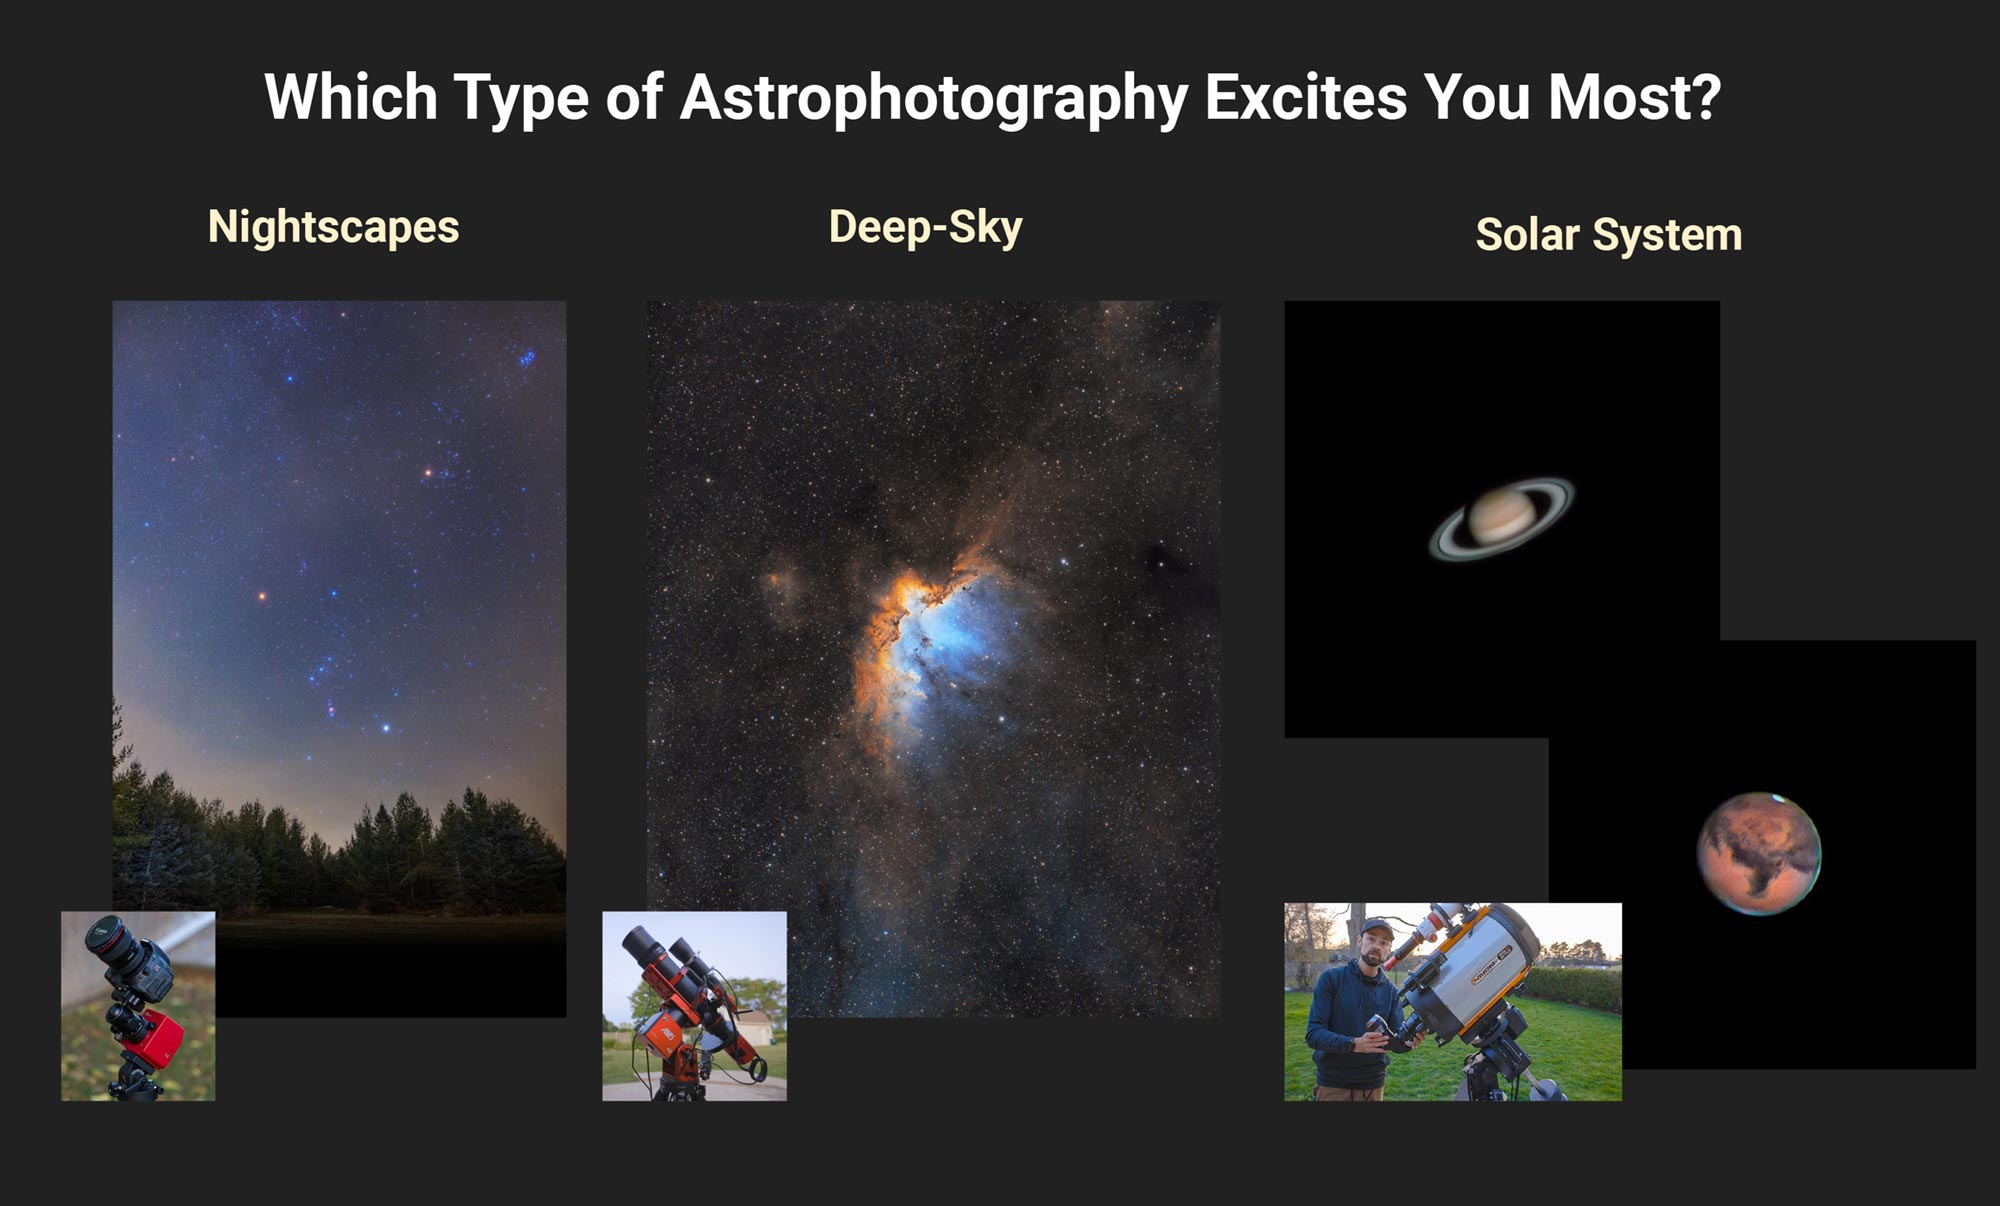
While I also enjoy photographing planets, solar system objects are comparatively small to the large nebulae I capture at much shorter focal lengths. In general, there are three different types of astrophotography equipment profiles to consider.
The following configurations can be customized and modified in countless ways. You can use the same telescope and/or camera for each type of astrophotography, but this is a good general overview of what you can expect early on.
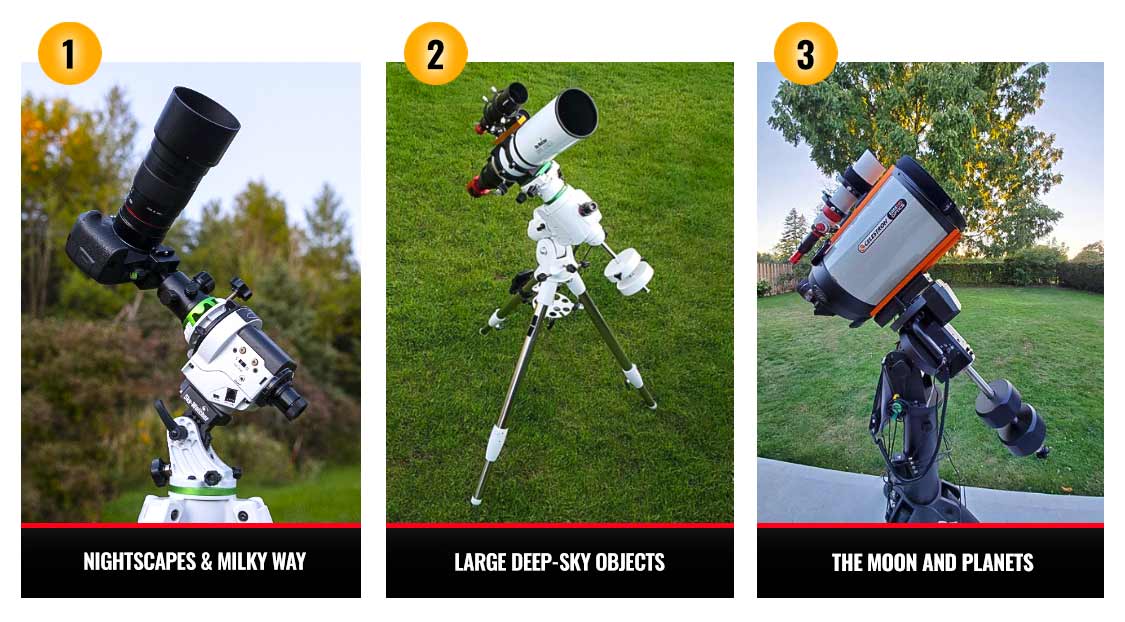
- Milky Way Photography and Nightscapes: Star Trackers, Camera Lenses, DSLR/Mirrorless Camera
- Deep-Sky Astrophotography (Nebulae and Galaxies): Refractor Telescope, Equatorial Tracking Mount, Dedicated Astronomy Camera
- Planet Photography: Long Focal Length Telescope, Equatorial Tracking Mount, High-Speed Planetary Camera
I tend to spend the most time using a system like the one shown in the middle. This one involves a refractor telescope with a mid-range focal length of about 500mm, and a cooled astronomy camera designed for long exposure imaging. A wide-field imaging telescope can be more forgiving than a larger model like the Celestron Edge HD 11 shown to the right. The higher the magnification of your optical instrument, the more pronounced any errors in tracking become.
Autoguiding is used to help correct any tracking errors the mount makes, and can make a big difference in the overall quality of your individual sub exposures. Modern astrophotography mounts include autoguiding ports that communicate with additional software (and hardware) to make subtle corrections. One of the most popular methods of adding this feature to your system is to mount an additional guide scope and camera to your primary imaging telescope.
As mentioned earlier, choosing the right telescope to suit your personal photography goals is important, but when it comes to astrophotography, the telescope mount should be your first priority. Without a solid platform, the best camera and optics money can buy will not perform as they should. Accurate tracking is everything.

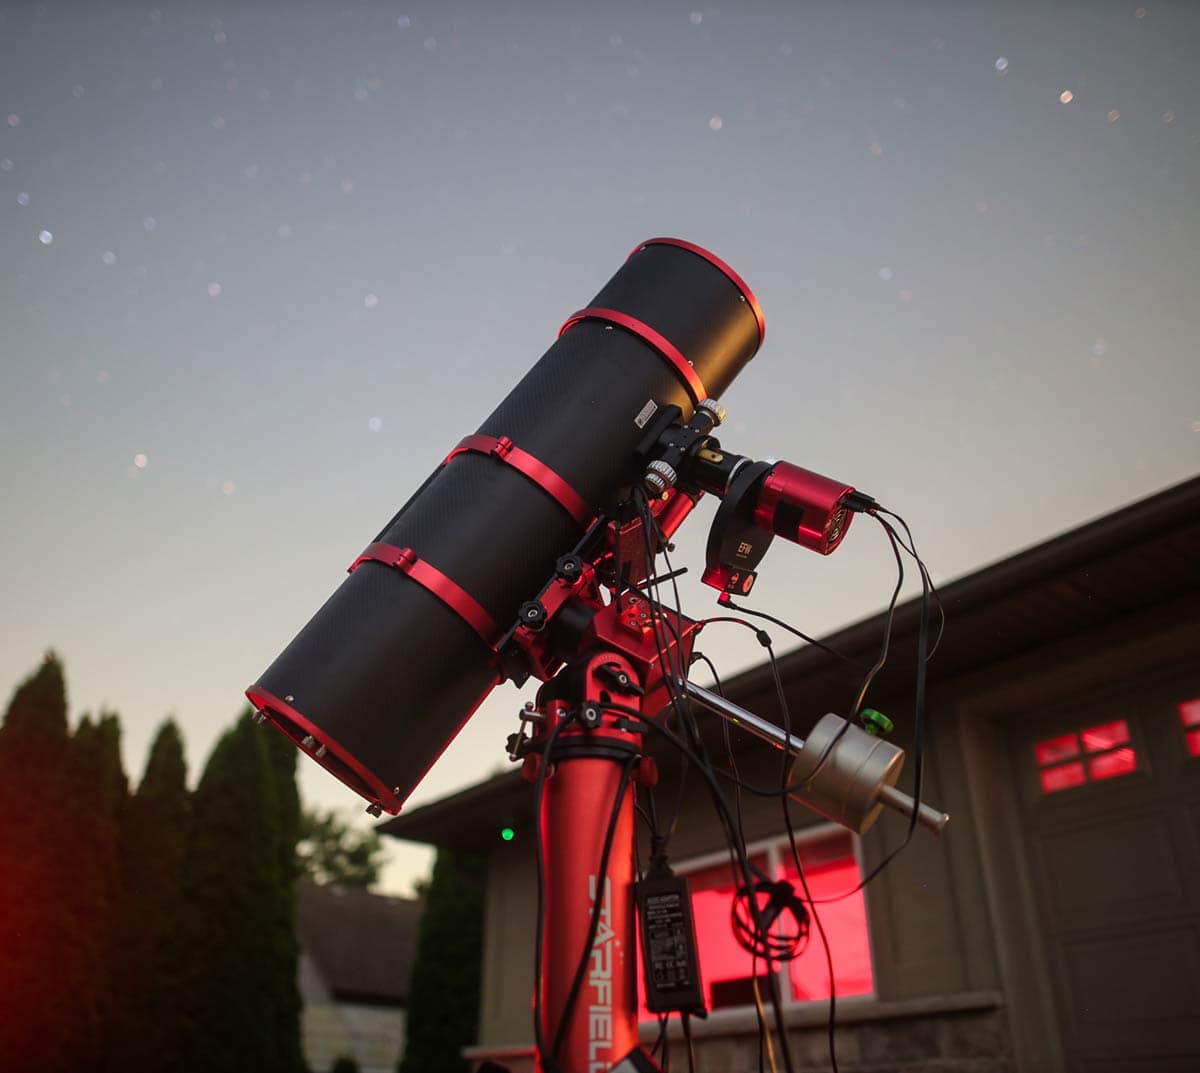
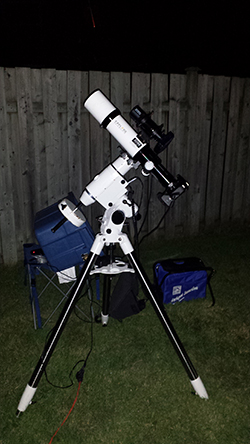
A typical deep sky astrophotography setup.
To photograph deep-sky objects in the night sky, several long exposure images must be captured to produce an image that reveals the faint light emitted by an object in space. This means that the telescope mount must compensate for the rotation of the Earth to precisely track your imaging target.
For years, I have used and enjoyed the Sky-Watcher EQ6-R Pro GoTo equatorial mount for my deep-sky astrophotography sessions. This is a robust computerized equatorial tracking mount with a 44-lb payload capacity. It includes an onboard hand controller and computer system that allows me to select objects in space from a large database, and the telescope will then slew to the desired position.
After a positive experience using the EQ-6 model, I had a chance to try out the much larger, observatory-grade EQ8-R Pro for heavier payloads. This is a great option for those mounting large telescopes like the Celestron Edge HD 11 to photograph planets and small galaxies. This is the telescope I used to photograph the planet Mars during opposition from my backyard.
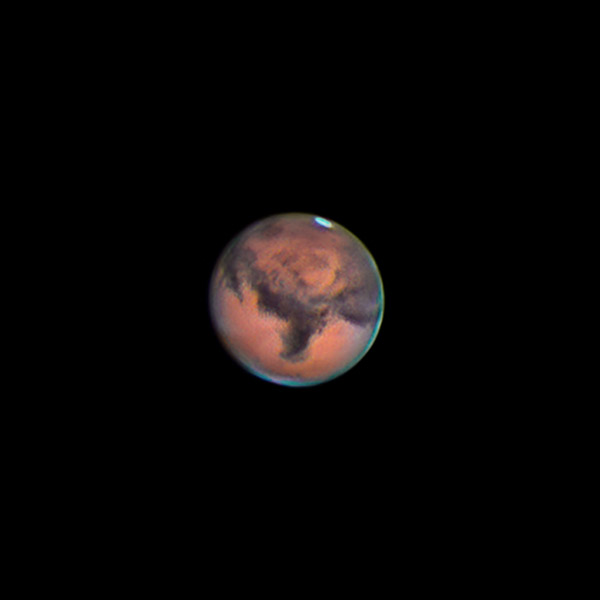
The planet Mars captured with my backyard telescope.
Just like the telescope you choose for astrophotography, the camera must also align with your intended subjects. Small, high-speed CMOS camera sensors are best for solar system imaging, while larger format monochrome CMOS sensors are advantageous for deep-sky projects.
For nightscape images or Milky Way Photography, a color DSLR/Mirrorless camera is often the most practical. Many amateur astrophotographers own all three types of cameras and use them strategically depending on their next project. To make your decision process even more difficult, you have the option of choosing a color or monochrome dedicated astronomy camera.
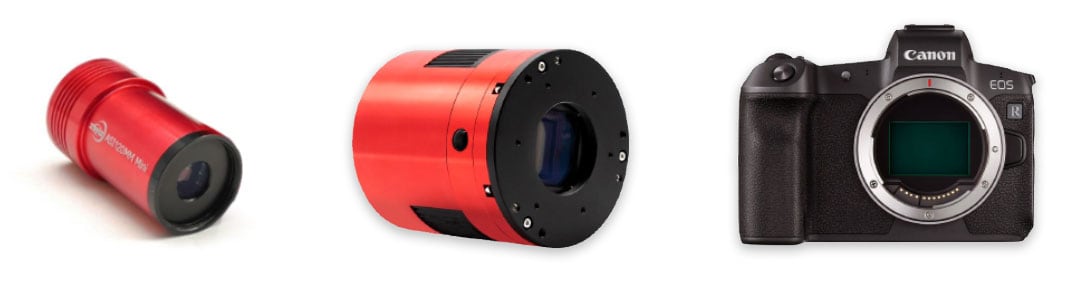
The 3 main types of cameras used for astrophotography.
Each of these camera types has its strengths and weaknesses. The DSLR/Mirrorless camera can be controlled on the camera body itself via the touch/LCD screen on the back. The dedicated astronomy cameras need additional software/hardware to control.
One of my most used cameras of all time (ZWO ASI2600MM Pro) features a high-resolution (26 MP) APS-C-sized mono sensor. This camera is a practical choice for many amateur astrophotographers because it produces images with manageable file sizes (about 50MB), and is less demanding on telescopes in terms of tilt and vignetting (compared to a full-frame sensor).
Because this camera uses a monochrome sensor, I need to take image exposures through separate filters using a filter wheel to create a full-color image. I have captured many incredible images with this camera, in both the broad (color) spectrum, and using narrowband filters in the Hubble Palette.

To photograph the moon, a DSLR/mirrorless camera and lens is a fantastic option to start out with. As you progress your skills further and learn new image processing techniques, you can capture larger, more detailed mosaics of the lunar surface using a dedicated astronomy camera. This type of astrophotography feels more like taking a video than it does taking a picture.
The process of capturing any solar system objects involves many of the same techniques, whether you’re photographing the Moon or the planet Saturn. Unlike deep-sky objects, these subjects are very bright and require high-magnification optical instruments to capture in detail. You can photograph planets without a telescope too, they will just be much smaller in the sky.
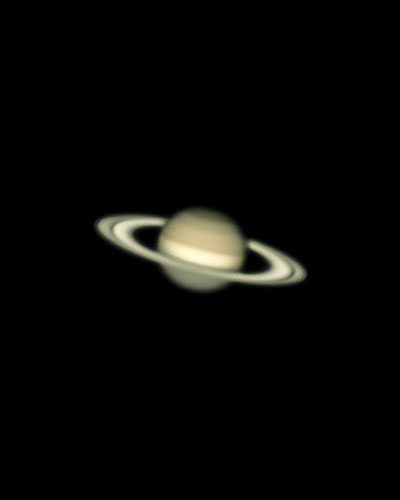
The planet Saturn captured through my telescope.
Smart Telescopes
Smart telescopes have revolutionized astronomy by offering user-friendly, automated features that make stargazing and astrophotography accessible to beginners. You get to spend more time exploring the night sky, and less time setting up and learning how to use complex equipment.
They combine built-in GPS, star alignment algorithms, and mobile app integration to automatically locate celestial objects. This eliminates the need for manual star charts or alignment processes.
Their compact designs, portability, and ease of use make them perfect for casual stargazing, and their advanced imaging capabilities—such as real-time stacking and noise reduction—enable stunning astrophotography without extensive technical knowledge.
Some of my favorite smart telescopes I’ve ever used are the Seestar S50 and the ultra compact Dwarf 3. Both of these models are capable of producing images that rival my results taken with a DSLR camera only a few short years ago.

A size comparison of compact smart telescopes for astronomy. (Dwarf 3, Seestar S30, and Seestar S50).
What Kinds of Pictures Can You Take?
If you’re getting started in astrophotography, the amount of equipment needed upfront can be a little overwhelming. I do my best to explain the basics in this video if you’re transitioning from daytime photography or have little to no experience in photography at all.
The good news is, once you learn the basics, capturing deep-sky images of nebulae and galaxies in space is within your reach. Seasoned veterans will devote several hours to each project, but that is not necessary to start understanding and enjoying the hobby. The following image was captured using a dedicated astronomy camera, through a 75mm refractor telescope.
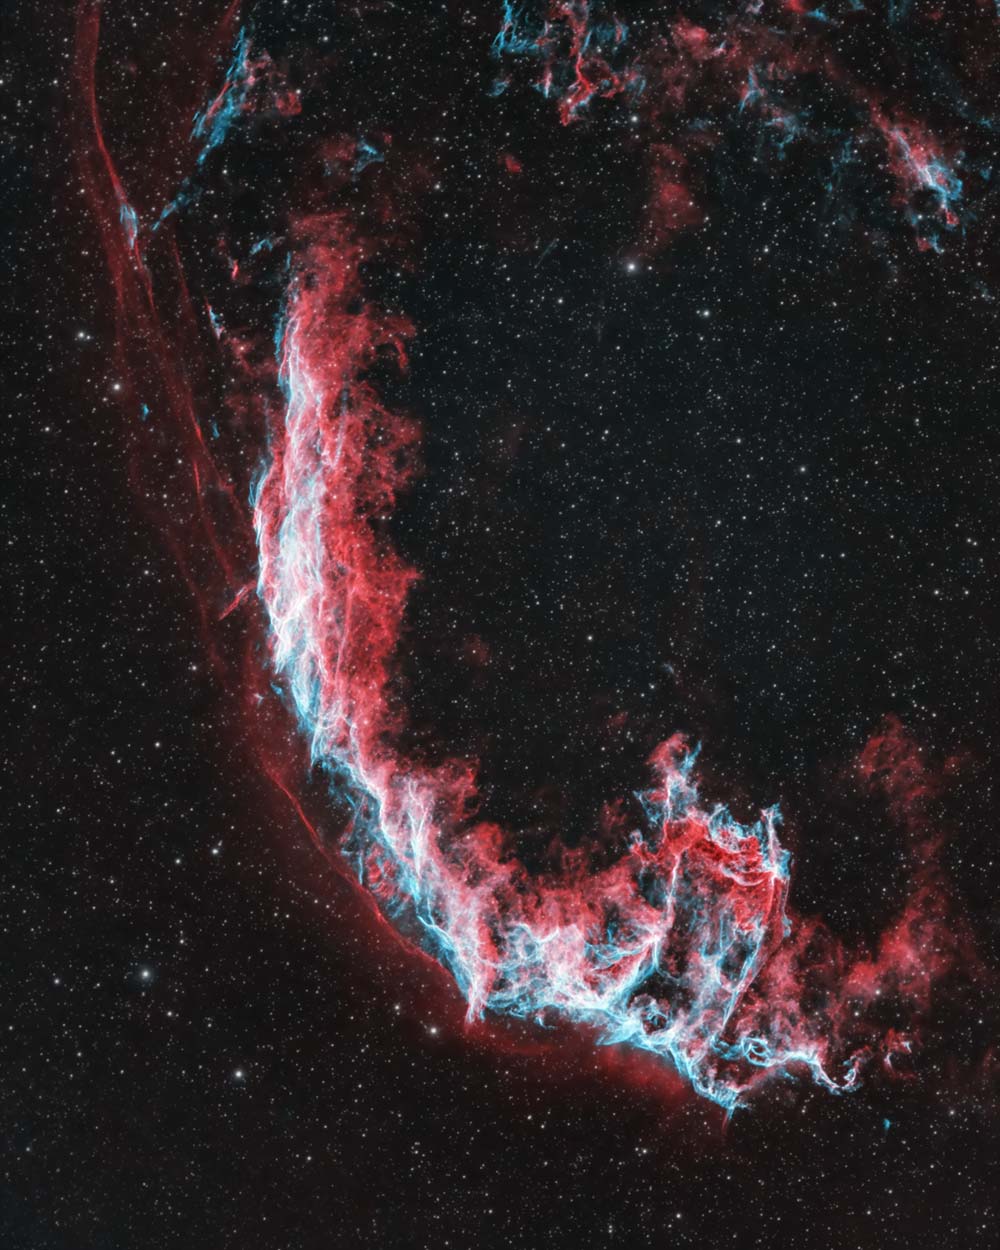
The Eastern Veil Nebula captured using a refractor telescope and dedicated astronomy camera.
Nebulae are one of my personal favorite subjects to photograph because they are often very large and colorful. Very few galaxies are this large in the northern hemisphere, with the exception of the Andromeda Galaxy and Triangulum Galaxy. Again, my primary astrophotography equipment setup is modeled around the type of images I like to capture most.
If photographing the Moon in its various phases is of interest to you, the process is quite different. Unlike a distant nebula or galaxy, the Moon is extremely bright, and shorter exposure images (or video frames) are needed to capture it in detail. It is also the most approachable target for beginners because it is easy to locate and does not require precise tracking.
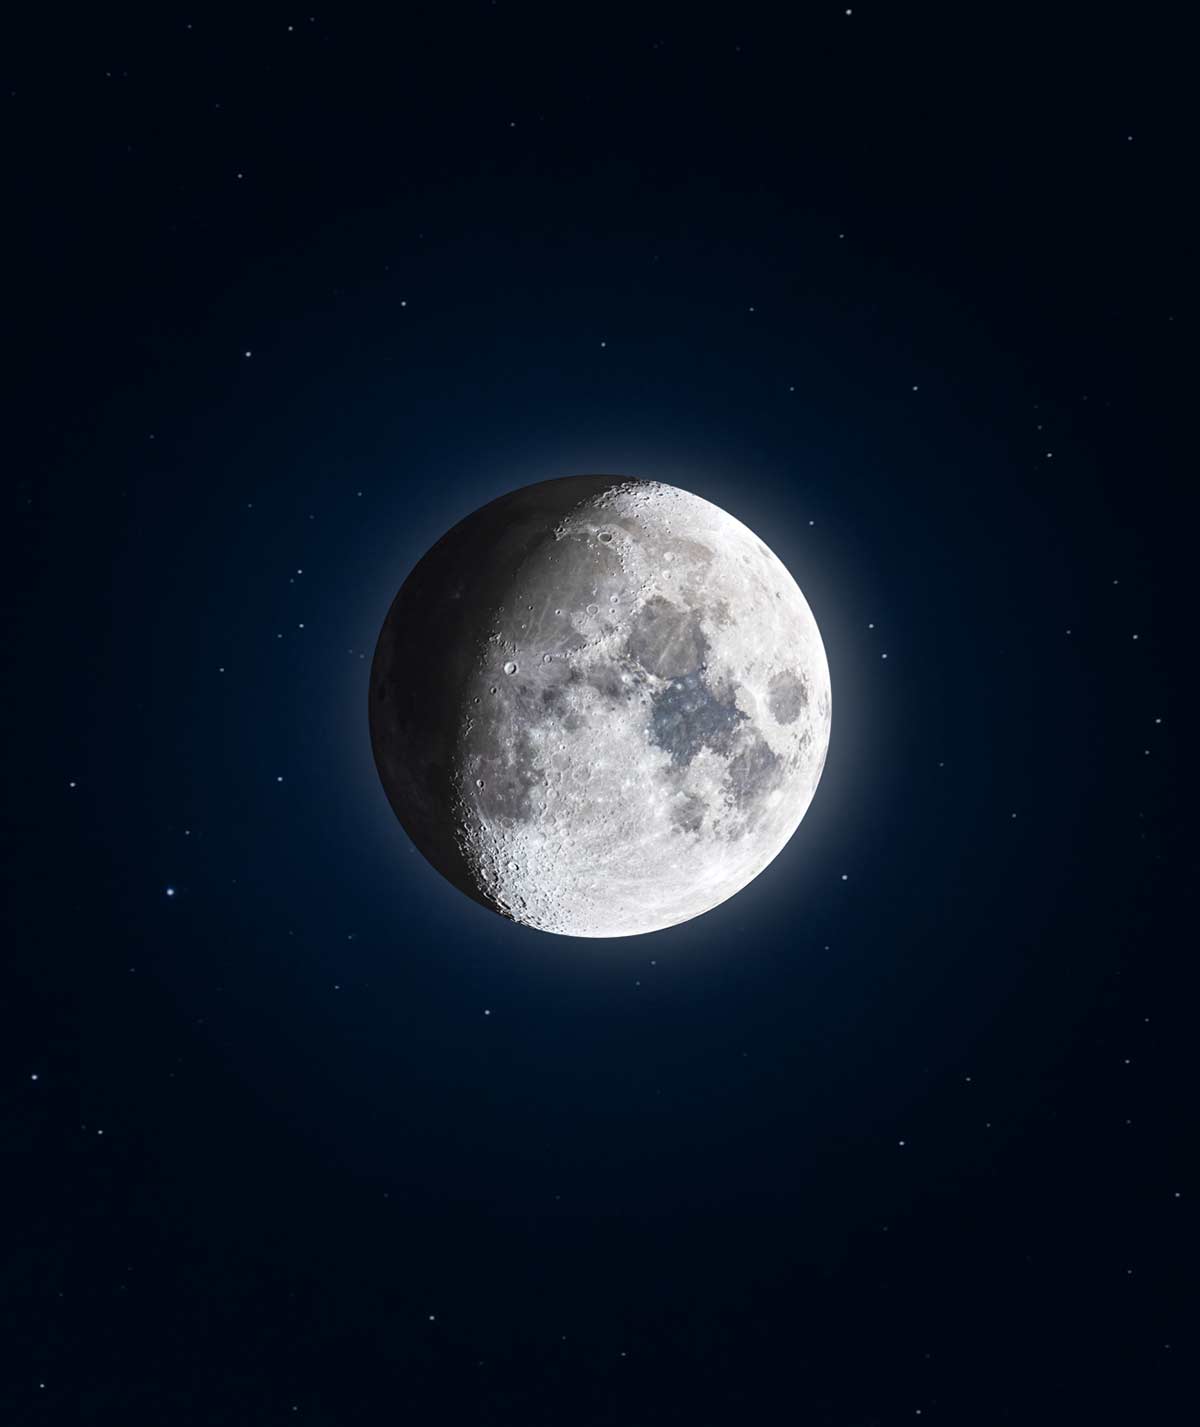
The waxing gibbous moon. Composite photo (3 images)
Image Processing and Computer Equipment
Image Acquisition
You can think of astrophotography in two stages: the image acquisition stage and the image processing stage. Your job is to educate yourself in both disciplines so that you, too, can capture incredible pictures of space from your own backyard.
The image acquisition stage (taking the pictures) involves setting up, monitoring, and running your physical hardware outside at night. Once your camera and telescope are up and running, this process is largely hands-off thanks to a wide variety of automation tools that exist today.
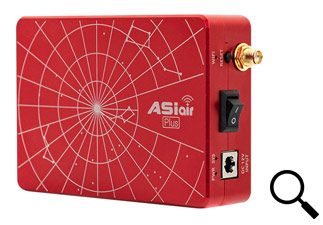
My personal favorite method of capturing images in the field is to use the ZWO ASIAIR Plus, which can automate everything from image capturing to plate solving. This is a WiFi device with an onboard computer that controls nearly every aspect of the astrophotography experience. The device is mounted to the telescope and records all of the images as they come through throughout the night.
Another option is to run an image capture software on their laptop computer. Popular choices include Astro Photography Tool and N.I.N.A. Years ago, it was not uncommon for me to run 3-4 applications on my computer at once to run a single imaging session. Today, most of these tools (planetarium, autoguider, plate-solver, etc.) are wrapped up into a single software package.
Image Processing
The sensational images of space I take are not possible without the second half of the process, image processing. This is when you finally get to reveal the intense beauty of the object you have captured through a process of ‘stretching’ the data.
There are many software options available for processing astrophotography images. During the pre-processing stages, you will need to combine all of the images you have taken using image stacking software. Your pre-processing routine will change based on the type of project you are working on, but almost all projects will require some sort of stacking.
I primarily use DeepSkyStacker to register, calibrate, and integrate my images into a single master file to process further. To process the master file, I use a combination of Adobe Photoshop and PixInsight to creatively edit the image to my tastes. Image processing is an involved process that will take many years to master, but it is also a lot of fun.
For a complete breakdown of the software I use for astrophotography, please see the resources page.
If you would like to see how my astrophotography images are processed, have a look at this image-processing tutorial using Adobe Photoshop. I also have a premium image processing guide (PDF) available for those looking to dive even deeper into the specific techniques that I use.
Astrophotography Equipment (Complete List)
Deep-sky astrophotography requires some specific equipment to get the job done. The hardware and accessories will vary widely, but there are a few common items that nearly every full-featured astrophotography equipment rig includes:
- Equatorial Telescope Mount
- Primary Imaging Telescope
- Primary Imaging Camera
- Camera Filters
- Guide Scope
- Guide Camera
- Filter Wheel
- Autofocuser
- Dew Heaters and Controller
- Laptop or Mini PC
- Power Supply
This does not include the adapters, field flatteners, reducers, cables, software, and many other items required to run these components. Not all of these items are essential to complete a deep-sky project (for example, an autofocuser), but they can make your life easier. I will provide a more thorough breakdown of each item below.
Telescope Mount
Your telescope mount is the heart of your entire astrophotography system. Its job is to accurately track the apparent rotation of the night sky, and allow you to capture long-exposure images. The type of mount needed for astrophotography is known as an equatorial (EQ) tracking mount. It tracks in two axes. The right ascension rotates on the axis of the celestial pole, while the declination allows you to point anywhere in the sky.
A quality telescope mount is an absolute must. A poor, unreliable EQ mount will cause a lot of frustration and makes astrophotography a seemingly impossible feat. While a telescope mount is often the most expensive purchase of your entire kit, there are smaller options that work incredibly well with a lightweight imaging system.
Recommended Telescope Mounts:
Telescope
The telescope is the item that most people like to obsess over when deciding on a deep-sky astrophotography setup. After all, it will determine the size of your target, whether it’s an emission nebula or the planet Saturn.
Telescopes can be expensive but if they are well taken care of, you should have them for life. I suggest choosing one that is within your budget. It should also be one that is easy to use and does not require a lot of upkeep and maintenance. Some telescopes require a substantial amount of tweaking to function at their best, and this is not an ideal start to your astrophotography journey.
Recommended Astrophotography Telescopes:
DSLR astrophotography using the Canon EOS 60Da and William Optics Zenithstar 73 telescope.
Camera
Your camera is an exciting piece of technology, one that has experienced more innovation in the last 10 years than any other piece of equipment. It is a fantastic time to be an amateur astrophotographer, thanks to a wide selection of affordable camera models now available.
Whether it’s a DSLR/mirrorless camera body, or a dedicated aged astronomy camera, these tools have the advanced features you need to make the astrophotography experience more approachable and exciting than ever before.
Recommended Astrophotography Cameras:
Filters
Filters are an important part of astrophotography, whether you are using them to block unwanted city light or to create dynamic Hubble Pallete false color images. There are three main types of astrophotography filters broadband, narrowband, and multi-bandpass narrowband.
A simple light pollution filter can help your camera sensor ignore some of the known wavelengths of light pollution. The resulting image should be less washed-out and have more contrast. There are many variations of these filters and some of more ‘strict’ with the amount of light in the spectrum they allow through.
Narrowband filters isolate specific bandpasses of light (for example, hydrogen-alpha), ignoring nearly all other wavelengths. These filters can help you create dynamic images of nebulae that reveal intricate details.
Multi-bandpass narrowband filters (the Optolong L-eXtreme, for example) allow selective bandpasses of light to reach the camera sensor, creating a less natural-looking color image with impressive details and contrast.
Recommended Astrophotography Filters:
- Optolong L-Pro Filter (Light Pollution)
- Chroma SHO 3nm Filters (Narrowband)
- Optolong L-eXtreme (Dual Narrowband)
Guide Scope
A small telescope for autoguiding is often referred to as a ‘guide scope’. These are relatively inexpensive, lightweight telescopes that can be mounted on top of your primary imaging telescope. A typical guide scope focal length is about 200mm for a small to medium-sized refractor telescope. As the focal length of your primary telescope increases, so does the need for a longer focal length of your guide scope.
Many amateur astrophotographers choose to use an off-axis guider when shooting with a longer focal length, as this method uses the native focal length of the primary imaging telescope. This also removes the need for an additional guide scope from the setup.
Recommended Guide Scopes
Guide Camera
The guide camera is placed into the guide scope or off-axis guider to play a continuous loop of images. This camera must be in focus, and be able to ‘see’ a few stars in the field of view.
Guide cameras are relatively affordable due to their small sensor size, and they can also be used for planetary imaging. These CMOS cameras are available in both monochrome and color variations.
Software is used to view and analyze the image loop of stars and to choose a ‘guide star’ (or multiple stars) as a reference point. The autoguiding software uses the subtle movement of the guide star(s) to make small corrections to the tracking mount to stay on target.
Recommended Guide Cameras
Filter Wheel
A telescope filter wheel can streamline your astrophotography acquisition process by allowing you to change filters without removing the camera. An electronic filter wheel adds a layer of automation to your deep-sky imaging rig, as you can now change filters using dedicated camera control software.
Filter wheels come in many shapes and sizes to accommodate the types of filters you own. For example, I use a 7-position filter wheel with 36mm filter slots for my primary imaging rig. Others may need a filter wheel with 48” filter slots to fit their filter set.
Recommended Filter Wheel
Autofocuser
Some amateur astrophotographers will consider an autofocuser to be a ‘luxury’ item; others consider it to be a must-have. Even if you have perfectly focused your camera and telescope during an imaging session, there is a good chance it will need to be re-focused at least once, or even multiple times, throughout the night.
An autofocuser reads the size of the stars in your images and sends that information back to the telescope’s focuser to make any subtle adjustments needed. These are subtle movements done with a stepper motor, so that you never have to touch the telescope, and/or waste time wondering if you are in focus or not.
Recommended Autofocuser
Laptop Computer/Mini PC
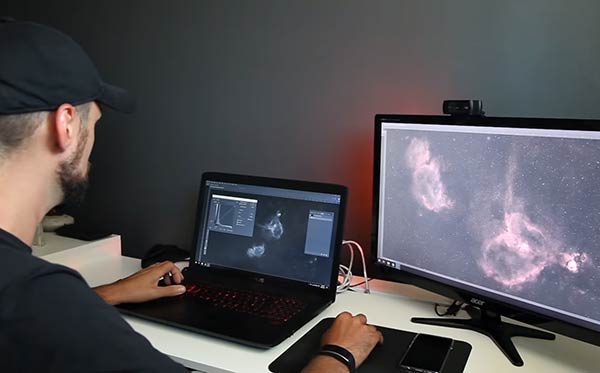
Whether you are using a DSLR camera or a dedicated astronomy camera, your imaging session can benefit greatly from automation software. Often called ‘image control’ software, these astrophotography-specific applications include tools to run a sequence of images, as well as many other features.
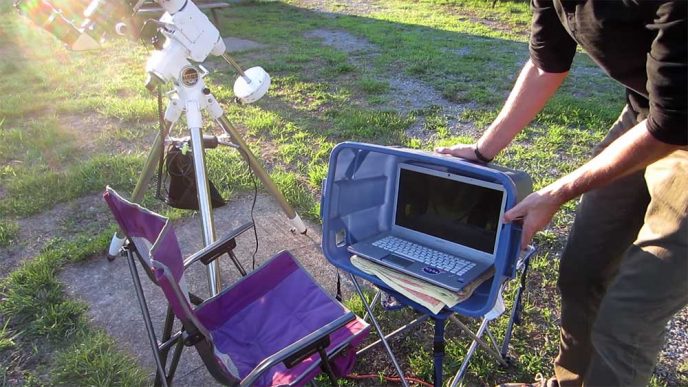
A laptop computer running astrophotography software in the field.
To run the software, you will need a computer of some sort. Many people choose to use a laptop computer, with all of the programs necessary to run an imaging session. Others choose to mount a mini PC to their telescope and remote into it via a wifi connection. This option allows for better cable management, as all of the devices can be plugged into a single unit.
Recommended Computer/WiFi Controller
Power Supply
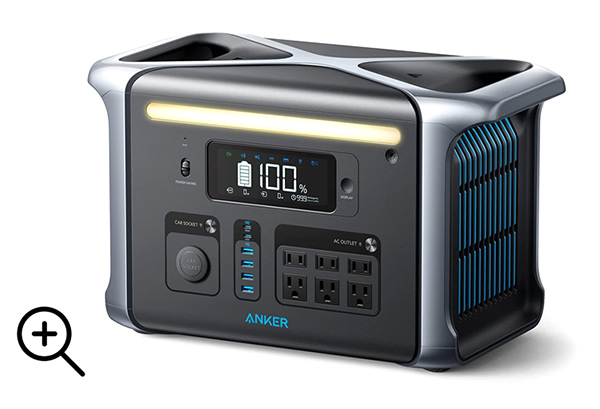
A reliable power source is critical when photographing the night sky. Any interruptions can result in a loss of tracking, ruining the image exposure you are currently taking. Plugging into household AC power while imaging from home is ideal, but this also leaves you open to potential power outages. An additional battery backup is recommended.
The amount of power you need will vary depending on the astrophotography equipment you are powering. Most devices will list a recommended minimum amount of power. For example, my telescope mount lists a 12V 5A adapter for optimal performance. There are many portable battery packs or ‘power stations’ available today. Some of them contain sophisticated lithium batteries capable of running large electronics for long periods of time.
Recommended Power Supply
Telescope Bag
When traveling with my gear (to star parties, camping, etc.) I usually pack my telescope in this multi-purpose carrying case. It is made from a soft material but is strong enough to hold my medium-sized refractors such as the Sky-Watcher Esprit 100.
The company is called Rhino BagMate, and you can order them on Amazon. My favorite feature of this bag is that I can keep the guide scope, camera, and guide camera mounted to the refractor and still fit it inside the bag.
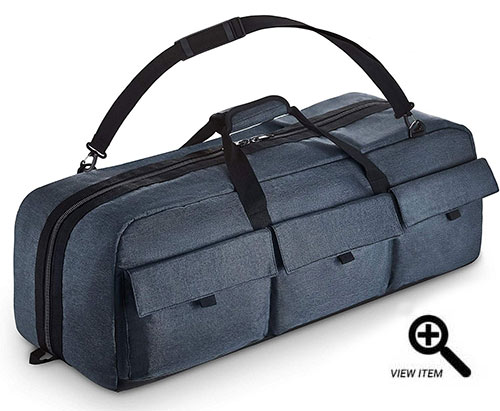
The Rhino BagMate is a quality case for telescopes under 40″ long.
Types of Astrophotography
The term astrophotography encompasses many types of photography styles and techniques. For beginners, a DSLR camera and a tripod are all you need to start taking pictures of the moon and stars above. Modern cameras and kit lenses (The ones that come with entry-level DSLRs) are well-equipped to capture the Moon, Auroras, the Milky Way, and much more.
Landscape Astrophotography (nightscapes) is a beautiful form of photography and can be done with nothing more than a camera and tripod. Below is a photo of the constellation Scorpius, and the Planet Mars. Although no tracking is involved when the camera is mounted to a stationary tripod, your photo can still benefit from the process of image stacking.
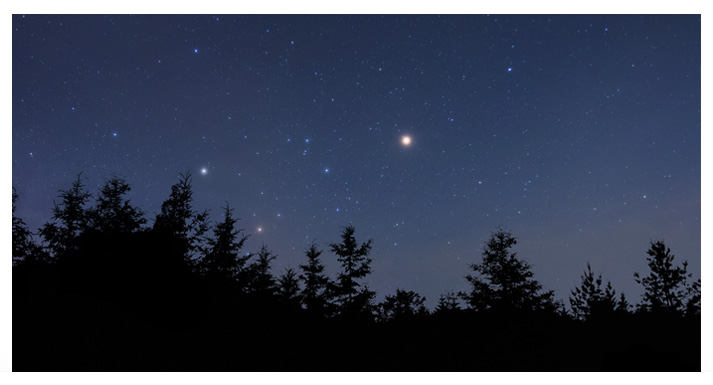
A ‘nightscape’ image of the summer constellations. Camera and stationary tripod.
You can later expand your astrophotography equipment to include hardware that allows you to track the night sky. Some of those items include a telescope, an autoguiding system, dew heaters, and filters. Start slow, and acquire the gear you need as you learn.
The video below should help you understand the basic equipment needed for imaging deep-sky objects in the night sky with a DSLR camera. I still own most of the astrophotography equipment featured in this video, but I have since upgraded every aspect of this configuration from the mount to the camera.
If you watched the video, you’ll know that I began my astrophotography journey by capturing images with an entry-level DSLR camera. Since then, I have explored the world of cooled CMOS astronomy cameras, and even a CCD camera.
My astrophotography equipment continues to evolve (and expand) each year, in an attempt to improve the quality of my images, and my personal enjoyment of the hobby. By sharing my experiences on this website and the AstroBackyard YouTube channel, I have the unique opportunity to test and review new astrophotography products on a regular basis.
As my focus is currently deep-sky astrophotography, my equipment, and reviews are geared toward items that aim to achieve success with this method. An alternative set of equipment and a camera may be a better option for other types of astrophotography, including planetary or lunar imaging, but I am not nearly as experienced in those areas.
Deep-sky images of nebula and galaxies are what pulled me into this hobby, and what keeps me coming back for more. Here is one of the earliest successful deep sky images I captured, the Andromeda Galaxy.
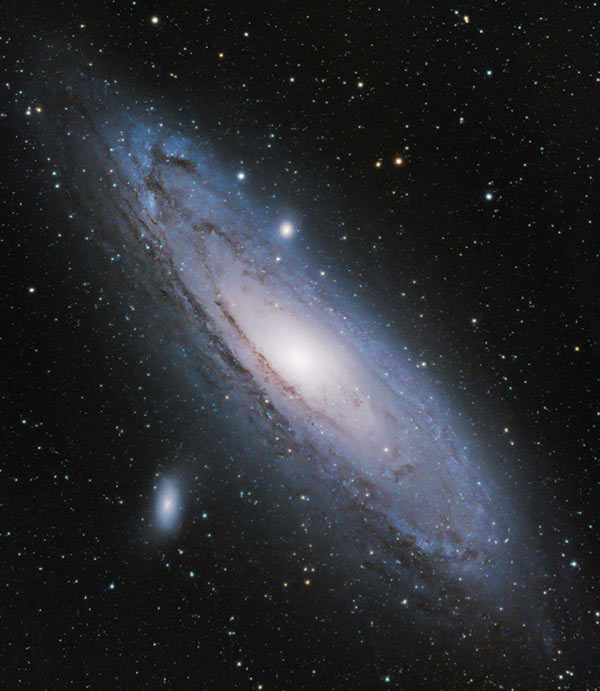
The image above was captured in 2012 using a stock Canon Rebel DSLR camera and a small telescope.
Astrophotography can change your life by providing you with a creative outlet like you have never experienced before. There are endless options when it comes to astrophotography equipment that can produce high-quality images.
Some hobbyists get carried away with the “gear” aspect of the hobby, and I can see why. There have never been so many options available to track and photograph the stars above. It is important to research the astrophotography equipment you are looking to purchase before you buy it. AstroBin is a great place to browse what others are using.
Connecting Your Camera to a Telescope
A camera adapter will connect the telescope to the front of your DSLR as if it were a large camera lens. A T-ring and T-adapter will allow the camera sensor to point through the focuser tube of the telescope. The T-ring locks onto the front of the DSLR like a camera lens, while the adapter screws into the t-ring and is inserted into the drawtube. Make sure to purchase the T-ring that is compatible with your brand of camera.
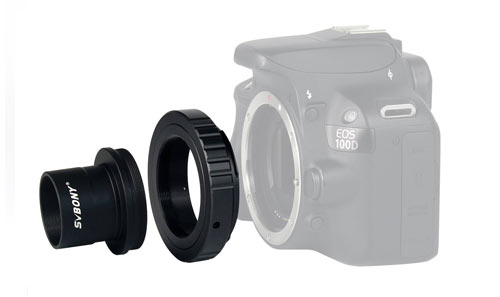
Connect your DSLR to the telescope with a T-Ring and a Prime Focus Adapter (step-by-step instructions)
This is one of the first steps you will need to take if you want to take deep-sky images through your telescope. Later on, you may want to replace the prime focus adapter with a field flattener/reducer, or a direct, threaded connection to the back of the telescope.
A secure connection between your camera and the telescope (with the correct back-spacing) is essential to focus your camera and take sharp images with pinpoint stars across the field. Depending on which telescope you are using, this connection may require additional adapters to achieve the correct spacing.
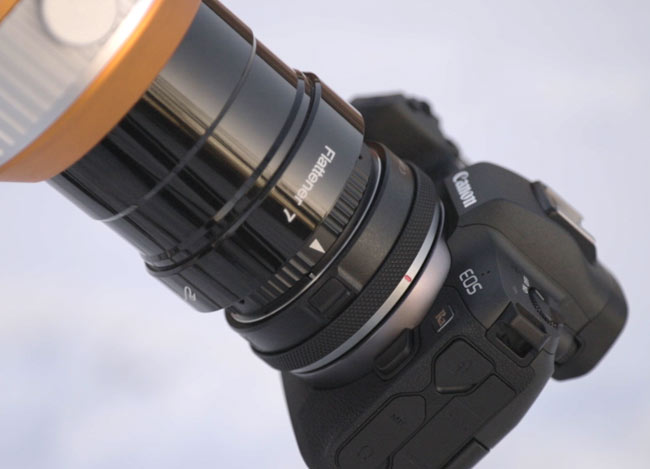
A mirrorless camera attached to a telescope field flattener via a t-ring adapter.
Some adapters will allow you to control every aspect of this connection, and the orientation of your camera sensor. This includes being able to adjust the rotation of the camera sensor, and the tilt of the sensor plane in relation to the optical path.
Astrophotography Autoguiding System
Amateur astrophotographers use a process known as autoguiding to improve the tracking accuracy of their telescope mount. This allows you to take longer exposures without worrying about periodic error. Certain high-end GoTo tracking mounts do not require autoguiding for optimal performance, but most do.
Thankfully, the process of autoguiding is quite simple to set up and works extremely well. There are a few different methods of autoguiding (off-axis guider, mounting a guide scope), and 2 main types of connections as well (ST-4 and On-Mount Pulse Guiding).
You’ll need to use a software tool like PHD2 guiding to set up and control the guiding session. This program integrates with many of the popular astrophotography acquisition tools such as N.I.N.A. and Astro Photography Tool.
I have found the absolute easiest way to autoguide to be using the ASIAIR mobile app on my smartphone. This is one of the many features of the app, and is relatively painless. As long as you are able to find focus using your guide camera and guide scope (and the right connection to your mount), the calibration routine takes minutes, and you are on your way.
Photographing the Night Sky on a Budget
The astrophotography equipment I started out with could be classified as ‘budget-astrophotography‘, as I did not have extra money to purchase new gear. Over time, I slowly upgraded each piece of gear by patiently waiting for items I was interested in to appear in the used equipment section of the online astrophotography stores and classifieds.
Much of my gear was purchased second-hand from astronomy classified websites such as Canada-Wide Astronomy Buy and Sell, and Astromart. I bought my beloved Explore Scientific ED80 used from Astromart, and my Sky-Watcher HEQ-5 used from Astro Buy-Sell. Below, is a picture of one of my first astrophotography setups, involving a DSLR camera and telescope.
Visual Astronomy with a Telescope or Binoculars
For visual observation through the eyepiece, I use a Celestron StarSense Explorer 8 Dobsonian reflector. The 8-inch aperture provides impressive views of both deep-sky objects and planets, and the dedicated smartphone app helps me locate dim objects in the night sky.
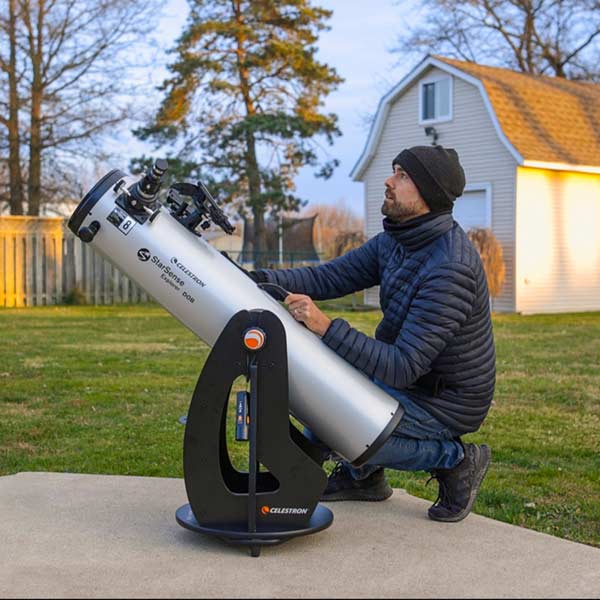
The Dobsonian mount design makes observing the night sky enjoyable with a comfortable viewing position and a simple way of moving the telescope. The combination of affordability and performance is why I think this is the best astronomy telescope for complete beginners.
Binoculars are another affordable way to take your astronomy observing to the next level. The Celestron SkyMaster Giant 25 x 70 Binoculars are a favorite at my local astronomy club, and feature a huge 70mm aperture.
These binoculars can get a bit heavy after a lengthy observing session, but you can’t beat the light-gathering power. Before owning these, I had no idea how amazing a nice wide view of the Milky Way could look when you use both eyes.
Related Article: Choosing Binoculars for Astronomy
Astrophotography Equipment List
Here is a list of every piece of astrophotography gear I have used to successfully capture an image. I have included a link to any additional information I have about it, whether it is a written/video review, or simply the product page.
I will continue to add to this list as I test new telescope equipment in the future. Many of the items have been returned to the company that lent the items to me for testing. For the latest information about what I am currently using, please sign up for the email newsletter or follow AstroBackyard on YouTube.
Telescopes:
- TPO 180
- William Optics RedCat 51
- Starfield Optics GEAR 60Q
- Radian 61 Triplet APO
- William Optics Zenithstar 61
- William Optics RedCat 71
- Celestron 8″ RASA F/2
- William Optics Zenithstar 73
- Radian 75 Petzval APO
- William Optics GT81 WIFD
- Sky-Watcher Esprit 100
- Explore Scientific ED102
- William Optics FLT 132
- Orion 8″ F/4 Newtonian Astrograph
- Sky-Watcher Esprit 150
- Celestron EdgeHD 11
- Askar SQA55
- Askar SQA106
- SVBONY SV555
- Apertura CarbonStar 200
- William Optics RedCat 91
Camera Lenses:
- Rokinon 14mm f/2.8
- Canon EF 17-40mm f/4
- Canon EF-S 18-55mm f/3.5-5.6
- Sigma 24mm f/1.4
- Canon RF 15-35mm f/2.8
- Canon EF 50mm f/1.8
- Canon EF 24-105mm f/4
- Canon EF-S 75-300mm f/5.6
- Rokinon 135mm f/2
- Canon EF 300mm f/4
- Canon EF 400mm f/5.6
Telescope Mounts:
- iOptron SkyTracker Pro
- iOptron SkyGuider Pro
- Sky-Watcher Star Adventurer 2i
- Fornax LightTrack II
- Sky-Watcher Star Adventurer GTi
- ZWO AM5
- Celestron Advanced Series CG-5
- Sky-Watcher HEQ-5 Pro
- Sky-Watcher EQ6-R Pro
- iOptron CEM60
- Celestron CGX-L
- Sky-Watcher EQ8-R Pro
- Sky-Watcher CQ350
- Paramount MyT
- Sky-Watcher Wave 150i
Cameras:
- Canon EOS Rebel XSi
- Canon EOS Rebel T3i
- Canon EOS 60Da
- Canon EOS 70D
- Canon EOS 7D
- Canon EOS 7D Mk II
- Canon EOS Ra
- Altair Hypercam 183C
- QHY268C
- Starlight Xpress Trius 694M
- ZWO ASI071MC Cool
- ZWO ASI294MC Pro
- ZWO ASI533MC Pro
- ZWO ASI585MC Pro
- ZWO ASI2400MC Pro
- ZWO ASI2600MM Pro
- ZWO ASI6200MM Pro
- ZWO ASI2600MC Air
Planetary/Guide Cameras:
Broadband Filters:
Multi-Bandpass Filters
- Optolong L-eNhance
- Optolong L-eXtreme
- Radian Triad Ultra
- STC Optical Duo-Narrowband
- IDAS Nebula Booster
Narrowband Filters:
- Astronomik SHO (12nm)
- Optolong SHO (3nm)
- Chroma SHO (3nm)
PC/Controllers
- Acer Enduro N3
- ZWO ASIair
- ZWO ASIAIR Pro
- ZWO ASIAIR Plus
Additional Hardware
- Pegasus Astro Pocket Powerbox
- ZWO EFW 7-Position Filter Wheel (36mm)
- ZWO EFW 5-Position Filter Wheel (48mm)
- Starlight Xpress 7-Position Filter Wheel (32mm)
- ZWO Electronic Autofocuser