How to Create a HaRGB Astrophotography Image in Photoshop
Since I started adding H-Alpha to my astrophotography images, I’ve had a lot of questions about how to combine the Ha exposures with the regular color (RGB) photos. In this tutorial, I will use Adobe Photoshop to show you exactly how I process each image and blend them together to create a HaRGB composite.
The H-Alpha exposures are captured using a clip-in Ha filter for my Canon Rebel T3i. The Ha filter blocks out all wavelengths of light except for a very narrow band of Hydrogen Alpha. The RGB exposures are simply the regular color images captured by the camera.
We’ll use the true color of the deep-sky object from the RGB photo, and the added detail and contrast from the H-Alpha photo. If you prefer to watch a video of this tutorial, please have a look at my step by step guide below:
How to create a HaRGB composite
Before combining the images, you will need to create a master file for both the full color and h-alpha versions. We’ll start by taking a look at the photos I have taken using only a light pollution filter. The images used in this tutorial are of NGC 1499 – The California Nebula. These were taken at a dark sky site back in October of 2014 using a modified Canon Rebel Xsi.
Update: I photographed the Wizard Nebula in HaRGB using a color astrophotography camera in late 2017.
Process the RGB image
This process is the same as stacking and processing any regular color deep-sky image. I will go through my exposures and delete any frames with poor guiding, clouds, soft or out-of-focus stars, or satellite trails. The exposures in this set are 5 minutes each, at ISO 1600. Unfortunately, I did not shoot any bias or flat support files, but I did capture 16 dark frames.
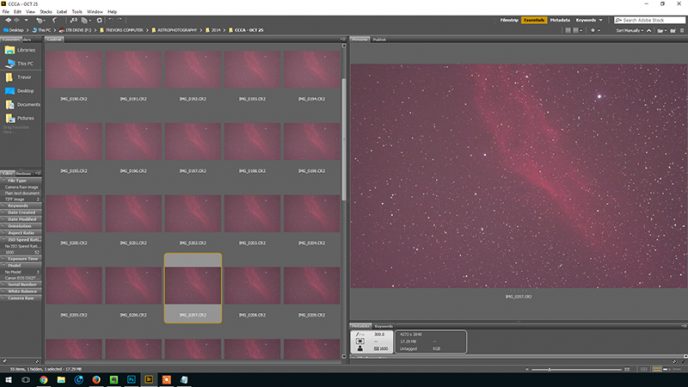
Once the files have been reviewed in Adobe Bridge, we can go ahead and load these RAW files into DeepSkyStacker. I’ll select Open picture files, and then locate all of my light frames that were shot during this particular session from my astrophotography archives. Then, I’ll select Dark files and locate the dark frames I captured using the same exposure length and temperature from the same imaging session.
I have made very few changes to the default settings in Deep Sky Stacker. DSS calculates that the total integrated exposure time will be 3 hours. Not bad! Let Deep Sky Stacker run its course, and then we’ll have a look at the stacked version in Photoshop for further processing.
Deep Sky Stacker Settings for Astrophotography
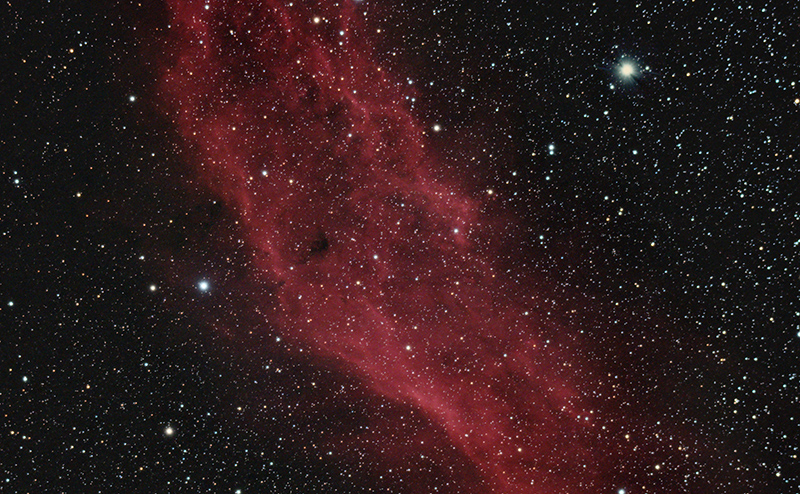
Now that Deep Sky Stacker has registered and stacked each of the 36 frames into one master file, we’ll adjust this file in Adobe Photoshop to bring it to life. Remember, this is only half of the battle. This RGB version of the California nebula will capture the beautiful true color of this object, but we’ll need to add H-Alpha to really make it pop!
My usual processing technique was used on the final RGB version of the image below. These actions and techniques can be seen in action in the astrophotography tutorial video:
Astrophotography Tutorial – Image Processing a Nebula with Photoshop.
For the purposes of this tutorial, my main focus is on combining the RGB and Ha images to create the HaRGB composite. I offer a quick run through of each step in the video version of the HaRGB tutorial at the top of this page.
Process the Ha Image
The process for stacking the H-alpha exposures mirrors the technique we just used for the RGB image. The filter I used to collect image in hydrogen alpha with my DSLR camera is the Astronomik 12nm Ha clip-in filter for Canon EOS cameras.
Related Video: How to Use a Clip-In DSLR Ha Filter
We’ve selected the best light frames in Deep Sky Stacker, and added dark frames to improve the signal to noise ratio. Once DSS has finished its process, we’ll again take a look at the stacked master file in Photoshop.
For a detailed look at processing an image shot in h-alpha in Adobe Photoshop, watch:
DSLR Astrophotography Tutorial – Processing Narrowband H-Alpha (Ha)
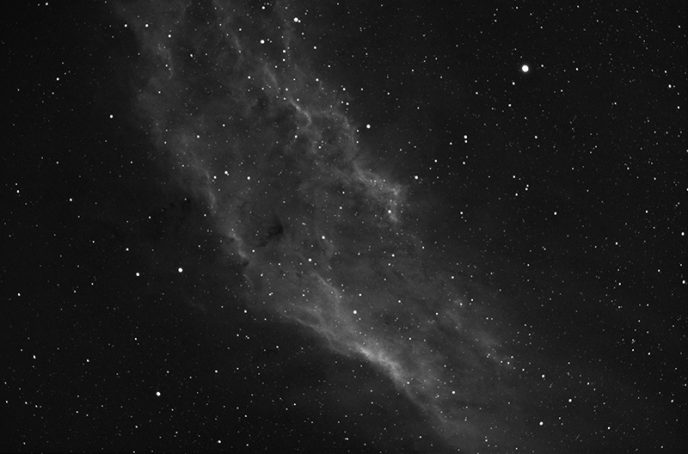
After adjusting the image to your liking, The final version of your H-Alpha image should look something like the image below:
Now that we have our final RGB and Ha versions of the image processed, we can combine them to produce a HaRGB composite. This will use the true color of the deep-sky object from the RGB image, and the enhanced detail and smaller stars of the H-Alpha image.
Before we can get to the fun part of adding the H-Alpha luminosity layer, we can modestly improve the RGB version by modifying the Red Channel specifically.
Create a HaR image
The first step is to create a “HaR” version of the image, we will later use this hybrid image in our final HaRGB version.
“Ha” is the H-Alpha portion, while the “R” is the Red channel of the RGB image.
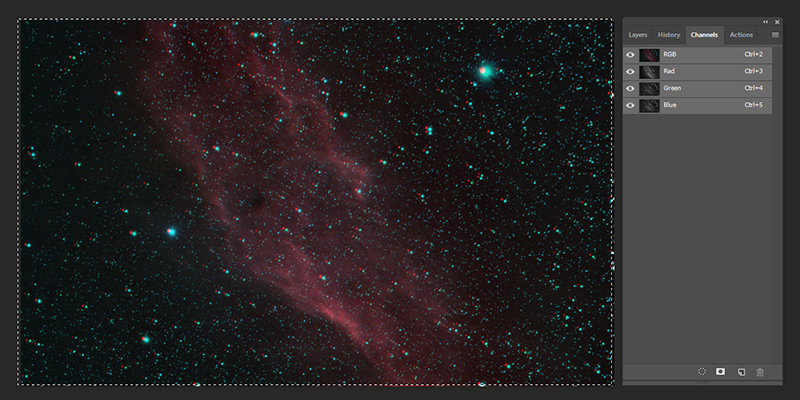
To start, bring up the channels window (Window > Channels) in the RGB version of the image. Click on the Red Channel of the RGB image to select it. This will isolate the red channel, and your deep-sky image will appear black and white.

Next, with only the red channel highlighted, select the entire image canvas (Ctrl + A or, Select > All). Then, copy the selection using Ctrl + C or, Edit > Copy.
Now paste the red channel copy on to your Ha image, and change the opacity to about 25-30%. You may need to move the layer around to line up exactly with the Ha layer below.
This creates a blend of the red channel and h-alpha data that was captured. Save this HaR version of the image as a separate file. We will use this HaR image to create a new version of the RGB photo.
Create a New and Improved RGB Image
With the HaR image still open. Select All, and Copy the entire image canvas. Now go back to your RGB version and open the Channels window once more. Select the Red Channel, and Paste the HaR image into the red channel. If necessary, move the layer into position. (Clicking the “eye” icon next to each channel will toggle the visibility of each channel.)
This creates a new RGB image that includes the enhanced detail and smaller stars from the H-Alpha image.
Create the final HaRGB composite!
Now we will combine the color of the RGB image, with the detail and reduced stars of the Ha image. With the new RGB image open, select Filter > Noise > Dust and Scratches. We want to remove the finer details and stars from the RGB image, we are just interested in the color. For the image in my example, I used a radius of 10 pixels, with a threshold of 0.
Now, paste the original H-Alpha image on top of this blurry RGB, and set the blending mode to Luminosity, and set the opacity to about 75%.
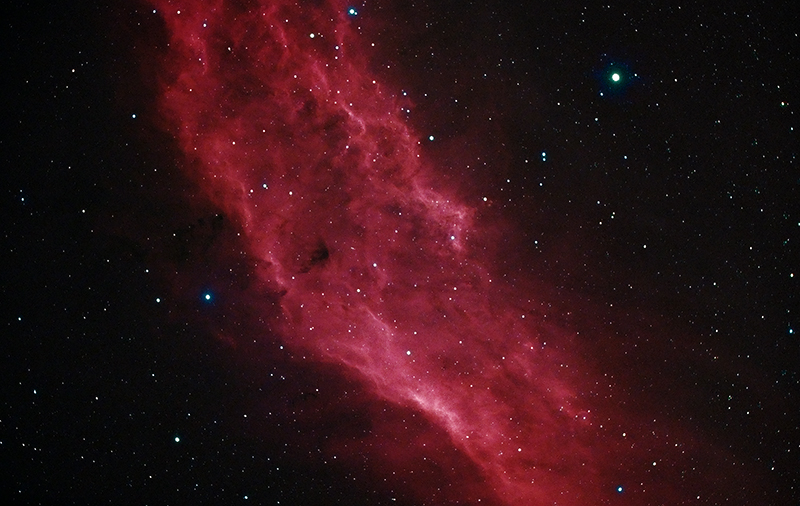
It is at this point where we finally start to see the power of creating a HaRGB composite, as the RGB and Ha have joined forces to produce a stunning rendition of the California Nebula not possible through standard color alone.
We can now make some small adjustments that will bring out even more color and enhance contrast.

With the RGB layer selected, open the curves adjustment dialog box. Pull the center of the curve upwards to increase the color saturation of the underlying RGB image. Next, we’ll make a curves adjustment to the h-alpha luminance layer on top. This time, however, pull the center of the curve downward to enhance the overall contrast further.
The Final HaRGB Composite
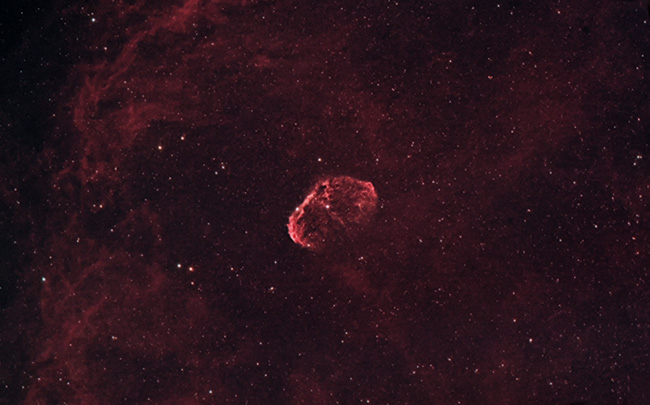
I hope you have enjoyed this tutorial and have been successful in your attempt to create a HaRGB composite photo. This technique works very well with emission nebulae such as the Eagle Nebula, Horsehead Nebula and more.