
Choosing an Astrophotography Camera

With so many types of astrophotography cameras available, choosing a specific model to spend your hard-earned money on can be a tough decision.
Beginners usually start with an entry-level DSLR or mirrorless camera as they are cost-effective and versatile, and I still think that’s the best way to go.
Quick Answer: Start with the camera you own. Otherwise, choose an affordable APS-C body with manual controls and RAW support.
Unlike a point-and-shoot or mobile phone camera, a DSLR or mirrorless camera uses an interchangeable lens, which is extremely beneficial for astrophotography.
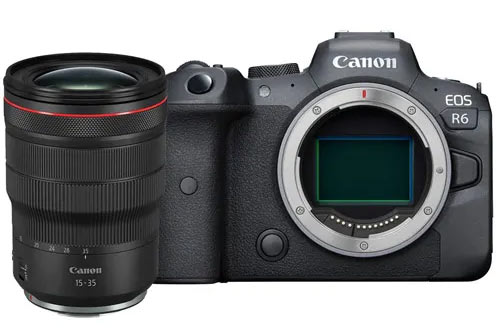
I use a Canon EOS R6 for astrophotography with various lenses.
If you are brand new to astrophotography, you can’t go wrong investing in an entry-level DSLR camera and kit lens. DSLRs are easy to use, affordable, and still a very relevant choice for long-exposure deep-sky astrophotography.
This will open the door to many types of astrophotography, including Nightscapes, Milky Way Photography, and even Deep-Sky Astrophotography through a telescope.
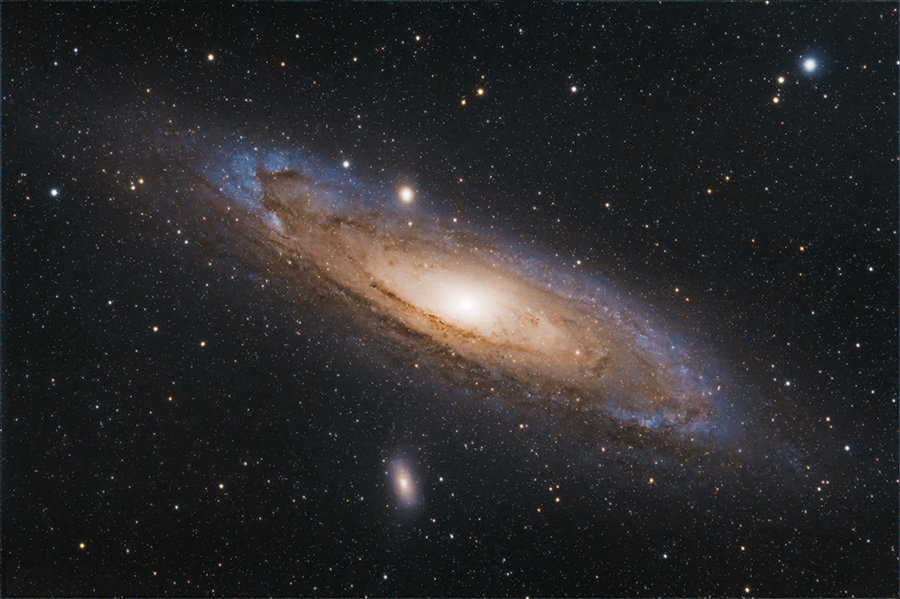
The Andromeda Galaxy. Canon EOS Rebel XSi (modified).
Unlike the other astrophotography camera articles you will find online, this post shares actual photo examples of space I have taken with the cameras mentioned.
Here are some quick camera options I have shared on my YouTube channel to consider, depending on your skill level and area of interest. These are suggestions based on my personal experience. These are all cameras I have used personally and recommend for astrophotography.
- Best ‘Cheap’ Astrophotography Camera: Canon EOS Rebel T7
- Best DSLR Camera for Astrophotography: Canon EOS 6D Mark II
- Best Dedicated Astronomy Camera: ZWO ASI2600MM Pro
- Best Budget Dedicated Astronomy Camera: ZWO ASI585MC Pro
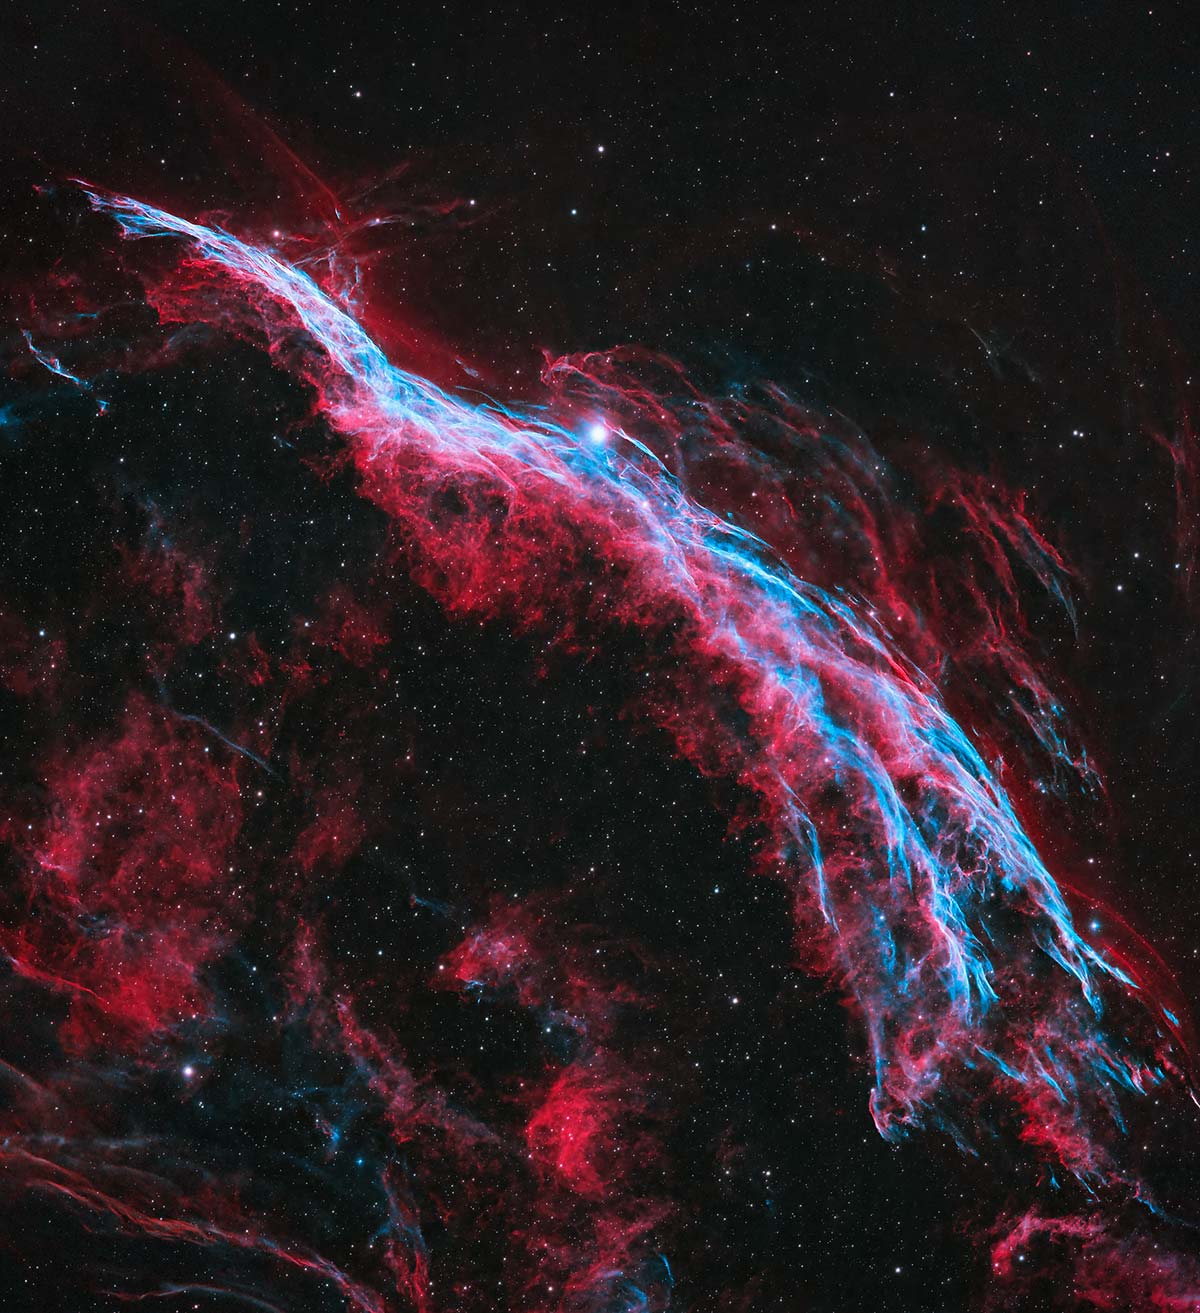
The Western Veil Nebula. ZWO ASI2600MM Pro dedicated astronomy camera.
For an in-depth look at the types and brands of astrophotography cameras available in 2026, read on. To see my latest images of space, be sure to follow me on X and Facebook.
Astrophotography Cameras
As the hobby evolves, more and more dedicated astrophotography cameras are entering the market. Despite the amazing advances in cooled CMOS sensor technology found in modern astronomy cameras, I will always continue to shoot with a DSLR camera body in some form or another because they are just too much fun.
My first astrophotography camera was a Canon Rebel 450D, and I haven’t spent a season without using a DSLR or mirrorless camera since. Since then, I have purchased nearly a half dozen cameras for astrophotography, with one of the most specialized being the full-frame Canon EOS Ra.
Canon, Nikon, and Sony are the leaders in the DSLR and mirrorless camera markets for astrophotography.
In the dedicated astronomy camera world, ZWO ASI and QHYCCD are two of the most familiar brands in the amateur market.
The brand you choose can have a huge impact on your future equipment options. This goes for both DSLR/mirrorless cameras and dedicated astronomy cameras.

For instance, Canon users are much more likely to remain loyal to the brand after purchasing multiple Canon lenses for a Canon DSLR body. Whichever brand of DSLR you choose in the beginning, you are more likely to stick with it until the end, so choose wisely.
Support varies by brand and region, so buy from an authorized dealer.
If your first dedicated astronomy camera is a ZWO ASI camera, you may choose to invest in a ZWO ASIAIR WiFi device. It supports ZWO astronomy cameras and many compatible DSLR and mirrorless models, but not third-party dedicated astronomy cameras.
The Best “Cheap” Astrophotography Camera
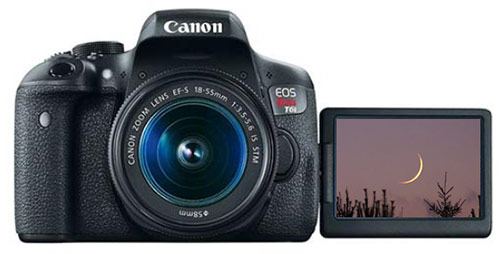
If you’re looking for the best cheap astrophotography camera, a Canon Rebel DSLR is tough to beat. They are highly capable astrophotography cameras (for both deep-sky and nightscapes) and can be found used for as little as $250.
In 2022, I proved that a DSLR camera is still a valid choice for astrophotography by photographing a galaxy from my backyard using an aging Canon EOS Rebel XSi.
While a dedicated astronomy camera is generally better suited for long-exposure deep-sky astrophotography than a DSLR, it requires additional hardware and software to operate. They can also be more complex to use than an entry-level DSLR camera because there is no onboard control screen.
My advice would be to start with an affordable body such as the Canon Rebel T7, or a used Canon T7i or Nikon D5300. These cameras support a wide selection of lenses and established software. If you prefer a newer mirrorless system, begin with the lens mount you expect to keep rather than choosing by megapixels alone.
A DSLR camera is very versatile and easy to use with a variety of lenses. A dedicated astronomy camera, on the other hand, is designed primarily for deep-sky imaging through a telescope and requires dedicated software to run. I currently use both types of astrophotography cameras regularly.
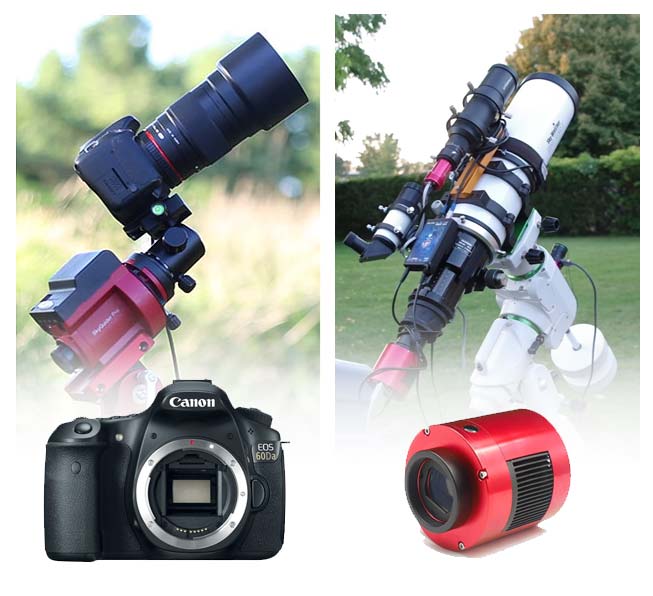
If you already own a DSLR or mirrorless camera for daytime photography, I would definitely recommend trying it for astrophotography before upgrading. Premium full-frame bodies can produce excellent results, but the lens, tracking accuracy, and sky conditions usually make a bigger difference than buying the most expensive camera.
For an idea of what a DSLR camera is capable of, have a look at the following image of the Andromeda Galaxy captured using a Canon 60Da. This camera body is rather unique in that it was specifically designed for astrophotography.
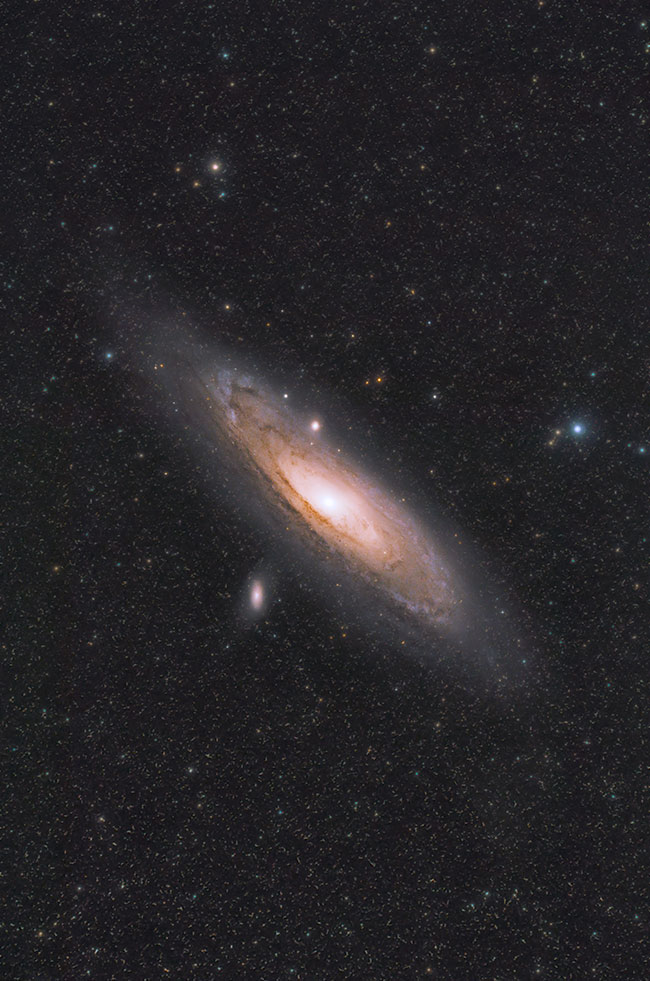
The Andromeda Galaxy using a Canon EOS 60Da.
If it’s your first “real camera,” it’s worth considering purchasing your model of choice in a bundle that includes a zoom lens kit. One of the best ways to get started in astrophotography is to use a DSLR with a camera lens, not a telescope.
This method can be enjoyed both on a tripod and on a simple tracking mount (star tracker), such as the iOptron SkyTracker Pro or the Sky-Watcher Star Adventurer 2i Pro Pack. A DSLR or mirrorless camera and lens are simple to attach and can capture much longer tracked exposures of the night sky.
When you have invested in your first astrophotography telescope, you can then attach your DSLR camera via a T-ring and adapter. This is known as prime-focus astrophotography and can lead to an extraordinary world of deep-sky imaging. This is where my true passion for this hobby began to take shape.
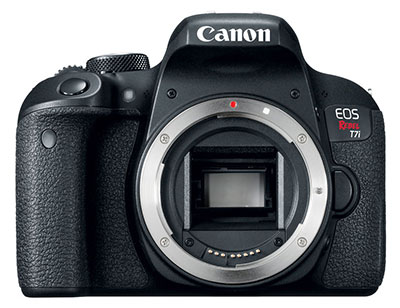
I recommend the Canon EOS Rebel T7 for beginners.
Beginner Budget: Expect $500-$1,000 USD for a used camera, lens, tripod, memory card, battery, and intervalometer.
DSLR vs. Mirrorless for Astrophotography
Both can produce excellent images. A DSLR is usually the better used bargain and often has longer battery life. Mirrorless cameras offer electronic viewfinders, focus magnification, and current lens systems. Keep a system if you already own compatible lenses. For a new system, mirrorless offers greater longevity; for lowest cost, buy used.
Best Mirrorless Camera for Astrophotography
Mirrorless cameras have become extremely popular for astrophotography, and for good reason. Compared to a DSLR, a mirrorless body is often smaller, lighter, and easier to use in the dark thanks to features like live exposure preview, focus magnification, and excellent rear screens.
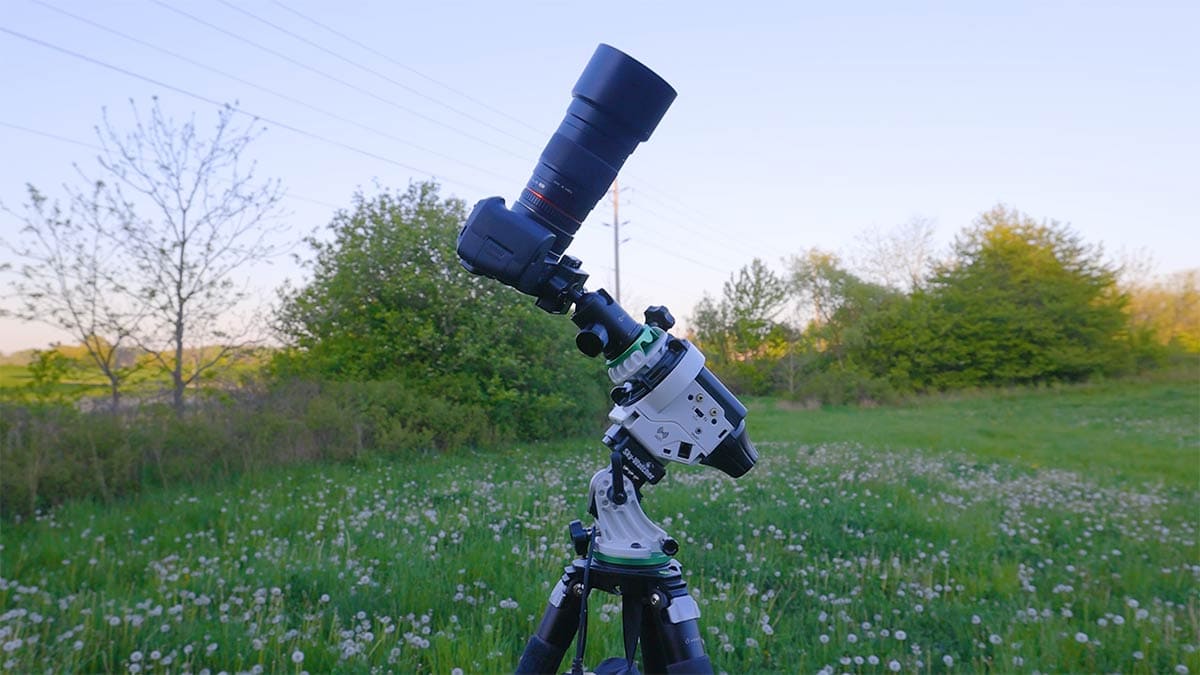
My Canon EOS Ra mirrorless camera on a star tracker with the Rokinon 135mm F/2 lens attached.
For nightscape photography and wide-field astrophotography, modern full-frame mirrorless cameras from Canon and Sony are especially attractive because they offer strong low-light performance in a more compact body than a traditional DSLR.
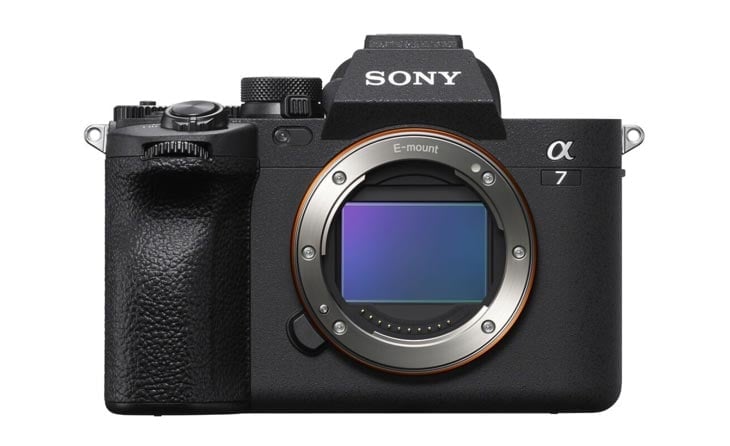
The Sony Alpha series of cameras is a very popular choice for astrophotography due to their impressive low-light performance.
My personal favorite mirrorless camera for astrophotography is the Canon EOS Ra. It is a rare model now, but it remains one of the most purpose-built mirrorless options ever released for astrophotographers thanks to its enhanced sensitivity to Hydrogen-alpha light and astro-friendly design. If you can find one, it is an outstanding choice for deep-sky imaging.
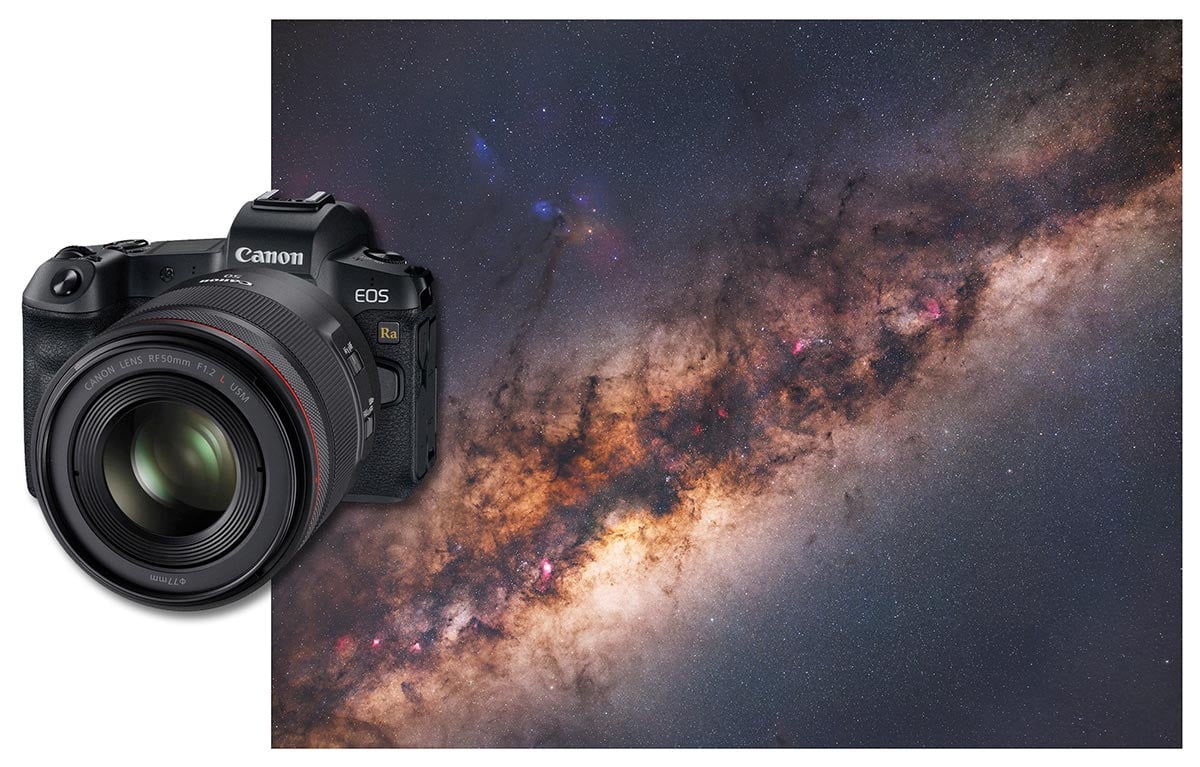
I have taken some of my best astrophotography images with the Canon EOS Ra mirrorless camera.
For a realistic modern recommendation, the 24.2-megapixel Canon EOS R8 is an appealing full-frame Canon option. The 45-megapixel Canon EOS R5 is a premium, high-resolution alternative, while the 33-megapixel Sony Alpha 7 IV provides a strong balance of resolution and low-light performance. Nikon users should also consider the 24.5-megapixel Nikon Z6 II, especially if they already own compatible Nikon lenses. These are standard cameras rather than astronomy-modified models, but all are capable of excellent nightscape and tracked deep-sky images.
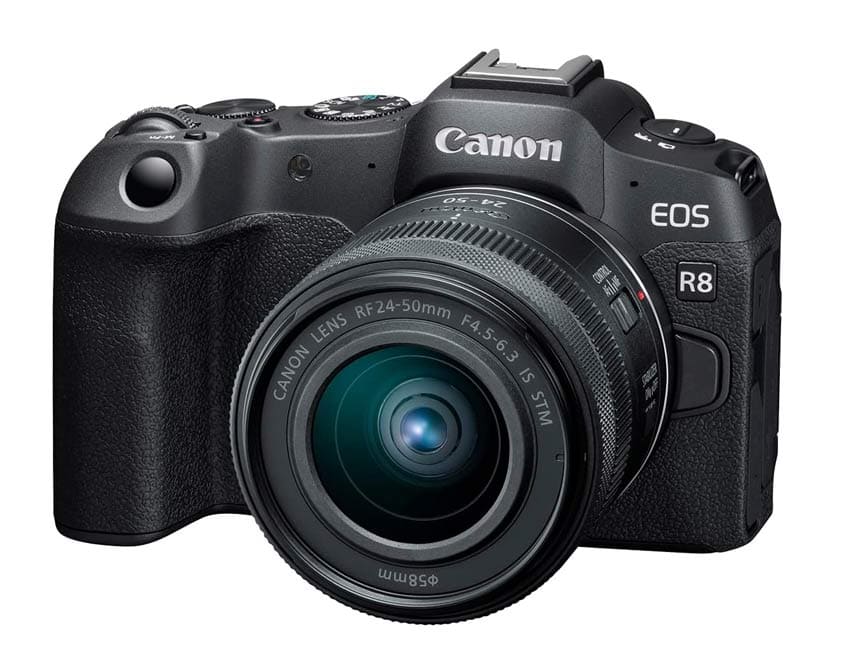
The Canon EOS R8 is a great choice. It features a full-frame sensor and impressive high-ISO performance.
Recommendation: If you can find a Canon EOS Ra at a fair price, it is still my top purpose-built mirrorless pick for astrophotography. If not, I would choose the EOS R8 for a lighter Canon setup, the EOS R5 when resolution is the priority, the Sony Alpha 7 IV for a capable hybrid system, or the Nikon Z6 II for photographers already invested in Nikon lenses.
Modifying a DSLR for Astrophotography
When you hear the term “modified DSLR” in the astrophotography realm, it usually means that the stock internal filter has been removed or replaced to transmit more of the deep-red light emitted by certain nebulae.
To be more specific, it’s the hydrogen-alpha transmission line (656nm) that’s so important for astro-imaging. Cameras like the Canon EOS 60Da were designed to be more sensitive to this wavelength, but an ordinary DSLR camera is not.
Having a camera sensitive to this wavelength of light (Hα) can make a big difference for certain emission nebulae, such as the California Nebula, the Eagle Nebula, and many others.
Those looking to take advantage of this modification can send their camera to a professional astrophotography modification service. A self-modification is possible, but it risks damaging the camera and can affect autofocus, dust protection, and the manufacturer’s warranty.
With my first astrophotography camera (Canon EOS Rebel XSi), I carefully removed the stock IR cut filter using this tutorial video. I am happy to report that after four intense hours of work, I was successful.
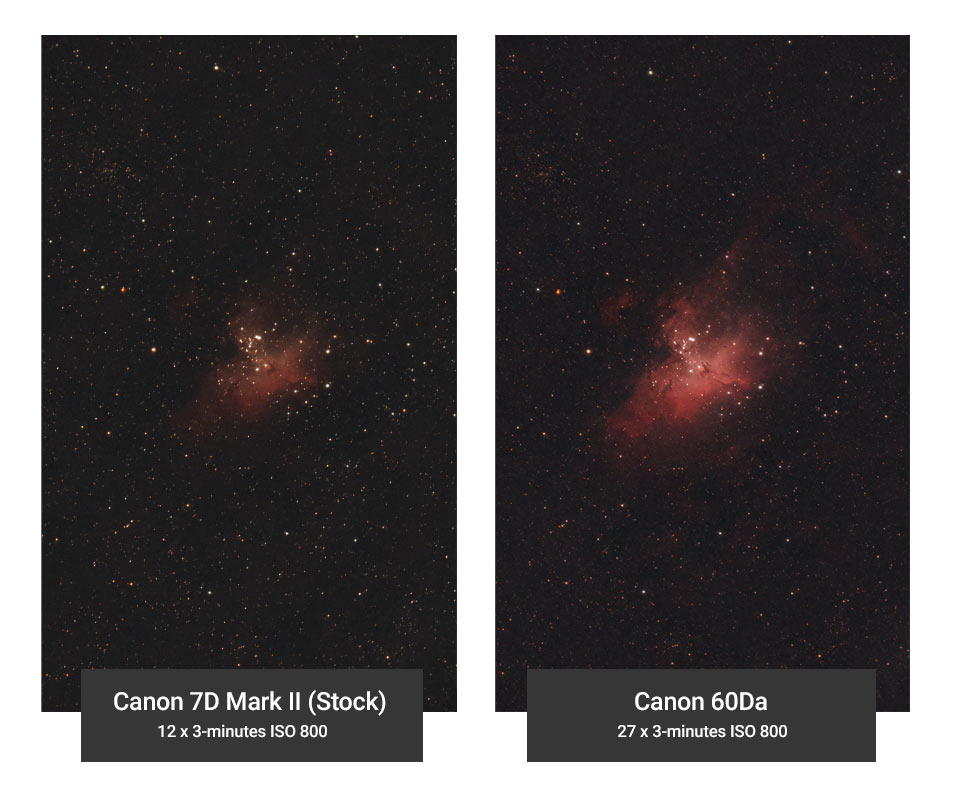
Examples of images taken using a stock vs. a “modified” DSLR camera.
In 2020, I tested an astrophotography camera developed by Canon. The Canon EOS Ra is a full-frame mirrorless camera capable of capturing stunning high-resolution images. Its astro-friendly features include enhanced H-alpha sensitivity and 30X live-view magnification for precise focusing.
Like the Canon EOS 60Da that launched before it, it is more sensitive to the H-alpha wavelength of the light spectrum than a traditional daytime photography camera.
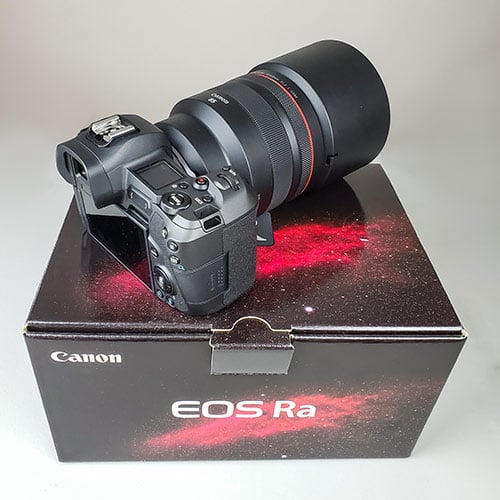
The Canon EOS Ra full-frame mirrorless camera (30.2 MP CMOS Sensor).
Camera Lenses for Astrophotography
I have used a number of lenses for astrophotography purposes over the years, and a few models stand out above the others.
Below, you’ll see 3 Canon L-Series lenses of varying focal lengths that I like to use on assorted projects. If you aren’t ready to invest in a high-end lens like this, you could always consider a camera lens rental service.
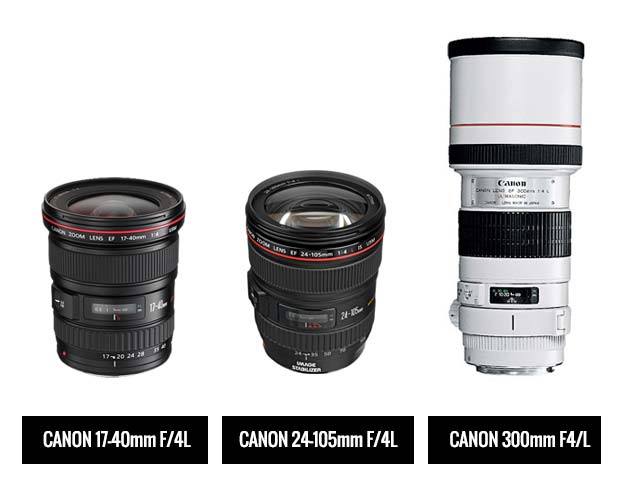
Astrophotography with a camera lens is a lot of fun and can often be a simpler and more enjoyable experience than with a telescope. Even a kit lens, such as the 18-55mm included with many beginner-level DSLRs, has excellent astrophotography potential.
Wide-angle lenses such as the Rokinon 14mm F/2.8 make it possible to capture entire regions of the Milky Way at once. Similar ultra-wide lenses may be branded Rokinon or Samyang. As the focal length of the lens increases, so will the demand for tracking accuracy and precise polar alignment.
Check your local classified market for deals on used lenses. Most of my camera lenses were purchased from either a classified site or from the “used” camera lens section of an online photography store.
Smaller camera lenses are much lighter than most telescopes, which means you won’t require a large equatorial mount to track the sky. Heavier telephoto lenses, such as the Canon 300mm F/4L, will require a more robust mount, such as the iOptron SkyGuider Pro.
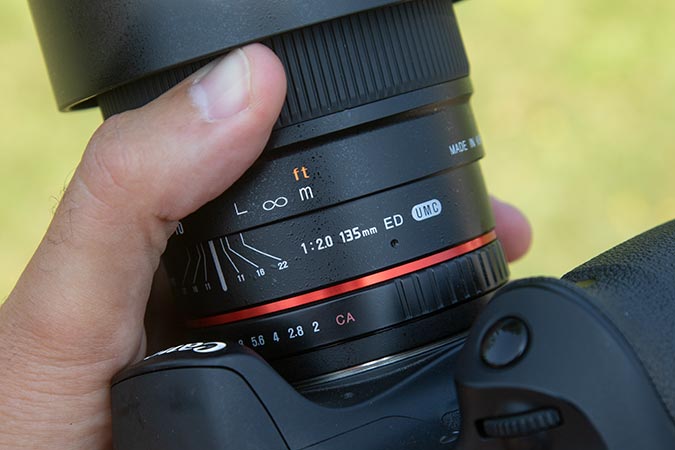
The Rokinon 135mm F/2 lens is an excellent choice for large deep-sky targets.
Best Camera Settings for Milky Way Photography
Use manual mode and RAW files. Start with your widest usable aperture, ISO 1600-3200, and 10-20 seconds with a wide-angle lens. Focus manually and shorten the exposure if stars trail.
There is no universal best “native ISO.” Lower ISO preserves more highlight range; higher ISO can lift faint detail above read noise. Use the histogram and avoid clipping the sky.
Dedicated Astronomy Cameras
Many dedicated astronomy cameras on the market are designed specifically for astrophotography and nothing else. They lack a display screen and camera controls on the body and must be controlled using dedicated software on your computer.
Cameras with CMOS sensors that include TEC (thermoelectric cooling) and precision gain controls can produce FITS-format images and are extremely popular for astrophotography.
Why Sensor Cooling Matters: Cooling holds the sensor below ambient temperature, reducing dark current and allowing reusable, temperature-matched dark frames. It needs external power and does not remove every source of noise.
Dedicated astronomy cameras come in two formats: one-shot color and mono. If you are like me and your clear sky time is limited, a one-shot color camera is a very convenient choice.
For example, the ZWO ASI294MC Pro houses a 4/3″ Sony IMX294 CMOS Sensor capable of capturing beautiful high-resolution images (4144 x 2822 pixels) in full color.
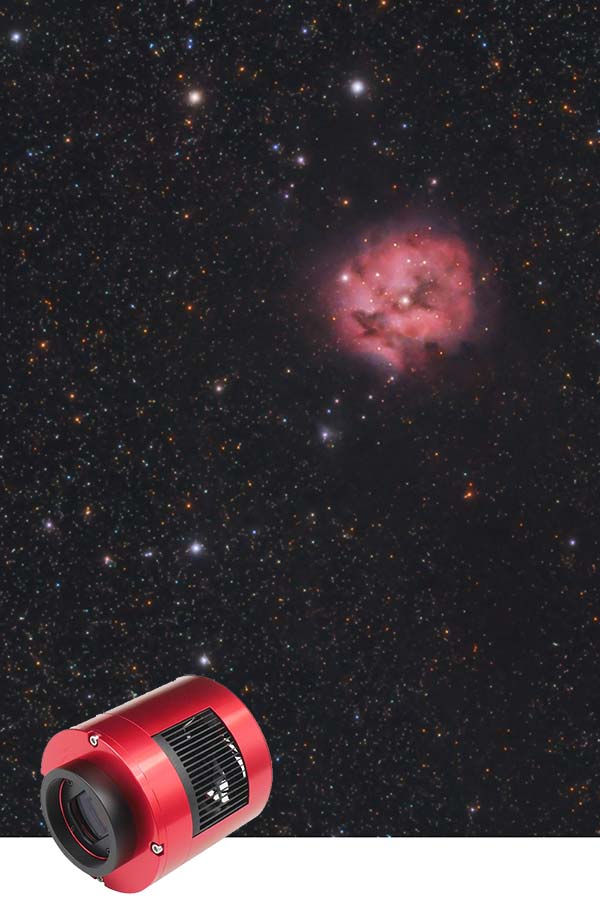
The Cocoon Nebula captured using a ZWO ASI294MC Pro color camera.
Years ago, CCD cameras dominated this category, but advancements in CMOS sensor technology have increased the popularity of brands like ZWO Astronomy Cameras.
A camera with a monochrome sensor, such as the ZWO ASI2600MM Pro, records images in greyscale, meaning that a minimum of 3 filters (R, G, B) are necessary to create a full-color image.
Mono CMOS sensors let every pixel record through the selected filter, unlike their color counterparts; you just have to work a little harder. As you take pictures through each color or narrowband filter, you benefit from the lack of the Bayer filter (CFA) found in traditional color cameras.
ZWO cameras can be controlled using a dedicated WiFi capture device called the ZWO ASIAIR. This controller allows you to operate compatible equipment from your smartphone or tablet, including autoguiding and plate solving.
I have found that using this particular camera with a duo-narrowband filter can produce some incredible results in a light-polluted area. The following image uses the STC Astro Duo-Narrowband filter with the ASI294MC-Pro on the Pacman Nebula.
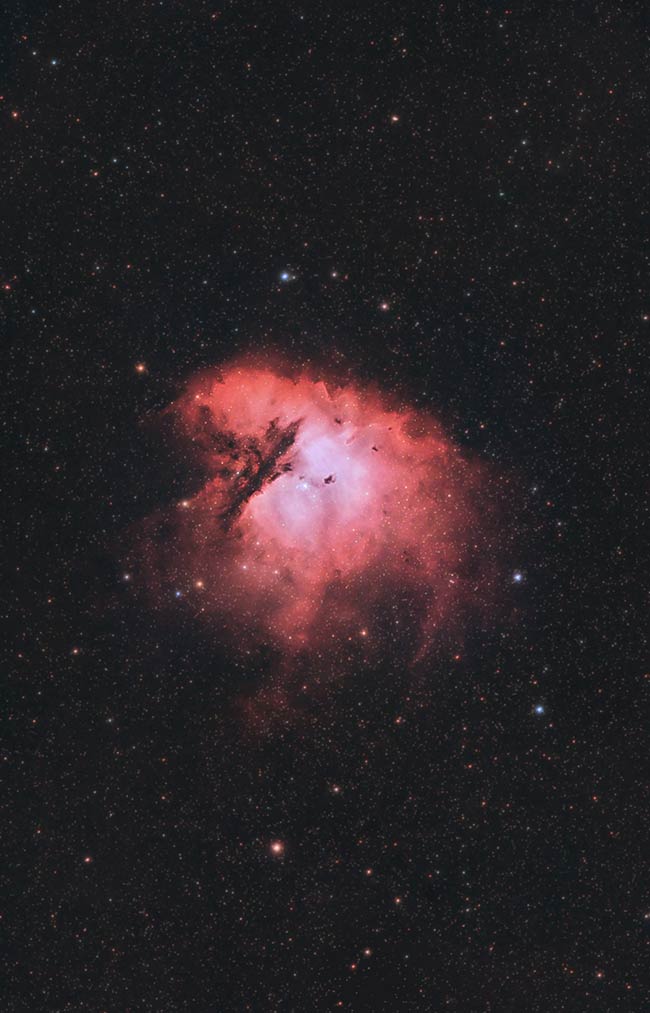
The Pacman Nebula using the ZWO ASI294MC-Pro camera.
The image was captured from a Bortle Scale Class 8 region (my backyard) during a nearly full moon. The combination of a cooled sensor and a narrow-bandpass filter allows amateur astrophotographers to capture impressive images from the city.
The camera was set to -20°C to keep thermal noise at bay, resulting in 5-minute image subs with an impressive signal-to-noise ratio. If you told me this photo was captured from my city backyard 2 years ago, I wouldn’t have believed you!
When using this camera under a dark sky (Bortle Class 3), my results with the ASI294MC-Pro and only a UV/IR-cut filter were impressive. The following image of the Triangulum Galaxy was captured at the Black Forest Star Party through a Sky-Watcher Esprit 100 telescope.
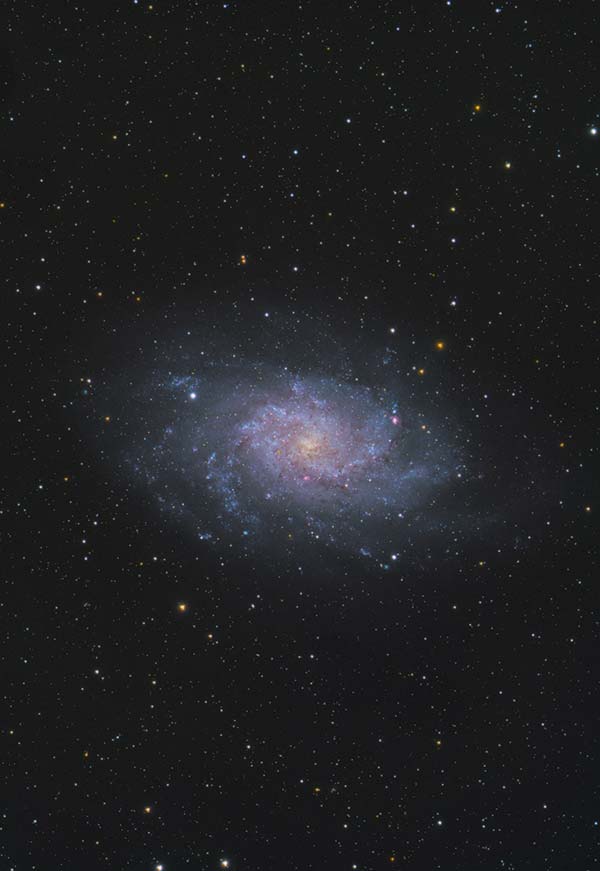
The Triangulum Galaxy using a Dedicated Astronomy Camera.
Astrophotography Cameras under $1,000
Modern CMOS sensor technology has made capable astrophotography cameras available below $1,000.
Dedicated astronomy cameras that can cool the sensor for cleaner signals are now much more affordable for casual or beginner-level astrophotography enthusiasts. The cameras listed below are best for deep-sky astrophotography. A different type of camera (and approach) is required for planetary or solar imaging.
I have included some very capable DSLR and mirrorless cameras on my list as well. APS-C bodies are an excellent value below $1,000. For a full-frame camera in this price range, you will usually need to browse the used market.
Prices change frequently, but these models are commonly available below $1,000 USD as a body-only purchase or on the used market. Check whether the price includes a lens before comparing one listing with another.

DSLR and Mirrorless Camera Bodies
- Canon EOS Rebel T7 (APS-C DSLR)
- Canon EOS 80D (APS-C DSLR, used)
- Nikon D5300 (DX DSLR, used)
- Canon EOS R50 (APS-C mirrorless)
- Canon EOS RP (full-frame mirrorless, used)
Dedicated Astronomy Cameras
- ZWO ASI585MC Pro (Color)
- ZWO ASI533MC-Pro (Color)
- ZWO ASI533MM Pro (Mono)
One thing to keep in mind when choosing a camera for deep-sky astrophotography is the user experience you want.
For example, if you prefer to run your imaging session outside with a simple remote shutter release cable or intervalometer, a DSLR is your best bet. You’ll be able to preview your images on the camera’s display as they come through, and control camera settings like ISO and white balance right on the camera.
On the other hand, dedicated astronomy cameras such as the ZWO ASI294MC Pro will only operate when connected to a computer or compatible capture controller and the necessary software. There is a big difference between running an interchangeable-lens camera and a dedicated astronomy camera.
Monochrome Cameras
I tested my first monochrome CMOS camera in late 2017. It was my first venture into monochrome territory and was an eye-opening experience. A mono sensor records every pixel without a Bayer color-filter array, which can provide a stronger signal through individual broadband or narrowband filters. Producing a color image takes additional filter changes and separate sets of exposures, but it does not automatically require exactly three times the total exposure.
To create a full-color image using a monochrome camera, you must shoot through red, green, and blue filters to “build” a complete image. A color camera does this for you, by using a Bayer filter mosaic pattern over the sensor to split the pixel data into channels.
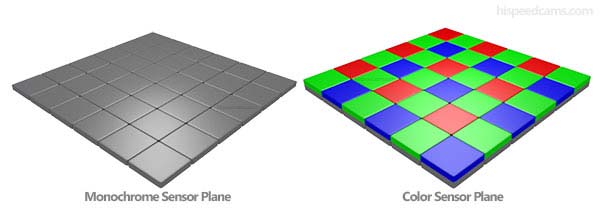
A mono sensor can collect a stronger signal through an individual filter than a one-shot color camera.
One aspect of monochrome cameras that really comes in handy is the stronger signal obtained when narrow-bandpass filters are used. A monochrome camera is much better suited for images shot through Ha, OIII, and SII narrowband “line filters” (although it’s never stopped me from doing it)!
Narrowband filters can provide excellent data for a false-color deep-sky image. Amateur astrophotographers “color map” monochrome (greyscale) images into RGB color channels to create false-color images. You can use Adobe Photoshop to create Hubble Palette images using narrowband data.
In 2021, I tested the ZWO ASI2600MM Pro, a high-resolution monochrome CMOS camera with an APS-C-sized sensor. This camera is behind some of my best personal astrophotography images, including the Wizard Nebula shown below.

The Wizard Nebula captured using a monochrome CMOS camera and narrowband filters.
Benefits of a DSLR Camera
A DSLR camera can be used for many types of astrophotography. Milky Way panoramic and constellation photos are well within reach with a standard kit lens (such as an 18-55mm).
Modern DSLRs are user-friendly and can help you quickly learn the basics of night photography, including shutter speeds, white balance, and how to monitor your images’ histogram. Mirrorless cameras now offer the same creative flexibility in newer, actively developed lens systems.
In November 2019, Canon announced the full-frame mirrorless Canon EOS Ra. Although it is now discontinued, it remains notable for its increased sensitivity at the hydrogen-alpha wavelength and 30X live-view magnification mode.
Types of Astrophotography Available:
- Milky Way Panoramas
- Auroras
- Meteor Showers
- Star Trails
- Constellations
- Night Landscapes
- Deep Sky Imaging
- Comets
One major benefit of using a DSLR camera over a dedicated astronomy camera is the ability to review your photos on the camera and make small adjustments to settings on the fly.
Dedicated astronomy cameras require external software or a capture controller and can be more time-consuming to configure. The ease of use and versatility you get with a DSLR or mirrorless camera is hard to beat.
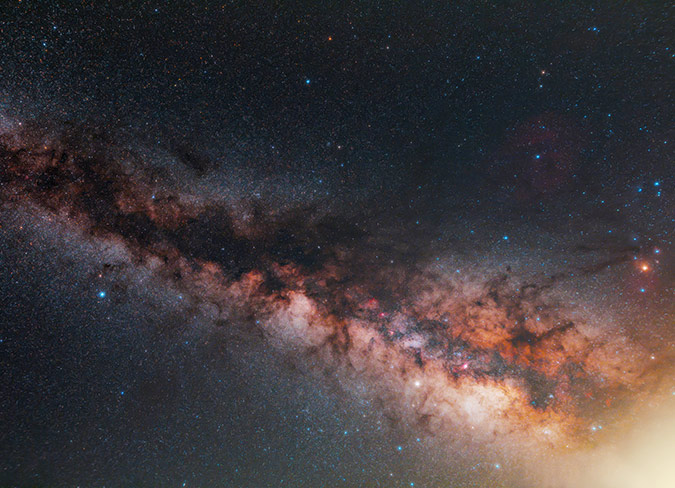
The Milky Way using a Canon DSLR with a wide-angle Camera Lens.
Once you have had success using a camera lens for astrophotography, you can swap it out with a telescope for some deep-sky imaging. The telescope you choose for astrophotography will likely have a much longer focal length and will make focusing on stars much easier.
A telephoto camera lens will also do a fine job of capturing deep-sky objects, but a telescope offers many advantages. For example, most high-end refractors include a locking dual-speed precision focuser.
They are also generally easier to attach to an equatorial mount and can easily accommodate guide scopes and other astrophotography accessories. To attach your DSLR to a telescope, you will need a t-ring and adapter to connect the scope to the camera body.
CCD Cameras (Mostly Legacy Today)
A CCD camera is designed for astronomical and scientific imaging, usually through a telescope. These cameras became known for clean, well-characterized data and reliable calibration, but cooled CMOS cameras now dominate new amateur purchases.
Exposure durations of 10-20 minutes were common in older CCD workflows, although the appropriate exposure depends on the sensor, optics, filter, sky brightness, and tracking performance.
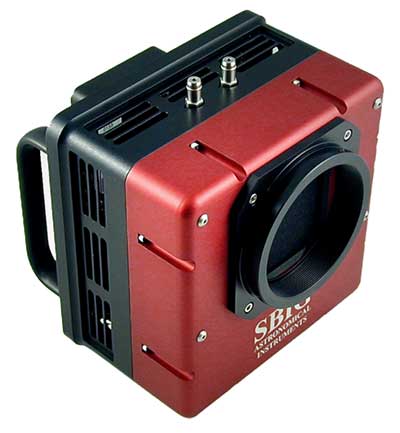
An SBIG STX-16803 CCD Camera.
Many CCD cameras use fixed gain rather than the flexible gain controls found on modern CMOS astronomy cameras.
Types of Astrophotography Available:
- Deep Sky Imaging
- Scientific Research
- Narrowband Deep Sky
Popular CCD camera brands include SBIG, Starlight Xpress, and Atik. These devices are designed to produce scientific-grade deep sky astrophotography images.
The first cooled monochrome CCD camera I ever used was the Starlight Xpress Trius SX-42 (694), a professional-grade 6MP cooled CCD camera.
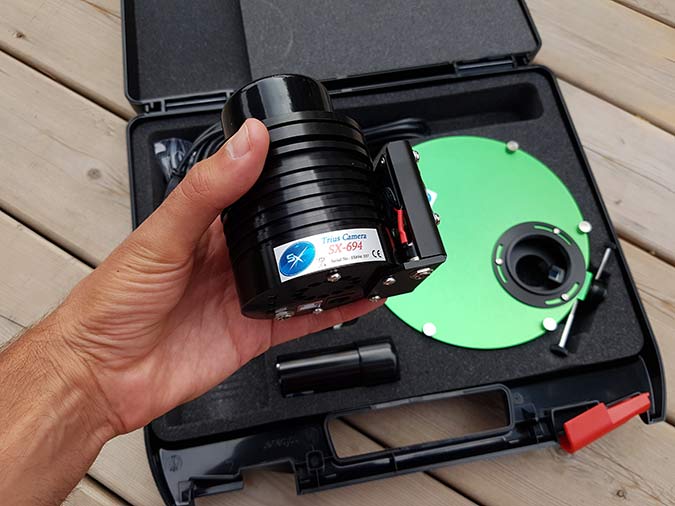
My Starlight Xpress Trius SX-694 mono CCD camera.
A Good Starting Point
My first astrophotography camera was a Canon Rebel XSi (450D). I learned to photograph deep-sky objects with this camera and even modified it myself by removing the stock IR-cut filter.
The Canon Rebel XSi is an important part of my story, but it would not be my first recommendation for someone buying today. Also known as the Canon 450D, this 2008 camera has a 12.2-megapixel CMOS sensor, no video mode, and a maximum ISO of 1600. A newer or used Rebel T7/T7i or Nikon D5300 offers a more practical beginner experience while keeping the price low.
In 2022, I used my oldest DSLR camera to photograph the Andromeda Galaxy. This more than 10-year-old camera did an admirable job on this target, considering its age:
The biggest drawback of a DSLR this old is the amount of thermal noise it produces. Today, Canon cameras are designed to handle noise more effectively at high ISO settings.
Despite its age and modest specifications, the Canon 450D can deliver stunning results that rival those of much more expensive cameras. For the most part, the noise can be addressed by shooting dark frames and applying noise reduction in post-processing.
I have seen used DSLR bodies for the Canon Rebel XSi sell for as low as $150 on astronomy classified sites like Astro Buy Sell.
Brands such as Canon and Nikon have dominated the market for DSLR astronomy photographers in the past. Still, now camera manufacturers like Sony have also entered the picture with their mirrorless design.
I prefer the Canon DSLR and mirrorless camera lines, but there are many satisfied Nikon, Sony, and Pentax shooters out there. If I had to choose the absolute best-case scenario for astrophotography, the Canon EOS Ra and Nikon D810A stand out.
Both of these camera bodies include astro-modified sensors that are more sensitive to the H-alpha bandpass of the visible spectrum. This feature is especially useful for photographing emission nebulae and H-alpha-rich regions of the Milky Way.

Full Frame vs. Crop Sensor for Astrophotography
The answer to this depends on the type of astrophotography you’re primarily interested in, your current equipment, and your budget.
If you prefer shooting nightscapes, including the Milky Way, meteor showers, or auroras, a full-frame camera can take full advantage of the wide field of view provided by a compatible wide-angle lens.
A full-frame sensor does not make the lens gather more light, but its larger imaging area records a wider field than an APS-C sensor with the same lens. A fast lens such as the Rokinon 14mm F/2.8 is a popular pairing.
For nightscape photography, full frame makes very wide compositions easier. APS-C remains perfectly capable and can be the smarter choice when budget, lens size, and portability matter more.

A nightscape image captured using a full-frame camera (Canon EOS Ra) and a star tracker.
For deep-sky astrophotography through a telescope, an APS-C camera such as the Canon T7i is often a smart choice. It is usually more affordable and uses a smaller portion of the telescope’s corrected image circle. The familiar “crop factor” changes the recorded field of view; it does not increase the telescope’s focal length or optical magnification.
Also, a full-frame camera is much more demanding regarding the optics of your telescope and the field flattener/reducer you use.
This means that the edges of the image field may show oblong stars (Coma) because the field was not corrected evenly.
Of course, you can crop the edges out in post-processing, but I think it’s worth mentioning. Before purchasing, make sure your field flattener/reducer is designed for a full-frame image sensor.
Another aspect to consider is the availability and price of astrophotography filters. The clip-in variety of light-pollution and narrowband filters is more widely available and affordable on a crop-sensor DSLR than they are for a full-frame camera body.
One solution is to invest in the 2-inch round-mounted versions, which can be used with either camera body type for deep-sky astrophotography. (I don’t recommend using filters on the objective of the camera lens)
If you want to modify these cameras for astrophotography, expect to pay a bit more for the service on a full-frame camera. I’d suggest buying a professionally modified camera rather than attempting to do it yourself.
I modified an old Canon EOS Rebel XSi (450D) using the Gary Honis method (full-spectrum mod), and it worked great.
DSLR Camera Filters
DSLR cameras are great for accepting filters during your imaging sessions through your telescope. For example, I use an Astronomik 12nm Ha Filter in my Canon T3i to capture narrowband h-alpha photos.
The 12nm H-alpha filters block all wavelengths of light (including light pollution and moonlight) except for a very narrow band in the hydrogen-alpha spectrum.
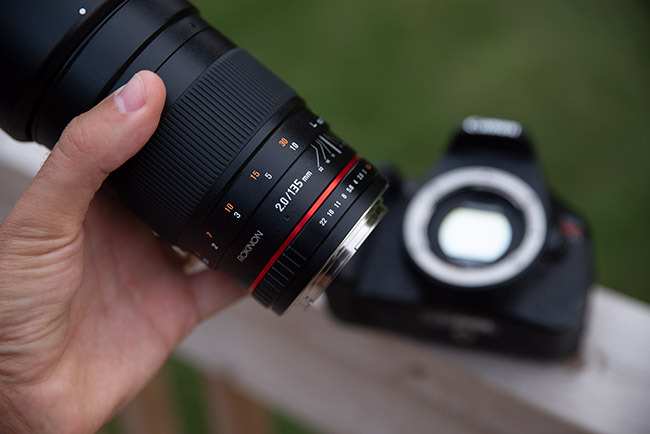
A clip-in DSLR filter can be used with a camera lens for astrophotography.
Speaking of light pollution, astrophotographers in the city can benefit from light pollution filters for their DSLR camera.
I have used many types of light pollution filters for astrophotography over the years. The types of filters range from broadband (or broad-spectrum) filters, such as the Optolong L-Pro, to much narrower bandpasses, like the Optolong L-eXtreme.
In the image below, you can see just how dramatic the results can be when using a light pollution filter that isolates specific wavelengths of light from a bright, city sky. These types of filters are often called “multi-bandpass” filters.
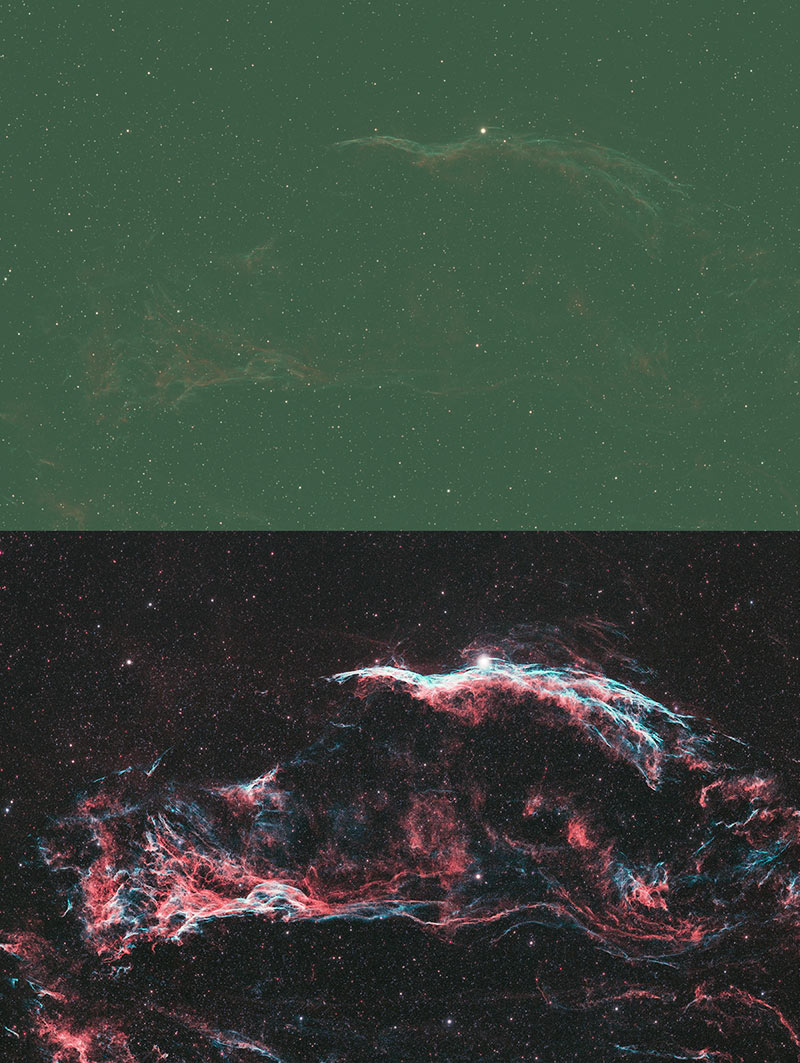
My results on the Veil Nebula using a light pollution filter with a color camera.
CMOS Astrophotography Cameras
A CMOS camera is an affordable alternative to a CCD camera. Modern CMOS technology has caught up with the expensive CCD cameras of the past and is now the mainstream choice for new amateur astrophotography setups.
These cameras use a thermoelectric cooling system on the sensor to help produce long-exposure images with less noise than an uncooled DSLR. To accomplish this, the cameras must be powered by an external source.
Dedicated astronomy cameras come with either color or monochrome CMOS sensors. A color camera is often called a “one-shot-color” camera because you can capture a full-color image in a single exposure. Mono cameras, on the other hand, must shoot through RGB filters individually to create a full-color image.
To effectively run a series of long-exposure images through each filter with a monochrome camera, you’ll want to use an electronic filter wheel that cycles through the filters as part of an imaging plan. This accessory adds further complexity to your imaging setup and requires additional software.

My ZWO ASI2600MM Pro (monochrome) camera with a filter wheel attached.
When I began my astrophotography journey in 2010, the only two camera options were DSLRs or CCD imaging. Today, dedicated astronomy cameras are widely used and enjoyed by amateurs worldwide.
Dedicated astronomy cameras, such as the ZWO ASI294MC Pro, usually save scientific image data in the FITS format.
Unlike RAW files such as Canon’s .CR3, FITS files generally cannot be opened directly in software like Adobe Lightroom. They are normally calibrated and stacked in astronomy software before being exported as a TIF file for final editing.
To begin processing the images, use image-stacking software such as DeepSkyStacker to calibrate and stack the data, debayering color-camera files when necessary. You can then export a file type suitable for editing, such as a TIF.
Image Scale Basics
When you start using dedicated astronomy cameras, you will need to pay attention to the sensor’s pixel size. The pixel size will determine the image scale you can expect with the telescope you are using.
You can calculate the image scale of your camera and telescope to see if they are a good match by using the following equation:

Image Scale (arcseconds/pixel) = 206.265 × pixel size (µm) / focal length (mm)
Generally, a well-sampled image will have an image scale between 1.0 and 2.0. For example, my ZWO ASI294MC Pro CMOS camera has a pixel size of 4.63.
When attached to my Sky-Watcher Esprit 100 ED refractor, the image scale is 1.73 (4.63/550 mm x 206 = 1.73).
Types of Astrophotography Cameras
There are several options for photographing the night sky. The two main types of cameras I use for astrophotography are DSLR/Mirrorless cameras and dedicated astronomy cameras.
Other options include CCD cameras (which use a different type of camera sensor), point-and-shoot digital cameras, smart telescopes (which include internal CMOS camera sensors), and smartphones.
Each camera type has strengths and weaknesses, whether in terms of performance, cost, or ease of use. I still enjoy using a DSLR camera for astronomy imaging because of its convenience, flexibility, and price.
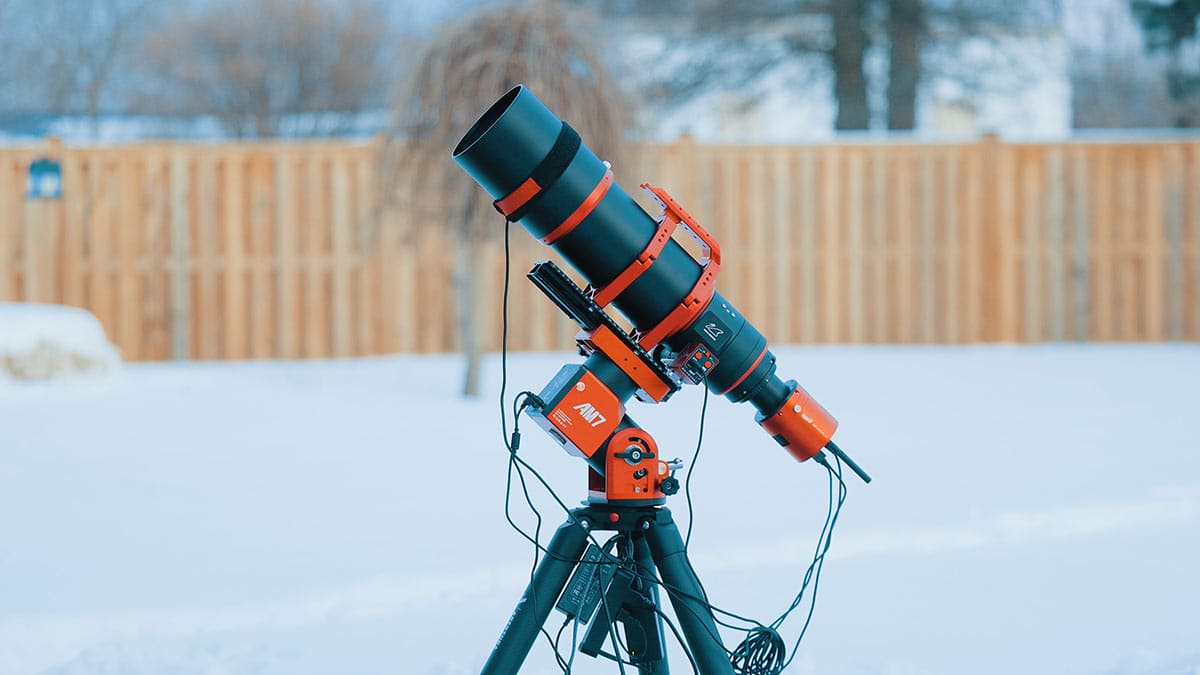
For deep-sky astrophotography of nebulae, galaxies, comets, and star clusters, I typically use a dedicated astronomy camera, such as the ZWO ASI2600MC Air pictured.
Choosing the Right Camera for the Job
The type of camera you will use depends on what you intend to photograph.
Because I mainly shoot deep-sky astronomical objects, a DSLR that I could attach to my telescope via a t-adapter was the logical choice. The DSLR also allows you to attach several different types of lenses to it for landscape astrophotography projects.
If you prefer to focus on taking pictures of the planets in our solar system, a webcam or dedicated astronomy camera may better fit your needs.
If you are not interested in the technical settings and advanced controls included in a DSLR camera, your smartphone may be all you need for your landscape astrophotography goals.
If you are a serious amateur astronomer who wants to take your deep-sky astrophotography to the next level, a dedicated astronomy camera is likely in your future.
Deep-Sky Astrophotography
This is the act of photographing deep-sky objects in space, such as galaxies, nebulae, and globular clusters. These objects are usually cataloged as Messier Objects, NGC (New General Catalogue) or IC (Index Catalogues).
This is the realm where I spend the majority of my time. A tracking telescope mount is required to compensate for the Earth’s rotation and the night sky’s apparent movement.
Without an equatorial mount, stars will trail once the exposure becomes too long for your focal length and pixel scale. With many wide-angle lenses, that may happen in roughly 10-20 seconds. The photo below shows the North America Nebula using a ZWO ASI2600MC Air with a small apochromatic refractor telescope.
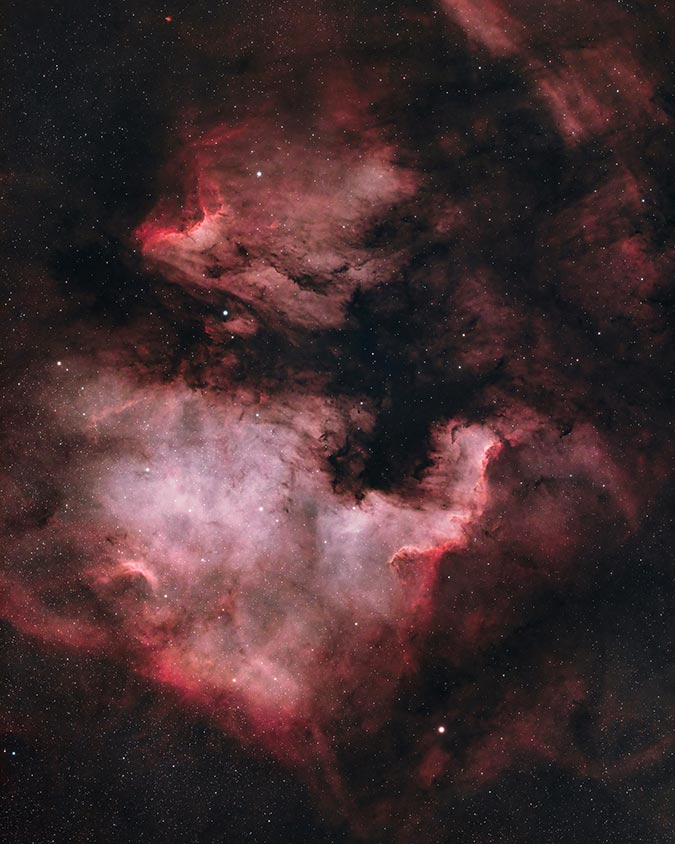
The North America Nebula. ZWO ASI2600MC Air + Askar SQA55 Refractor.
Landscape Astrophotography
Landscape astrophotography has gained popularity over the years with the increasingly affordable DSLRs. These cameras are much more sensitive to light than ever before, and nobody can resist the allure of an image of the Milky Way.
This type of photography can also include shots of constellations, planet conjunctions, the moon, and more. This type of photography has quickly become a close second behind my interest in deep-sky imaging.
Attaching a camera lens to your DSLR is necessary for a wide-field view of space rather than connecting the camera to a telescope.
I use a wide-angle camera lens on a small star tracker for shots like the one below.
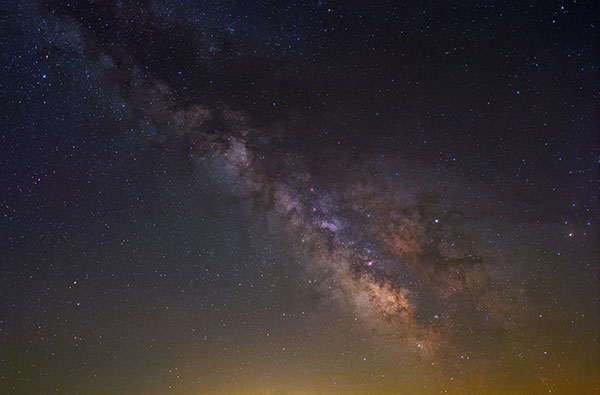
The Milky Way – Canon EF 17-40mm F/4L lens on an iOptron SkyGuider Pro
Solar System Imaging – Planetary Astrophotography
I began my photographic journey with this type of imaging. My first shots were of the Moon through my Orion 4.5 Reflector Telescope using the eyepiece projection method.
I would use my Point-and-Shoot Canon Powershot digital camera through the telescope’s eyepiece to take pictures of the Moon, Jupiter, Saturn, Mars, and Venus.
It is possible to photograph solar system objects through a non-tracking Dobsonian telescope with your smartphone, but it will be challenging to capture a clear shot at high magnification. You can also capture wide-angle photographs of the planets with your DSLR camera as they dance across the night sky each night.
The ZWO ASI585MC is a popular choice for beginners due to its affordable price tag and solar system photography capabilities. This camera uses an 8-megapixel one-shot color imaging sensor with 2.9 x 2.9 micron pixels.

ZWO ASI585MC planetary camera
This type of camera sensor is ideal for capturing images of planets like Saturn, Jupiter, and Mars because the images are highly magnified. You can either take single exposures during times of good seeing or record video footage (SER file format) and stack the best frames in Registax.
This method helps overcome brief changes in atmospheric seeing by keeping and stacking only the sharpest frames. Some of the best planetary images in the world were taken using these inexpensive “webcam”-style cameras.

The planet Jupiter photographed through the telescope eyepiece. (ZWO ASI462MC Camera)
Narrowband Deep-Sky Astrophotography
This is where it gets interesting. Narrowband imaging is used by professional astrophotographers around the world, including on the photos that were taken by the Hubble Space Telescope.
The concept behind this type of photography is to shoot your deep-sky object through different filters that only pick up certain wavelengths of light.
This is beneficial for several reasons, among them is being able to capture images under heavy light pollution. This is usually done with a cooled CMOS camera with an attached filter wheel.
I have captured many images using a color camera with narrowband filters, and have found it to be an excellent way to add more detail to my existing photos.
There will always be a learning curve to overcome when starting out with a new camera. I encourage you to join your local astronomy club or one of the many astrophotography communities on the web for specific advice about the camera you are using.
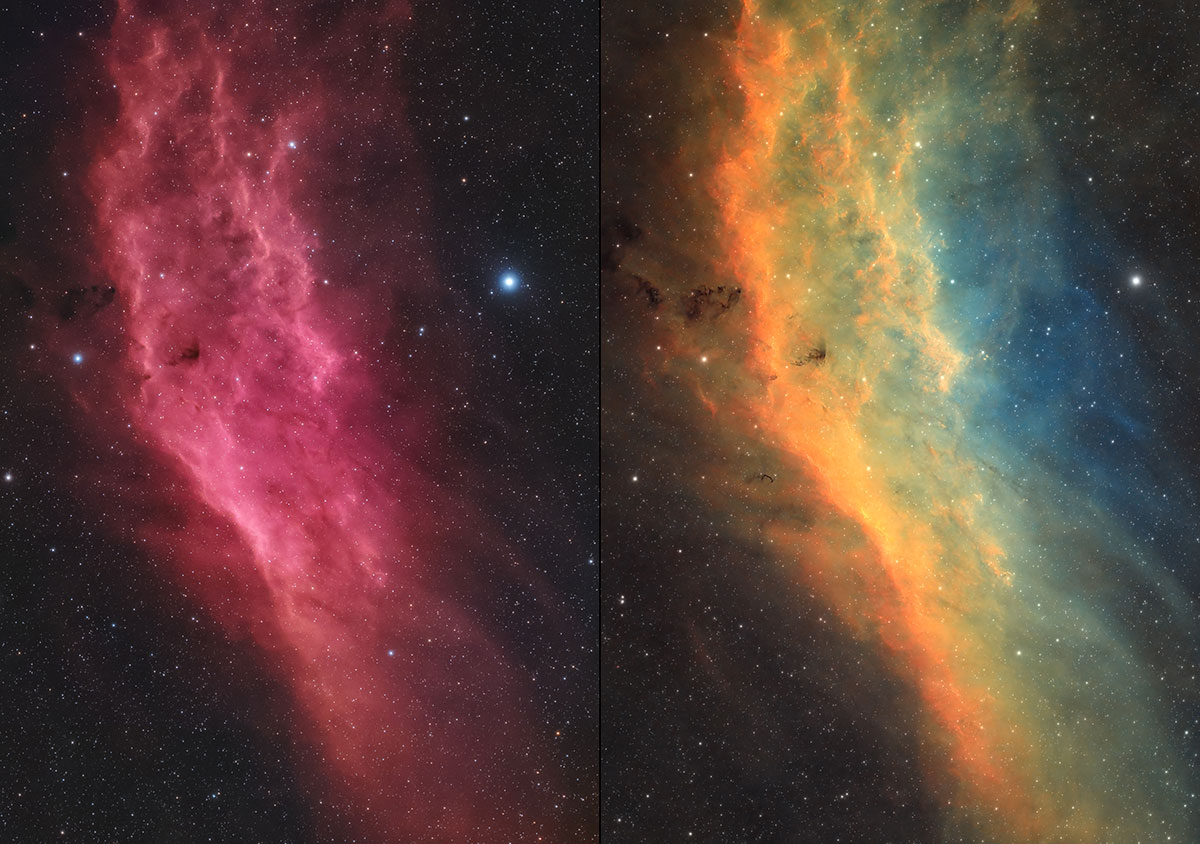
The California Nebula captured in broadband RGB (true color) vs. narrowband in the Hubble Palette (false color).
What Type of Camera do you recommend?
No matter which type of astrophotography camera you use, the important thing is that it produces the results you are aiming for. Personally, I thought I would always shoot with a DSLR camera.
That all changed when I experienced the power of a dedicated astronomy camera with a cooled sensor and the high-quality, low-noise images it produced.
For a streamlined deep-sky workflow, I often use a cooled one-shot color camera such as the ZWO ASI2600MC Air. When I want maximum control over narrowband data, I use the ZWO ASI2600MM Pro monochrome camera with a filter wheel.
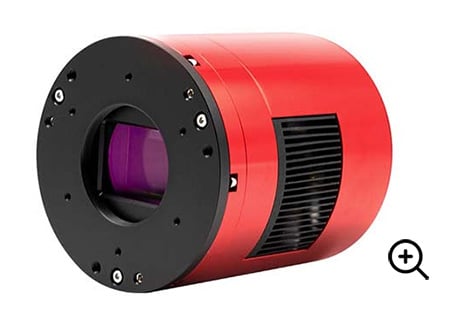
The ZWO ASI2600 camera series has been central to my deep-sky imaging workflow.
Your camera should complement your style and imaging conditions. For me, it’s all about maximizing the short windows of imaging time I can squeeze in.
Please subscribe to the AstroBackyard Newsletter for my latest equipment reviews and astrophotography tutorials.

Trevor Jones is a deep-sky astrophotographer and a valued member of the RASC. His passion is inspiring others to start their astrophotography journey on his YouTube Channel so they can appreciate the night sky as much as he does. His images have been featured in astronomy books & online publications, including the NASA Astronomy Picture of the Day (APOD).
Related Content
- The Best Telescope For a Beginner
- The Dobsonian Telescope: The Best Bang for Your Buck
- The Best Way to Get Started in Astrophotography
