How to Focus your Camera For Astrophotography
Whether you’re using a camera lens or a telescope, learning how to focus your camera for an astrophotography image is one of the first big hurdles to overcome when entering this hobby.
In this article, I’ll discuss the methods I use to focus my telescopes and lenses for astrophotography, and the camera settings that make the entire process easier.

In astrophotography, the magnification and scale of your image will vary widely depending on the optical instrument used. Sometimes, you want to capture a massive area of the night sky such as the core of the Milky Way. Other times, we focus on small nebulae and galaxies for a closer look.
No matter what the focal length of your camera lens or telescope is, your focus must be spot-on for a sharp image. Achieving a tight focus on your subject is important in all areas of astrophotography, from pictures of the moon and planets to wide-angle photos of the Milky Way.
Depending on the optics and camera used, this experience may become a challenging task. Lenses with fast optics (F/2 or below) tend to be the most challenging to focus, as they can be very demanding in terms of reaching critical focus.
There are certain situations where you may not want to be in focus on the night sky, but these are creative shots that can be explored later on. Learning how to focus your camera for astrophotography properly is an essential step of the hobby.
Related: 7 Essential Astrophotography Tips and Camera Settings

Using a Camera Lens
If you’re using a camera lens, it needs to be on manual focus (MF) mode, as the stars are too dim and too small for the camera to use autofocus on. Autofocusing a lens or telescope for astrophotography is possible, but requires some additional hardware and software (more on this below).
Taking the time to focus your camera lens is vitally important, as an out-of-focus shot is unrecoverable. Camera noise and slight star trailing can be corrected and hidden to an extent, an unfocused shot cannot. There is something about night photography that causes people to rush their setup (often to maximize time under a clear sky), yet a hasty setup routine often results in disappointment.
To focus your camera lens, find the brightest star you can find in the night sky (or the moon/bright planet). Turn on the “live-view” mode of your camera, which essentially turns the display screen into a live video of what your sensor sees.

The moon, planets, and bright stars are useful when focusing your camera.
It is possible to achieve a useful, rough focus your DSLR or mirrorless camera using the viewfinder, but you’ll definitely want to fine-tune it using the cameras large LCD display screen.
With the right camera settings, you should see at least one bright star on your camera’s LCD display screen.
You can also use a manmade light source like a distant streetlamp, but an actual star is best. It’s important to remember that the settings you use to focus the lens are not the same one you’ll use for the actual image.
Camera Settings for Focusing the Lens:
- Mode: Manual or Bulb
- Lens Mode: Manual Focus
- Aperture: F/4 or below (as low as it goes)
- White Balance: Daylight or Auto
- Exposure: 30-seconds or Bulb
- ISO: 1600 or above (Higher will show more stars)
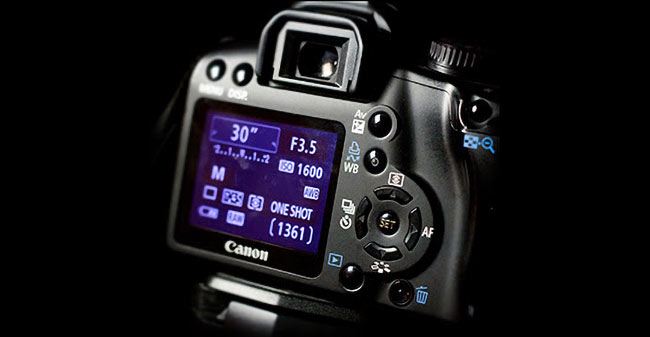
The reason you’ll want to use these exaggerated settings us to let as much possible light reach the sensor as possible. Some of the brightest stars in the northern hemisphere to help you focus include Sirius, Vega, Deneb, Altair, and Arcturus. These stars are all bright enough to see in your live-view display to help you focus your lens or telescope.
If you are certain that your camera lens is pointed towards a bright star, and still see a completely black screen, ensure the following scenarios are not present:
- The lens cap is still on your lens (take it off)
- You are not using exaggerated camera settings for maximum light (adjust ISO, exposure, and f-stop)
- The lens is so out of focus (rack focus in and out and look for the star)
It’s easy to forget to adjust the lens back to your “shooting” settings after focusing. Even if you have every setting right, but have accidentally set your aperture to F/22, you won’t see a single star.
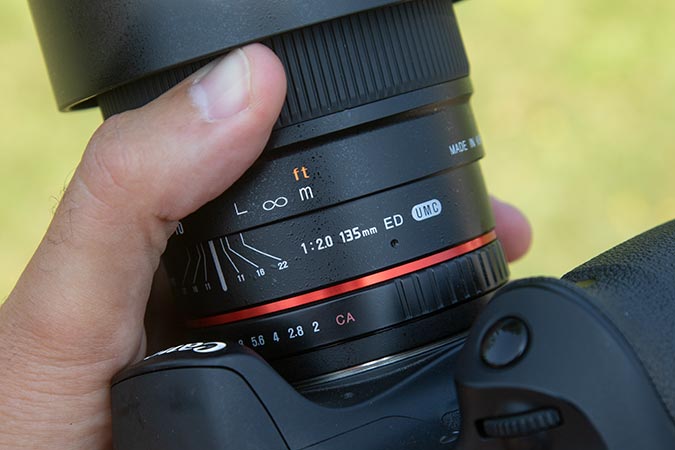
The lens shown below, (Rokinon 135mm F/2) uses a manual “click” aperture ring to adjust the f-stop. Using this lens “wide open” at F/2 makes focusing very easy because plenty of light is collected while in live-view mode. However, this lens performs better with a less aggressive aperture (F/3.2), so you must remember to change the aperture setting after focusing the lens.
Once you do see the star in on the camera’s display screen, zoom in on it, at 5X zoom, and then 10X zoom. The digital zoom is making the picture on your display screen bigger, the lens has not changed the magnification. While in 10X zoom mode, slowly adjust the focuser on your lens until the star becomes a small pinpoint of light.
You will have to go back and forth, in and out of focus many times before you find the spot where the pinpoint is smallest and sharpest.
You can take test exposures and compare your results to confirm the stars in the image are as small as possible. Now, the tricky part is retaining this focus as you move your camera lens or telescope to your subject.
You might get lucky and choose a subject that includes a bright star in the field as was the case for this photo of the California Nebula. See that star to the right of NGC 1499? That’s Atik, and it was bright enough to see in the live-view display of my Canon 60Da.
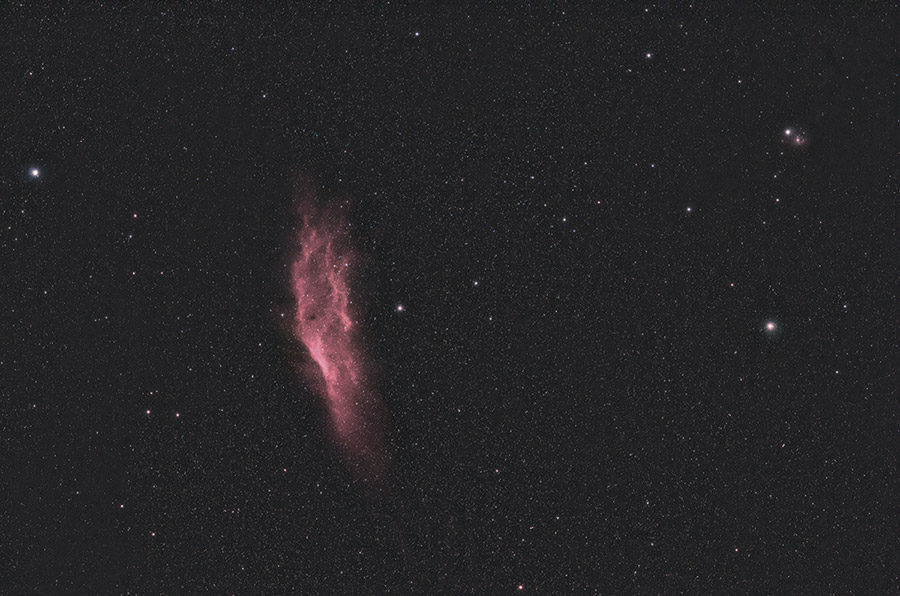
The California Nebula in Perseus. DLSR camera and Rokinon 135mm F/2 Lens.
If you’re using a telescope on a tracking mount, your focus likely won’t budge when you move to your target. If you’re using a camera lens, however, it’s very easy to knock the helical focuser out of position when moving the camera.
Avoid grasping the barrel of your lens when positioning the camera (tape can be effective). If you change the focus slightly by mistake, it’s usually not far off and can be fine-tuned with a few test shots on your subject.
Using a Telescope
When it comes to astrophotography, telescopes are often easier to focus than camera lenses. This is simply because telescopes usually have precision, robust focusers that lock into place. A camera lens designed for daytime photography, on the other hand, was meant to move quickly to accurately focus on moving subjects.
To focus a telescope with a camera attached, you simply need to turn the focuser knob until your subject comes into view. Most of the telescopes amateurs use for astrophotography (Here are the ones I recommend) will have dual-speed, 10-1 focusers, and the ability to lock the focuser in place.
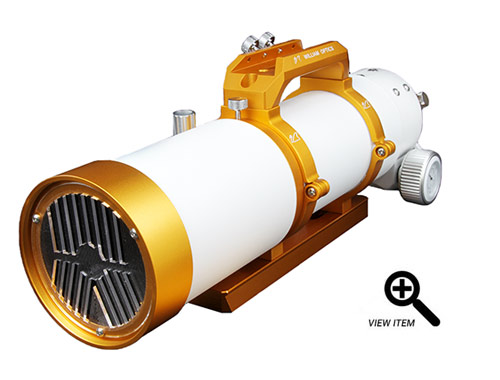
being able to lock the focuser in place is extremely valuable. When the telescope is pointed at certain angles (like straight up), the weight of your camera equipment can be enough for the focuser to “fall” out of position over time. The telescope pictured below is an excellent choice in this regard, as the focuser on the William Optics Zenithstar 73 is robust, smooth, and locks.
In the photo below, you can see the camera attached to the end of the focuser drawtube, and focus is achieved by turning the focus knob to move the drawtube in and out. In contrast, a camera lens uses a helical style focusing ring.
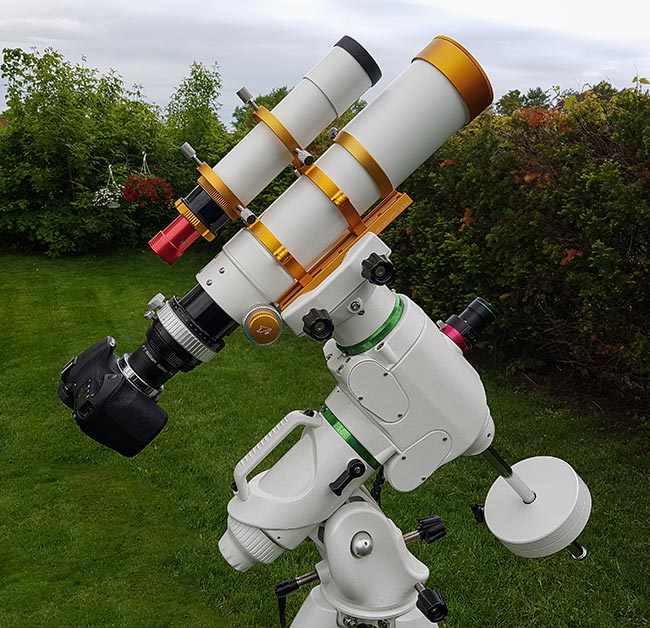
A typical astrophotography telescope setup with a dual-speed (Crayford-style) focuser.
You’ll likely find it easier to focus a refractor telescope on a bright star than a camera lens. The focuser moves much slower, and you’ll make several rotations of the focuser knob rather than the small turns of a camera lens focus ring.
Telescopes with “fast” optics such as the Celestron RASA (F/2) are more demanding on focus accuracy but can let in a lot of light in a short period of time. Many of the apochromatic refractor telescopes I have used are in the range of F/6 – F/7 and are capable of capturing images with extremely sharp details of your subject.
Focusing on the Moon and Planets
The same process of using the 5-10X live view applies when photographing the moon or the planets. The difference this time is that the subject is very bright, and less aggressive camera settings must be used.
I recommend dialing back your ISO and exposure settings so that the face of the moon is not over-exposed, and you can see the mid-tones of the surface. Once you have found a rough focus on the moon, you can zoom in to look at it at 5X and 10X magnification.
It is not uncommon to see a lot of turbulence (that looks like rippling waves of air) between your optics and the surface of the moon at high magnification.
Now, you should start to see the rocky surface of the moon come into focus and it is just a matter of adjusting the focus until it is as sharp as possible. You can also use the moon to focus your lens or telescope before hopping over to a much dimmer target in the night sky.
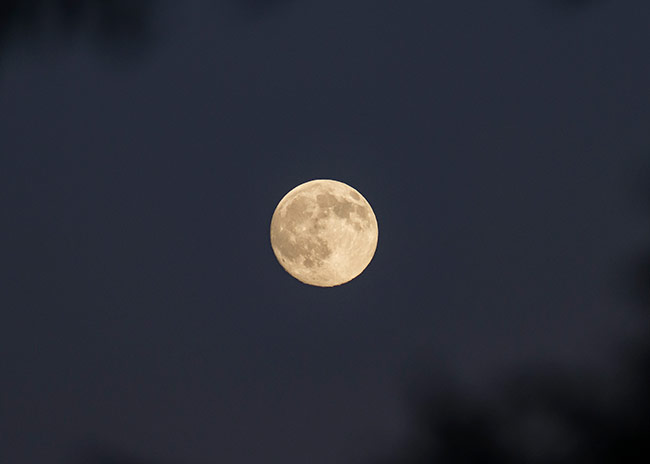
A sharp photo of the moon captured with a Canon 300mm F/4L telephoto lens.
Changes in Temperature
Because astrophotography takes place at night, you often experience a drop in temperature between the time you set up your camera, and when night sets in. Always take extra time to focus your camera properly, and continue to monitor focus throughout the night. As the ambient temperature changes, your focus does too.
If you simply focus the camera once and leave it in that position for an entire night of imaging, you may discover that your shots gradually became unfocused over time. This can be a painful and unexpected experience, so do yourself a favor and check your focus a few times throughout your imaging session.
When the time comes to stack and register a series of images, you’ll only want to stack the subframes with the sharpest focus into your final picture. Stacking software such as DeepSkyStacker can provide you with a “score” for each of your exposures, and the level of sharpness of the stars in the image is a large contributing factor.
If your focus becomes worse over time, you should see the scores gradually drop. This usually indicates that a change in temperature affected your focus.

DeepSkyStacker can score the quality (and sharpness) of your astrophotos.
Use a Bahtinov Mask
A Bahtinov mask is a handy tool to use when focusing your camera for astrophotography. This simple accessory sits in front of the camera lens or telescope objective to create a star diffraction pattern. The pattern helps you reach critical focus by creating an “X” pattern with a central bar that you must place in the center.
To use a Bahtinov mask you must point your camera towards a bright star in the night sky. You will also need to use the “wide open” settings for focusing mentioned earlier to maximize light transmission.
As you adjust the focuser of your telescope or lens, the central spike in the pattern will move in and out of the X pattern. When the central spike is sitting directly centered between the X, your camera is in focus.
I regularly use a Bahtinov mask to focus my telescopes. In the image below, you’ll see the pattern you are looking to replicate with the Bahtinov mask in place.

Use the star diffraction pattern created by a Bahtinov mask to reach focus.
Some of the telescopes I use for astrophotography include a built-in mask inside of the lens cap. The William Optics RedCat 51 is one example, and I use this tool to focus my camera each and every time.
William Optics feels strongly about this design and includes it as a built-in feature for most of their refractors. The compact Z61 doublet refractor (shown below) is a popular choice for wide-field deep-sky imaging with a DSLR camera.
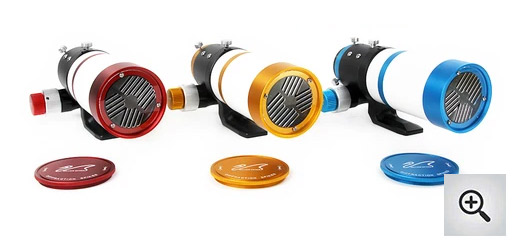
The clear, acrylic version you see on the telescopes above (William Optics “Star Spikes” focus mask) allows even more light to pass through to the camera sensor and can make focusing the telescope a little easier.
You can also purchase Bahtinov masks or nearly any size for your lens or telescope. The product below was designed to fit inside of a 58mm DSLR camera lens filter.

What about Autofocus?
In the world of astrophotography, autofocus can only be done with a combination of software and a motorized focuser. This is because a reading of the star size (FWHM or HFD) must be made and applied to your lens or telescope in real-time.
Camera automation software such as N.I.N.A can read the subtle changes in the size of a star, and apply micro-adjustments to your telescope or camera lens’ position.
Advanced imagers rely on motorized focusers to maintain critical focus on their subject over long periods of time. One of the most popular options is the ZWO EAF (electronic automatic focuser) device.
This can be controlled using automation software or the handy ASIAIR WiFi controller remotely. Smart telescopes rely on autofocus to keep the images sharp, as they analyze and stack the best images.
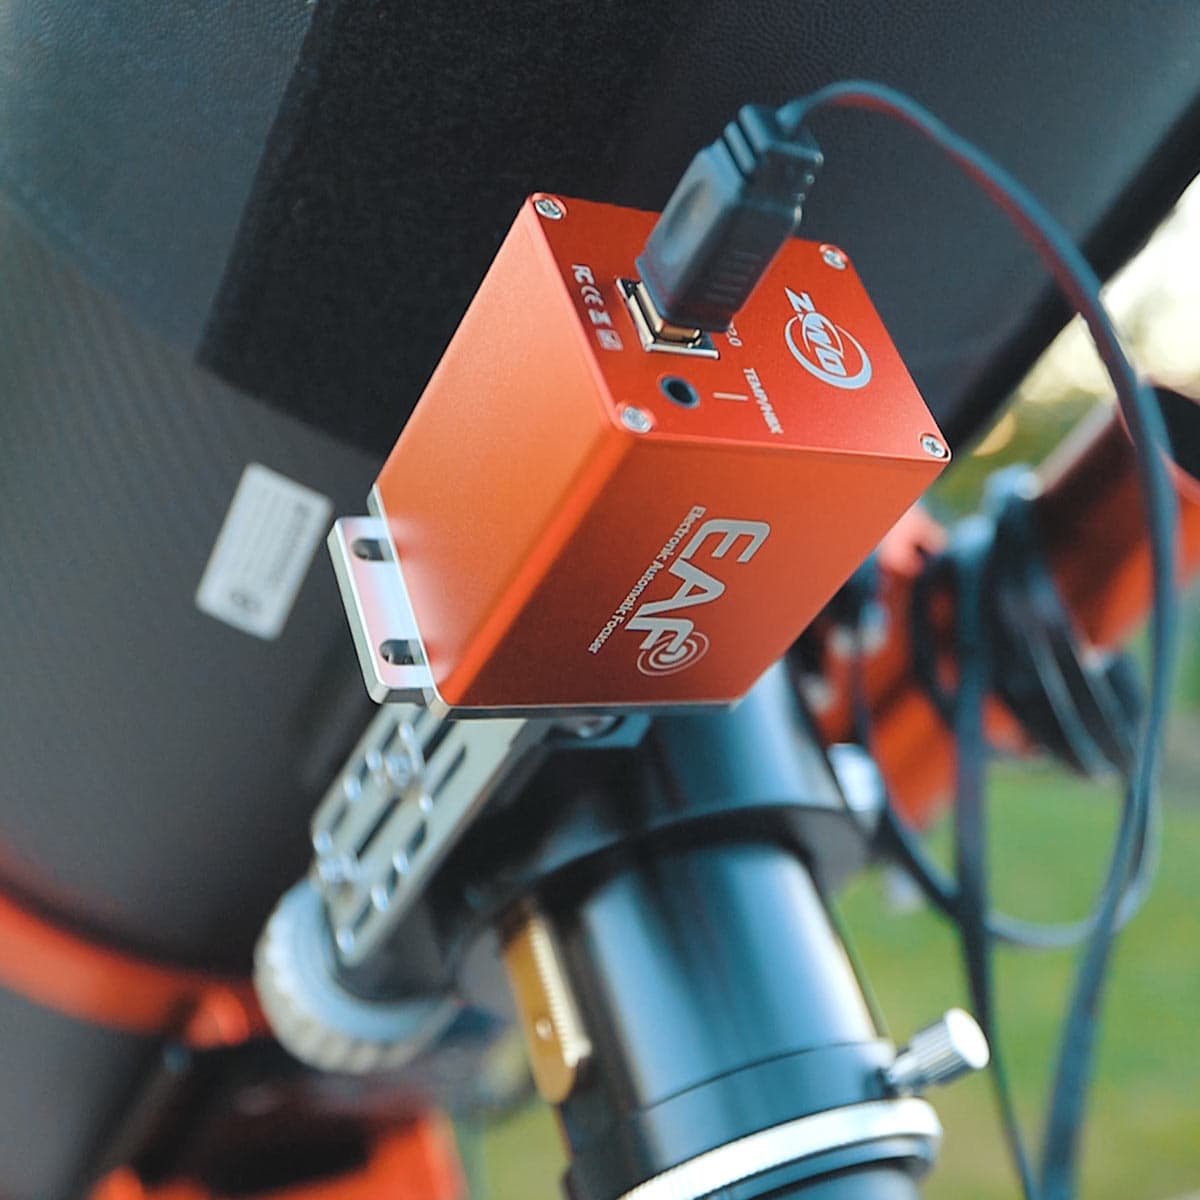
I use a ZWO EAF telescope autofocuser to automate the focus routine during a night of astrophotography.
Practical Insights from Amateur Astrophotographers
I asked the AstroBackyard Facebook page if they had any additional tips for focusing their camera at night for astrophotography. As usual, the amateur astrophotography community offered a number of helpful focusing tips.
“I am a big proponent of bahtinov masks and even more so for automatic focusers using the FWHM method. With those focusers, I usually refocus every hour and on filter changes, since I use a mono camera. For long imaging nights, this allows me to focus without me even being present. Unfortunately, I have not yet found a good way to focus on the sun…”
- Michael Abraham
“Focus to hyperfocal distance, or a few centimeters past it. Downside is, hyperfocal changes with the focal length and aperture. In this case, apps such as PhotoPills are great help.
But lacking that, I resort to the live view zoom technique.”
- Carlos PhotoCage
“When using long focal lengths and manual focusing I find it best to focus on a very bright star that has a not so bright companion. For example my personal favourite is Acrux. Use the bright star (Acrux A) for focusing, with live view enabled and zoomed in as much as possible showing both stars. Once it is in focus you will notice the fainter star (Acrux B ) that is otherwise hardly visible will start to ‘pop’. This happens only in the very narrow space where you have achieved actual focus.”
- Steffen Boelaars
“Here’s another tip. Mark your focuser tube with a sharpie. Mine has “25mm” and “Nikon” lines that make it easy to get quickly near focus. Of course this works best if your tube isn’t black.”
- George L Poston
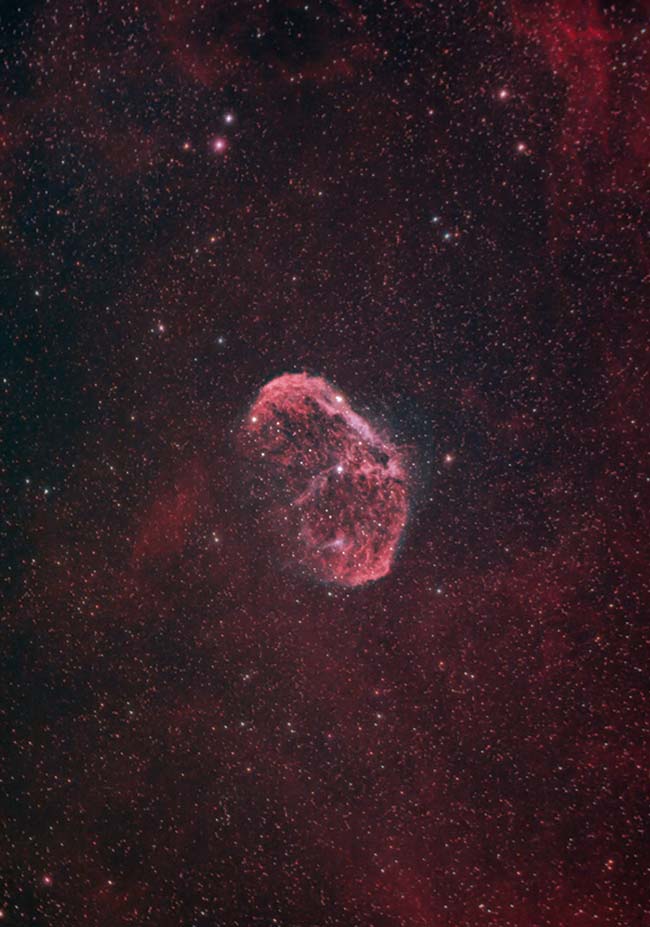
I used a Bahtinov Mask to achieve focus on a bright star before capturing this image of the Crescent Nebula.
Final Thoughts
The main takeaway I would like you to remember is that is always worth your time and effort to really fine-tune the focus of your camera. When it comes to long exposure astrophotography, we often get caught up in collecting the maximum amount of exposure time possible while the sky is clear. However, collecting multiple sub-exposures with out-of-focus stars is of no value to your final project.
Don’t obsess about re-focusing your camera every five minutes either. Unless there has been a major drop in temperature, your focus should remain relatively unchanged for an hour or more. I tend to check the focus of my shots about 2-3 times throughout an imaging session.
Sometimes, the weather can affect the clarity of your photos, and soften or bloat the stars in your picture. A thin haze of clouds will make an image that is in-focus appear soft and blurry, but there is nothing you can do about that.

The results of your focus efforts will be rewarded when reviewing your long-exposure images in post.
Related Posts:
- The Best Astrophotography Telescopes Available
- White Balance Settings for Astrophotography
- Remove Dust and Vignetting with Flat-Field Frames
