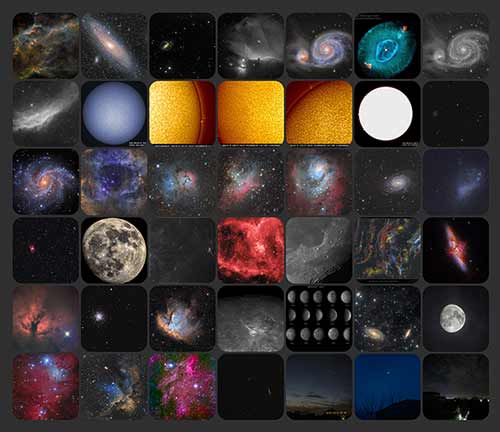
Resources
Astrophotography resources include software, mobile apps, websites, and generally great information that can take your skills to the next level. The right software and tools can save you from unnecessary headaches and help you enjoy the art of astrophotography on new levels.
It is important to maximize your time under the stars and make sure that you give yourself the best chance of successful results. I have listed many of the software applications I use on a daily basis for capturing and processing deep-sky astrophotography images. Some of these programs are free, but most are not.
Before spending your hard-earned money on software for astrophotography, it is best to research the product. If it is something that can provide value to your processing workflow by saving you time or helping you produce better results, then it is well worth the money.
For example, reliable image stacking software will allow you to get the most out of your imaging data captured under the night sky. There are many free tools available to get the job done, but there are advanced paid options available to take your image processing skills even further.
Below, you will Astrophotography Resources for:
- Image Capture Software
- Image Stacking Software
- Image Processing Software
- Photoshop Plugins and Filters
- Planning Your Imaging Session
- Polar Alignment
- Where to Buy Equipment
Getting Started in Astrophotography
If you are brand new to astronomy and are ready to take your first step towards developing your passion for the night sky, I have put together some simple guidelines to follow when deciding on which telescope to buy.
I would not recommend jumping straight into astrophotography without first learning about the sky and experiencing what it is like to spend a considerable amount of time outside with your telescope. For more information, visit the “Buying Your First Telescope” page.
One of the greatest elements of astrophotography is the amazing online community of imagers willing to help beginners. This is how I learned much of what I know now, and I am happy to assist beginners learn how to photograph the night sky.

A DSLR camera and lens on a portable Star Tracker is a great way to enter the hobby.
I have used many different telescopes for astrophotography, but I prefer the imaging performance and consistency of an apochromatic refractor. If you would like to see a complete list of the astrophotography equipment I use for deep-sky imaging, please visit the Equipment Page.
Capturing images outside is just 1 part of the astrophotography process. The work that takes place after your images have been taken is equally important. Having the right tools and software at your disposal will allow you to develop a workflow you are comfortable with.
Choose software that will enhance your overall experience and make you want to get out an image as much as possible. There is a solution to every headache! (Except clouds)
Software for Deep-Sky Astrophotography
These are some of the astrophotography-based applications I use on a daily basis to capture and process my images. Having the right tools can help you produce better images and save time during processing. Most of the software I mention below is not free.
Before I dive into the specific software applications used for controlling your camera and telescope, have a look at the ASCOM initiative and learn how the ASCOM architecture is used in many astronomy-related devices. The INDI Library is another collection of programs designed to control astronomical equipment from filter wheels to observatory domes.
With so much time and energy spent capturing those precious light frames, you owe it to yourself to have the opportunity to make your final photo a masterpiece! Personally, I would highly recommend the small investment to greatly improve your astrophotos.
Acquisition Software
There are many software applications available to control your camera and automate your imaging sessions, including:
Investing in software that allows you to enjoy capturing and processing deep sky images will allow you to focus on why you got started in astrophotography in the first place. The best astrophotography capture software is one that is reliable, easy to use, and supports a wide variety of equipment. Once you have become comfortable with the interface, your imaging sessions will involve less trial-and-error and more exposure time on your subject.
Astro Photography Tool (APT)
I began using Astro Photography Tool (APT) in April 2017. I was looking for an alternative to Sequence Generator Pro to control my dedicated astronomy camera sessions. I am delighted to say that APT is a fantastic and affordable choice for both CCD and Canon DSLR imagers.
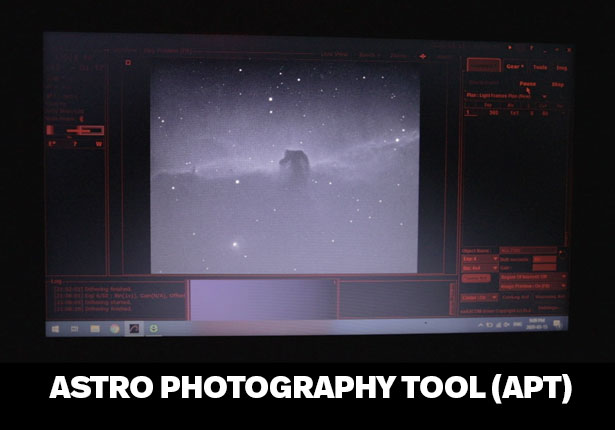
This software offers much more than just camera control, such as plate solving, automatic dithering, and more. Some of my favorite features of Astro Photography Tool are the Cooling Aid, and Flats Aid.
I was able to successfully capture Light Frames, Dark Frames, Bias Frames, and Flat Frames my very first time out with APT. This software integrates with PHD2 Guiding to handle matters like dithering between each image exposure.
Connecting a dedicated astronomy camera is straightforward, and I have never had any issues when connecting hardware using ASCOM drivers with APT. You can change the binning mode from 2×2 for focus and framing, and back to bin 1×1 for your imaging plan.
I have found APT to be a very reliable way to control my imaging sessions in the backyard. I have used a number of different cameras (with native and ASCOM drivers) with APT to capture deep-sky images. To date, I have used the APT software to control the following DSLR cameras and dedicated astronomy cameras:
- Canon EOS Rebel T3i
- Canon EOS 60Da
- Canon EOS Ra
- ZWO ASI071MC Cool
- ZWO ASI294MC Pro
- ZWO ASI533MC Pro
- Starlight Xpress Trius 694 (Mono)

SharpCap
I have used SharpCap to frame my imaging target, and to focus my telescope. SharpCap is responsive and lightweight. I can quickly connect my camera for a near live-view look at my desired area of the night sky.
This software is extremely useful when focusing as well. With a Bahtinov mask attached to the telescope, I can fine-tune the focus of my imaging area using SharpCap.
I also enjoy the Polar Alignment feature in SharpCap. Using my autoguiding camera, SharpCap will plate solve the images allowing me to align the RA Axis of my mount with the North Celestial Pole.
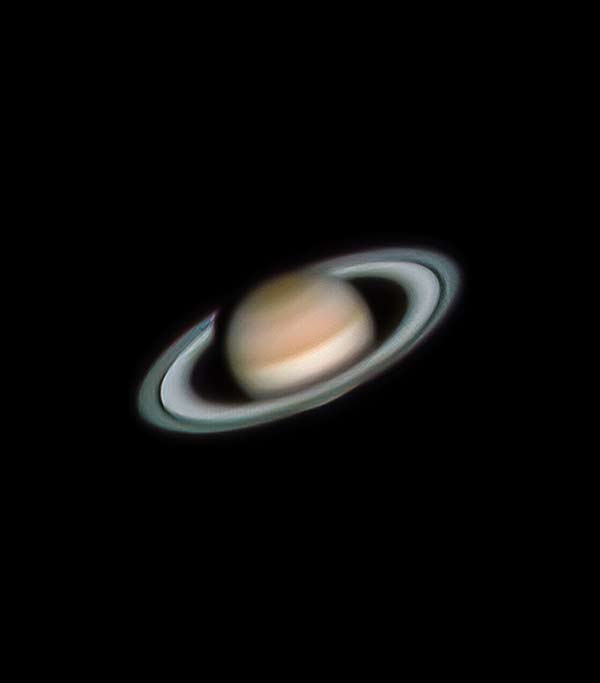
FireCapture
After years of continuous development by the author (Torsten Edelmann), and a dedicated community of amateur astrophotographers, FireCapture has evolved into one of the leading planetary capture tools.
This dependable application supports a wide variety of cameras, including ZWO, QHY, Altair, Celestron, and more. It’s also available for multiple operating systems including Mac, Linux, and Raspberry Pie (for select cameras). For support, you can join the FireCapture email group.
I use FireCapture to photograph planets at high magnification using telescopes like the Celestron Edge HD 11 and planetary cameras such as the ZWO ASI462MC. This tool is free to download and extremely user friendly.
My absolute best images of Mars, Jupiter, and Saturn were captured using FireCapture.
BackyardEOS
For several years of my deep-sky astrophotography journey, I used BackyardEOS for camera control. It has several handy features that make imaging with your Canon DSLR and telescope a more enjoyable experience.
Early on, I used the Canon capture software that came with my DSLR, EOS Utilities. This worked well for me and I was quite happy with it. A few friends of mine talked about how great BackyardEOS was, so I finally decided to upgrade.
Backyard EOS was designed for astrophotographers and, as such, has numerous tools to assist you in the field. The star focus module (FWHM) and dithering compatibility with PHD2 guiding would have to be my favorite features.
I also love the interface and the robust file-naming and description options. The company offers a 30-day trial, so give it a go for yourself.
Own a Nikon DSLR? Try BackyardNIKON.
PHD2 Guiding
Love it or hate it, PHD2 Guiding gets the job done. Unless you are blessed with a high-end astrophotography mount that doesn’t require guiding such as the Paramount MYT, you will likely need an autoguiding system to keep your stars round during a long exposure.
This application communicates with your telescope mount to “lock-on” to a guide star so that your image frames are nice and sharp. Good polar alignment will help, but autoguiding with PHD will make sure that your images are sharp during exposures of 3-minutes or more.
Related Post: 5 Tips for Better PHD Guiding
Sequence Generator Pro
This software is still new to me, but I can see the potential for complete automation of my deep-sky imaging in the backyard. Once I am able to construct an observatory, I will likely control my sessions largely with Sequence Generator Pro (SGP).
I used this software in its most basic form during my experiences with the ZWO ASI071MC-Cool camera in March 2017. This software offers a generous 45-day, full-featured trial version.
If you’re interested in the computer I use for controlling my camera and telescope, I’ve written a detailed post about the PC I now use. There are several options available for controlling and automating your astrophotography equipment, but I prefer the convenience and practicality of a laptop computer.
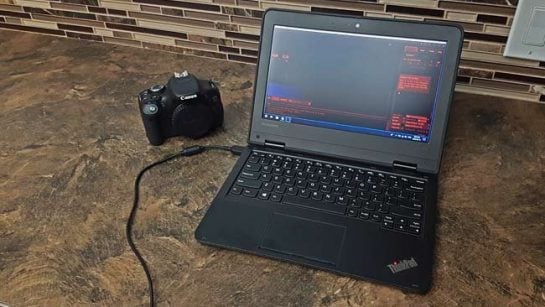
Computers for Astrophotography (My Advice)
ZWO ASIair
The ZWO ASIair mobile app is installed on my Android smartphone and tablet. This is a camera control unit for ASI cameras, such as the ASI294MC Pro one-shot-color camera and the ASI290MM Mini guide camera.
I enjoy the freedom and simplicity of this system as the internal Raspberry Pi-based computer rides along with my telescope without the need for an external imaging laptop.
In late 2021, ZWO released the ASIAIR Plus, a version with more onboard memory and an extended wifi range. This is the best version of the ASAIR yet and the mini PC I currently use for portable, deep-sky imaging sessions from the backyard and beyond.

The ZWO ASIair mini-computer riding along with my primary imaging telescope.
Image Processing Software
For astrophotography image processing, you will need a capable computer to run resource-intensive tasks. Today’s plugins and scripts can take a long time to run, depending on your system’s speed.
I recommend using a computer with at least 16GB of RAM (32GB is better), an Intel Core i7 processor (or better), and an NVIDIA GPU. I currently use an ASUS ROG Strix GL10CS Desktop for image processing.
The following tools are used for both image stacking and image processing (often referred to as ‘post-processing’).
DeepSkyStacker
DeepSkyStacker is an amazing free program designed for astrophotography. It simplifies the pre-processing steps required to create an astrophoto by automatically registering and stacking your images into one hi-resolution file.
This is where you will submit your light frames, dark frames, bias frames, and flat frames that you captured during your imaging session. You can then bring the file it creates into Adobe Photoshop for post-processing.
View the Deep Sky Stacker settings I use
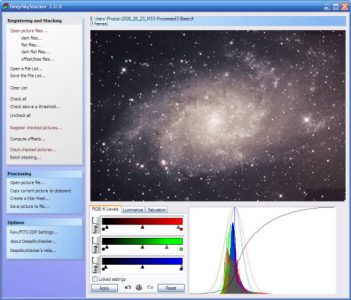
I use DeepSkyStacker in its most basic form. I prefer to organize all of my best light frames in Adobe Bridge (Any RAW format photo viewer will do), and then bring those images into DSS for registering and stacking.
This basically means that it will automatically stack all of my images on top of each other, and create a high-resolution .TIF file that I can then process in Adobe Photoshop.
For a detailed tutorial on how to use DeepSkyStacker, you can download my premium image processing guide. Alternatively, you can visit the tutorials section to see DSS in action in a variety of scenarios.
Registax
Registax is software designed for stacking, aligning, and even processing your solar system images. It is a completely free tool that does a great job with images of planets and the moon.
I’ve used Registax to align and stack my images of high-magnification planetary images of Saturn, Jupiter, and Mars. There are some fantastic tutorials available on YouTube including this one about processing the Moon.
The wavelet adjustment tools are remarkably effective at sharpening your images of planets and the moon.
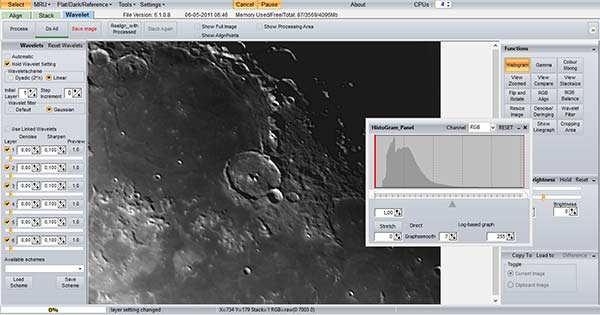
Registax 6 software for planetary image processing.
Adobe Photoshop
Adobe Photoshop is a very powerful and flexible program for processing all types of photographic images. The power of Photoshop lies in its ability to stretch your pixel data further. By using adjustment methods such as levels and curves, you can bring out more color and light from your deep-sky object.
There are plenty of other options when it comes to post-processing an astrophotography image (PixInsight for example) – but Photoshop will always be my personal favorite.
I have recorded several Photoshop tutorials on my YouTube channel over the past 5 years.
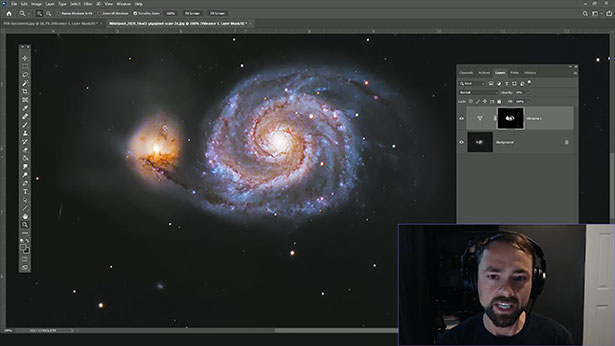
One of my Photoshop Image Processing Tutorials on YouTube.
PixInsight
PixInsight is a powerful image-processing software designed specifically for astrophotography. Unlike general photo editing programs like Photoshop, PixInsight offers advanced tools tailored for deep-sky imaging, allowing astrophotographers to process raw astronomical data with precision.
It is highly regarded for its ability to handle complex calibration, stacking, and post-processing techniques, enabling users to bring out faint details in nebulae, galaxies, and other celestial objects.
One of the main reasons astrophotographers love PixInsight is its comprehensive and science-based approach to image processing.
The software includes an extensive set of tools for noise reduction, gradient removal, color calibration, and detail enhancement, all of which are essential for creating high-quality astrophotography images.
Features like Dynamic Background Extraction (DBE) and Photometric Color Calibration (PCC) allow users to correct uneven illumination and achieve accurate color representation of deep-space objects.
These capabilities make PixInsight a go-to choice for those who want full control over their data and a workflow optimized for astrophotography.

Photoshop Image Processing Tutorial (Video)
Here is an image processing guide for Photoshop that will show you how to turn an unprocessed image into a final astrophoto. The Photoshop actions and plugins used in this tutorial video can be found on this page.
I have put together a premium image processing guide, sharing all of the specific techniques I use in DeepSkyStacker and Adobe Photoshop. This guide is over 100 pages long, more information here..
Adobe Bridge
This application is an extremely handy resource when organizing and previewing your astrophotography images. I use it as a key part of my current workflow. I have been using Adobe Bridge for astrophotography for several years now.
The power of Adobe Bridge is its ability to preview hundreds of raw images files at once. The metadata for each frame is displayed, giving you access to all of the important details, including ISO, Exposure length, Color mode, and much more.
Adobe Bridge makes it easy to view your entire imaging session at a glance. You can quickly remove frames that include satellite trails or frames with poor tracking.
Astrophotography Plug-Ins in Photoshop
 Astronomy Tools Action Set (Photoshop)
This might be the single most important purchase you will make in your adventures in astrophotography. Noel Carboni’s astronomy tools action set is a must-have for anyone processing their astronomy photos in Adobe Photoshop.
Some of the actions I regularly run when processing my images are; Enhance DSO and reduce stars, Make stars smaller, and Increase star color. My current processing workflow includes these actions. You can view my video tutorial processing the Rosette Nebula using this action set here.
It might seem strange paying for “actions” that you could probably do yourself in Photoshop. However, this plugin will save you hours and hours of experimentation with proven processing methods for astrophotography.
Gradient Xterminator
This is another “must-have” for astrophotographers that use Adobe Photoshop. The Gradient Xterminator plugin is especially handy if you capture your images under light-polluted skies. With the click of a button, you can remove horrible gradients and vignetting in your night sky images. Running the Gradient Xterminator filter is one of the first steps I take when processing any of my astrophotos.

HVLG (Hasta La Vista Green)
HLVG is a plug-u filter for Adobe Photoshop that does a great job of removing the green noise from your images. This plugin was designed by the legendary astrophotographer Rogelio Bernal Andreo. The idea is simple. Since there are no green objects in space (with a few exceptions of course), the green data in your deep-sky image is usually noise. I only use this filter in situations where the green noise is obvious.
StarNet++
StarNet++ is a simple program that allows you to remove the stars from your astrophotography images. It is free to download, and you can run it as a stand-alone tool. StarNet++ is an invaluable tool to have when processing your images. It allows you to quickly separate the stars from your image for more control over your image processing.
Planning Your Imaging Session
Astronomy Tools Field of View Calculator
When deciding on your next project (or telescope purchase), it is essential that you understand the image scale of your imaging system. You’ll want to match the right camera to the right telescope to maximize the data you collect.
The Astronomy Tools Field of View (FOV) calculator lets you easily see what the image scale of your system will be. It provides a preview of your intended deep-sky or planetary target to show you exactly how big it will be with your camera sensor.
This tool will present you with the focal ratio, resolution, field of view, and Dawes limit of your imaging system.
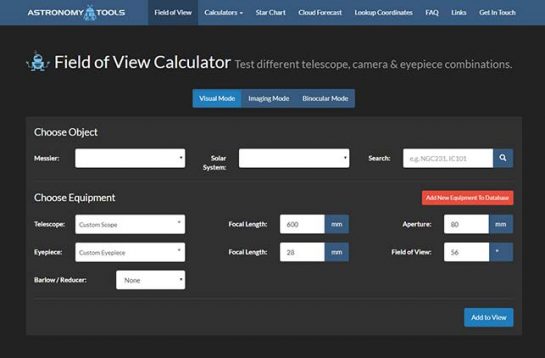
The Astronomy Tools FOV Calculator
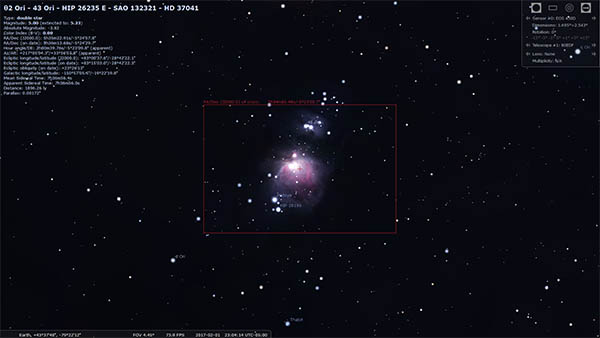
Stellarium (Planetarium)
This is free software you will need to install onto your computer. This is probably the most well-known free planetarium software and is straight-forward and simple to use. I also recommend the mobile app version of this software. Stellarium is fantastic because you can customize it to your observing conditions.
This includes being able to upload a custom landscape of your location! I plan on uploading a panoramic shot of my backyard in the near future to get an accurate rendition of my observation window.
You can also set options to view deep-sky objects in the same field of view as your telescope and your camera sensor! No longer will you be surprised to find out that the object you planned on imaging is bigger than your field of view.
This goes a long way in regard to the preparation of your imaging session.
AstroBin
AstroBin is a fantastic resource for planning your next imaging target. By researching the results captured by other amateur astrophotographers, you can get a sneak peek into the performance of specific gear. If you are looking for example images using a specific telescope or camera, you can use the search function to filter the images based on that particular piece of gear.
Another way to use AstroBin is to get a better idea of how your next project may turn out. For example, you can browse images taken by others to see how large a particular galaxy will be in your telescope’s field of view. The advanced equipment details and technical cards included in the Astrobin gallery will provide you with the answers you need.
A service like AstroBin is geared towards astrophotographers, so it’s likely your best choice for hosting an image gallery. The forum, big wall, and image of the day feature add an element of competition and comradery to the group. This website can be an incredible source of inspiration.
“The Big Wall” on AstroBin
The idea of posting one of my images to a gallery where it will be seen by some of the best amateur astrophotographers in the world forces me to step up my game. An image that’s getting posted to Astrobin goes through a long and thorough processing treatment because I know it will be enjoyed in high resolution from corner to corner.
I gladly pay the yearly membership fee to not only build out a large archive of organized high-resolution images but also support a unique and growing community of amateur astrophotographers.
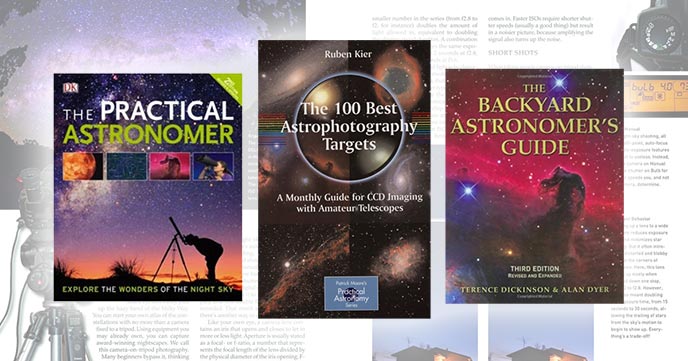
Astrophotography Books
Although I prefer to do my research and educate myself online, a hard-copy book is often a nice change of pace. A physical guide has the convenience of being right there in front of you at all times.
Books can be a great option to consider when following along with an image processing tutorial or even a step-by-step setup process.
I put together a useful resource of the 14 Best Astrophotography Books that may help you better understand the hobby, and how to get the most out of your experience.
The 14 Best Astrophotography Books.
My favorite book is probably the Backyard Astronomers Guide. Even though it is not exclusive to astronomy photography, it does offer some powerful advice in this department.
The wonderful illustrations and photography by Alan Dyer left a memorable imprint in my mind. I highly recommend this book to those starting there astrophotography journey.
Mac Astronomy and Astrophotography software
I currently collect and edit all of my astrophotography images on a PC computer, but what about Mac users?
The post-processing side of things is easy, Mac users can use Photoshop, Lightroom, PixInsight, or any other of the premium creative tools. However, there are fewer options available for the pre-processing and capturing processes.
For example, many users find themselves looking for stacking software for the Apple Mac because DeepSkyStacker was designed for PC’s (I suggest using Astro Pixel Processor).
Thankfully the list of astronomy software options for Mac users continues to grow. Many successful amateur astrophotographers use an all-Mac workflow from acquisition to processing.
Here are some of the most promising astronomy software options available for Mac users:
Planning and Telescope Control
Image Acquisition Software
Pre-Processing and Stacking Software
Modifying your DSLR Camera
If you’re thinking of modifying your existing DSLR camera for astrophotography, you have two options: perform the mod yourself using a tutorial, or sending the camera away to get a professional modification service performed. Unless you are very technical, and are used to taking apart small electronic devices, I would recommend option 2.
Gary Honis has put together a number of videos and tutorials explaining how to modify your DSLR camera for astrophotography. The act of modifying a DSLR camera involves removing the IR cut filter that blocks certain wavelengths of light produced by deep-sky nebulae. (Particularly the pink-red emission nebulae).
I was able to successfully modify my Canon Xsi (450D using Gary Honis’ detailed and information YouTube video.
Gary Honis is not the only expert in this field. Hap Griffin also offers this service, as well as many others.
My Canon Rebel T3i was modified by AstroMod Canada
Weather Forecasting and Sky Data
Amateur astrophotographers check the weather constantly! Clear skies are what we need to accomplish our goals, and depending on where you live, they can be hard to come by.
View my list of recommended astronomy apps for your mobile phone or tablet. These include sky maps, astronomical weather forecasting, and observation aids.
I like to use a combination of tools to get a good prediction of the weather before setting up my gear.
Weather Website Resources
I enjoy using the Clear Outside Astronomy app on my Android phone. This app seems to be more accurate than the Clear Sky Chart, based on my own personal experiences. I also prefer the format of low-medium-high cloud cover as opposed to seeing and transparency.
When planning my astrophotography sessions, I use a mix of many weather resources to gauge the conditions I can expect. The app is completely free and offered by First Light Optics.
I hope that you have found these astrophotography resources helpful in your quest to improve your images. It took me years to build this library of software that I use for each and every photo I capture.
If you would like to see some of this software in action, have a look at my image-processing tutorials.
Trevor Jones is a deep-sky astrophotographer and a valued member of the RASC. His passion is to inspire others to start their astrophotography journey on his YouTube Channel, so they can appreciate the night sky as much as he does. His images have been featured in astronomy books and online publications, including the NASA Astronomy Picture of the Day (APOD).
Related Posts:
This article was last updated on March 3, 2025.