Image Processing Software

While astrophotographers use image stacking software to pre-process and calibrate their image data, image processing software handles the next stage of the workload.
For deep-sky and solar system astrophotography, a typical workflow involves a stacking and calibration stage, followed by an image processing (post-processing) stage.
In this article, we’ll focus on the second half of the journey, where the real fun and creative freedom begin. For those interested, I offer a premium image processing guide that covers user techniques in-depth.
For more astrophotography software recommendations (image capture, weather, books, etc.) please visit the resources section of this website.
Pre-Processing Stages
- Registration, Alignment, Calibration, Stacking, etc.
Post-Processing Stages
- Stretching, Color Enhancements, Sharpening, Noise Reduction, etc.

Image Processing Software for Astrophotography
Whether you use a PC or a Mac, there are many fantastic options to choose from to edit your photos, both paid and free.
The post-processing experience is the most rewarding part of the entire experience for most folks, and you should enjoy the ride.
Popular choices for astrophotography image processing include PixInsight, Adobe Photoshop, Siril, Astro Pixel Processor, GIMP, and Registax.
Many image processing software choices allow you to perform the pre-processing steps as well as post-processing the image.
I personally use a number of tools to complete an astrophotography image, as certain applications are better at some things than others.

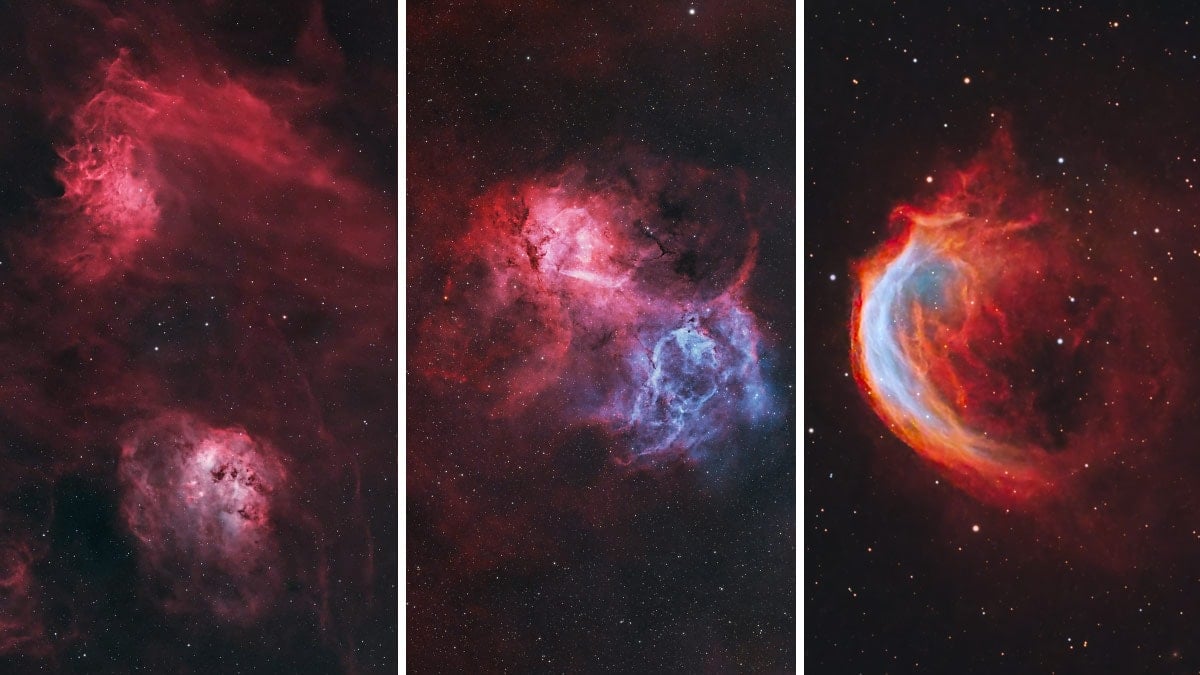
The Eagle Nebula processed using Adobe Photoshop and PixInsight.
Image editing can be very resource-intensive on your computer. Before installing the software, make sure your computer is up to the task.
No matter which type of data you are processing, from short, live stacking exposures from a smart telescope to wide-field Milky Way photography, the following tools can help you produce an amazing image.
The Best Way to Learn
While there are a number of great astrophotography books out there, I have found the best way to learn how to use a new image processing software is by watching YouTube.
This way, you can follow along with a video tutorial and mimic each step along the way. It’s even more effective when you’re processing the same image data together.
If you’re looking for some astrophotography image data to practice on, I have several raw image datasets available here: Practice Your Astrophotography Processing Skills.
While I consider myself to be somewhat of a guru when it comes to Adobe Photoshop video tutorials (I studied graphic design in college), others have taken the reins on some of the more advanced tools.
My favorite instructors for PixInsight tutorials are Shawn Neilson and Adam Block, while Nico Carver covers everything you could possibly want to know about Siril.
When learning how to perform a specific task in a new software tool, I find it is best to mirror someone else’s settings and make subtle adjustments to taste from there.
Which Tool is Best for Astrophotography?
A lot of the decision-making process of choosing an image processing software comes down to experience level and personal taste.
The type of astrophotography you partake in also weighs in on this decision.
For example, nightscape photographers will likely find all of the tools they need in Adobe Lightroom, whereas deep-sky imagers are more inclined to use the advanced tools found in PixInsight.
A do-it-all free software like Siril can take raw image files all the way through the pre-processing stages to a complete, processed image, but it takes time to understand.
Adobe Photoshop has the most fluid and responsive processing tools for color enhancements, and (in my opinion) is the most user-friendly, but it was not designed specifically for astrophotography.
PixInsight was created exclusively for astrophotography and includes highly advanced tools for image manipulation, but it is incredibly daunting to learn.
Long story short, there is truly no one-size-fits-all answer for you. However, the following summary is the best advice I can give you:
- If you’re on a tight budget: Siril
- If you have a photography background: Adobe Photoshop
- If you want the most advanced tools: PixInisight
Let’s dive a little deeper into what each of these image-processing software tools does best.
Top Choices
Adobe Photoshop
- Cost: $22.99 USD/month (subscription)
- Operating System: PC and Mac
- Difficulty: Medium

Those familiar with graphic design, photography, or basic image editing will have a leg up over those starting from scratch.
Adobe Photoshop has been around for over two decades, and many people have explored the software in some form or another.
While it was not designed specifically for astrophotography, it has been used by both amateur and professional astrophotographers for many years.
Photoshop does several things very well, but its key strengths are in color management, color enhancement, and creating layer masks.
Many of my astrophotography tutorials involve a series of steps performed in Adobe Photoshop.
It is a popular choice for landscape astrophotographers who are already familiar with the Photoshop workspace.
While I enjoy certain tools for specific tasks, I can’t imagine processing an astrophotography image without Photoshop.

Even with powerful dedicated astrophotography software available, Adobe Photoshop continues to be an invaluable tool in the processing workflow. Its layers, masking tools, and selective adjustments make it incredibly effective for fine-tuning contrast, color balance, and star control.
Highlights:
- User-friendly workspace and creative controls
- Layers, Layer Masks, and Responsive Layer Control
- Intuitive controls for selective color enhancements
PixInsight
- Cost: $275 USD (one-time)
- Operating System: PC and Mac
- Difficulty: Hard

This software was developed from the ground up with deep-sky astrophotography in mind.
It features advanced processing tools for specific astrophotography-related tasks, from star minimization to gradient removal.
PixInsight is difficult to learn because it is very mathematical and uses advanced terms unfamiliar to the average person (such as deconvolution).
The user interface is also quite daunting, and the workspace seems as though it was designed by a developer, not a photographer.
Despite these challenges, PixInsight is an incredible resource for astrophotographers of all skill levels. It is well worth all of the time and effort to learn.
Its biggest strengths (in my opinion) are its calculated operations in the early stages of the image processing journey.
I especially appreciate the Screen Transfer Function (non-linear preview) and the advanced gradient extraction tool (Dynamic background extraction).
Highlights:
- Ability to preview non-linear adjustments
- Advanced background extraction and color calibration tools
- Ability to install and apply advanced processing scripts
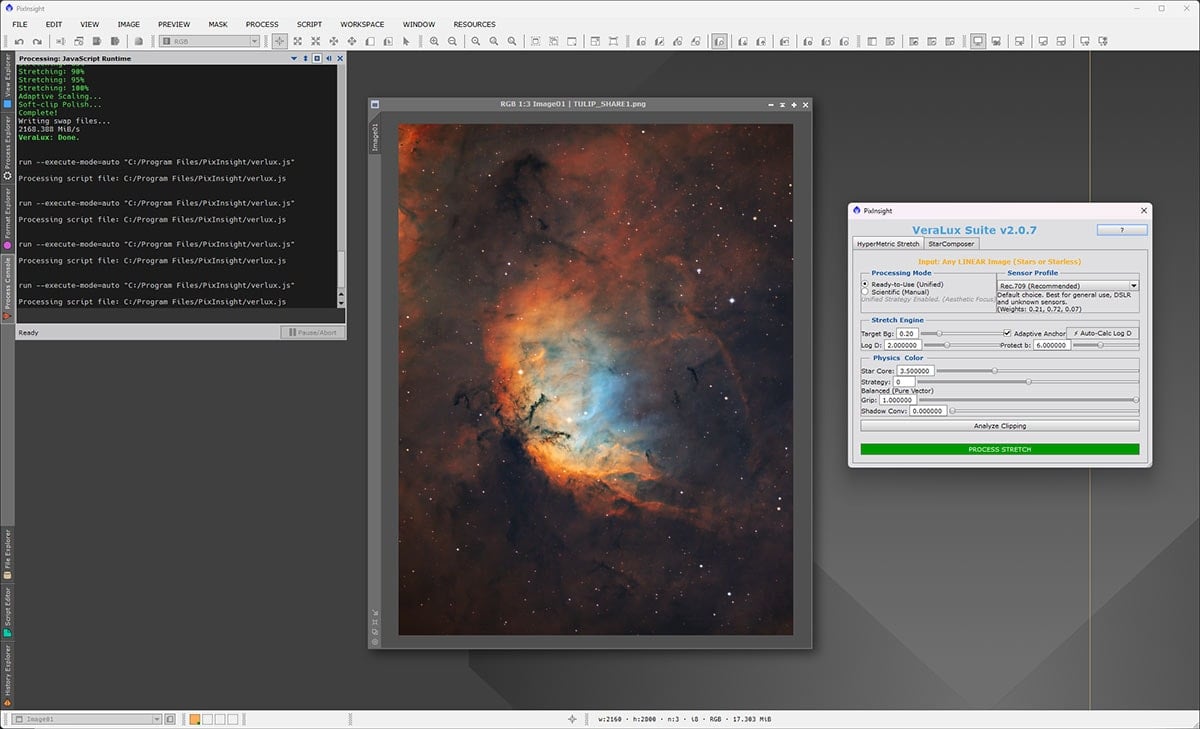
The Veralux Suite script is a newer stretching tool that has quickly become a favorite for many astrophotographers. It offers an intuitive way to bring out faint detail while maintaining strong star control and balanced contrast.
Siril
- Cost: Free
- Operating System: PC and Mac
- Difficulty: Medium

Siril is an astronomical image processing tool that was tailored for noise reduction and improving the signal-to-noise ratio of an astro-image.
It can do everything from image alignment and stacking, to target specific enhancements from various file formats.
Over the past few years, Siril has come a long way, becoming a valid contender alongside Photoshop and PixInsight for editing astrophotos.
Unlike Photoshop, Siril can automate the pre-processing stages of the stacking process using calibration files to build your master image (PixInsight can do this, too).
From there, you can perform important tasks like photometric color calibration, apply calculated curve stretches, and even run third-party tools like StarNet.
Out of the three main image-processing software choices mentioned in this article, Siril is the one I have used the least.
That is not to say that it is not a valuable resource; I just have a lot more to explore with Siril.
Highlights:
- Effective Image Pre-Processing Scripts
- Generalized Hyperbolic Stretch (GHS) Transformations
- Starnet++ integration
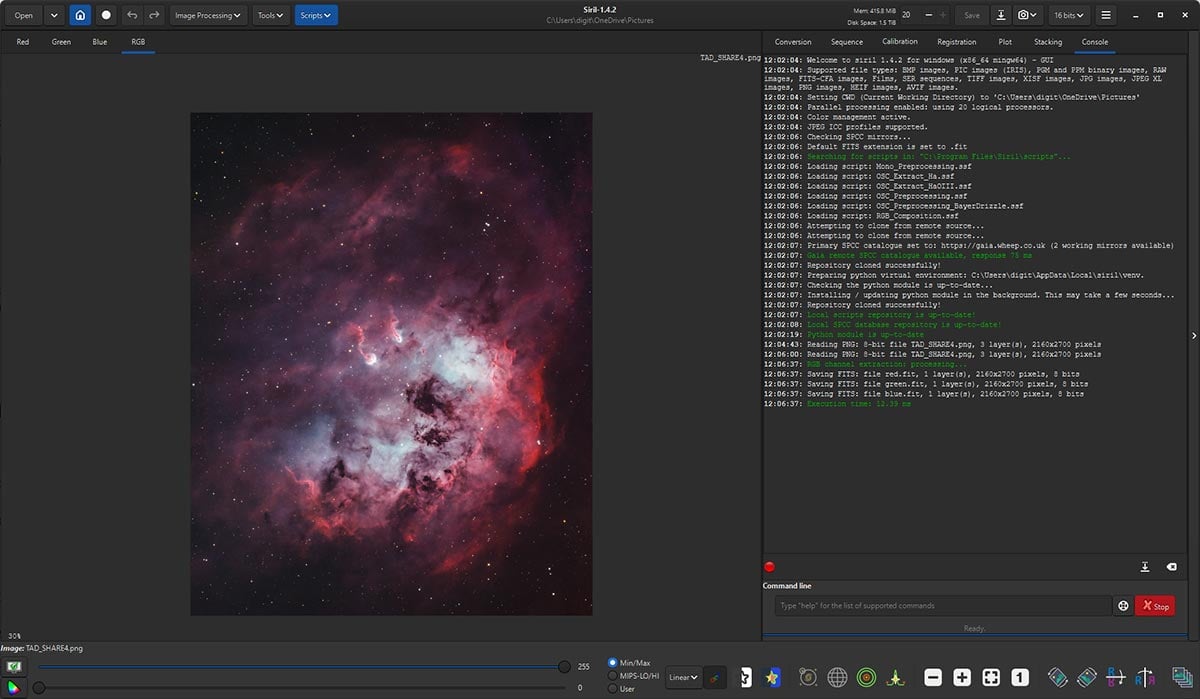
Siril is an incredible free option for processing astrophotography images. This open-source software offers powerful stacking, calibration, background extraction, photometric color calibration, and stretching tools. While the interface may feel more technical at first, Siril can produce outstanding results when paired with a solid workflow.
Recommended Add-Ons
The following add-ons will enhance your image processing workflow and make complex and potentially annoying tasks easier.
While these tools are not necessary to produce a stunning astro-image, they will save time and usually provide more consistent results than the workaround.
I have personally purchased each of these plugins (except StarNet++, which is free) and regularly use them in my astrophotography image-editing workflow.
The first item is an ‘action set’ for Adobe Photoshop that simplifies a series of steps into a single click, while the others perform specific single actions to the image.
If you need help installing any of the tools mentioned above, just read the helpful installation guides shared on their website.
Conclusion
The best image processing software for you heavily depends on the types of projects you take on and your desired user experience.
If you are primarily interested in landscape astrophotography, including Milky Way Photography and nightscapes, Adobe Lightroom and Photoshop are solid choices.
However, those capturing videos of the planet Saturn and extracting the best single frames may want to use Registax.
As someone who studied creative arts, Adobe Photoshop provided me with a great start to my deep-sky astrophotography editing workflow.
From there, I began learning how to use image stacking tools to produce better master images for me to edit in Photoshop.
I reluctantly began using PixInsight a few years ago just to see what I was missing, and I was rewarded with a new toolset for specific tasks.
My personal workflow uses a mix of tools. No single piece of software does everything perfectly, which is why I combine multiple programs when processing my images.
I often rely on PixInsight for technical tasks such as color calibration and gradient extraction, where precision matters. Then I’ll move into Adobe Photoshop for creative adjustments, custom color palettes, and advanced layer masking to shape the final look of the image.
List of Astrophotography Image Processing Software
Here is a larger list of image processing software tools available. Among this group, the most popular within the astrophotography community are Astro Pixel Processor, Registax, and GIMP.
Astro Pixel Processor is a complete astrophotography image editing tool that can calibrate, stack, and enhance images. It is a paid software (about $180 USD) and is known for its excellent mosaic creation tool.
GIMP is considered to be the “free version of Photoshop” with many familiar tools and features.
Registax is used primarily for solar system (planetary) astrophotography, specifically for its handy wavelet processing tools.