Star Removal in Photoshop
How to remove the stars from your astrophotography image
This is a very easy, yet powerful image processing technique for astronomy photos because you can make adjustments to your deep-sky object independently. In this example tutorial, I am using Adobe Photoshop CC 2015, but older versions of Photoshop will complete this task the same way.
You can see the star reduction technique in action in the following video on my YouTube Channel:
There are dedicated astrophotography software applications and plugins that can speed this process up and may do a better job. However, sometimes you may want to manually remove stars from your space photography for the desired look. Here is how to manually remove stars from your astrophotography images using the Color Range method.
New Method: Use StarNet++
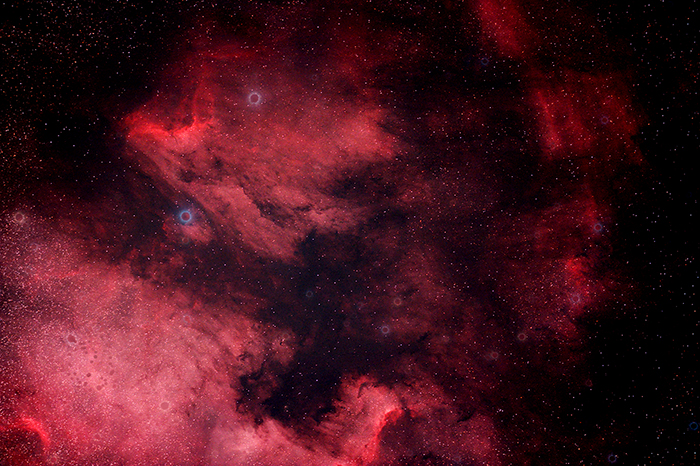
For this example, I am using my image of the Pelican Nebula. Many astrophotographers will say that this trick works best with nebulae composed of Hydrogen-alpha because of their inherent small stars. To start, you will need to make sure that you have your main image layer selected, containing your deep-sky object and stars.
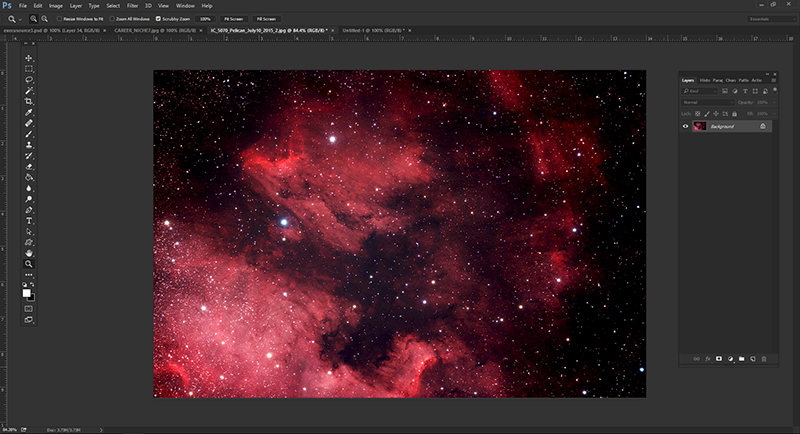
An image of the Pelican Nebula and surrounding stars in Photoshop.
Step 1. Select Color Range
With your main image layer selected, go to Select > Color Range in the Photoshop Menu. A dialogue box will then pop up like the example you see below. You want to make sure that the Select: option is set to Highlights.
Experiment by dragging the Range and Fuzziness sliders, so that they select as many stars as possible, without too much of your nebulosity or galaxy included. For my image, setting the fuzziness slider to 50% worked best. Once you are happy with your selection, click OK. You can always go back to the History tab and try again.
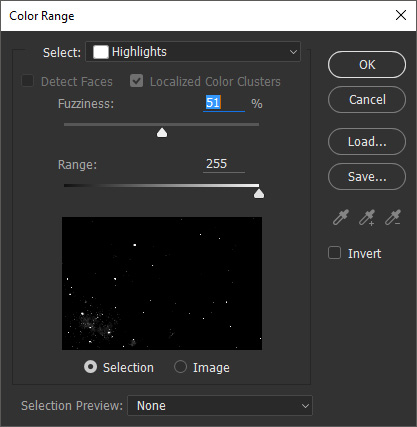
The Color Range Dialogue Box in Adobe Photoshop.
Step 2. Expand Your Selection
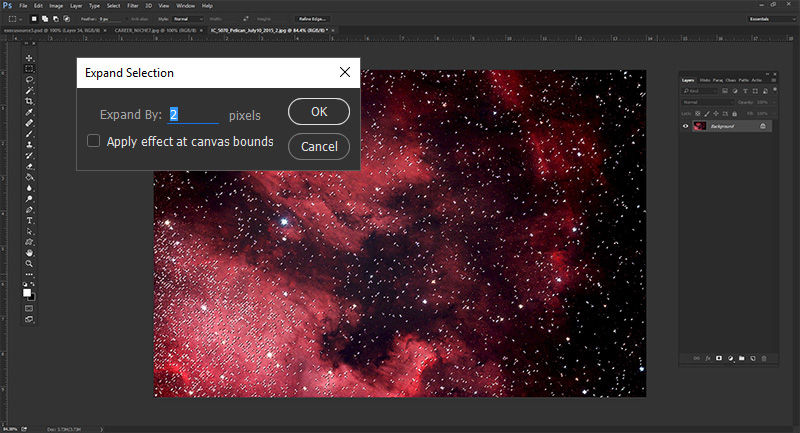
Next, we will need to make sure that this selection captures each star completely. Because the initial selection will surround the stars quite tightly, we need to expand our selection using the Expand command. You will find this action under Select > Modify > Expand.
You then want to input a suitable amount based on the scale of your image. For example, my image is 1,400 x 931 pixels, so a value of 2 was enough. I then like to soften the selection around the stars by using Select > Modify > Feather, with a value of just 1 pixel.
This step may not be needed, depending on the image you are using.
Step 3. Remove the Stars!
Now that we have selected our stars that we would like to get rid of, we will simply hit the Delete key, that’s right! This will bring up the Fill dialogue box, which should be set to Content-Aware by default. Keeping the default settings intact, hit OK.
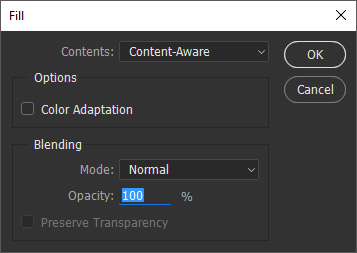
The Content-Aware Fill window in Adobe Photoshop.
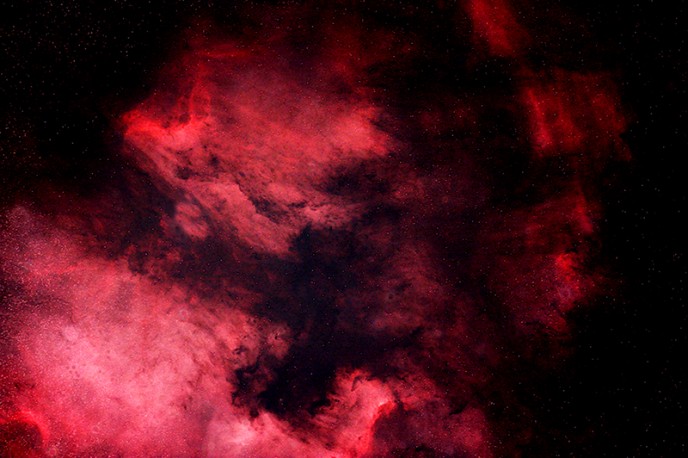
You should now see a very different astro-image then you started with! Go to the menu and click Select > Deselect to view your image, free of marching ants. We are very close to our final starless image, but there are still some minor adjustments to make.
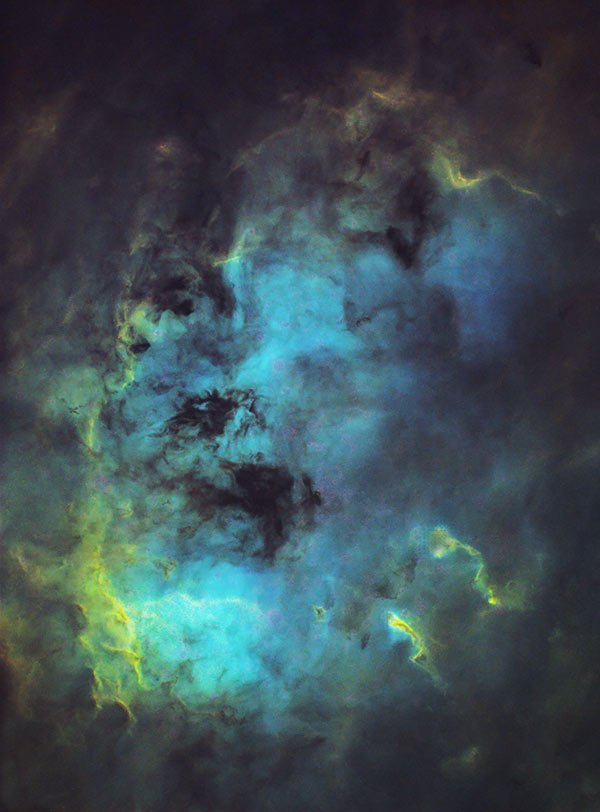
The Pelican Nebula – with no Stars… and some halos.
Step 4. Clean up the Artifacts
As you can see, there are some interesting artifacts in this photo, where the large stars used to be. To remove these unwanted guests, you have to great options at your disposal. You can tackle this job using Content-Aware Fill, using the Lasso Tool to select the artifacts.
You can also remove these items like I did, using the Healing Brush Tool. Both methods will get the job done, it just depends on your preference. These actions will, of course, change the actual composition of the nebulae.
To remove the artifacts without disrupting the scientific accuracy of the data takes time and attention to detail. I was able to produce this rendition of my Pelican Nebula image in a matter of minutes.
This Star removal technique has been around for a while and has been used by many amateur astrophotographers to create interesting Space Art. This technique can also help when processing an image with many stars in the frame, so you that you are able to stretch the data of your nebulosity or galaxy without blowing out all of the surrounding stars.
More image processing techniques like these can be found in my Image Processing Guide.