How to Take Pictures of the Moon

Here’s how to take pictures of the moon using a DSLR or mirrorless camera and a telephoto zoom lens. I use this no-nonsense approach to take high-resolution pictures of the full moon (and its other phases).
Ensure that your camera and lens are securely fastened to your tripod. A tripod is essential for moon photography to keep the image steady and sharp. I also recommend using a sturdy ball head mount to help you point the lens up into the night sky toward the full moon.

Use a DSLR or mirrorless camera with a focal length of at least 200mm (Canon EF 70-200mm F/4 pictured).
Equipment Needed:
- DSLR/Mirrorless camera
- Telephoto (prime or zoom) lens with at least 200mm focal length
- Study Tripod with a ball head
- Remote shutter release cable or intervalometer
The Approach:
- Set up your tripod on level ground, with a clear view of the moon
- Mount your camera and lens to the tripod and make sure it is secure
- Focus your camera lens on the moon’s surface using the 10X zoom feature
- Use a remote shutter cable to capture the picture and avoid camera shake

Camera Settings:
- Set the aperture (f-stop) on your camera to f/11 (for a sharp image)
- Set the shutter speed to 1/250 second or faster (to avoid a blurry photo)
- Set the ISO to ISO 800 (avoid going higher than ISO 1600)
- Use manual focus and adjust the lens to infinity
- Adjust your exposure using live-view, while monitoring the histogram
You will have to adjust these settings on the fly to ensure that the moon is in focus and exposed properly. Avoid bumping the ISO setting up too high (which may introduce noise), and don’t shoot exposures of less than 1/50 seconds, as this may result in a blurry photo.
If your lens’s infinity focus setting produces a soft image, you may need to manually adjust the focus for a crisp shot. After a few test shots, you should be able to capture a photo of the moon similar to the one below.

The full moon is exposed to show details on the lunar surface.
While these are specific settings for those using a camera kit similar to the one I use, the basics apply to various camera types. If you want moon photography tips for creative shots (using any camera), read on!
Moon Photography Basics
Moon photography includes much more than close-ups of the lunar surface. Some of the most stunning images of the Moon are landscape-style photographs that feature the alluring feeling of the Moon shining down on the Earth below.
On the one hand, moon photography is the most approachable form of astrophotography because it can be done by anyone using simple camera equipment. However, as you continue to hone your skills, you quickly realize that capturing an exceptional shot is more complex than you initially thought.
Here are some of the challenges of moon photography:
- The moon is a moving target, which can make focus difficult
- It is very bright; combined exposures may be needed
- A long focal length is required to capture close-ups of the moon
- A tripod or telescope mount may be required for your goals
- The “auto” function on your camera will not likely work on the moon

A total lunar eclipse. Canon EOS R through a refractor telescope.
The type of camera you own—a DSLR, a point-and-shoot, or the mobile phone in your pocket—will determine the shots available.
A DSLR camera (or mirrorless variation) will give you complete control over your image, from wide-angle landscape photographs highlighting the magic of a full moon to detailed close-ups of its rocky surface.
Individual parameters like shutter speed (exposure), aperture, and ISO must be controlled to expose the bright moon properly. You can also blend images of the moon taken using different camera settings to create an HDR composite, like the one shown below.

An HDR (high dynamic range) picture of the full moon involving multiple exposure lengths.
Which Camera is Best for Moon Photography?
While you can take pictures of the moon using almost any camera, it is recommended that you use a camera with complete manual control that lets you control the moon’s brightness. An interchangeable lens camera like a DSLR or Mirrorless camera can provide this level of control.
DSLR/Mirrorless Camera
A DSLR camera gives you complete manual control over the camera and lens settings for moon photography. This allows you to make small changes to exposure length, ISO, f-ratio, etc., which are applicable when photographing an object as bright as the moon.
DSLR and Mirrorless cameras have two primary configurations: crop sensor (APS-C) and full frame. This does not affect the quality of your moon photography, but it will determine how big the moon appears through a particular focal length. Here is a list of example models that would make an excellent astrophotography camera.
- Entry Level: Canon EOS Rebel T7
- Intermediate: Canon EOS R6
- Professional: Canon EOS R5 Mark II

I currently use a Canon EOS R6 Mirrorless camera for moon photography.
I have always used Canon cameras for astrophotography, but Nikon and Sony also make incredible DSLR and Mirrorless cameras. When selecting a compatible camera lens, remember to consider the specific camera body you own.
Point-and-Shoot / Compact Camera
A point-and-shoot camera (or “bridge camera”) is also capable of powerful images of the moon, especially when held up to the eyepiece of a Dobsonian reflector telescope. It can be tricky to capture a sharp image while hand-holding the camera up to the eyepiece, so you’ll likely need to take many pictures and hope for the best.
These cameras are often more affordable than a DSLR, but they offer limited control over the camera settings and do not perform well in low-light situations. One of the most popular choices for moon photography is the Nikon P1000, which lets you zoom in on the moon and reveal its craters in impressive detail.

The Nikon Coolpix P1000 has become popular for its ability to zoom in 125X on the moon.
Smartphones
With the right approach, you can take incredibly detailed portraits of the moon with your smartphone. Capturing Earth’s natural satellite with your iPhone or Android smartphone through a telescope is often one of the first steps into astrophotography.
Many photographers begin their journey into this hobby using a smartphone because it is often the best camera they currently own. By securing your phone to a telescope eyepiece adapter, you can tap into the manual camera settings, often found in your phone’s ‘pro’ mode.
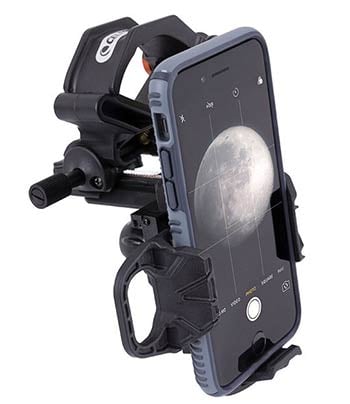
Use a smartphone adapter to keep your phone camera steady at the eyepiece.
With an eyepiece adapter, you are levering the magnification of the telescope eyepiece for a close-up view of the moon. This is called eyepiece projection astrophotography and can be effective when photographing solar system objects such as the Moon or even Planets like Jupiter and Saturn.
Smart Telescopes
Smart Telescopes like the Seestar S50 can take fantastic pictures of the moon and eliminate a lot of guesswork. All smart telescopes have a moon-tracking mode to find and track the moon in the sky.
They can automatically focus on the moon to ensure you take a sharp image. They also automatically adjust the exposure so that the moon is not too bright with blown highlights.

The moon captured using the Seestar S50 smart telescope.
Using a Tripod and/or Star Tracker
You can use the camera with a lens on a fixed tripod or attach the camera body to a telescope and tracking mount for an extreme close-up.
A star tracker that can match the night sky’s apparent rotation (such as the Sky-Watcher Star Adventurer GTi) opens up even more options for astrophotography.
![]()
A Canon EOS Rebel T7 with a Canon EF 300mm F/4 lens attached.
Understanding Focal Length
At only half a degree wide, the moon appears relatively small from our vantage point on Earth (a pinky finger at arm’s length covers approximately 1 degree of the sky). To capture the moon up close, you need to use a camera lens with a long focal length.
A telephoto lens with a maximum focal length of at least 200mm is recommended. Many consider 500mm the ideal focal length for lunar and solar photography. The focal length comparison chart below shows how big the moon will appear at different focal lengths.

Comparing the size of the moon at different focal lengths (full-frame and crop sensor DSLRs).
You can always crop your photo during the photo editing stages of your project to display a larger image. However, capturing the moon at a long focal length will provide more detail and resolution.
Moon Photography with a Telescope
If you are looking to capture the moon in incredible detail, an astronomical telescope can provide the focal length and magnification needed to pull the moon in for an unforgettable view.
All telescopes can observe the moon, but some models are better for moon photography than others. The main benefits of using a telescope for moon photography are its long focal length and computerized models that can track the motion of the night sky.
Prime Focus Method
One method is prime focus astrophotography, the same technique astrophotographers use to take deep sky images. This method requires that you use the telescope’s focuser to focus the image.
You can use a T-ring adapter to attach your DSLR camera body directly to the telescope for prime-focus imaging. This method borrows the telescope’s native focal length (no eyepieces) to capture a magnified view of the moon.
Refractor telescopes are similar in optical design to a prime telephoto lens, with similar focal lengths and f-ratios. For example, the Sky-Watcher Esprit 100 APO refractor has a focal length of 550mm at F/5.5. These optical specifications lend themselves well to lunar photography.
Afocal Method
Another method is Afocal astrophotography, in which you add a level of magnification by placing your camera up to the telescope eyepiece. The most common eyepieces for this method are 10mm and 25mm.
This method is popular with smartphone users, as you can purchase a simple adapter that fastens securely to the eyepiece for a steady shot.

The Celestron NexStar 8SE is an excellent telescope for lunar observing and Afocal moon photography.
Capturing the Moon’s Surface
You’ll want to shoot the moon when it is not full for a textured photo of its rocky, cratered surface. The lunar terminator is the division between the illuminated and dark portions of the moon, creating dramatic shadows on the Moon’s surface.
As the Moon transitions through its phases, the terminator will highlight new textured features of the Moon’s surface. You may find interesting shapes and formations along this division line, such as the famous “Lunar X” that occurs during the first quarter phase.
Some notable lunar surface features include Mare Serenitatis (Sea of Serenity), Mare Humorum, and Mare Crisium. All lunar mares have interesting characteristics that can be enjoyed and studied through photography. For a complete map of the Moon’s surface see Google Moon.
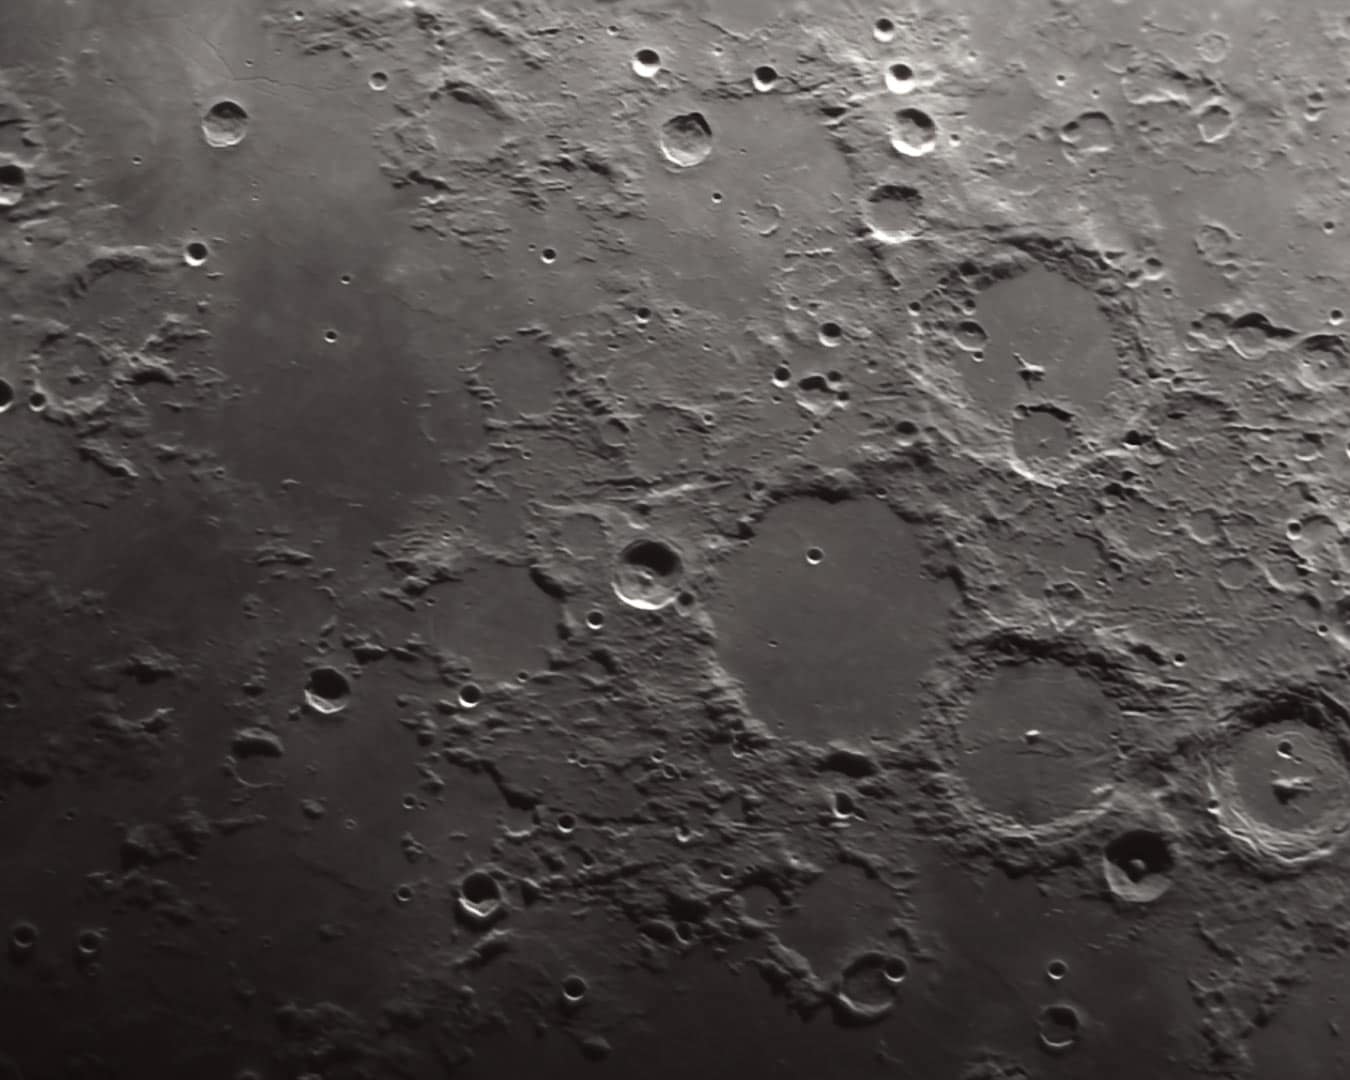
The lunar surface captured through a Dobsonian telescope.
Using a Planetary Camera
To produce detailed pictures of the moon’s surface, astrophotographers often record short video files with a planetary camera (or solar system camera). The best individual image frames are then extracted from the video and stacked.
One of the many advantages of this method is the ability to double your telescope’s magnification using a Barlow lens. This method works best on nights with stable air quality and good seeing.
The stacking process helps to create an image with a strong signal-to-noise ratio. These images can be sharpened substantially in post-processing, creating jaw-dropping, high-resolution images of the moon’s surface.
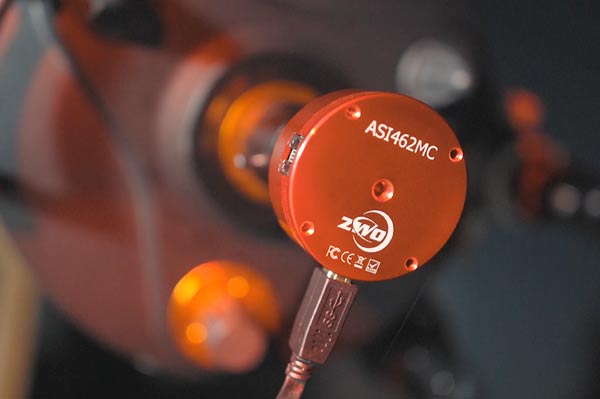
A planetary camera with a small CMOS sensor. (ZWO ASI462MC)
Photographing a Lunar Eclipse
One of the ultimate moon photography experiences is capturing a lunar eclipse. However, capturing a lunar eclipse presents additional challenges, such as gradually increasing exposure time as the moon’s brightness dims.
To effectively photograph a lunar eclipse throughout the event, from the penumbral stages to the maximum eclipse, you must understand what each camera setting does and how it will affect your exposures.
The photograph below was accomplished using a DSLR camera and telescope on a tracking equatorial mount that had been accurately polar aligned. This kept the moon centered on my camera screen as the eclipse unfolded.

A total lunar eclipse. Canon EOS R through an apochromatic refractor telescope.
A lunar eclipse is often referred to as a ‘blood moon.’ This name comes from the orange/red hue the moon takes on during the totality phase of a total lunar eclipse. At this time, the Earth is directly between the sun and the moon, causing the moon to be fully immersed in the Earth’s umbra.
Landscape Moon Photography
The same rules of landscape photography apply when shooting at night, including the basics, such as the rule of thirds, and composition techniques, such as including foreground interest. Consequently, the moon can help both aspects by producing additional light for your foreground.
The moon presents itself in different phases at different times, giving you endless opportunities to photograph it from a new perspective. One of the best times to take pictures of the Moon is when it is full and low on the horizon.
A rising Full Moon is full of dramatic warm colors as it peeks over the eastern horizon. The distinctive orange/pink hues are due to the composition of Earth’s atmosphere and the angle at which it is viewed.
For a truly unforgettable photo of the full moon, get to a location with an unobstructed view of the eastern horizon. Use a stargazing app such as Stellarium to simulate the exact position of the moon so you can prepare your composition before it rises.

When the Moon is low and dim, it’s possible to capture the details of the Moon’s surface and your landscape in a single exposure.
The moment you spot the moon low over the eastern horizon as a giant, warm-colored disc is exceptionally rewarding and exciting. I often bring my wife along for the ride when I travel to a remote location to photograph a moonrise!
Planning your photoshoots around the different moon phases will help you prepare for the many challenges of documenting this astronomical subject. It’s important to know when the Moon will be where it is on a given night.
Using DSLR and Kit Lens
A standard kit lens like the Canon EF-S 18-55mm, often included with the Canon Rebel series DSLRs, can take incredible landscape photos. It offers some flexibility in composition for your photos, although you will be limited to a maximum of 55mm focal length (magnification).
I have found it best to focus on creating powerful landscapes that feature the Moon in an exciting composition when using a camera lens in the 18-55mm range. Wide-angle camera lenses force you to be creative about composing the surrounding landscape around the Moon. The basic principles of landscape photography apply in composition, balance, color, and exposure.

Entry-level DSLR ‘kit lens’ packages are capable of beautiful full moon landscape photos.
Remember to use the rule of thirds to your advantage when capturing landscape images that include the moon. Use lead-in lines to draw attention to the importance of the moon as your primary subject.
Recommended Settings:
The following settings are a general starting point using an entry-level DSLR camera and kit lens. (18-55mm, F/5.6)
- Focal Length: 18mm
- Lens Aperture: F/11
- Mode: Manual
- File Type: RAW
- White Balance: Daytime / Auto
- Exposure: 1/150
- ISO: 400
It is helpful to use a remote shutter release cable to take pictures without touching the camera (this is the one I use). As is the case for all forms of astrophotography, keeping the camera steady when activating the shutter is essential.
How to Ensure a Sharp Focus
Your camera’s autofocus system may be enough for a critically focused shot, but I recommend using manual focus for the best results.
The live-view backlit display on your DSLR camera will help tremendously when focusing your camera lens on the moon’s surface. For the best results, use the 5X and 10X zoom modes to focus on a specific creator or the moon’s edge.
For many lenses, the sharpest focus on the moon will be with the lens set to infinity. However, you may find that the lens needs a slight focus adjustment from there for the sharpest possible shot.
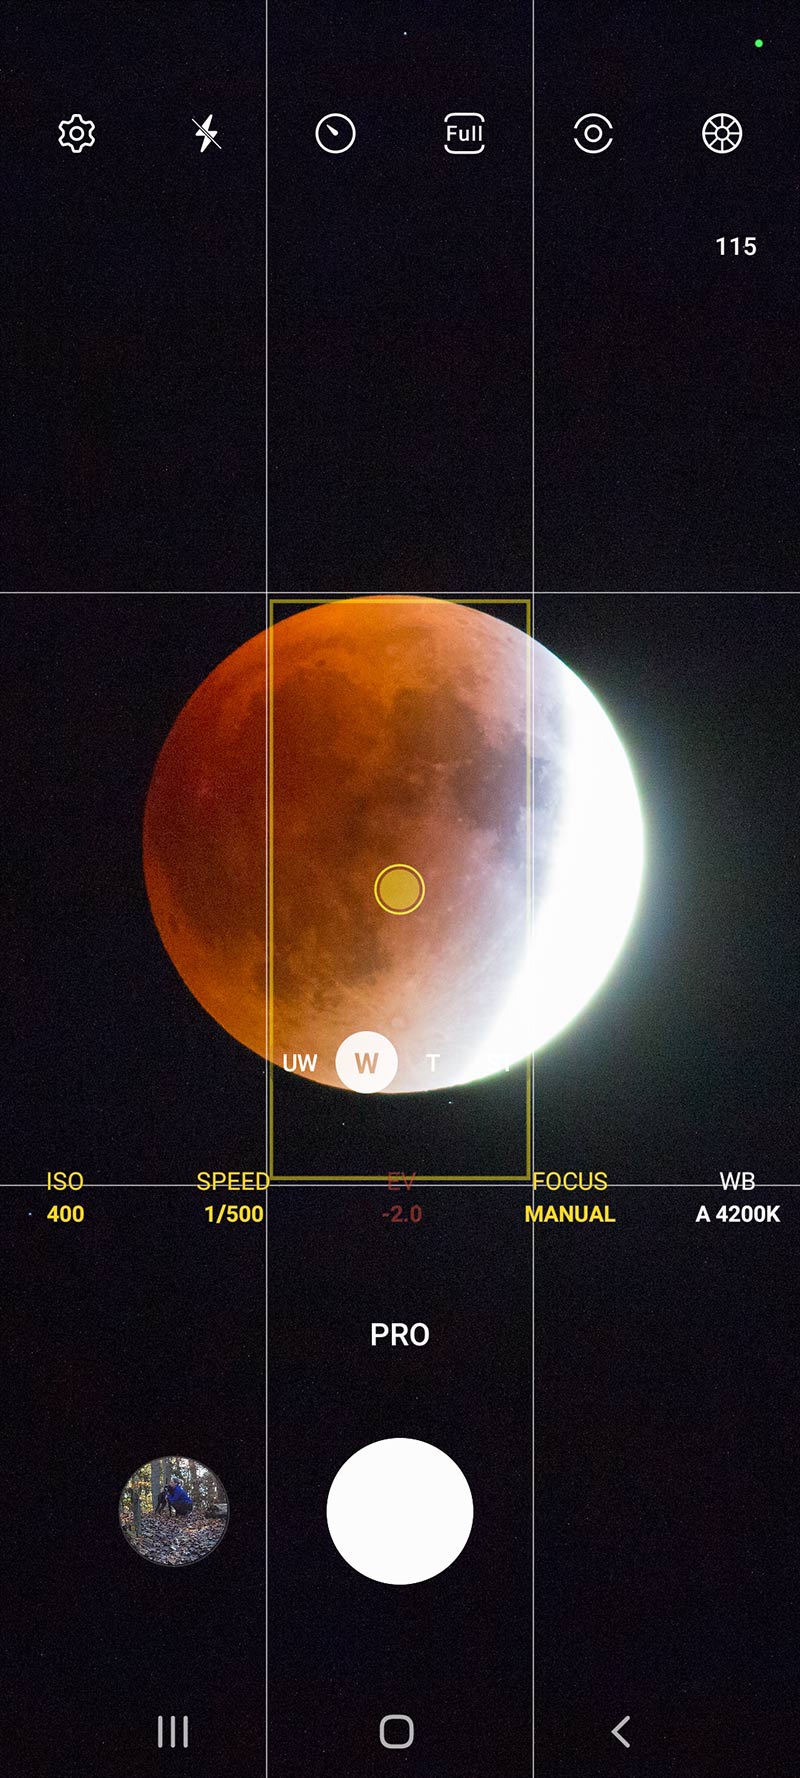
If you are using your smartphone to capture the moon, I suggest using the manual focus mode in the ‘pro’ camera settings menu.
Capturing the Moon’s Phases
The position and lighting available for your photograph will change as the Moon goes through its phases throughout the month. Although there are 8 phases of the moon, there are 7 phases of the moon you can capture with your camera:
- New Moon (Moon not visible)
- Waxing Crescent
- First Quarter
- Waxing Gibbous
- Full Moon
- Waning Gibbous
- Last Quarter
- Waning Crescent
Each moon phase presents new challenges and photographic opportunities. We do not see the new moon phase, but capturing a thin sliver the day before and after the new moon is possible.

The moon’s phases provide new creative photography opportunities.
Photographing a ‘Supermoon’
A supermoon occurs when a full moon aligns with its closest approach to Earth in its elliptical orbit, known as perigee. Because the moon has an elliptical orbit, the distance between Earth and the moon varies throughout the lunar cycle.
When the full moon coincides with the perigee, it can appear up to 14% larger and 30% brighter than at its farthest point or apogee.
The supermoon’s slightly enhanced size and brightness might be subtle to the casual observer, but it garners significant interest among astrophotographers.
While I am not sure that a supermoon deserves the ‘hype’ on social media, the image below shows just how much bigger a supermoon appears to be compared to its farthest point from Earth.

The Moon’s apparent size at its farthest and nearest points to Earth during 2020. NASA’s Scientific Visualization Studio.
The same photography tips and camera settings apply to any full moon will work on the supermoon. The main advantage of photographing a Supermoon is the additional interest in the event and public awareness of our solar system.
One-Day-Old Moon
The one-day-old moon can be seen and photographed the day after the new moon phase. Because the moon appears as a thin sliver of light during this phase, it can be difficult to find and photograph.
The best time to photograph a one-day-old moon is just after sunset. The moon will not be very far behind the Sun, which is why waiting until the Sun has dipped below the horizon makes the process much easier (and safer).
Here is a photo of the one-day-old Moon captured using a DSLR camera with a long focal length (450mm) camera lens.
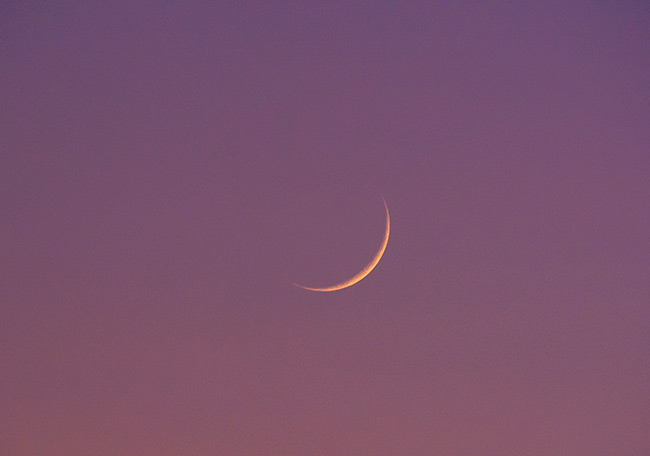
The one-day-old moon can be seen close to the western horizon at dusk, the day after the New Moon.
Creative Photography Tips and Ideas
As you know, the Moon has many phases. It rises and sets at different times. Each phase offers a new photographic opportunity to capture the Moon from a different perspective. My favorite phases to capture the Moon are when it is completely full and when it is in the thin crescent phases.
Although the full Moon shows the least amount of shadows and surface detail, it rises simultaneously as the sun sets and can create fantastic landscape compositions in a colorful dusk sky.
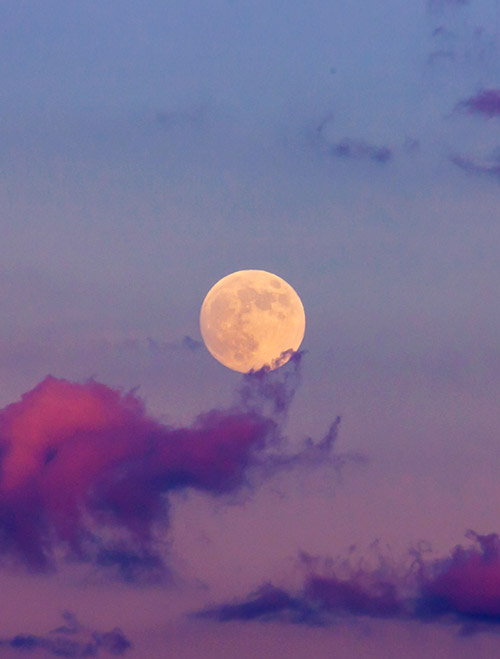
A nearly full moon rises in a colorful evening sky. Canon EOS Rebel XSi and 300mm F/4 lens (cropped).
Capturing ‘Earthshine’
Capturing Earthshine involves adequately exposing the night side of the moon. This can only be accomplished during the crescent moon phases and is best when the Moon appears close to Earth’s horizon.
Earthshine is light reflected from Earth’s oceans back onto the Moon. It is enough to see the rest of the Moon’s disc even if the Moon is in a crescent phase. To photograph this phenomenon, you may need to experiment with shutter speeds, and a small star tracker will help to keep your image sharp.
![]()
The waxing crescent moon shows ‘earthshine’, with the planet Venus nearby.
As you can see in the image above, exposing the dim Earthshine portion of the Moon often results in an overexposed “lit” side of the Moon. This can be corrected by capturing two exposures at different exposure lengths and merging them together in Photoshop.

Trevor Jones is a deep-sky astrophotographer and valued member of the RASC. His passion is inspiring others to start their astrophotography journey on his YouTube Channel so they can appreciate the night sky as much as he does. His images have been featured in astronomy books & online publications, including the NASA Astronomy Picture of the Day (APOD).
You can follow Trevor on Instagram, Facebook, and X.