Sky-Watcher Star Adventurer GTi Review
The Sky-Watcher Star Adventurer GTi is a highly portable star tracker that was designed for astrophotography. It allows you to take long-exposure images of space by tracking the apparent movement of the night sky.
Unlike the original Star Adventurer, the GTi model also has the ability to find deep-sky objects in the night sky using the SynScan GoTo system. It includes a dedicated WiFi-connected smartphone app, and can be used with autoguiding.
Sky-Watcher sent me a production copy of their brand new Star Adventurer GTi to test out, and I’ve been waiting for this version of their iconic star tracker for a long time.
![]()
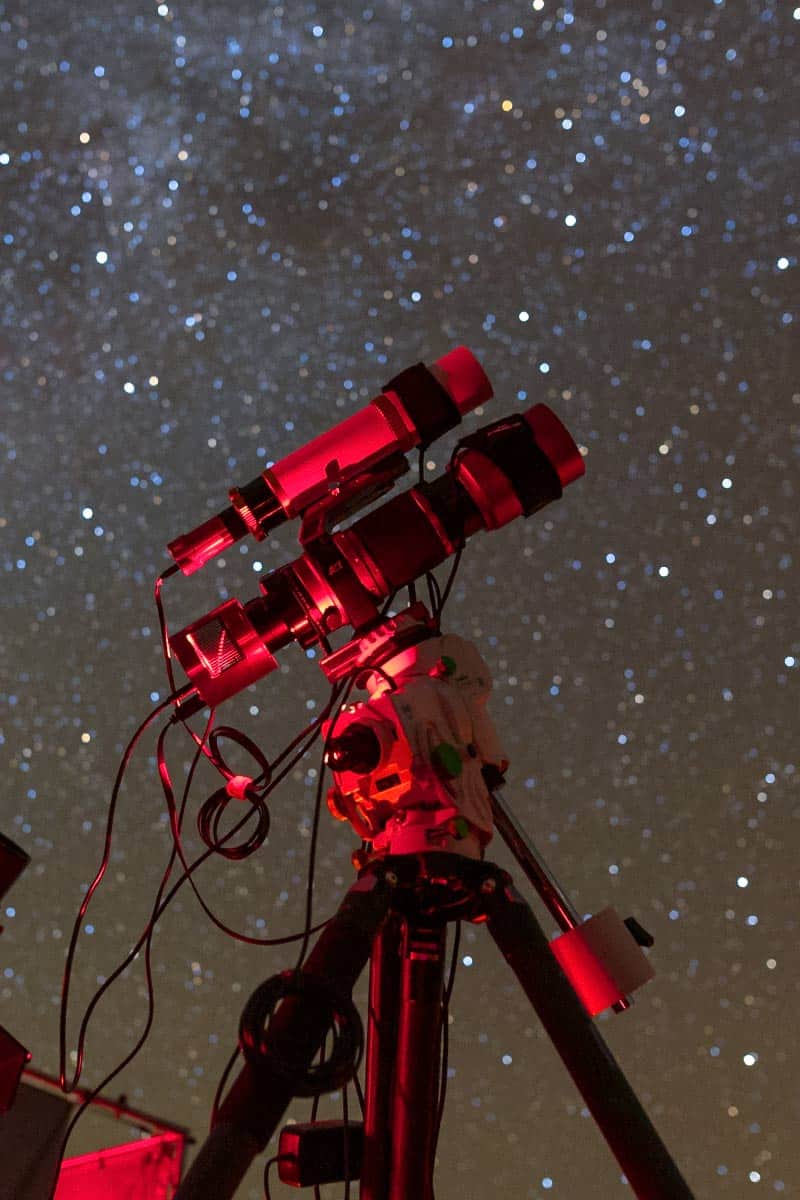
The Star Adventurer GTi with an Askar SQA55 refractor telescope mounted on top.
Before the Star Adventurer GTi was released, the only comparable “GoTo grab and go” mount from Sky-Watcher was the AZ-GTi. However, this was an altitude-azimuth mount designed for visual use, not astrophotography. The Star Adventurer GTi combines the best of the AZ Gti and the Star Adventurer 2i into one mount.
In this article, I’ll cover what’s included with the Sky-Watcher Star Adventurer GTi package and share my early astrophotography using the star tracker in my backyard. I have used this mount at several star parties over the past year with great success.
Set up Pictured Above:
Mount: Sky-Watcher Star Adventurer GTi
Camera: ZWO ASI2600MC Air
Telescope: Askar SQA55

The Blue Horsehead Nebula captured using the Star Adventurer GTi and Radian 61. (2.5 hours exposure)
Sky-Watcher Star Adventurer GTi
The one major missing feature of the original Sky-Watcher Star Adventurer star tracker was GoTo functionality. “GoTo” simply means that you can pick an object in the night sky, and the mount will point to it for you.
Now, I know not everyone feels this feature is essential, but “How do you find objects in space?” was the most common question I got from beginners using the original Sky-Watcher Star Adventurer.
To find and photograph a deep-sky nebula or galaxy in the night sky, you first had to manually find it yourself. This was a major roadblock for newbies who were still learning the sky and/or didn’t have the resources to come up with a solution to the problem on their own.
With the Star Adventurer GTi, you simply tell the mount what you want to see, and it points right to it. The best part is, you can do all of this on your mobile phone or tablet connected to the mount via WiFi.
Big Upgrades
The SynScan GoTo system (the same one in Sky-Watcher’s larger mounts like the HEQ-5) is a significant upgrade for the GTi, but this next-gen star tracker improves on almost all other aspects of its predecessor as well.
You can now autoguide in both RA and DEC, control the brightness of the built-in illuminated reticle, and fine-tune your polar alignment with a studier, more substantial EQ wedge.
In fact, the Star Adventurer solves nearly every issue I had with the previous model while retaining its small form factor and portability. I believe the GTi will be one of the best-selling astronomy products of all time.
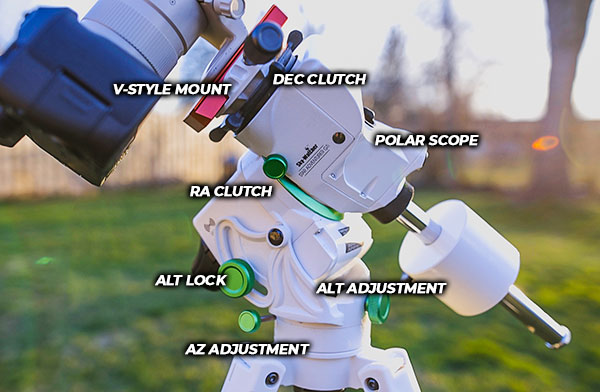
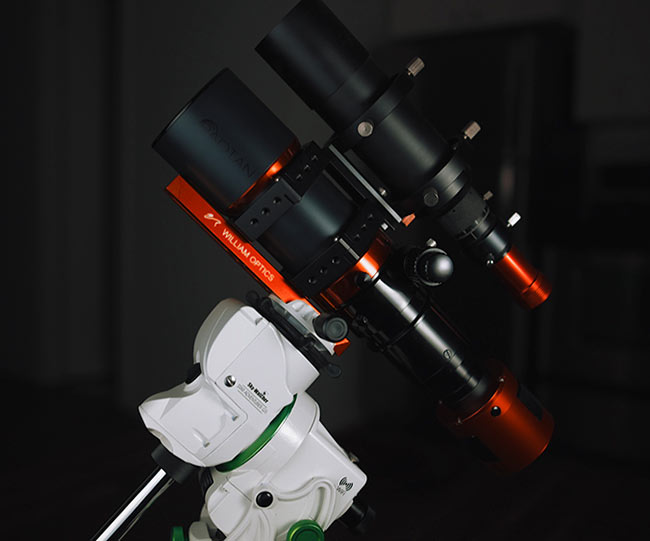
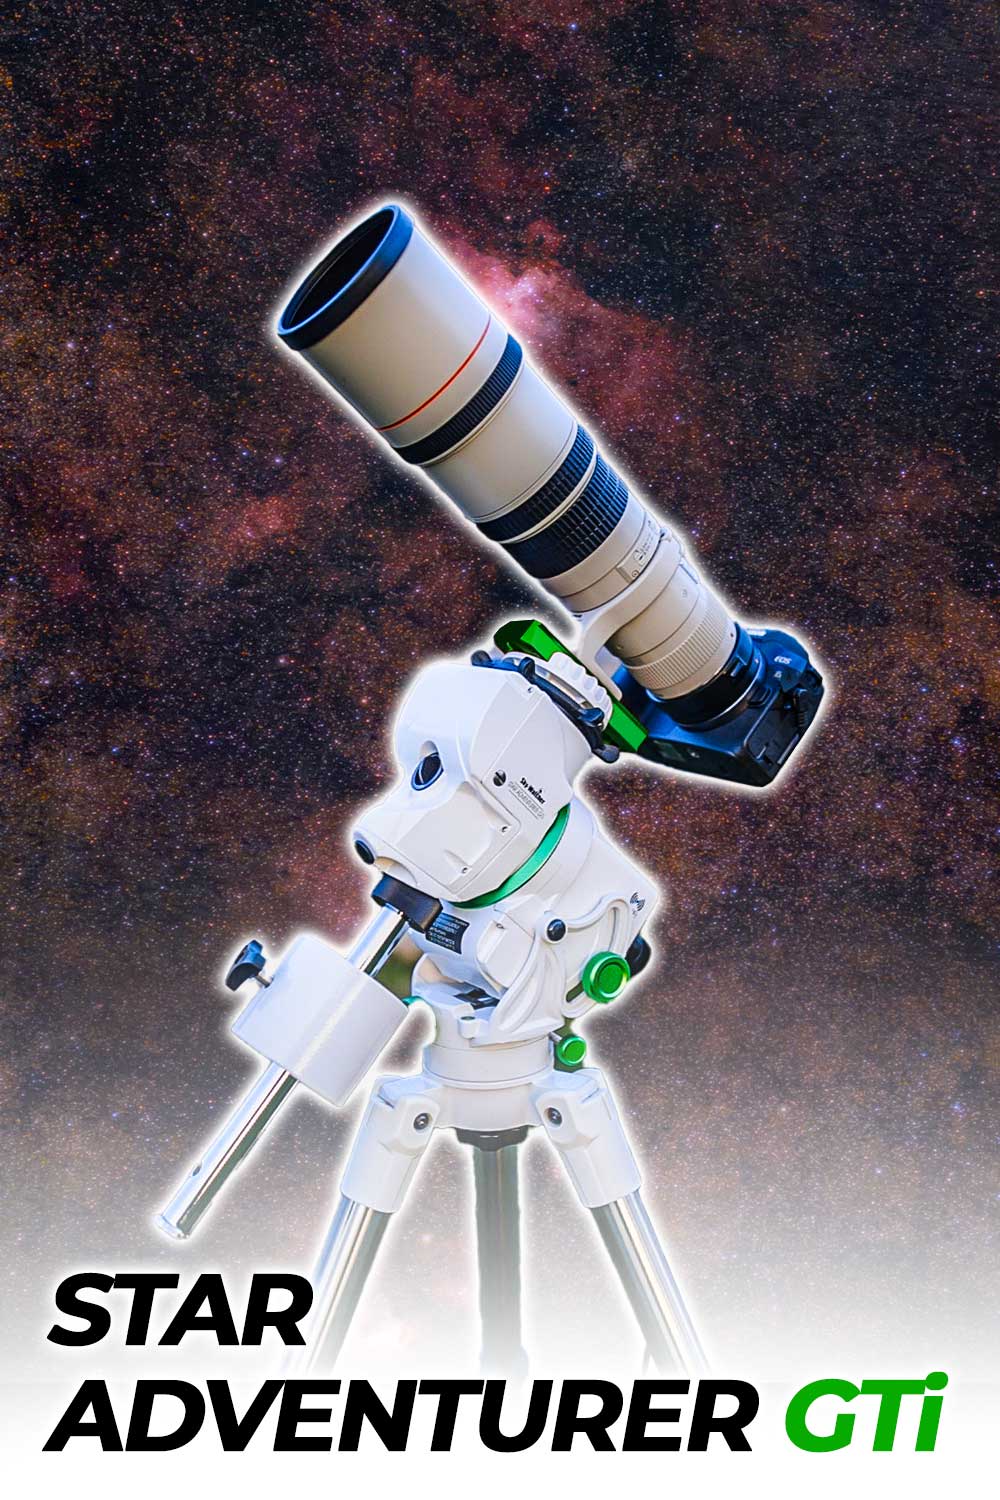
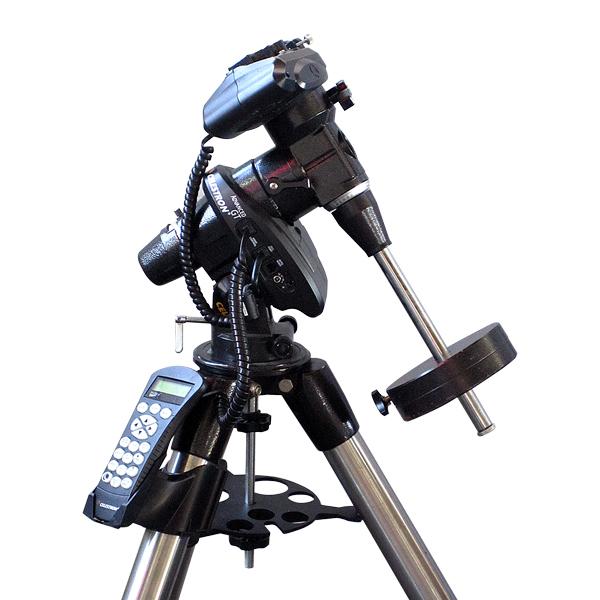
Above, I have labeled the key components of the Star Adventurer GTi. The design and function of the mount are very similar to a larger GoTo equatorial telescope mount, but in a travel-friendly package.
The EQ mount head weighs just 5.7 lbs, making it lightweight and small enough to fit in your camera bag or carry-on luggage. To keep things compact, a collapsible carbon fiber tripod is recommended (this is one I use).
Update: April 20, 2022
I have now run the Star Adventurer GTi with the ZWO ASIAIR Plus, complete with a dedicated astronomy camera, guide camera, and autoguiding. Controlling the GTi mount through the ASIAIR interface (plate solving, object centering, etc.) was absolutely fantastic, and the autoguiding performance was impressive (Total RMS Error hovered between 1.0 – 2.0″).
To connect the mount to the ASIAIR for mount control (and autoguiding) you need this cable. You may find a similar option available online through one of the many astrophotography equipment vendors, but this is the exact one I use.
- GoTo SynScan System (hand controller or mobile app)
- Robust EQ Wedge and Base
- Larger Counterweight and Bar
- Autoguiding in RA and DEC
- Built-In Illuminated Reticle (dimmable)
- High Latitude Counterweight Position
If you already own the original Star Adventurer Pro Pack (or the newer 2i edition), you may be less interested in the GTi as you already have a reliable astrophotography platform. For those of you in this position, I would ask yourself whether adding a motorized DEC axis (with autoguiding potential) and a robust GoTo system is worth the upgrade.
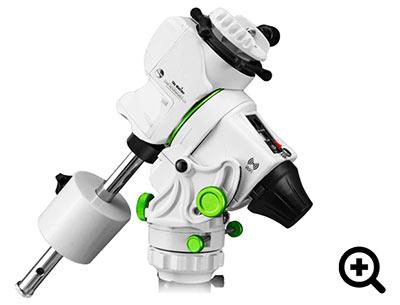
The fact that the EQ wedge base is now integrated with the mount head (unlike the original Star Adventurer) means that this star tracker is mount stable more than ever. The more robust counterweight shaft and 5-lb counterweight increase stability even further.
Specifications
- Computerized: Yes
- Counterweight Weight: 5 lbs
- Drive Type: Worm Gear
- Head Design: Hybrid
- Autoguiding: Yes, ST-4 Port
- Instrument Capacity: 11 lb
- Latitude Range: 0 to 70 Degrees
- Mount Head Weight: 5.7 lb
- Power Supply: DC 12v or 8x AA
- Telescope Connection: Vixen Style
- Tracking Accuracy: 0.35″ in RA / 0.44″ in Dec
- Tracking Rates: Sidereal / Lunar / Solar
- Tripod Attachment: 3/8″
- Warranty: 2 years
The Star Tracker Effect
If you’ve been taking long-exposure images of the night sky on a stationary tripod, chances are you will reach a point where tracking is your logical next step. You can do some amazing things without a star tracker, but entering the star tracker world allows you to start shooting dim objects deeper and longer.
Without tracking, your exposure times are limited by the apparent rotation of the night sky (the stars will begin to trail). Unless you are creating a star trail photo, this is an undesirable effect that only gets worse as you increase your focal length.
A star tracker removes this barrier by matching the precise speed and rotation of the earth to essentially “freeze” deep-sky objects in place. The standard tracking rate for this motion is known as the sidereal rate (the rate of movement of the stars across the sky as the Earth spins), which is the default tracking speed of all equatorial telescope mounts.
![]()
Star trackers come in many shapes and sizes, but are generally considered to be a portable version of a much larger equatorial telescope mount. They are well-suited for Milky Way photography using a camera and lens, but can also carry compact refractor telescopes in the 50-60mm diameter range. Personally, I enjoy taking on all sorts of astrophotography projects with my star trackers, from wide-angle nightscapes to deep-sky nebula photography.
Along with the iOptron SkyGuider Pro, the original Sky-Watcher Star Adventurer and 2i models are some of the best star trackers available on the market today. They are highly portable and capable star trackers, and I will continue to use mine for Milky Way photography, nightscapes, and more. But when it comes to mounting a longer focal length lens or telescope, the GTi has some nice upgrades that deep-sky imagers will appreciate.
Packages and Features
The Star Adventurer GTi is sold in two packages. One includes the tripod kit and mount head shown above, while the other is just the Star Adventurer GTi mount head on its own if you already own a photographic tripod with ⅜” central bolt and a flat base.
I expect most amateur astrophotographers to spring for the mount head-only package, as you will likely already own a suitable, stable photographic tripod. I have tested my Radian Carbon Fiber tripod with the Star Adventurer GTi, and it is a perfect fit. This tripod is slightly lighter than the Sky-Watcher version and allows me to raise the height of the mount head significantly.
The GTi includes a V-style mounting saddle to mount your astrophotography telescope or favorite camera lens. This is the ‘smaller’ style saddle, like the one on the HEQ and many other equatorial mounts.
You can see the short dovetail I’ve fastened my camera lens collar to here. A small mounting plate with a ¼” thread to fasten a camera body (like the one included with the original Star Adventurer and 2i) was not included in the production copy Sky-Watcher sent me, so just a heads up there.
The SynScan GoTo system allows you to find any object in the night sky.
The Star Adventurer GTi can support an imaging payload of up to 11 lbs (this includes the weight of the camera, lens or telescope, and all accessories). If you’re familiar with the original star Adventurer, it’s the same overall weight limit, and it’s really not a whole lot.
I expected this model to bump up the overall payload capacity, but I guess you could say this limit ‘forces’ you to keep things light and portable. This thing is definitely still a star tracker.
So, if you’re thinking of mounting a telescope with autoguiding, stick to something compact and portable like the Radian 61 or RedCat 51. This is the type of setup I’ll be using on the GTi this summer when Ashley and I take our camper on the road on our star party circuit.
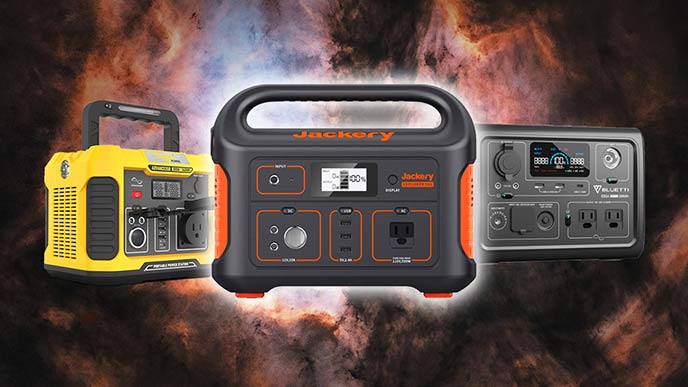
Speaking of portability, the GTi is powered by (8) AA batteries. Even with brand-new batteries, the power light on my copy of the GTI continues to flash (as if the batteries were getting low). I am told this is a firmware issue that will be sorted out before the official launch.
When using the mount at home, you can also power the mount using an external 12-volt power supply.
The Star Adventurer GTi with an astrophotography telescope mounted (Radian 61).
Astrophotography Tests and Results
To test the Star Adventurer GTi’s unguided tracking performance, I mounted a DSLR (or, in this case, a mirrorless camera) to the GTi, with my Canon EF 300mm F/4 telephoto lens. I took several 60 exposures of the Eagle Nebula region during a rare 2-hour period of cloudless skies.
I was able to take impressive 60-second unguided exposures at this focal length, and with a spot-on polar alignment, I am sure I could even longer. If I were to add a small autoguiding setup, I am confident that 5-minute exposures are absolutely possible.
Now I could have loaded this baby up with gear, but I intentionally decided to keep it simple for this “first look”, because I think many of you will be using the GTi with a setup like this (or maybe a smaller lens), especially if you’re new to the hobby.
I ran the Sky-Watcher Star Adventurer GTi at the Cherry Springs Star Party in 2023 and captured one of my favorite deep-sky images of all time.
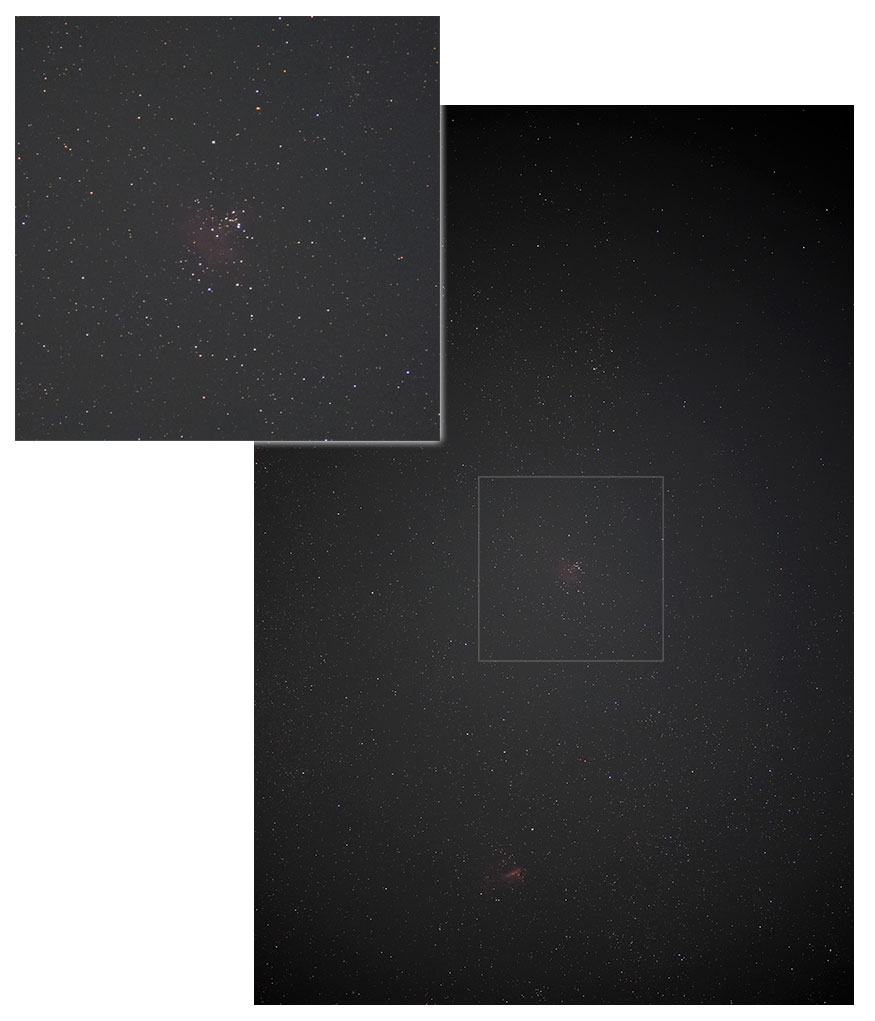
A single unguided 60-exposure at 300mm using the Star Adventurer GTi.
First Impressions
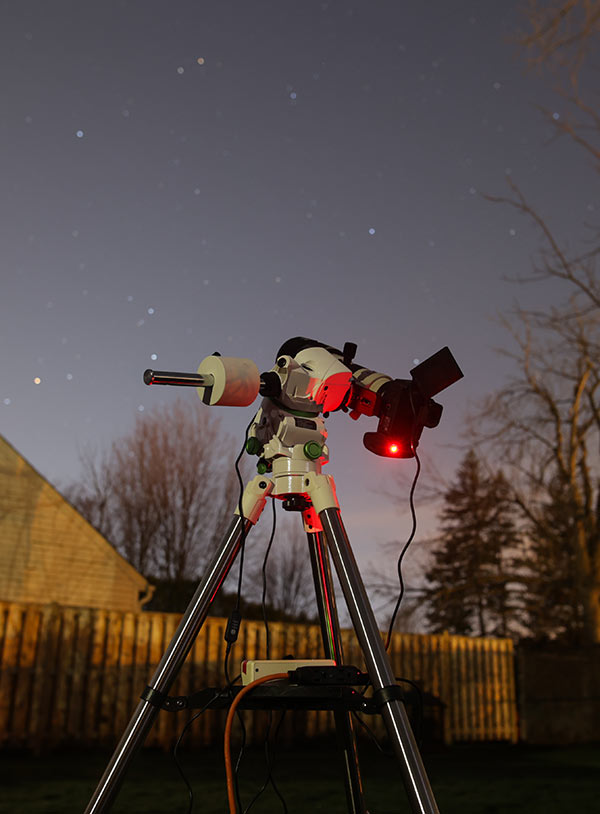
Balancing the load is critical on a star tracker, and it was dead easy to accomplish with a lightweight setup like this. The integrated wedge and tracking mount head feel very solid, much more so than the original Star Adventurer.
The base of the mount and the connection to the tripod are solid and secure. I ran into a small issue with a stiff right Azimuth knob out of the box, but I took it all the way out, re-threaded it in straight and it’s working flawlessly now.
Loosening the RA and DEC clutches feels comfortable and secure as well, although it does feel a little odd using such a small thumbscrew to tighten the RA clutch. If you live at a lower altitude than I do here in Ontario, Canada, you have the ability to change the position of the counterweight shaft to the ‘lower latitude’ position for clearance.
The tripod that comes with the GTi is much smaller and lighter than the one you would find on a full-blown equatorial mount. It’s not much to look at, but it actually feels surprisingly solid. There are some nice grippy, rubber feet on it.
For a mount head of this size, it feels very secure, and you can easily carry the entire setup around with everything attached. Even though the manual says not to do this.
![]()
Polar Alignment Process
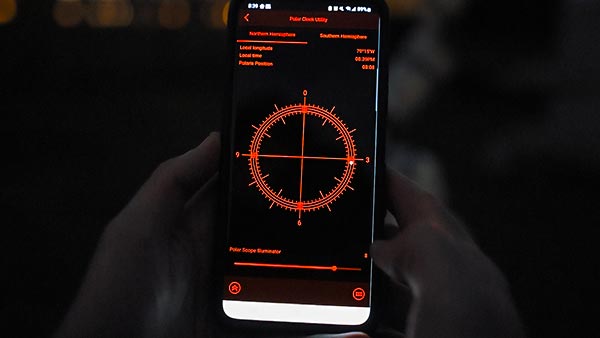
The built-in polar scope makes polar alignment quick and easy. There is a built-in illuminated reticle this time around, which is great news for anyone who either didn’t use… or lost the external one that came on the original Star Adventurer.
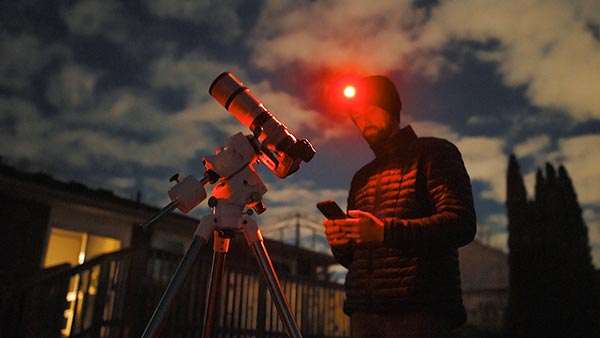
To turn it on, you simply need to open up the SynScan app on your phone and adjust the slider to the brightness of your liking. There is a polar clock utility in the app, so there is no need to hop over to another tool for this process on your phone.
Manually adjusting the alt/az bolts on the mount to line up Polaris in the correct spot only takes a minute. This skill will come in handy the next time you set up in a new, dark sky location with minimal gear (trust me).
SynScan Pro Mobile App
If you already own a Sky-Watcher mount like the Sky-Watcher EQ6-R Pro, you could connect your existing SynScan hand controller to the mount head and control it like your EQ6-R.
I prefer to use the Sky-Watcher SynScan Pro app on my phone to control the mount via WiFi. Here I can quickly perform tasks such as setting my location, running a star alignment, and selecting and slew to my desired target.
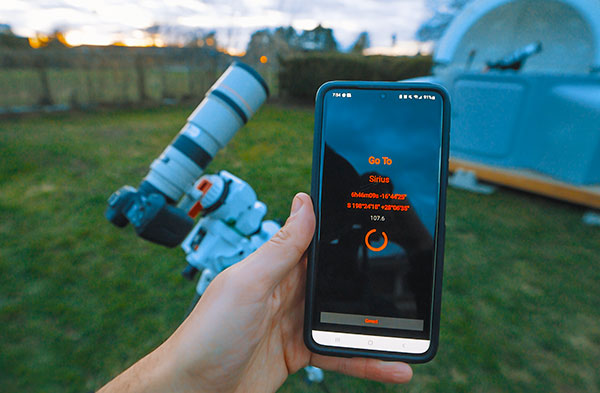
The Sky-Watcher SynScan Pro app connects to the mount via WiFi.
If you have connected your DSLR camera to the mount using the correct cable, you can even run a series of exposures through the Sky-Watcher app. I’m still just using a remote shutter release cable for now, but I’ll be browsing Amazon shortly to get the correct 2.5mm jack for the built-in snap port.
I really like the controls for moving the mount in RA and DEC. You can easily change the slew speed to your liking, and it’s smooth and responsive. Choosing a target (whether it’s for star alignment or to GoTo) from a long list of objects is a much better user experience than navigating through one object at a time on the hand controller screen.
And, of course, for those of you who want full control of the mount and with plate solving and pulse guiding (ASCOM/EQMOD), you can connect the mount to your laptop using the USB Type B port. This thing seriously feels like a miniature EQ6-R Pro. It even kind of looks like one.
Ashley brought the GTi mount to the Okie-Tex Star Party in her carry-on bag!
Final Thoughts
The Sky-Watcher Star Adventurer GTi provides an excellent solution to the most notable missing feature of the previous version. Yet it manages to retain nearly the exact same amount of portability and form factor as its younger brother, which is what star trackers are all about.
I love that it’s battery-powered so that I can completely disconnect from the grid and take this astro rig anywhere I want. In my mind, this is the ultimate travel setup, and it truly feels like a more advanced equatorial telescope mount in a tiny package.
This is a GoTo equatorial mount that can fit in your carry-on bag. If you’re a travel nightscape photographer or aspiring deep-sky imager, you are going to freak out when you try this mount.
I can’t believe this is how far the hobby has come, and it’s not even fair that newcomers entering now have options like this. I’ll end this article with some photos captured using the GTi with a compact refractor telescope.
I hope this was useful to you, and until next time, clear skies.

The Seagull Nebula using the Star Adventurer GTi and a Starfield GEAR 60Q.
Photo Details:
- Total Exposure Time: 48 x 300-seconds (4 hours)
- Sky Quality: High Clouds, Bortle 6
- Camera: ZWO ASI2400MC Pro
- Filter: Radian Triad Ultra
- Telescope/Lens: Starfield Optics GEAR 60Q
- Mount: Sky-Watcher Star Adventurer GTi
- Controller: ZWO ASIAIR Plus
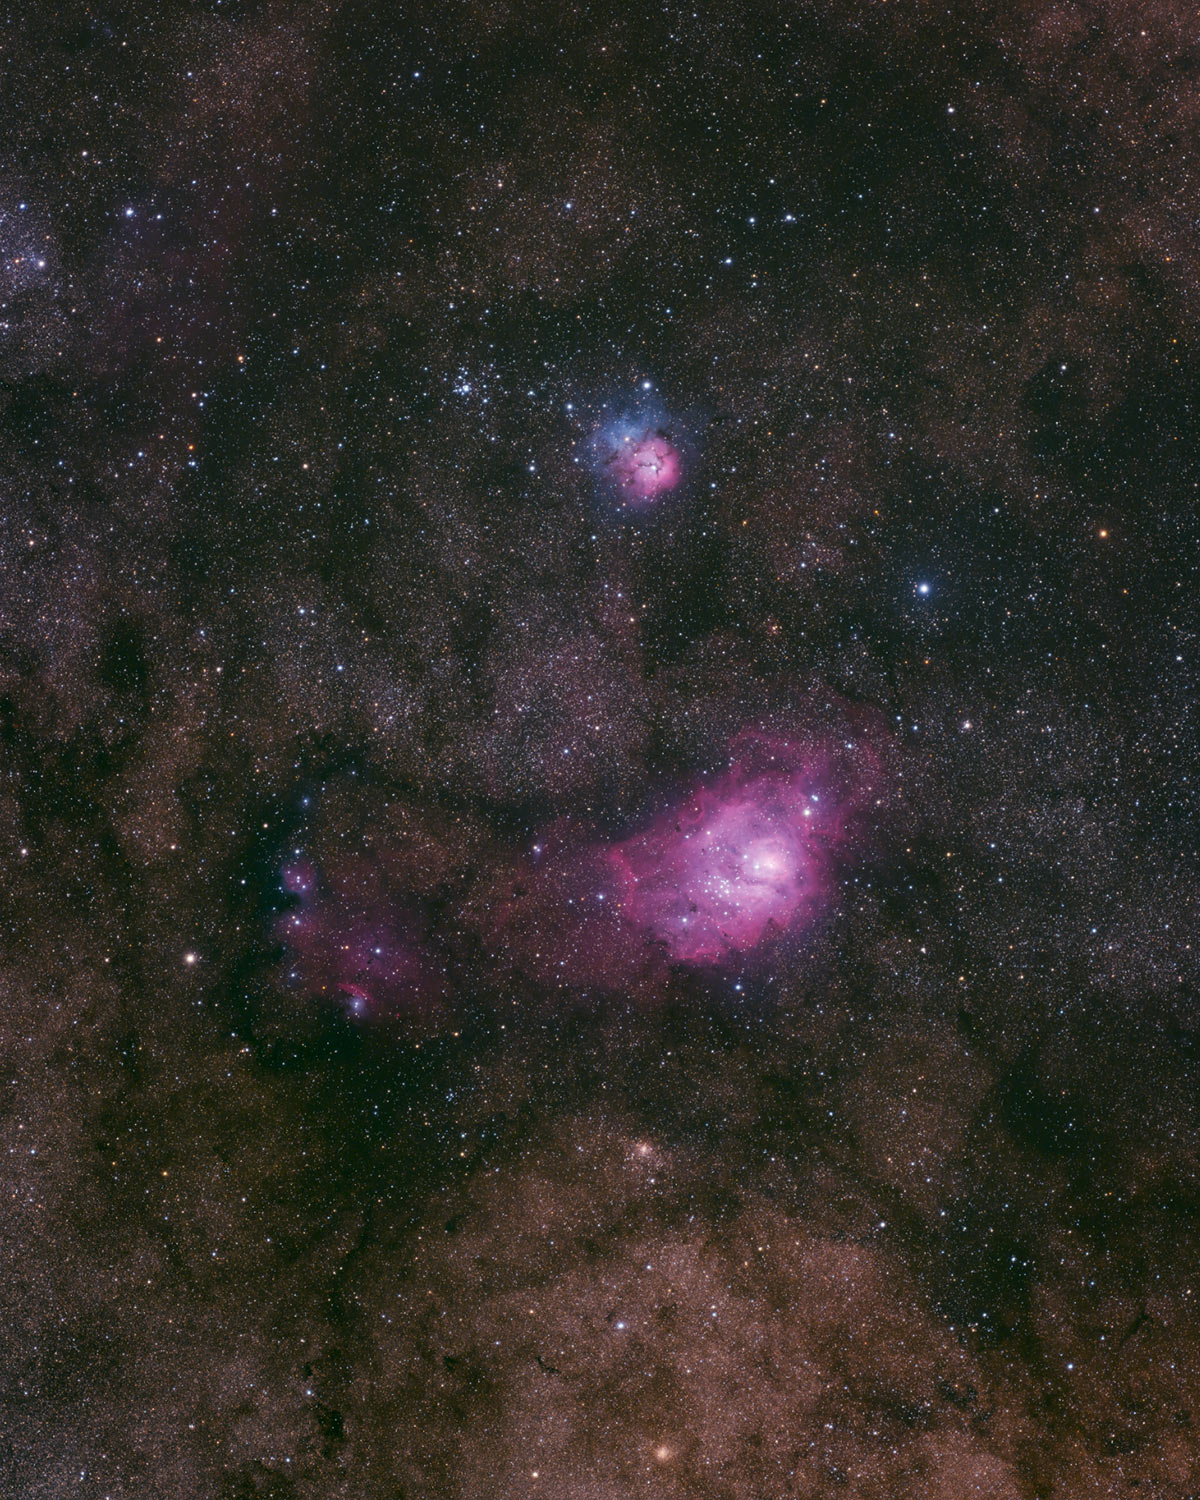
The Lagoon and Trifid Nebula using the GTi and a William Optics RedCat 61.
Photo Details:
- Total Exposure Time: 67 x 120 seconds
- Sky Quality: Light Smoke, Bortle 2
- Camera: ZWO ASI2400MC Pro
- Filter: None
- Telescope/Lens: William Optics RedCat 61
- Mount: Sky-Watcher Star Adventurer GTi
- Controller: ZWO ASIAIR Plus
Summary
Best Used For:
• Milky Way Photography
• Deep-Sky Astrophotography
• Nightscape Photography
What I Like:
• Overall Design and Function
• Robust wedge and Counterweight
• SynScan Pro Mobile App
• Built-in Illuminated Reticle
What I Don’t Like:
• Only 11-lb Payload Capacity
• Polar Scope Cover (pops off way too easy)
• Tiny Azimuth Adjustment Knobs


Looks great, has there been any mention of price, I have the Skyguider pro that I love, but the goto of this may make me change 🤔😊
Hi,
I would like to compare this new tracker with my Gem28 but of course fully guided with Asiair Pro. Is it possible to connect Asiair to Sky-Watcher Star Adventurer GTi ?
¿Has the astrotimelapse features included as on 2i version?
Price looks to be about 740 US$
$640 for the tracker. $740 for tracker and steel tripod. It’s available for preorder on their website.
The adventurer 2i has a rather annoying issue when trying to shoot in app mode. It stops the tracker after 2 seconds. You then lose your deep space object. The work around is to shoot on Astro mode(where it continues to track) and fire the camera with an off board intervalometer.
Does the Gti operate differently?
How was the polar alignment process on ASIAIR? Can I do polar alignment guided by ASIAIR or I must eyeball it through the mount’s built-in polar scope?
Could you describe how to use that cable to connect the GTi to the ASIAir? Does the cable go from the hand controller port on the GTi to a USB slot on the ASIAir? I REALLY love your videos and posts. I have learned so much useful information from you during the last year. I have the GTi on order and have ordered that cable from Amazon through your link. Your link goes to a product with seven versions and lands on Washinglee RJ45 Control Cable 6 foot for GoTo mount. I hope that’s the right one. Thank you again for all the wonderful info. Keep up the great work. You and Nico are treasures of the astrophotography world.
Michael – Yes that Washinglee RJ45 control cable (6 foot) is the one I use! You simply plug it into the HAND CONTROLLER port (not the autoguider) and the USB end into the ASIAIR. Choose AZ/GTi/Sky-Watcher SynScan in the mount dropdown on the ASIAIR. You are absolutely going to love it!
I’m looking for a small, light driven EQ mount for my 60mm f/8.8 scope. Purely for visual use. Would this be the answer?
How is the GoTo pointing accuracy without plate solving?
Has this mount actually been released yet or is it just pre-order? If so, does anyone know WHEN it gets released?
Very good review. Thanks for that.
The anticipation shortened the waiting time for me. My mount arrived a few days ago. I also use the ASIair for control.
Note: The connection is also possible via a simple USB cable. The Star Adventurer AZ GTi could even be connected wirelessly via WiFi in Station Mode. However, I haven’t managed to do that with the Star Adventurer GTi yet.
Keep on going, Ralf
Great review, thanks. What dovetail did you use and would you mind posting a link? I’ve used the GTI last night for the first time for a proper session (DSLR & lens only) but my camera mount plate was a bit too short and didn’t fit perfectly.
So a short-ish dovetail like the one you used might be ideal, as I’ll also be able to move the camera along to balance it out.
Would it be able to take a Heritage 130P OTA?
11lb = 5kg, and the OTA is roughly 4kg
Or should the OTA weight be even lesser? Appreciate your advice!
You don’t need that cable to connect the GTI to the asiair. Just a USB cable.
What would you suggest equal to this but with a higher payload limit (~15 pounds)?
MD, thanks for your comment. Could you please clarify: do you mean a USB-A to USB-B cable? Thanks.
Hi,
Thanks so much for your great review, that is really useful.
Just a quick question, I want to mount my Polemaster on to the GTI mount, do you know how can I mount it / which adapter I should be using?
Thanks!
Great review!
I got this yesterday (April 15th, 2023) and there are a couple of things which I think must have changed since you wrote this – the biggest one is that it came with 2 counterweights, a 1.5lb and a 3.5lb – I think this addressed issues people had with balancing light payloads. Also I was surprised to find a USB “printer” style cable so you can plug the mount directly into an ASIAir or similar
I got the version with the tripod and was surprised at the quality of it… it’s not perfect and a bit too heavy to probably use as a grab and go tripod but great job for the price
How do I connect my Canon EOS Rebel T7 directly to the GTI using Wi-Fi?
MY INITIAL FEELINGS —– Very Poor finish. In my new unit the scope had large “dust” spots. The supplier said this was normal!! So you wonder if it was put together in a cow shed. Trying to clean it I found the “dust” was in fact paint scrapings on the internal scale & cross-hairs coming off its fixing ring. Shows poor quality as does the plastic battery cover. Why wasn’t it made of metal? Its holding screw falls out and can be lost. Why didn’t the Chinese manufacturer make it 3mm longer and put in a C-clip around it to keep it withheld with the cover? Why didn’t they also produce rubber covers for the connection sockets on its top, to keep dust and moisture / water out and keep the electric contacts clean? Why didn’t they produce a proper cover for the eyepiece — one that doesn’t fall off. Not difficult or expensive to make a screw-on decent quality cover. And yet the cost is over $600. One therefore wonders what quality are the internal workings. Seems deliberately poorly manufactured so things break and parts cannot be replaced.
I bought a Star Adventurer 2i a couple of months ago and it had the same issue with the polar scope. I big piece of lint or dust that was sitting on the reticle (both are in focus). It’s behind another piece of glass so a bulb blower didn’t help.
I was surprised at the finish of the Star Adventurer 2i and GTI as well. They are built like tanks but the screws are a bit rough, the slots for the plastic hooks are too big, the bolted screws on the 2i’s declination bracket were crooked, etc.
On the other hand, the Redcat 51 that sits on top of it is machined perfectly.
Ciao, can i dither with the SW GTI / Syncscan App? Thinking my D5600a paired with a Redcat 61 on a GTI 🤔
Cheers
Enjoyable read, as usual, thanks. The Adventurer sounds very interesting.
I know this is a old post but is there a full tutorial anywhere, start to finish of how to use this properly. i.e. – balancing, polar alignment, star alignment, focusing, taking the shots, etc
Jamie – I can work on putting something like that together. That might be a helpful YouTube video.
Hi,
This article is great – couple of questions if that’s ok.
– The article is only from 2022, are there any changes or updates to the info provided?
– I have an old Canon EOS 700D / T5i DSLR Camera – will that work as an alternative to the set up above. I want to limit costs until I know it’s something I will continue (although I assume this kind of kit keeps a reasonable re-sale value).
Thanks again.
John
Hi,
Doh – my previous comment should have been on https://astrobackyard.com/deep-sky-astrophotography-kit/
Thanks again.
John
Thinking of buying a Sky adventurer Gti, but I’ve just downloaded the app and I can’t see any settings for lunar tracking, or much else information if this tracker is any good for the moon.
Thanks for a very helpful review, it got me to finally took pull the trigger in hopes of using the SWSA GTI together with my nature photography equipment; including a Canon 600/4L III, Canon R5 and Sony A7RIII + Sony 200-600. I wound up using the Sony A7RIII together with the Canon 600/4 and got suprisingly good results with 30 sec exposures unguided. Still learning all the details on how to best use and configure the unit, as well as a steep learning curve on Pixinsight, but I have been more than happy with my initial results ( https://www.astrobin.com/full/v8a34y/0/ ) . Keep up the good work!
I connect the mount to ASIAIR Plus without the RJ45 to USB cable, and it works perfectly fine.
Thanks for a great post and video! Much appreciate for such wealth on the GTI mount. I just have a quick question: What is the model of the orange bracket/slide that you use to attached the camera to the mount? I am thinking of getting the GTI mount and just want to know how to attach a DSLR camera to it. Thanks again!
The GTI is a great little tracker mount, though I agree that some of the fit and finish is not so great.
For those struggling with the polar scope cover, I found a solution suggested elsewhere on the Internet – replace the stock cover with a 1 1/8th inch (29mm) vinyl dust cap meant for covering the ends of bolts or pipes. It just slips on and stays in place, and as a bonus is much less bulky than the stock cover. I got a pack of ten from Amazon (they didn’t sell them singly!):
https://www.amazon.co.uk/dp/B07TZ3GYQS