How I Captured the Boogeyman Nebula
In this article, I’ll describe how I photographed the Boogeyman Nebula (LDN 1622) in the constellation Orion using my camera and telescope. This was the first time I had ever captured this deep-sky object before, and one of only a handful of dark nebulae I have ever photographed.
LDN 1622 is a dark molecular cloud that is just shy of 10 light-years across in size. The Boogeyman Nebula is surrounded by the intense hydrogen gas of Barnard’s Loop and close by to other fascinating deep-sky objects like Messier 78.
In this article, I’ll cover everything from the astrophotography equipment I used to capture the shot to the image processing techniques I performed to create the final image you see below. My hope is that you can replicate some of my techniques to produce your own image of the Boogeyman Nebula to enjoy.

The Boogeyman Nebula in Orion. (Updated Version) Pleiades 68 + ASI2400MC Pro.
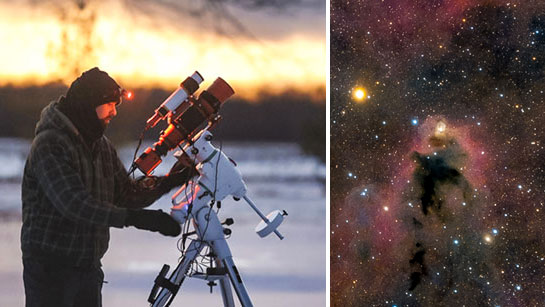
As most of you know, I take the majority of my deep-sky photos from my backyard at home, but during the new moon phase, I like to escape the city lights and head to a dark-sky site.
This winter has been terrible for astrophotography – night after night of cloudy skies. But in late February, my astronomy weather app (Astrospheric) indicated an upcoming clear patch of sky appearing within the cloud cover.
I crossed my fingers that this forecast would hold true, and booked a one-night stay in a cabin under Bortle 4 skies. Although it was snowing while I set up my telescope, the clouds parted as darkness fell and I was able to enjoy about 4 hours of clear-sky time in total.
Related Article: The Best Astronomy and Stargazing Apps for your Smartphone
Video:
If you would like to follow along and see what the cabin I stayed in looked like, feel free to watch the video below. If you take your astrophotography images in the city like me, I highly recommend searching for dark-sky rentals on Airbnb during the new moon phase.
The Boogeyman Nebula
The Boogeyman Nebula is a beautiful dark nebula in Orion. Also known as Lynds Dark Nebula (LDN 1622), it is a dark molecular cloud that sits on top of a faint background of hydrogen.
The reflection nebula known as Messier 78 resides nearby, and you may want to consider including this nebula in your image if your field of view is wide enough.
- Cataloged: LDN 1622
- Common Name: The Boogeyman Nebula
- Constellation: Orion
- Object Type: Dark Nebula
- Distance: 500 light-years away
This rather dim object benefits from a dark sky. The Boogeyman Nebula (and all dark nebulae) are likely too faint to successfully capture from my backyard in the city.
Nearby M78 is an attractive reflection nebula that glows brightly above Orion’s Belt. At a distance of about 1,500 light-years, this reflection nebula is lit by nearby hot, young stars. The cool blue look of this reflection nebula plays well off of the warmer red regions of hydrogen gas in terms of photographic composition.
There is plenty of hydrogen gas nearby as well. This region lies next to the massive Barnard’s Loop, which shines in deep red and magenta when photographed with an astro-modified camera.
The main reason I had never photographed the Boogeyman Nebula until now is that there are so many other gorgeous deep-sky objects in this region.
I had to restrain myself from capturing the Horsehead Nebula next door for the 12th time. In the image below, you’ll see that the Boogeyman Nebula lives north of the bright star in Orion’s Belt known as Alnitak.
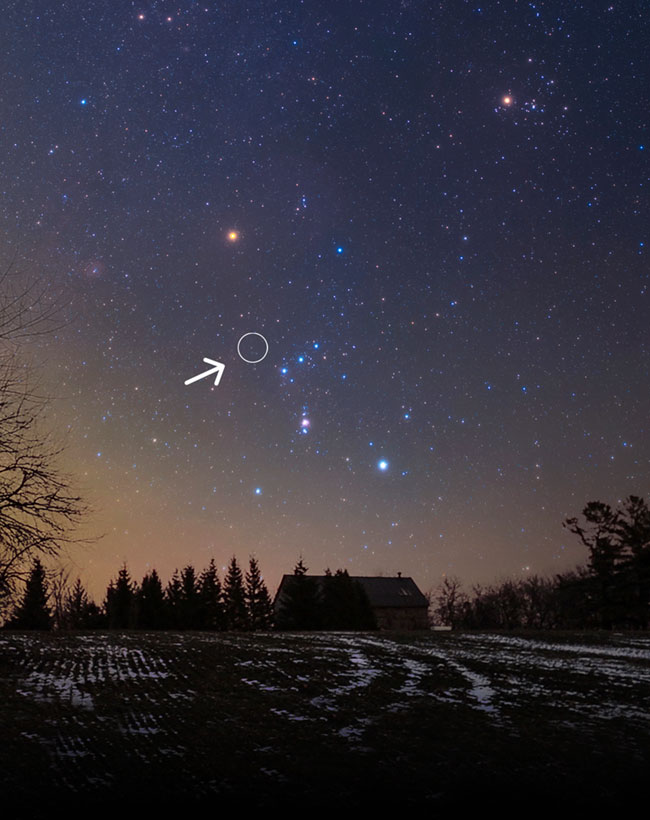
The location of the Boogeyman Nebula in Orion.
From mid-northern latitudes, the best time of year to photograph the Boogeyman Nebula is from November to February. From my latitude in Ontario, Canada, LDN 1622 rises to a maximum apparent altitude of about 45 degrees in the sky.
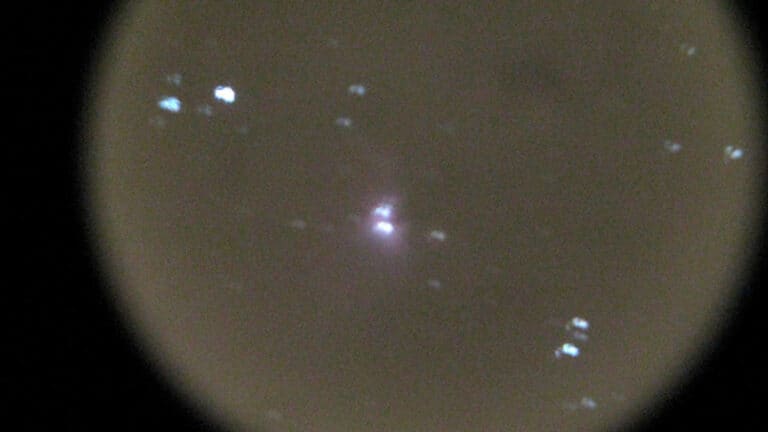
Due to its proximity to the 3 bright stars in Orion’s Belt, the Boogeyman Nebula and M78 are quite easy to find in binoculars or a telescope. Unlike Messier 78 at magnitude 9.5 (which can be seen in a small telescope), the Boogeyman Nebula is much too dim to be seen visually through the eyepiece.
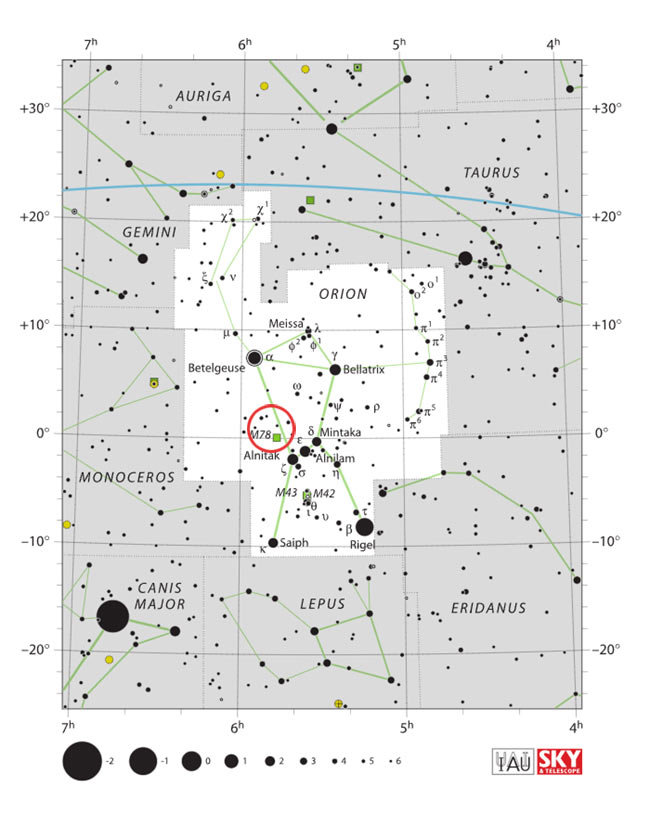
The location of the Boogeyman Nebula and M78 in Orion.
My Equipment
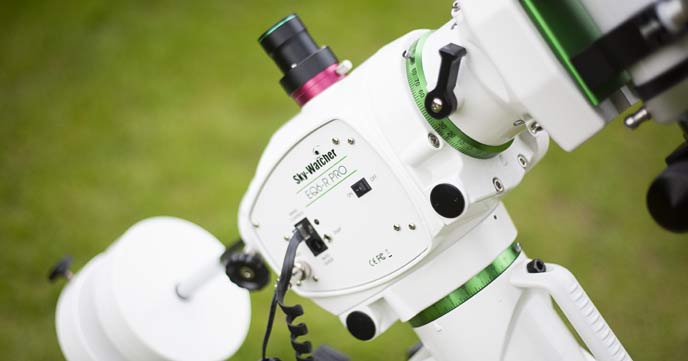
I brought my Sky-Watcher EQ6-R Pro telescope mount on this trip. It’s not the most portable telescope mount in the world, but it allows me to mount a small to medium-sized refractor with autoguiding.
This equatorial telescope mount is capable of precise tracking, even using a telescope with a focal length of 1000mm+. The largest telescope I have mounted to the EQ6-R Pro was a William Optics FLT 132 (750mm).
It can handle a much heavier load than my star tracker, which I also brought along to capture some wide-field images using my Rokinon 135mm F/2 lens. I have yet to take a look at this data and process the image!
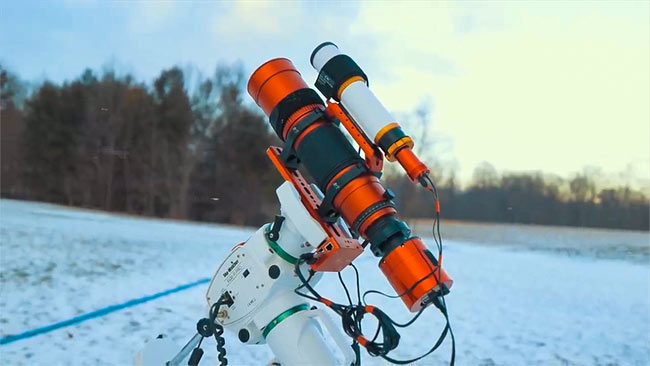
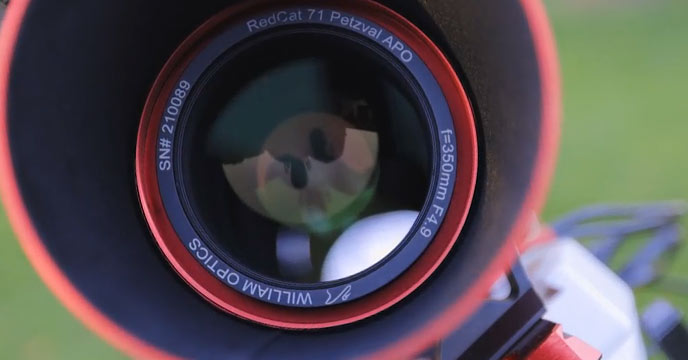
The William Optics RedCat 71 and ZWO ASI2400MC Pro.
The EQ6-R Pro has proven itself to be reliable and work well in my cold Canadian winters, every time. In fact, the temperature dropped to -15 degrees Celsius throughout the night during this imaging session.
The telescope is a William Optics RedCat 71. This has become my go-to travel telescope, as it offers an excellent balance between focal length and portability. This telescope weighs about 7 lbs, making it a great option for those trying to travel light.
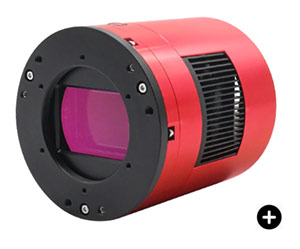
The camera attached to the Cat 71 is a full-frame one-shot-color model, the ZWO ASI2400MC Pro. This allows me to pull in an impressive amount of sky in a single shot at the telescope’s native focal length of 350mm.
I was very excited to test this camera when it first arrived, as I view it as the dedicated astronomy camera equivalent to my Canon EOS Ra mirrorless camera. It offers a massive full-frame, back-illuminated color sensor with TEC (thermoelectric cooling).
I have enjoyed using this camera on several projects over the past few months, including my best ever image of the Iris Nebula and the Pleiades. This 24-megapixel camera captures huge images with incredible detail when zooming in.
I use the ZWO ASIAIR Plus to run my imaging session. This device allows me to wireless run the imaging session, controlling everything from autoguiding to setting the sequencing plan.
The ASIAIR Plus replaces my laptop computer, which means I have less to pack on my astrophotography excursions. I control everything from my smartphone and have precise control over things like the focus and framing of my target.
I did not use a light-pollution filter to capture this scene, hoping that the Bortle 4 skies would be enough to bless me with clean sub-exposures in broad-spectrum light. I keep an empty Starizona filter drawer in front of the camera to achieve the recommended back-focus for my camera.
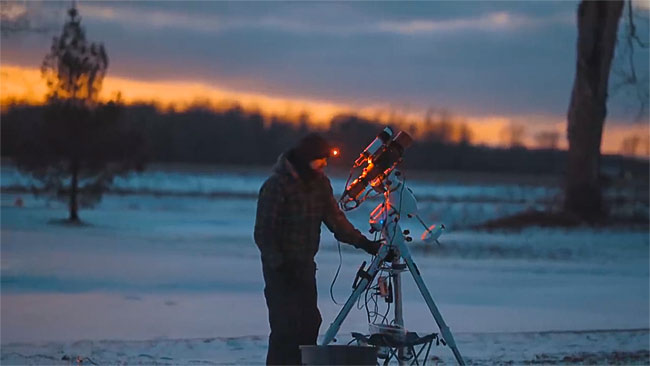
Setting up my telescope on the property at the Airbnb.
The cabin I stayed in was very cozy and warm. I was able to set up and run my telescope outside using a long extension cord (through a window) to power the mount.
Because I used the ASIAIR wifi controller to run my imaging session, I could monitor the sequence and make adjustments to the camera from inside of the cabin.
My Camera/Telescope Tilt Issues
I think I’ve identified a tilt issue on this system. Tilt just means that the image sensor of my camera isn’t perfectly flush with the image plane of the scope.
A big sensor like the one on the ZWO ASI2400 is very demanding in this regard. When using this combo, I noticed that the stars on one side of the image always start to elongate.
At this point, I am unsure whether the tilt issue is due to the optics of the telescope, or the camera sensor itself. I believe it is the optics, as I did not notice this issue when attaching the ASI2400MC Pro to another telescope (SW Esprit 150).
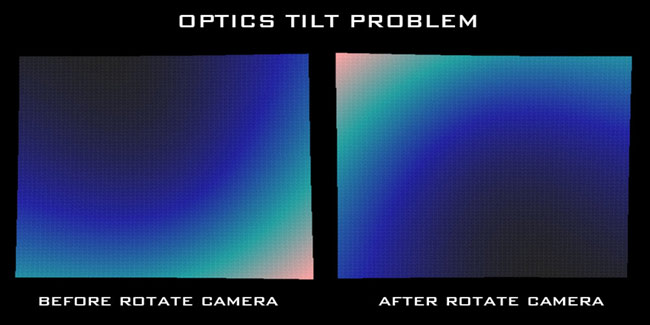
A diagram of tilt issues in an astrophotography optical train. ZWO ASI Article.
Unfortunately, these rare clear nights don’t allow much room for tweaking and testing, so I’ll have to live with it for now and avoid placing my target in the ‘danger zone’ side of the image.
The viewers of my YouTube channel have offered some helpful suggestions to help me correct the issue. I know that some people swear by the CCD Inspector to fine-tune their optics, but I have not used the tool myself.
For now, I will continue to work on finding a solution so I can fully utilize the entire field of my telescope with a full-frame camera attached.
Related Article: The Best Astrophotography Telescope for a Beginner
Image Processing
To create the intermediate file for processing, I stacked 32 x 4-minute exposures (with 20 dark frames) in DeepSkyStacker. This produced a calibrated master file with just over 2 hours of total exposure time.
The image below represents the ‘before’ image (stacked), with very few image processing techniques applied. As you can see, the image is much duller and less dynamic than the final image I produced.
This should give you a better idea of what to expect ‘out of the camera’, whether you are using a DSLR/Mirrorless, or a dedicated astronomy camera.
My “before” image of the Boogeyman Nebula and M78.
At this stage, all that has been applied to the image is a quick stretch to the linear file and some background extraction. You may notice the blue light on the right-hand side of the frame, which is a stacking artifact of a bright flare emitted by the star, Alnitak.
The Boogeyman Nebula and M78 cover a wide area of sky (3 degrees +), and unless you are using a wide-field optical instrument (350mm or wider), you likely won’t capture both objects in the same field of view. Even using the full-frame ASI2400MC Pro and 350mm RedCat 71, the objects were closer to the edges of the frame than I was comfortable with.
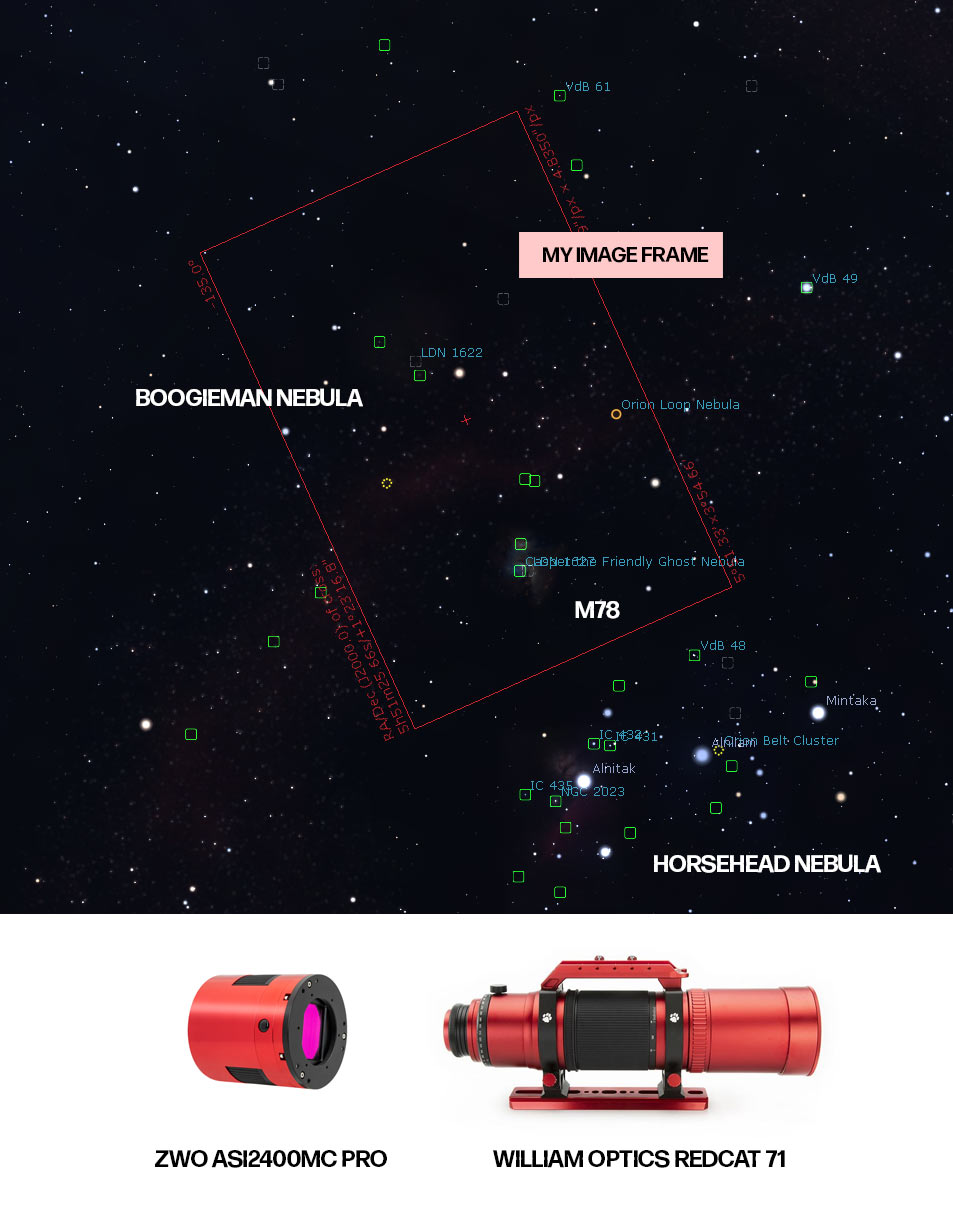
When planning your next deep-astrophotography project, make sure to check and see what your field of view will look like using your specific camera and telescope combination. For this process, I use the “sensor view” tool in Stellarium to see if my intended target is a good fit for my system.
During the final stages of setting up my imaging session, I had to precisely rotate the camera to match the framing shown above. The bright star, Alnitak, made this process much easier. Bright stars in the field give you a near-real-time reference point to aid in the framing process.
Related: My Astrophotography Image Processing Guide
One of the key aspects to processing the Boogeyman Nebula was to carefully preserve the natural, diverse mix of colors in the area. Barnard’s Loop is vibrant red, while the LDN 1622 and the Messier 78 region include several blue and yellow stars.
Star reduction was critical to draw more attention to the nebulae structures, without going overboard and destroying the natural beauty of a filterless, broad-spectrum image. In the end, I would have preferred to have had double the amount of exposure time, but I think the dark skies helped me produce high-quality data in such a short period of time.
My Final Image
I ended up with 32 x 4-minute sub-exposures on the Boogeyman Nebula and M78 (2 Hours, 8 Minutes total exposure). My camera tilt issue meant that I needed to crop the image down from about 80% of the original frame.
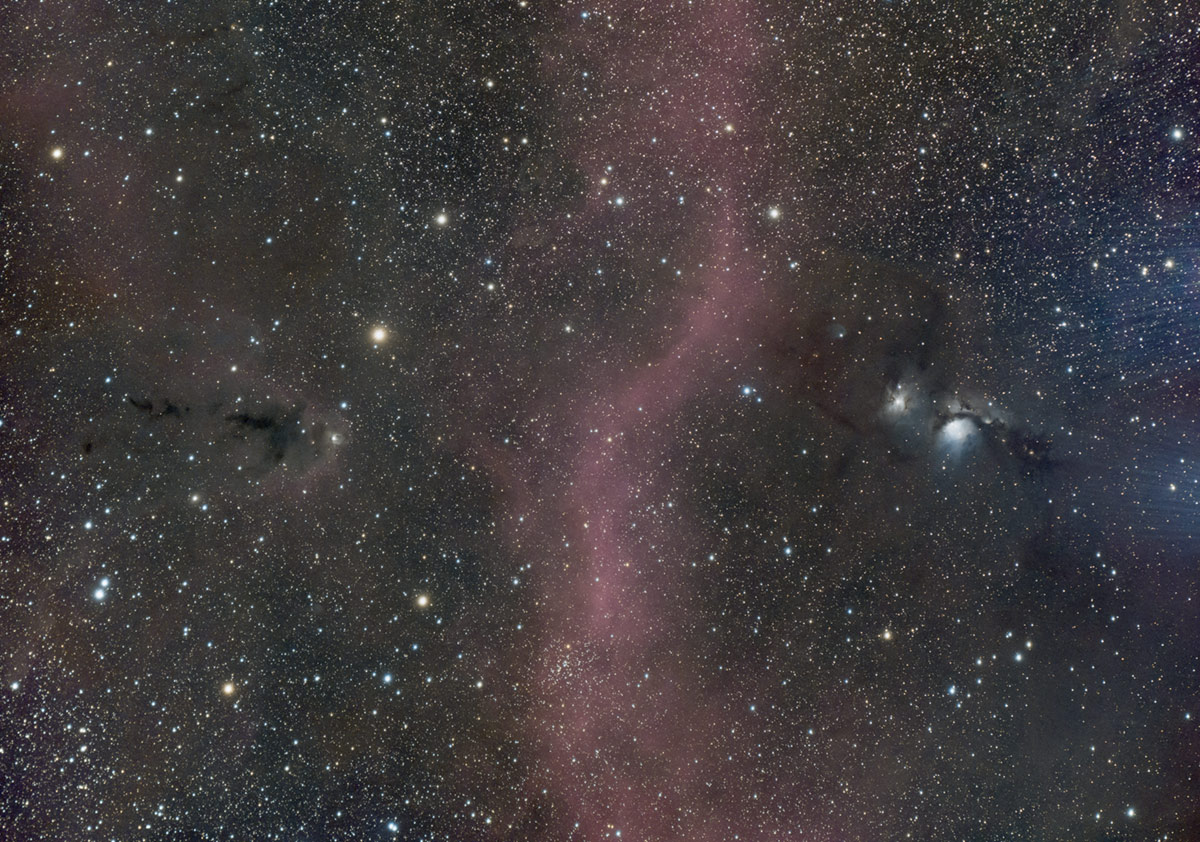
I am thrilled to have finally photographed the Boogeyman Nebula, especially during a cloudy winter like the one we’ve had this year. Click the image for a larger view:

The Boogeyman Nebula, Barnard’s Loop, and Messier 78 in Orion.
Final Thoughts
As brief as the experience was, it felt so good to be under a sky full of stars again. I know my videos have been a little staggered lately, but it’s just because I need to feel the energy of this hobby firsthand to really get into it.
I don’t want to force the creative process, as much as it pains me to watch 2 weeks go by without posting a video. I want to share exciting moments and experiences that inspire you to get out and photograph the night sky yourself.
That’s what excites me, and hopefully, you appreciate them too.


Hello from Israel
Thank you for all the information.
Do you think an 8″ dobsonian is a good choice a for a balcony with 140cm fence? Maybe if I place it on something…?
First telescope, but I don’t want to end of switching…
Can buy a bresser Pollux 150/750 eq3 , but not sure if to do so.
Any thoughts?
Thank you
Michael
Thanks for all the great info.
Here is an interesting article on how to correct image tilt in the camera. Comments suggest that the whole image train could be done on a refractor as well. The great thing is being able to do this during the day and indoors.
https://www.macobservatory.com/blog/2021/11/28/how-to-remove-sensor-tilt-from-your-astrophotography-camera-while-indoors
Ah yes! That is indeed a great resource (as is the entire site) Thank you!