Selective Color Boosting (Photoshop Tutorial)
In this astrophotography image processing tutorial, I will explain an easy way to selectively boost the colors in your image. I like to call the technique “selective color boosting“.
Increasing the saturation of your deep-sky object can bring out the true beauty of your subject, and better showcase the contrasting elements of the nebula or galaxy.
The amount of “boosting” is up to you of course. Some prefer bright, vibrant colors, while others prefer a toned-down “natural” look. I’d like to consider my images to be somewhere in the middle.
The definition of a “true-color” image varies, but the techniques described in this tutorial are generally accepted in the astrophotography realm.
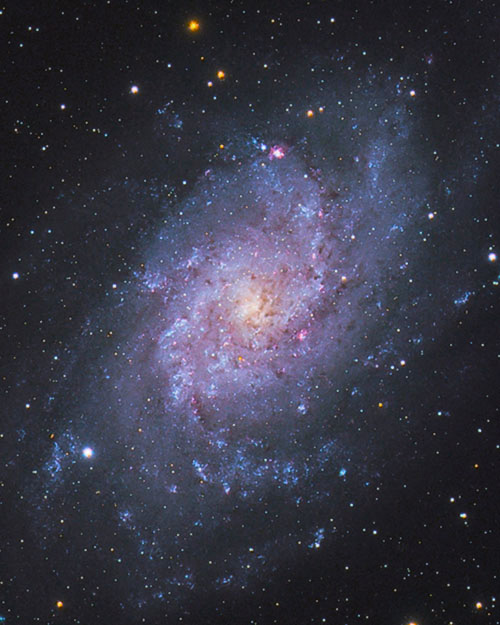
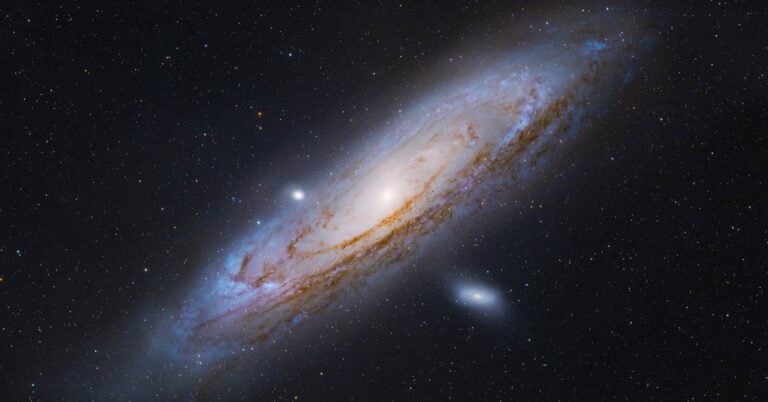
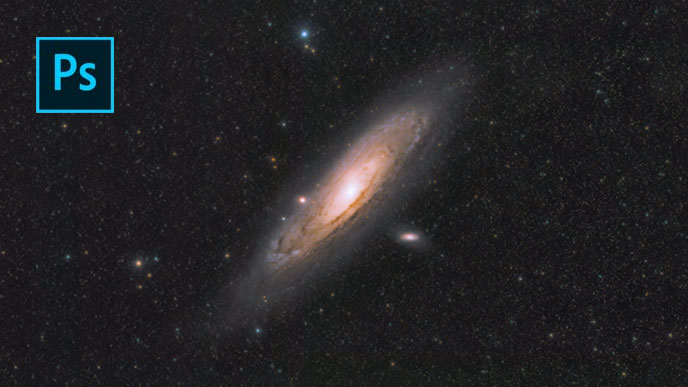
The Triangulum Galaxy in RGB (Dedicated Astronomy Camera).
Long exposure astrophotography can reveal the colors of all deep-sky objects and galaxies. By exaggerating these colors through post-processing, we can increase the impact of the image.
In this tutorial, I’ll use Adobe Photoshop to accomplish our tasks. This software includes countless tools to perform the finishing touches on your images. (See the rest of the astronomy and astrophotography software I use).
I have also found it to be a fantastic start-to-finish image editor, with the help of a few third-party plugins of course. But we’ll get to that in a minute.
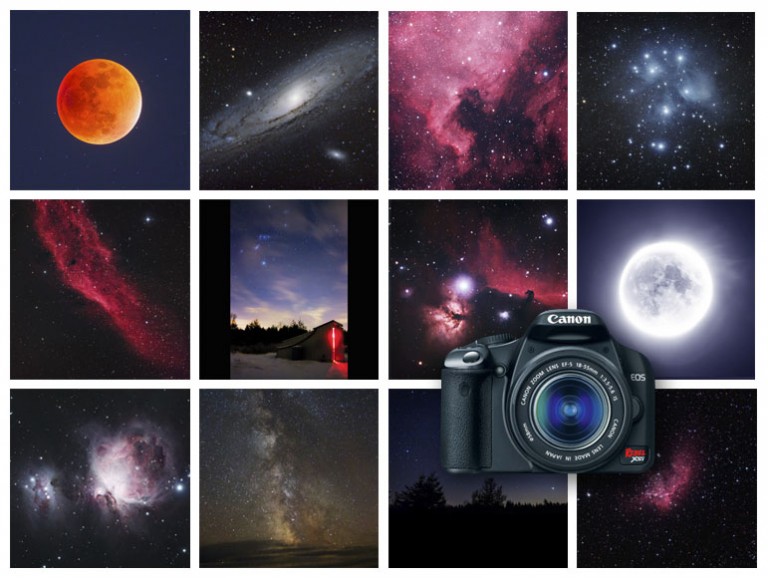
The example images in this article were captured using a variety of cameras, from an astro-modified DSLR camera to a monochrome CCD camera. The color boosting methods I describe will work for all color images, whether they are broadband RGB, LRGB, narrowband, bi-color, etc.
The data used in this tutorial was registered, stacked, and calibrated in DeepSkyStacker first. If you need help with the pre-processing stages of deep-sky astrophotography, be sure to check out my premium image processing guide.
For an overview of this process, please watch my video tutorial on YouTube:
How to Boost the Colors in Your Astrophotography Images
Astrophotography is a broad term and covers a wide variety of disciplines from wide-angle Milky Way nightscapes, to high-magnification planetary imaging.
The methods of boosting color discussed below are most applicable to deep-sky imaging of nebulae and galaxies, but can also be applied to all forms of digital photography.
In a nutshell, you need to carefully isolate the areas of color that you wish to enhance, and leave the rest of the image alone.
If you globally increase the saturation of your astrophoto, you run the risk of intensifying noise, color-mottling, and other nasty surprises hiding in your data.
For example, in my image of the Whirlpool Galaxy shown below. I wanted to focus on boosting the colors of the areas of pink hydrogen inside of the spiral arms, without oversaturating the blue areas of the galaxy.
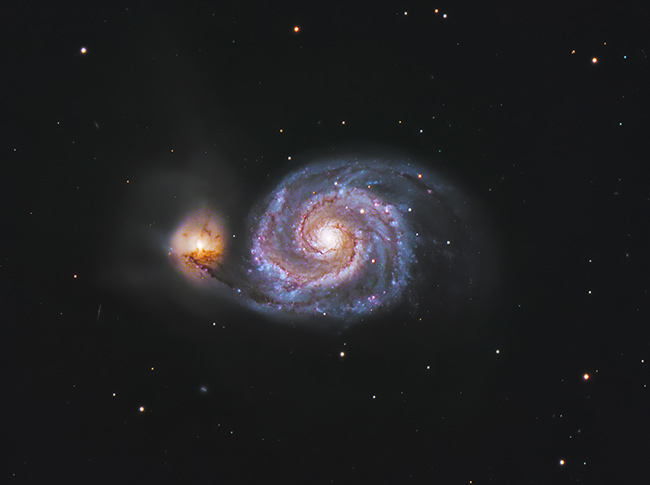
The Whirlpool Galaxy in LRGB (Mono CCD and telescope).
The same selective color boosting method can be used on a wide-angle nightscape image too. The most challenging part of the process is the selection itself.
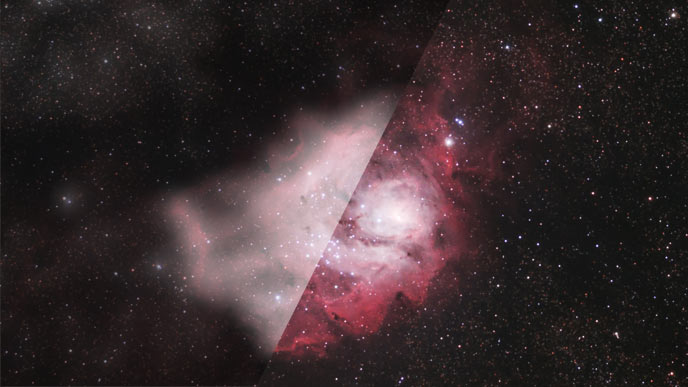
In the example image below, I again carefully isolated the areas of pink hydrogen emission nebulae. I was able to increase the saturation of these areas and brighten them with a careful mask selection.
Truth be told, I could have done a better job at masking the darker areas of the night sky, but I think you get the idea.
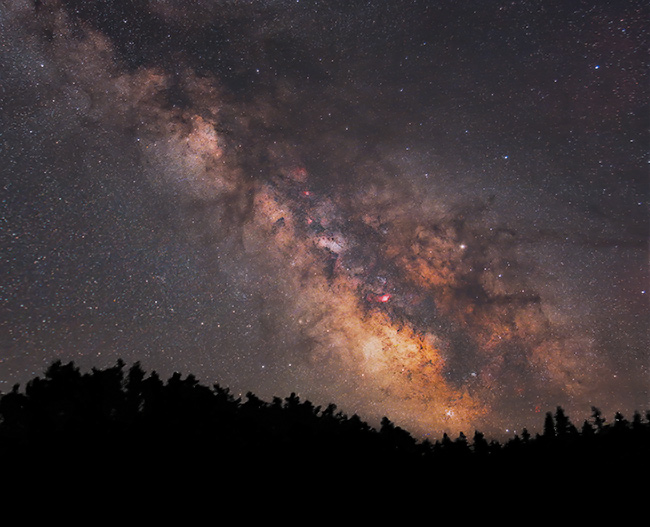
The Core of the Milky Way. Canon DLSR and a wide-angle lens.
As you can see, this technique gives you full control over the amount of saturation in your image in each area. The key concept is that you’re being very specific about which areas of color are boosted.
A basic saturation slider adjustment to the image as a whole will degrade the quality of your image significantly.
With some inspiration to get your creative juices flowing, let’s get into the nuts and bolts of the process.
When to Start Boosting Colors
The timing of these actions on your image is up to you, but I highly recommend leaving it until the end.
After the pre-processing stages (DeepSkyStacker, Astro Pixel Processor, etc.)
The first few steps you take towards processing your image should focus on balancing the RGB levels in the histogram and applying basic curve adjustments that bring up the signal.
Here is a basic image processing workflow timeline that I generally follow:
- Levels Adjustment
- Curves Adjustment
- Balance Levels
- Neutralize Background
- Curves Adjustment
- Star Color Adjustment
- Star Minimize
- Selective Color Boosting
- Noise Reduction
- Sharpening
You may want to make some less dramatic stretches to your colors along the way, but leave the selective color boosting method until the end of your workflow.
The reason for this is that your image won’t be in a state that portrays what the final colors will look like until the end of your workflow.

The Soul Nebula captured using a DSLR camera and a small refractor.
How to Select Specific Colors
There are two selection tools in Adobe Photoshop that allow you to isolate specific areas of your image. One (Color Range) makes an early, rough selection based on your input. The second (Select and Mask), is much more powerful and allows you to refine a detailed mask over your image.
With a careful selection and masking process, you can then create a new adjustment layer to increase saturation and vibrance. The same powerful masking technique also allows you to carefully adjust the highlights on your image, noise, sharpening, and much more.
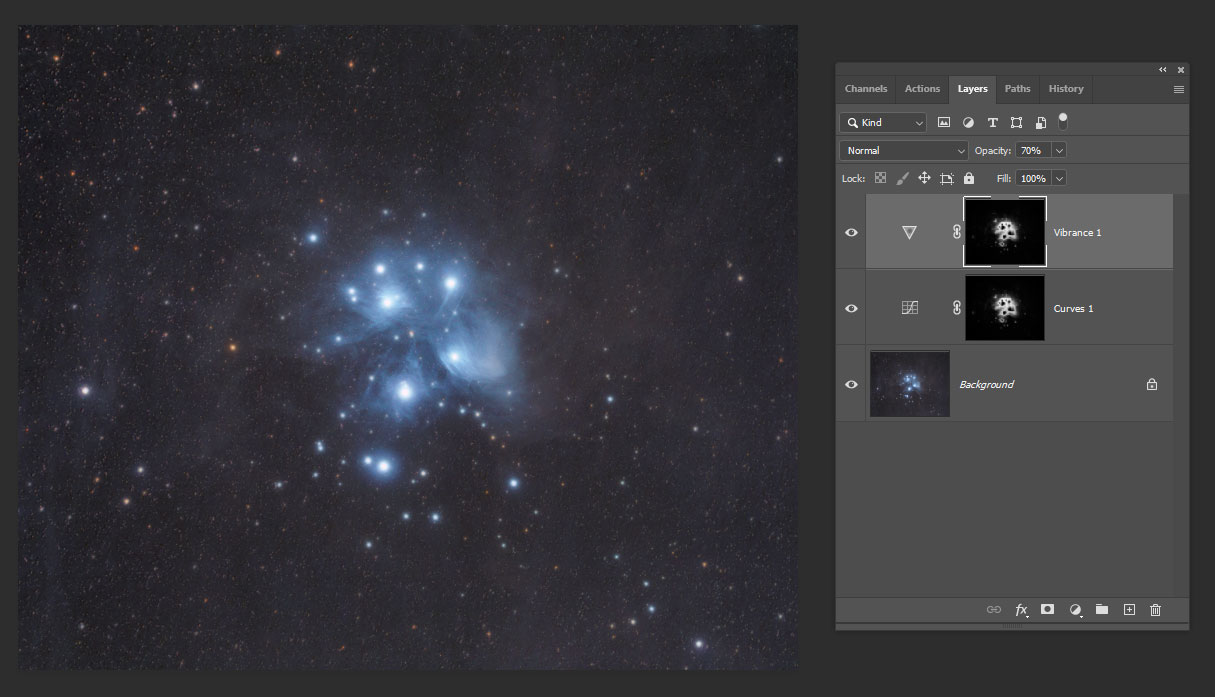
In the image of the Pleiades shown below, I selected the outer nebulous regions of the object to increase saturation and bring up the midtones.
At the heart of this image processing technique is the Color Range tool. This magnificent tool was introduced way back in Adobe Photoshop 3.0, and photographers have been enjoying it ever since.
Select Color Range
The Color Range tool in Photoshop is an effective way to start the selection process. I like to use this tool to create a rough mask that can later be refined.
You can find this tool in the main menu under Select > Color Range…

The Color Range Tool is under the “Select” heading in the main menu.
This opens up a new dialogue box with a number of options to choose from. The drop-down menu at the top labeled “select” is where you will need to decide which method you would like to use to quickly grab the details you’re interested in.
I find “sampled colors” to be the most effective because you can use the eyedropper tool to manually point to the colors in your image you would like to enhance.
The “highlights’ selection method is also very useful, as this is often the best way to separate your deep-sky subject (and stars) as a whole from a background sky.
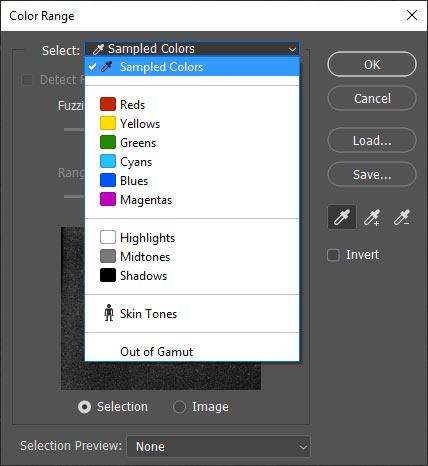
“Sampled Colors” lets you manually pick the color range in your image.
No matter which selection method you use, you’ll want to do a basic refinement of your selection using the preview window. Make sure the “Selection” option is ticked during this stage.
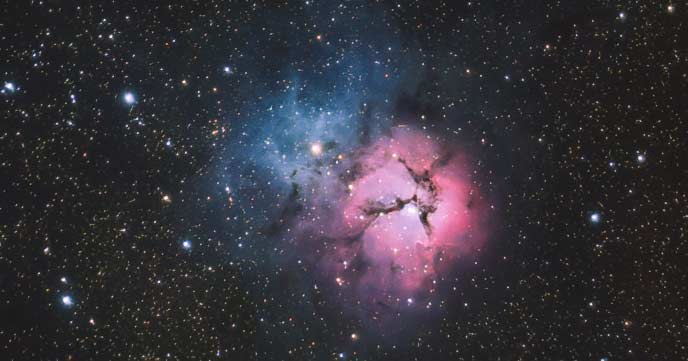
In my image, I want to select the blue areas of the Trifid Nebula, so I can apply a targeted adjustment to this element only.
You simply need to click the eyedropper on the color range you would like to isolate, and the preview window will display a rough mask over these regions in the preview window.
You can also change the selection preview dropdown menu to “Grayscale” for a live preview of your upcoming mask on your full-size image.
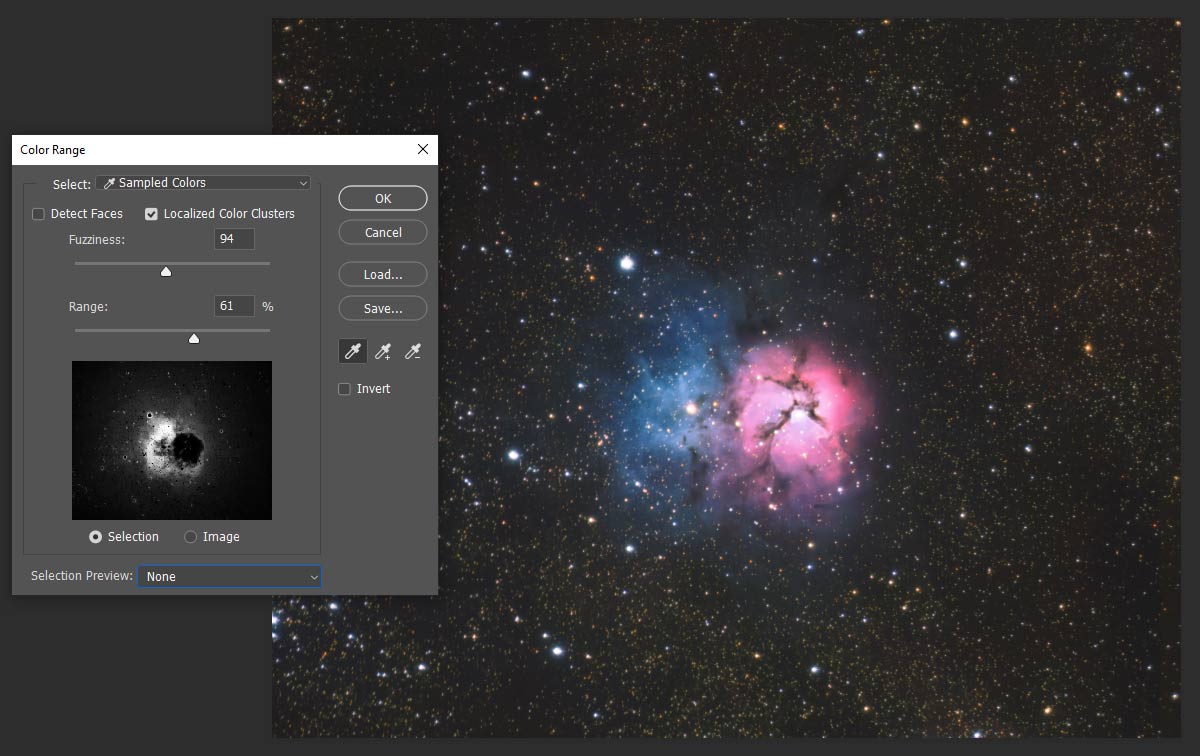
The preview window provides a rough idea of your initial selection (change the selection preview to grayscale to see a full-size image).
You can adjust the “fuzziness” and “range” sliders to increase the selection of the mask. Make sure that you have the “localized color clusters” checkbox ticked off for full control.
The eyedropper with the “+” and “-” icons next to them allows you to add or subtract from your selection, but they are a little too unrefined to be effective for our purposes.
The point of this step is to isolate the areas of color in your image that you wish to boost the colors in. Don’t worry about getting too specific at this point, as we will refine the mask substantially in the next step.
When you are happy with your rough color range selection, you can click the OK button. Now you should see the “marching ants” selection on your original image, which is not a very helpful indication of our selection.
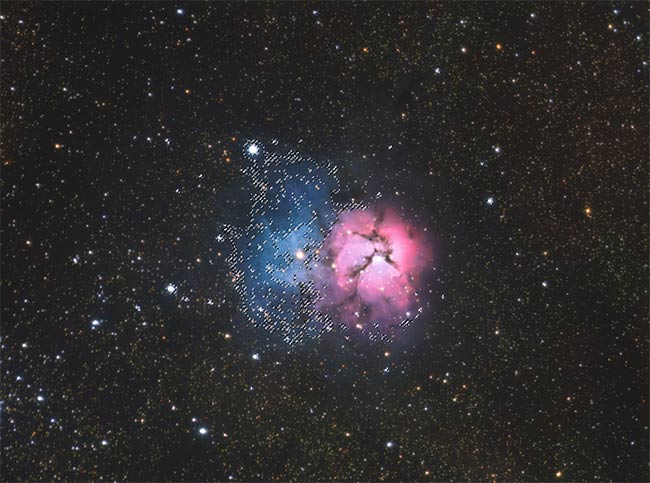
Our initial color range selection is applied.
The Select and Mask Tool
When it comes to processing astrophotography images, the Select and Mask tool is probably the most important tool in all of Photoshop. To really get the most out of your images, isolating one element from another is essential.
The Select and Mask tool allows you to refine your selections with an extremely robust set of adjustment options. Learning how to harness the power of this feature will most certainly improve your astrophotography image processing skills.
I will use the terms “selection” and “mask” interchangeably, as they are essentially the same thing. When we create a “layer mask” it just means that we are isolating a portion of the image to either be left-alone or targeted for adjustments.
With your original Color Range selection still active, navigate to the main menu, and click Select > Select and Mask.

The Select and Mask tool.
An important step to remember here is that you will want to make sure your original, rough, color range selection is active (as indicated by the marching ants on your image) before invoking the Select and Mask feature.
There is a lot going on in the Select and Mask dialogue box. Below, I have provided an overview of the key adjustment sliders you’ll want to pay attention to when processing a deep-sky image. Click the image for a larger version.
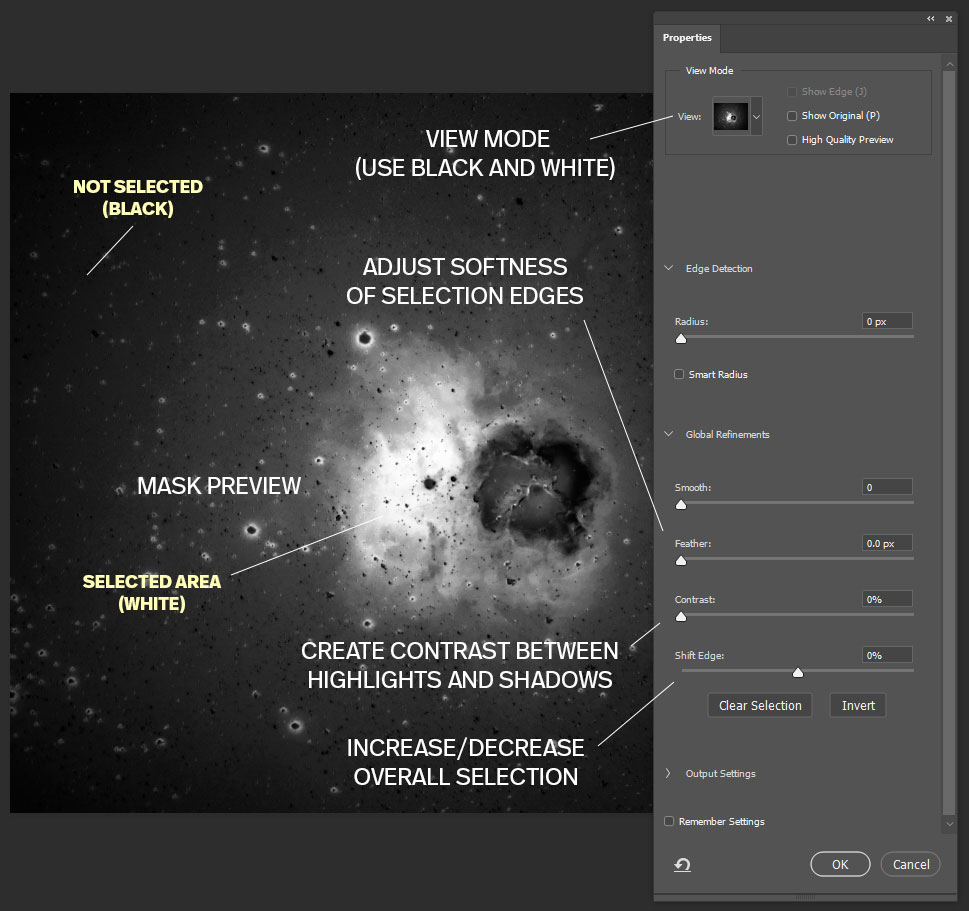
The purpose of this tool is to allow you to make precise refinements to your selection, and provide a clear indication of where this mask will be applied.
There are several options to choose from when it comes to the way the mask is displayed on your image. The view modes are as follows:
- Onion Skin
- Marching Ants
- Overlay
- On Black
- On White
- Black and White
- On Layers
In my eyes, the Black and White view mode is by far the most useful. You may see the Onion Skin view mode appear by default, which I have found to be the second-best option from this list.
Adjusting the Sliders to Refine Your Mask
The three most important sliders to adjust in the Select and Mask dialogue box are Contrast, Feather, and Shift Edges. A balanced approach between all three will yield the best results.
The Contrast slider is used to further separate your masked area from the rest of the image. With the Black and White view mode active, increasing the Contrast Slider will result in a more defined “shape” of the color range, with less of a transition area between the highlights and shadows.
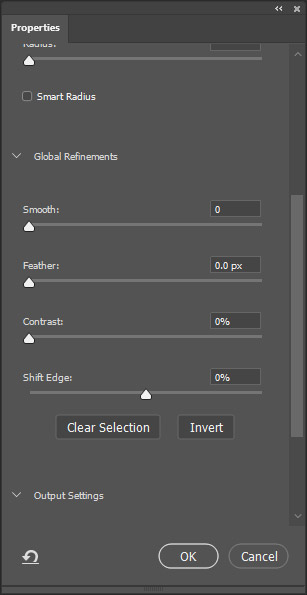
The important adjustment sliders in the Select and Mask tool.
The Feather slider is the most important of them all because this creates a smooth transition between the edges of your mask and the background. Aim for super-soft edges around your targeted area to avoid harsh edges between your manipulated elements.
The Shift-Edges slider is useful for expanding the area of your selection mask overall, retaining any feathering settings you have put in place. Between these three adjustment sliders, you should be able to create the ultimate layer mask for your image.
Note: You can use the brush tool (set to your desired width and softness) to remove specific areas of your selection. On a PC, just hold down the Alt key to subtract from the image when painting with the brush tool.
Accept the Mask and Create and a New Adjustment Layer
The default action that takes place after hitting OK on the dialogue box is to output to a selection. This will display the marching ants view overlay on your image.
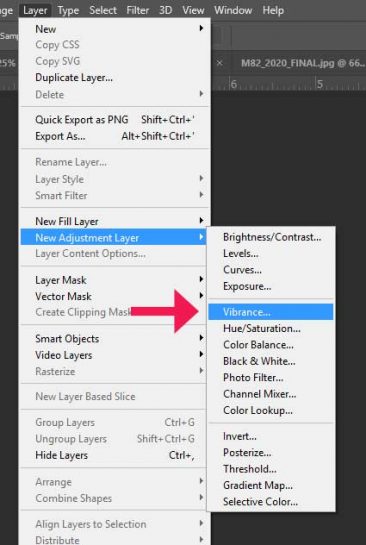
From here, you will want to create a new adjustment layer to apply your desired saturation boost and any other effects. For increasing color, you’ll want to choose the Vibrance… adjustment layer.
The advantage of this procedure is being able to see a full-size preview of your image with your targeted adjustments to the selection happening in real-time.
You may want to choose “output to: new layer“, as this will essentially accomplish the same result.
In this scenario, you would simply edit the new layer with your desired effects rather than as a new adjustment layer.
Selective Color Boosting
By now you should have a solid understanding of how the color range selection tool works, and why it’s important to isolate the specific areas of your image that you want to manipulate.
With a well-defined selection mask placed over your image (remember, the white areas will be affected, the dark will not) you can begin to increase the vibrance and saturation of the important colors of your nebula or galaxy.
In case you’re getting a little lost in the order of things, here is a step-by-step path to get you up to speed:
- Select > Color Range
- Use Sampled Colors from Dropdown Menu
- Place the eyedropper on the color range you would like to boost
- Adjust the fuzziness and range sliders to roughly isolate these colors in the image
- Click OK to confirm your rough selection
- Open Select > Select and Mask to further refine your selection
- Use the Feather, Contrast, and Shift Edges sliders to create a smooth mask on your subject
- When you are happy with the selection (remember, no hard-edges!), click OK
- With the selection active, click Layer > New Adjustment Layer > Vibrance
The following illustration shows what your screen should look like at this stage. The new adjustment layer is the top-most layer, which ensures that your edits will be seen as you make adjustments.
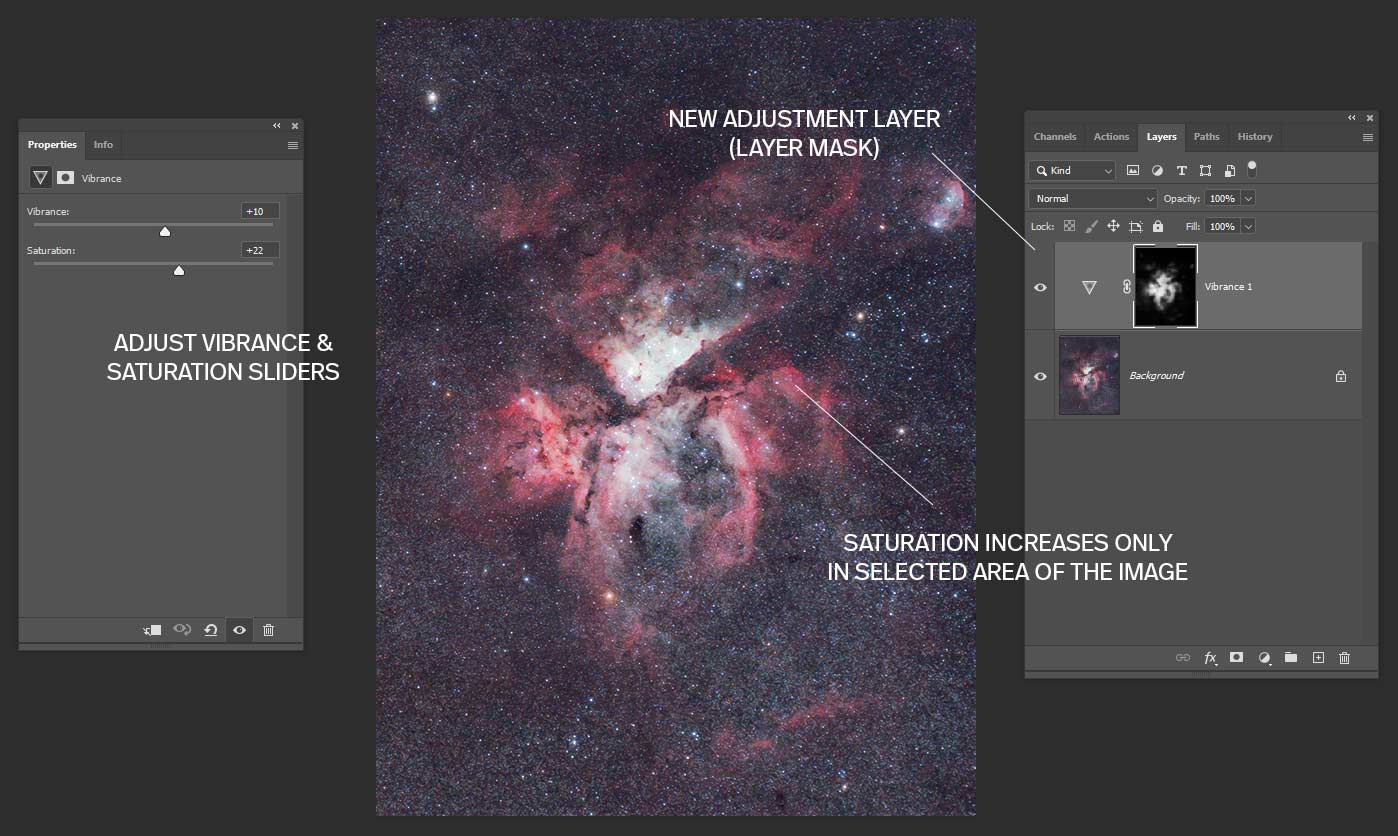
Adjust the vibrance and saturation sliders to your selected area.
Now, you can adjust the vibrance and saturation sliders to increase the color of your selected area. Pay close attention to your image at a glance at this stage.
Remember, drastic changes made to isolated areas of the image run the risk of looking unnatural. This is another reason why creating a mask with a soft, feathered edge is very important.
Any areas where the mask stops abruptly may appear odd in your final result. The more you “push” the data, the more pronounced this effect becomes.
In the example below, I chose to increase the saturation of the warmer colors in the image. The Pinwheel Galaxy appears as a very cool blue color when stretched, and I wanted to contrast these cool areas with the warmer core of the galaxy.

In this image of M101, Selective Color Boosting was used to keep the core warm, and the spiral arms cool.
There are no rules when it comes to the exact saturation settings you should use to enhance the color of your image.
I tend to bump the sliders up to about 15-20, depending on the deep-sky object, and the desired look I am going for. Once you are happy with the amount of boosting to the saturation and vibrance you have applied, you can simply close the properties window.
The new adjustment layer will sit on top of the other layers in your image. From here, you can save the file with the layers intact (.PSD file), or simply flatten the image and save it as a JPEG or TIFF.
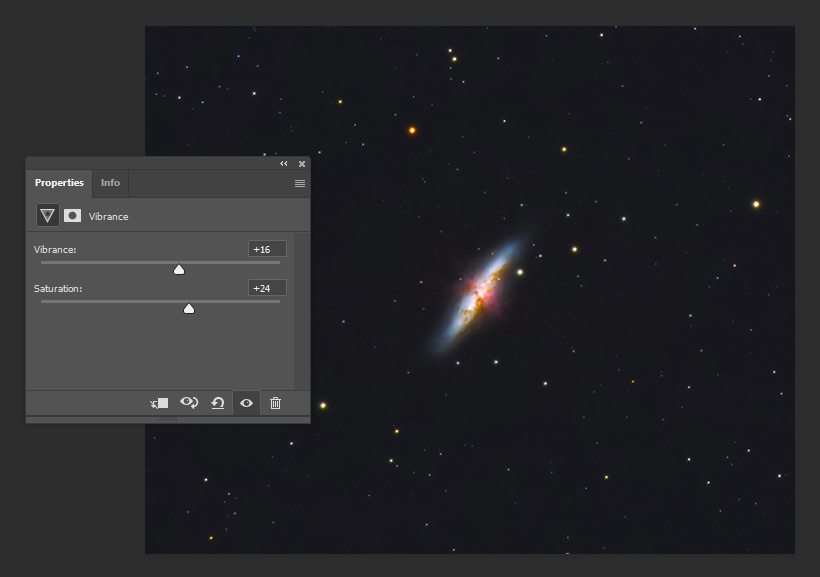
Typical vibrance and saturation settings for a deep-sky image.
Adjusting Color Balance, and Photo Filters
Since you have gone to the trouble of creating a highly selective layer mask, why not use it to make other color enhancements as well?
In certain situations, creating a color balance adjustment layer is helpful. You can gently pull the colors towards a cooler or warmer result as desired.
If bumping up the saturation and vibrance sliders don’t achieve the look you are going for, you can also try a specific photo filter.

The color balance and photo filter adjustment layers can be useful for certain looks.
I have found the warming filter to be useful for enhancing star colors, and the cooling filter to be useful for a natural background sky. In all scenarios, you’ll want to mask the area that you are applying the color filter to.
Adjust the Opacity of the Adjustment Layer
Remember, you can always adjust the opacity of your new adjustment layer, and tone down the amount of saturation in your image.
If you feel like you have overdone it, just bring the opacity slider down to about 25%. Turn the layer visibility on and off to observe the subtle enhancement this technique makes to your astrophoto.
I usually make my vibrance/saturation layer rather aggressive, and then bring the opacity slider down to about 50% to “normalize” things a little bit.
You will have to practice the selective color boosting technique on a few images to really get a feel for it. The more types of images you perform this task on, the more comfortable you’ll feel.
Remember, this method can be useful for all types of astrophotography, not just deep space nebulae and galaxies.

Final Thoughts and Advice
If you were able to follow along with this tutorial, you should have a good feel for the Select and Mask tool, and its power. You can use the same selection process to perform other tasks on your image, from noise reduction to sharpening.
Although the examples in the tutorial focused on selective color boosting nebulae and galaxies, the technique works exceptionally well when processing star colors, too.
In this case, you would want to mask out the stars in the image on their own, so you have full control over their saturation without disrupting the rest of the image.
For the wide-field view of the Eagle Nebula shown below, I isolated the stars using the “highlights” color range mode and increased their saturation independently from the rest of the image.
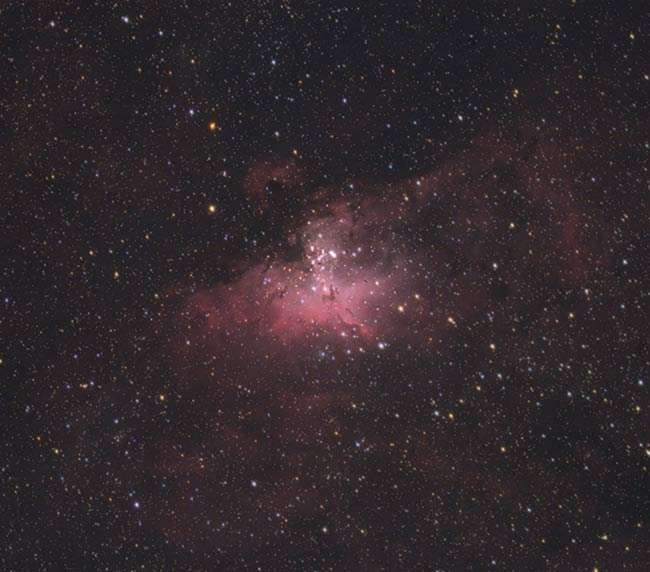
The colorful stars surrounding the Eagle Nebula.
If you are unsure about how far to take your image, in terms of boosting saturation, I find it useful to use a reference image. I often search for APOD images of my target and see the direction that other amateur and professional astrophotographers have chosen to steer the image in.
If I could offer one more piece of advice, I would like to remind you why you began your journey in astrophotography: enjoyment. Adjust your personal images in whichever way you think looks best.
If you have found this image processing tutorial useful consider purchasing my premium astrophotography image processing guide.
How are your tutorials published/available and what costs are associated with them. I am more acquainted with PS Lightroom than Photoshop. I have used Images Plus until 2 strokes that affect me physically & mentally so my efforts in Astro Photography and visiting the gathering at Mt. Forest annually.
Hi Doug! I have one image processing guide available currently (through Sellfy), it’s $26 and covers the pre-processing stages of the image all the way through the finishing touches (it’s 90% Photoshop). Cheers
Thanks Trevor, as ever as very informative tutorial. I use Photoshop a lot and there are so many ways to do similar things it’s easy to forget what options there are. I have your processing guide which is a great help, and I certainly need to use the select and mask tool more :-).Thanks again.
Hi Trevor, very good information. I’m wondering what scopes you used for the images.
Hi Trevor, do you have a link to that guide?
thanks
Matt