Photograph the Milky Way this Summer

I recently returned from an unforgettable astrophotography trip where I photographed the Milky Way under some of the darkest skies in the Eastern United States. The Cherry Springs Star party is an annual astronomy event where night sky enthusiasts come together to appreciate the true beauty of an unspoiled night sky.
In this post, I’ll explain how I photographed the Milky Way with my DSLR camera, using a wide-angle lens and a small star tracker mount. I’ll also share the deep sky image of the Trifid Nebula I captured through my refractor telescope and a cooled CMOS camera. As far as astrophotography-based camping trips go, it doesn’t get any better than this.

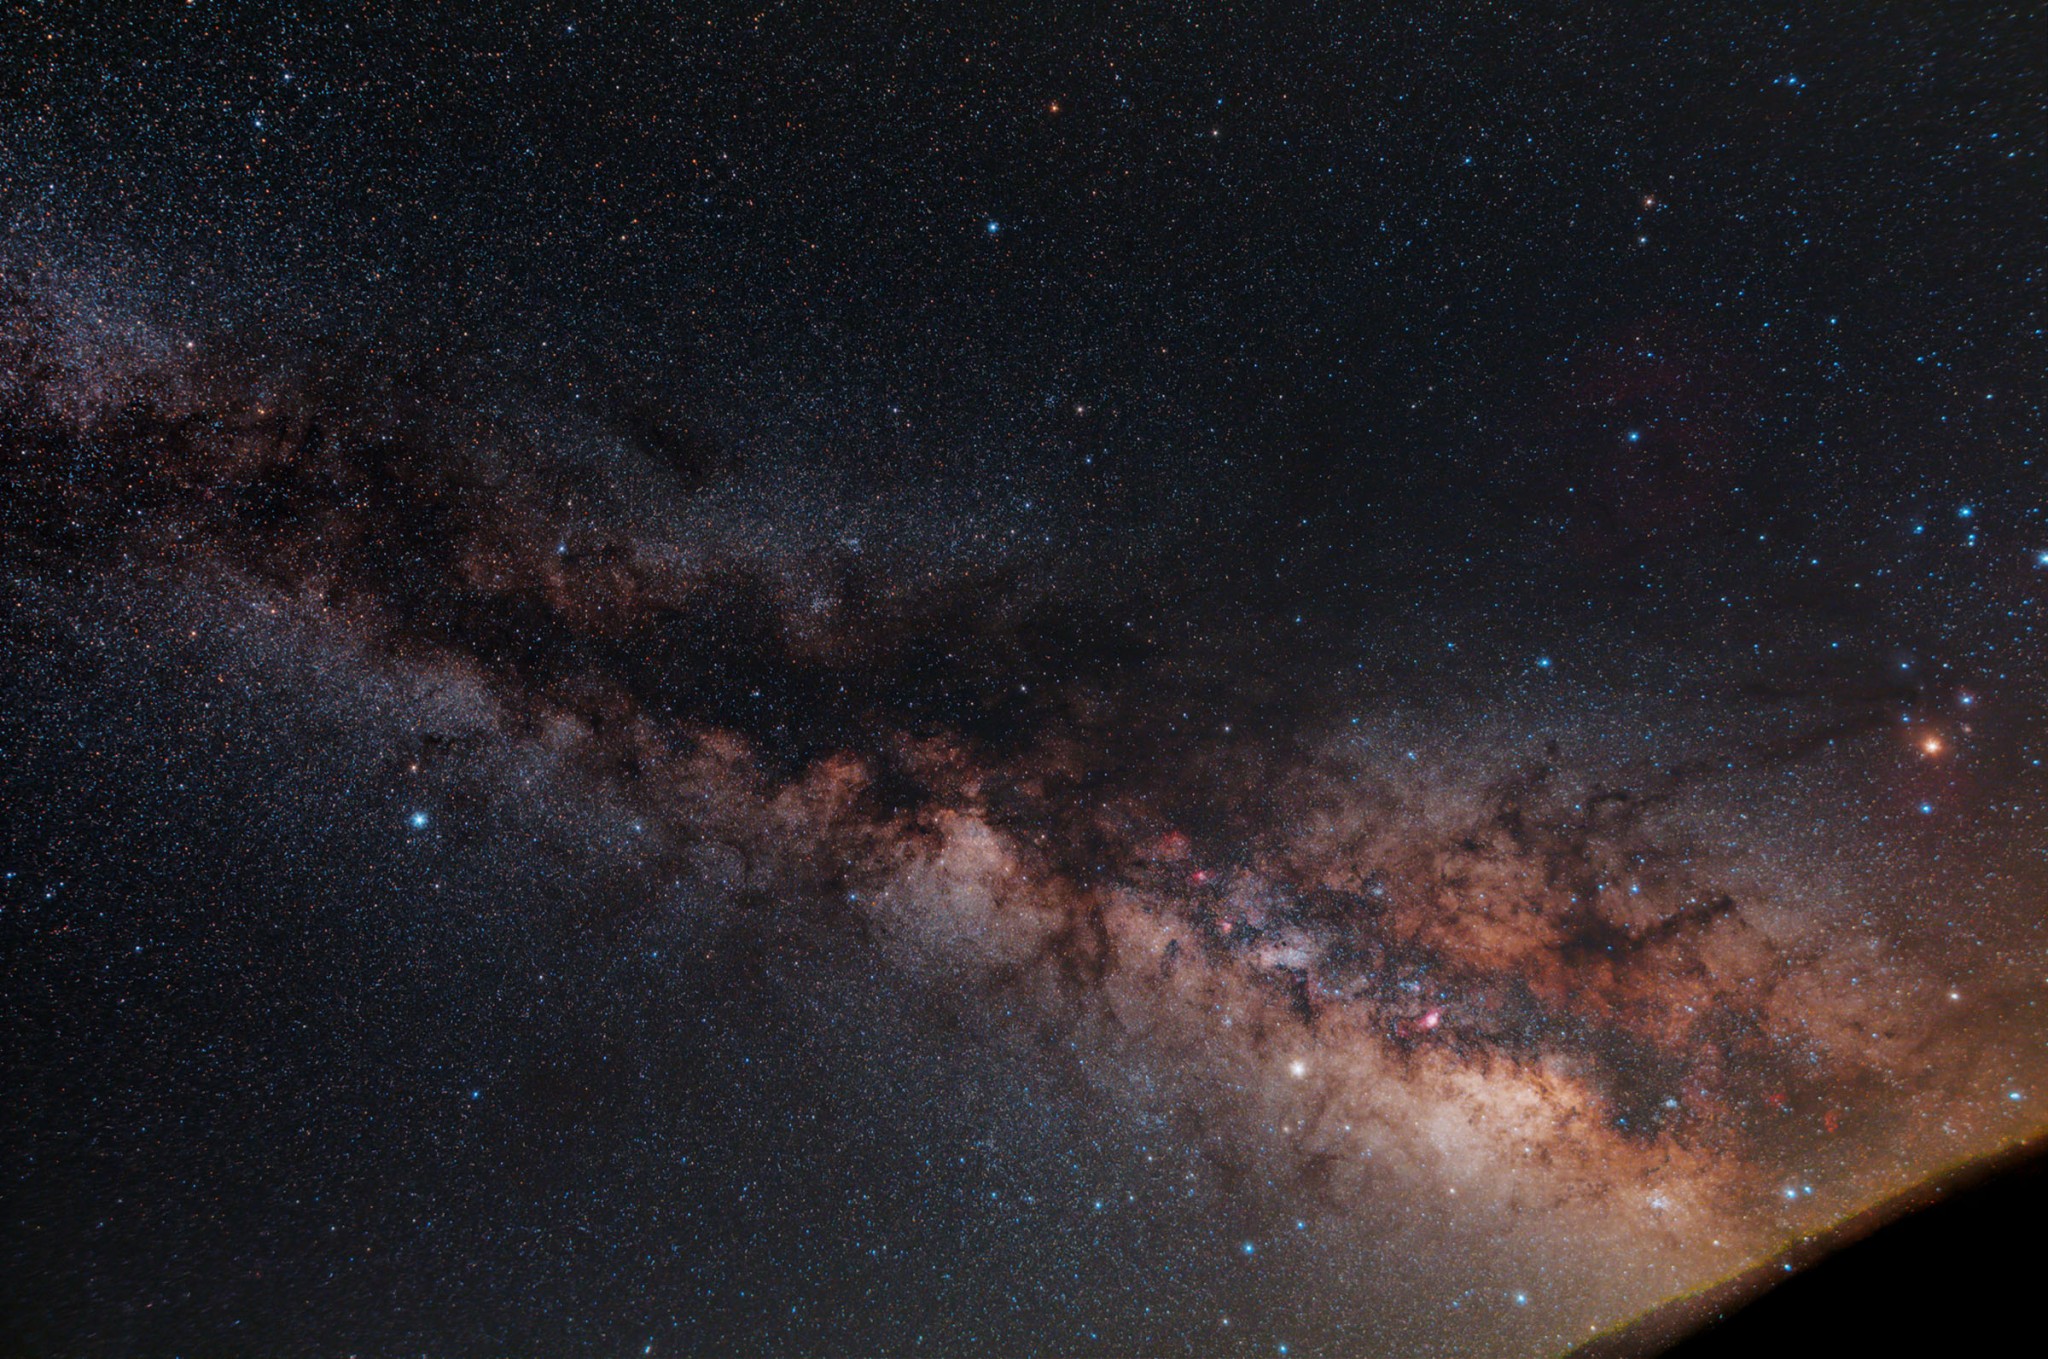
My view of the Milky Way from the Southern Hemisphere (Yulara, Australia).
Photographing the Milky Way
Before I describe how I photographed the Milky Way on my latest astrophotography adventure, a bit of backstory:
Deep-sky imaging with a DSLR camera and telescope from a light-polluted backyard in the city is challenging. We use light pollution filters and isolate narrowband wavelengths in our targets to separate the beautiful nebulae and galaxies from a washed-out sky.
As challenging (and rewarding) as this process may be with a telescope, an even bigger challenge is to capture a clean wide-angle shot of the Milky Way from a bright city sky using a camera lens. My previous attempts at this feat have resulted in odd-looking portraits of our night sky because of image-processing workarounds that can’t replace a truly dark sky. (Correcting gradients is often the biggest challenge)
The reason I mention this is to segue into my next point. When I do get the opportunity to travel to a dark-sky site, I try to capitalize on the opportunity by capturing astrophotography images that are simply not possible from my backyard. There is absolutely no substitute for dark skies.
Video: An amazing trip to the 2018 Cherry Springs Star Party
In the video, I share a brief description of the astrophotography equipment used to capture my deep sky target (the Trifid Nebula), but failed to explain the gear used to photograph the Milky Way image that was featured at the end. The following information is a complete breakdown of the simple, yet essential gear I use for wide-angle Milky Way photography.
What Do You Need?
It’s hard to argue that purchasing a DSLR camera isn’t the most pivotal first step towards astrophotography. Whether you want to photograph the Milky Way using a camera lens or dive into deep sky astrophotography through a telescope, a DSLR camera such as the Canon Rebel EOS T7i can take you there.
A DSLR offers many pivotal advantages over a point-and-shoot camera when it comes to astrophotography. The biggest difference is the complete control over the image-capturing process when using the camera in manual mode. Exposure length, aperture, and ISO are just a few of the many variables that come into play when photographing the Milky Way.
I personally use an older camera model, the Canon EOS Rebel T3i, but the newer versions of this camera body add increased resolution and higher sensitivity in low-light situations like this. If you’ve already got a DSLR camera, the following pieces of gear can take your Milky Way photography to the next level.
Related Post: Astrophotography Cameras
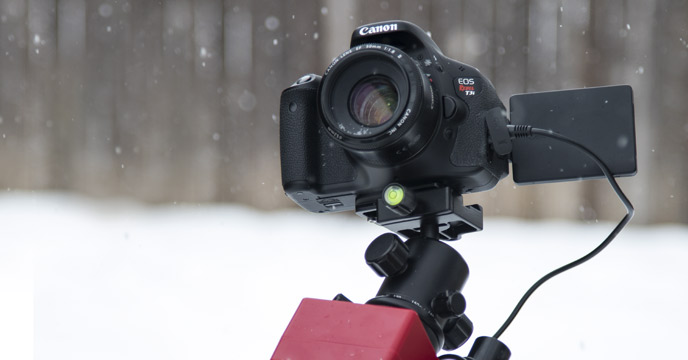
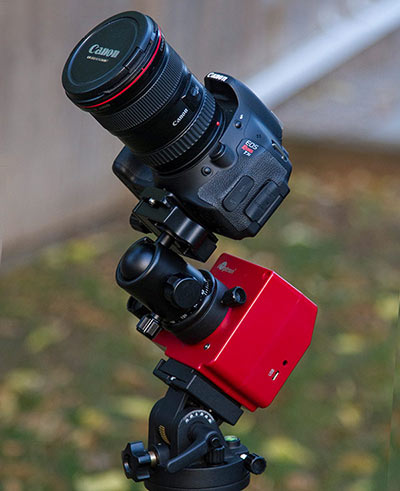
A Sky Tracker Mount:
By attaching my DSLR camera and lens to the iOptron SkyTracker Pro camera mount, I am able to shoot long exposures of 2 minutes or more without star-trailing. To do this, the mount must be properly polar-aligned and mounted to a sturdy tripod to avoid any star trailing.
The built-in polar axis finder scope makes this process rather quick and easy, as long as you know where to position the North Star in the illuminated reticle. I use the Polar Finder app on my Android smartphone to gather this information.
With a ball-head attached to the mount, it’s easy to point your camera in a variety of handy upward directions to photograph the night sky. I use the iOptron branded ball-head mount, which has been extremely reliable and secure when used with my Canon DSLR’s and wide-angle lenses.
When everything is secure and polar aligned, the astrophotography potential of this affordable star tracker is tremendous.
Related Post: How to Polar Align Your Telescope
This little red box was designed specifically for lightweight and portable long exposure nightscape astrophotography. The uncomplicated nature and proven capabilities of this camera mount easily make the SkyTracker one of my favorite pieces of astrophotography gear I’ve ever used.
A Sturdy Tripod
I use a lightweight carbon fiber camera tripod to keep the SkyTracker steady and accurately track the apparent movement of the night sky. The model I use is extremely lightweight and perhaps not sturdy enough for some imagers. I compensate for this by hanging my camera bag from the center column to lower the center of gravity.
I’ve owned many heavy aluminum tripods in the past, and I prefer a lightweight carbon fiber tripod that is easy to pack and collapses small enough to fit into a backpack or camera bag. With an accurate polar alignment being critical to the success of your astrophoto, having a tripod that won’t budge during your imaging session is a must.
A Remote Shutter Release Cable
The imaging sequence is automated using a remote shutter release cable with a built-in timer. I can choose the exposure length, number of shots, and set a delay between each shot. (A delay can help reduce noise by letting the sensor cool down between shots)
This inexpensive model I found on Amazon has served me well for years and runs on two triple-A batteries. The internal lithium-ion battery in the SkyTracker camera mount, camera battery, and the remote shutter release cable make this a completely portable astrophotography rig that takes up very little space when traveling. (I use an AC adapter to power the camera when possible)
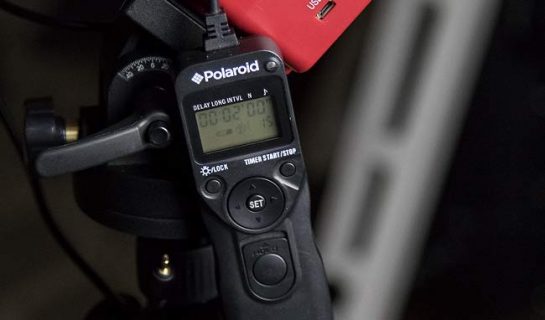
The Remote Shutter Release Cable I Use (Amazon)
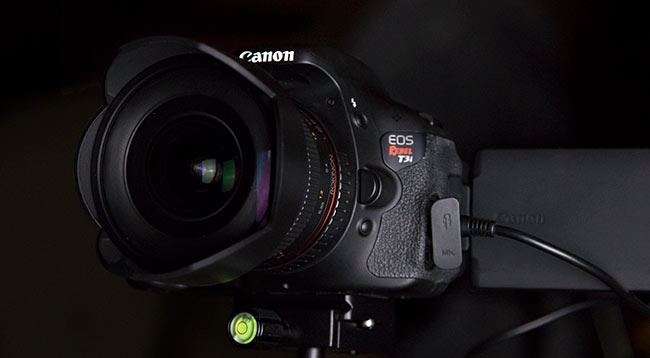
A DSLR Camera
The camera I use for most of my DSLR astrophotography is a Canon EOS Rebel T3i (600D) that has been full-spectrum modified for astrophotography. The modification involved removing the stock IR cut filter in the camera to capture more “reds” in certain nebulae. Although it helps to reveal certain areas of nebulae, an Astro-modified DSLR is not necessary to produce stunning images of the Milky Way.
Recommended Astrophotography Lens
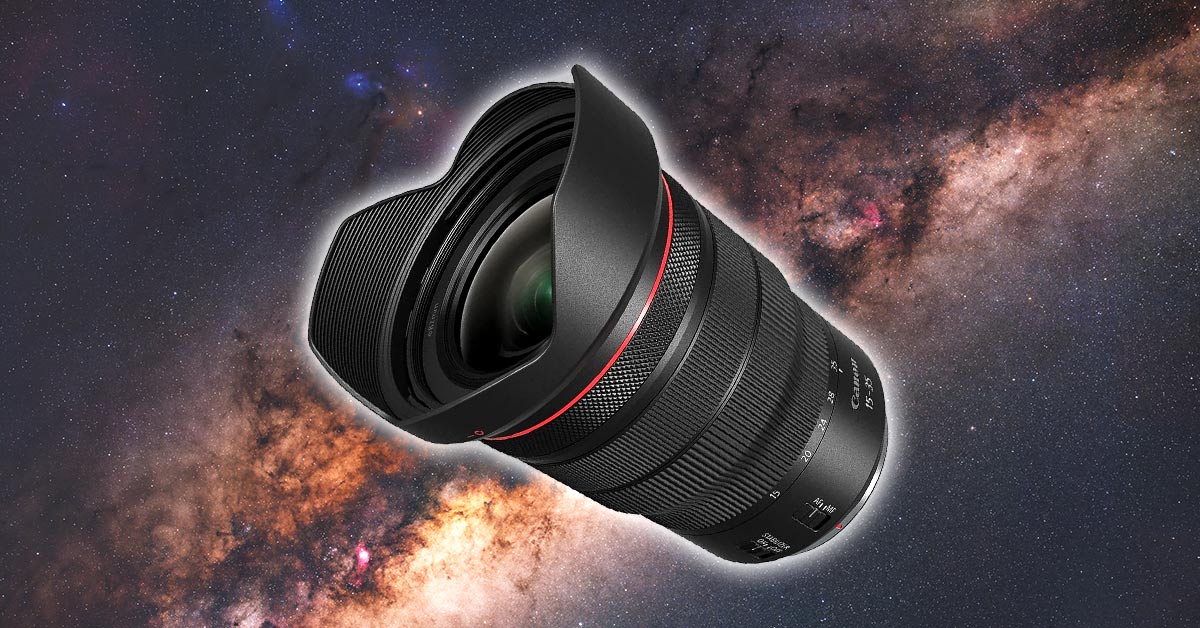
The camera lens used for the Milky Way photos in this post is the Rokinon 14mm F/2.8. This lens is widely regarded in the astrophotography community as a great, affordable camera lens for Milky Way photography. At 14mm, the Rokinon offers the widest field of view of all my camera lenses. It’s also one of the fastest ways for me to collect starlight thanks to an f-ratio of F/2.8.
Late last year, I announced the purchase of this budget-friendly astrophotography lens on Facebook and was pleasantly surprised by the example images being shared with it. My early testing on the Winter and Spring constellations was promising, but I was really interested in capturing the Summer Milky Way.
The Rokinon 14mm F/2.8 Lens used for the Milky Way images below
This is a completely manual lens, meaning you need to turn a dial to adjust the aperture (You cannot adjust this in-camera). Although this lens lacks autofocus and image stabilization, these features are unused during long-exposure nightscape astrophotography. I have found that stopping the f-ratio of this lens down to F/3.2 produces better results in terms of star quality.
When it comes to photographing the Milky Way, it’s tough to beat the affordability and performance offered by a portable setup like this.
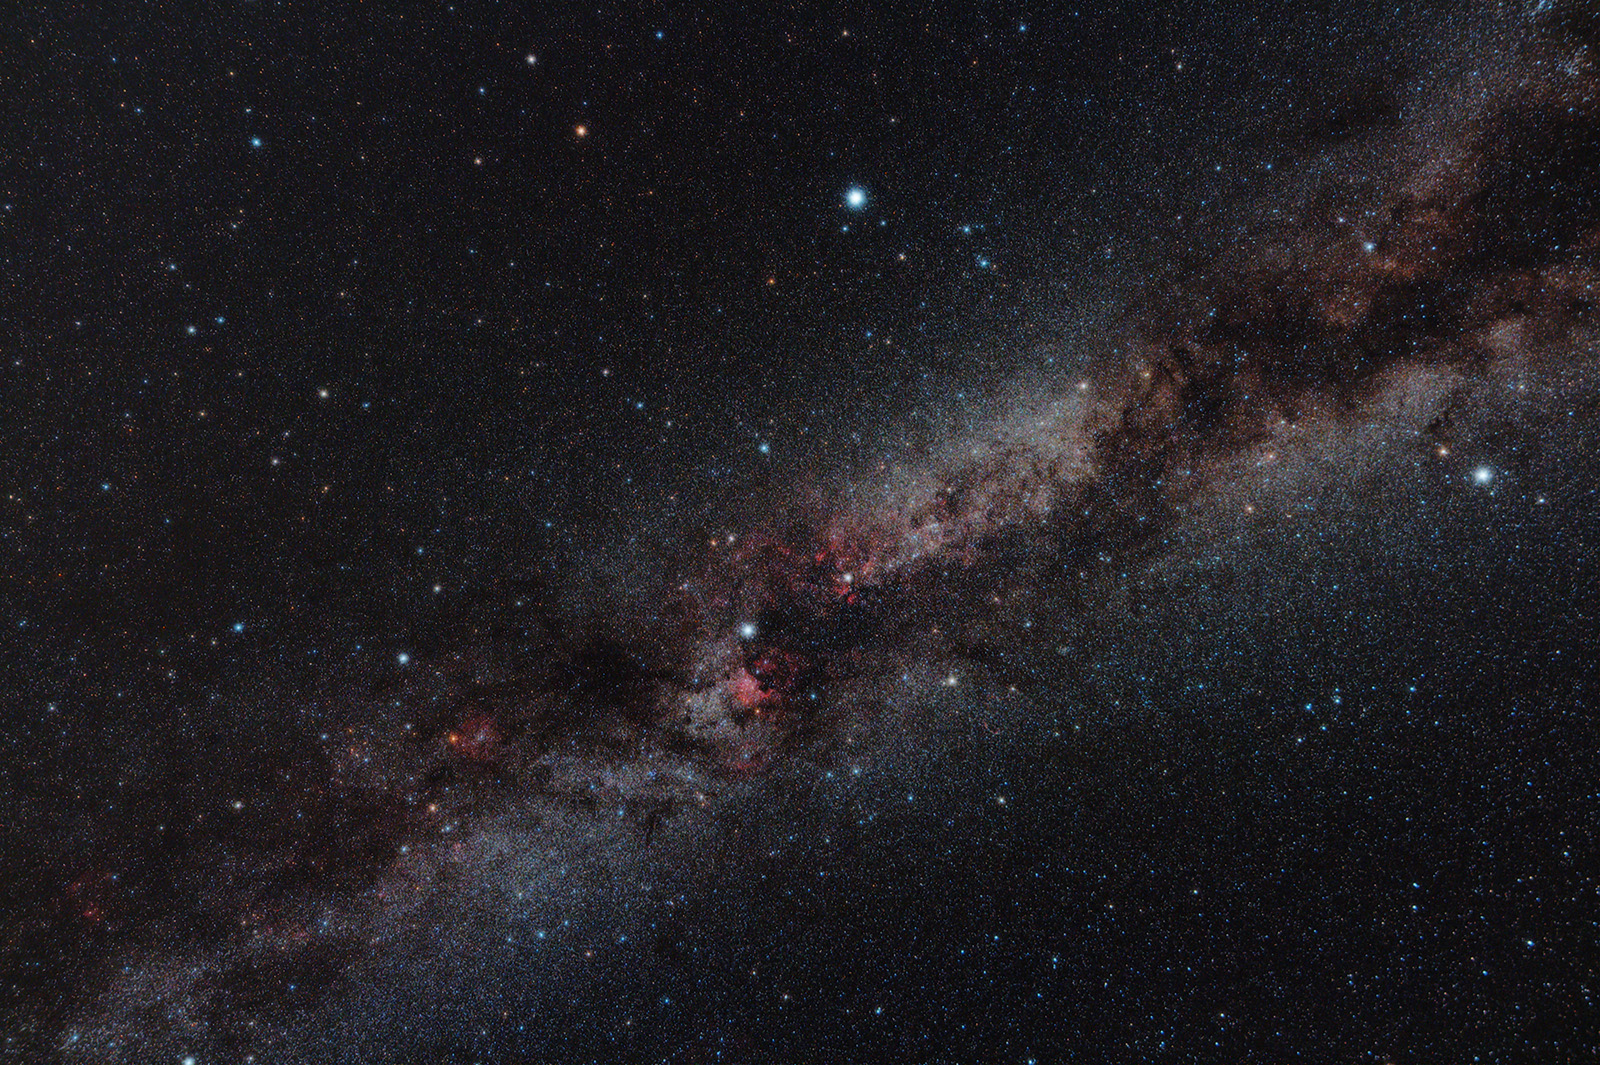
The Milky Way using the Rokinon 14mm F/2.8 Lens
The photo above uses 60 x 2-minute exposures taken at ISO 1600. The camera lens was fixed at a focal length of 14mm, and the f-ratio was set to F/3.2 for a sharper image.
The image frames were registered and stacked using DeepSkyStacker to improve the signal-to-noise ratio. The 2 hours of integration time produced a final high-resolution photo of the Milky Way with reduced noise and much more detail.
Camera Settings
- Exposure: 120 seconds
- ISO: 1600
- F-Stop: F/3.2
- White Balance: Auto
- Number of Frames: 60
As you can see, the white balance settings on your camera are not important, as long as you are shooting in RAW file format. Shooting in RAW allows you to adjust individual parameters such as white balance after-the-fact, during post-processing. There are many excellent ways to process a photo of the Milky Way (including making edits in Adobe Camera Raw), but my personal preference is to stack the unedited image files in DeepSkyStacker first.
This registers the frames so that the stars align with each other, and then stacks them together to reduce noise and improve detail. The final stacked image that DSS produces can then be further tweaked in Adobe Photoshop to pull out all of the colorful information living within the data. The entire process is much more enjoyable when the images are captured from a dark sky site with little to no light pollution.
The Summer Triangle and the Milky Way from Cherry Springs
How it Works
The SkyTracker camera mount slowly turns its RA (Right Ascension) axis at the same speed the night sky appears to be moving. It compensates for the rotation of the Earth and freezes your target for a long exposure photo. A great photo of the Milky Way can be produced when you combine several images together of 60-seconds or more. The stacking process improves the signal-to-noise ratio, and allows you to collect much more detail than you ever could in a single shot.
With a wide-angle lens and a DSLR camera, exposures of up to 3-minutes or longer are possible on the SkyTracker Pro. The images will reveal much more detail in the Milky Way than it is possible to see with the naked eye, and will not suffer from star-trailing. The same concept applies to deep sky astrophotography, but on a more complex level. (Balance and polar alignment accuracy become critical for a clean shot).
Related Article: Getting Started in Astrophotography
Related Article: The Best Milky Way Lens (Complete Guide)
Deep Sky Target: The Trifid Nebula
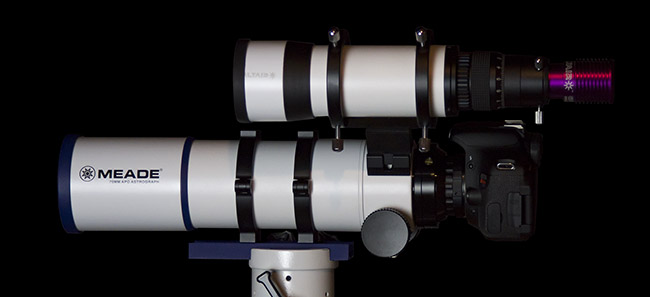
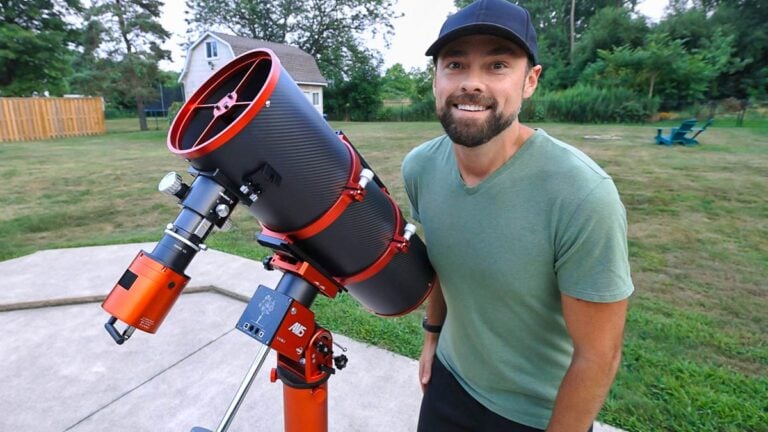
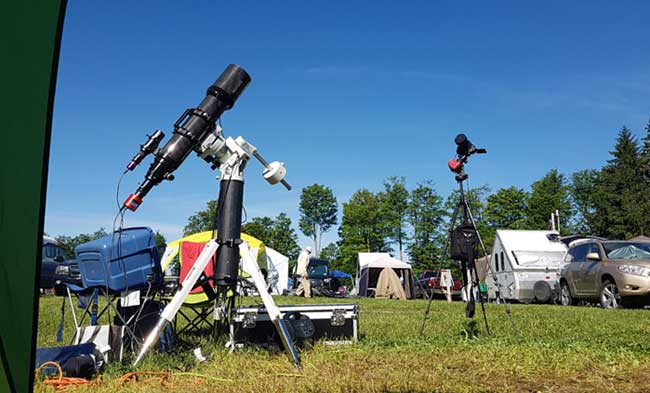
I couldn’t spend time photographing the Milky Way without also capturing a deep sky object through my telescope. While my DSLR camera and lens fired away at the heavens, I commisioned the Explore Scientific ED140 refractor to collect light on the colorful Trifid Nebula.
To carry a large refractor telescope of this size effortlessly across the sky required a tracking telescope mount with an adequate payload capacity.
Having never traveled with the iOptron CEM60 mount before, I spent a large amount of time making sure it was properly leveled and polar aligned when I arrived at Cherry Springs. The campers next to me both owned CEM60’s as well and gave me some pointers on how to position the center pier in a more practical position. (The higher the pier, the less worry there is of a long telescope running into the mount)

The iOptron CEM60 Mount with an Explore Scientific ED140
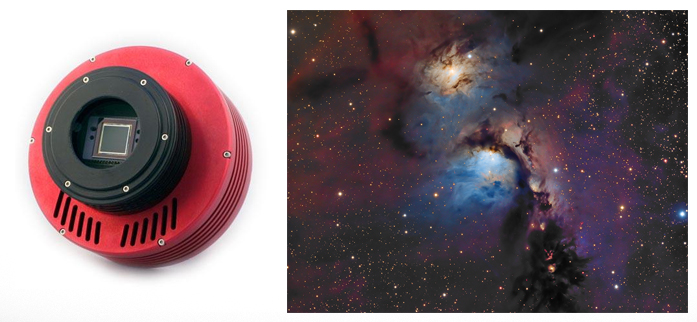
With my DSLR in use on the SkyTracker, I decided to use a cooled CMOS camera (ZWO ASI294MC-Pro) under dark skies for the first time. This proved to be a ground-breaking experience, as this combination is capable of producing results not possible in the city. I envy the astrophotographers with dark skies in their backyard, as this trip reminded me of just how much easier everything is when processing. (More on this later)
As dusk set in, I corrected my rough polar alignment and ran a 3-star alignment routine. With the ASI294MC-Pro camera attached, I use the live view mode of Astro Photography Tool to center my alignment stars in the field of view. The William Optics Star Spikes Bahtinov mask creates intense star diffraction spikes that not only aid in focus, but shows the direction of my alignment star even when it is not in the field of view. (The long edges of the star spikes will enter the frame)
Target Acquired: The Trifid Nebula
I chose the Trifid Nebula because it sits low on the horizon here in the Northern Hemisphere. This makes it difficult to capture from my backyard, so this was my best chance to catch it this summer. This nebula is a combination of an emission nebula and a reflection nebula in one, giving it a pink and blue appearance. It’s one of the most iconic and colorful deep sky objects in the night sky and a target that inspired me to get into astrophotography early on.
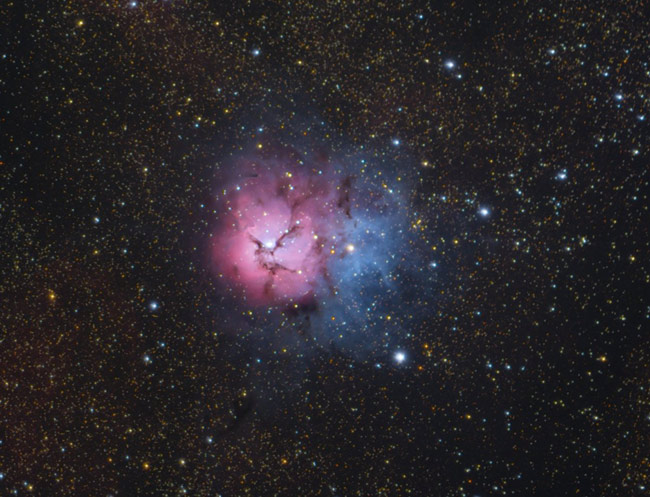
Image Details
- Exposure Time: 61 x 3-minutes (3 Hours, 3 Minutes Total)
- Camera: ZWO ASI294MC-Pro
- Binning: 2×2
- Filter: Astromania Luminance
About the Cherry Springs Star Party
The dark skies are by far the biggest appeal when it comes to the Cherry Springs Star Party. However, there is much more to this event than that. There are interesting talks given by industry professionals and astronomy enthusiast inside the on-site pavilion during the day. These astronomy presentations discuss everything from current space program endeavors to beginner astrophotography tips and advice. In fact, there is a good chance I will be giving a talk on beginner deep sky astrophotography at next years event!
There are vendor booths set up during the day with an impressive assortment of astronomy gear and accessories available for purchase and inquiries. The The 24-hour snack bar caters to astronomers by offering items such as coffee and pizza at all hours of the night. The CSSP is truly meant for astronomers, at an incredible IDA (International Dark Sky Association) site.
Related Post: The 2017 Cherry Springs Star Party

Amateur Astrophotographers at the Park
The number of deep sky imaging setups on the field at Cherry Springs is staggering. Clearly, astrophotography is a top priority for many (if not most) of the attendees of the event. I met some wonderful new astrophotography friends at the star party this year.
With common bonds in such a specific hobby, it’s easy to hit it off in a hurry. One of those gentlemen was Adam, also known as reddog1972 on Cloudy Nights. Adam absolutely floored me with the results he was getting using his 2 Orion equatorial telescope mounts. He captured exquisite portraits of objects like the Lagoon Nebula, Trifid Nebula, and even the Andromeda Galaxy.
Perhaps the most impressive part was that his shots were unguided, using affordable astrophotography mounts. I have recommended the Orion Sirius EQ-G Computerized GoTo Telescope Mount to beginners for many years, and Adam validated the practicality of this advice once more with his incredible images taken at Cherry Springs.

The Lagoon and Trifid Nebulae by Adam Toder(reddog1972 on Cloudy Nights)
Id like to thank the organizers of this event for an amazing time, and also the welcoming vendors and attendees. The star party lives up to the high expectations of an event held in such a remarkable location. From the friendly service at the 24-hour snack bar, to the bathroom facilities lit up in red lights – Cherry Springs is probably one of the best places on Earth to photograph the Milky Way.
Upcoming Image Processing Tutorial
For those interested in a Milky Way image processing tutorial, I will be publishing an updated video on my YouTube channel later this month. I will walk you through the steps taken in DeepSkyStacker and Adobe Photoshop to turn the single 2-minute image frames into the final image you see on this page. This will include any additional actions or plugins used to produce a high-resolution image for online sharing or print. Stay tuned!
Update:
I just recorded a tutorial on Milky Way image processing in Photoshop. The video below walks you through the stacking stage, right through to the final actions used to enhance the beautiful colors and details of the Milky Way:
Video: How to Edit Milky Way Photos in Photoshop
A summary of the astrophotography equipment used on this trip:
Cameras:
Mounts:
- iOptron SkyTracker Pro Camera Mount
- iOptron CEM60 Center-Balanced Equatorial Mount
Telescope:
Filters:
IDAS LPS D1 Clip-In for Canon APS-C Sensors