Astrophotography in Costa Rica (Carina Nebula)
I’ve just returned from a vacation to Costa Rica with the goal of capturing some astrophotography images from the resort. Being so close to the equator, the night sky featured many new southern hemisphere deep-sky targets I had never seen before.
Aside from astrophotography (including an impromptu Facebook Live stream from our balcony) my wife and I also enjoyed a private birding tour and some much-needed relaxation. The average temperature from home in Canada was around -10 degrees Celsius, in Costa Rica, 33.
Despite the pleasant temperatures and an impressive number of clear nights during our trip, it took some creativity and persistence to accomplish my astrophotography goals from this location. All-inclusive resorts never sleep, which means that the lights never go out.
In this post, I’ll share my experiences photographing the night sky from Guanacaste, Costa Rica. For a fun overview of my experience, and some of the raw emotions this trip included, please watch the video.
Astrophotography from Costa Rica (On our honeymoon).
Astrophotography in Costa Rica
The resort we stayed at was Dreams Las Mareas, located in the northwestern peninsula of Guanacaste. The closest city is La Cruz, which is very close to the Nicaraguan border.
While others focused on the all-you-can-eat buffet, piña colada’s and catamaran tours, I couldn’t help staring up at an entirely different looking night sky.
Attempting to take deep-sky images through a telescope from a vacation resort in a foreign country has its challenges. As you will soon find out, those uncontrollable variables began to add up.

The location of our resort in Costa Rica.
A Preview of the Southern Sky
The first and most obvious looking change was just how high the Orion constellation was. How fortunate for those that live at this latitude to photograph the Orion Nebula near the zenith!
Below Sirius, in Canis Major, I saw the bright star Canopus for the first time. This star belongs to the southern constellation, Carina, which is non-existent in mid-northern latitude skies.
In fact, there are numerous southern hemisphere constellations and deep-sky objects observable from Costa Rica. I thought a trip to Australia would be necessary to see many of these targets.
Southern Deep Sky Objects from Costa Rica
- Centaurus A
- Carina Nebula
- Southern Pleiades
- The Running Chicken Nebula
- Southern Pinwheel Galaxy
- Pearl Cluster

My view of the night sky from 10 degrees north of the of the equator. (Stellarium)
An easy way to get a preview of the night sky from a new location is to download the Stellarium mobile app on your smartphone. Then, you can either enter in the location manually in the settings, or let the app use your GPS for the exact latitude and longitude of your position on Earth.
My android smartphone was set to “airplane” mode during our trip, as I was able to use the resort WiFi for internet access. However, I needed to quickly turn airplane mode off for a GPS signal to get the lat/long coordinates of my location. This may not be necessary depending on your operating system.
A GPS signal was also needed for my polar alignment process, to display an accurate position of the north celestial pole on the Polar Finder mobile app. If you are interested in the software and tools I use for astrophotography including astronomy mobile apps, be sure to visit the resources page.

The Stellarium and Polar Finder mobile astronomy apps were very handy on my trip.
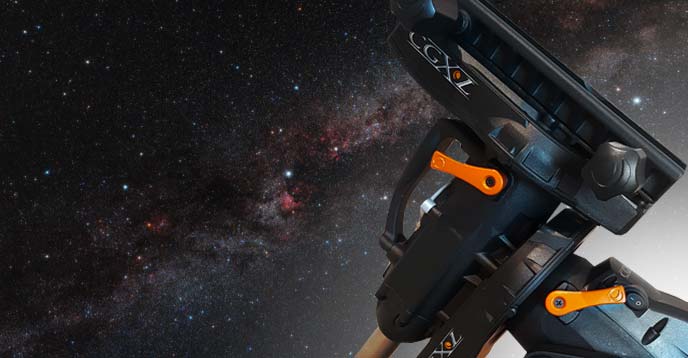
Polar Alignment
Since I was still in the northern hemisphere, I could theoretically polar align my telescope mount using the North Star, Polaris. The north celestial pole doesn’t land precisely on this star, but it’s a fantastic reference point. The process of polar alignment is much more difficult in the southern hemisphere.
I have polar aligned my telescope mount countless times using the north star from home in Canada, but this time, Polaris sat just above the northern horizon. It was far too low to observe from the resort as it was blocked by the surrounding mountainous landscape and the hotel itself.
To polar align my portable iOptron SkyGuider pro, I guestimated the exact altitude of the polar axis, and it was nearly level with the horizon. At only 10 degrees north, there was no way I’d be able to spot it.
I ran a series of test exposures at 30-seconds in length to improve my rough polar alignment. Luckily the focal length (250mm) of the telescope I brought is more forgiving in terms of tracking accuracy than higher magnification instruments. The RedCat 51 is also extremely lightweight and portable, which makes it a superb choice for wide-field deep sky imaging while traveling.

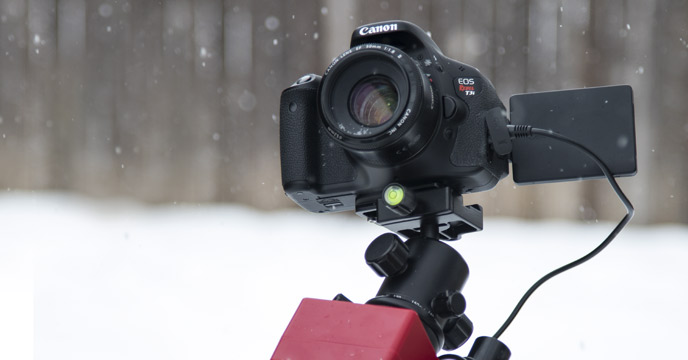
My DSLR astrophotography setup including a telescope and tracking mount.
Portable Astrophotography Gear for an Airplane
I packed all of the astrophotography equipment needed for wide-field deep sky imaging in my carry-on bag on to the airplane. This included the telescope, camera, mount, tripod, filter, and adapters.
This “deep-sky travel kit” included a capable equatorial telescope mount, the iOptron SkyGuider pro. The EQ head of the mount was easily packed into my bag, along with the wedge and collapsible carbon fiber tripod. This camera mount matches the apparent rotation of the night sky using a right ascension tracking motor.
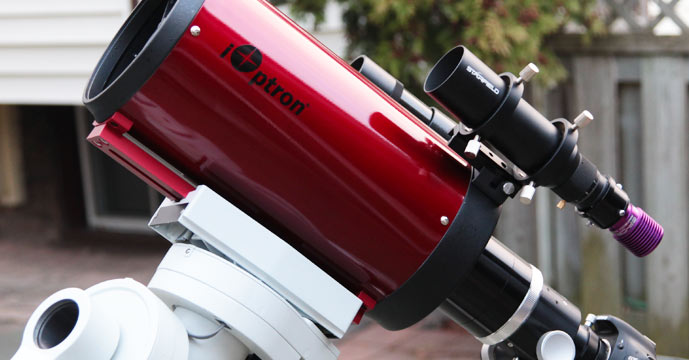
The telescope is a William Optics RedCat 51 refractor. The RedCat weighs just 3.2 lbs, and can easily be mounted to a lightweight astro tracker for long exposure imaging.
Inside of the RedCat, sits a 2-inch Optolong L-Pro filter that I’ve pre-threaded into the M48 adapter of the telescope. This proved to be a great way to record images in broadband true color while reducing the immediate light pollution from the resort.
The camera is a stock Canon EOS 7D Mark II. When I say “stock”, I mean that this DSLR has not been modified for astrophotography by removing the internal IR cut filter. The camera threads on the RedCat 51 via a dedicated Canon EOS t-ring adapter.
My Portable Deep Sky Astrophotography Rig (Carry-on friendly)
- Tripod: Neewer Carbon Fiber Tripod
- Mount: iOptron SkyGuider Pro
- Telescope: William Optics RedCat 51
- Camera: Canon EOS 7D Mark II
- Filter: Optolong L-Pro (2″)

The astrophotography gear used for my shot of the Carina Nebula.
The Game Plan
Due to factors such as lack of precise polar alignment, and setting up in a high traffic area, I decided to shoot 30-second exposures at ISO 6400. This way, I could at least complete a number of successful images rather than having to discard many of them in the pre-processing stage.
The constant wave of wind gusts made keeping my camera and telescope ultra-steady during an exposure very difficult. The limited exposure lengths helped to reduce this effect.
The location of our resort meant that there was very little light pollution in the direction of the nearby Atlantic Ocean. However, this resort chooses to shoot high-intensity spotlights toward the night sky during their nightly shows.
There was an unfortunate amount of localized light pollution from the many lighting fixtures that stay on all night long. The mild light pollution filter inside of the telescope adapter helped to reduce this unnatural glow.
I generally like to see all of the lights go out at night, but the lighted pathways on the resort came in handy when navigating to my deep-sky imaging location near the front lobby. As an experiment, I took a photo looking towards the constellation Orion from the pathway near our room. As you can see, there is a lot of light coming from all angles.

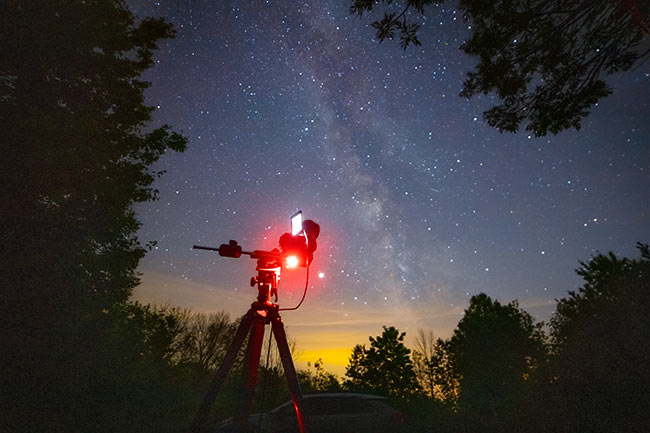
Deep Sky Imaging Location
I decided to stay on the resort to run the camera and telescope. The beach was a better spot in terms of darkness, but it was just too risky to leave the security of the resort at night in a foreign country.
The wind was also much stronger and unpredictable by the water, and I had enough to worry about already. I did, however, sneak down to the beach one night to take some wide-angle tripod shots of the night sky. Unfortunately, the timing of this idea was off, as my photos were spoiled due to rare clouds at night.

The Location of my Deep Sky Astrophotography Session from Costa Rica.
Shooting from the balcony of our room would have been ideal, but the window of sky was limited to the west. I did attempt to photograph a deep sky object from the balcony through the telescope, but it was more of an experiment than anything else.
There was a large open area of grass outside of the main lobby of the resort, and the security staff by the front entrance gave me some peace of mind. This is where I planted the tripod and iOptron SkyGuider pro with my telescope attached. I kept the tripod very low to the ground for added stability during strong winds.
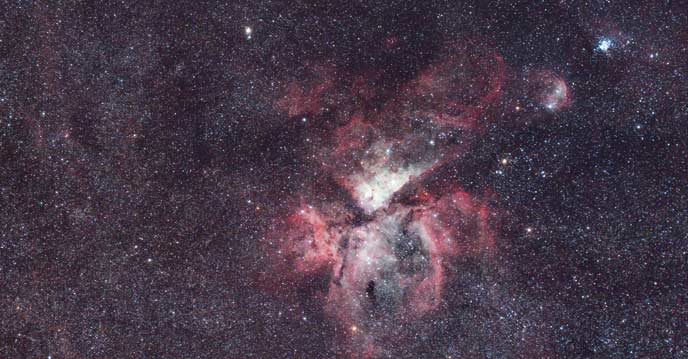
The Target: Carina Nebula
Coming from a northern hemisphere sky with the usual constellations and deep-sky objects, how could I not attempt the Carina Nebula from Costa Rica? This is a “bucket list” target for me, and one I didn’t imagine capturing without a trip to Australia.
The Carina Nebula (also known as the Eta Carinae Nebula) is a magnitude 1 deep-sky object, so 30-second exposures were enough to reveal much of this complex and large nebula. This emission nebula is cataloged as NGC 3372, and includes multiple objects within it.
See this annotated image for a closer look at the many deep-sky objects found inside of the Great Nebula in Carina.
The Carina Nebula
- Distance to Earth: 7,500 light-years
- Radius: 230 light-years
- Magnitude: 1
- Designations: NGC 3372, ESO 128-EN013, GC 2197, h 3295, Caldwell 92
- Constellation: Carina

Star map showing the location of the Carina Nebula (Universe Today).
Cataloged deep-sky objects inside of the Carina Nebula:
- Keyhole Nebula
- Mystic Mountain
- Trumpler 14 Star Cluster
- Trumpler 16 Star Cluster
- WR 22
- WR 25
The Carina Nebula does not reach a high altitude in the sky from northern Costa Rica, which meant I needed a low view to the horizon to capture it. The Carina Nebula just barely cleared the treeline from our resort at 10pm.
As it turned out, one of the biggest obstacles I had to overcome was wind. The wind gusts were as strong as 40km an hour at times, completely ruining the current exposure being captured on my portable rig.
This element was particularly painful to experience, as it can occur when absolutely every other measure of success has been taken.
To compensate for wind, I used my body to block the telescope from the direction the wind was blowing from. Also, I was limited to 30-second exposures, as this offered the best chance of completing a frame without interruption.
Results
My final image of the Carina Nebula includes just over 9-minutes of total exposure time. The following image consists of 18 x 30-second images at ISO 6400.
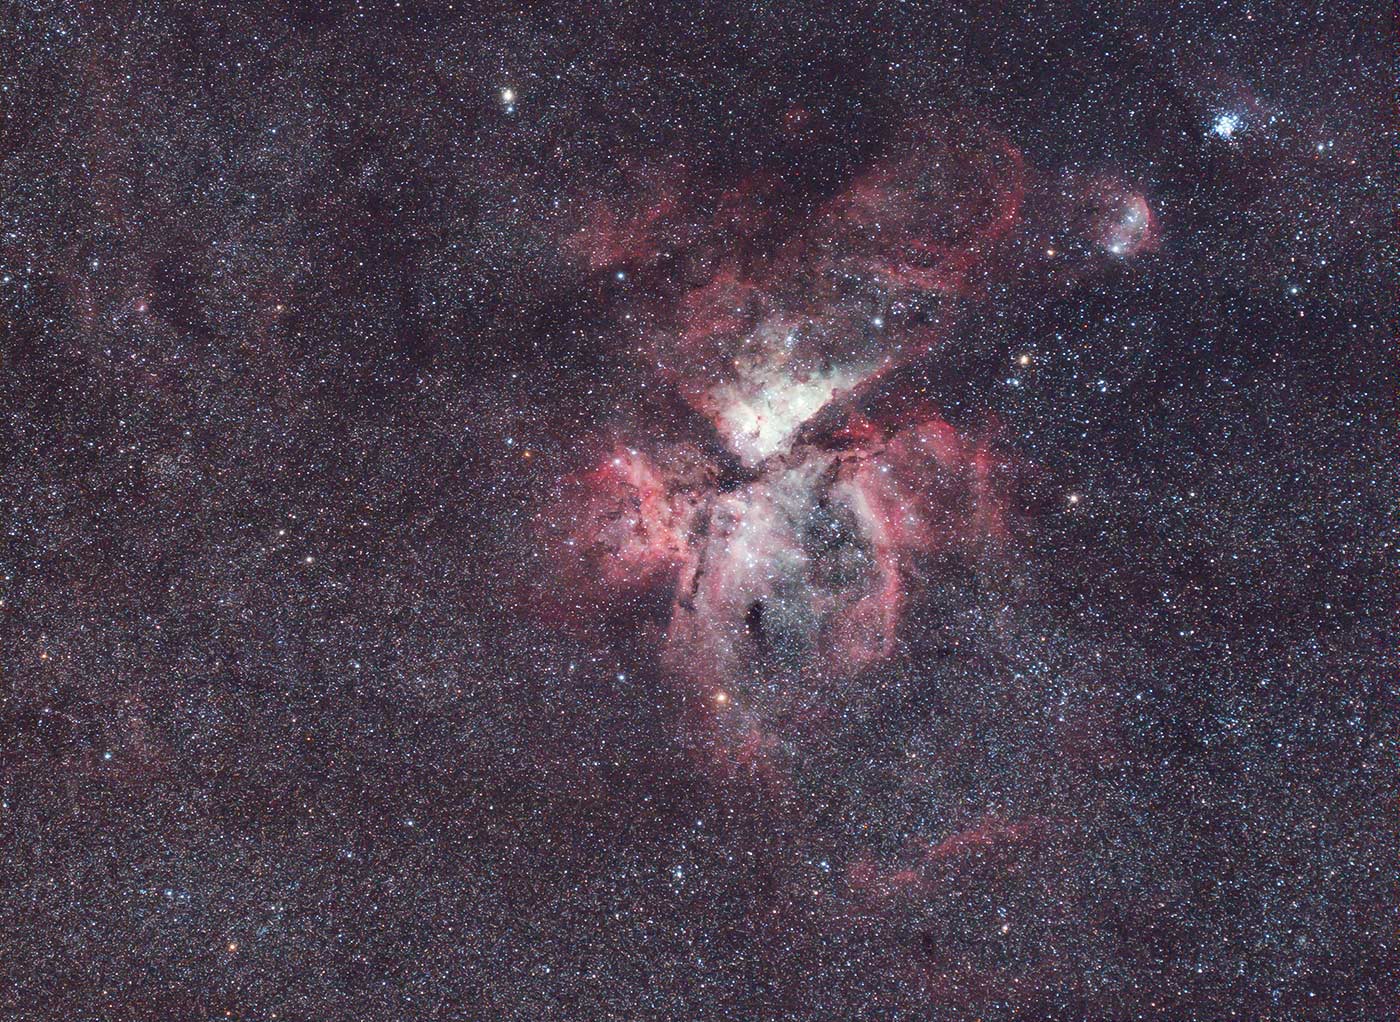
The Carina Nebula | 18 x 30-Seconds @ ISO 6400
Once I registered and stacked the sub frames in DeepSkyStacker, I had a total overall integration time of 9 minutes, and 30 seconds. Processing the stacked integration in Photoshop was an exciting experience, and I took my time. The individual 30-second light frames were very noisy, which was to be expected when shooting on a hot night using an ISO of 6400.
The stacking process helped improve the signal to noise ratio a great deal. However, the noise reduction actions in post processing seem to have softened the image up significantly. In these situations, it’s a fine balance between noise and overall sharpness.
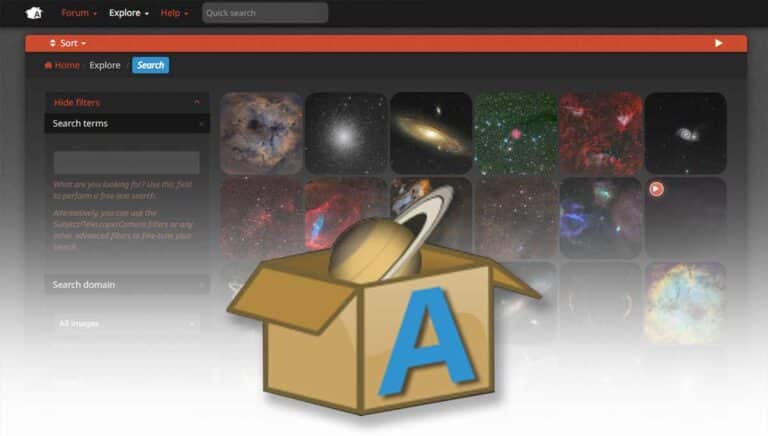
I really enjoyed processing this image, and loaded it into nova.astronomy.net to be annotated. As you can see, my photo includes NGC 3293, NGC 3324 in the frame as well. This website is a great way to annotate your own astrophotography images online).

A drone shot of our resort from the beach.
Final thoughts
I would have loved to capture more data on the Carina Nebula, and attempted to capture images of more southern targets like the Centaurus A galaxy. However, I left my new bride in the hotel room during these ventures, and she was very patient and understanding to give me the time I had.
I witnessed the Southern Cross, Carina, Canopus, and much further into the southern night sky than ever before. I could hear the white-faced monkeys in the forest as my camera collected each exposure on the Carina Nebula. I stood alone in a field of grass in the dark while the rest of the guests slept or tied one on at the bar.
Deep sky astrophotography from Costa Rica in early March presents the best of two hemispheres, from Orion to the Carina Nebula. If you are planning on traveling to Costa Rica in the future, I highly suggest that you don’t forget to pack your telescope.
View a high-resolution version of my Carina Nebula image on Flickr.
Love it! Wished you’d been around to guide my efforts few years ago. A lot of the information you post is “hard-fought.” Keep it coming Trev, it is an inspiration. 🙂
Thank you, Mitch! It’s a pleasure 🙂
Hi Trevor,
Thanks heaps for sharing your Costa Rica adventure with us. I enjoyed your acknowledgment of how darned annoying it is for those of us in the Southern Hemisphere who do not have a Pole Star to work with, and mostly that it is so important to be able share the experience with a loved one. Going solo is no fun for some of us and you nailed that so well.
Rudy gets so much exposure, but your wonderful wife needs much more. She’s a great pal and we wish to know her much better.
How about coming to Australia for your next adventure? Talk to Dylan O’Donnell about an invitation to Star Stuff III. Fraser and his missus really enjoyed Star Stuff II.
Dinner is on us in Sydney!
Cheers and keep up the great work. More please with the STC Multi Band filter.
Great pic Trevor! I’ve really got to look into a travel rig. And lots of great info as always. It must have been very exciting to see all those new stars! I’ll check out the video when my husband gets home, we like to watch them together. 🙂
Just one little thing… according to your map pin.. weren’t you actually on the Pacific, not the Atlantic?
Great video. Very inspiring, you added a lot with the segments before and after. Beautiful locations encourage beautiful photography, and yours certainly is.
Best wishes to you and your supportive (and pretty) wife.
Amazing Trevor!! I just started astrophotography and your posts are so helpful. I have bookmarked your site.
You explain the process really well. Thank you for the amazing work and giving us details about the pictures. They look stunning.
Every time I see a picture like the one you posted, makes me wonder about our place in the universe and the amazing scientific strides we have taken in the past century.
Thanks Trevor
Hi Trevor I am considering buying the red cat as my first telescope can I just ask how big the nebula actually appears in the frame. I have used my 150-600 mm Tamron on the orion nebula and it appears to fill about a 6th of the frame on my Nikon crop sensor camera would the red cat be similar to this or better. Sorry if this is a dumb question but all of this is very new to me. Love the image by the way.
Very good review.
My recommendation: Next trip to San Pedro de Atacama (Chile) . The best place in the world for Astrophotography.
Hi Trevor! Now you know how hard it can be for some of us (I live in Panama, one degree below Costa Rica’s 10° LAT). Thank God for drift alignment. I purchased the Redcat 51 not too long ago and will be doing some wide field in the near future as well. If you’re ever interested in going to Atacama in Chile, let me know. I can get you the right contacts for that. Clear skies!
Hi Trevor, did you just record the images directly to the camera or did you connect your camera to s software? Cheers Tom (from Germany)
Hi Tom! Yes, the images were just recorded directly onto the memory card and transferred later.
Try the Stellarium app,it shows point of view for your set up on each target.
This new WO refractor looks really promising. It would be fantastic if they make it Fuji-X-mount-ready also (maybe someone from William Optics will read that?).
Hi Trevor, Great picture and info. I am getting ready to buy the Red Cat 51. It has great optics as I can see from your picture. I can imagine how hard it must have been to polar align. You got talent.
What are the pros and cons of a telescope like the RedCat vs a DSLR lens? If I compare with my Canon 70-200 f2.8 with a diameter of 77mm, the Redcat is f4.9 and a diameter of only 51mm. Obviously the RedCat is a lot cheaper, but I’m sure that many people like myself will already have a decent long lens for their DSLR. Thoughts?
Neil thanks for you question.. I am a a seasoned bird Photographer
and a total armature to Astrophotography..
I have a few prime Canon DSRL lenses and the same question comes up
in my mind.
Please forward me a possible answer
When I traveled to Costa Rica I stayed in the Guanacaste region. Loved the resort and loved the country. This was before my interest in AP (which is brand new at this time). I was wondering what made you select such a relatively high ISO. This would be good for me to learn as I start working on settings.
Thanks what a great article! Being in Costa Rica I’m looking all around at my settings thinking of the views I have! Haven’t taken a single picture yet but I will!