Autoguiding a Telescope for Deep-Sky Astrophotography
Many amateur astrophotographers are hesitant to add any additional complexity to an already steep learning curve. But the truth is, autoguiding your camera and telescope isn’t overly complicated.
I’ve been using a small ‘guide scope’ with an autoguiding camera to take longer exposures through my telescope for several years. With the right equipment and a little trial and error, you’ll wonder how you ever lived without it.
These days, I use the ‘guiding’ tool within the ZWO ASIAIR mobile app for nearly all of my deep-sky projects. Below, I’ll explain how to start leveraging the power of autoguiding for deep-sky astrophotography.
I use autoguiding on the ZWO ASIAIR
When I’m capturing deep-sky images, I let the ASIAIR handle the small tracking corrections. I attach a small guide scope (or an off-axis guider) with a dedicated guide camera, then run a quick calibration once the mount is polar aligned and on my intended imaging target.
The multi-star guiding feature of the ASIAIR works well and is easy to get up and running.
Introduction to Autoguiding
Whether you’re shooting with a DSLR or a dedicated astronomy camera, capturing longer exposures means that more light (or signal) can be recorded in a single shot.
You’ll often reveal much more signal on a deep-sky object in a 5-minute exposure than you would in 30 seconds. This makes being able to consistently capture long-exposure images with sharp, focused details a real benefit for astrophotography.
However, to do this requires extreme accuracy from your equatorial telescope mount as it slowly tracks the apparent movement of the sky. Even the slightest amount of periodic error can ruin a long exposure image of your target.
As you increase your telescope’s focal length, autoguiding becomes more important. This is because we are now “sampling” a smaller (zoomed-in) area of the night sky that can potentially highlight the smallest amount of period error in your telescope mount.

An example deep-sky astrophotography setup with autoguiding.
Why It’s Useful for Astrophotography
In the following video, you’ll see me use autoguiding to collect 3-minute-long exposures on the Cocoon Nebula, using a DSLR camera and a 73mm telescope. When using a DSLR camera for deep sky astrophotography, autoguiding allows you to shoot longer, and dithering (which helps reduce noise in your stacked image) is now possible.
Autoguiding will help to correct the following issues:
Star Trails
Without autoguiding, your telescope mount will inevitably drift slightly as it tries to track the motion of the stars. Even tiny tracking errors add up over time, causing elongated stars or visible trails instead of sharp pinpoints, especially in longer exposures. This is usually the first and most obvious problem people notice.
Periodic Error
Most mounts, even good ones, suffer from periodic error — small mechanical imperfections in the gears that cause the mount to speed up or slow down slightly over time. This creates a wobble in tracking, which shows up as squiggly, distorted stars during a long exposure. Autoguiding can correct for this by sending tiny adjustments to keep the star centered.
Mount Limitations
Modern equatorial telescope mounts are quite capable of compensating for the Earth’s rotation —that is what they were designed for. However, deep-sky astrophotography (especially at longer focal lengths) is a very demanding application for any entry-level to intermediate equatorial mount.
Depending on which telescope mount you’re using, subtle errors in the accuracy of your polar alignment can begin to surface in images as short as 60 seconds. The slightest bit of off-balance in your imaging payload can put stress on the gears in your mount, which often leads to less-than-perfect stars in your long exposure image.
Even with your polar alignment spot-on and your payload perfectly balanced, autoguiding is often necessary to track your object smoothly enough for astrophotography. This is especially true on beginner-level GoTo mounts such as the Sky-Watcher HEQ5 Pro .
The telescope mount itself may have shortcomings due to worn-out gears or low-cost materials used in its construction. If the issues are severe enough, even autoguiding won’t help.
For this reason, it’s always best to invest in a quality telescope mount that has been proven reliable for deep-sky astrophotography. Thankfully, basic autoguiding is enough to correct most of the issues associated with modern equatorial mounts.

Drift from Misalignment
If your mount isn’t perfectly polar aligned, the stars will drift across the field of view as Earth rotates. The better your polar alignment, the slower the drift — but even the best “quick” polar alignment usually isn’t perfect. Guiding can correct this drift on the fly, letting you take longer exposures without obvious movement.
Wind and Vibrations
Even slight environmental factors like wind gusts, vibrations from people walking nearby, or mount instability can nudge your setup. Without guiding, there’s nothing to recover from these small shifts — once your stars are blurred in a frame, that sub is ruined. With guiding, the system quickly reacts and corrects small movements.
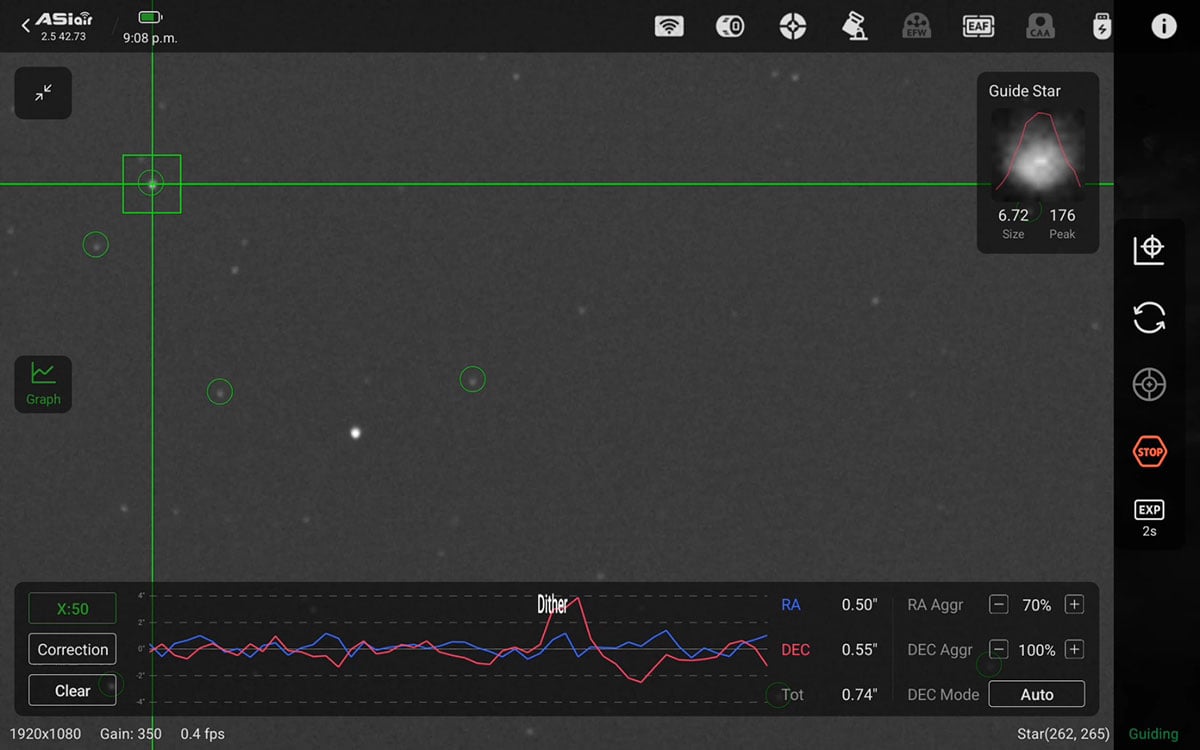
How Does Autoguiding Work?
Autoguiding is accomplished by sending minor corrections to your telescope mount via an ST-4 cable that communicates with your guide camera to the mount. You can also autoguide using the pulse-guiding method that directly connects your PC to the telescope mount.
It is said that pulse guiding with an ASCOM-compliant equatorial mount improves guiding accuracy. This can be measured using the tools in the PHD2 guiding software, mainly in the total RMS error reading.
Over the years, I have made it very clear on my YouTube channel that I don’t obsess about these values much. However, if you are looking for a general benchmark, Jerry Lodriguss shared a helpful reference in this Cloudy Nights thread:
- Good seeing (2″) averages around 0.3 arcseconds RMS in the guiding
- Average seeing (2-3″) averages around 0.5 arcseconds RMS in the guiding.
- Bad seeing (more than 3″) averages around 1.0 arcseconds RMS in the guiding.
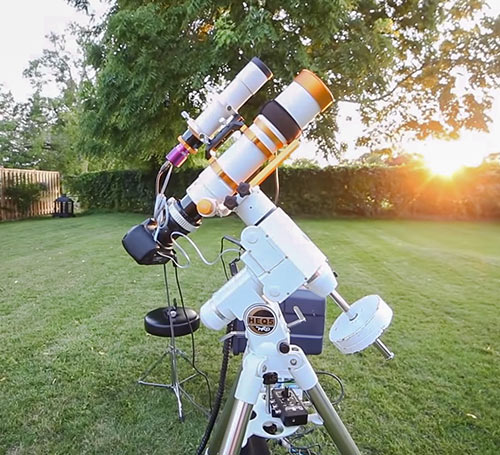
My portable deep-sky astrophotography setup with a 50mm William Optics 50mm guide scope riding on top.
Autoguiding Equipment
The basic equipment needed to accomplish a successful night of astrophotography with autoguiding is a secondary telescope (guide scope) and a guide camera.
You will also need software to run the camera, and utilize the autoguiding port on your astrophotography mount. Once properly connected to your computer using the appropriate cable (in my case, a USB 2.0 A-male to B-male cable), the autoguiding camera will broadcast a live-loop image through the guide scope to your computer.
Equipment Breakdown:
- Computerized telescope mount: these mounts will have an autoguiding port and/or USB port to connect it to the guiding software. Modern equatorial telescope mounts like the Sky-Watcher EQ6-R Pro, portable star trackers like the Star Adventurer GTi, and strain wave drive mounts like the ZWO AM5 support autoguiding.
- Guide Camera: lighter than your primary imaging camera, and will often include a small mono CCD or CMOS sensor (like ZWO ASI120MM Mini)
- Guide Scope: rides atop your primary imaging telescope and is usually much smaller (like Astromania 60mm Guide Scope)
- Guiding Software: Image capture software tools like N.I.N.A, PHD2 Guiding, and the ASIAIR have autoguiding modes to utilize this feature
You can assemble a reliable autoguiding package for about $250 USD. Even a simple guide camera and guide scope package will allow you to harness the power of autoguiding for primary imaging telescopes with a focal length of up to 1000mm.
Keeping weight to a minimum has many advantages, and is an attractive option for beginners. I started out with a small 50mm guide scope package back in 2011, and this is still a popular starter system for many backyard imagers.
Guide Cameras
A guide camera is a small, sensitive camera that locks onto a star and tells the mount when it drifts.
Your guide camera should be sensitive enough to pick up faint stars and have a slightly bigerr sensor to make it easier to find a guide star. It does not need to be high resolution or cooled for guiding purposes.
A mono camera (i.e., black and white) is also better for guiding since it is more sensitive.
Some popular guide cameras for autoguiding include:
-
ZWO ASI220MM Mini
 The ZWO ASI120MM Mini guide camera is affordable and works exceptionally well.
Duo-Sensor Astronomy Cameras
One of my absolute favorite ways to perform autoguiding is by using a duo-sensor camera like the ZWO ASI2600MC Air. This color camera features the primary image sensor from an ASI2600MC Pro, and an ASI220mm mini guide sensor.
This allows me to skip the guide scope and the additional camera altogether. The primary imaging telescope’s focal length is used for autoguiding purposes. This cuts down on the overall weight of the rig, as well as reduces the number of overall cables.
If that weren’t enough, this model also includes an ASIAIR WiFi controller. That means there is no need to connect a laptop computer, mini PC, or separate ASIAIR controller to the rig. 
ZWO ASI2600MC Air has the imaging camera sensor and guide camera sensor built in
Autoguiding Software
The main objective of your autoguiding system is to focus and lock onto a star in the guide telescope’s field of view. The camera continuously captures short exposures through the guide scope, usually between 1 and 3 seconds in length.
The guide camera and your telescope mount communicate to maintain a lock on your target by making subtle corrections to the tracking. This is accomplished using great free software developed by Stark Labs called PHD2 Guiding.
The two main software tools astrophotographers use for autoguiding are PHD2 Guiding (which integrates with several camera control software) and the ASIAIR smartphone app. Both are easy to use and allow you to dither your images between each frame.

PHD2 Guiding
Our computer can communicate with the telescope mount using autoguiding software such as PHD2 Guiding. PHD2 Guiding is the successor to PHD Guiding, which I used for several years before upgrading to PHD2. PHD stands for “Push Here Dummy,” and it is very easy to use once everything is set up properly.
This software can also do other useful astrophotography tasks, such as drift alignment, which is helpful for those who cannot use Polaris for Polar Alignment.
I use a 1-second refresh rate on the Altair GPCAM2 to display an assortment of stars within the field of view. It is important to make sure that the guide scope is properly focused to ensure accurate star tracking. When PHD2 is running, I usually open on the “graph” window to monitor the accuracy of the tracking.

Please consider visiting the Learn Astrophotography section of this site to explore my techniques in real-life backyard situations.
Other Software Options:
While PHD2 is the most common, there are a few others depending on your setup:
-
ASIAIR: if you use ZWO gear, it has guiding built right in
-
N.I.N.A.: a free all-in-one imaging program that can run PHD2 in the background.
-
PrimaluceLab Eagle: bundle in guiding tools
Tips for Better Guiding Performance
- Perfect Your Polar Alignment: The closer you are to perfect alignment, the less work your autoguider has to do.
- Use Longer Guide Exposures: 2–5 seconds is often better than 1-second exposures because it smooths out the noise.
- Pick a Good Guide Star: Bright, unsaturated stars near the center of the field guide better. Avoid double stars.
- Avoid Overcorrecting: Set your aggressiveness carefully. Too much = chasing seeing. Too little = not correcting real drift.
- Cable Management: Sagging or snagging cables can tug your setup and ruin guiding, secure cables so they don’t tug.
Troubleshooting Common Autoguiding Errors
Even once you’re guiding, things can (and will!) go wrong. Some common autoguiding headaches are:
-
Star Loss: If your guide star fades or disappears (clouds, bad seeing, bad focus), the system can’t guide. Use a more sensitive camera, select a brighter star, or use longer exposures. Or you may just need to wait until the clouds have cleared.
-
Calibration Errors: If calibration fails, it might be because the mount isn’t moving properly (wrong settings, loose cables, wrong hemisphere settings). Double-check your mount connection and calibration steps.
-
Oscillations or “Chasing Seeing”: Sometimes the guide graph will look like it’s jumping wildly up and down instead of staying smooth. This usually happens because your guiding system is trying too hard to fix tiny wobbles caused by the Earth’s atmosphere.The guider sees those tiny jitters and tries to correct them — but it shouldn’t, because they aren’t real problems. You can lower the agressive-ness setting or increase your exposure time
-
Backlash Issues: When your mount changes direction (like when the guider tells it to move back the other way), there can be a tiny bit of “looseness” or “lag” in the gears.
The mount needs a second to “catch up” and this confuses the guider because it thinks the mount isn’t listening properly. You can correct this by improving mount balance (slightly east-heavy) or guide mostly in one direction.
What is Off-Axis Guiding?
Off-axis guiding (or OAG) involves using a device that sends starlight to your guide camera from the optical axis of your primary imaging telescope. It does not affect your primary imaging camera, as it uses the ” off-axis ” starlight and does not enter it.
I have used the Lumicon Easy Guider for off-axis autoguiding with my iOptron SkyGuider Pro. The pick-off prism sent useful guide stars to my ZWO ASI290mm mini guide camera to correct the telescope mount for long-exposure astrophotography.
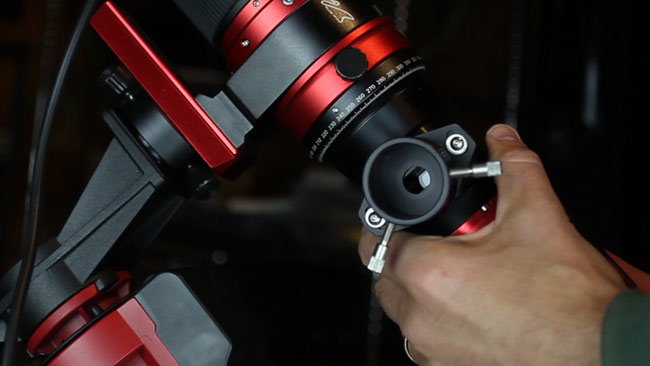
Using an OAG for autoguiding on an iOptron SkyGuider Pro.
No matter which autoguiding method you use, the goal is simple – to capture long-exposure images with round, sharp stars. If you’re able to collect images over three minutes in length through your telescope, your autoguiding system has done its job.
What Am I Using?
I use various mounts, guide scopes, and guide cameras for autoguiding.
If you’re using a guide scope for autoguiding, a good rule of thumb is to use one with a focal length of at least a third of your primary imaging scope.
An off-axis guider (more on this below) solves this problem by utilizing the native focal length of your imaging telescope, but it can add weight and complexity to your camera system. Both systems have their strengths and weaknesses, but I personally prefer the simplicity of an auxiliary guide scope over an OAG.
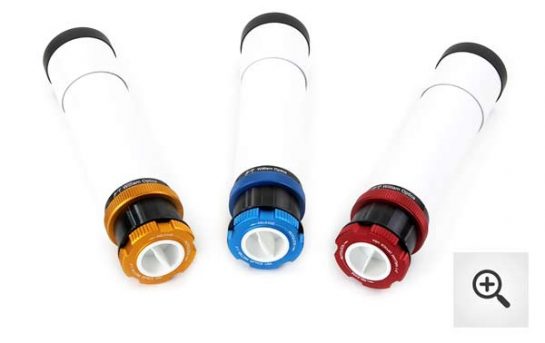
Here is a complete list of guide scopes I have used in the past:
- Orion 50mm Mini Guide Scope
- Starfield 50mm Guide Scope
- Starfield 60mm Guide Scope
- William Optics Z72 APO Doublet
- William Optics 50mm
- William Optics 32mm
I primarily use a William Optics 50mm Guide Scope because it is lightweight and easy to mount to various telescopes.
It features a Rotolock system, a design feature that securely holds your 1.25″ barrel guide camera. The guide scope’s focal length is 200mm @ F/4. You’ll need to fit the tube into an appropriate set of tube rings or your existing finderscope rings on your telescope.
The camera I use most often with the 50mm guide scope is the ZWO ASI290mm mini. This is a highly sensitive monochrome guide camera and is compatible with the ZWO ASIair Wi-Fi camera control device and software.
The ASIAIR Plus has its own autoguiding program in the application that communicates with the telescope mount just like PHD2 does.
Final Thoughts
Autoguiding is something that you won’t even think about once you’ve got it working properly. For those having issues early on, I urge you to ensure that your telescope mount is properly polar aligned and balanced (with no cable snags) before trying to diagnose autoguiding issues.
Also, don’t obsess about the numbers and guiding graphs within PHD2 guiding. If you are chasing numbers, chances are you’re not taking pictures. If you’re taking pin-sharp 5-minute exposures at a focal length of 1000mm or more, chances are your autoguiding system is working just fine.


Trevor Jones is an astrophotographer and a valued member of the RASC. His passion is inspiring others to start their astrophotography journey on YouTube so they can appreciate the night sky as much as he does. His images have been featured in astronomy books & online publications, including the NASA Astronomy Picture of the Day (APOD).