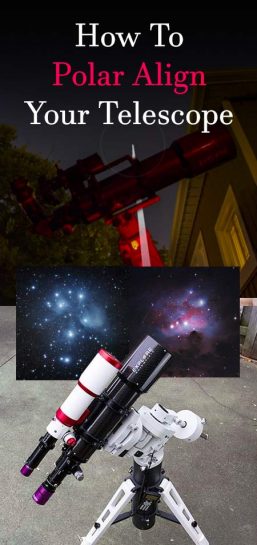
Polar Alignment for Beginners – Step by Step
Polar alignment is an essential first step toward a night of visual observation or astrophotography. Why is it so important? By aligning the axis of your telescope mount with the motion of the sky, you can accurately track objects in space. It’s a rather simple process for German equatorial mount (GEM) owners.
The same process applies to a portable star tracker and is completed via the built-in polar finder scope. Accurate polar alignment is essential for all types of long-exposure astrophotography from wide-angle nightscapes, to high-magnification deep-space imaging.
Once you’ve got the basics down, the entire polar alignment process can be done in less than 10 minutes.
Polar alignment is the process of accurately aligning the polar axis of your mount with the north (or south) celestial pole. The polar axis does not move when you move the telescope. Simply put, you need to make sure that your telescope mount is rotating on the exact same angle the sky turns on. This process should be well understood before diving into astrophotography.
See more astrophotography tips.
Polar alignment for beginners
This tutorial is for users in the Northern Hemisphere, who are able to view the “North Star”, Polaris. For instructions on polar alignment using Drift Align in the Southern Hemisphere, visit How to Polar Align Easily in PHD2 Drift Align. The Drift align method can be used in either hemisphere by using free software called PHD2 guiding.
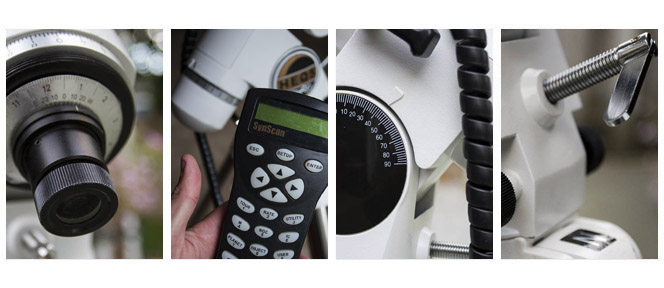
The equipment used in this example a Sky-Watcher HEQ5 German equatorial mount. This is a very popular telescope mount for beginner to intermediate astrophotography enthusiasts. It is very similar to the following models:
The Sky-Watcher HEQ5 in this example features a built-in polar scope with an illuminated reticle. All of the telescope mounts on the list above include a polar alignment scope (depending on the version you order), with the exception of the Celestron CGEM. A polar scope makes aligning the polar axis of this mount with the North celestial pole much easier.
Celestron telescope mounts are equipped with a feature called All-Star Polar Alignment. Rather than using a polar scope, it uses a system of alignment stars. This method is handy if you own a Celestron mount, and Polaris is not in view.
You’ll want to use an illuminated reticle eyepiece with a crosshair to center the star in your field of view. It’s not absolutely necessary, but at least you’ll know that the star is completely centered, rather than “close enough”.
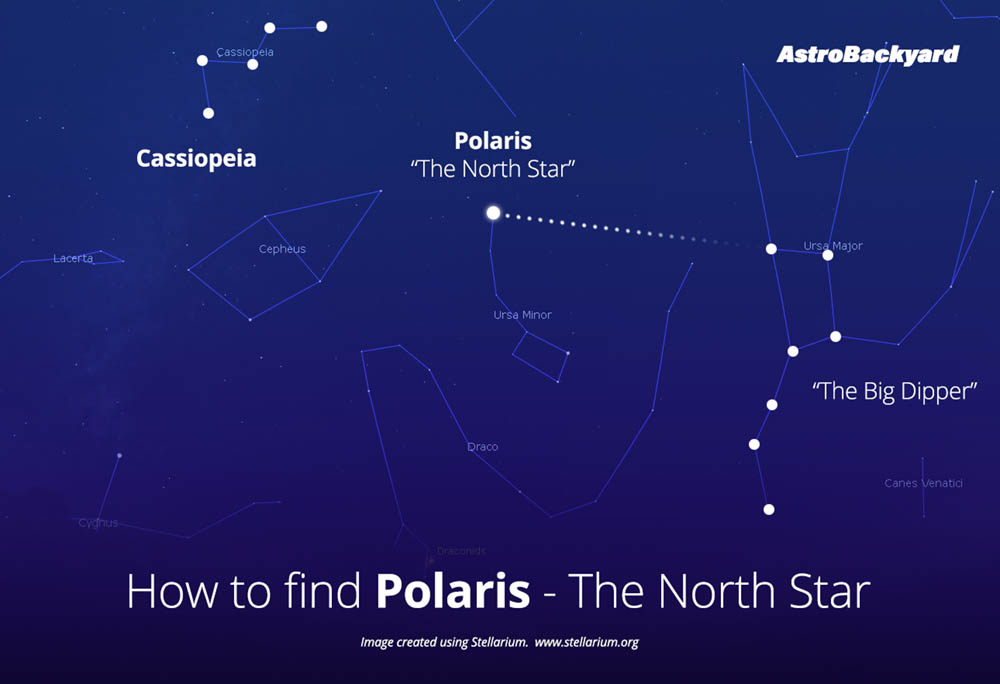
1. Finding Polaris – The North Star
Start by roughly aligning your telescope mount in the direction of the North Celestial Pole. This can be accomplished by physically moving your tripod and mount at dusk, and aiming the polar axis in a general North direction. Polaris can be spotted in the sky quite easily, as it is much brighter than any surrounding stars in the immediate area.
Use the two outer stars in the bowl of the Big Dipper to help you locate Polaris.
Still having trouble finding Polaris?
Use a free planetarium software such as Stellarium to help you learn the night sky and its constellations from your location on Earth. The mobile version of Stellarium is a fantastic tool to use when you are outside under the stars. It offers a live-view overlay of the night sky to confirm the constellations and stars you are observing.
Related Post: The best astronomy and stargazing apps for your mobile phone
What if I can’t see Polaris from my location?
If your view of the Big Dipper or Polaris is completely obstructed, you may need to polar align using the Drift Align method I mentioned earlier.
2. Level the Tripod
Make sure that the tripod of your telescope mount is as level as possible. An uneven tripod will result in an inaccurate position of your mount in relation to the altitude scale. Many German equatorial mounts have a bubble level built-in. I like to place a level on the tripod before the mount is attached and make sure it is level on each axis.
It is important to note that the tripod needs to be pointing North before leveling. Otherwise, you’ll have to rotate the tripod and possibly re-level. I prefer to make a visual observation at nightfall to align with Polaris. If you are setting up during the day, a compass will do the trick.

3. Adjust the Altitude
Next, you’ll want to find the latitude and longitude coordinates for your location. It’s the latitude we’re interested in.
This is the coordinate we will use to adjust the position of the telescope mount to align with the North celestial pole. The telescope mount should have a latitude scale posted on one side, with an indicator of what latitude your mount is currently in line with. You will need to adjust the mount to your current latitude using its altitude adjustment bolts.
My latitude happens to be 43° N, so the altitude adjustment scale is set to 43.

The altitude adjustment bolts can be a little difficult to get the hang of. To turn one bolt, the other has to be loosened.
If your telescope has already been attached to the mount, turning these bolts can be hard. The overall weight of the telescope attached will determine how hard it will be to turn the bolts.
By this point, the telescope mount should be roughly aligned with the height of the North Star. You may be able to crouch down and see Polaris through the polar scope reticule at this point.
It is now a matter of moving the mount left or right until Polaris comes into view.
I can’t see anything!
Depending on the telescope mount, the view through the polar scope may be obstructed when the telescope is in the rest position. On the Sky-Watcher HEQ5, the declination needs to be rotated 90° for a clear view through the polar scope.
4. Position Polaris using PolarFinder
A mobile app such as PolarFinder will tell you the exact spot to position the North Star for a near-perfect polar alignment.
The app uses your mobile device’s GPS to automatically calculate the position of Polaris for your latitude and longitude. It will display the correct position of Polaris in relation to the North celestial pole.
You will then simply mimic this location by adjusting your telescope mount.
Android users can download PolarFinder, and iPhone users have Polar Scope Align Pro. See the rest of the astronomy apps I recommend.
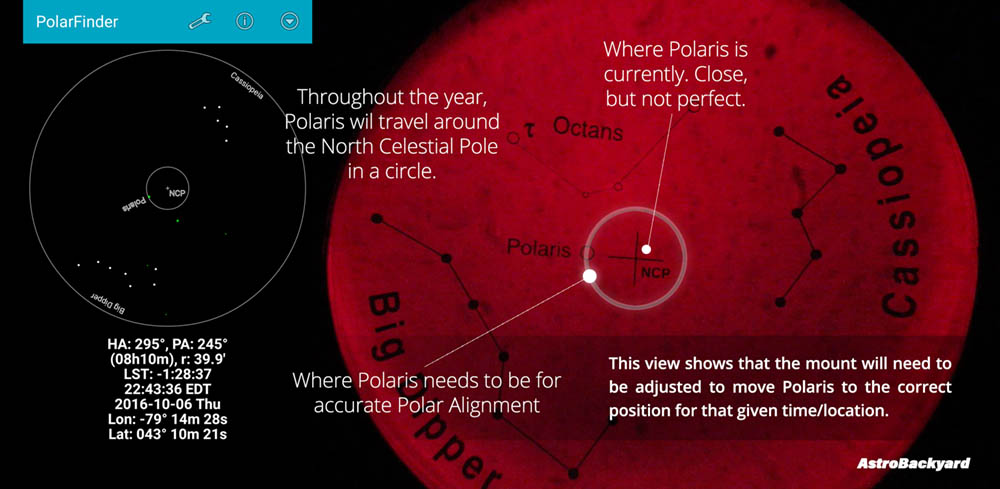
The graphic above portrays an example of the PolarFinder app screen, next to the view through the Sky-Watcher HEQ-5 polar scope.
The cross in the middle of the circle is the North Celestial Pole (NCP), and the ring that circles it is the path of Polaris throughout the year.
What if I don’t want to use my phone?
If you do not have a mobile device or internet connection where you are setting up your telescope, you can try Polar FinderScope software online. Print the polar alignment charts out beforehand and bring them with you.
5. Adjust the Azimuth
A German equatorial mount will have azimuth adjustment knobs for moving the mount from left to right. These knobs work in the same way that the altitude adjustment bolts did.
Loosen one, tighten the other. Turn the knobs a few times while looking through the polar scope. Polaris should have moved to either the left or the right. Continue this balancing act until the North star appears in the approximate horizontal plane that was displayed in PolarFinder.

6. Finishing Up
Now, go back to the Altitude adjustment bolts to raise or lower the mount further. At this point, Polaris should be very close to the exact position for a near-perfect Polar Alignment for the night.
Remember to tighten the adjustment bolts and knobs when you are satisfied with the accuracy of your placement. This will ensure that nothing moves or shifts during your observations or astrophotography.
If you are experiencing tracking issues or severe star-trailing in your images, it may be useful to re-check your Polar alignment later on. Make sure to view the current position of Polaris in your mobile app, and make any adjustments necessary to your mount.
![]()
7. Fine Tuning
Want even more accuracy when Polar Aligning your telescope mount? Try the Polar Alignment feature in SharpCap to increase your accuracy. SharpCap can help you align the RA axis of your telescope mount with the NCP by comparing images.
The same process applies when using a small star tracker to take wide-angle nightscapes using a camera and lens. These compact little mounts can rotate along with the night sky for long-exposure astrophotography, but they must be polar aligned accurately to work properly.
The QHY PoleMaster
It’s worth mentioning the PoleMaster device here, although I have not used one myself. The QHY PoleMaster is a high-precision electronic polar alignment scope. Along with the device, you’ll need to order the correct adapter for your specific EQ mount model.
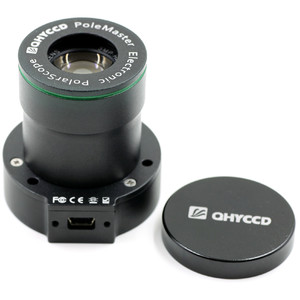
The QHY PoleMaster Electronic Polar Alignment Device
The QHY PoleMaster uses a high-sensitivity camera to capture an image of the northern sky to calculate where the true north is. It displays this information on a screen so you can quickly make the adjustment to the mount.
The nice part about the PoleMaster is, you don’t need to kneel down or contort your body to look through the polar finder scope or worry about entering the time and date to the handset.
The ASIAIR Polar Alignment Feature
The ZWO ASIAIR wireless controller and dedicated smartphone app have a user-friendly polar alignment feature that works exceptionally well. This is one of the most common ways I polar align my telescope mount for a night of deep-sky imaging.
You start by setting up your telescope mount in the general direction of the north celestial pole. Once it gets dark out, you can enter the Polar Alignment mode of the ASIAIR and it will start by taking a picture of the stars through your telescope.
For this to work properly, your telescope needs to be in focus. After a few seconds, the ASIAIR will use plate solving to identify the stars in the picture. Next, it will rotate the mount in the RA axis by 45 degrees and take another picture.
Now, the app will tell you exactly how much you have to adjust the alt-az adjustment bolts on the mount to achieve perfect polar alignment. I have found this method to be extremely accurate on my ZWO AM5 harmonic drive mount.
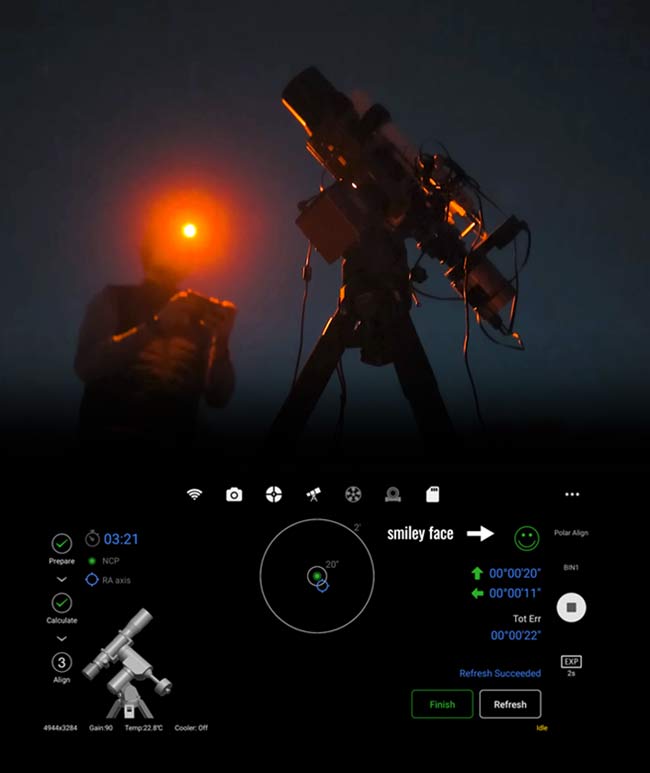
Using the Polar Alignment feature on the ZWO ASIAIR.
The Importance of Polar Alignment for Astrophotography
Polar alignment doesn’t just “help” you take better images, it’s absolutely imperative for success. For those lucky enough to have a permanent home observatory, you can be sure that every measure was taken to ensure that the telescope mount and pier were precisely polar aligned.
The beauty of a permanent setup in an observatory is, that the polar alignment process only needs to be done once. For those that set up and tear down their equipment each night like me, you’ll quickly become a master in polar alignment through experience.
A precise polar alignment can provide you with many benefits when it comes to astrophotography, including better autoguiding accuracy. This means that you’ll be able to capture longer exposures without the worry of tracking errors.
Even without the use of autoguiding, you may be able to capture long exposures with sharp stars depending on the mount you use. I recall being able to shoot 2-minute subs on my old Celestron CG-5 without autoguiding, thanks to the All-Star Polar Alignment routine.
Helpful Resources:
- The Best Astrophotography Telescopes Available in 2024
- How to Use Your First Telescope
- How Much Does a Telescope Cost?
I hope that you now have a better understanding of how to polar align your telescope for a successful night of astronomy. For a closer look at the rest of the gear I use for astrophotography in my backyard, please visit the astrophotography equipment page.
For more video tutorials and astrophotography tips, please subscribe to AstroBackyard on YouTube.