What is Dithering?
In astrophotography, to dither means to shift the pointing direction of your telescope (via the telescope mount) in random directions between each exposure.
This technique is a useful way to create images with a better signal-to-noise ratio by “canceling out” hot pixels, fixed pattern noise, and more.
By moving the pointing direction of the telescope, dithering shifts the stars to a slightly different place in each frame. As you process your images, you will align (register) and stack individual frames based on the stars in each image.
This subtle feature found in most camera control software applications (including Astro Photography Tool) can make a dramatic difference to your final image.
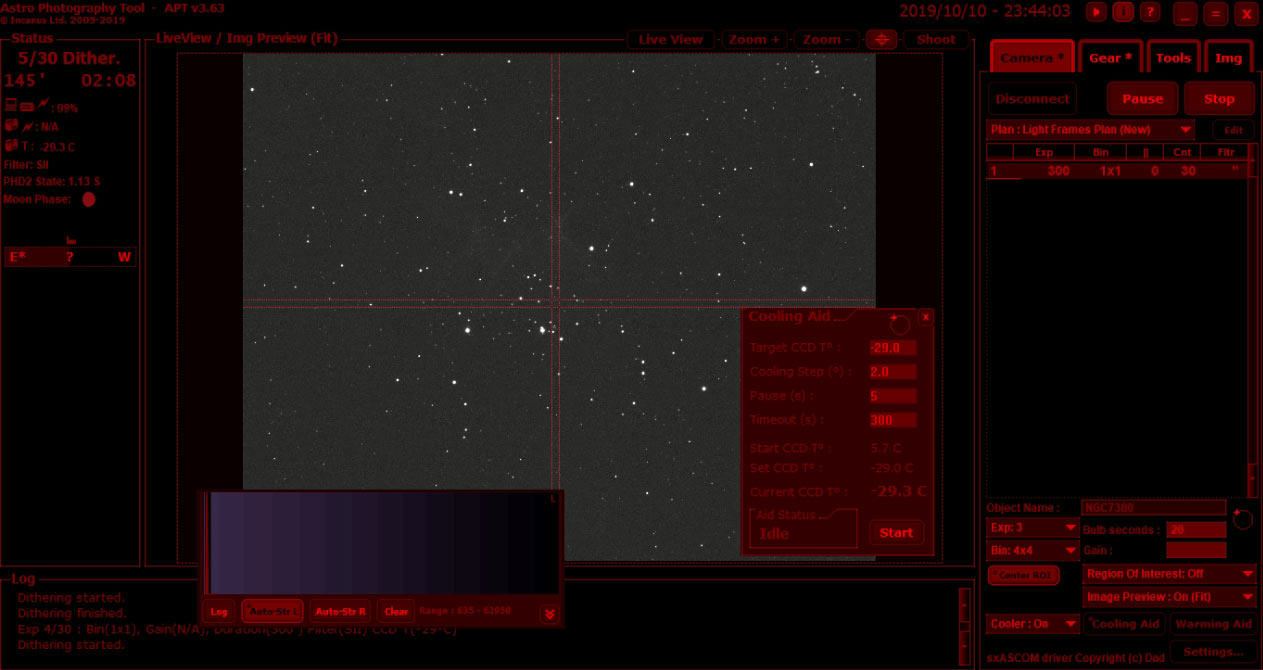
Using Astro Photography Tool and PHD2 Guiding to dither between each image exposure.
Astro Photography Tool (APT for short) can communicate with various guiding programs and devices to monitor your autoguiding performance. This communication between the camera capture software and your devices is necessary to provide dithering.
The gentle, random changes of the telescope’s position between each sub-exposure place your deep-sky object (the target) in slightly different positions on every image. However, the sensor defects, such as hot and cold pixels and ugly banding noise, remain fixed in each exposure.
When you stack the image exposures using a tool like DeepSkyStacker, the stars are registered and the images are aligned using the star positions. Suddenly, your deep-sky object is aligned in each shot, and the noise and other nasty defects become random (and are identified by the software).
The Sigma clipping pixel rejection method extracts the random pixel data and preserves your precious signal. The more light frames you collect, the better this technique will work. The APT user guide recommends at least 6 light frames for dithering to be effective.

The guiding/dithering settings dialog box in APT.
Jerry Lodriguss has written an extensive (and technical) description of the dithering process in this Sky and Telescope article.
In the past, I have manually dithered my astrophotography images, by shifting the image frame slightly after a few exposures. This was done on a portable star tracker that was not utilizing autoguiding.
I used this technique when capturing images of the Carina Nebula from the resort I was staying at in Costa Rica. I was using short exposures, an aggressive ISO setting, and I needed to do something to help reduce the noise in my final image.
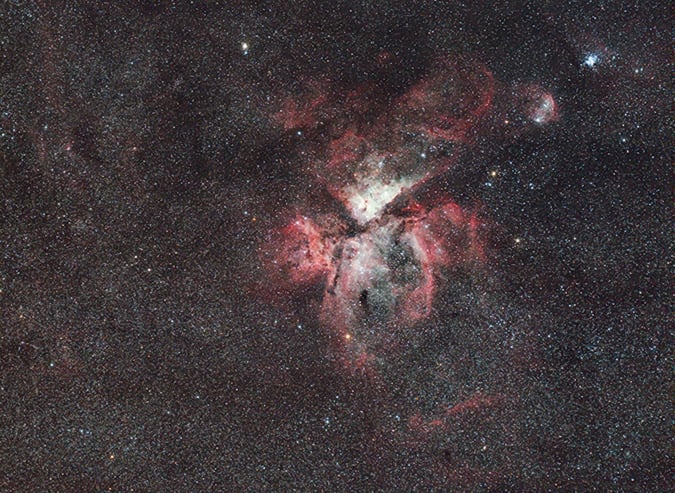
I manually dithered this image of the Carina Nebula using an iOptron SkyGuider Pro mount.
Benefits of Dithering
There is a saying by professional astronomers; “dither or die.” It may not be quite that serious for amateur astrophotography, but dithering will improve your images tremendously. Have a look at what my good friend Dylan has to say about dithering:
Dithering improves the signal-to-noise ratio (SNR) and can remove artifacts like hot pixels and satellite trails. Images shot with a regular DSLR camera can benefit from dithering, by helping to decrease the amount of fixed pattern noise.
Because the noise pattern is fixed, shifting the image frame between exposures allows your stacking software to isolate the signal from the fixed pattern noise and create an image with an improved SNR.
I dither every deep-space image I take (on an equatorial telescope mount) whether it was captured with a DSLR camera or a dedicated astronomy camera. It is a simple way to improve the overall quality of your stacked image and is easy to apply using today’s image capture software.
Dithering Before and After Example
The following images were captured using the same camera, the same filter, and the same settings on back-to-back nights. On night 1, no dithering was used during the capturing process. On night two, dithering was used between each 180-second exposure.
The images were stacked (28 light frames each) in DeepSkyStacker using the Kappa Sigma-Clipping method. 15 dark calibration frames were applied to each stack as well.
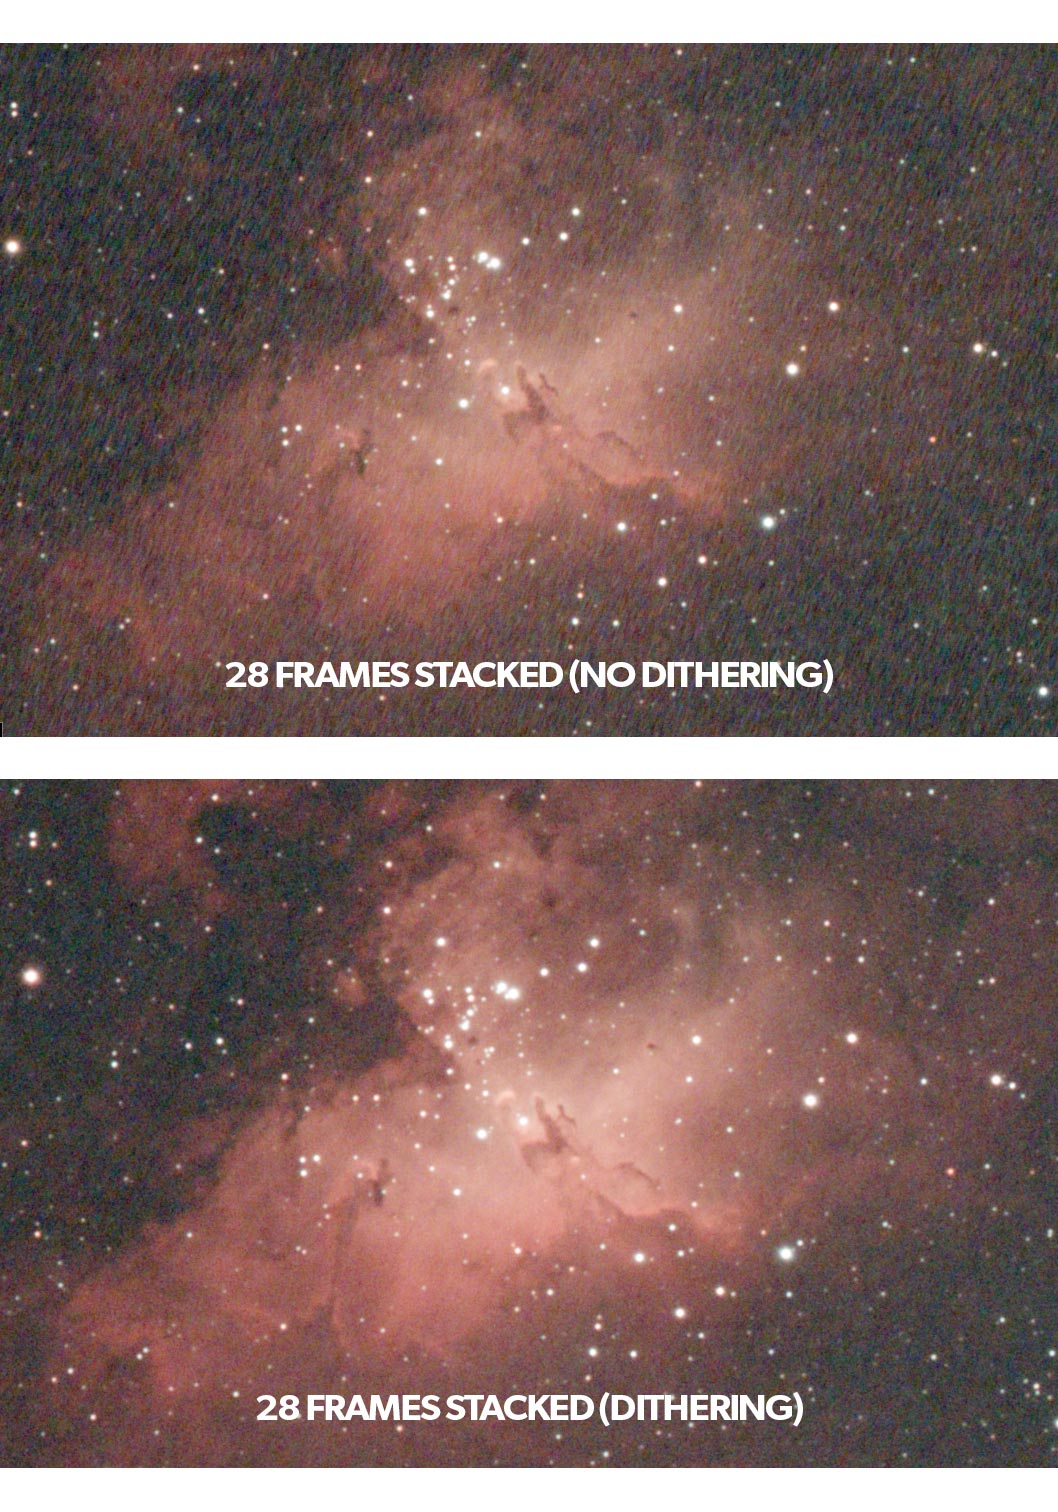
Example image showcasing the benefits of dithering.
You’ll notice the horrible walking noise present in the non-dithered image. This can be time-consuming and a real pain to remove in post, and can easily be avoided by using dithering.