Using A Canon 300mm Lens for Astrophotography
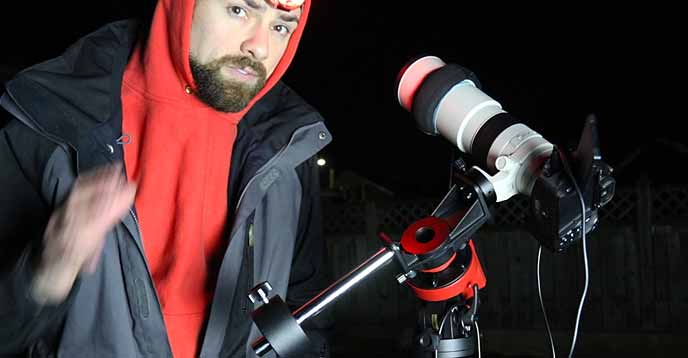
If you watched my video about Comet 46P Wirtanen, you may have noticed that my imaging gear included a Canon EF 300mm F/4L USM Lens. This may have seemed a little odd to those that are used to seeing me use a telescope for astrophotography, but a camera lens like this can be a great way to capture deep sky images.
Over the years, a lot of people have asked me why they should invest in a new telescope when they already own a high-quality telephoto camera lens with a comparable focal length. After all, a prime lens like the Canon EF 300mm F/4L isn’t cheap, and its got some seriously impressive optics.
So, if you’ve already got a lens like this in your kit, you should definitely try using it for astrophotography before investing in a new telescope.
Canon 300mm F/4L Lens for Astrophotography
Make no mistake, a telescope designed for deep sky astrophotography has many advantages in terms of deep-sky astrophotography. Specialized features such as a robust dual-speed focuser, light baffles, and the ability to easily accommodate astronomy cameras and autoguiding systems to name a few.
But if you’ve been into photography for a while, there’s a good chance you’ll already own some camera lenses that are perfect for astrophotography. The secret is, to leverage the tracking abilities of an equatorial mount that allows you to capture long exposure images of the night sky without star trailing.
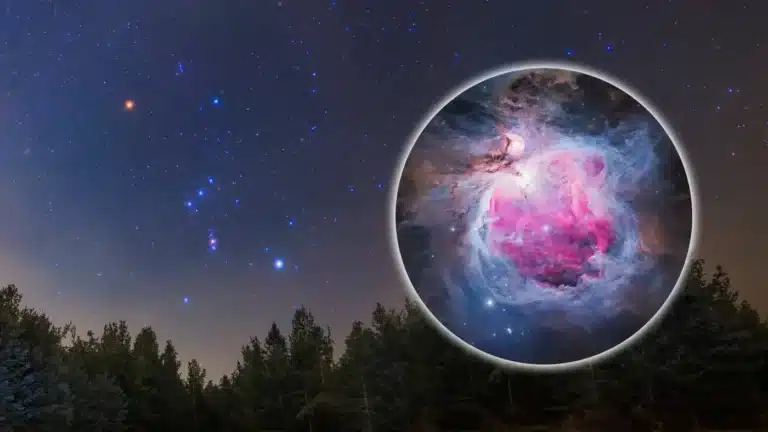
In this post, I’ll show you how I managed to capture an impressive portrait of the Orion Nebula using a 300mm camera lens from my backyard in the city. I’ll discuss the filter I recommend, the camera settings I use, and share the process of capturing long exposure images on a tracking mount.
My Canon EF 300mm F/4L USM Lens
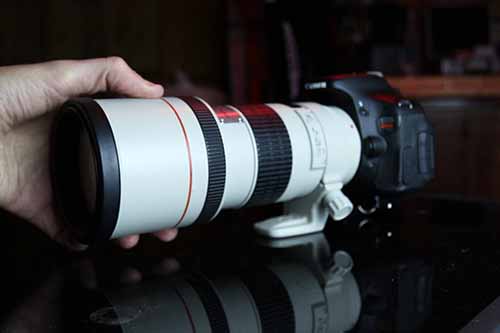
Canon 300mm F/4L (Non IS)
The camera lens I am using is a first-generation Canon EF 300mm F/4L (Non-IS). This is an old L-series lens from Canon that does not include Image Stabilization but does include the ring-type USM autofocus motor. Features like IS and autofocus won’t work for astrophotography, so older prime (non-zoom) lenses like this are a great value in the used market.
It’s quite useful to have prime lenses at different focal lengths in your astrophotography kit. You’ll be able to capture a wide variety of targets from large open star clusters to emission and reflection nebulae like Orion. (See my review of the Rokinon 135mm F/2 for even wider deep sky images).
Video: Deep Sky Astrophotography with a 300mm Camera Lens
I purchased my 300mm F/4L used, and drove a fair distance to meet the seller. The lens was originally intended for bird photography, which I still enjoy today with a 1.4 extender attached for more reach. The native focal length of 300mm and widest aperture are a better configuration for astrophotography purposes.
The 1.4 x Canon teleconverter introduces chromatic aberration, and I lose a full stop of light (F/5.6). This is not usually an issue in my daytime photography images, but it’s out of the question when photographing stars.
Using the Canon 300mm F/4L lens on a crop-sensor DSLR (APS-C) camera like my Rebel T3i will effectively create a narrower field of view than a full-frame camera does. This creates an equivalent focal length of 480mm with the crop factor applied (1.6X), which is important to consider when framing up an astrophotography target.
Using a simple FOV (field of view) calculator, you can get a preview of the expected image scale of your target. As you can see, the Canon 300mm F/4L and Canon EOS 600D combo frame the Orion Nebula and Running Man nicely.

The Field of View using a 300mm Camera Lens and APS-C Sensor DSLR
Most of the astrophotography telescopes I recommend for beginners hover around the 400mm to 700mm focal length mark, so this camera lens is quite comparable. Also, the Canon EF 300mm F/4L Non IS contains two UD (Ultra-low dispersion) lens elements similar to the construction of an apochromatic refractor.
The rather fast optics of this lens (F/4) is advantageous for night photography, as its widest aperture will allow plenty of signal (light) to be collected in each shot. For comparison, my Sky-Watcher Esprit 100 APO has an F-Ratio of F/5.5.
When it comes to acquiring astrophotography data for a healthy signal-to-noise ratio, a camera lens with a fast aperture is recommended. This is why camera lenses like the Rokinon F/2.8 and Canon F/1.8 are excellent choices for astrophotography.
Focusing the lens
Finding a precise focus using a camera lens is much more difficult than it is with a telescope. Rather than using a smooth dual-speed micro focuser, you have the challenging task of using the rather sensitive focusing ring on the lens (in manual mode of course).
It’s best to point the camera towards a bright object (not a star) to find the initial focus. The Moon or a distant streetlight will do. Once you have it dialed in using the lens’s widest aperture (F/4), you can then aim the lens at a bright star in the night sky using your cameras highest ISO setting.
From here, it’s a matter of trial and error until you find the sweet spot. Once you’ve found it, be very careful not to bump it out of focus when slewing to your target. You can always fine-tune the focusing ring on your deep-sky target using short test exposures after.
The Camera: Canon EOS Rebel T3i
This Rebel T3i (600D) camera has been “modified” for astrophotography, which isn’t nearly as complicated or technical as it sounds. I’ve basically removed an internal filter that blocks certain wavelengths of light from being recorded on the sensor (I didn’t modify this 600D myself, it was done by a professional).
The stock internal IR cut filter found in DSLR cameras like the Canon Rebel T3i creates “normal” looking daytime images, but can hold your astro images back. If you own a DSLR camera that you want to use for astrophotography, look into getting it modded. I waited almost 4 years before making this upgrade, and it significantly improved my astrophotography images.
This modification will better showcase the rich areas of hydrogen gas in the Orion Nebula. For certain deep-sky targets (such as the California Nebula) a full-spectrum modified DSLR is essential for a respectable image.

My Full Spectrum Modified Canon EOS Rebel T3i
The Orion Nebula isn’t one of them! A stock DSLR camera can capture exquisite images of this reflection/emission nebula with beginner-level equipment.
To photograph Messier 42, I’ll shoot a series of 1.5-minute exposures at ISO 400. The images will collect a healthy amount of signal (or light) on this nebula and the surrounding area. With the temperature hovering around zero on the night of acquisition, I benefited from a cool camera sensor that didn’t produce nearly as much noise as I experience in the summer.
Covering the sensor is an Optolong L-Pro filter. This broad-spectrum filter is an excellent choice if you are looking to produce natural-looking astrophotography images in the city. Light pollution is a big problem for many amateur astrophotographers, and filters like the L-Pro can make your life easier.
This filter clips-into the camera body, and fits neatly underneath the camera lens. Being able to use this filter with either a camera lens or telescope attached is a real bonus. I have also used this filter underneath the Rokinon 14mm F/2.8 lens for some wide-angle shots of the night sky from home.
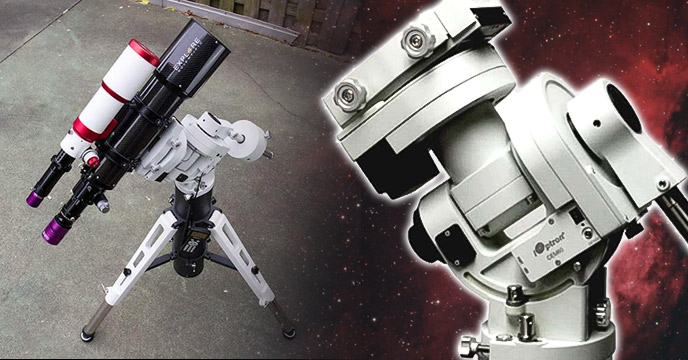
The Camera Mount: iOptron SkyGuider Pro
The iOptron SkyGuider Pro is the perfect solution for those looking to get started in astrophotography with a DSLR camera and lens. It’s a highly portable, non-nonsense astrophotography mount that allows you to start tracking the movement of the night sky for long exposure imaging.
With the counterweight attached, it can handle heavier lenses like this 300mm F/4L, and even a small telescope like the William Optics Z61.
For this mount to be effective, it must be accurately polar aligned. In the northern hemisphere, we have the advantage of being able to use the north star, Polaris, to help us align with the polar axis of the Earth.

The iOptron SkyGuider Pro Camera Mount
To start tracking, its a simple as turning the SkyGuider on, with the mode set to 1X sidereal rate. After that, the camera mount slowly matches the apparent rotation of the night sky, and my long exposure images record pin-point stars without trailing.
The SkyGuider pro includes an illuminated reticle that you can use as a guide to align the mount. This makes it really easy to get your alignment just right – which is critically important for astrophotography. Polar alignment and balance will make the biggest impact on your images.
The farther off you are in either area (balance and polar alignment), the shorter your exposure times will need to be. With a sound polar alignment and a careful balance, unguided exposures of 3 minutes or more are no problem on the iOptron SkyGuider Pro mount.
Locating Objects with the SkyGuider Pro
To locate and frame a deep sky target using this mount, it must be done manually (no GoTo functionality). For bright targets like the Orion Nebula, this is extremely easy, as I can line up the target using the viewfinder on my DSLR camera. For faint targets, or when using a narrowband filter, you may need to take a number of test exposures to get it framed just right.
I personally have the SGP mounted to a lightweight carbon fiber tripod. This is a highly portable configuration, but it’s likely a little too flimsy for folks that want a rock-solid platform. Consider using a more robust aluminium tripod with this mount.
The Target: Orion Nebula
The bright moon certainly isn’t helping me capture the faint dusty details surrounding Orion. Luckily, M42 is such a bright deep sky object that it can be enjoyed in less than perfect conditions. I’ve photographed this target so many times, and it never gets old.
It’s a spectacular target to test new equipment on, because you are bound to get a rather impressive image no matter which approach you take. The light pollution filter used (Optolong L-Pro) did a great job of reducing the unwanted artificial light present in my backyard, allowing the natural star colors to shine through.
To create my final image, I’ve stacked the individual exposures together using a free software called DeepSkyStacker. The resulting was then brought into into Adobe Photoshop for further processing. If you want to learn how I process my astrophotography images, have a look at some of the image processing tutorials I’ve shared in the past.
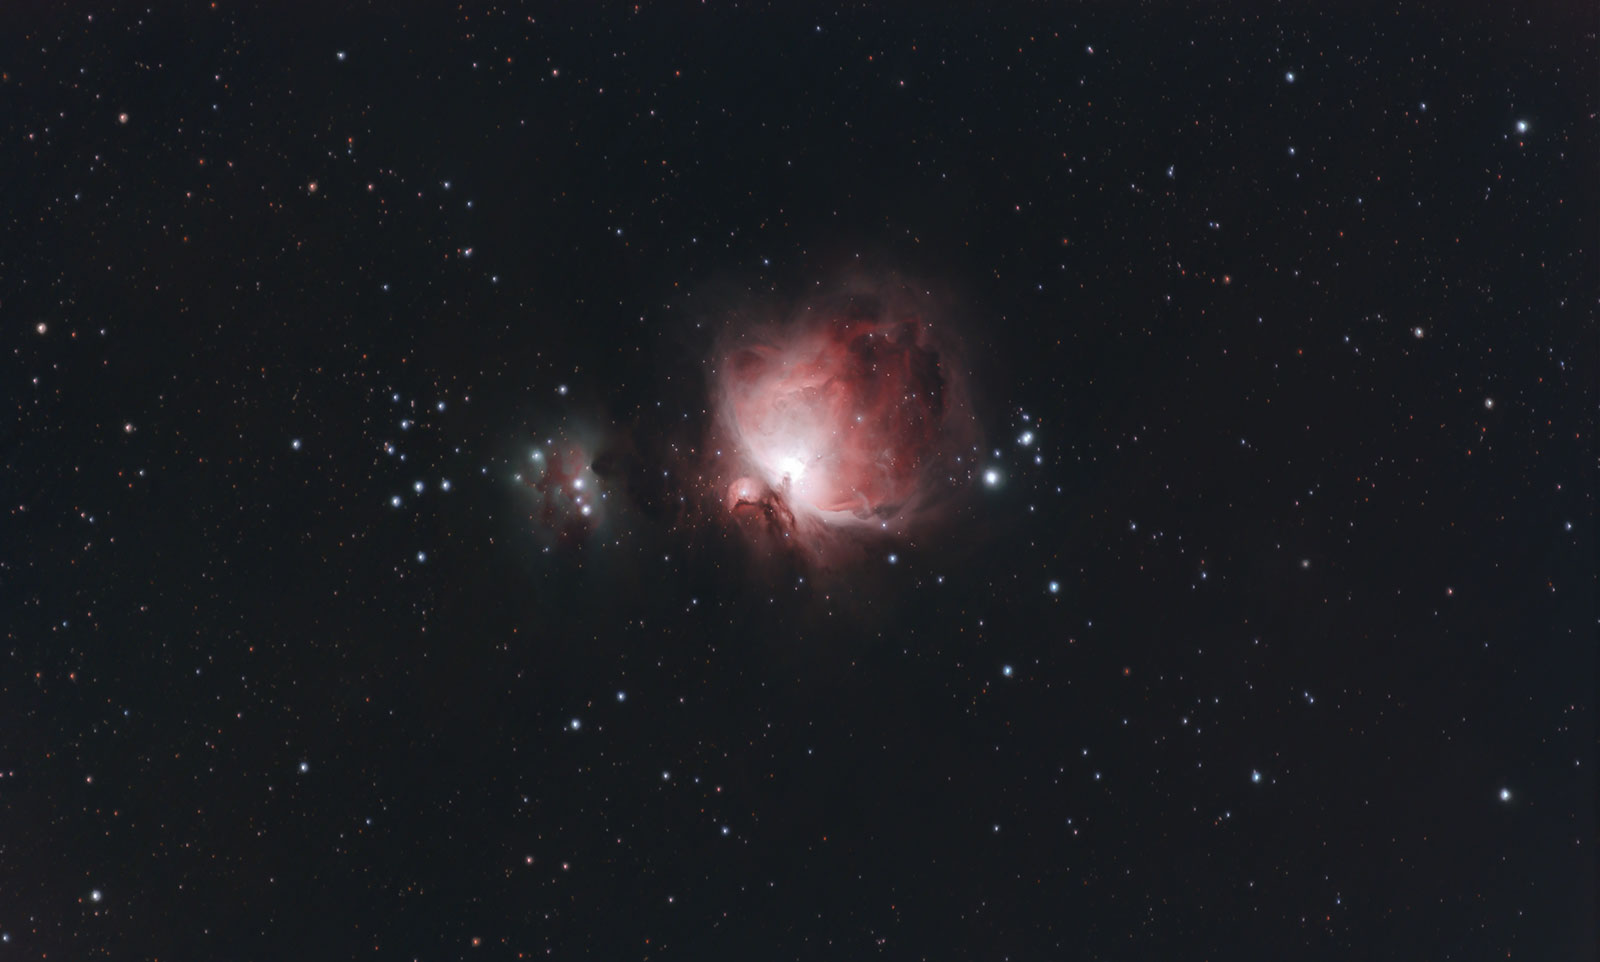
The Orion Nebula captured using a Canon EF 300mm F/4L Lens (Click for larger version)
Image Details
- ISO Setting: 400
- Exposure Length: 90-seconds
- Number of Exposures: 117
- Total Overall Exposure: 2 Hours, 49 Minutes
- Support Files: 15 Darks, 15 Flats, 15 Bias
- Image Processing: DeepSyStacker, Adobe Photoshop
The Bottom Line
As you can see in my image above, the stars are sharp and free of chromatic aberration (color fringing). This is a testament to the high-quality optics of the 300mm F/4L lens, and an important factor to consider when choosing a camera lens for astrophotography.
Capturing sharp, accurately colored stars is the ultimate challenge for optical equipment, and the Canon EF 300mm F/4L passes with flying colors. The field is also extremely flat, another trait of only the best camera lenses.
A prime telephoto camera lens like the Canon EF 300mm F/4L is a great way to capture deep-sky astrophotography images, as long as you’ve got a way to track the night sky for each shot. The wide field of view is very forgiving, meaning autoguiding isn’t necessary for a successful long exposure image.
Whether you’re using a camera lens, telescope, or a pair of binoculars. I hope you’re able to get out and appreciate the impossibly beautiful history of our universe that shines above our heads this season.
Until next time, clear skies.
More Lenses For Astrophotography:
Helpful Resources:
- Astrophotography Cameras – What’s the Best Choice for Beginners?
- Examples using a Canon EF 300mm F/L Non IS for astro imaging (Cloudy Nights)
- How to Make a Bahtinov Mask for Your Camera Lens (Deep Sky Watch)

Trevor,
This entry is perfectly in synch with my current abilities and ambitions. I love my Apertura AD8 and am anxiously saving to progress from I-Phone images to some DSLR work. I’m leaning towards the WO Z61 with the SkyWatcher Pro.
Did take advantage of clear skies to observe Neptune on the 7th and Uranus on the 16th.
Greatly appreciate all the effort you put into advancing our understanding of this amazing universe.
Hi Trevor,
Thanks heaps for you always entertaining and very informative videos and blogs. My favourite YouTube continuing education!
I see you won the ‘move to darker skies’ debate. Whoopee! Our collective thanks to your long-suffering and adorable wife. I hope she will agree to something more than cameo appearances in future. We all want to meet her!
Christmas greetings to you both from us, Penny and Mel Davis from Sydney. A special virtual bone for Rudy!
I second Melvyn’s thoughts here. Also, thanks for dropping back to some more beginner things from time to time! #RudyRules
Andy Weeks
Hi Trevor,
I have been piecing together a deep sky rig since I found your channel earlier in the summer. This post fits perfectly with what I am working on. I just wish I had a few less cloudy days.
Hope to meet you in person at the Cherry Springs Sky Party!
Hey Trevor,
I’ve been watching your YouTube videos since quite recently..
I’m about to buy the SkyGuider Pro and I haven’t once seen anyone use the guiding option in this tracker – successfully. I haven’t seen/heard of any great/good review where someone has specifically used the SkyGuider Pro with an autoguider and a DSLR camera mounted side by side..
Can you tell me more about how to use a DSLR camera with an Autoguider in this mount? First off, what should I buy to mount the camera and the Guider side by side?
Secondly, which guider should I use (I’m concerned about the payload limit) so that I could track without issues?
Thirdly, what is the periodic error of the SkyGuider Pro and how much better does it get with an auotguider?
My uncle is buying the tracker from the US and will be bringing it back to India so that I may use it.. So I need to make an informed decision before buying this.
I also need help in picking a dovetail incase it will be required for autoguiding.. So I need to order all of these things to his US address before he gets here so that I don’t regret the loss of missing out vital parts.
Thanks for listening.
An amateur astronomer from Bengaluru, India.
Udayan
Trevor, thanks for another great segment on astrophotography for the common man! I’ve got a Canon EOS-30D and a handful of lenses, and just recently moved to a darker sky location in Indiana. The Sky Guider Pro is on my Christmas list, which I’ll run for my DSLR (and hopefully my Williams Optics Z73) and with those I’ll be employing a lot of what you’ve taught me over the last couple of months. Thanks again, and clear skies!
Thanks Trevor for posting sessions like this. I am at the very beginning of my journey into AP and this is right up my alley. I have been working on Orion’s untracked with some less than ideal lenses, but having heaps of fun trying anyway.
Something no-one seems to talk about is the type of tripod to use with star trackers. What are your thoughts on this; height, pay load limits, ball head verses flat horizontal, carbon fiber verses aluminum?.
Hi Trevor! Can’t thank you enough for all the help you have been to all us Astronuts. I have just one question- where can I buy an Astrobackyard
Tshirt???
I just picked up an Orion Starseeker Iv Alt Mount and hooked up my Sigma 150-600 up to it with my 5dIV. I’m going to be limited a bit with my Ir cut filter still in place but I’m not willing to mod out this particular camera, at least not yet. the nice thing about the sigma is the ability to turn off IS. It’s been about -20 in Chicago so have not been able to get out and test it out yet but I’m hopeful it steps up my game a bit. I’m in a Bortles 8 like you were so here’s hoping.
Hi
Thanks for the details report. I have examined the Orion photo at full resolution and found a lot of “red dots”, is it artifacts? noise due to heat? since sensor is not cooled? or due to processing?
Thanks
I think you might find they’re stars, from the Ha data overlay. Or I may be entirely wrong.
Thanks, I have a Canon 2.8 300 mm sport L glass lens and canon camera. How do I attach these to a Skywatcher 6 pro for example?
thanks