My Latest Portable Astrophotography Build
Are you looking to build a full-featured (GoTo, autoguiding, etc.) portable astrophotography rig for this summer? If so, I think I have found the perfect “template” to follow (with plenty of room for substitutions, of course).
The major difference between this setup and the portable rigs I’ve shared on this site before is that this one features complete mount control via the ASIAIR Plus wifi controller. The entire system can be powered using a portable power station, for complete mobility.
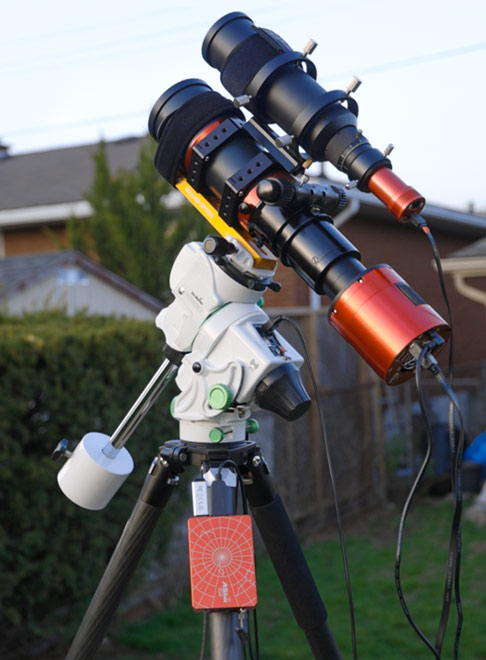
It’s a lightweight, wide-field refractor telescope configuration that revolves around the Star Adventurer GTi, that doesn’t skimp on any of the modern features astrophotographers have come to expect these days (except an autofocuser). Again, consider this less of a shopping list to follow piece by piece, and more of a roadmap to an enjoyable setup.
A setup like this excels in wide-field nebulae (like the North America Nebula), and large galaxies (like Andromeda), not planets or small galaxies. A travel-friendly setup has its limits in terms of payload capacity, which means a wide-field imaging system.
Want to use a different telescope or camera? No problem. The main idea of this system is that it mirrors a much larger configuration using a robust equatorial telescope mount like the Sky-Watcher EQ6-R.
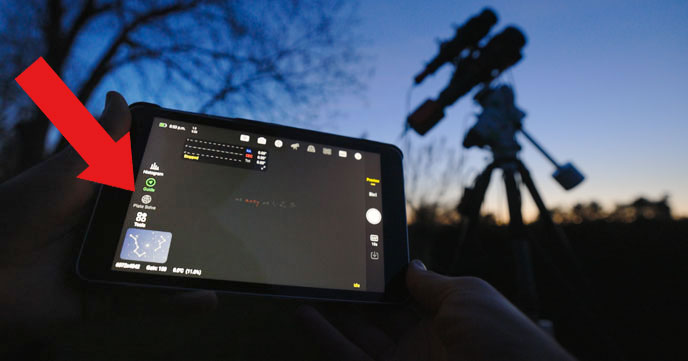
The new SkyAtlas feature (included in the latest update to the ASIAIR), allows you to tap your way from target to target, using a real-time star map of your sky. It’s a thing of beauty.
The Ultimate Portable Astrophotography Rig in 2022
In this post, I will share with you an ultra-portable, travel-friendly, easy-to-use deep-sky astrophotography setup that I have recently put together. It’s light, it’s battery-powered, and it can (almost) do it all.
It is unlike any other kit I’ve shared on this website before, mainly because I don’t usually use plate solving or mobile apps (in this case, the ASIAIR) to control my telescope during an astrophotography session.
That’s right, I usually stick to the hand controller for the star alignment and GoTo process for my deep-sky astrophotography sessions in the backyard.
You could say I have been doing things the ‘old school’ way up until now. But in this imaging session, I take advantage of the full capabilities of the ASIAIR Plus and plate solving.
Plate Solving
Plate solving is used to properly align your telescope without doing it all manually (i.e. instead of manual polar alignment). This particular technique uses images and patterns to determine where your telescope is pointed in the night sky by comparing your field of view with a star catalog.
I personally don’t use plate solving to align my telescope very often, especially on mobile-friendly setups and star trackers. To me, a star tracker is all about mobility and freedom. Tethering yourself to a laptop computer adds complexity and the need for a sufficient power source.
The ASIAIR now includes the SkyAtlas planetarium with plate-solving.
Why I didn’t plate solve for so long:
If your deep-sky astrophotography kit is stationary, in a semi-permanent location, I understand why it makes sense to plate-solve. Especially if you have selected and finalized all of your hardware and software.
Me? I am constantly swapping telescopes, cameras, mounts, and even imaging laptops throughout the year. It takes time to get the software, drivers, and catalogs installed properly each time.
I chose not to spend precious clear-sky time sorting this out and have always opted to star align the mount myself with the hand controller. I don’t get many clear nights a year, and this was the most reliable way to produce an image on a consistent basis.
My observatory, however, uses plate solving to find and solve incredibly faint objects in the night sky, but this is a robust, permanent setup that took a long time to get sorted out.
Portable Kit Breakdown
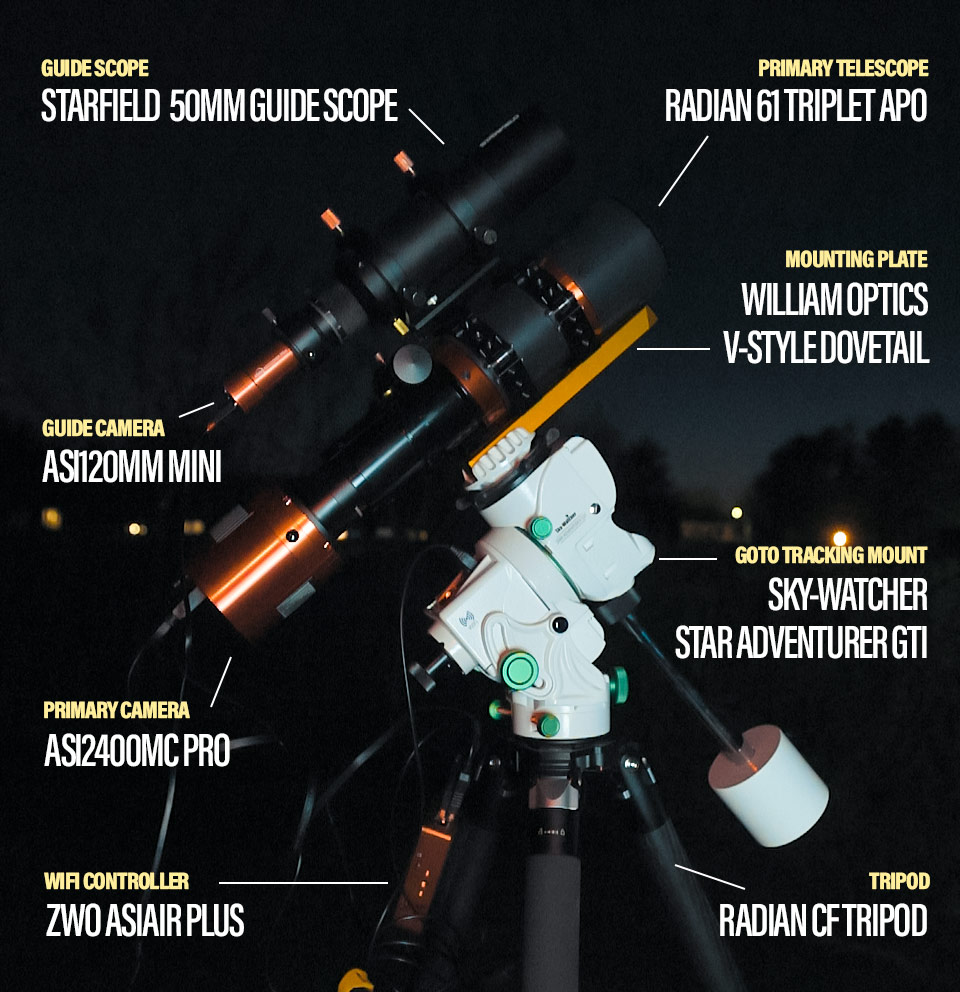
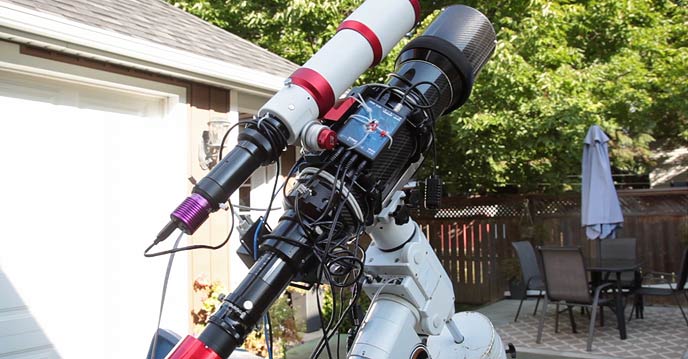
Before I get right into the details of how it works – here is a complete breakdown of the portable astrophotography kit I am using for this imaging session:
- Star Tracker Mount: Sky-Watcher Star Adventurer GTi
- Telescope: Radian 61 Triplet APO Refractor Telescope
- V-Style Dovetail: William Optics V-Style Dovetail
- Camera: ZWO ASI2400MC Pro Color Camera
- Tripod: Radian Carbon Fiber Quick Release Tripod
- Guide Scope: Starfield Optics 50mm Guide Scope
- Guide Camera: ZWO ASI120MM Pro Guide Camera
- Camera Controller: ZWO ASIAIR Plus
Power Cables and Connections
I use a 12V 4amp power cable to power the ASIAIR WiFi controller and run some USB dew-heater bands. When running this setup from home I plug into regular household AC power, but both of these items could easily run off a small battery pack (which I will cover in an upcoming YouTube video).
The star tracker mount runs off of 8 x AA batteries, one of my favorite features of the Star Adventurer GTi. I managed to run the GTi for 6 (full) nights before needing to replace the batteries.
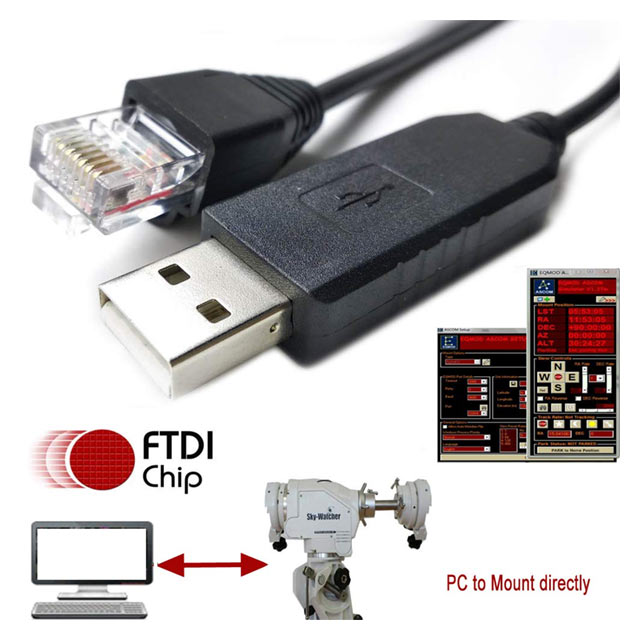
Don’t forget the RJ45 control cable for Sky-Watcher Mounts. This cable connects the ASIAIR to the mount and opens up the most powerful features of this setup. This is the one I use, and I can tell you for a fact that works with this amazing little setup.
Speaking of cables, there is one cord that is noticeably missing from my setup. One that I just couldn’t live without for the last 10 years, the ST-4. This cable is no longer needed since we are pulse guiding to the mount and not “on-camera”.
Essentially the ASIAIR guiding system sends pulses directly to the mount to make corrections to the tracking, instead of through the guide camera via the ST-4.
If you’re using an ST-4 cable for autoguiding with PHD2 guiding and everything is running well, don’t feel like you are missing out. One of the few added benefits of pulse guiding is that you no longer need to recalibrate your guiding after pointing to a new location in the sky. Not a huge deal.
The change from the ST-4 cable to the RJ45 control cable is a slight improvement, but the real power of this RJ45 control cable for Sky-Watcher mounts is the new plate-solving abilities the mount now has.
Yes, the Star Adventurer GTi can already GoTo objects in the night sky on its own but the ASIAIR takes it to the next level.
The ASIAIR Plus
If you own an ASI camera and appreciate a streamlined setup, the ZWO ASIAIR Plus will be your new best friend. It is the easiest way to control your dedicated astronomy camera, and automate a sequence of images.
I was hesitant to switch from my traditional capture methods at first, but have since fallen head over heels for this ingenious device. There are plenty of other options out there for camera and mount control (including mini PC’s), but the ASIAIR does a wonderful job at wrapping everything up into an easy-to-use package.
The ASIAIR user interface also makes the object location and framing stages of the astrophotography process very enjoyable. You just search for the deep-sky object you want, and the mount slews directly to it and centers it. It’s that easy.
Your telescope mount now knows exactly where it’s pointed, without you fumbling around back and forth confirming alignment stars. The RJ45 control cable connection and the appropriate settings in the mobile app are all you need for this to work.
Even if a good old 3-star alignment makes me feel nostalgic and more connected to the sky, saving 20 minutes of imaging time feels pretty good too.
How it Works:
The ASIAIR interface can do everything here from polar alignment (I have not personally explored this feature) to setting camera temperature to focusing. I have used an ASIAIR for several years to run an imaging plan and autoguide, but I didn’t tap into the incredibly easy telescope control features (including SkyAtlas) until now.
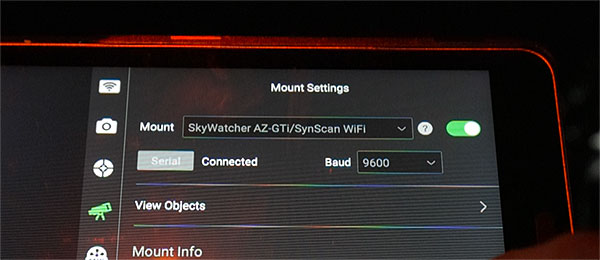
Here is the telescope mount connection panel where I can confirm that the Star Adventurer GTi is indeed connected. Notice that I have the SkyWatcher AZ-GTi/SynScan WiFi mount selected here, along with a Baud 9600 (the default setting).
Now the camera, guide camera, and tracking mount are connected to the ASIAIR controller. Two additional pieces of hardware you may wish to include here are a filter wheel (for a monochrome camera), and an autofocuser.
Make sure that you have set the accurate focal length of your primary telescope and guide scope, or else the plate-solving mode will not work. For me, this was the following:
- Radian 61 Triplet APO: 275mm
- Starfield 50mm Guide Scope: 200mm
What is SkyAtlas?
I missed the announcement from ZWO that SkyAtlas was introduced in March 2022. However, after installing the latest ASIAIR update, I noticed a small “star map” box placed on the lower left-hand side of the user interface.
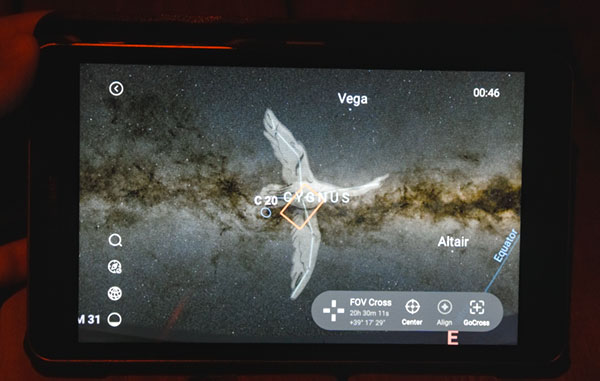
Whether you call it “planetarium mode” or SkyAtlas, it is essentially the same experience you are used to with a tool like Stellarium. You can also use the traditional “object search” feature on the ASIAIR to find and slew to a target if you prefer.
As with any astrophotography session, you will first need to polar align your equatorial mount before using the plate-solving feature. You can use the aided tool in the ASIAIR, I just do it manually as I did (using the Sky-Watcher polar alignment aid).
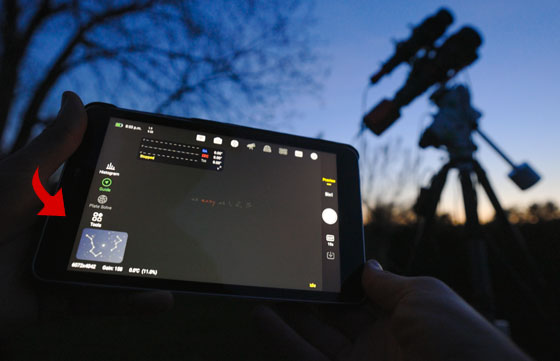
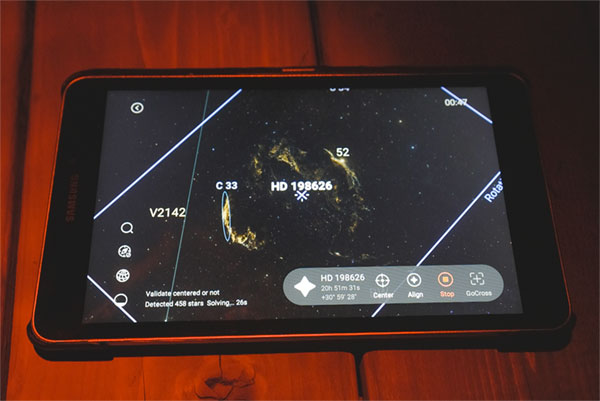
The new SkyAtlas feature is in the bottom lefthand side of the UI.
Since I like to dial in my focus before shooting my deep-sky target, the first object I “tapped” on my tablet was a bright star. Because I don’t have an autofocuser, I use a Bahtinov mask to focus the telescope manually.
Vega is in a convenient spot right now, so I started with that. I simply need to tap on it in the sky map and press GoTo. Now, remember, I haven’t done any type of star alignment at this point.
The mount is going to find this star and center its position on its own by taking pictures and plate solving the star fields it sees. It will automatically center the object, which is so handy when focusing your telescope manually with a Bahtinov mask.
You might be thinking, a bright star is easy to find, “I could have done that on my own”. But what about an extremely faint dark nebula that is nearly impossible to locate manually?
The software will find, confirm, and center any object you want to photograph. It is a similar experience to selecting an object within Stellarium, except this time, the telescope moves towards it and displays the exact framing of your sensor!
Controlling the star tracker with my mobile tablet via the ASIAIR and SkyAtlas.
My Imaging Session
To test out this kit, I set up the telescope in the backyard to collect light on the Veil Nebula complex, a dramatic intersection of supernova remnants in the night sky.
I have photographed each area of the Veil Nebula separately before, but I have never photographed the entire complex at once. The massive field of view (275mm) on the Radian 61 means that I can capture the remains of this exploded star in its entirety.
I decided to use the Optolong L-Extreme filter for this target, and when you see the final image, I think you’ll completely understand why. This light pollution filter does an excellent job of isolating the important wavelengths of hydrogen and oxygen gases emitted by this object.
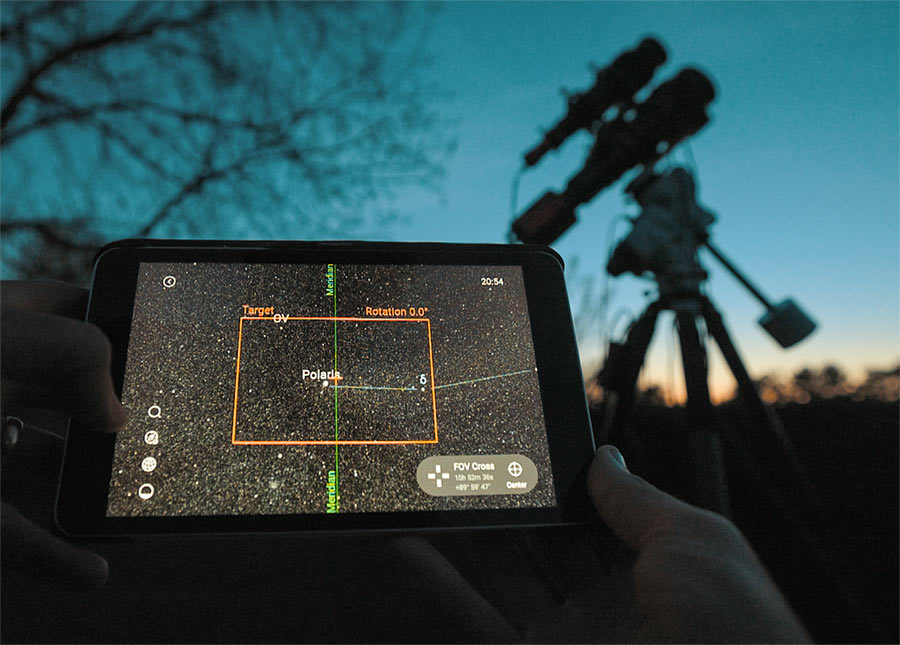
Even though I could see the Veil Nebula Complex visually in each sub exposure, the field of view indicator and the exact orientation on the ASIAIR star map confirm that I have indeed enveloped the region.
The SkyAtlas feature shows you exactly where your camera and telescope are pointed (including the orientation).
Running an imaging sequence on the ASIAIR is very straightforward. You just need to use the “Autorun” selection in the camera tab and set up a simple series of images on your target. I usually take 40-50 sub-exposures of 5-minutes in length when using a multi-bandpass narrowband filter like the Optolong L-eXtreme.
This is where you will also set up a sequence of dark frames, flat frames, and bias frames if necessary. For my imaging session, I only used a set of temperature-matched dark calibration frames.
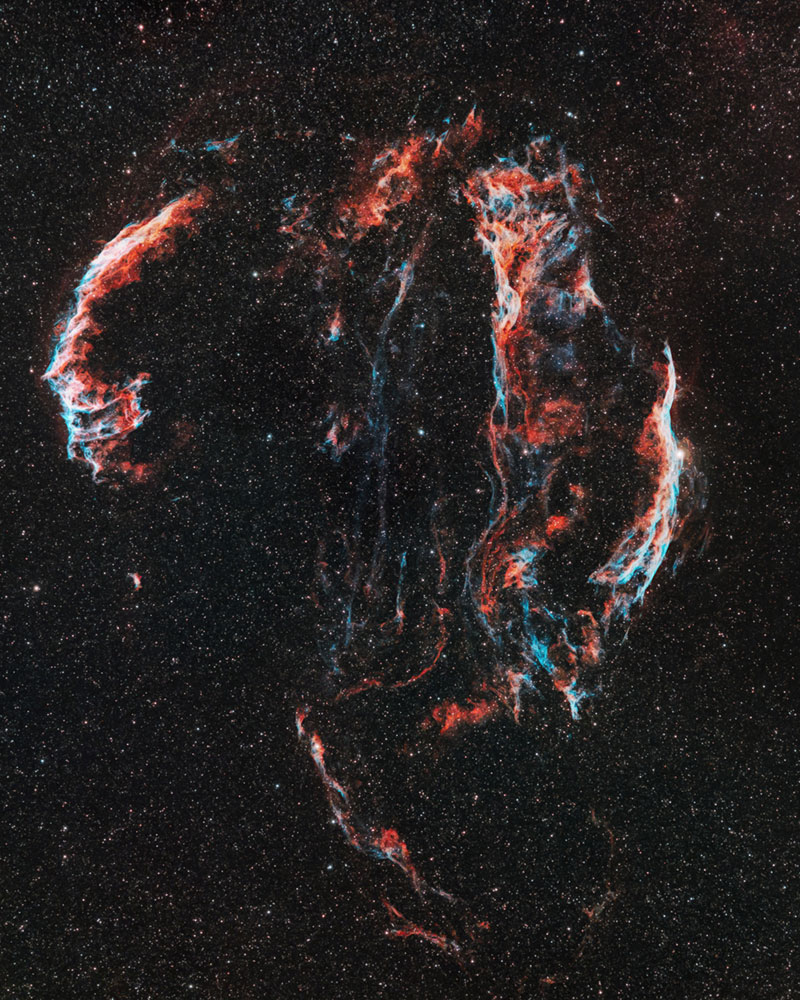
My final image of the Veil Nebula complex, captured using this system.
The final image includes 72 x 5-minute exposures (6 hours total) at Unity Gain. The images were registered and stacked in DeepSkyStacker and processed in Adobe Photoshop (with gradient removal in PixInsight).
For a walkthrough of my image processing steps, you can see my detailed instructional guide here: Premium Astrophotography Image Processing Guide.
Final Thoughts
I used to manually star align my telescope mounts in place of a software-aided plate-solving routine. Like I said before, this was a matter of convenience, routine (and maybe a dash of procrastination).
However, I was shocked at how well the ZWO ASIAIR mount control (including SkyAtlas) of this little star tracker performed. It was one of the most painless new astro-gear moments I’ve ever experienced.
To have a grab-and-go setup like this with so much control and so much precision is really exciting.
The reason I created this post was so that more people realize that this option not only exists but it’s probably a lot better than you thought.
If you’re extremely tech-savvy, you will probably (or already have) build yourself a system that can do all of this using a mix of equipment and creative solutions.
As you know there are a million ways to go about the astrophotography experience and the road you take really comes down to preference and budget.
I look forward to expanding this system even further to include an electronic focuser and filter wheel and I’ll bring you along for the ride.
This will be my travel astro-rig for summer 2022 and I can’t wait to get it under some dark skies.
- Star Tracker Mount: Sky-Watcher Star Adventurer GTi
- Telescope: Radian 61 Triplet APO Refractor Telescope
- V-Style Dovetail: William Optics V-Style Dovetail
- Camera: ZWO ASI2400MC Pro Color Camera
- Tripod: Radian Carbon Fiber Quick Release Tripod
- Guide Scope: Starfield Optics 50mm Guide Scope
- Guide Camera: ZWO ASI120MM Pro Guide Camera
- Camera Controller: ZWO ASIAIR Plus

This is very interesting to me. Is there a way to use a system like this with a regular full frame camera and lens? (Say a sony a7/canon r6)?
It looks like the asiair plus is tied to their camera? That would be a non-starter for me.
I am upgrading my main photography camera and would love to add an equatorial amount (the one mentioned here) as well as other stuff over time. I would *really like* fully automatic capabilities on day one with an app.
Any way to do that with a normal camera?
Thanks!
Derrek – the ASIAIR works with most of the popular DSLR/Mirrorless cameras on the market. It supports the EOS R and Ra, I’m not sure about the R6. But yeah, for dedicated astronomy cameras, it’s ASI cameras only. There are some other options out there for you to build a travel-friendly kit that functions like this (full mount control, plate solving etc.), I have just not personally tested one! Either way – the Star Adventurer GTi is probably your best bet in terms of a portable mount. Clear skies!
Thanks! Looks like sony isn’t supported at all. Not sure if anyone else does support sony. Unfortunately, sony is almost certainly going to be my next camera system. so I need to understand what it can’t do. If it can still polar align, guide, track… etc, but just can’t do the images directly, that’s a non-issue.
I am trying to figure out what using an incompatible main camera disables.
The plate solving and Meridian flip automation are absolute game changers.
Entering 0 for your focal length will allow ASIAIR to determine it for you. I’ve had issues with it not plate solving or polar aligning properly when I entered what I thought were my focal lengths.
It shows my Raptor as 325mm and my 8″f6 Newtonian as 1370mm.
As long as it works, I’m not going to argue with it.
Thanks for your content!
I’ve been using the ASAIR Pro for about a year or so and am a HUGE fan. It’s much easier to use its plate solve feature to orient the scope than to line up the mount with three stars using the the cheezy 1970s-era looking hand control that came with the mount (I have the HEQ5). It’s not only easier for orienting the mount, because it iteratively zeros in on a target, it’s ultimately much more accurate in finding the target than the hand control – the ASAIR almost always is dead on. Having said that, it’s still a good idea to keep an eye on the scope while it is moving toward a target, as it rarely, but more than never, will get a wild hair and go on a bit of a mispointing frolic (in that regard, don’t plug it into the hand control (that did not work well at all); ditch the hand control and buy the cable to connect the ASAIR directly into the mount).
The polar alignment feature works pretty well also. However, it rates your alignment time against everybody else’s time and rewards or scolds you for your standing . . . I could do without being mocked by my mount when I take an inordinately long time to align (although you get fireworks when you do it quickly). 🙂 Brused ego aside, it’s a great feature.
Thanks for the update on the Sky Atlas feature! Under the theory of, if it ain’t broke, don’t fix it, I haven’t bothered to do the most recent firmware updates. That looks like a worthwhile improvement (particularly, showing the orientation, that otherwise is tricky with a very dim object). Fingers crossed that that is available for the Pro as well as the Plus.
My only quibble with the ASIAIR Pro is that it often drops the WiFi connection to the iPhone/iPad. When it drops, it will continue to do its thing, but may take a while to send a completed sub images to the phone. The new Plus with external WiFi antenna probably fixes that, but I likely won’t ditch my current Plus for just that upgrade.
I also had some quibbles with the guiding settings. For a long time, I couldn’t guide because my guider was acting as an “unguider,” moving the scope around and ruining my shots. I couldn’t find instructions for the guiding settings, but finally figured out that I could fix my issue by tinkering with the declination setting.
Quibbles aside, I’m very happy with my ASIAIR Plus.
BtW . . . love your website!! Thanks for sharing your experience. I picked up astrophotography after I bought a cabin in 2019 on a WV mountaintop in a dark sky location (my primary residence is in a Washington, DC area highrise condo) and still am on the bottom end of the learning curve (although am nailing some nice images on the way up). My WV neighboorhood is filled with domes and slide-off roofs, as many astronomers (retired NASA and JPL types) bought out there for the dark skies and fast internet (long story) for remote connections. The location also is prime for my other nerd hobby – ham radio – but that’s for another website. 🙂
Clear skies!
John
I have been thinking about doing a very similar travel scope system. I do have one question about the choice of camera, though. With such a wide field and short focal length, why are you using a camera with a 5.94 um pixel size? Wouldn’t a 3.8 um camera give you much better sampling? You are getting about 4.5” per pixel with your setup, very undersampled.
Hi Trevor,
Hope youre doing well mate.
Just wondering how you connected the ASI Air to the GTI, I have had significant issues with this. Everything is leading me to that I need to configure network settings in the “modify station” tab in the Syn Scan app, change the IP address of the mount and then plug all that info into the AIR. Surly there is an easier way of doing this and wondering how you did it?
I am using the same cable as you with a very similar setup but can not get it connected to the mount.
Best Regards
Ben
Hello,
I am seeing the necessary cable to connect the asiair plus to skywatcher gti, in the amazon link there are 8 possible, which would be the correct one?
Thank you very much
Cheers
Juan
Hi Ben, regarding how to connect the ASIAir to your GTI…
Short: Use the AAP’s Station Mode to connect to the mount, then in the AAP’s ‘Mount’ settings, enter the IP of the GTI. Synscan not required.
1) Ensure your GTI is powered.
2) In AAP, go to ‘Wi Fi’ settings, go to ‘Station Mode’…turn on ‘Station Mode’….and then select the GTI hotspot from the list. There should be no password required.
3) Then, in AAP, go to ‘Mount Settings’, from the drop-down list select “Skywatcher AZ-GTi/Synscan Wifi’
4) For IP enter the IP address of the GTI’s hotspot…typically 192.168.4.1…..the port number is 11880
That’s it…the mount fields should ‘light up’ once it connects.
You can test it by doing a manual slew….
FYI…you can still connect to the AAP wirelessly or by ethernet and this step still works.
Clear skies!
Mario
3) Once
Hey Trevor, came to this link from your video. Great stuff! In the past few years I’ve had a 150mm celestron Newt on Goto, A WO Z73 on AVX, and currently ready to sell my Zhumell dob with encoder rings for something more portable. This setup looks awesome to me, except many of your links go to OPT which is now Agena and the Radian 61 is not available. A nice touch would be to update links and replace the Radian 61 with another comparable scope. Also, totalling up the cost for an idea of the setup cost would be great. We winter in AZ (Oct-May) and summer in Maine so portability is great. I have never used the ZWO cameras (or any like it). I’ll probably look for a 72mm APO and then work towards a similar setup to this (keeping weight in mind). Thanks for this info! It give me hope I can find something decent for casual visual astronomy as well as occasionally dabbling back in astrophotography which I started doing in the early 90’s with a Meade LX200 8” SCT and a pentax K1000 film camera. Cheers!
Do you use a tablet with the ASIAIS Plus? If so, can you recommend one? My old eye won’t tolerate looking at the tiny screen on a phone at night for too long…
Thanks,
Gene
Hi Gene. Yes, I do use a tablet with the ASIAIR Plus! The one I use is a Samsung Galaxy Tab A8, 32GB, 10.5″ – it works wonderfully.
Hi, so i am new to astro and i really wanna get the William Cat 71 scope along with the GTi …i also plan on using a full frame camera i just recently bought, is the GTi good for this set-up? i also plan on adding a guide scope and some heaters if necessary along with a controller ( if needed) …Thanks for the article …it def pointing me to the right direction 🙂
Nice article, I spent the past few month doing a very similar build but using the Askar ACL200 as the imaging scope with my ZWO ASI294MC OSC cam and Antlia ALP-T Ha OIII and Hb SII filters. Exactly my reason to have a grab and go rig for travel.
Hello, thank you so much for your enthusiasm! Sorry Im a newbie, I’d like to ask if you explain how it works the connections between the guide camera, mount and asiair with the rj45 cable, which cable goes in which socket? I suppose you’re connected wirlessly to the mount?
Sorry if my question is boring and too basic but thank you anyways for your videos
I am not understanding something. If the Asiair can guide, why the need for a separate guide scope?
The ASIAIR includes the software to perform guiding on the mount – but it needs a guide camera and guide scope to provide a live-loop image of the sky. I hope that helps!
Thanks Trevor. If I’m just starting out with a DSLR, can I just use the Asiair with the Skywatcher GTi without a guide scope while I learn?
Precisely, how much weight was needed to balance the build?
Hi Michael – I believe the total weight was about 10 pounds. The included counterweight was enough to balance. I have also pushed this mount to about 14 pounds with an additional counterweight with excellent results!
Hi Trevor,
I am working on setting up close to the same, but a few differences. I’m hopeful this will work.. any tips will be great. Nikon D750 300mm f4, SA gti, ASI Air Mini, no guider yet. RJ45 cable (Mount to ASI), Nikon USB cable (Camera to ASI),
how plug and play is this?
Can I Plate Solve.
do I have to have a guider?
again new.. your Youtube has been a great help!!
Im in Maine if you are ever down this way..