Astrophotography Accessories
There are so many astrophotography accessories available today to complement your deep-sky or wide-field astrophotography setup. It can be overwhelming to narrow down the ones that will enhance your imaging experience since you usually don’t find out you need the accessory until after a few imaging sessions.
Some of the most essential astrophotography accessories include a portable power supply, red headlamp, optics cleaning kit, and a Bahtinov mask. All of these seemingly ordinary items can have a profound impact on your astrophotography experience in the field.
Whether you use a DSLR camera and a star tracker for nightscape photography, or a sophisticated dedicated astronomy camera and a large telescope, some accessories are a must-have in almost every scenario (such as a dew heater band).

Some items are obvious, such as a laptop computer. You could argue that this is a “staple”, not an accessory since it’s needed to run your camera and software. Others, such as a rubber strap wrench to unscrew a filter that is completely stuck in your telescope adapter, are not.
In this article, I have put together the ultimate list of astrophotography accessories that will add value and versatility to your setup. Whether you are building your first rig or looking to add to your existing setup, I think you’ll find some great ideas to improve your experience.
For beginners just starting out and building their first deep-sky or wide-field rig, start with the astrophotography accessories that are essential to get up and running first and add on other accessories as you become more comfortable with the hobby and/or as your budget allows.

A telescope workbench mat is perfect for your garage.
Deep-Sky Astrophotography Accessories
With the complexity of deep-sky astrophotography, it’s not surprising that there can be many accessories involved. This list of astrophotography accessories covers everything you might need other than the telescope, mount, and camera (astrophotography equipment).
There are many items that could be classified as an astrophotography accessory (is a personal telescope observatory an accessory?), but I had to draw the line somewhere. Below is the list of the top 16 astrophotography accessories for deep-sky astrophotography.
- Laptop
- Software
- Dew Heater Straps/Controllers
- Red Headlamp
- Filters
- Reference books
- Mobile Apps
- Bahtinov Mask
- Portable Power
- Guide Camera and Scope
- Focal Reducers
- Electronic Polar Scope
- Wifi Controller
- Adaptors
- Cleaning Kit
- Mounting Rings
Laptop Computer
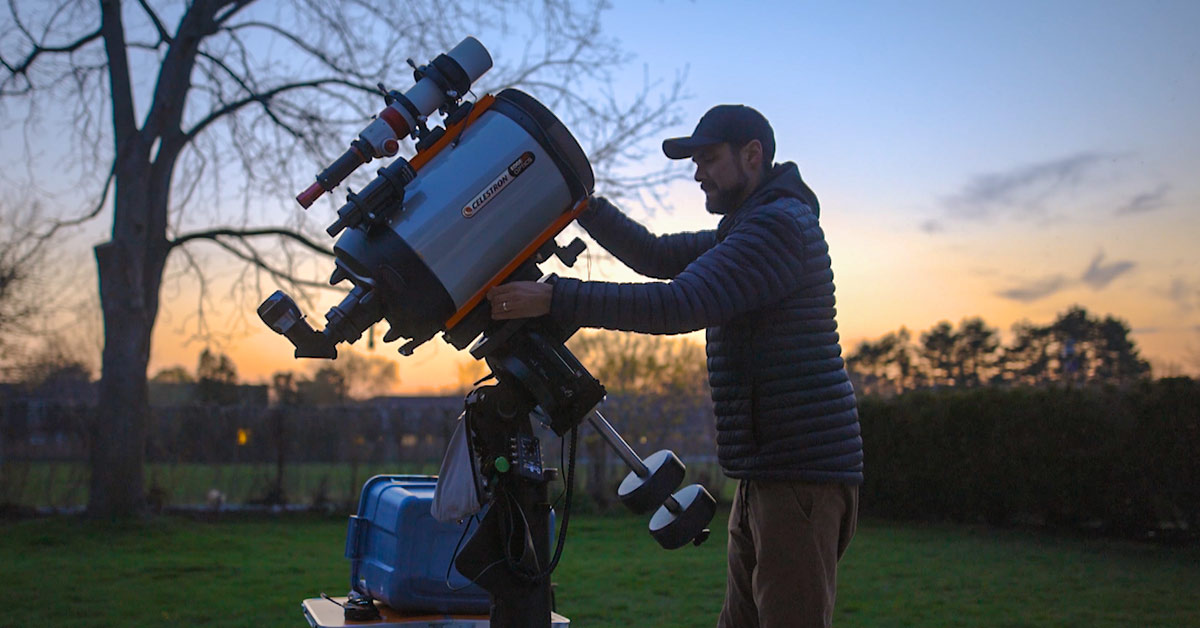
A typical deep-sky astrophotography rig may include a dedicated astronomy camera, a guide camera, an equatorial telescope mount, and a number of other devices that need to be controlled by a computer.
A more advanced telescope setup for astrophotography will include even more devices to control, such as a motorized focuser and an electronic filter wheel. All of these astrophotography accessories will need some sort of user interface to control.
For myself, a laptop computer has been the most practical way for me to control these devices and run my imaging sessions. The other option is to use a mini PC or a dedicated wireless controller like the ZWO ASIAIR Plus.
For now, let’s focus on the traditional method of controlling your imaging session, the laptop. The following video walks you through the useful features of the laptop I currently use to run the majority of my imaging sessions:
A laptop computer allows you to run an imaging session on a deep-sky target with autoguiding, and the ability to review each of your images as you shoot. You’ll also connect to additional hardware such as a filter wheel, and even control your telescope mount.
You will need to install all of the necessary software to control and run your astrophotography hardware. Depending on the brand of device you are using, this can take some time to finalize, so leave yourself plenty of time to complete this task before heading outside.
Keep in mind that this laptop will spend a lot of time outdoors and will need to be protected from the elements. To protect my laptop in the harsh Canadian winters and humid summers, I used a plastic tote container flipped on its side with holes in either end to feed my cables through.
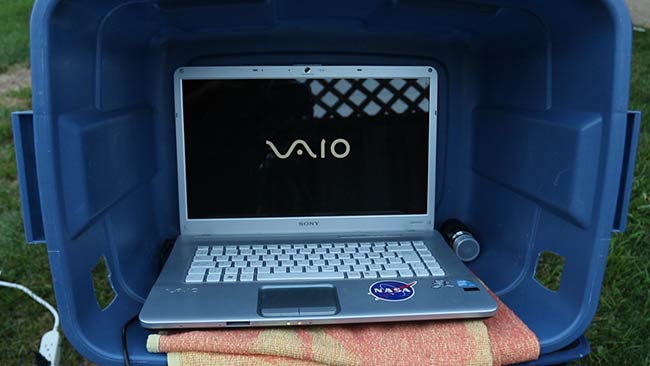
My first laptop for astrophotography
By adding the holes for your cables in the side, you are able to put the lid back on the tote while imaging to protect your equipment and reduce the amount of light escaping from your laptop.
I am currently using the Acer Enduro N3 laptop, which is a rugged, durable (military-grade IP-53) notebook designed to handle demanding outdoor conditions. Most computers weren’t designed to live outside, but this one was.
Through the years, I have used a variety of other laptops that were not built to handle outdoor conditions including Sony Vaio, Asus, and Lenovo ThinkPad. You can read more about my experience with these laptop computers in a previous post: A Computer For Astrophotography.
You should note that if you are looking for a one-size-fits-all laptop (i.e. a computer that can handle your image acquisition and image processing) the suggestions below will likely change.
For image processing, you will need something capable of running some pretty demanding software. The computer you use for image processing will likely need much higher specs than your field laptop, to handle CPU-intensive software like PixInsight and Adobe Photoshop.
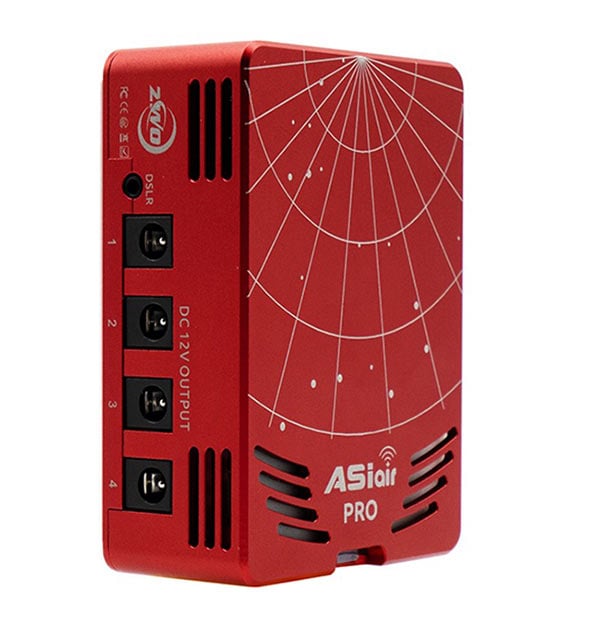
The ZWO ASIAIR Pro is a popular alternative to a laptop computer.
Acquisition Software
If you plan on using a laptop to control your imaging session, you will need software to run specific applications for your camera, guide scope, guide camera, and process the data you capture.
Related Post: Astrophotography Resources (From Software to Planning Tools)
There are many different types of software for both image acquisition and image processing. I recommend choosing software that you are comfortable with and that fits your budget. If you are a beginner, choose one that has a lot of online resources to help you through the learning process.
I use Astro Photography Tool (APT) to set my camera settings, automate my imaging sequence and capture my calibration frames (i.e. darks, bias, and flat frames). This particular software is free and supports a wide range of astrophotography cameras. For a more detailed post on using APT, please see Astro Photography Tool for Camera Control.
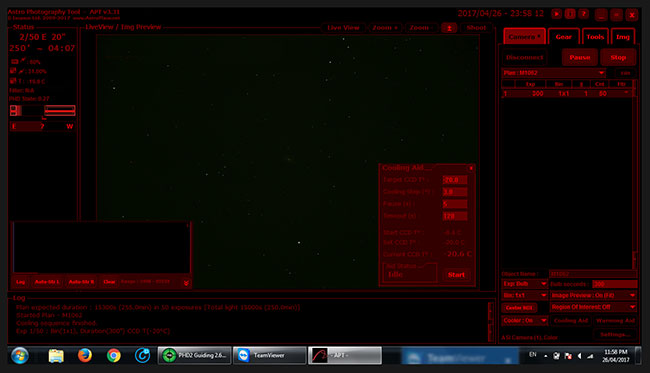
APT User Interface
APT integrates with PHD2 Guiding (free) which automates the process of tracking a guide star. This is also where you will focus your guide scope for autoguiding and set up dithering between each image exposure. If you are ready to improve your autoguiding, be sure to check out 5 Tips for Better PHD2 Guiding.

APT and PHD2 for Image Capture and Auto-guiding
Astrophotography Software Options:
- ASIAir (does not require a laptop)
- BackyardEOS (for Canon DSLRs)
- N.I.N.A
- SharpCap
- Sequence Generator Pro
Image Processing Software
Once my imaging session is complete and I have my light, dark, and flat frames, I use DeepSkyStaker (DSS) to stack my images. I then use Adobe Photoshop for image processing and refinement while also experimenting more in PixInsight.
While DeepSkyStacker is free, Adobe Photoshop CC requires a monthly subscription. I use Photoshop, as this is what I am most comfortable with given my previous work experience as a graphic designer. There are several alternative resources for image processing.
If you are interested in learning exactly how I process my astrophotos in DeepSkyStacker and Photoshop, consider purchasing my premium astrophotography image processing guide with over 100 pages of detailed instruction.
I have also begun to use PixInsight to further enhance my images using a handful of specific tools. My favorite tools to use are Automatic Background Extraction, StarNet++, and Deconvolution.
Other image processing/stacking software options include:
Dew Heaters
Dew heater straps are another important astrophotography accessory and my preferred method to ensure my camera/telescope/guide scope remains moisture-free. The straps produce heat once plugged in to keep the telescope/lens free from moisture so you can collect multiple hours of exposure time on your target.
Other dew control options include dew shield, dew heater controllers, and the old-school hair/blow dryer method.

Dew Heater Strap

Dew Heater Strap Placement
Dew heater straps may be important to use in both the winter and the summer months depending on your climate. Here in Southern Ontario, I use dew heaters in the winter and on hot summer nights to stop the lenses from fogging up due to humidity. For more information on dew heaters, please see Dew Heaters for Astrophotography
A USB-powered dew heater strap can either be plugged into your power source (with a powered USB port) or controlled by a separate accessory like the Pegasus Astro Power Box.
The Pegasus Astro Pocket PowerBox is a lightweight power source accessory used to help organize your cables. The Powerbox includes (4) 12V outlets that can be used to send power to the various devices riding along with your telescope – everything from your dew heater straps/band to your dedicated astronomy camera.

Pegasus Pocket PowerBox
Red Headlamp
A red headlamp is an essential astrophotography accessory. Those who watch my YouTube videos know how much I use my red headlamp while imaging.
They are necessary for checking on your gear throughout the night, making sure you do not knock your equatorial mount out of polar alignment, making adjustments to your target or equipment, etc. They are also great if you attend star parties, where the use of white light is often prohibited.
Why red light specifically? Without getting too technical, your eyes will start to adjust to the darkness after approximately 20 minutes and this triggers your body to produce a chemical called rhodopsin. Red light does not disrupt the production of this chemical and allows our night vision to continue.
 Universal Astro Red Headlamp.
Astrophotography Filters
Let’s face it, most astrophotographers have the unfortunate experience of dealing with light pollution. For me, astrophotography from my backyard means shooting in Bortle class 6/7 conditions.
The filters I use for astrophotography fall into two basic categories, light pollution filters, and narrowband filters. There are also multi-bandpass narrowband filters (such as the Radian Triad Ultra) which allow multiple (narrow) bandpasses of the spectrum to pass through.
The following video discusses some of the best light pollution filters for astrophotography.
While we would all rather shoot under darker skies, filters are often a good solution for dealing with light pollution in the city. They are designed to ignore specific wavelengths of light in the visual spectrum so you collect only the ‘good light’ that contains the gas from your target.
This means, the artificial light-blocking power of Ultra-high contrast (UHC) filters also affects the natural colors found in the night sky, specifically the beautiful blues and cool colors of stars, which is not ideal. A City Light Suppression (CLS) filter has a wider bandpass than a UHC filter, which may be a better solution for some.
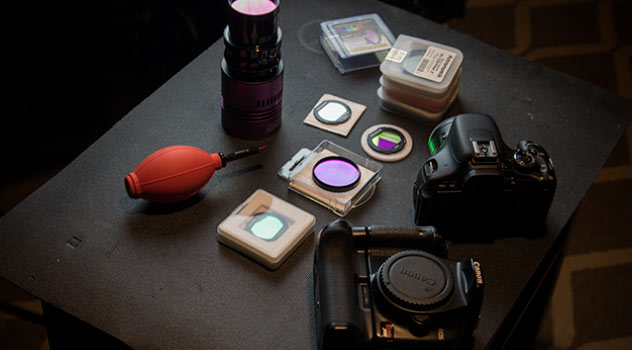
Different filters (clip-in, threaded, etc.)
The ideal astrophotography filter for your situation will reduce light pollution and create images with natural colors with impressive contrast. The amount of light you will need to block depends on your imaging conditions.
Need some advice for choosing a light pollution filter? Visit How to Choose a Light Pollution Filter. If you’re looking for a versatile light pollution filter for a broad range of astrophotography projects, I recommend the Optolong L-Pro filter.

Astronomy Books
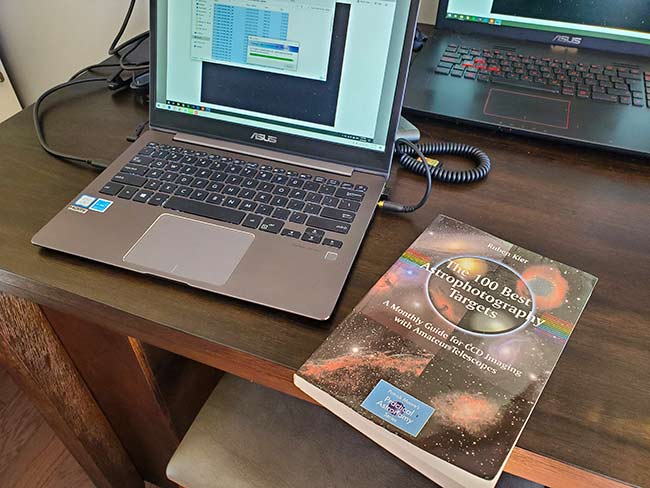
Reference books are an extremely helpful accessory when it comes to planning your imaging session and learning more about your target, new image processing software, etc.
They can help you choose an available deep-sky target based on the season, give you a visual reference for framing your target and provide general information about the target itself.
For example, I often use the ‘100 Best Astrophotography Targets’ by Ruben Kier to help choose my target and plan my imaging session, while ‘Inside PixInsight’ by Warren Keller provides more information about available processing tools in PixInisght.
For more great reference books, visit 14 Best Astrophotography Books.
Stargazing Apps
Technology has come a long way and there have never been so many applications available to assist with the hobby of astrophotography.
Mobile phone apps have become an important astrophotography accessory and can help you plan for a clear night and assist in making your imaging session easier.
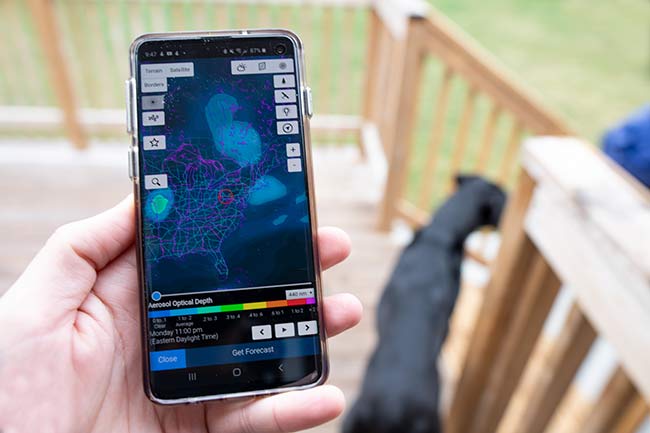
Astrospheric Astronomy Weather Forecast App
Mobile phone app uses:
- Take advantage of every clear night with weather forecasting apps
- Choose and locate your target based on your location with planetarium apps
- Align your telescope using polar finder apps
- Observe new moon using moon phase apps
For more information on the most popular astronomy apps, visit 19 Best Astronomy Apps for Stargazing.

Stellarium and Polar Finder Mobile Apps
Bahtinov Mask
A Bahtinov mask is a simple tool that can help you achieve and confirm sharp focus. They’re affordable, come in all sizes, and can even be made yourself at home with a little effort (and the right tools).
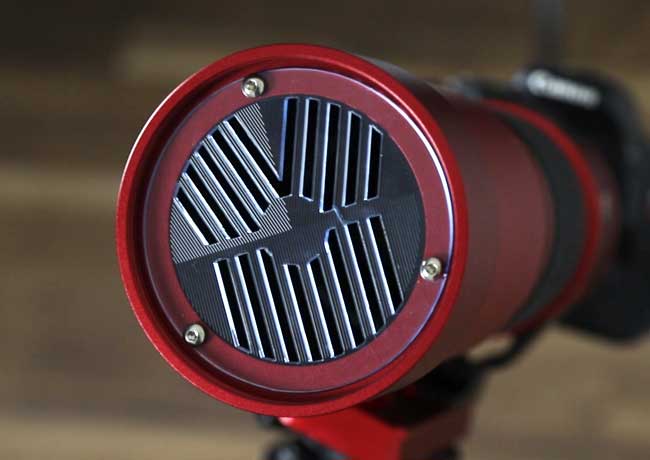
Built-in Bahtinov Mask on the William Optics Redcat
The process involves placing the focusing tool on the objective lens of your telescope or camera lens and centering the ‘X’ in the middle of a bright star. They are inexpensive, easy to use and make a big impact on your images by achieving critical focus.
Portable Power Station
A portable power station is an important accessory for those looking for flexible access to power as a result of your location at home or those looking to travel to darker skies. If you need portable power to run your rig from home, then this will be considered a necessity.

When looking for a portable power option, you will want to pay close attention to the voltage and number of outlets to ensure they can accommodate your gear. A display screen will also come in handy for being able to see the remaining amount of power and other information as it pertains to your power availability. Deep-marine batteries with a converter are another option.
Some portable power boxes or packs also come with solar panels, which could be a useful addition if you plan on traveling for multiple days without access to power.
Guide Camera & Scope
Autoguiding involves using a guide camera and a guide scope to capture more light (i.e. signal) and longer exposures in a single shot.
The process of autoguiding involves sending small corrections from your guide camera to your telescope mount to maintain tracking accuracy. The guide camera and your telescope mount communicate with each other to maintain a lock on your target by making subtle corrections to the tracking.

Guide camera and guide scope riding atop primary imaging telescope
Once the guide camera is properly connected to your computer (using the appropriate cable for your set-up), it will broadcast a live-loop image through the guide scope to your computer. The camera will continuously capture short exposures through the guide scope, usually anywhere between 1 and 3-seconds in length.
For more information on autoguiding, visit Autoguiding a Telescope for Astrophotography.
Focal Reducer/Field Flattener
Focal reducers allow you to change the native focal length of your telescope (i.e. shorten the focal length) and improve the light-gathering power. For example, a 0.8X focal reducer will transform a telescope with a focal length of 500mm at F/6, to 400mm at F/4.8.
A field flattener, as the name suggests, flattens the field of view. When the field flattener is optically matched to the telescope, you should achieve a flat field image with sharp stars from edge to edge.

It is quite remarkable to be able to shoot a new focal length and f-ratio with the same telescope. Widening the field of view, and increasing the amount of signal collected in a single exposure has many benefits.
Focal reducers must be matched to your telescope’s optics to work effectively. Many telescopes have dedicated focal reducers (and/or field flatteners) available that are a perfect match for the optical design.
Electronic Polar Scope
Electronic polar scopes, like the QHY PoleMaster, were designed to make your polar alignment routine easier, and more precise which is a critical step in astrophotography.
If you struggle with polar alignment and have no interest in getting low enough to look through your polar scope, an electronic polar scope might be the perfect accessory to add to your kit.
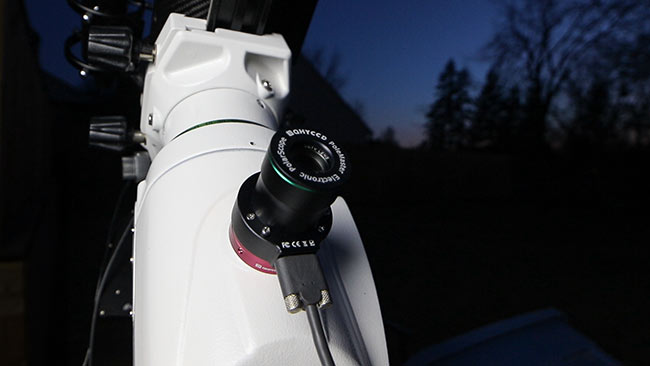
QHY Polemaster Electric Polar Scope
You can also complete the task of electronic polar alignment (without an additional device) using software. SharpCap, N.I.N.A., and the ASIAIR have useful polar alignment tools that use the stars in your primary imaging telescope to aid in your polar alignment.
Related Video: Polar Alignment using N.I.N.A (video)
Wifi Camera Controller
Wifi controllers allow you to control your astronomy cameras, run an imaging sequence, autoguide and even plate solve using a smartphone or tablet.
Accessories like ZWO ASIair, StellarMate, and Primaluce Labs EAGLE allow you to ditch your laptop computer for a miniature (nearly weightless) device that can be velcroed to your telescope.
If the idea of having less kit to set up with the ability to control your equipment remotely versus having to go outside to make adjustments, then this accessory will be something you will definitely want to add to your setup.
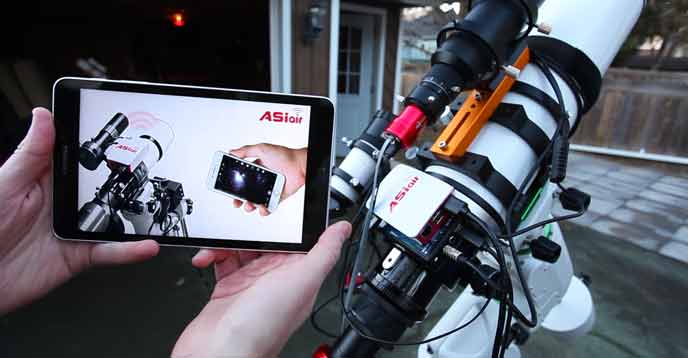
ASIair Camera Controller
If your interest has been peaked by this accessory, check out the ASIair review for more information.
Adaptors
There are many different variations of adaptors when it comes to astrophotography (i.e. T-rings, T-adaptors, Prime Focus adaptors, etc.).
For example, in order to attach your camera to your telescope, you will need a T-ring adaptor (that locks onto the camera body like a lens), this adaptor must match the design or model of your camera in order to properly lock on.
Another adaptor (i.e. prime focus adaptor) will thread onto the T-ring and be inserted into the focus tube of the telescope, like an eyepiece.

T-ring Adaptor on DSLR Camera
Without the required adaptors, you won’t be able to complete the assembly or your astrophotography rig so it’s important to make sure you have the correct adaptors, and maybe even some extra on hand, so your imaging night can continue as planned.
List of adaptors needed depending on your set-up:
- T-ring
- Prime Focus Adaptor
- Focal Reducer
- Field Flattener
- Spacing Adapters
A situation may occur where a filter or threaded adapter becomes so tightly secured that you are unable to remove it. In these situations, a rubber strap wrench is a life-saver.
Cleaning Kits/Accessories
With so many optical instruments as part of your setup, it is important to invest in a lens cleaning kit to properly care for your telescope, camera, filters, etc. Useful items to have in your cleaning kit include:
- Cleaning solution
- Lens wipes
- Microfiber cloth
- Cleaning brush
- Dust blower

Optics cleaning kit for refractor telescopes.
Mounting Rings
As you add additional optical tubes to your imaging train, you will soon find out that mounting them properly can be a challenge. This scenario comes up when you first attach a guide scope to your primary imaging telescope for autoguiding.
You may also want to mount a finder scope to your telescope to aid in the star alignment and object location process. Telescope tube rings come in various sizes, and you’ll need to choose the right diameter for the scope you intend to mount.
Thankfully, there are numerous mounting rings and brackets available online, and it is simply a matter of selecting the right set for your needs. A common size is 80mm, for telescope tube diameters of about 50-75mm.

Astromania telescope mounting rings (Amazon).
When mounting a small guide scope to your primary imaging telescope, it is important that you balance the imaging system, and ensure that there is minimal flexure between the two scopes. This is one of many reasons why some astrophotographers prefer to use an off-axis guider.
You’ll not only need to know the diameter of tube rings you need but also how you’re going to mount those rings on your existing setup. You may require a dovetail bar or mounting plate to secure the tube mounting rings and your primary imaging telescope.
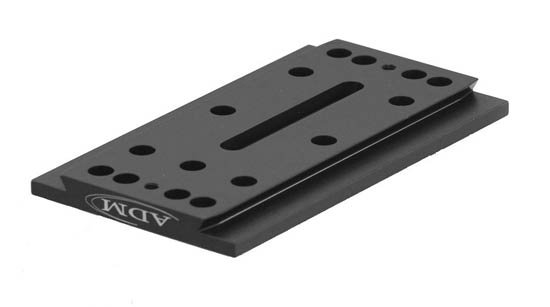
Universal Dovetail Plate for Losmandy D Style Mounts.
Wide-field Astrophotography Accessories
There are significantly fewer accessories required for wide-field astrophotography, with a few items making a second appearance. These few astrophotography accessories are necessary if you plan on photographing the Milky Way in detail.
Below is a list of the top 5 wide-field astrophotography accessories.
- Remote shutter release cable/intervalometer
- Tripod
- Star Tracker
- Dew Heater Straps
- Portable Power
Remote shutter release cable/intervalometer
The imaging sequence is automated using a remote shutter release cable with a built-in timer. With this cable, you can choose the exposure length, number of shots, and set a delay between each shot (a longer delay will help cut down on noise in your image). This is an inexpensive accessory that adds a lot of value to your wide-field setup.
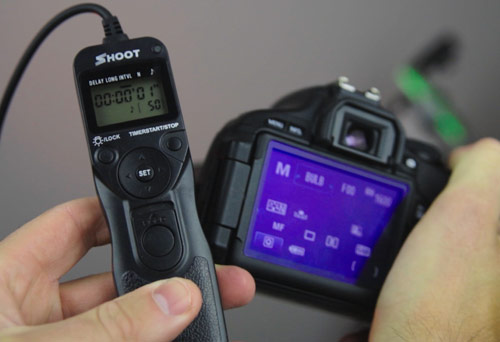
Remote Shutter Release Cable
Tripod
A sturdy tripod is such an important accessory for wide-field astrophotography, especially if you plan to attach a star tracker to your tripod for more versatility. I personally tend to favor lightweight, carbon fiber tripods over aluminum ones solely for their portability.
To compensate for the lighter weight, I hang a camera bag from the center column of the tripod to lower the center of gravity.
Regardless of which type of tripod you decide to purchase, having a tripod that won’t budge during your imaging session is a must in order to maintain polar alignment for a successful astrophoto.
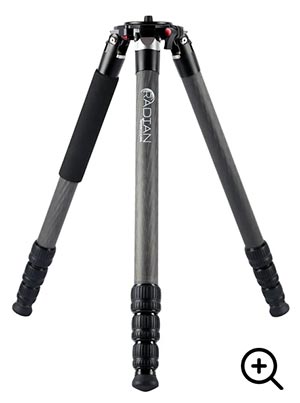
Radian Tripod
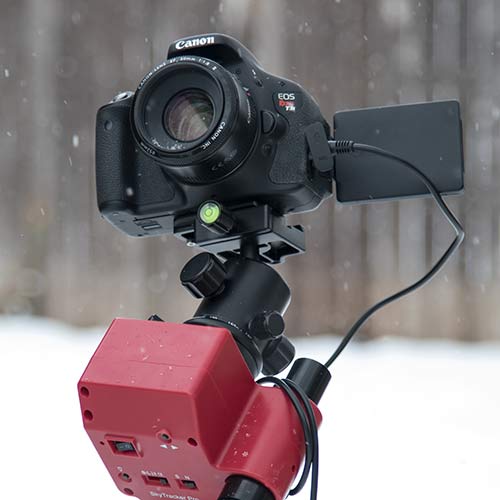
Star Tracker
By attaching a DSLR camera and lens to a star tracker you are able to shoot long exposures of 2 minutes or more without star-trailing.
Related Post: Astrophotography Results using a $200 Camera Lens
To do this, the mount must be properly polar-aligned using the built-in polar axis finder scope and mounted to a sturdy tripod to avoid any star trailing. It is also worthwhile to invest in a star tracker if, at some point, you plan to venture into deep-sky astrophotography.
![]()
Their payload capacity can handle smaller refractors, like the Radian 61 or William Optics Redcat.
It is worth noting that adding a ball-head attachment to the star tracker mount makes pointing the camera in a variety of directions effortless. When everything is secure and polar aligned, the astrophotography potential of a star tracker is tremendous.
Need help choosing a star tracker for astrophotography?
![]() Star Tracker Options (iOptron SkyGuider Pro, Fornax Mounts LighTrack II, Sky-Watcher Star Adventurer)
Star Tracker Options (iOptron SkyGuider Pro, Fornax Mounts LighTrack II, Sky-Watcher Star Adventurer)
Dew Heaters
Similar to deep-sky astrophotography, dew heater straps are often a necessary accessory when it comes to wide-field astrophotography Wrapping a dew heater strap around your camera lens will keep it free from moisture. The difference for wide-field astrophotography is that you likely want to stay fairly portable and avoid having to use power to power your dew heater strap.
Portable Power
If you plan on using any accessories that require your wide-field set-up to need a power supply, portable power will be essential. Certain items, like dew heaters, guide scopes, and guide cameras will require power, and to maintain the portability of your rig, portable power is a must.