
Choosing a Portable Power Station for Astrophotography

One of the most common questions I get is, “What portable power source do you use for astrophotography?” It is a hot topic in the astrophotography community because a battery failure can end an otherwise perfect clear night.
For a typical deep-sky astrophotography setup, I recommend a portable power station with a LiFePO4 battery, regulated 12V DC output, and at least 300-500 watt-hours (Wh) of capacity for one night. A larger 1,000Wh-class unit makes more sense for a power-hungry rig, a laptop, multiple dew heaters, or two nights away from an outlet.
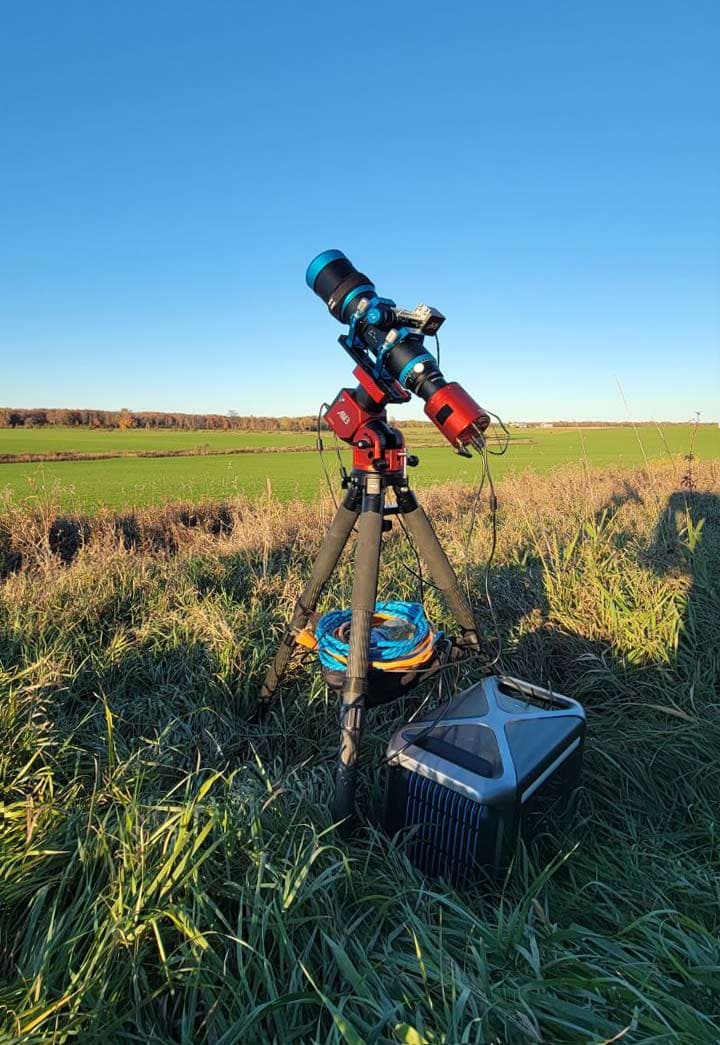
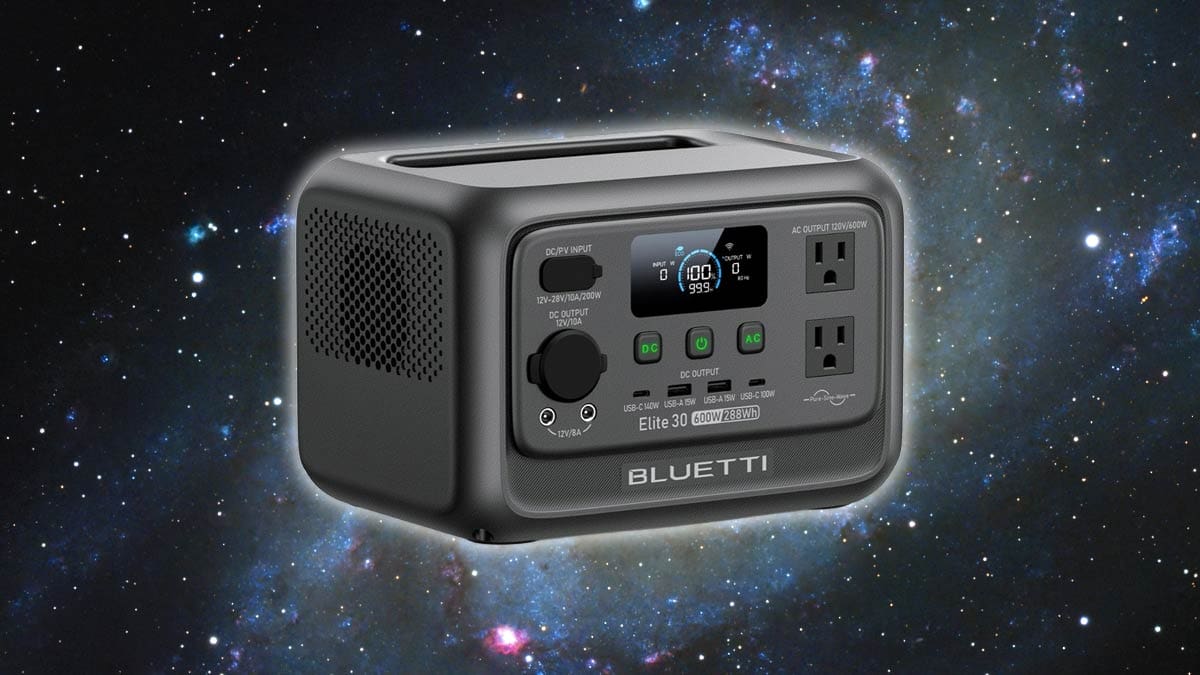
My short answer: I still use the 1,229Wh Anker 757 PowerHouse when I want lots of reserve capacity. I have also started using the much smaller BLUETTI Elite 30 V2, a 288Wh, 600W power station that is easier to carry for a lighter setup. The right choice depends much more on watt-hours and output ports than on the largest watt number printed on the box.
When deciding on an off-grid power station, you need to think about battery capacity, output, charging speed, and the number and type of ports. There is no one-size-fits-all option because runtime, weight, and budget all change as you move into higher-capacity models.
If you’ve ever browsed the portable power stations on Amazon, you’ll know that there are hundreds of options. Choosing one for a telescope and astrophotography setup requires a slightly different approach than choosing one for occasional phone charging or emergency use.

Which portable power station is best for astrophotography in the field?
Whether solar charging is important to you, or you need a unit that can save your butt during a power outage, there is an option for you. If you enjoy comparing features and prices, selecting the best portable power station for astrophotography is actually kind of fun.
In this article, I’ll share my experience with two very different power stations, show you how to estimate overnight runtime, and explain which specifications actually matter.
Jump to: Choosing the right capacity | Runtime examples | What I use | Cold-weather use | Solar charging
Feel free to leave a comment describing the portable power station you use, to help create a complete resource for astrophotographers. Just like everything else in this hobby, there are many options to choose from at various price points.
The Need for a Portable Power Station
When taking pictures of space from the backyard, I plug into household AC power, but what about when I travel to a dark sky location? Milky Way photography with a DSLR and star tracker is one thing, but running a robust deep-sky imaging kit away from home is another.
There is a good chance that if you’re an amateur astrophotographer, at some point you will need to invest in a quality portable power station. Something that can reliably power your astronomy telescope and accessories throughout the night.
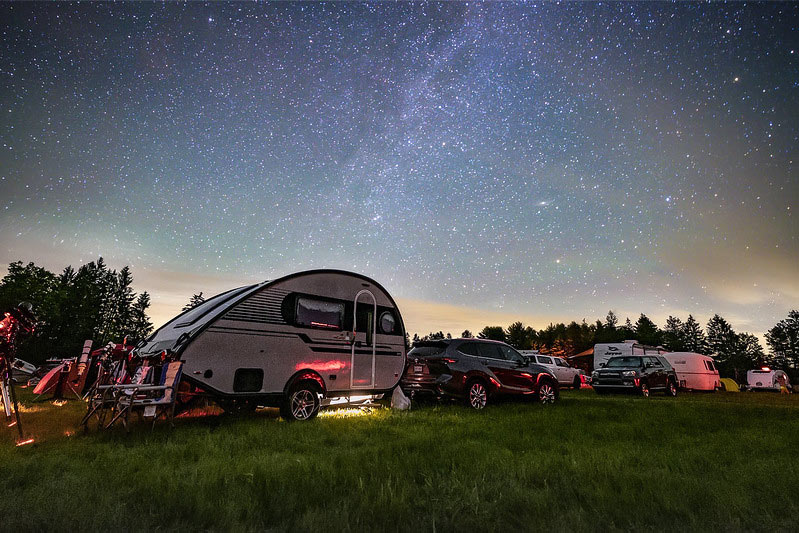
Portable power stations are essential while camping.
Visual observers sometimes need power for a GoTo computerized mount and maybe a few dew heaters, but astrophotographers? We need to power anywhere from 3 to 17 devices (or more) and if even one of them fails, you can kiss your precious picture goodbye.
Thankfully, today’s portable power stations are equipped with many output ports, including dedicated AC and DC ports and multiple USB types. Some of them even include integrated wireless charging areas to charge your phone.
Here are some of the potential devices you will need to power on your astrophotography setup:
Powered Devices for Astrophotography
- Dedicated Astronomy Camera
- Equatorial Telescope Mount
- Camera Controller/Laptop
- Dew Heater Bands
- Autofocuser/Electronic Filter Wheel
How Much Battery Capacity Do You Need?
The most useful specification is watt-hours, written as Wh. Watt-hours describe how much energy the battery stores. Watts describe how much power the station can deliver at one moment. A 600W power station is not necessarily a bigger battery than a 500W model; it may simply have a more powerful inverter.
Start by measuring or estimating the average power draw of your complete rig. The number on a mount or camera power adapter is usually its maximum rating, not what it continuously consumes. Tracking uses less power than a fast slew, and a cooled camera draws more while it is first reaching its target temperature. Dew heaters can also become one of the largest loads on a damp night.
Power Bank vs. Portable Power Station
These terms are often used interchangeably, but they are not quite the same. A small USB power bank is useful for a phone, camera battery charger, or star tracker. A portable power station adds a much larger battery, regulated 12V outputs, and usually an AC inverter. For a computerized telescope mount, cooled camera, and ASIAIR or laptop, a power station is normally the more practical choice.
If you are shopping for a “telescope power bank,” check for a continuous regulated 12V output and enough current for the complete system. USB capacity advertised in milliamp-hours is difficult to compare across battery voltages, so I prefer watt-hours for side-by-side comparisons.
| Astrophotography setup | Typical average draw | Capacity to consider |
|---|---|---|
| Star tracker, DSLR, phone | 5-15W | 150-250Wh |
| Small mount, cooled camera, ASIAIR, one dew heater | 25-45W | 300-500Wh |
| Larger mount, cooled camera, laptop, multiple heaters | 50-90W | 700-1,200Wh |
These are planning ranges, not guarantees. Temperature, cooler power, dew-heater settings, AC conversion losses, and the age of the battery all affect runtime. I prefer to add at least a 20% reserve so the session does not depend on a best-case calculation.
LiFePO4 is now my preferred battery chemistry for this job. Compared with the conventional lithium-ion packs used in many older power stations, LiFePO4 batteries generally offer a much longer cycle life and strong thermal stability. The tradeoff is that they are not immune to cold-weather capacity loss, and they should not be charged below the temperature allowed by the manufacturer.
How to Estimate Runtime
Use this simple formula:
Estimated runtime = battery capacity in Wh × usable-efficiency factor ÷ (average equipment load + station overhead)
For a first estimate, use 0.85 for an efficient DC setup. If the manufacturer does not publish its own consumption, allowing another 5-10W provides a more conservative estimate for a small rig. AC outlets and power bricks can reduce runtime further.
A 288Wh battery running a 35W rig with 7W of station overhead works out to about 5.8 hours in mild conditions: 288 × 0.85 ÷ 42 = 5.8 hours. A 1,229Wh station at a 60W equipment load, using the same 7W allowance, works out to roughly 15.6 hours. These examples show why a battery percentage observed during a complete home test is more trustworthy than a perfect on-paper number.
The best method is to set up everything at home and watch the power station’s live output reading through a complete test. Let the camera cooler settle, slew the mount, autofocus, and run the dew heaters at the level you expect to use. That real average is far more useful than adding the maximum ratings printed on every adapter.
Can a Power Station Handle Startup Surges?
A cooled astronomy camera does not usually create the kind of starting surge associated with a refrigerator compressor. Its thermoelectric cooler ramps up, while the more noticeable short-duration peak in an imaging rig often happens when the mount slews or the dew heaters run at full output.
Even a 600W AC inverter provides far more output than a typical single astrophotography rig needs. The more important limit is often the 12V DC circuit. Many compact stations share a 10A limit across the car socket and other DC ports. An ASIAIR can distribute power to a camera, dew heater, and other accessories, but those downstream devices still count toward the total. Check the continuous amperage of the station’s DC output, use correctly rated cables, and leave some headroom.
Whenever practical, I run low-voltage astronomy equipment directly from regulated DC rather than turning battery power into AC and then back into 12V through a power brick. Fewer conversions usually means better runtime. Use AC when the device requires it, such as a laptop without a suitable USB-C or DC option.
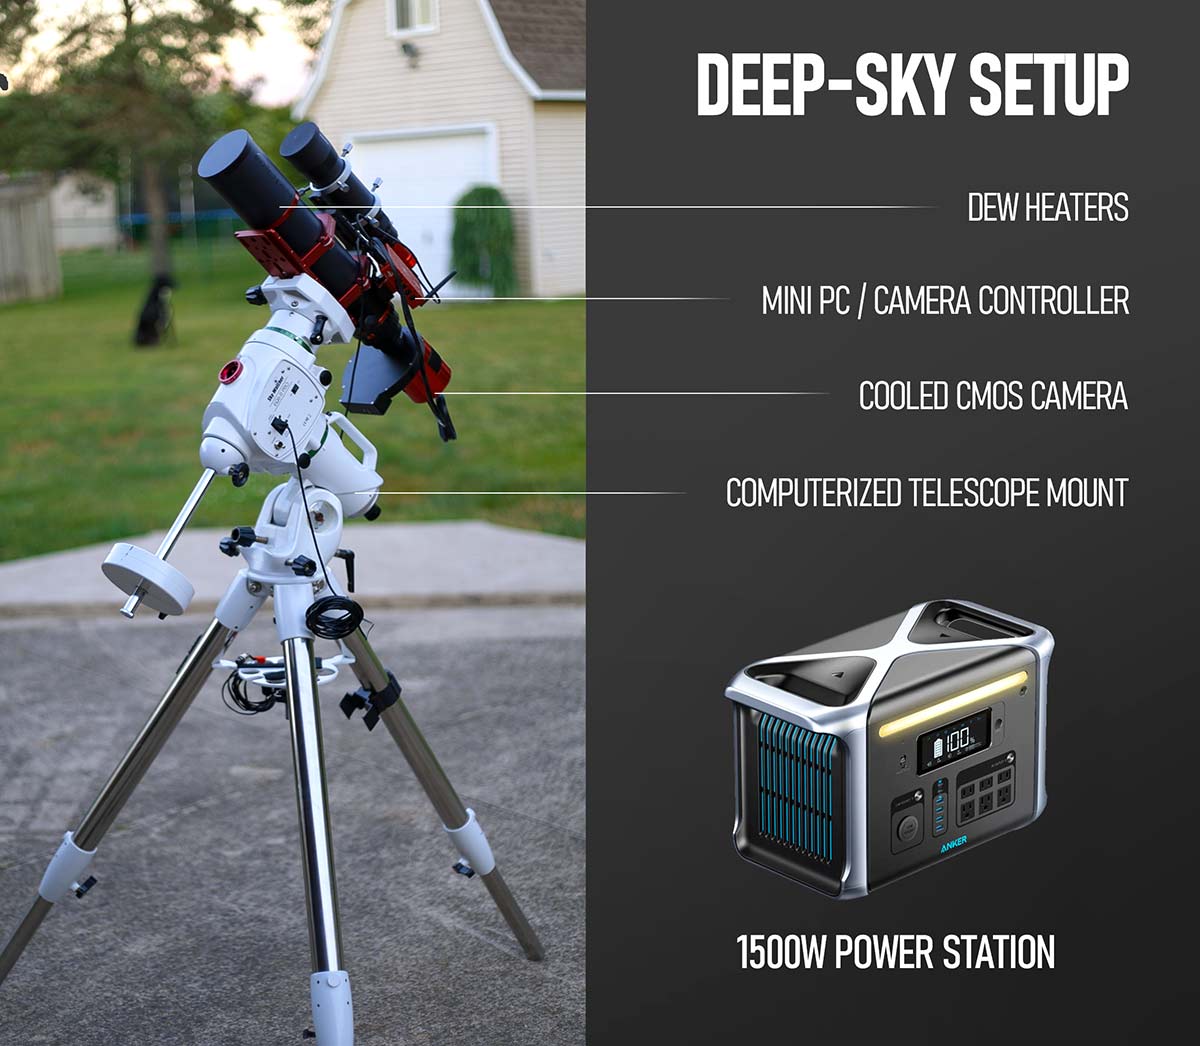
In the following video, I provide an overview and real-world experiences using the Anker 757 Portable Power Station. Anker asked that I provide an “astrophotographer’s perspective” of their new mobile power station.
This is a great option to consider if you need a serious power station that can handle a wide variety of devices. If you are running a simple setup in the field, this type of portable power may be overkill for your astrophotography needs.
This large power station combines a 1,229Wh battery with a 1,500W AC output. The battery capacity is the number that helps estimate runtime; the output rating tells you the maximum load it can support.
Portable Power Station vs. DIY Battery vs. Generator
The Anker 757 Portable Power Station is a fantastic unit, capable of powering several devices for an extended period. However, many amateur astrophotographers believe it is more cost-effective to build a DIY power supply using a deep-cycle marine battery.
| Power option | Best advantage | Main drawback |
|---|---|---|
| Portable power station | Quiet, regulated, all-in-one | Higher cost per Wh |
| DIY battery box | Flexible and cost-effective | Requires safe wiring and fusing |
| Fuel generator | Long runtime with extra fuel | Noise, exhaust, vibration |
For astrophotography, a fuel generator is usually my last choice. It can support large loads and be refueled, but the noise is disruptive at a campsite or star party, and exhaust makes it unsuitable anywhere near a tent, vehicle, or enclosed observing area. A battery station is quiet and produces no exhaust while operating. If a generator is necessary, keep it outdoors, well away from people and equipment, and follow the manufacturer’s carbon-monoxide and fire-safety instructions.
There are some serious cost savings if you take this route, and there are many great how-to tutorials available online to build one. To build one you will need:
- A sealed deep-cycle marine battery
- DC to AC power inverter
- Smart Charger/Maintainer
- Inverter cable
- Properly rated fuses, wiring, and protected connectors
Unfortunately for me, I have not had much luck with a DIY deep cycle marine battery unit (yes, I built one several years ago). My poor experience taking this route is likely due to the fact that I have zero experience in the field of electrical or mechanical engineering. It seems that I am the exception in the astrophotography crowd.
As I mentioned in the video, bulletproof reliability is critical to me, and I am willing to pay a little extra for it. The all-in-one package that Anker has created is impressive and is a smart option for anyone willing to pay the added cost.
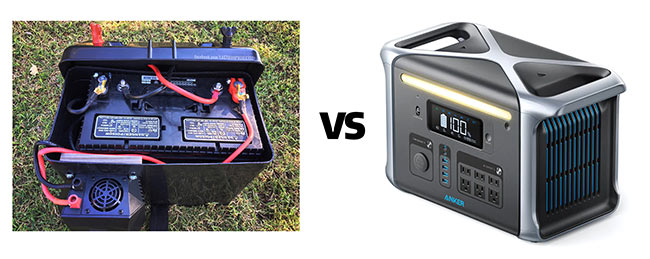
Here is an example of someone who built their own portable power station using a mix of components. If you’re up to the task of taking on projects like this, you can really save some money. Again, this is beyond my personal skill set, but it’s an option.
Video: How to Make a Portable Power Station
The Portable Power Stations I Use
To me, the most important feature of a portable power station for astrophotography is reliability. It also has to have enough power to go at least an entire night (or 2) before needing to be charged.
It also needs to have enough output ports for all of the astrophotography accessories I need to plug in from USB-powered dew-heaters to my laptop charger.
If the portable power station is not up to the task of providing a constant source of power to my rig for an entire night without interruption, it’s useless to me. Even a brief outage means I lose the connection to my telescope mount, the autoguiding goes nuts, and I squander a precious clear sky.
I’d rather run a 200-foot extension cord than risk a battery that flickers in and out. I’ve had this happen before, and it’s absolutely infuriating. The good news is that most astrophotography gear does not consume a huge amount of power, with a few exceptions.
Ashley and I regularly camp during the summer and fall, and a dependable battery pack has become part of the standard gear we bring to run the imaging rigs away from home. My two current options sit at opposite ends of the portability scale.
| Feature | Anker 757 | BLUETTI Elite 30 V2 |
|---|---|---|
| Battery capacity | 1,229Wh | 288Wh |
| AC output | 1,500W | 600W |
| Battery chemistry | LiFePO4 | LiFePO4 |
| Weight | About 44 lb | About 9.5 lb |
| Best fit | Large rig or multiple nights | Light rig or shorter session |
Anker 757 PowerHouse
I tested Anker’s flagship 1,500W-output power station to run my deep-sky astrophotography rig, the 757 PowerHouse. It’s pretty heavy (44 pounds), but the built-in handles make it a lot more manageable.
The 757 uses LFP (LiFePO4) batteries, and it can charge from 0% to 80% in about an hour. It’s a slick package made with an automotive-grade aluminum frame. It is very quiet under a typical astrophotography load, although its cooling fan may run while charging or under heavier loads.
The Anker 757 PowerHouse is a 1,500W, 1,229Wh power station with LiFePO4 batteries and 13 output ports on the North American version.
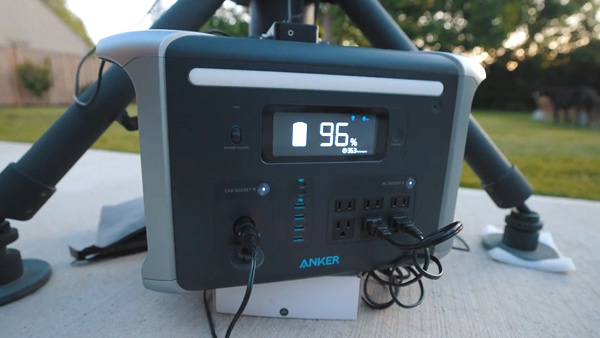
There are 13 ports in total to power everything you need for your astrophotography imaging rig. There is 1 “car-socket style” DC port which you might use for your computerized telescope mount.
I still use a DC connection for my Sky-Watcher EQ-6 Pro equatorial mount, so I was pleased to see it there. The rest of my astrophotography equipment is powered by the AC and USB outputs on the power station.
I like to plug in things like a 12V 4A power supply for my ASIAIR Plus, or Celestron NexStar 8SE into the AC output ports. The USB-A ports are perfect for my USB-powered dew heater bands, although you’ll need to make sure that you have long cords to reach the power station from the objective of the telescope.
Those of you with laptops, cooled dedicated astronomy cameras, and autofocusers will have more than enough power to play with for about 2 straight nights (depending on usage and temperature).
When running an advanced astrophotography setup including my Sky-Watcher EQ8-R Pro mount, cooled camera, and dew heaters, the 757 PowerHouse had 45% power left after 1 full night.
One thing I should note: disable power-saving or ECO modes when they can automatically shut off a low-load output. A tracking mount may draw very little power for long stretches, and you do not want the station to mistake that for an unused port. This applies to the BLUETTI as well; its manual specifically recommends disabling ECO mode for small devices under 10W or other critical loads.
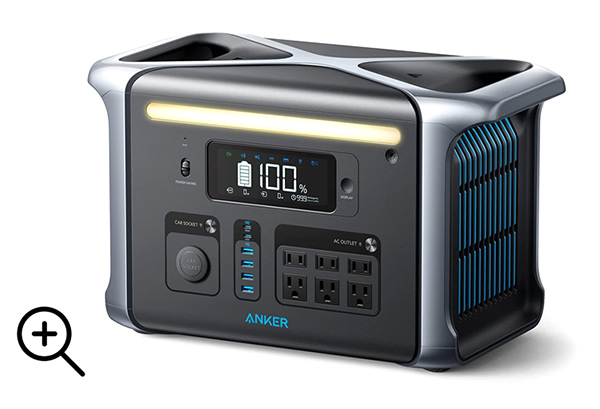
Anker 757 Power Station Specs
- Rated Capacity: 51.2V 24000mAh / 1228.8Wh
- AC Input Voltage: 100-120V~ 12A Max, 50Hz / 60Hz
- AC Input Power (Charging): 1000W Max
- AC Input Power (Bypass Mode): 1440W Max
- XT60 Input: 11-30V⎓ 10A (300W Max)
- USB-C Output 1: 5V⎓3A/ 9V⎓3A/ 15V⎓3A/ 20V⎓3A 20V⎓5A (100W Max)
- USB-C Output 2: 5V⎓3A/ 9V⎓3A/ 15V⎓3A/ 20V⎓3A (60W Max)
- AC Output (Bypass Mode): 100-120V~ 12A Max, 50Hz/60Hz, 1440W Max
- AC Output (Inverter Mode): 110V~ 13.64A, 50Hz/60Hz, 1500W Max
- USB-A Output: 5V⎓2.4A ( 2.4A Max Per Port )
- Car Charger Output: 12V⎓10A
- Discharging Temperature: -4°F-104°F / -20°C-40°C
- Charging Temperature: 32°F-104°F / 0°C-40°C
The light bar is handy to have when you’re off-grid, and I am happy to see that it is a warm color temperature and that it is soft. A lot of the lights on portable battery packs use hyper-white, blinding LEDs. This one is a warm, orange color.
However, I wish that there was a red light option to protect your night vision even better. I also wish that clicking the display button for a second time (when it’s on) turned it off, but it doesn’t. So, you may want to cover this up with tape if you are at a star party or a gathering where any amount of light needs to be shielded.
Using a Power Station in Cold Weather
The temperature limits need a little clarification. The Anker 757 is rated to discharge from -4°F to 104°F (-20°C to 40°C), but charging is limited to 32°F to 104°F (0°C to 40°C). The BLUETTI Elite 30 V2 lists the same charging and discharging ranges.
That does not mean you will get warm-weather runtime at -10°C. Lithium batteries temporarily deliver less usable energy in the cold, while the camera cooler and dew heaters may work harder. Keep the station dry, off frozen ground, and sheltered in a ventilated container that does not block its fans. Never cover a power station so tightly that heat cannot escape.
Most importantly, do not charge a cold-soaked LiFePO4 battery below the manufacturer’s minimum charging temperature. Let it warm into the approved range first. For a winter session, I would also increase the planned capacity reserve beyond the usual 20% rather than trusting a mild-weather runtime test.
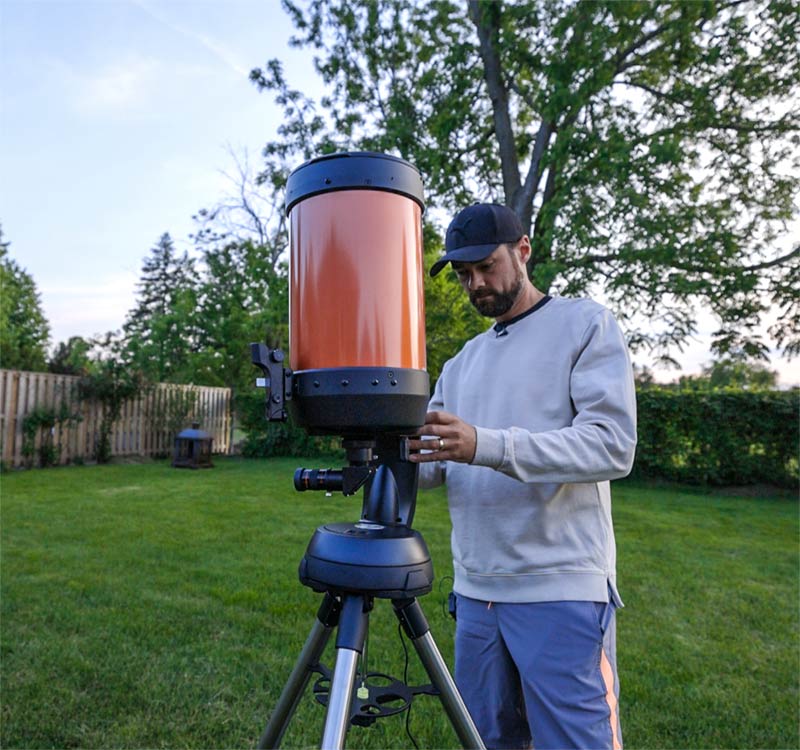
I use a portable power station to run my Celestron NexStar 8SE while camping.
BLUETTI Elite 30 V2
The BLUETTI Elite 30 V2 is the smaller power station I have started using. Its 288Wh capacity is nowhere near the Anker’s 1,229Wh, but at about 9.5 pounds it is much easier to carry from the vehicle to the telescope.
It has a 600W AC output, a regulated 12V/10A car socket, two 12V DC5521 ports, two USB-A ports, and two USB-C ports. One USB-C port supports up to 140W, which is useful if your laptop can run or charge directly over USB-C. The DC ports share limits, so check the total current draw rather than assuming every 12V port can provide its maximum at the same time.
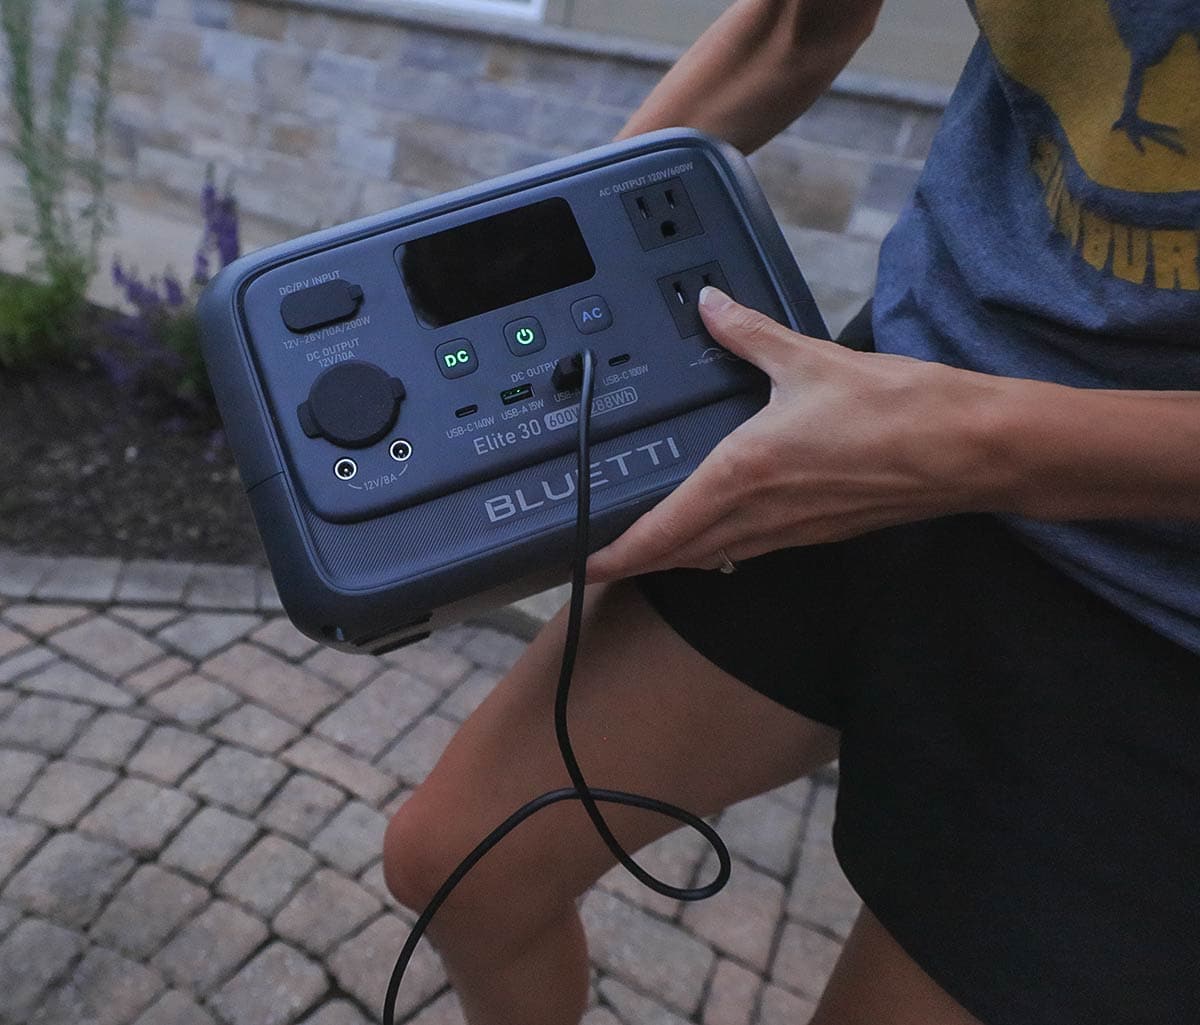
I have been using the portable Bluetti Elite 30 to keep my Seestar S50 Pro smart telescope topped up.
For me, this is a practical one-rig battery when portability matters. BLUETTI’s manual lists about 9W of self-consumption in its runtime formula. Using that figure, a 30W equipment load works out to roughly 6.3 hours, while a 45W load is closer to 4.6 hours under favorable conditions. Those are estimates, so I would test the exact rig before relying on it for a full winter night.
The unit accepts up to 200W of solar input and can reach 80% from an AC outlet in about 45 minutes in Turbo mode under the manufacturer’s test conditions. It also uses a LiFePO4 battery rated for more than 3,000 cycles, making it a much more current alternative to the older BLUETTI EB3A mentioned in the original version of this article.
Smaller Options for Astrophotography
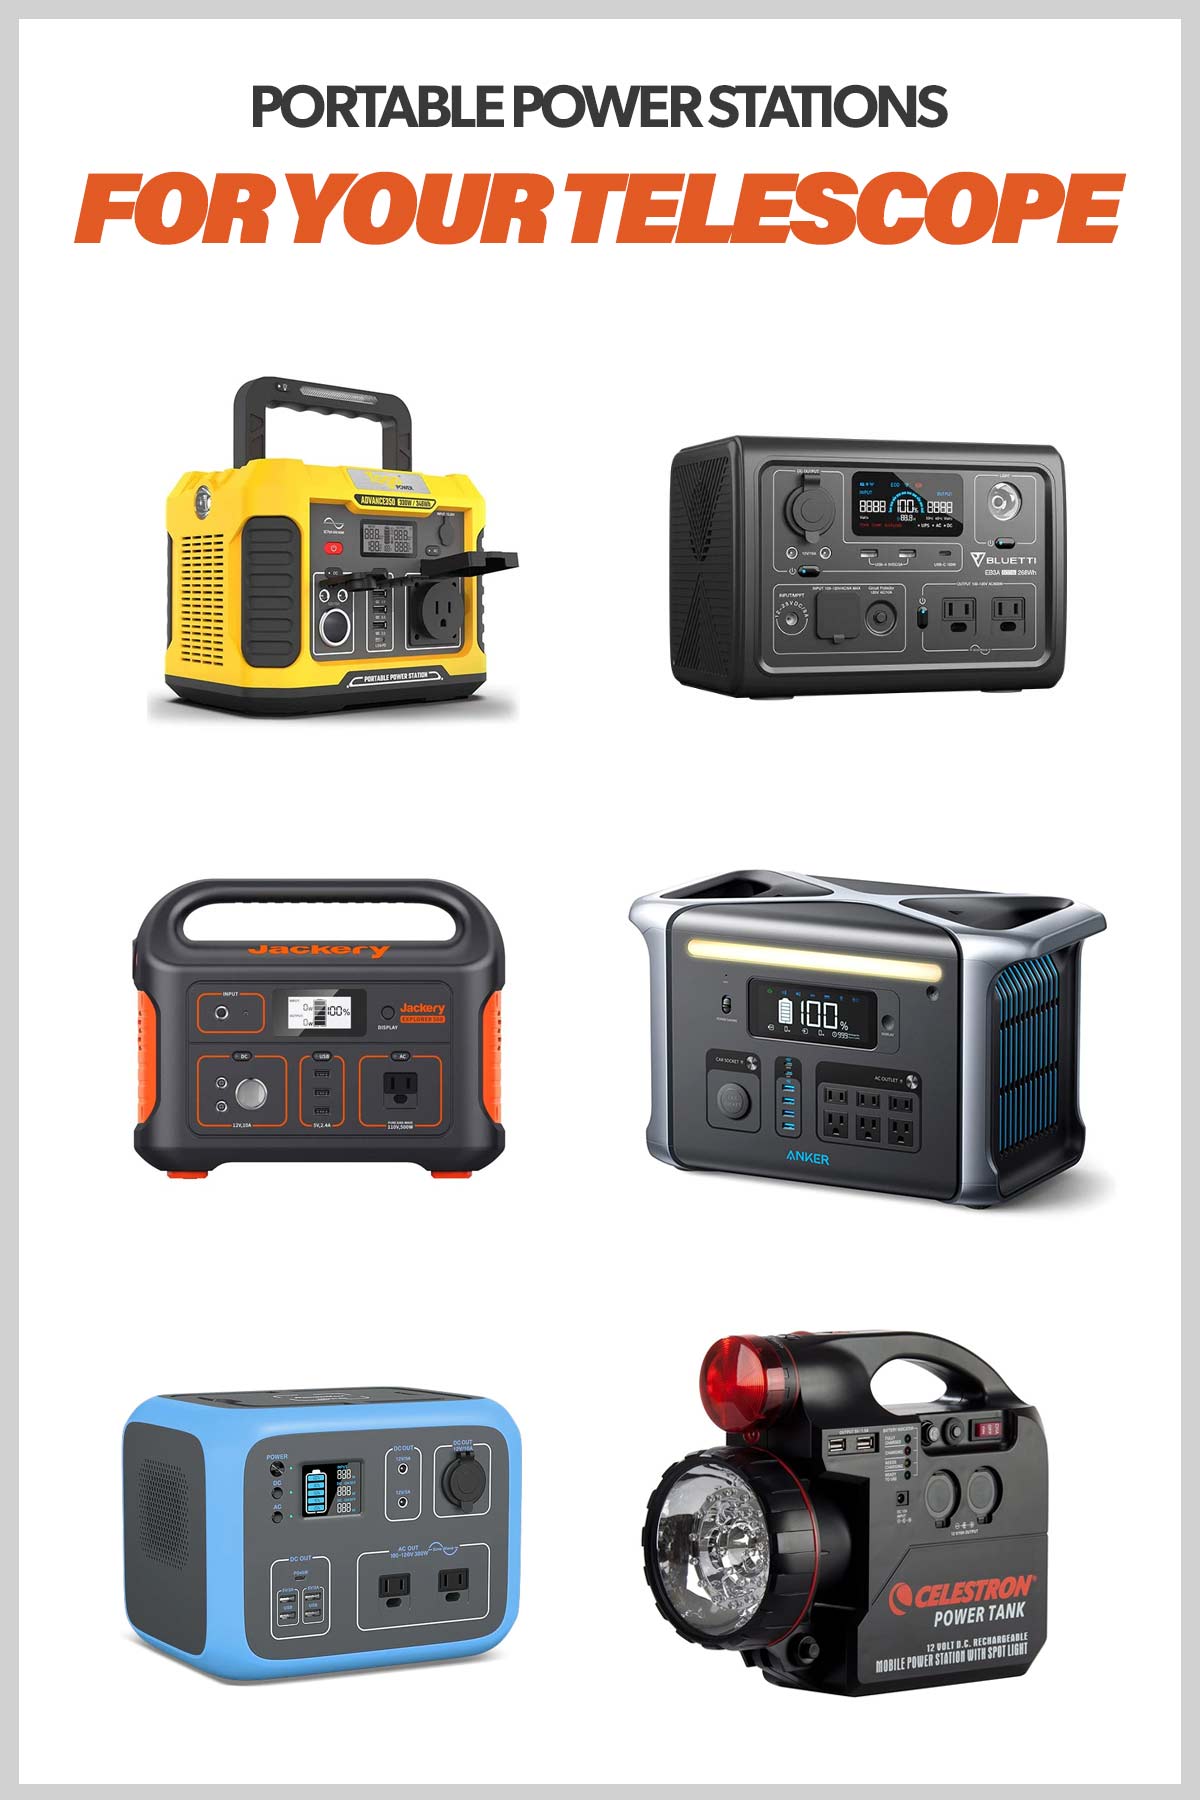
Jackery Explorer 500
If you’re on a budget and prefer to keep your power station portable, the Jackery Explorer 500 Portable Power Station is another option to consider. This older model weighs about 13 pounds and uses a lithium-ion battery rather than the longer-cycle LiFePO4 chemistry found in many newer stations.

Jackery Explorer 500
The Jackery Explorer 500 has a 518 watt-hour (24Ah, 21.6V) lithium-ion battery pack and a pure sine wave inverter. It includes 1 AC outlet, 3 USB-A ports, 2 DC ports, and 1 car socket. Jackery also offers a smaller version with less wattage (Explorer 240) for maximum portability.
Please note: One reader reported problems powering an EQ6-R Pro from a Jackery 12V output; you can read Ken Scheben’s description in the comments. I have not independently tested that combination, and the report should not be treated as applying to every Jackery model. Whatever brand you choose, confirm that its 12V output is regulated and can continuously supply the current required by your mount.
BLUETTI EB3A
The BLUETTI EB3A is an older compact option with a 268.8Wh capacity, a 600W AC output, and nine output ports. It can be charged from a compatible solar panel and includes app-based monitoring. Its capacity is similar to the newer Elite 30 V2, but I now have firsthand experience with the Elite 30 V2 and would start there when comparing BLUETTI’s current compact models.

Bluetti EB3A
If you need substantially more capacity, the BLUETTI AC200P combines a 2,000Wh battery with a 2,000W AC output, but it weighs about 60 pounds.
Togo Power Advance 350
The Togo Power Advance 350 was designed for laptops, mini-coolers, drones, and other outdoor electronics. Its roughly 346Wh battery and 330W AC output may suit a modest astrophotography setup, but whether it lasts all night depends on the rig’s average wattage.
Its pure sine wave AC outputs provide clean power to compatible devices. It features 8 output ports in total, including 2 handy 12V 10A DC ports for powering your astrophotography devices like the ZWO ASIAIR, and/or dedicated astronomy camera.
This unit can be charged using a solar panel in about 5-8 hours on the road, and also features a 10W wireless charging area for your smartphone.

Togo Power Advance 350
Solar Charging Between Clear Nights
Solar charging can be useful on a multi-night camping trip, but the maximum solar-input rating is not a promise of what you will see all day. Panel angle, clouds, shade, temperature, and charge-controller losses all reduce the real input.
A simple planning calculation is battery capacity ÷ actual solar watts. A 288Wh battery receiving a steady 120W would need at least 2.4 hours for the energy alone, and longer after charging losses and changing sunlight are included. A 1,229Wh battery is a much bigger job. At 200W of real input, the theoretical minimum is a little over 6 hours before losses.
Always check the station’s allowed solar-input voltage, current, connector, and maximum wattage before attaching a panel. More panel wattage is not automatically safe if the array’s open-circuit voltage exceeds the input limit. The Elite 30 V2, for example, accepts 12-28V, 10A, and up to 200W. For fast turnaround between two clear nights, AC charging at a serviced campsite is much more predictable than solar.
Battery Maintenance and Storage
Seasonal storage matters if the power station spends several months indoors between camping trips. Follow the manual for your exact model because recommendations differ. In general, turn off unused AC and DC outputs, disconnect accessories, store the unit somewhere cool and dry, and do not leave it empty for months.
BLUETTI recommends storing the Elite 30 V2 at 40-60% charge if it will not be used for more than three months, then cycling it every three months. Anker’s published guidance for the 757 calls for recharging it regularly during storage. I would put a recurring reminder on the calendar rather than discover a flat battery the night before a trip.
Final Thoughts
There have never been so many portable power stations to choose from. Price, battery capacity, output, port selection, and weight vary widely. The Anker 757 PowerHouse remains an excellent choice for me when I want a heavy-duty battery with a large reserve. The BLUETTI Elite 30 V2 is a better fit when I value a much smaller, lighter package and only need to support one modest rig.
The car battery booster-style packs I purchased from the hardware store in the past were a huge letdown. All of them would hold less and less of a charge over time, and would unexpectedly shut off in the middle of an imaging session. Thankfully, portable power stations have come a long way since then, and are much more reliable.
I know that a lot of you have built your own DIY power supply consisting of a marine battery, and an inverter. If you enjoy that type of thing (and know what you’re doing), by all means, go for it. You’ll likely save some money and get to work on a fun project.
If you are more comfortable in the office than in the shop (like me), one of the many fantastic pre-built portable power stations is likely a better fit, and worth the added cost.
Be sure to choose a unit that has dedicated output ports for the astrophotography equipment you use most, and that it can reliably power your rig for at least 1 entire night before requiring a recharge.
For now, I plan to keep using both the Anker 757 PowerHouse and BLUETTI Elite 30 V2 on our astrophotography and camping trips. My main advice is simple: estimate your rig’s average draw, buy enough watt-hours for the session plus a healthy reserve, and test the complete setup at home before you trust it under a dark sky.
Even More Options to Consider
Here is a list of options provided by the AstroBackyard community on YouTube and Facebook:




I go out to Big Bend National Park a few times a year. I camp in an area with no electric. I use a Goal Zero Yeti 500 and 200 to power smaller devices such as an iPad and recharge batteries for my Canon R6.
I use a 100Ah lithium battery to power my astrophotography rig(s). The battery sits in a marine box with a one 12v port. No laptop, I use an iPad Pro and ASIAIR.
I charge everything via solar.
The main reason I use a regular lithium battery is it serves as a backup to my vehicle battery when I’m miles away from anything and there’s no cell service. I’m sure I could rig up a power station in a pinch, but the lithium is plug and play.
I also like the simplicity, no special adapter to charge via solar. I rigged up a power meter that allows me to monitor usage, calculate runtimes and monitor solar charge rates.
Hi Trevor,
I am using the Ecoflow River pro station. I really like it!
Hello Trevor,
Operating temperature of the Anker 757 is between -20 and 40 C, so lowest of 0 Celsius is only for charging. The discharge temperatures are the operating temperature range i.m.h.o.
So you can use it in winter, maybe in Canada not all the time.
Greetings from NL,
Erik Schut
Great article Trevor and very timely for me. I’ve been struggling with the power to my EQ6-R Pro mount and have had to return it to Skywatcher for repair twice in the past 5 months. Both repairs involved replacing the controller board. My last mount failure was particularly ill timed as it happened at the Cherry Springs Star Party in June, leading to a 13 hour round trip drive without capturing a single sub! I’ve been using a Jackery portable battery when I’m away from home and after the last repair, I spent some time conversing with the engineers at Skywatcher. I was somewhat surprised when they shared with me that they’ve had a large number of problems with mounts powered by Jackery batteries. One of their engineers further shared that his personal testing indicated that he recommended Eco-Flow, Goal Zero and Celestron Lithium Pro. Of course, I’m sure they haven’t tested them all so your Ankar unit could very well be an excellent fit. Their techs implied that the Jackery 12V output is actually not maintained at 12V under load. This leads to the mount pulling more current to make up for that and this in turn heats up the ICs until they eventually melt. I have no idea if this is in fact correct as I have not done the testing myself. However, in an effort to never again have a mount failure at a dark sky site, I recently invested in an Eco-Flow unit which was one of the Skywatcher recommended brands. So far it’s worked out perfectly although I haven’t had many opportunities to test it yet. I’m sharing this in the hope that it may help someone else avoid the problems I’ve been having!
Thank for your comment Ken. I was about to purchase Jackery portable power source for my Sky-Watcher EQ6. Your comment perhaps saved me from a lot of trouble. Thank you.
Best Regards,
Peter
Ken – I am so glad you shared your story to save others a lot of frustration! Great seeing you again at Cherry Springs – Clear skies!
what Model Jackery Caused the issues? WE left that part out
I have two, Jackery, portable, power sources: a 200 W and 300 W. For my purposes, these are economical and very reliable solutions for my portable power source requirements.
The 200 W source can run the sidereal drive on my MEADE LX70 mount (using a 6 W A to D converter), with a 6-inch or 8-inch Newtonian attached, for 8 hours and still retain 85% of its stored power. This power source eliminated my need for D cell batteries to run the LX70 mount and so paid for itself in 8 months. If I add a cooled ZWO camera and a laptop, 30-35% of the power remains after 8 h.
The 300 W source will run my ORION ATLAS II mount (with an 8-inch Newtonian attached), two ZWO cameras (main (cooled) and guide cameras) and a laptop for 8 h and still retain 35-40% of its stored power.
Yes, I will have to recharge each power source before using it again, but this has never been a problem.
Nice summary of these power units, Trevor! I bought the “GOLABS R150 Portable Power Station, 204Wh LiFePO4 Battery with 160W AC, PD 60W, 12V DC, Type C QC3.0 Outlets, Solar Generator Backup Power Supply for Outdoors Camping Fishing Emergency Home Orange” from Amazon about 6 months ago (currently $110.00 US). Doesn’t have as much power as some of the others, but the advantages are the port versatility, weight (not very heavy compared to others), and the very reasonable price. Of course, it’s not suitable to tons of equipment or multiple nights, but for my one-night stands, it’s worked beautifully.
There is also GoalZero portable battery power units. Many years ago I built a power unit out of a emergency power pack for vehicles and on the handle I attached a small piece of wood that help a power inverter, I used it for running my barn door tracker and charging cellphone. Rama radio or small b&w tv during a winter storm when the power went out. Took it to StarFest every year and it charged many cellphones and other things for people.
Aggree with you Trevor
The only way to go is to use a good power supply. Marine or car battery drops in current really quick and causes problems, they are also normaly heavier then other solutions….but of course less expensive.
I use a Li – ion battery 1500 wh with continues and stable power output 13 volts DC and max 10 amps
My rig needs 3-5 amp average output
Never had any problems.
And i only need to reload max once a week if i use it every night
Also 220 v ac outlet and also solar power is possible to use for reload
I use a Bluetti EB70S and when it gets down to below -10 C I put it in an insulated box along with the laptop. Kept everything warm and working down to -35F this winter in Wisconsin.
To make you charge last as long as possible try to run everything on DC. The inverters take power in and of themselves and are rarely at best 90% efficient at conversion. Then the bricks to change back to DC are little toasters too. Even the laptop I use can charge and run through a USB C port so when in the field I use no power bricks at all.
I use the Powerwerx PWRbox with a 20ah battery. And the Powerpole connectors are a direct fit for the power cable.
It works well for me. You can get them up to 70ah (MEGAbox) depending on your needs.
I bought the sale on the Jackery Costco package of the 240W and 850W including two 65W solar panels with all the cabling as a self contained unit. The 240W is what I use to power my CGX-L mount with the supplied 12V car adapter. I power my Pegasus Ultra Box with the 110V outlet. I live in a dark sky area of Arizona (Bortle 4) and started the evening’s activities at 100% charge on the 240 (small light weight) and at dawn the next day it was down to 20% charge. Three image gathering sessions throughout the night using the ASI 294 OSC. Because it was warm at night the fan was mostly constant at 80% to -5C degrees. Watching the power spikes on the Pegasus app revealed nothing greater than 25W pull when slewing.
Pretty awesome power supply. Recharged the next day back to 100% and ready for the next night. The 240W Jackery has an internal fan as well for its operating temperature range. I’m pretty pleased with it.
I’ll take both the 850 and 240 with me on trips away from home. In addition, as an experiment/test, I used the 850 to power a side-by-side Frigidaire refrigerator/freezer to check its performance. Lasted all day into the evening…maybe 16 hours.
I’m pleased to be going all solar for astronomy…except for my computer. Haven’t tested that yet. Need to get a small dedicated CPU I guess.
Hi Trevor. Great review. It is unfortunate, us Canadians, can’t purchase the Anker 757 in Canada as of yet, therefore I’m thinking of getting the BLUETTI Portable Power Station AC200MAX.
Hi Trevor, I have to drive 20 minutes to get to my dark site. I use a 110Ah maintenance free lead/acid leisure battery which I bought in 2013 for about $90. I use it to power my HEQ5 mount, Astroberry Raspberry Pi and ASI294MC Pro OSC camera. The RPi also has a GPS and guide camera attached. Dew shields on my 200mm Newtonian and 80mm guidescope always seem to work well so I don’t use dew heaters. One power cable from the battery plugs into a 12V power splitter box strapped to my tripod. That box also has a 12v to 5v DC-DC converter for the RPi. There are other cables, one of which powers a laptop PC via a 12v/19v DC-DC converter when I need that for my Polemaster. Another I use for my flats panel and there’s a charging cable into which I plug an intelligent charger when I get home. I don’t need AC or USB etc. so my system is very simple. The battery has a window with a coloured condition indicator. Green for “Good condition”, Black for “Charging necessary” and White for “Replace battery”. In nine years of use down to -10degC once or twice I have never seen it show anything other than Green. The only downside is that it is very heavy. I can use the laptop but most of the time I operate my system from an iPad. BTW I use Anderson Powerpole connectors on the cables which I find work very well.
‘Love your videos, all the best from the UK,
Pete.
I looked into portable power supplies, but the cost for anything of 500W and above can be astronomical, especially taking into consideration solar panels for recharge.
In the end, I opted for “farm stays”. The wife is comfortable, I still get dark skies, I can power via domestic AC supply, and it isn’t as though I head for dark skies every weekend.
Great post. I agree Jackery 500 or equivalent is a great option for most setups. I decided to do a DIY approach not only to save money but to make something a little more convenient. I took a standard wheeled toolbox by Husky, mounted 2 lipo batteries 40 amp hour) and a ac/dc power source; secured them under a false bottom then mounted counter weights and all other accessories on shelves above. So basically one easy to move box for everything except mount and scope. When I am in backyard I plug extension cord into external plug on outside and flip external switch to go from battery power to ac. So same exact cables to scope whether it’s battery powered or 120/220v. It’s been a really simple way to do things.
Ken Scheben’s comment has me a little worried in case the voltage of my 110Ah lead acid battery drops below 12V and results in failure of the motherboard in my Skywatcher HEQ5. My battery is 9 years old so the voltage probably drops quicker now compared to when it was new. I think I will take a multimeter with me in future to monitor the voltage drop during my imaging sessions.
Pete.
Hi Trevor,
Not sure if it’s just my own experience, but having used the SW AZ EQ6 Pro along with both the Power Oak 500W, if I attempt to plug in another device, the mount auto guiding goes bananas! If I’m just running the mount it is perfect. I therefore run all my other bits off my Jackery 250W.
Just a note on the Jackery, I attempted to run the mount off this power tank and once again the EQ6 started doing odd 360 rotations!
I’m assuming the EQ6 models are power hungry beasts?
Thanks to Ken for the tip on Eco Flow. Just got myself the River 288 instead of Jackery and think it’ll be better overall anyway. Willing to put up with a premium price point for expandability as I go.
Or, my needs will vastly change by the time I max out the battery and I’ll just have to eat the cost. lol
I use an EcoFlow River Pro. I paid a bit more for all the output ports as charging family gadgets on outings is another use. It puts out at about 13.6V and I tend to run gear off 12V AC adapters until I’ve confirmed they are ok at that voltage when it switch them to the DC going through my Pegasus PBUV2. It powers all my astro gear for at least 2 nights. Obviously an adapted marine battery is less expensive but for convenience and stability I love it. Mark 2 model is out now with many more charge cycles, though for typical astro use that won’t matter. PLL recommend this range for their Eagles and make the point that the slightly higher base voltage prevents gear fails that you might get with voltage dropping below 12 late in a long session.
Just a quick note to mention that I had to return an EcoFlow River Pro 2…it was dropping as low as 11.6v! The older models had a higher voltage rating. I mentioned this to PLL, and they’re looking into it as well.
I know this is a few years old now, is there a new updated version. I am so lost in what to get to run basically what you listed above. I currently have a Jackery 300 Plus but i don’t think its going to be enough to run everything.
Can anyone help?
Hi Travor, I’m currently planning my next trip from Germany to La Palma (Canary Island). I’ve been there several times and have always been able to borrow the heaviest equipment (mount, battery, counterweights) in the past on the island. Since my contact on the island has moved away, I now have 2 problems: a) the mount and b) the power supply when I’m not staying at my accommodation.
I have solved the problem with the mount: I now use a ZWO AM3, which is very easy to transport and works very reliably.
Unfortunately, the international flight regulations only allow power banks up to a maximum capacity of 100Wh, and the power banks also have to be transported in hand luggage. After a test, my Celestron LiFePO4 power tank, which is now 5 years old and has 84Wh, only allows me to use it for around 2.5 hours, which is unfortunately far too short for long exposures. Have you had any experience with power banks when traveling by air – or are the regulations in the USA perhaps different?
Many greetings from a long-term fan of your exciting reports!
Ralph
Hi Raplh! Glad to hear the AM3 is working out for you — I’ve been loving my AM5 here at home for the same reasons.
As for the power situation, you’re absolutely right — most airlines limit lithium battery packs to 100Wh per battery in carry-on, and anything above that can get dicey.
I’ve always either plugged in when traveling by air – or used something battery-powered like the Sky-Watcher Star Adventurer 2i (4 x AA’s).
For longer sessions, you could try bringing multiple 100Wh power banks and swapping them mid-session (not ideal, I know)
Any guides on how to power from AC? I tried chatGPT and am totally confused. I’m in Korea so has to work for 240v. From what I gather I need a DC power brick with 12v 10a minimum and chatGPT says something about fuses, distribution boxes etc. Any tips?
Trevor, I currently use a portable 12v LFP power pack from Kendrick Astro in Toronto,Ontario. I have been using it for approx. 3 years and never had a problem. Also use their 12v powered USB hub.
Side note, keep up the excellent work helping beginning astrophotographers like myself learn this fantastic hobby.
Thank you