
Seestar S50 Pro Review: The Most Capable Smart Telescope Yet

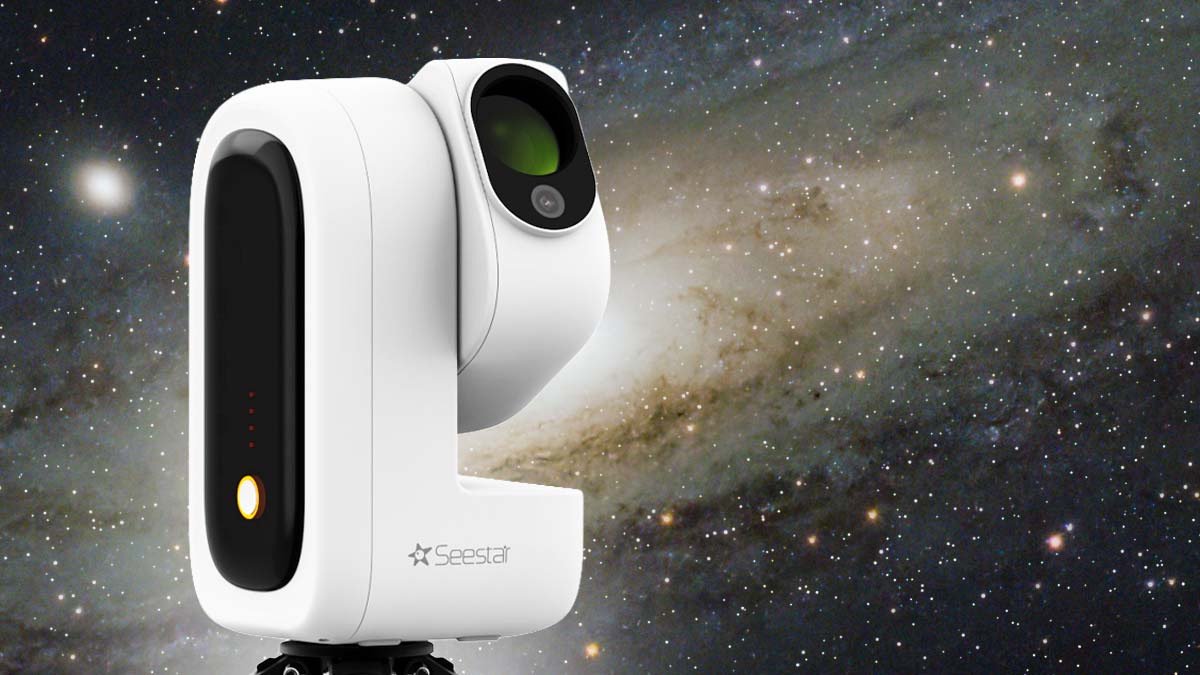
I have spent a lot of time testing the different Seestar models, and the S50 Pro feels like the first one aimed just as much at experienced astrophotographers as at complete beginners.
It keeps the approachable, all-in-one experience that made the original Seestar S50 so popular, but adds a much larger 4K imaging sensor, a second wide-angle camera, equatorial mode, improved tracking, more storage, and a longer-lasting battery.
After using it on everything from large emission nebulae to the Andromeda Galaxy, I can confirm that it is the most capable Seestar I have tested so far. The improvement is especially noticeable when you want to collect several hours of data in equatorial mode and process the individual files yourself.
However, the price changes the conversation. The regular retail price is $999 USD, although ZWO launched it at a temporary introductory price of $899. That puts it well above the original S50 and makes the question less about whether it is better—and more about whether its improvements are worth the extra money.
My quick verdict: The Seestar S50 Pro is the best-performing Seestar for smaller deep-sky objects, lunar detail, and longer equatorial-mode projects. The original S50 remains the value choice, while the S30 Pro is still better for maximum portability and very large nebulae.
In this Seestar S50 Pro review, I will explain the upgrades, image quality, and how it compares to the original Seestar S50 and my Seestar S30 Pro.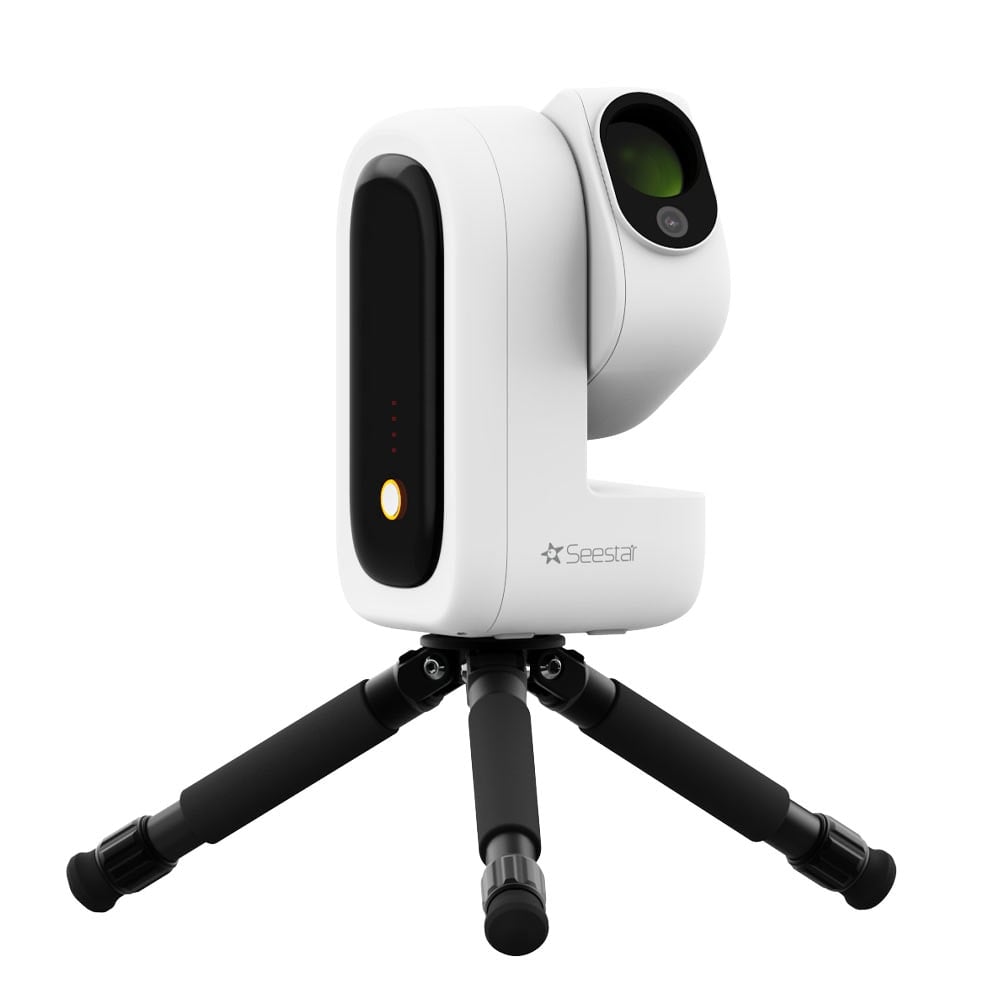
The Seestar S50 Pro is available at High Point Scientific for $899 USD.
What Is the Seestar S50 Pro?
The Seestar S50 Pro is an all-in-one robotic telescope controlled through the Seestar app on a phone or tablet. You place it outside, connect to it, and choose an object such as a galaxy, nebula, star cluster, the Moon, or the Sun.
The telescope locates the target, centers it, focuses the camera, tracks the sky, and starts taking a sequence of short exposures. It aligns and combines those images in real time, allowing the object to become brighter and more detailed on your screen.
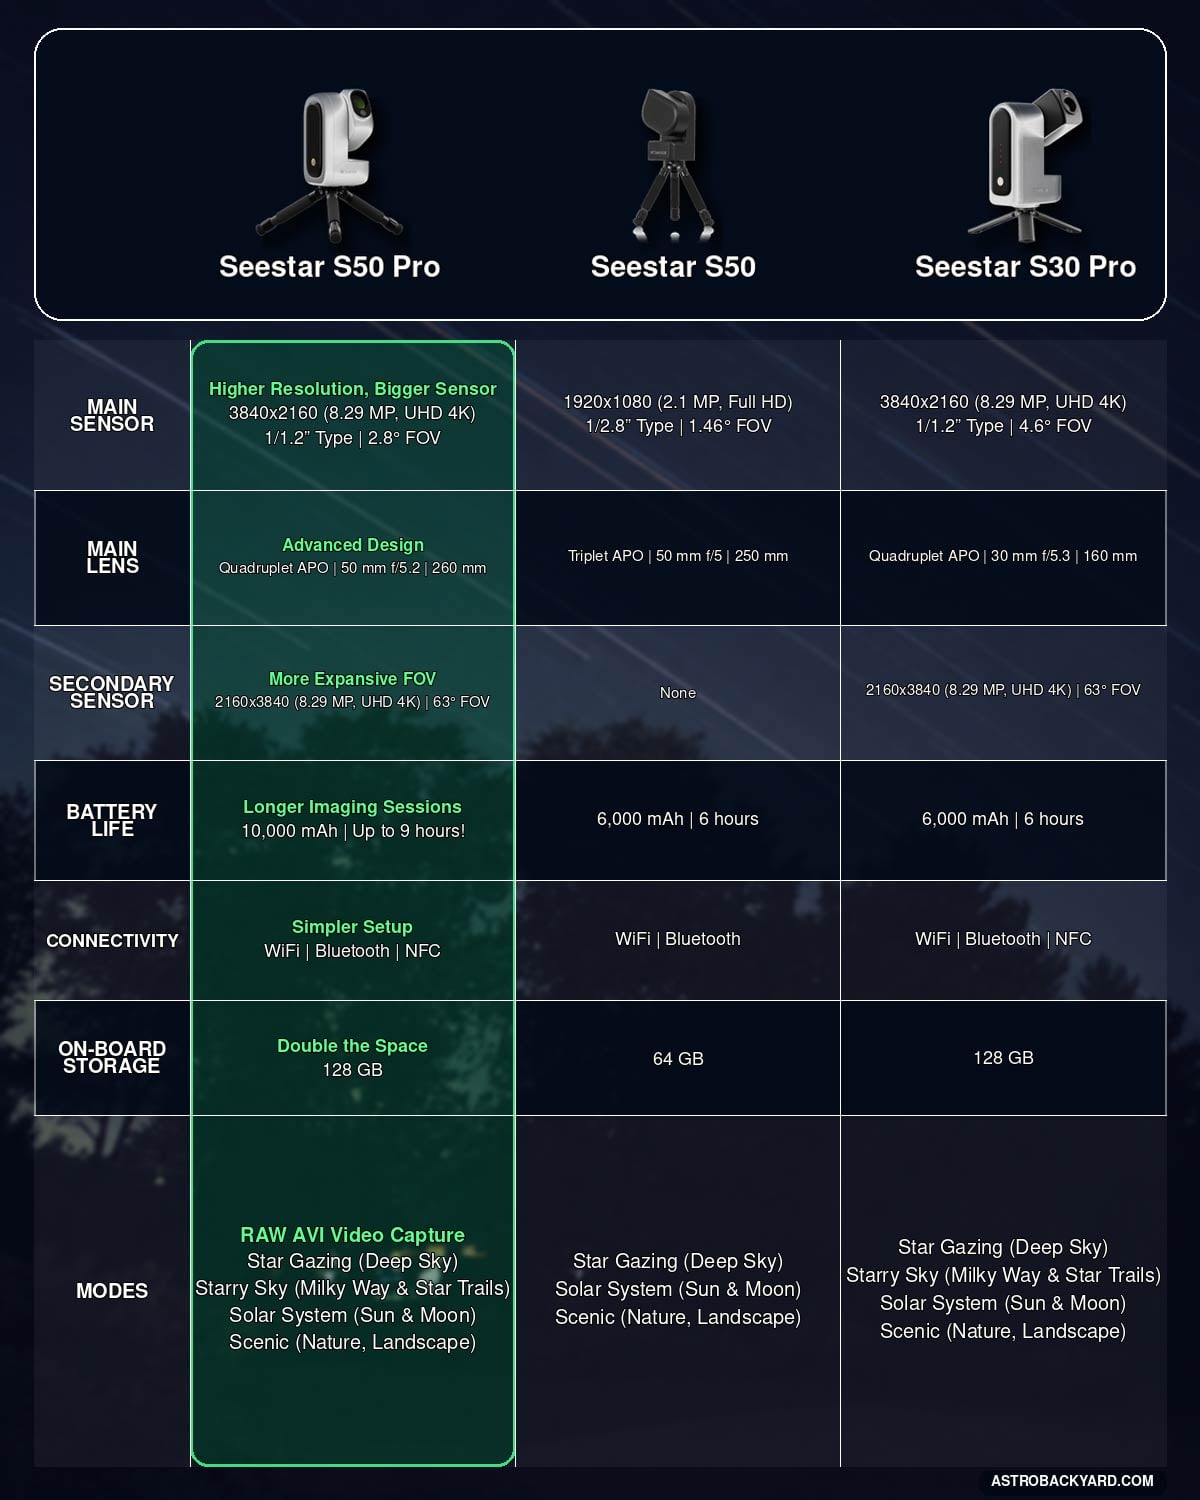
Note: The primary image sensor in the S50 Pro has the same specs as the one in the S30 Pro, but it is a different brand.
This is called live stacking. Dozens or hundreds of short, aligned frames can produce a surprisingly detailed result. My article about the best astrophotography exposure time explains why total integration time often matters more than an extremely long individual exposure.
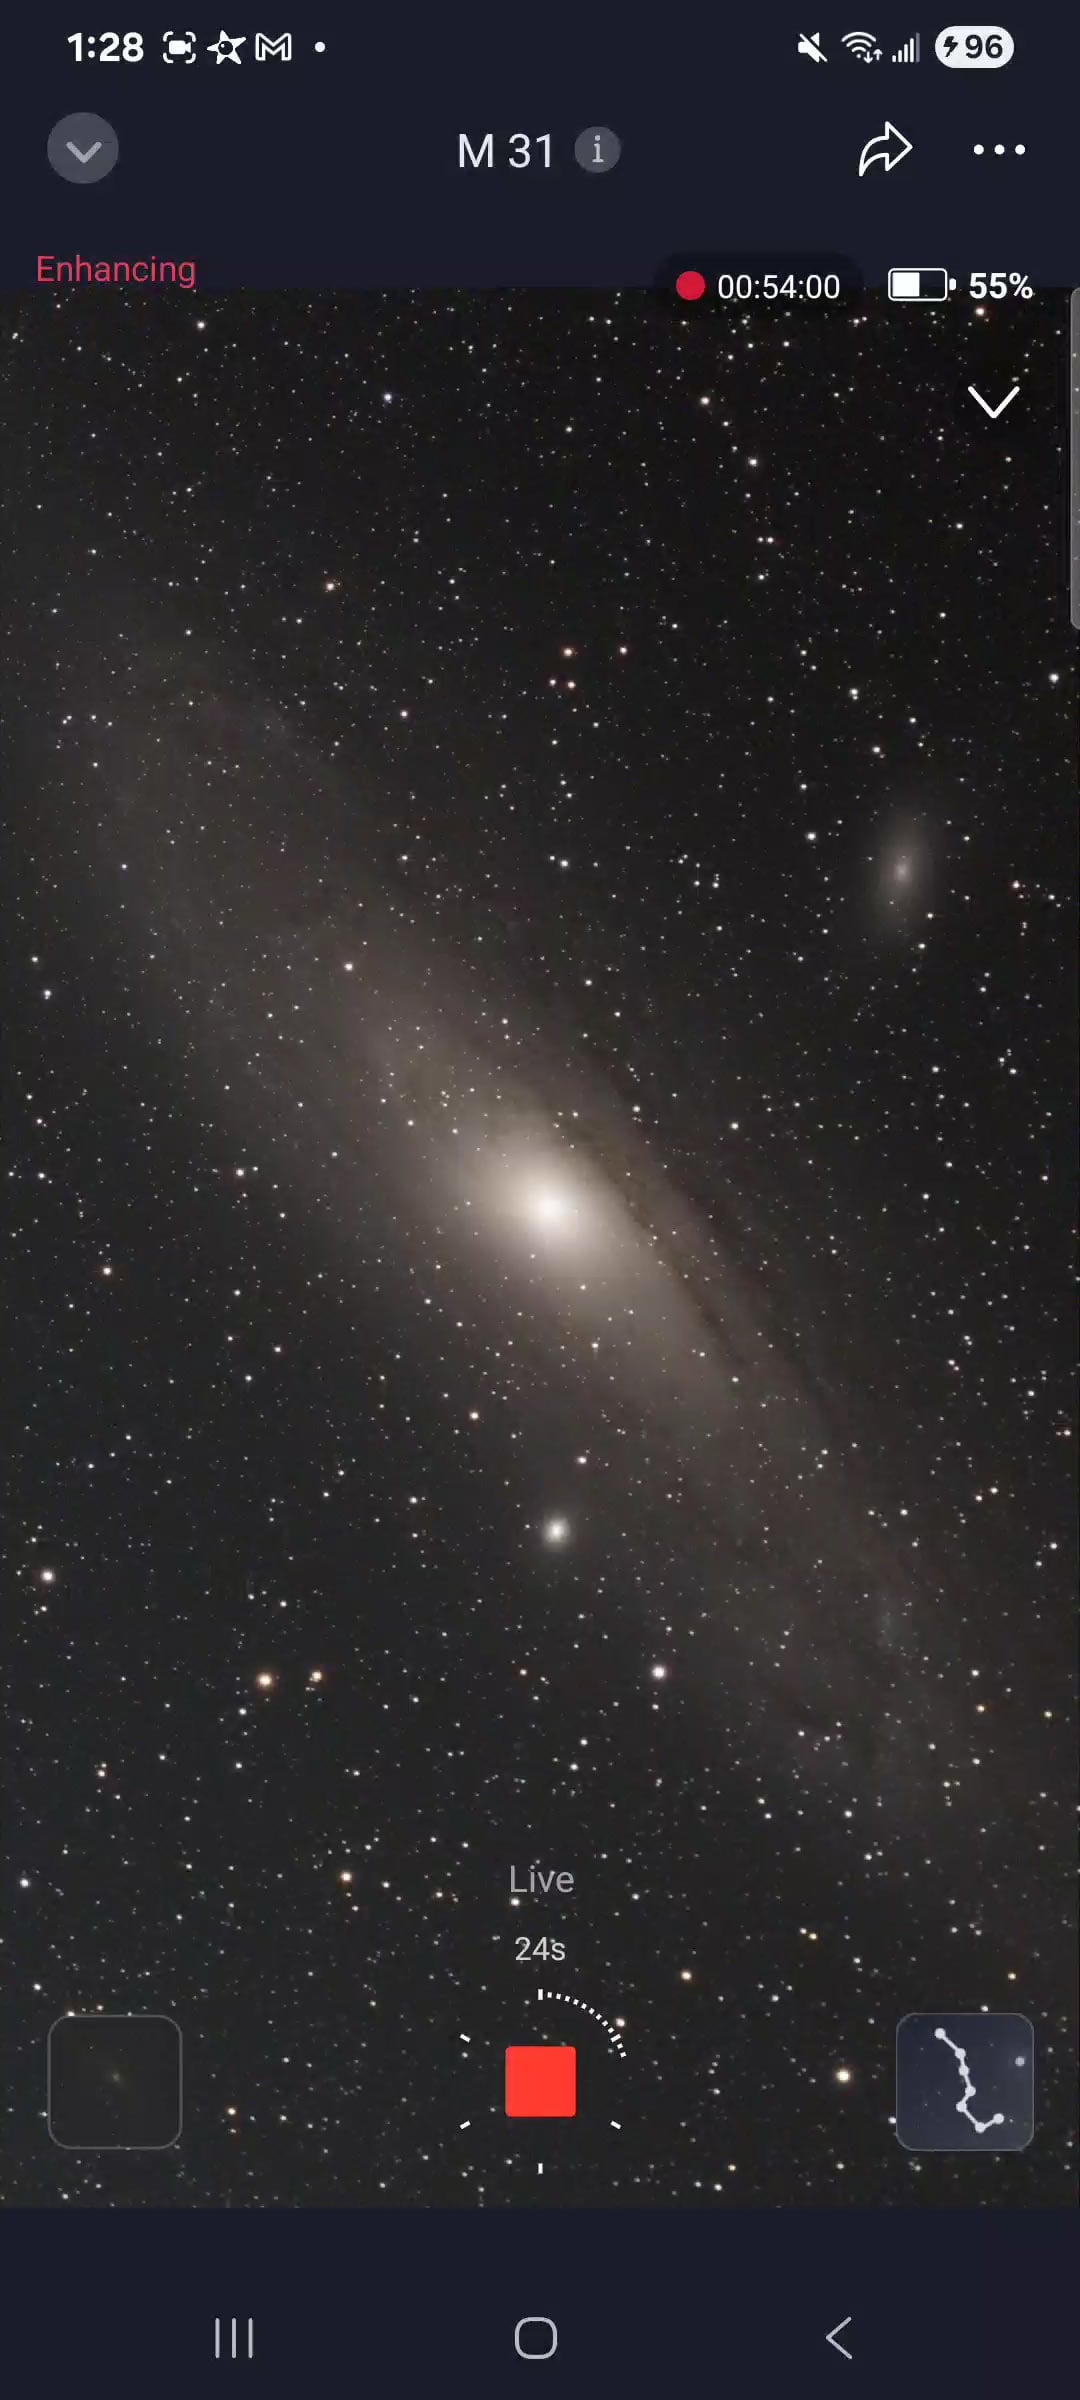
Live stacking while imaging the Andromeda Galaxy
There is no eyepiece. Everything happens through the cameras and app, allowing this small telescope to reveal objects that would be difficult to see visually.
The system includes the cameras, motorized mount, focuser, filters, dew heater, battery, storage, and control computer. There is no guide scope, laptop, or cable collection to assemble.
Beginners avoid many technical barriers, while experienced imagers get a telescope that can be operating within minutes.
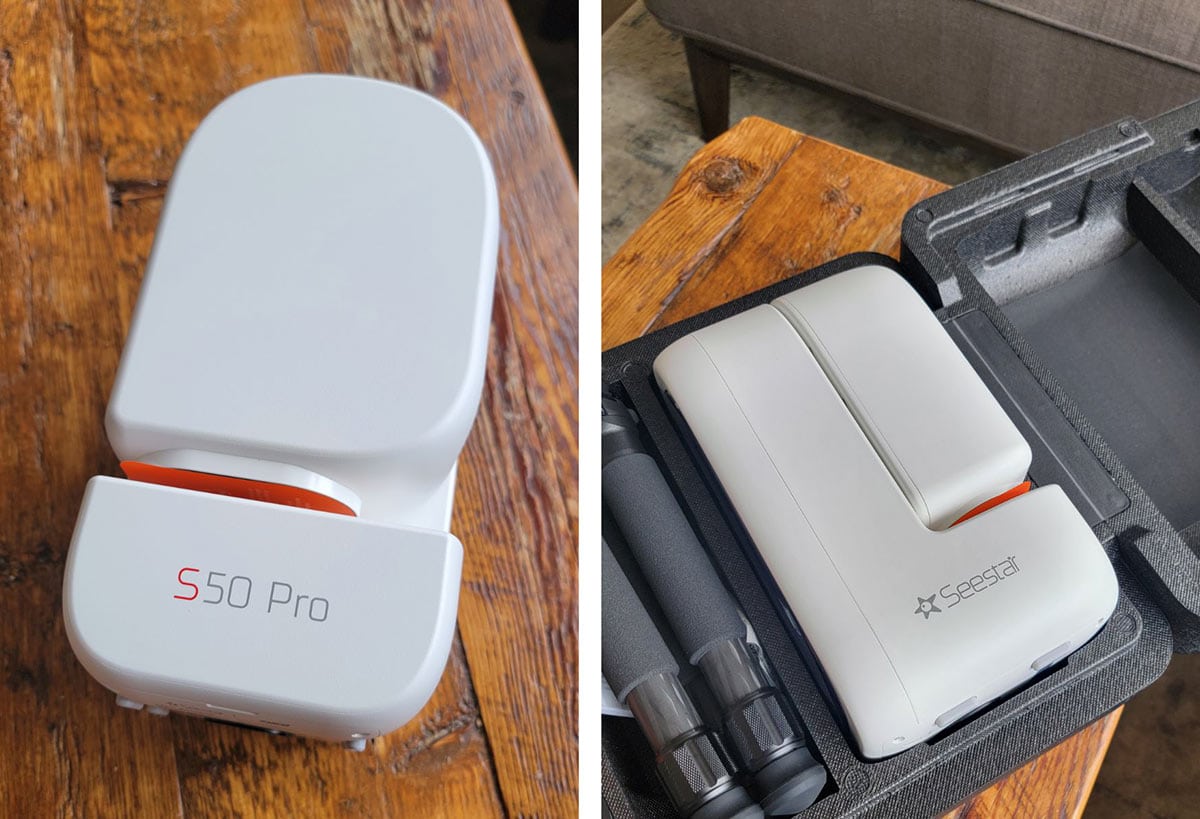
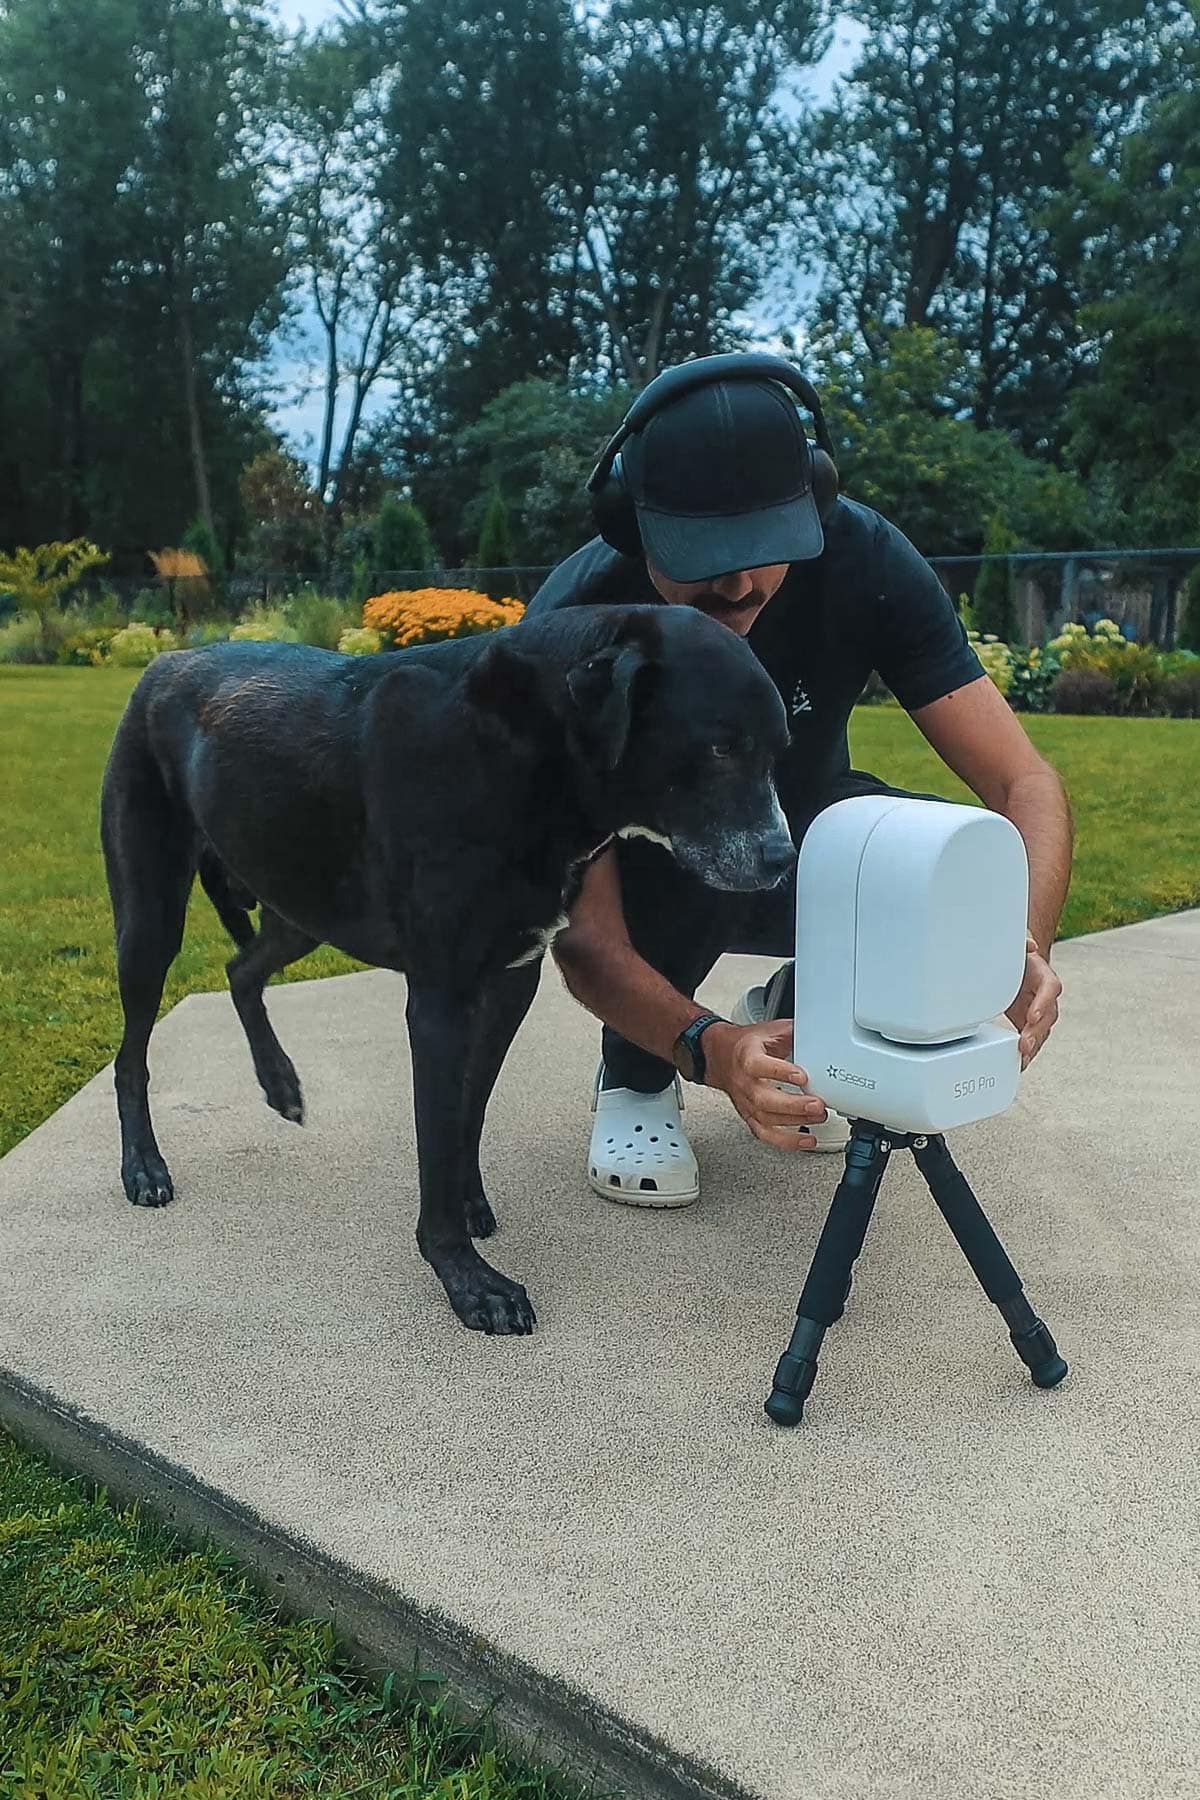
The S50 Pro when it first arrived in the protective carrying case.
Seestar S50 Pro Specifications
The Seestar S50 Pro combines a 50mm apochromatic refractor with upgraded imaging hardware, a secondary wide-angle camera, and several changes from the original S50. Here’s a look at the key specifications.
| Feature | Specification |
|---|---|
| Main Telescope | 50mm aperture, 260mm focal length, F/5.2 |
| Optical Design | Four-element apochromatic refractor with ED glass |
| Telephoto Camera | 8.29 MP, 2.9-micron pixels |
| Telephoto Resolution | 3840 × 2160 (4K) |
| Telephoto Field of View | 2.8 degrees diagonal |
| Camera Sensor | OmniVision OS08B10 |
| Wide-Angle Camera | 1/2-inch CMOS, 8.3 MP, 1.6-micron pixels |
| Wide-Angle Lens | F/1.75 with a 63-degree field of view |
| Filters | UV/IR cut, dual-band, and dark-frame filter |
| Imaging Modes | Stargazing, Milky Way, Solar System, and Scenery |
| Output Formats | JPEG, FITS, MP4, and AVI |
| Connectivity | 2.4 GHz and 5 GHz Wi-Fi, Bluetooth, and NFC |
| Battery | 10,000 mAh; rated for up to 9 hours |
| External Power | USB-C; can operate while connected to an external power source |
| Storage | 128GB internal storage; approximately 100GB available to the user |
| Operating Temperature | 14°F to 104°F (-10°C to 40°C) |
| Total Weight | 6.17 pounds (2.8 kilograms) |
| Equatorial Mode | Supported; requires a compatible wedge or adjustable tripod head sold separately |
| Included Accessories | Carbon-fiber tripod, magnetic solar filter, USB-C-to-USB-A cable, carrying case, quick-start guide, and safety information sheet |
| Warranty | Two years for the telescope; one year for the battery |
| Retail price | $999 USD |
The preorder price is $899 USD beginning August 25, 2026. Customer orders are scheduled to begin shipping in September.
Important sensor clarification: The S50 Pro’s main camera has the same headline sensor size, resolution, and 2.9-micron pixel size as the S30 Pro, but it does not use the same Sony IMX585 sensor. It is best to judge the complete optical and imaging system rather than assume the cameras are identical.
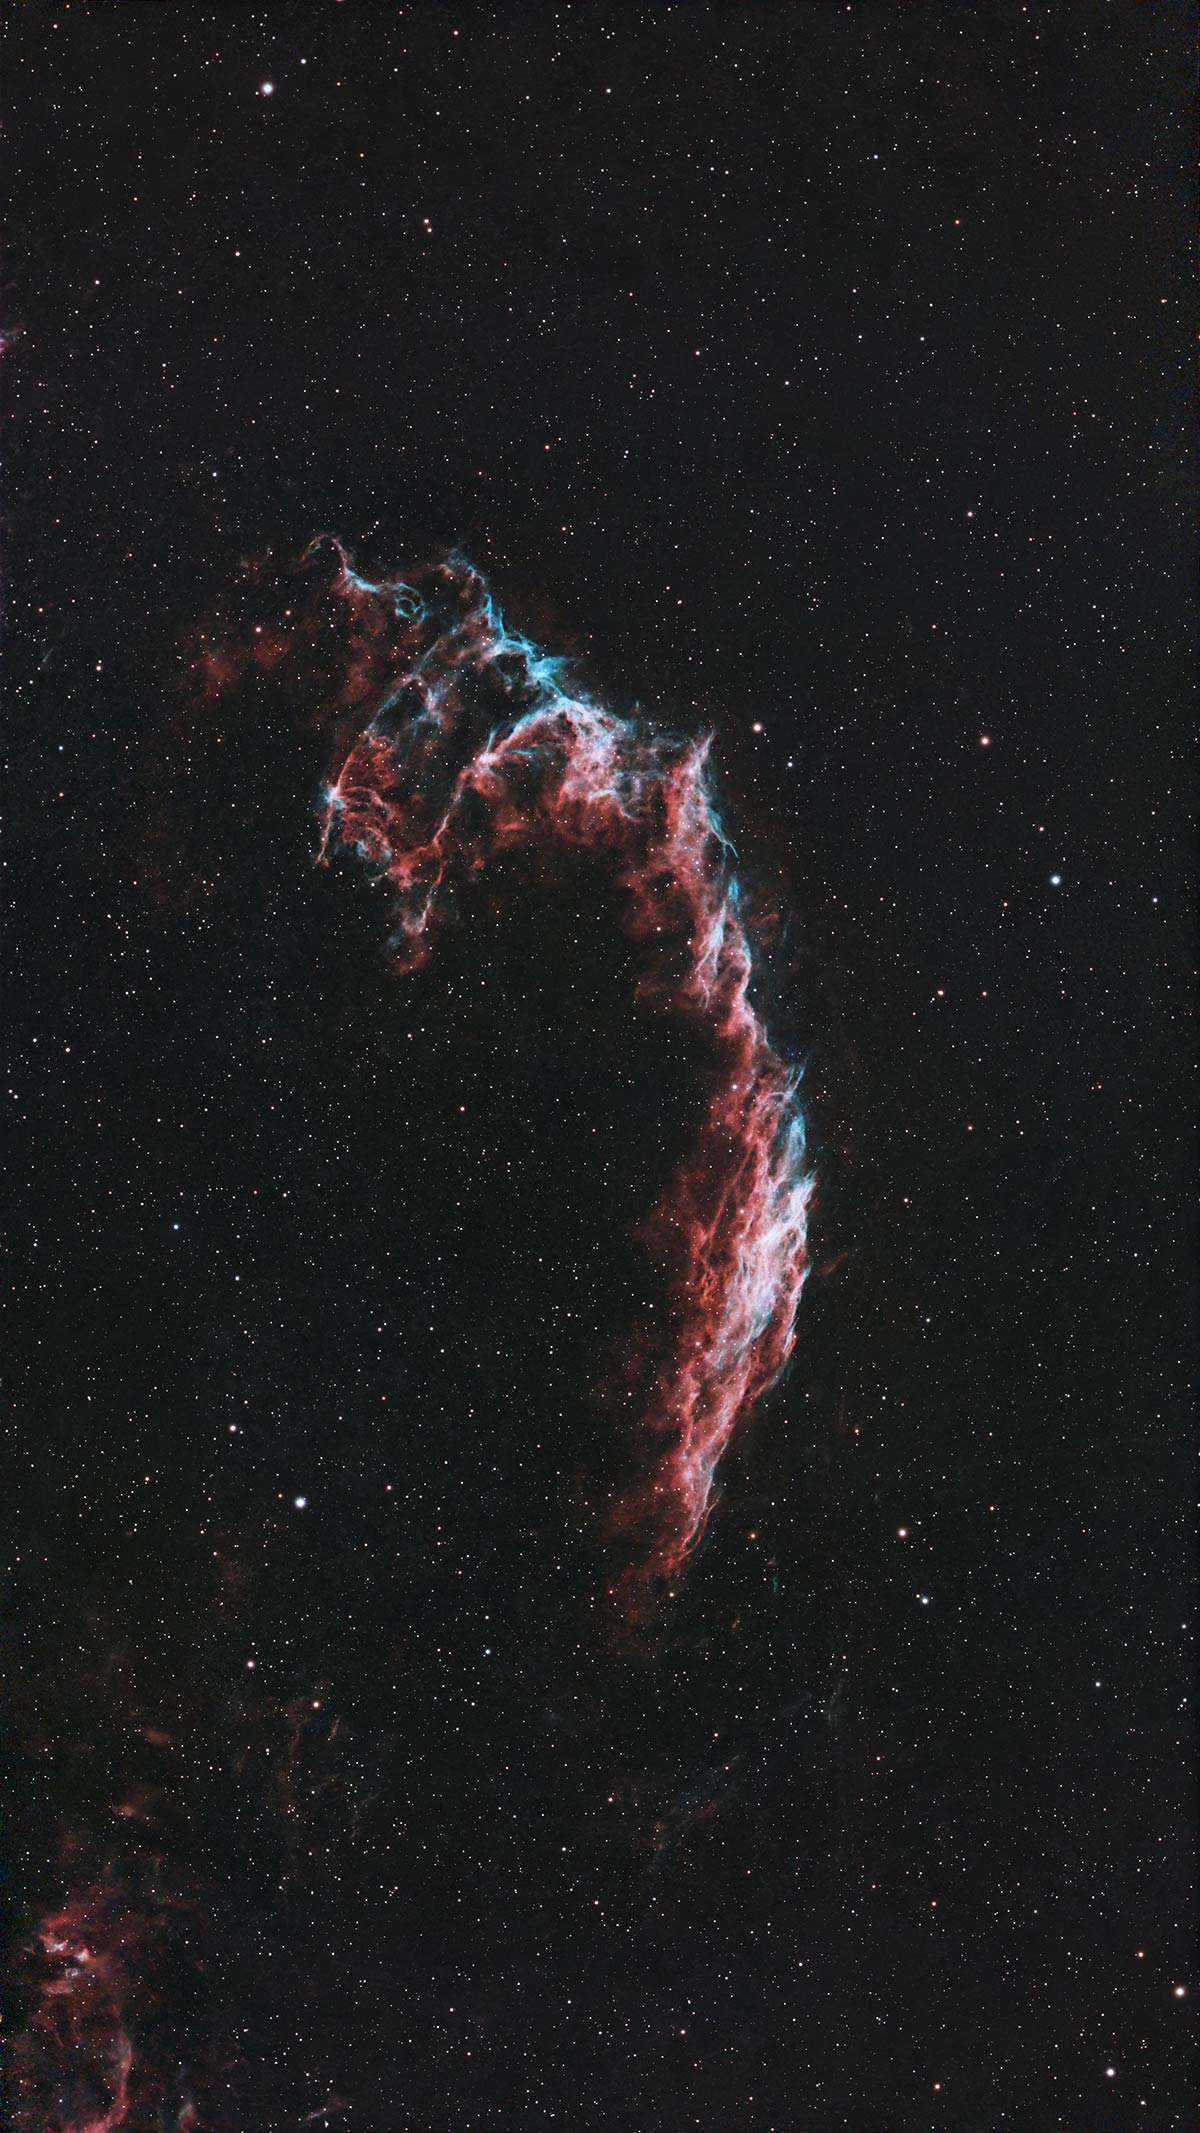
The Eastern Veil Nebula captured using the LP Filter. (358 x 10 seconds in Alt-Az mode).
The Main 4K Telescope Camera
The main imaging system is where the S50 Pro separates itself from the other Seestar models. Its 50mm aperture and 260mm focal length create a useful middle ground between the original S50 and the much wider S30 Pro.
The original S50 also has a 50mm aperture, but its main camera produces 1920 x 1080 images and covers a narrower 1.46-degree diagonal field. The S50 Pro captures 3840 x 2160 images and expands the diagonal field to 2.8 degrees.
That is twice as many pixels across each dimension and nearly four times as much sky area. The extra room helps with framing and cropping alt-azimuth edge artifacts.
The calculated image scale is approximately 2.3 arc-seconds per pixel, a sensible match for a portable 50mm telescope under typical backyard seeing. My guide to image scale in astrophotography explains this measurement.
ZWO revised the optics with a four-element apochromatic ED-glass design. A precision fold mirror fits the 260mm optical path inside the compact body.
The company also improved the mirror and developed a dedicated star-quality test. Adding pixels is easy to advertise; keeping stars clean across the larger frame is harder.
Why 50mm matters: A 50mm aperture gathers about 2.8 times as much light as a 30mm aperture. The S50 Pro also uses a longer focal length, giving small galaxies, globular clusters, and compact nebula structures more image scale than the S30 Pro.
A 50mm telescope still has real limits. Its advantages are stronger light collection, better sampling of compact targets, and more freedom to crop or print.
The Second 4K Wide-Angle Camera
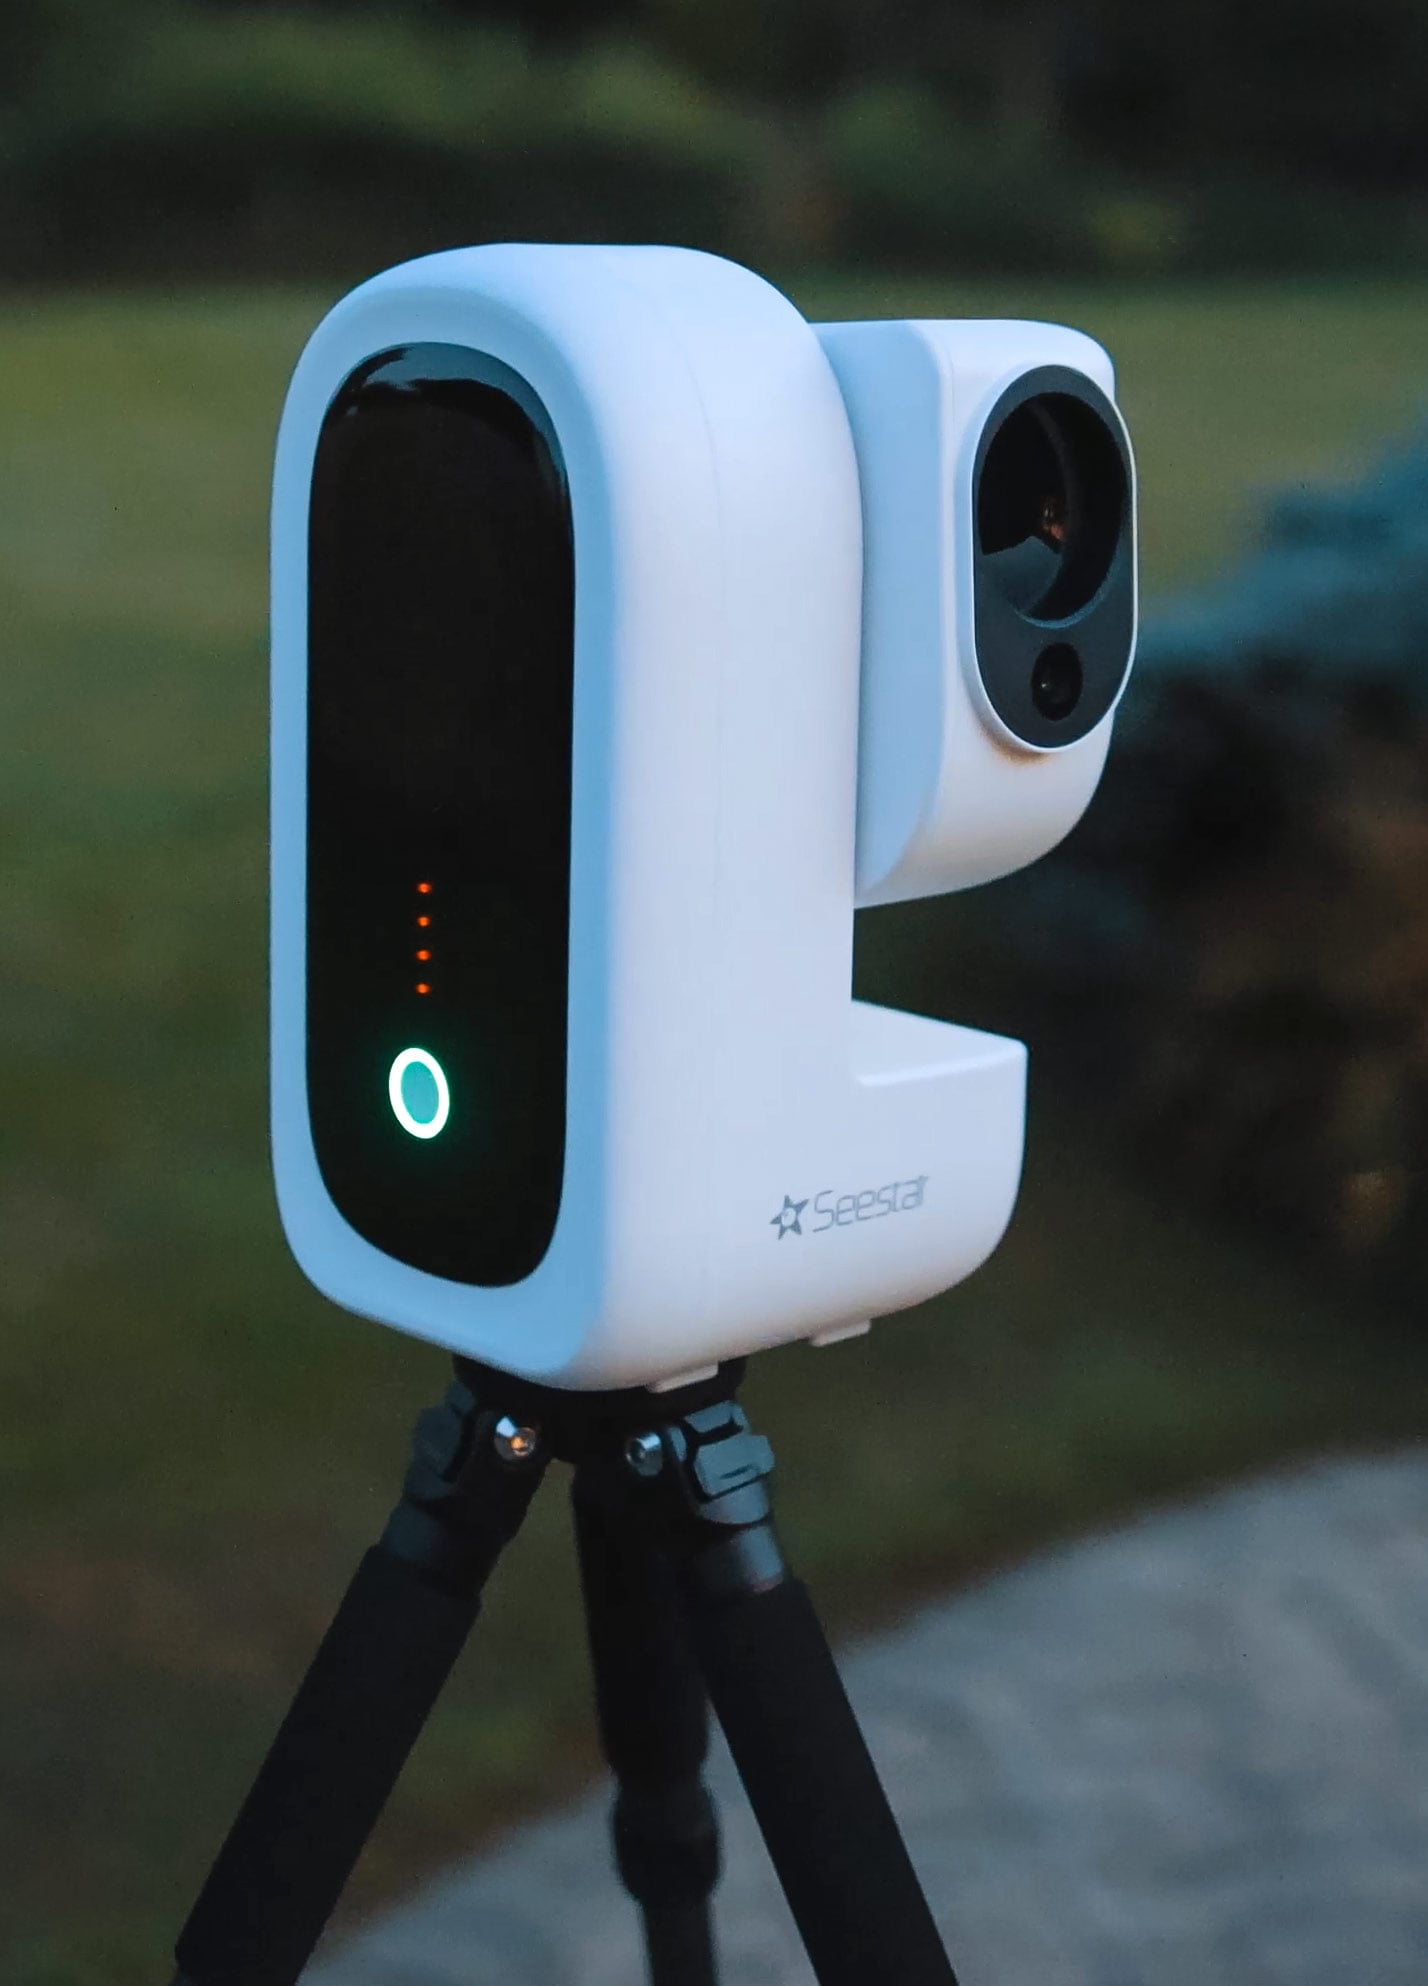
The S50 Pro includes a second camera with a 63-degree field of view. It uses a 1/2-inch, 8.3-megapixel sensor with 1.6-micron pixels and a fast F/1.75 lens.
This camera supports Milky Way panoramas, star trails, night-sky time-lapses, constellation identification, scenery, and wide-field live stacking. It can autofocus, so it is a genuine imaging system rather than a basic finder camera. During the day, it can also help locate and track moving subjects such as aircraft and wildlife while the telephoto camera provides a closer view.
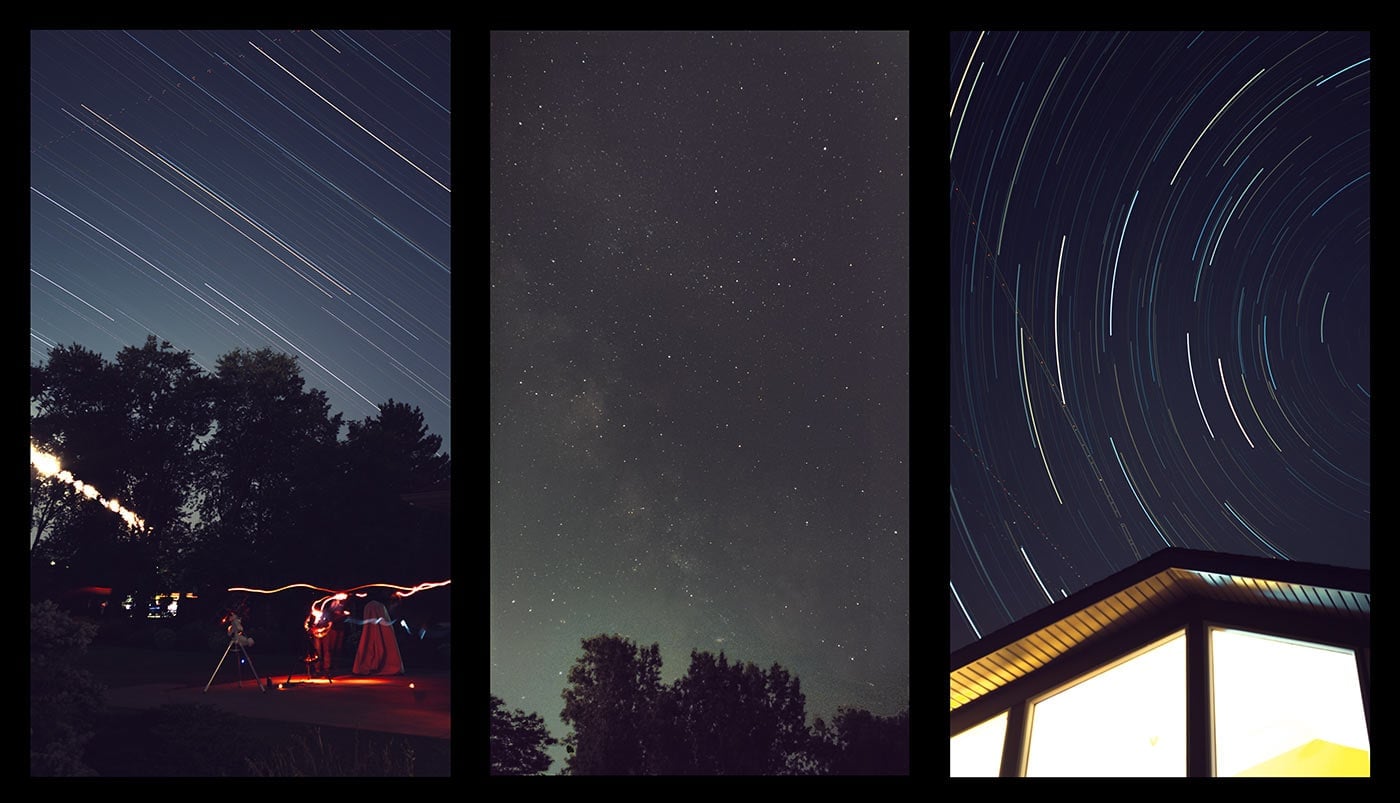
I took these images using the wide-angle ‘Milky Way mode’ on the Seestar S50 Pro.
The wide camera also helps the main telescope locate objects. This is particularly useful when finding the Sun or Moon because the telephoto camera sees only a small portion of the sky.
ZWO confirmed that the wide-angle sensor and lens are essentially the same as the system in the S30 Pro. The S50 Pro’s primary image-quality advantage comes from the larger main telescope, not an upgraded wide camera.
I would not expect this mode to replace a full-frame mirrorless camera and fast lens for serious Milky Way photography. However, a portable camera that can autofocus, track the sky, automate a panorama, and build the final result in one app is incredibly approachable.
What Sensor Does the Seestar S50 Pro Use?
The main telephoto camera uses the OmniVision OS08B10, a 1/1.2-inch CMOS sensor with 2.9-micron pixels and a resolution of 3840 × 2160.
This is worth clarifying because the sensor has the same size, pixel count, and pixel size as the Sony IMX585 used in the S30 Pro. That led many people to assume the two telescopes used the same sensor. They do not.
Sensor clarification: The Seestar S50 Pro uses the OmniVision OS08B10 in its main telescope camera. The wide-angle camera uses the Sony IMX586.
Some astrophotographers have been understandably cautious about this decision because the IMX585 is already a well-known astronomy sensor. Matching specifications on paper do not guarantee identical read noise, sensitivity, dynamic range, or calibration behavior.
At the same time, I do not think the sensor model alone tells us whether the S50 Pro is a good imaging system. The revised four-element optics, 50mm aperture, tracking performance, internal processing, and calibration all contribute to the final image.
My real-world results have been encouraging. I was able to collect and process detailed images of targets such as the Crescent Nebula, NGC 7822, and the Andromeda Galaxy without seeing an obvious issue that would prevent me from recommending the telescope. However, I would still like to see more independent testing of the sensor as additional production units reach users.
For a much deeper technical look at the OS08B10 and the early concerns surrounding it, Cuiv the Lazy Geek has produced the following helpful video:
Setup and the Seestar App
The Seestar app is a major part of the experience. Press the power button, connect a phone or tablet, open the telescope arm, and the S50 Pro is ready to look around.
NFC allows a compatible phone to pair with a tap. You can also connect directly over Wi-Fi or use Station Mode through your home network. Station Mode is especially convenient in winter because I can control the telescope from inside the house.
The SkyAtlas lets you search, check visibility, frame a target, and create an imaging plan. You can schedule multiple targets and let the Seestar work through the plan automatically, which is particularly useful for longer or unattended imaging sessions. Tap GoTo, and the telescope locates, centers, focuses, tracks, and starts stacking.
On a traditional rig, those steps can involve several pieces of hardware and software. Here, the routine takes a few taps.
The telescope continues imaging when the app is closed. I prefer a tablet because the live image can remain visible while another rig is running.
Remote telescope sharing and photometric measurement workflows show that ZWO is expanding beyond simple point-and-share imaging.
Image Quality, Filters, and Real-World Expectations
I test smart telescopes outdoors under the same imperfect conditions most people experience: light pollution, changing transparency, wind, moonlight, and limited clear-sky windows.
The wider 4K frame provides more room than the original S50 while preserving more image scale than the S30 Pro. The files also suit a large monitor or respectable print.
Pixels do not automatically create detail. Focus, tracking, optics, seeing, and total integration still matter. A well-tracked two-hour project will usually beat an aggressively processed 20-minute stack.
The S50 Pro includes three filters in the telephoto path. The UV/IR-cut filter is intended for broadband objects such as galaxies, star clusters, and reflection nebulae. Under dark skies, it allows the telescope to collect a natural range of visible light.
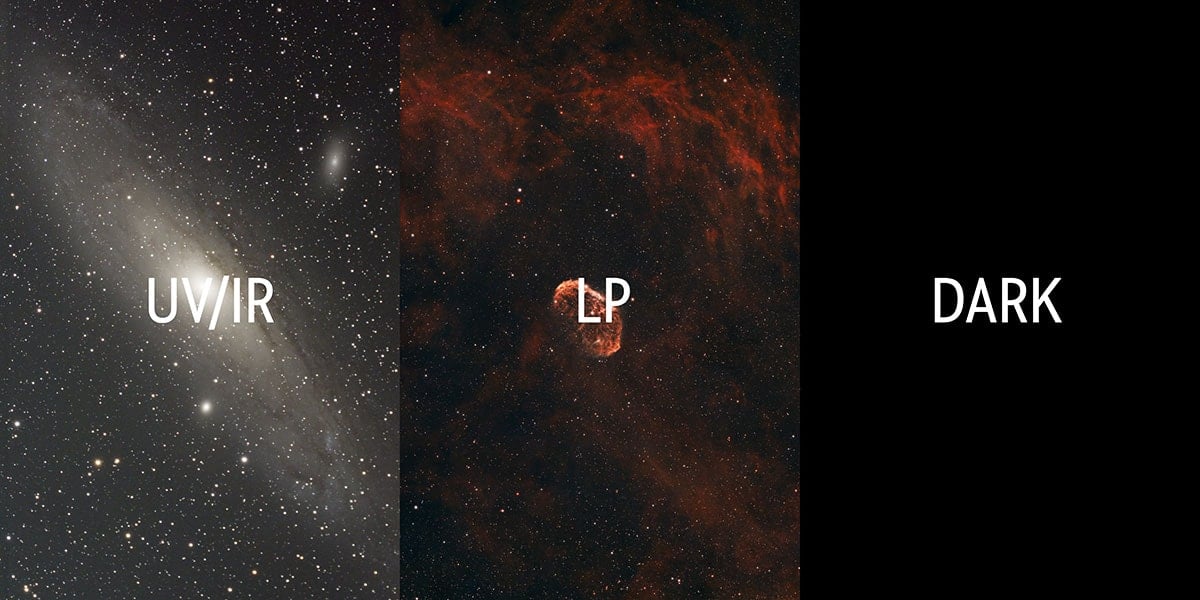
For emission nebulae, the dual-band filter passes hydrogen-alpha and oxygen-three light. Its H-alpha band is 20 nanometers wide, while the OIII band is 30 nanometers wide.
Those bands are wider than the filters on my full-sized rigs, but they suit a small, fast, uncooled system. The filter rejects much of the city glow while retaining strong nebula wavelengths. Learn more in my guide to light-pollution filters for astrophotography.
A dark-frame filter supports automatic calibration of hot pixels and fixed-pattern noise. My guide on how to take dark frames explains the traditional workflow.
An integrated anti-dew heater protects the objective during damp conditions and can save a long session from blurry data.
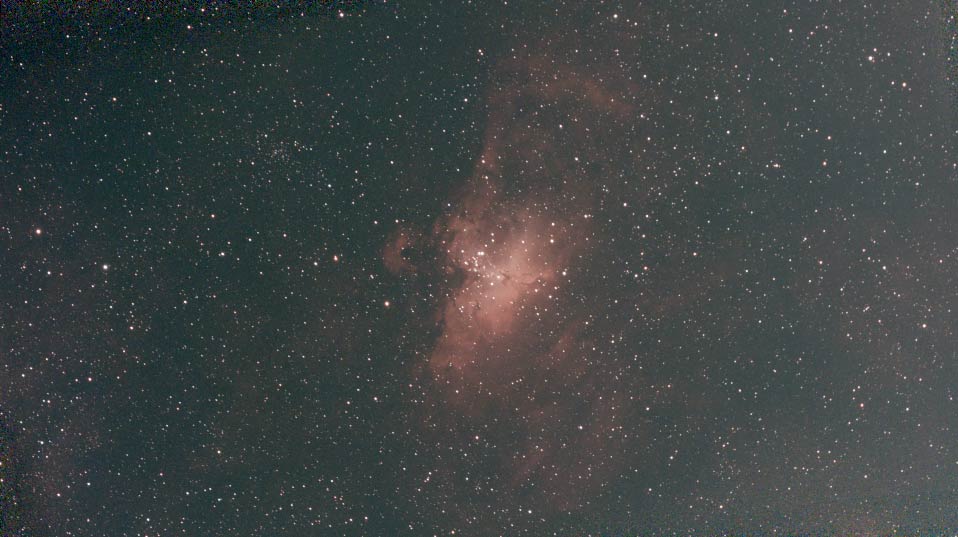
Want to process the raw image data for yourself? You can download my stacked image (stacking done in the Seestar S50 Pro) of the Eagle Nebula captured in Alt-Az mode using 10-second exposures.
Alt-Azimuth Mode vs. Equatorial Mode
The S50 Pro can operate in standard alt-azimuth mode or equatorial mode. The best choice depends on whether you prioritize fast setup or maximum imaging performance.
| Mode | Best For | Main Advantage | Main Limitation |
|---|---|---|---|
| Alt-azimuth | Quick sessions, beginners, Sun and Moon | Fastest and easiest setup | Field rotation during long stacks |
| Equatorial | Long deep-sky projects | Cleaner edges and more efficient tracking | Requires alignment and a stable angled setup |
Alt-Azimuth Mode
In alt-azimuth mode, level the tripod, power on, and choose a target. This is the fastest way to begin imaging and will probably remain the default for many owners.
The mount follows the sky in two directions, but the camera does not rotate with the sky. The app aligns each short exposure, while the changing edges eventually need to be cropped.
The wider frame provides more breathing room than the original S50, but it does not eliminate field rotation. This mode is ideal for a quick result, public outreach, or a brief opening in the clouds.
Equatorial Mode
In equatorial mode, the telescope is tilted so one tracking axis aligns with Earth’s rotational axis. The app guides the alignment, so you do not need experience using an equatorial telescope mount.
Setup takes longer, but the reduced field rotation produces cleaner edges and allows sub-exposures of up to 60 seconds, compared to the shorter exposures typically used in alt-azimuth mode.
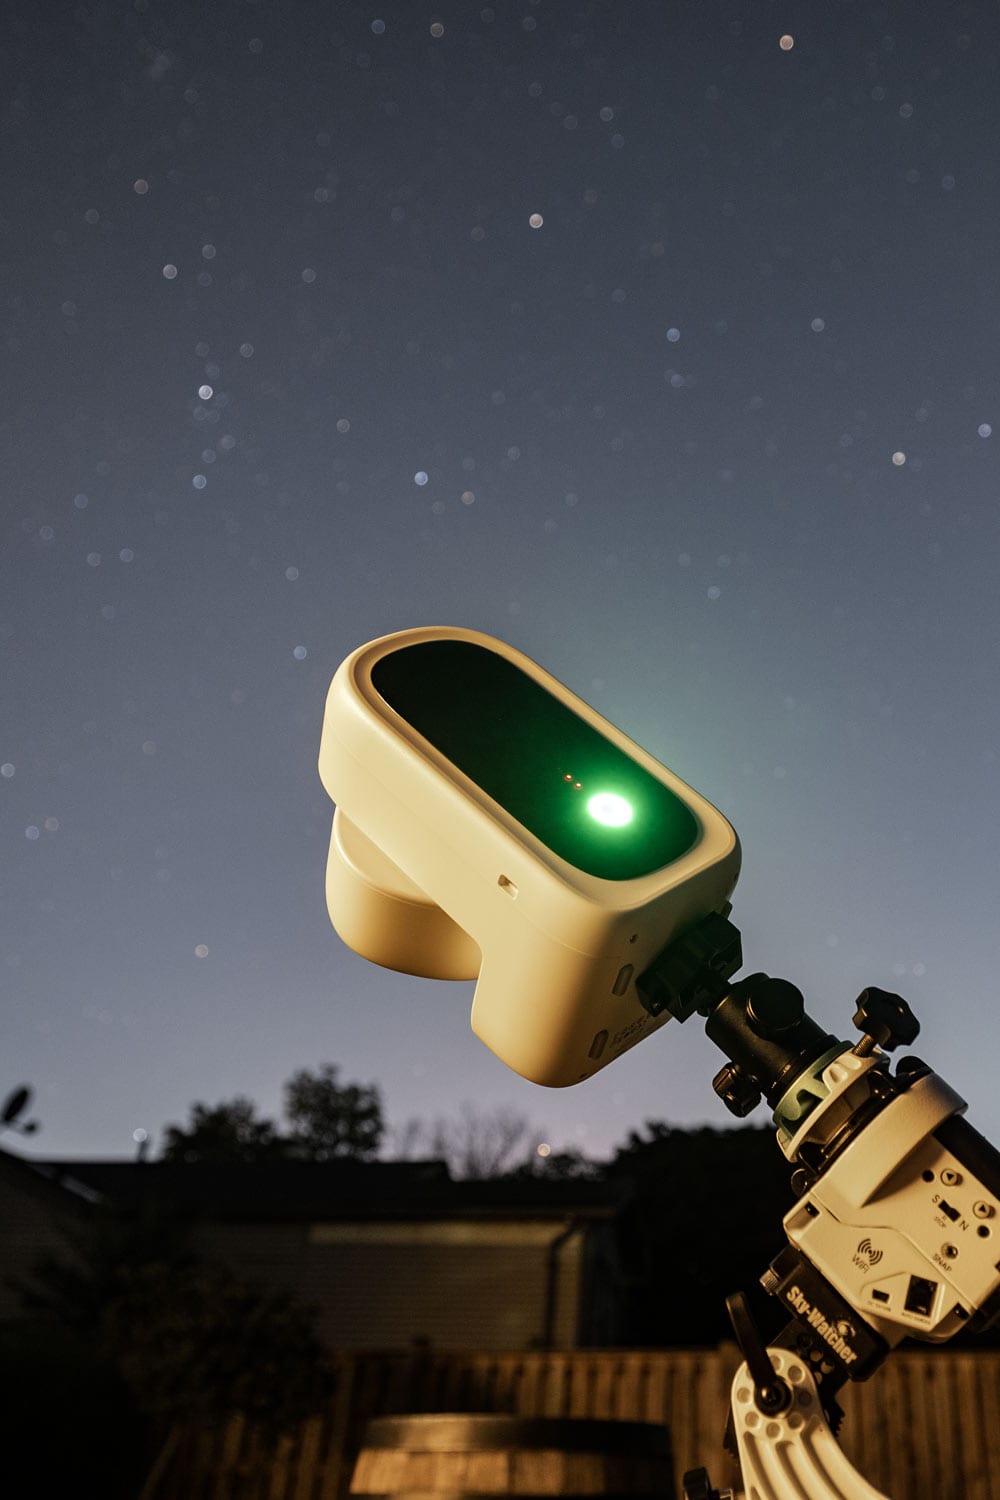
Using the Seestar S50 Pro in EQ mode for improved tracking (I use 30-second exposures)
To use the S50 Pro in equatorial mode, you will need a compatible wedge or adjustable tripod head. ZWO sells the TH10 head and S50 Pro quick-release plate separately, and High Point also offers them as part of an EQ bundle.
The S50 Pro uses a near-zero-backlash precision drive. Reducing mechanical play helps the mount respond consistently and maintain steadier tracking.
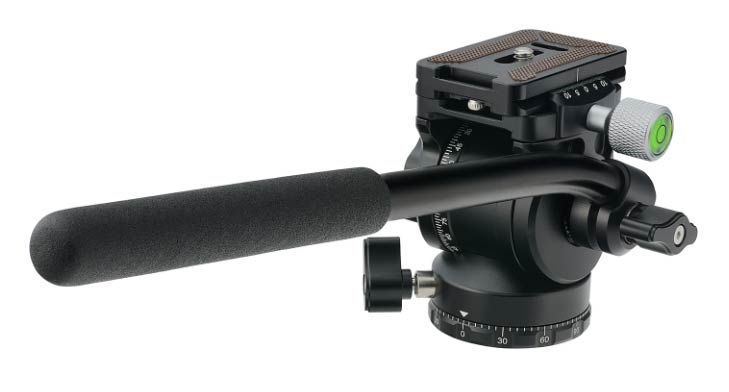
ZWO offers the TH10 Tripod Head as an added accessory to utilize EQ mode on the Seestar S50 Pro.
ZWO says this is especially noticeable in EQ mode, where better tracking can increase the percentage of accepted frames. A four-hour session is not truly four hours of useful data if the telescope rejects a large portion of it.
My recommendation: Start in alt-azimuth mode while learning the telescope, but use EQ mode for any deep-sky target you plan to capture for several hours. The extra setup is worthwhile when your goal is the best possible image.
Mosaic Mode and Image Processing
Mosaic mode captures overlapping panels and combines them into a larger composition. The planning tool lets you include surrounding dust or nebulosity, position the target, and let the telescope handle the panel capture.
Remember that a mosaic divides your imaging time. A four-hour, four-panel mosaic does not contain four hours of exposure in every panel. For a faint object, a tighter single frame with deeper integration may look better than a huge mosaic with weak signal.
The app aligns and stacks the sub-exposures, applies calibration, and offers AI-assisted noise reduction, star removal or reduction, cropping, rotation, and image optimization. Automatic background extraction helps correct gradients and uneven sky glow.
You can also combine saved sub-exposures from the same target across multiple nights using Deep Sky Stack. This lets you build a longer integration over several sessions without moving immediately to desktop processing. If you plan to use this workflow, enable the option to save individual frames.
The app result may be all you need. For more control, save the individual FIT files and process them on a computer using one of the programs in my astrophotography image stacking software guide. You can then control frame rejection, gradients, color, sharpening, star size, and the final stretch.
While I have seen many examples of the mosaic mode in action, I still need to test this feature myself! I will update this article once I have.
Solar, Lunar, and Planetary Imaging
The included magnetic solar filter enables white-light imaging. The wide camera locates the Sun, while the telephoto camera records the full disk and large sunspot groups.
Solar safety: Always confirm that the supplied solar filter is seated securely before pointing the telescope at the Sun. Never use the S50 Pro for solar imaging without the correct filter installed.
This is not a hydrogen-alpha solar telescope, so it will not reveal prominences or detailed chromosphere structures. It is useful for sunspots and eclipses; my guide explains how to photograph a solar eclipse safely.
The 260mm focal length and 50mm aperture give the Moon more image scale and resolving potential than the S30 Pro.
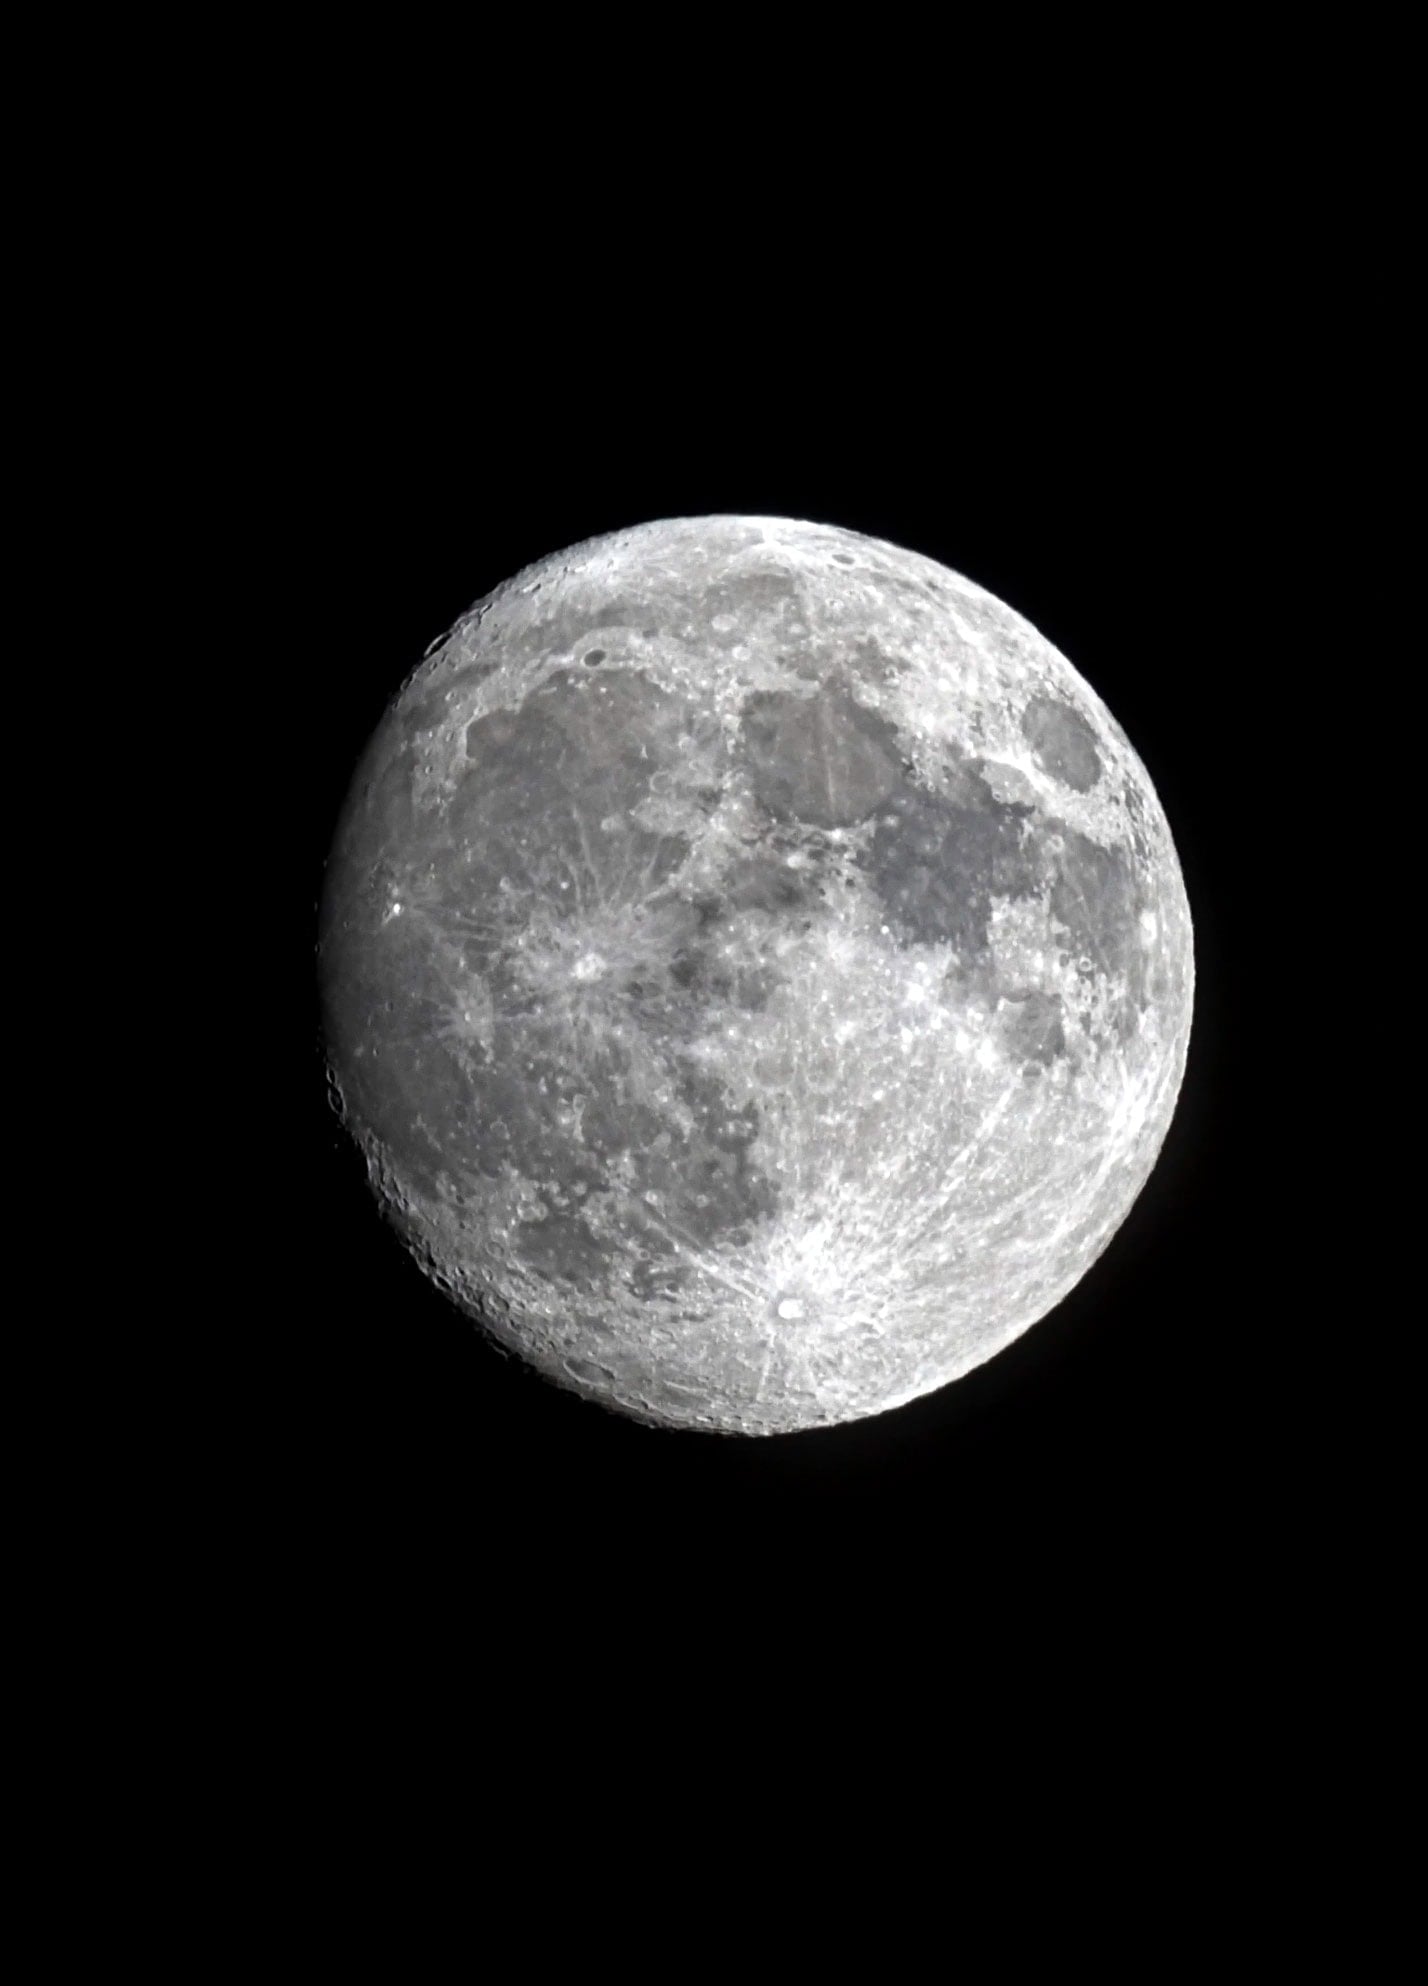
My photo of the Moon using the ‘Solar System’ mode on the Seestar S50 Pro. Single image.
For higher-resolution lunar and solar imaging, you can also record video and stack the best frames directly in the Seestar app. This is similar to the traditional planetary-imaging workflow of recording many short frames and combining the sharpest ones to improve detail.
Bright planets are possible, but the small aperture and short focal length impose real limits. I consider planetary imaging a useful bonus rather than a primary reason to buy this telescope.
Battery Life and Storage
The S50 Pro has a 10,000 mAh internal battery, a substantial increase over the 6,000 mAh battery in the original S50 and S30 Pro. ZWO advertises up to nine hours of operation, which gives the telescope much more potential for long equatorial-mode projects and all-night imaging plans.
Real-world battery expectations: ZWO’s nine-hour result was measured in laboratory testing at temperatures above 25°C, using the telephoto camera in stargazing mode with the telescope operating in alt-azimuth mode. It should be treated as a best-case figure.
Actual battery life will depend on temperature, dew-heater use, slewing, Wi-Fi activity, the selected imaging mode, and how often you use the two cameras. Here in Canada, I would expect noticeably less runtime during a cold night than the advertised maximum.
For a long unattended session, however, I would connect a suitable USB power bank rather than risk losing the final hours of clear sky. The telescope can continue operating while being powered or charged.
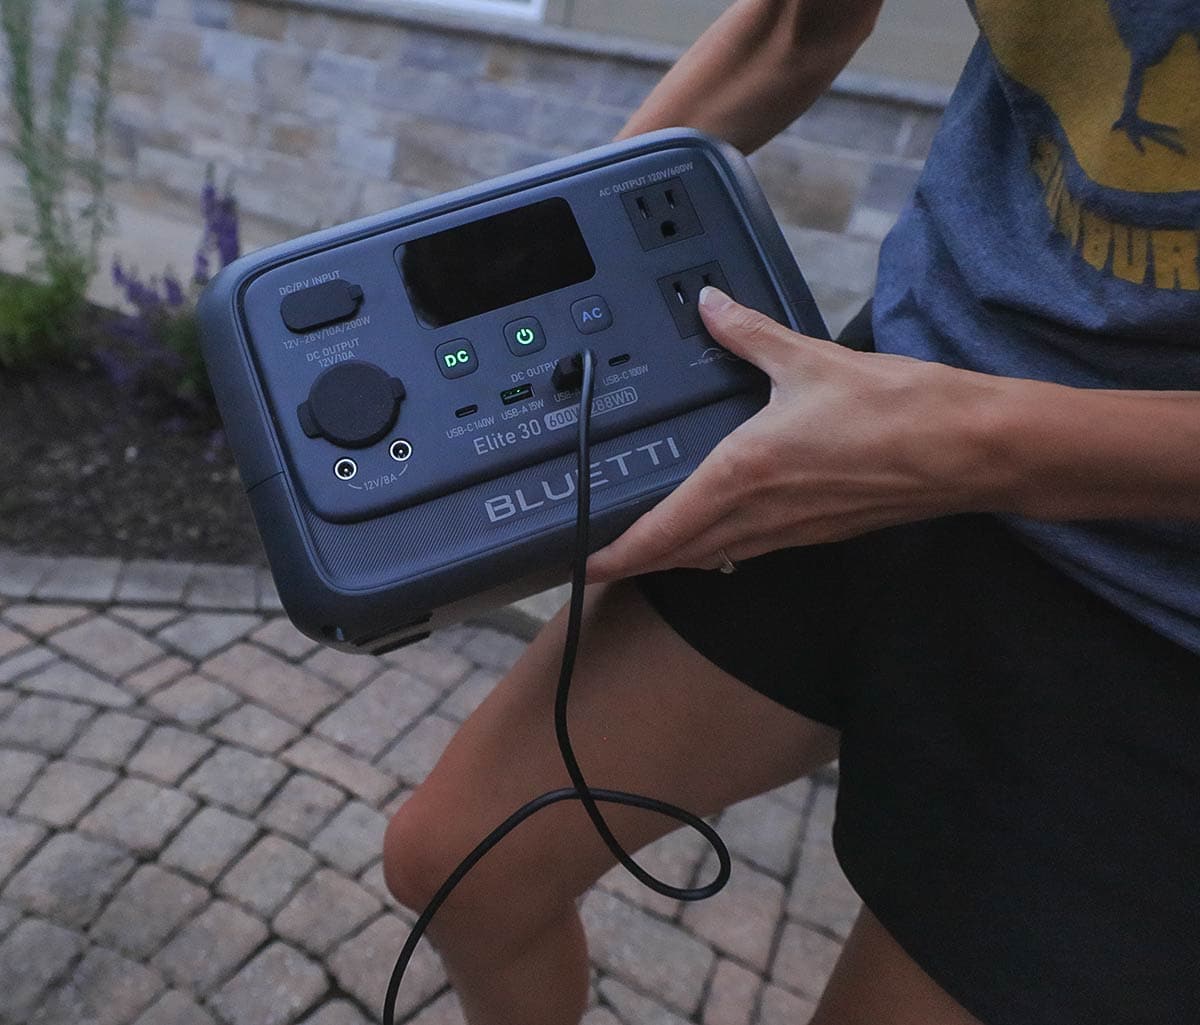
I have been using a Bluetti Elite 30 600W Power Station to keep the S50 Pro battery topped up.
The S50 Pro includes 128GB of internal storage, but approximately 100GB is available after accounting for the operating system and reserved space. That is twice the advertised capacity of the original S50 and should be comfortable for normal use.
Individual 4K FIT files, videos, and multiple nights of saved sub-exposures can still add up quickly. I recommend transferring important projects to a computer regularly and confirming that the files are safely backed up before deleting them from the telescope.
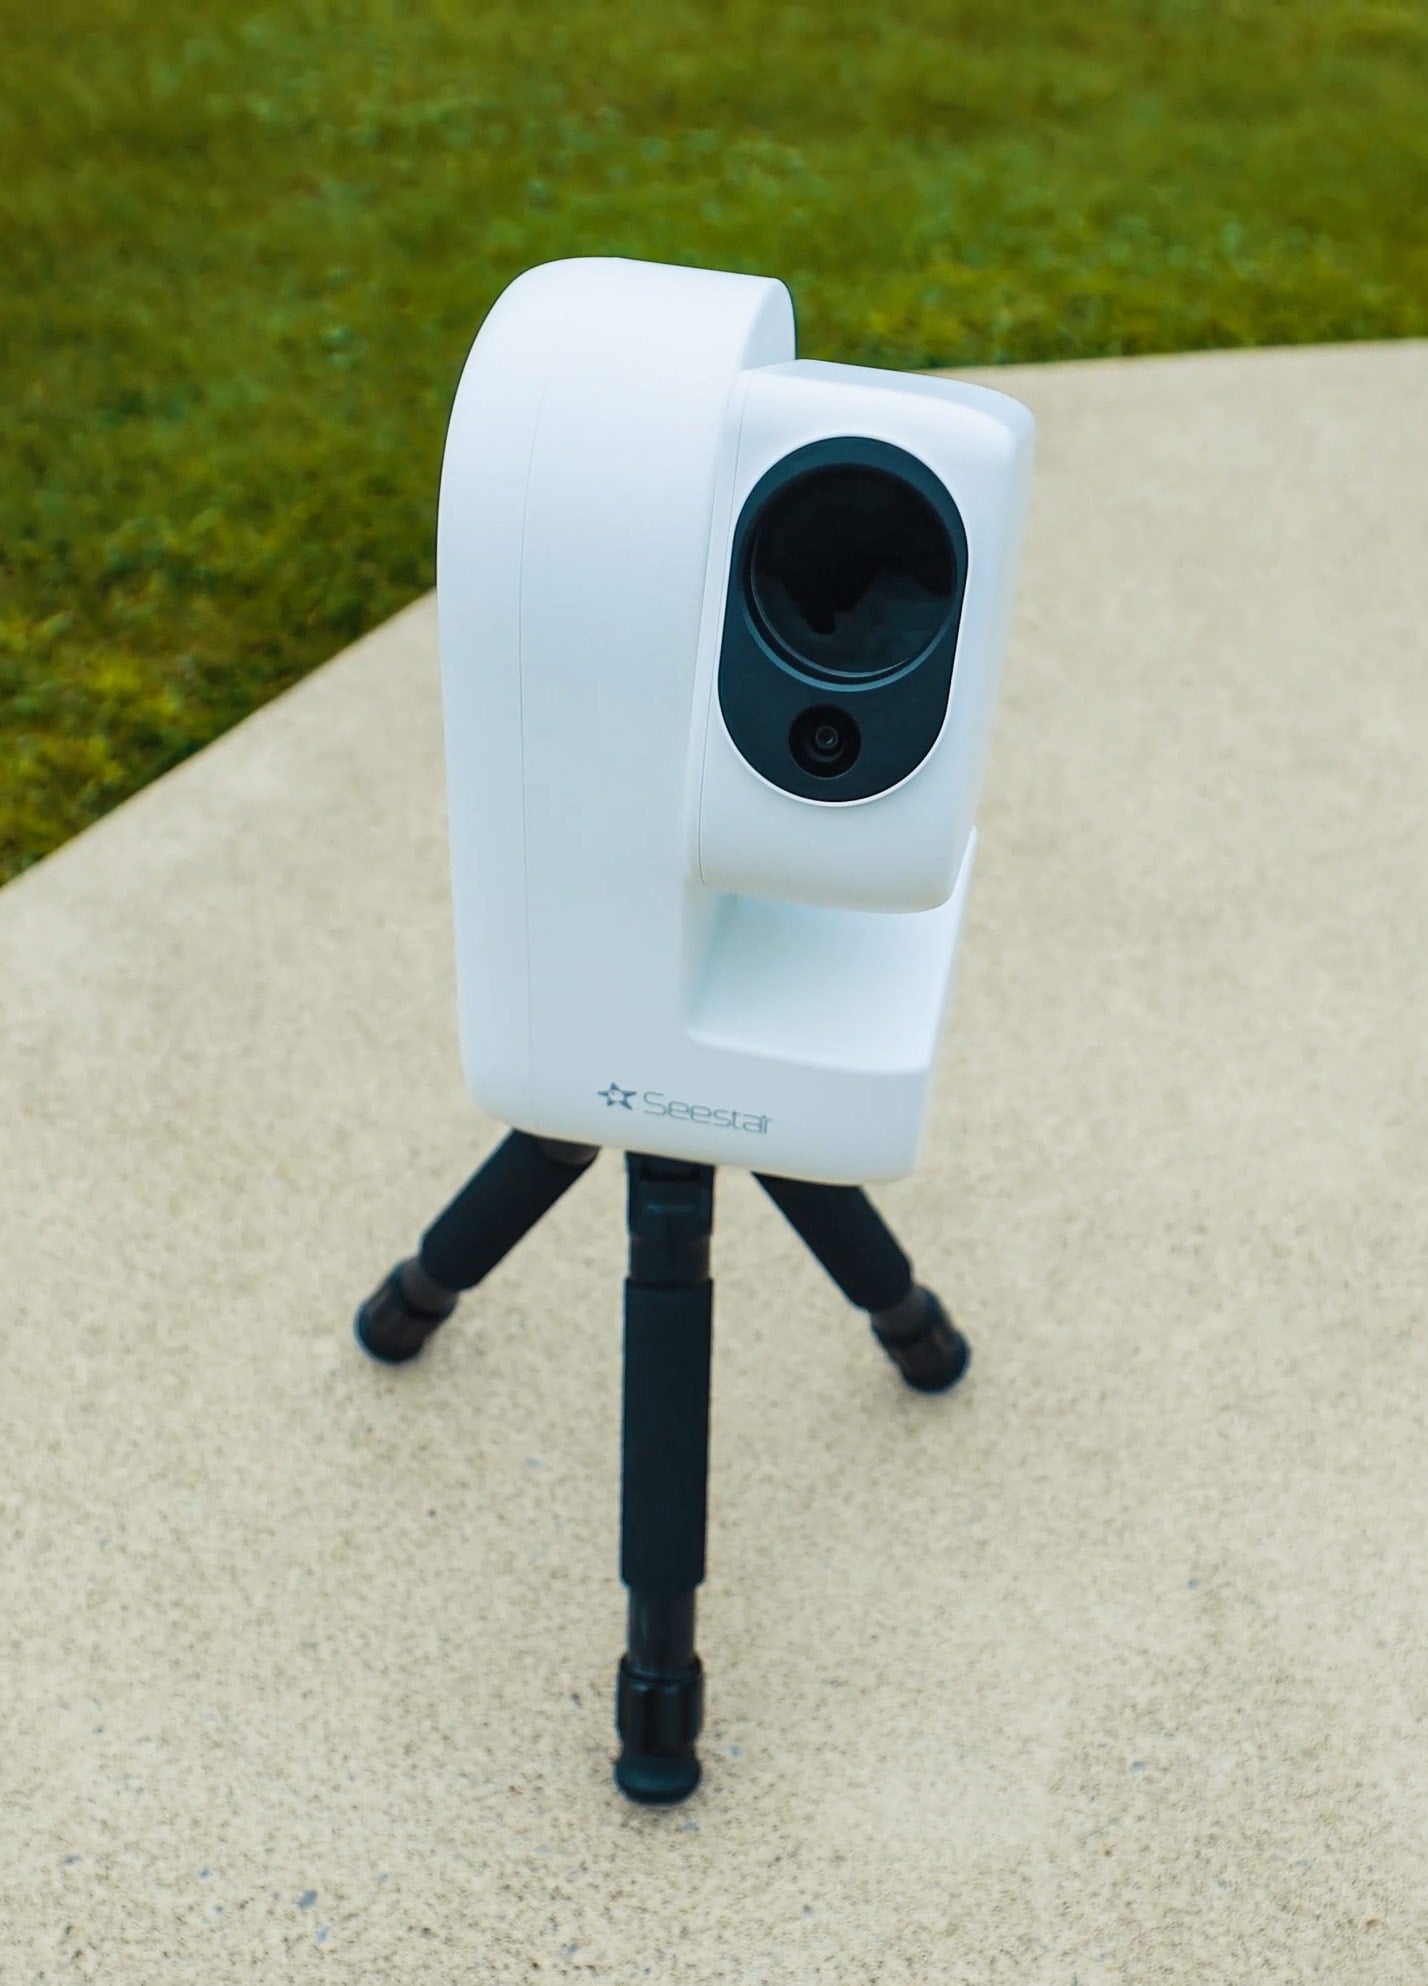
How Far Does the Seestar S50 Pro’s Wi-Fi Reach?
The Seestar S50 Pro supports both 5 GHz Wi-Fi for faster data transfers and 2.4 GHz Wi-Fi for better range. Although walls and other obstacles can affect performance, you can generally expect a reliable direct connection within about 10 meters (33 feet).
For greater operating distance at home, enable Station Mode in the Seestar app under Settings > Wi-Fi > Station Mode. This connects the telescope to your home network, allowing you to control it anywhere your home Wi-Fi provides a stable signal.
Testing the Seestar S50 Pro
I used the Seestar S50 Pro to photograph a variety of deep-sky objects, including large emission nebulae, smaller detail-rich targets, a reflection nebula, and the Andromeda Galaxy.
This gave me a chance to see how the larger 4K sensor, revised optics, improved tracking, and built-in filters performed across several different types of astrophotography projects.
Emission Nebula: NGC 7822
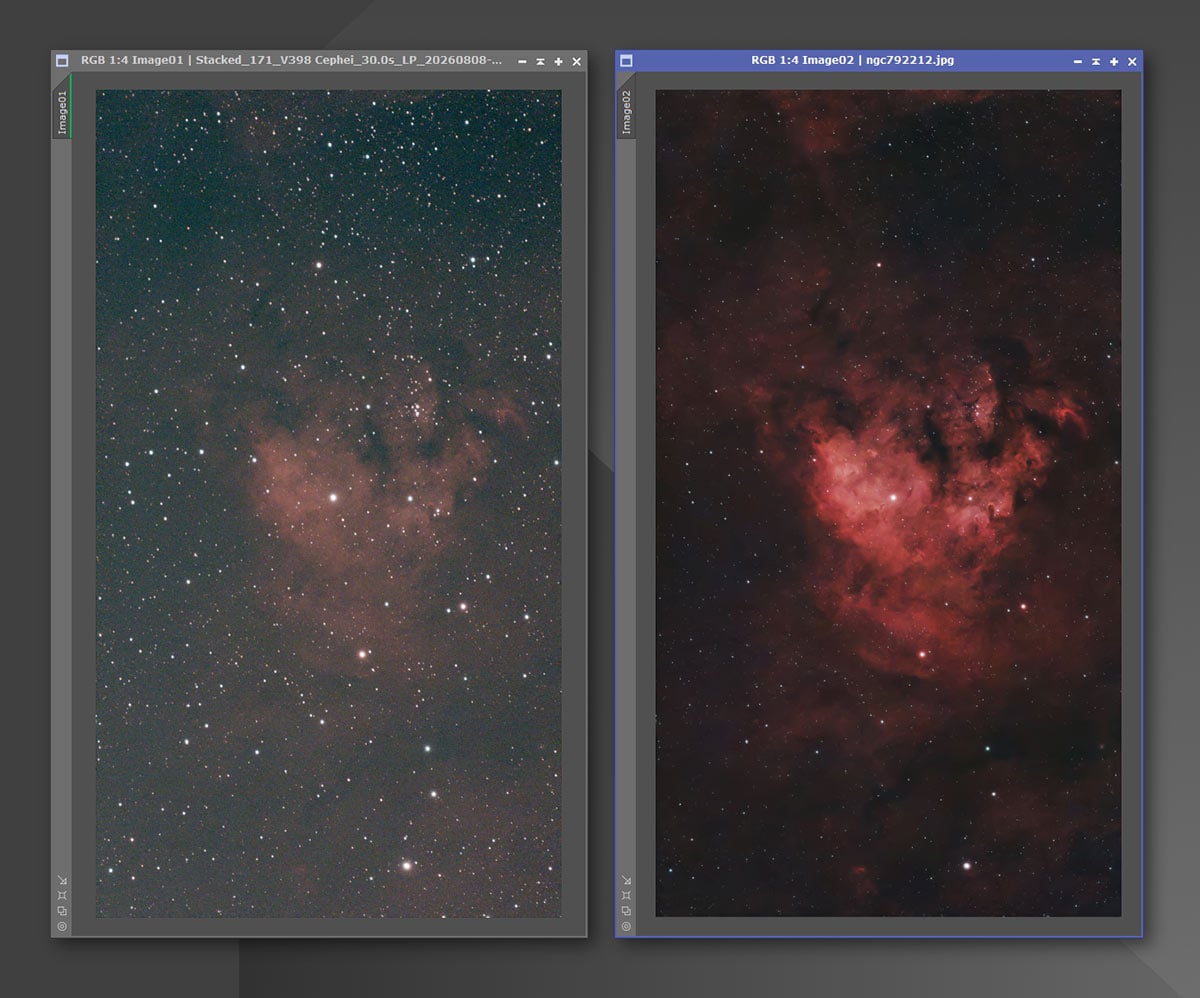
171 x 30-second exposures on NGC 7822 using the S50 Pro in EQ mode with the LP Filter. Left is the autostack; right is my processed final.
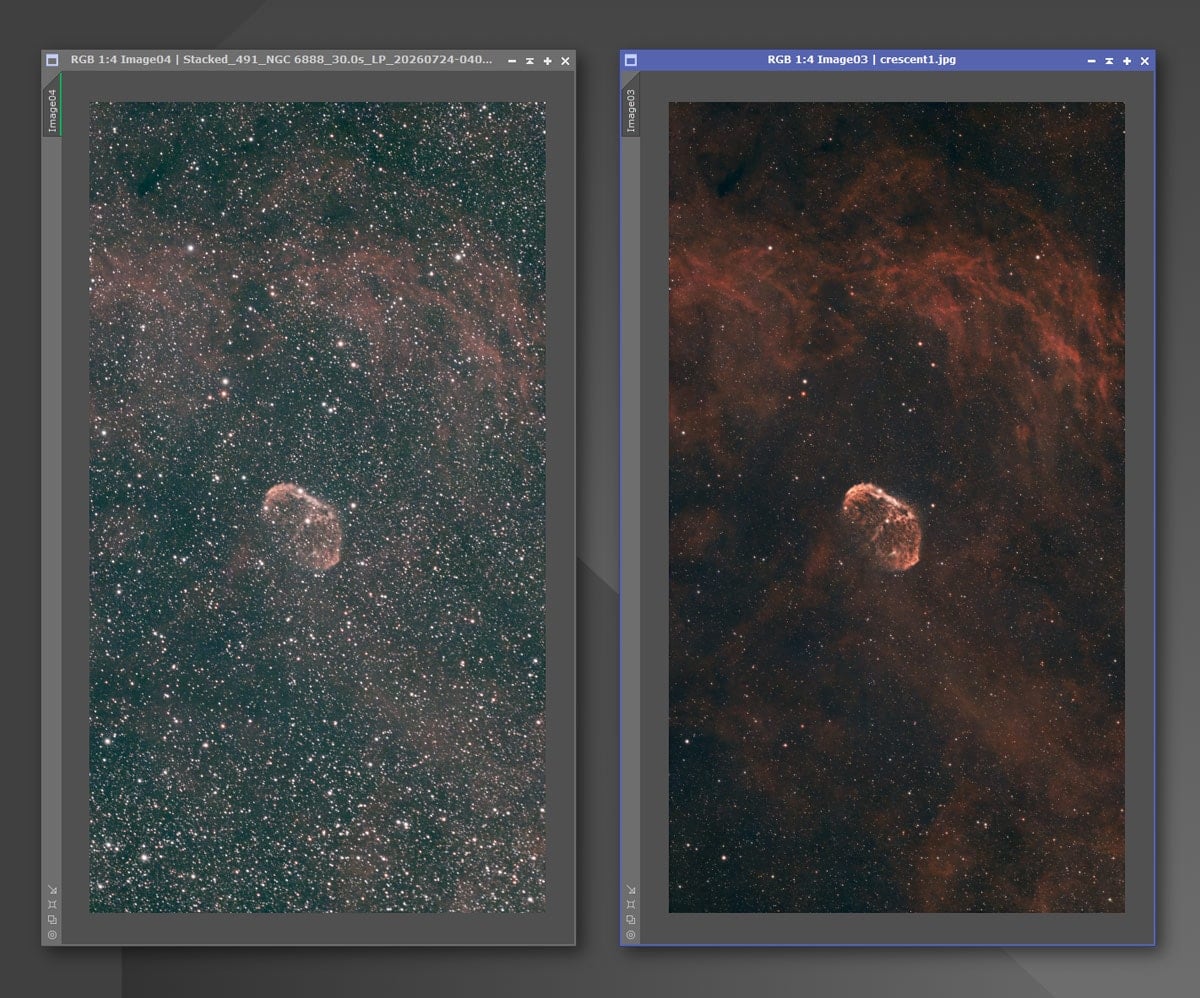
491 x 30-second exposures on the Crescent Nebula using the S50 Pro in EQ mode with the LP Filter. Left is the autostack; right is my processed final.
Broadband Target: Andromeda Galaxy
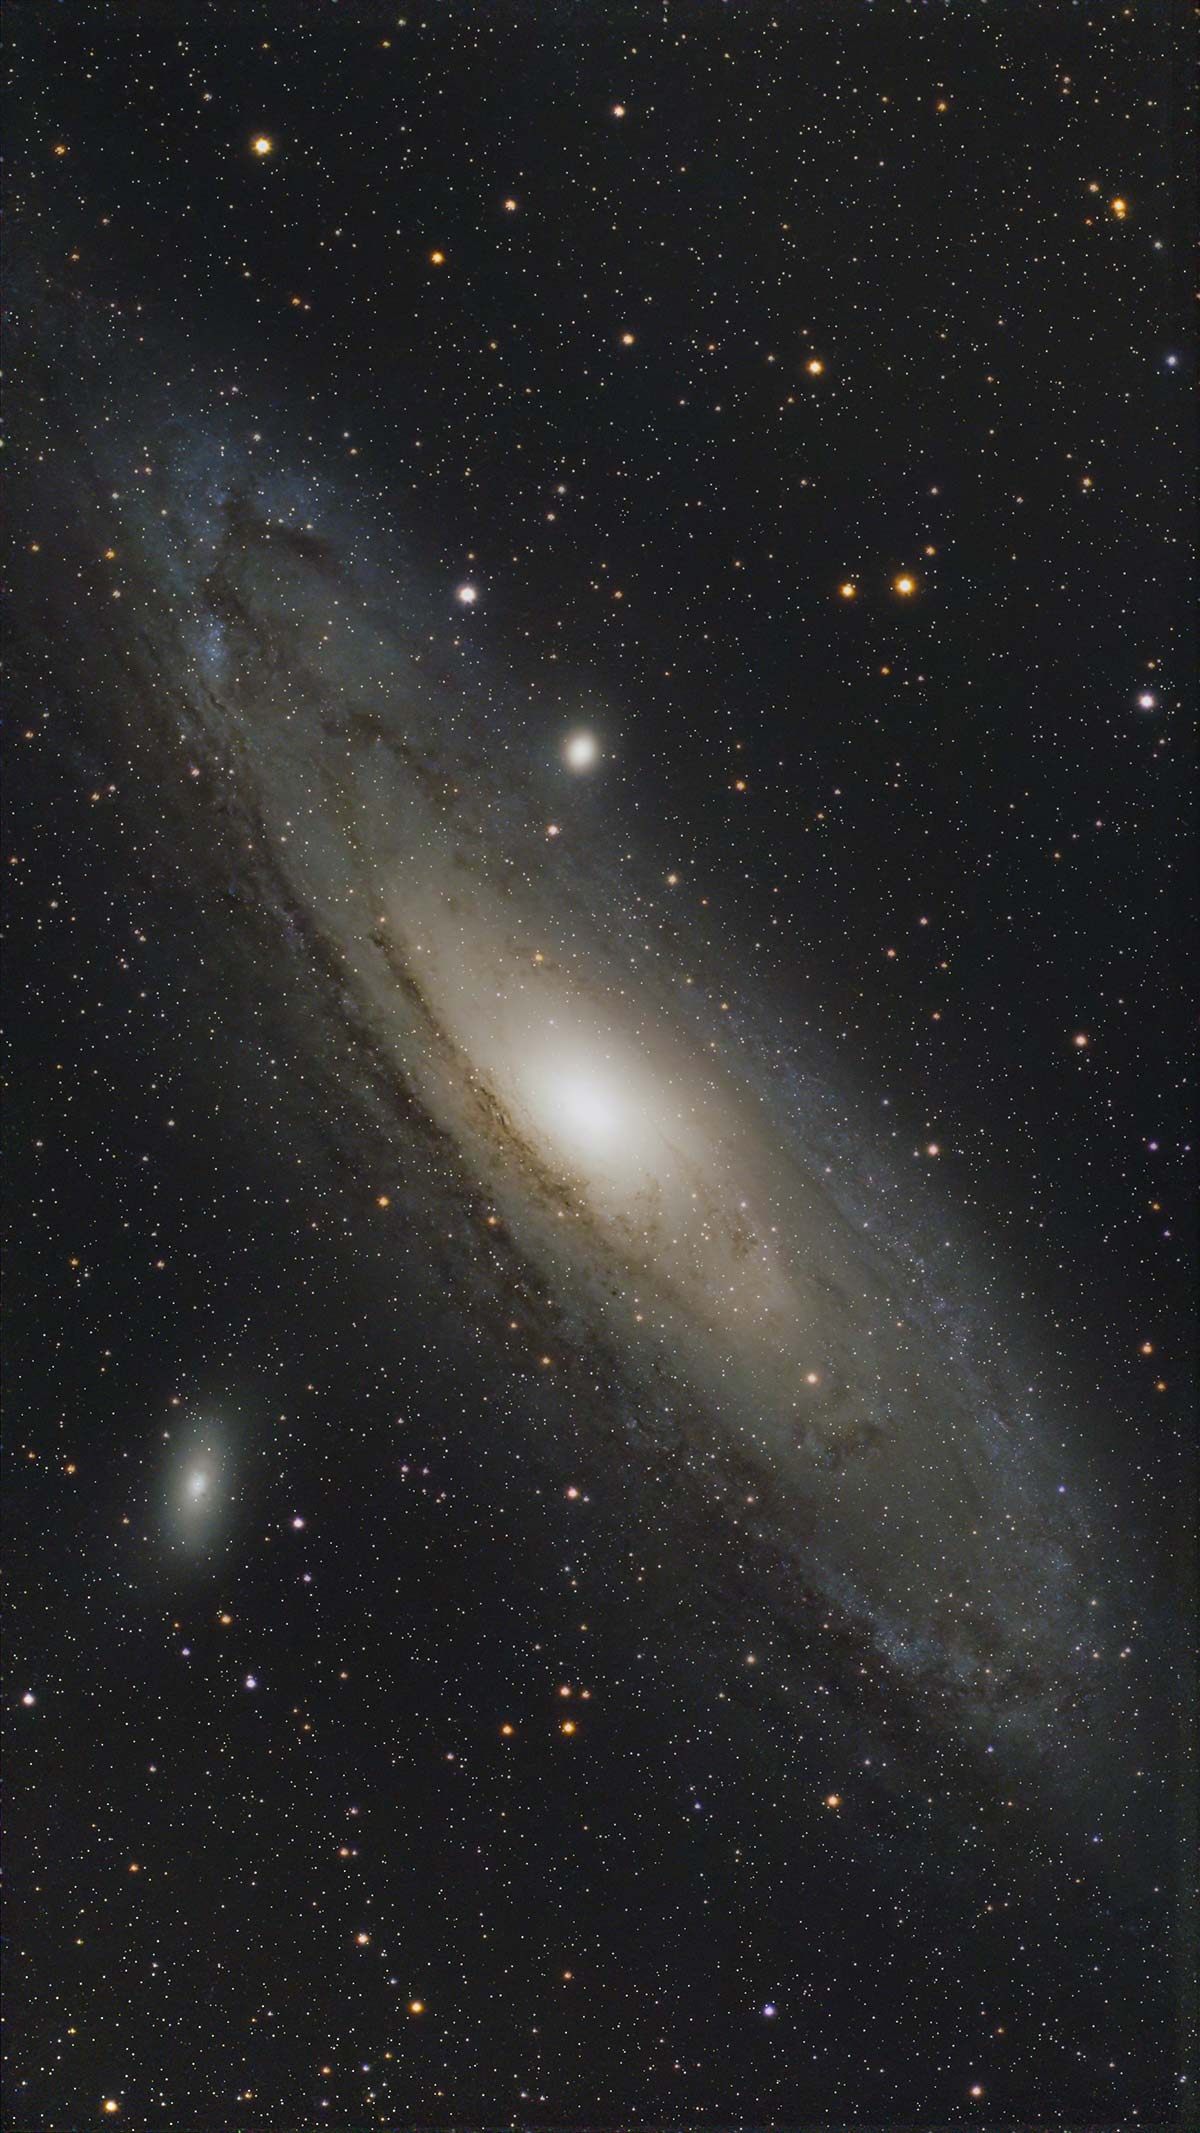
261 x 30-second exposures on the Andromeda Galaxy using the S50 Pro in EQ mode with the UV/IR cut Filter.
Imaging with the Seestar S50 Pro
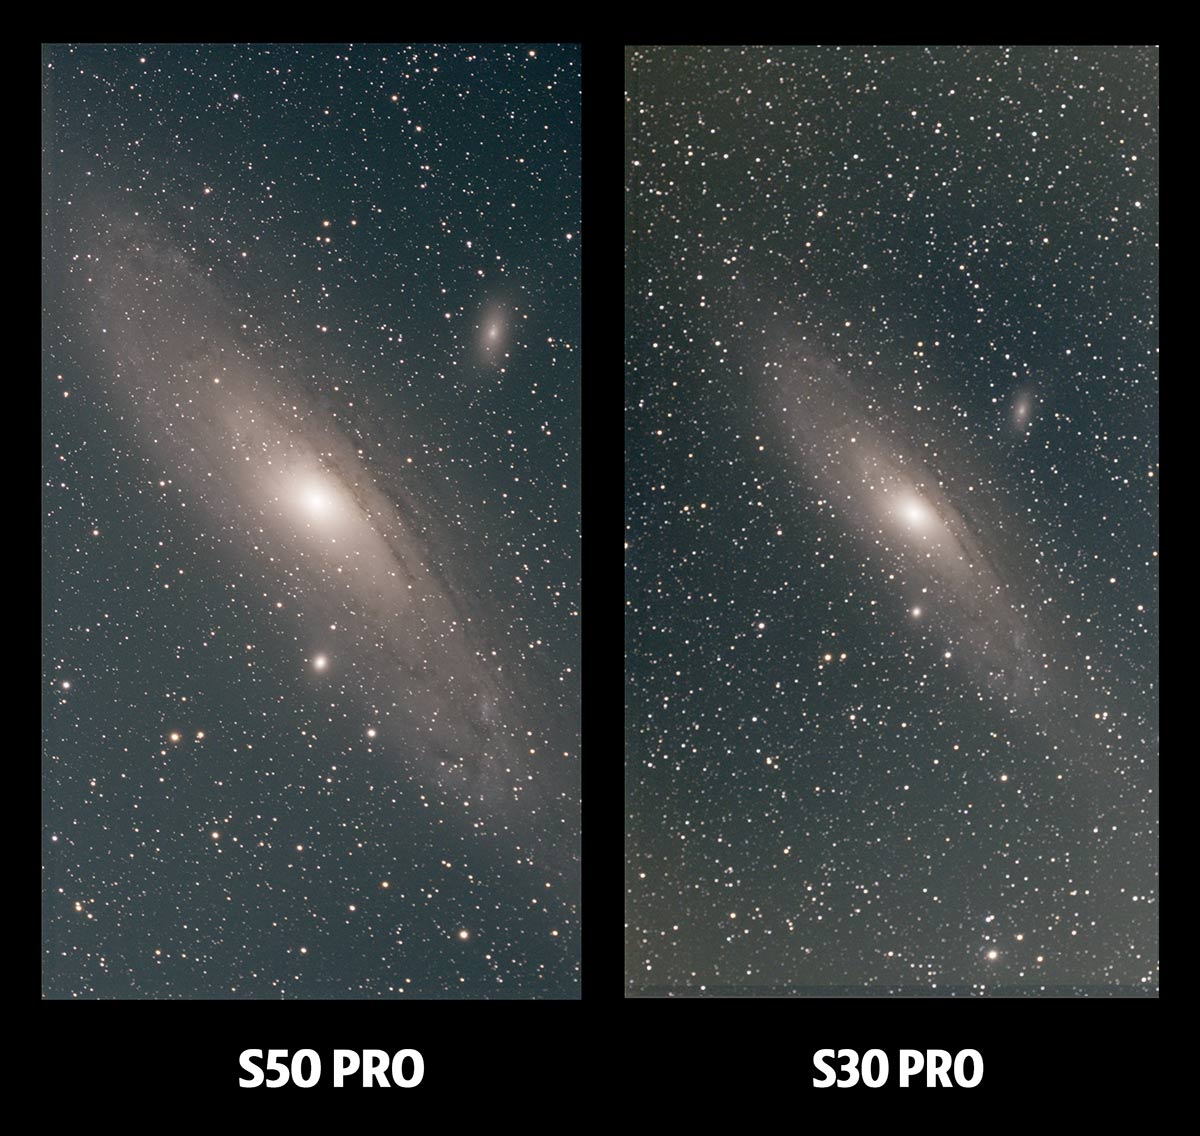
Look at the dramatic difference in image scale between the image of the Andromeda Galaxy taken using the S30 Pro vs the S50 Pro.
What I Do Not Love About the S50 Pro
No Seestar S50 Pro review would be complete without discussing its compromises.
The Price
The $999 retail price is a significant jump from the other Seestar models. At this level, the S50 Pro begins competing with entry-level modular astrophotography equipment.
A small telescope, mount, and camera may offer more flexibility, but the cost grows after adding focusing, power, filters, control, and guiding.
The Main Camera Is Not Cooled
Active cooling allows a dedicated astronomy camera to maintain a stable sensor temperature and reduce thermal noise during long imaging sessions.
ZWO considered cooling, but its mechanical complexity, power use, and reliability trade-offs did not fit a maintenance-free telescope. Automatic dark calibration helps, but warm conditions may still require more careful processing.
The Integrated Design Cannot Be Upgraded
The all-in-one design is both its greatest strength and biggest limitation. You cannot replace the camera, change focal length or filters, or move the optics onto another mount.
You are buying the complete system as ZWO designed it. Anyone who values interchangeable parts and a clear upgrade path should read my beginner deep-sky astrophotography guide before deciding between a smart telescope and a traditional rig.
Seestar S50 Pro vs. S50 vs. S30 Pro
| Feature | S50 Pro | S50 | S30 Pro |
|---|---|---|---|
| Retail price | $999 | $549 | $699 |
| Aperture / focal length | 50mm / 260mm | 50mm / 250mm | 30mm / 160mm |
| Optical design | Four-element APO | Three-element APO | Four-element APO |
| Telephoto resolution | 3840 x 2160 | 1920 x 1080 | 3840 x 2160 |
| Telephoto field | 2.8 degrees | 1.46 degrees | 4.6 degrees |
| Wide-angle camera | 4K, 63 degrees | None | 4K, 63 degrees |
| Storage | 128GB | 64GB | 128GB |
| Battery rating | Up to 9 hours | Up to 6 hours | Up to 6 hours |
| Best suited to | Maximum Seestar performance | Best overall value | Travel and large targets |
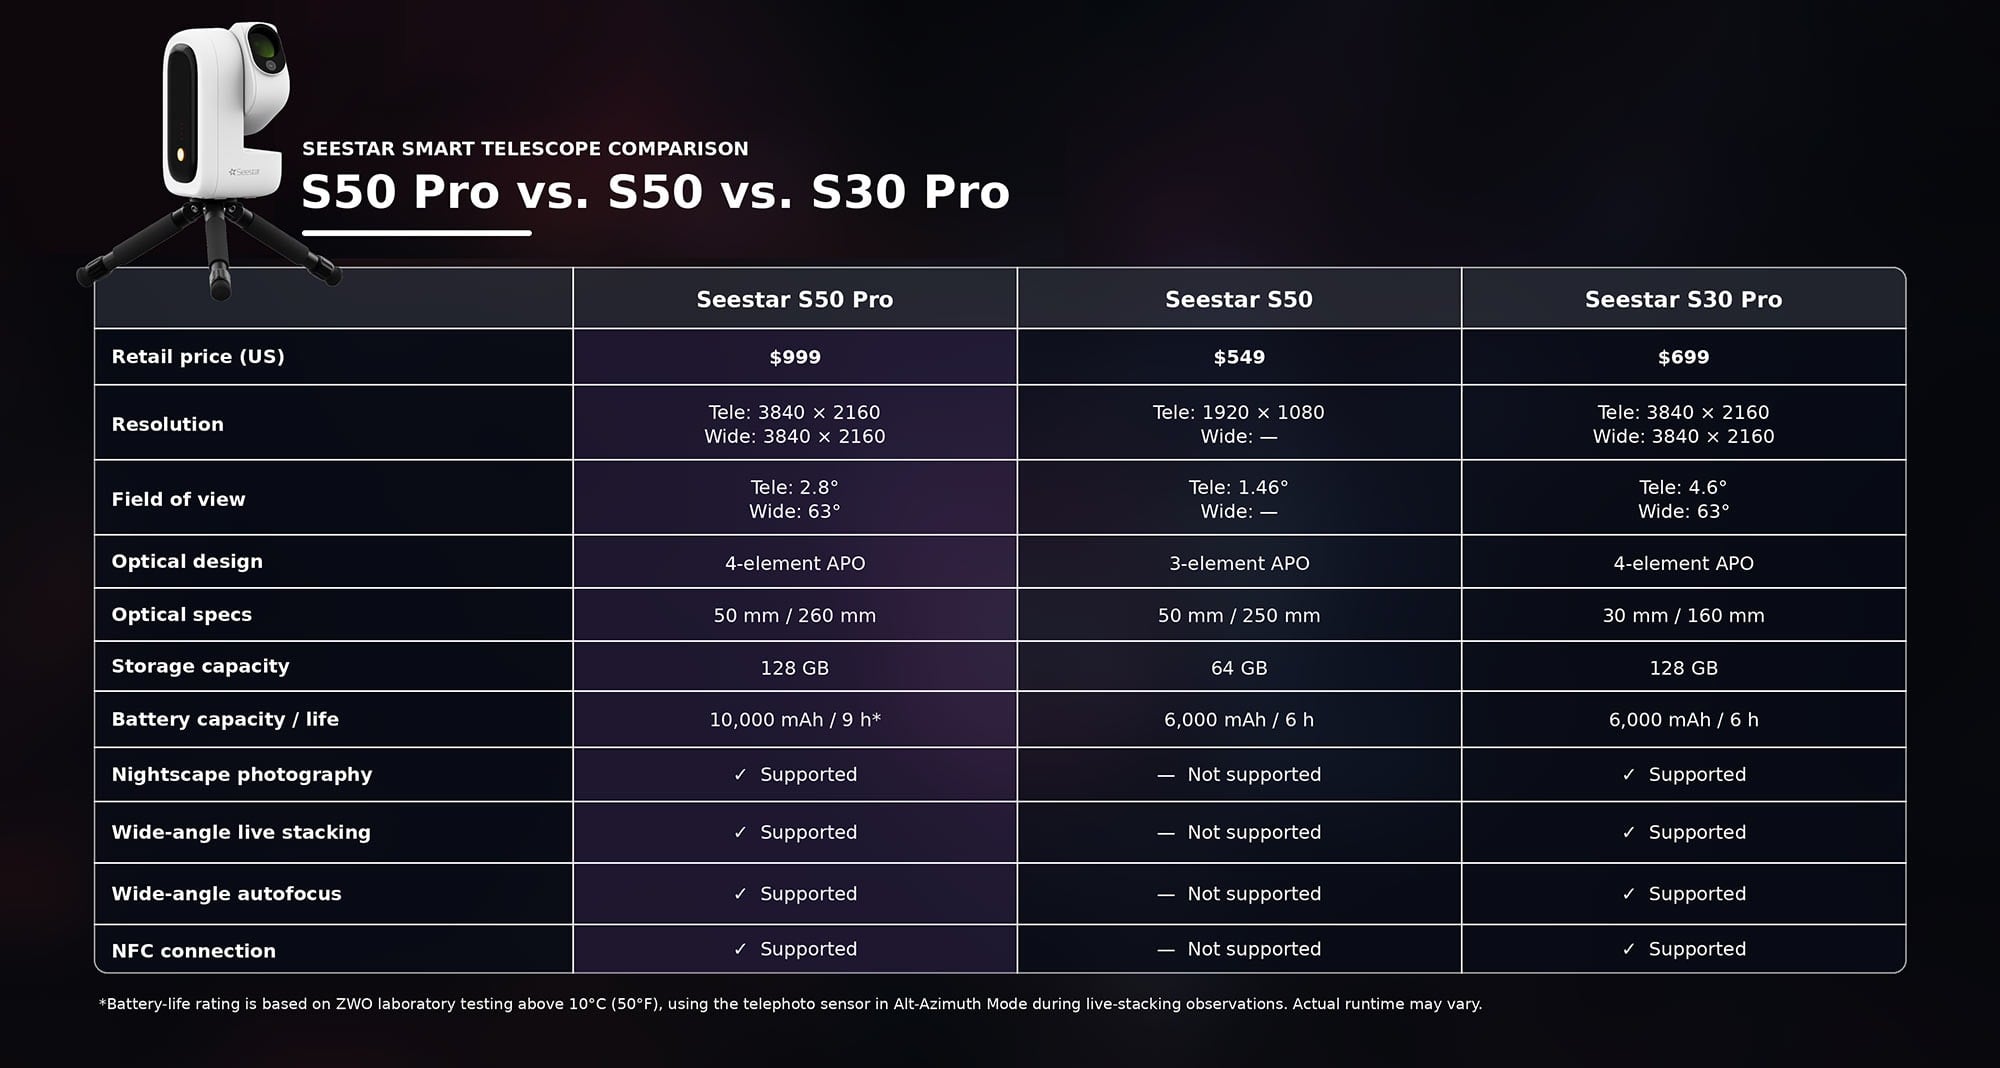
The original S50 remains the value pick. It provides the essential Seestar experience, including automatic GoTo, autofocus, tracking, and live stacking, for almost half the price of the S50 Pro.
The S30 Pro is the portability and wide-field choice. Its 160mm focal length and 4.6-degree telephoto field are excellent for large emission nebulae, and its smaller body is easier to pack for travel.
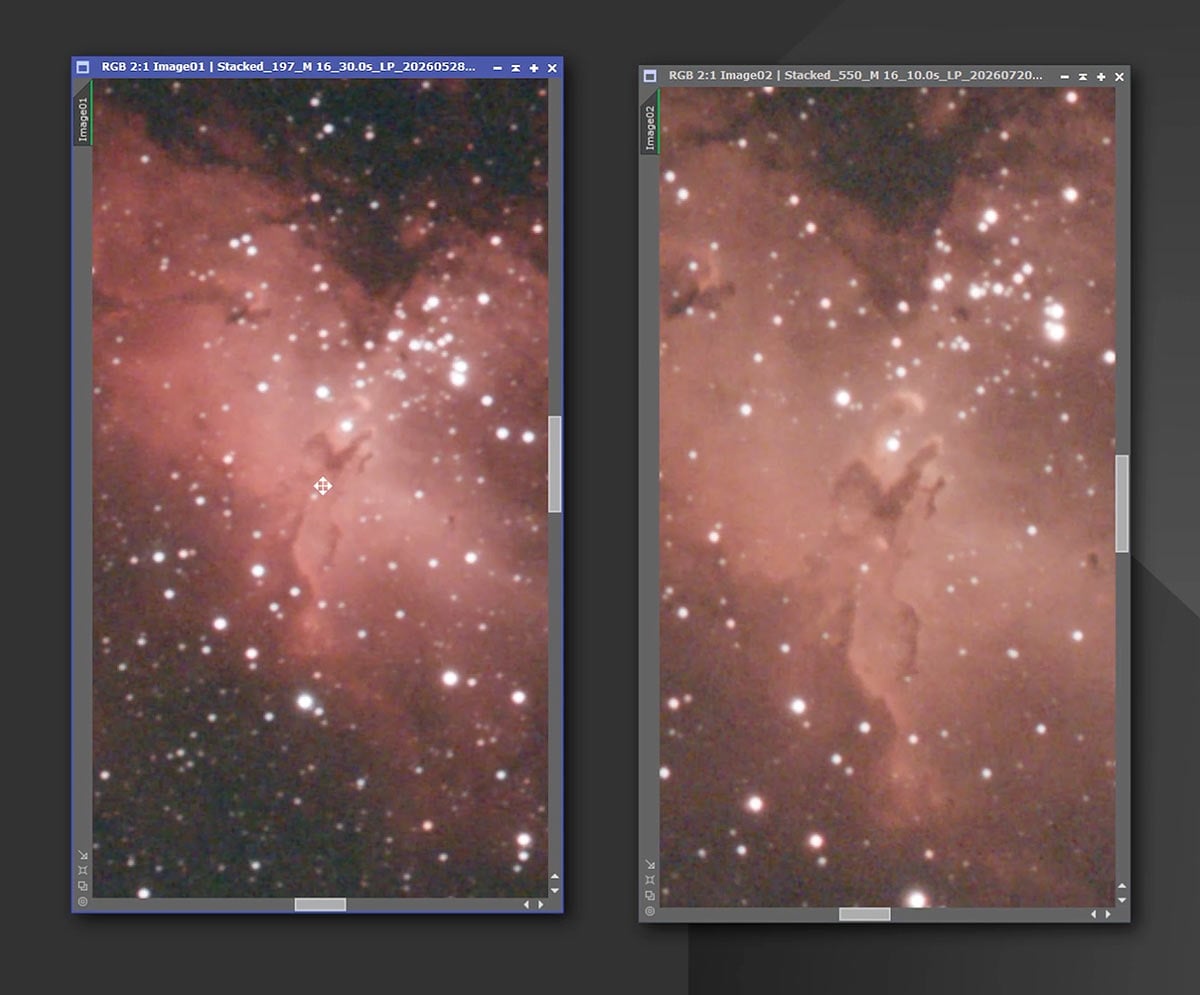
The ‘Pillars of Creation’ captured by the S30 Pro (left) and the S50 Pro (right).
The S50 Pro is the performance choice. Its 30mm sibling gathers only about 36 percent as much light, while the original S50 lacks the larger 4K field, wide-angle camera, upgraded drive, and extended battery.
I do not think the S50 Pro makes the other models obsolete. Each one has a clear role. For a wider comparison with competing brands, see my guide to the best smart telescopes available.
Who Should Buy the Seestar S50 Pro?
The Seestar S50 Pro is a strong choice for a beginner who wants the most capable all-in-one Seestar and has the budget for it. It removes almost every barrier between choosing a target and collecting a usable image.
For original S50 owners, the upgrade makes sense if its 1080p files, narrow field, storage, tracking, or lack of a wide camera regularly hold you back. If you mainly share images on a phone, there is no urgent reason to replace it.
For S30 Pro owners, keep the smaller model for huge nebulae and travel. Choose the S50 Pro for compact objects, stronger light collection, lunar detail, and a more capable EQ platform.
Experienced imagers should see it as complementary equipment. It can be deployed while the main rig is cooling, guiding, plate solving, or refusing to connect for reasons known only to the astronomy gods.
It is also the telescope I am more likely to bring on a family trip, use during a short astronomical event, or hand to someone who has never photographed a nebula. That convenience has real value.
What About the DWARFlab Alternatives?
If you are comparing the Seestar S50 Pro with the DWARF mini, DWARF 3, or upcoming DWARFLAB DRACO, the best choice depends on what you value most.
For deep-sky astrophotography and the strongest overall image quality, I would choose the Seestar S50 Pro. Its 50mm aperture, capable optics, equatorial mode, and polished app experience make it the most complete option for someone primarily interested in photographing galaxies and nebulae.
The DWARF mini makes more sense if price and portability are your biggest priorities. It is remarkably compact and approachable, but its smaller aperture and sensor place it in a different performance category than the S50 Pro.
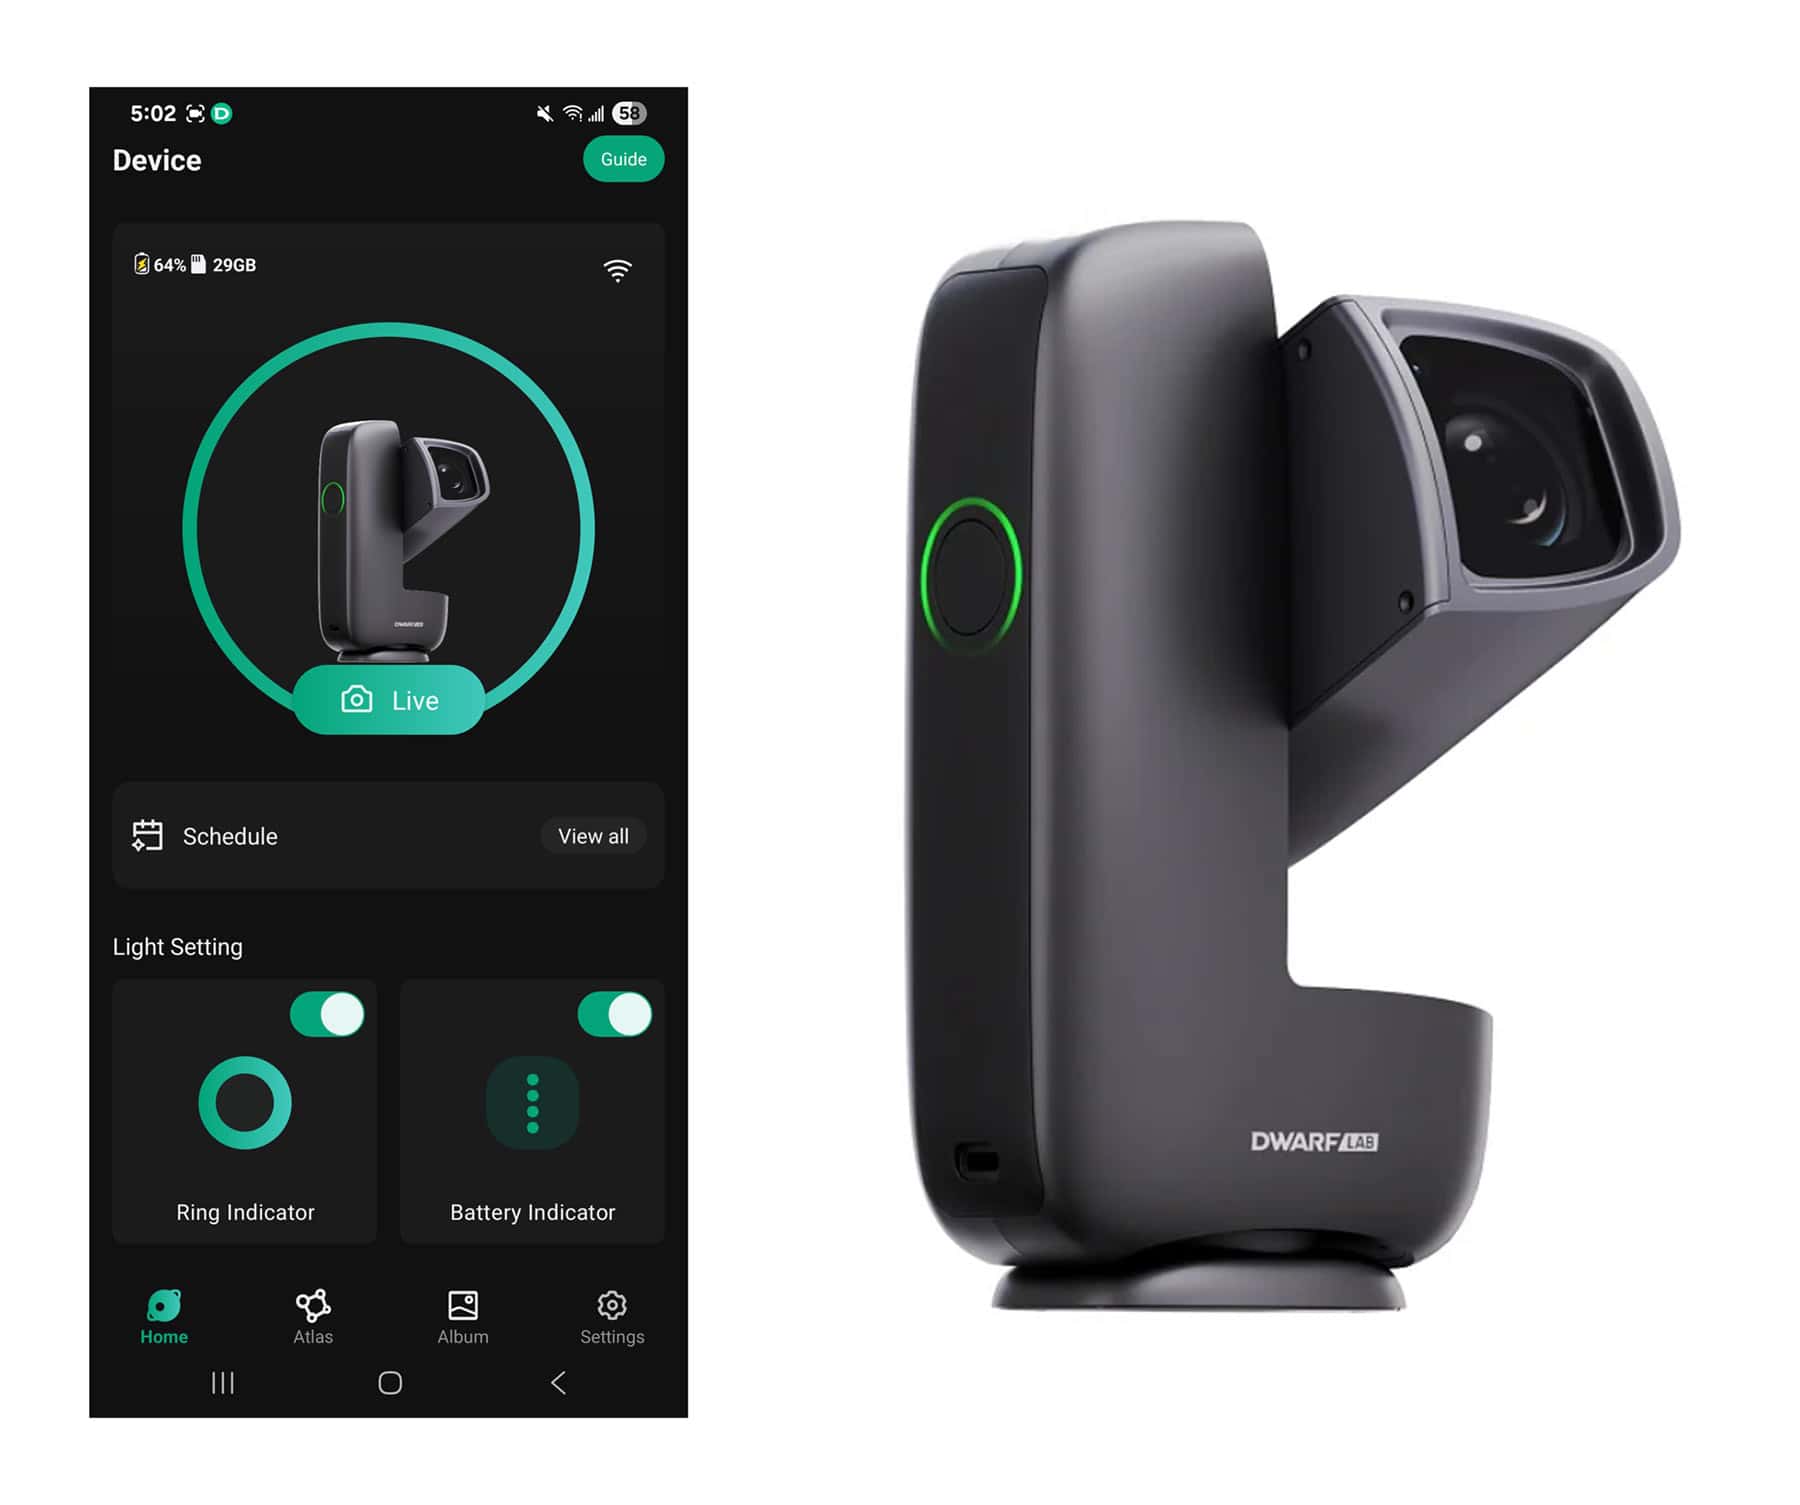
The DWARF 3 is the more versatile middle ground. Its extremely portable dual-camera design is useful for wide-field astronomy, daytime photography, birding, and travel. For someone who wants one small device that can do more than deep-sky imaging, it remains a compelling alternative.
DRACO may become the closest direct competitor to the S50 Pro, but I would not base a buying decision on specifications and promotional material alone. Until I can evaluate a production model and compare real-world images, tracking performance, and app reliability, I am reserving judgment.
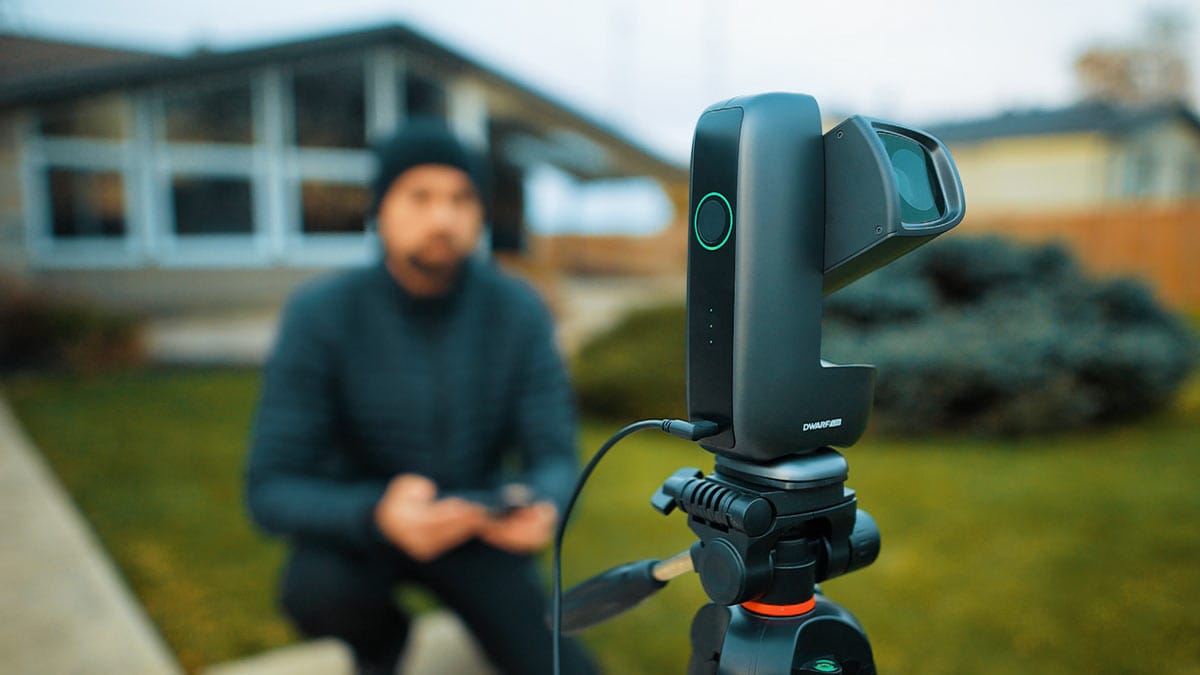
The DWARF mini is a fierce competitor to the S30 Pro, but its 30mm aperture can’t compete with the S50’s optics.
Final Thoughts
The Seestar S50 Pro is the most complete smart telescope ZWO has built. Its greatest improvement is not one flashy feature, but the way the upgrades work together.
The 50mm aperture collects nearly three times as much light as the S30 Pro, while the 260mm focal length gives small targets more image scale. The 4K camera expands the original S50’s field and resolution, and the near-zero-backlash drive strengthens EQ mode.
Add the wide camera, 128GB storage, 10,000 mAh battery, filters, dew control, mosaics, and a capable app, and this is an impressive amount of astronomy in one unit.
If you value upgradeability, active cooling, interchangeable filters, and maximum image quality, a traditional rig remains the better long-term path.
If you value speed, portability, consistency, and collecting data instead of troubleshooting equipment, the S50 Pro makes a very strong case for itself.
The original S50 brought deep-sky imaging to a new audience. The S50 Pro pushes that idea closer to equipment experienced astrophotographers can take seriously.
It is not a professional astrophotography rig in disguise. It is something different: a highly capable smart telescope that hides the complicated parts without hiding your data.
The Seestar S50 Pro is available at High Point Scientific for $899 USD.
Bottom line: Buy the S50 Pro if you want the strongest all-around imaging performance in the Seestar lineup. Choose the original S50 for value, or the S30 Pro when portability and the widest telephoto field matter most.

Trevor Jones is an astrophotographer and a valued member of the RASC. His passion is inspiring others to start their astrophotography journey on YouTube so they can appreciate the night sky as much as he does. His images have been featured in astronomy books and online publications, including the NASA Astronomy Picture of the Day (APOD).



As always, Trevor, thanks for the thorough and informative look at the S50 Pro. I’ve ordered one. I think the sensor brouhaha is an interesting example of the lack of PR smarts of ZWO. Think back to Apple ditching Intel. Yes, that was processors not sensors but I see parallels. Apple gets impatient with Intel’s slow development pace and ditches them. But they convince us that we’re getting something BETTER with Apple Silicon. And, lo and behold, we eventually were. ZWO should have trumpeted the sensor change to the heavens and told us how fortunate we were to get a superior replacement to the pokey Sony stuff. Instead they chose to pretend the change wasn’t happening. Dumb.
Thanks again,
Steve
A great comparison, and I feel the same way. In this industry, it doesn’t take much for the hive mind to make a rash decision or judgment about a product. In their defense, hiding something is never the right approach. In the end, I hope the PR curfuffle doesn’t cloud the fact that this is an incredible smart telescope all around. Cheers!
Trevor, thank you for your great reviews and information. Having an S50 already, a Dwarf3 and Dwarf Mini, I will actually be saving up for the Dwarf Draco. From the specs released already it looks to be a game changer in smart telescopes.
You have quite the arsenal of smart ‘scopes – and I can see why the S50 isn’t different enough to justify the upgrade. The Draco, on the other hand, has some exciting specs to separate it from the Seestars!
Hi Trevor. Buddy barks WOOF to Rudy.
Have you heard of Vaonis’s “Hyperia”? They want $95,000! Do they have rocks?
I’m using a Vespera Pro2 and Celestron Origin 2.2 focal ratio. If I could buy a clear sky!
There’s nothing about the S50 pro that could compete. Am I wrong?
But I just love these cute little capsules with amazing tech inside.
Give me a reason to need one.
Clear Skies
MC
Hey Michael – Rudy sends his regards! The larger, more expensive smart telescopes (especially that Hyperia!) are on another level. The Celestron Origin Mark II, too. I think they are going after a different market than the Seestars. I am still waiting patiently to test an Origin to compare the image results!
Hey Trevor, thanks for the reviews and updates. I am on the fence on this one, I have it ordered and got shipment notification this morning. However I was unhappy with the original s50 as the FOV was too big for most galaxies and too small for a lot of wider objects. I believe the larger sensor was the main upgrade here, and the new sensor controversy has me questioning if my 900$ is better served toward the future Draco. Great review as always.