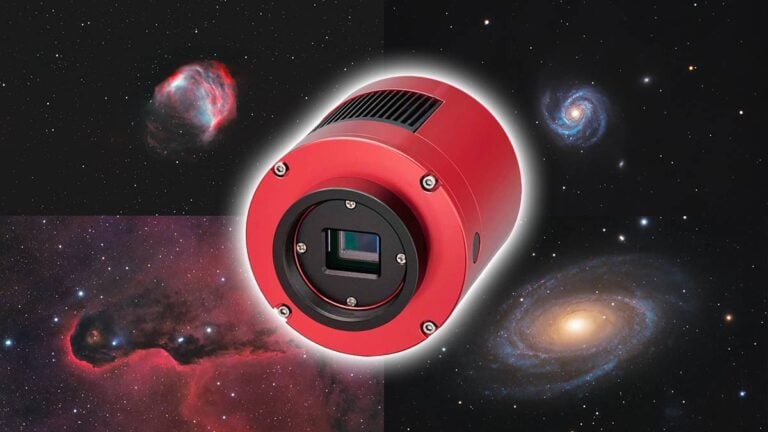
ZWO ASI585MC Air Review: A Serious Smart Camera
The ZWO ASI585MC Air is a compact, self-contained smart astrophotography camera that replaces the usual laptop, controller, and cable mess with a single, lightweight unit you control from your phone or tablet. This is a ‘smart’ version of the extremely versatile ZWO ASI585MC Pro.
In my experience on the Orion Nebula using only 60-second exposures, it delivered clean, detailed data with an impressive balance between bright cores and faint nebulosity, making it a very compelling option for both beginners and portable deep-sky rigs.
The ZWO ASI585MC Air is currently listed for $999 USD at High Point Scientific.
In this review, I’ll walk you through how the ASI585MC Air actually performs in the real world on a demanding target: the Orion Nebula (M42).
The twist is that I captured everything with just one-minute exposures. No long subs, no HDR tricks, just straightforward 60-second frames and a compact wide-field refractor.
The goal was simple: see how far this little camera can be pushed on a target with extreme dynamic range, using a setup that many backyard imagers can realistically put together.
Fast Facts: ZWO ASI585MC Air (Field Test)
- Camera Type: Self-contained smart astrophotography camera
- Control: Phone or tablet (no laptop or ASIAIR required)
- Test target: Orion Nebula (M42) and Running Man Nebula
- Exposure strategy: 60-second subs only
- Telescope used: William Optics RedCat 51 (250mm, f/4.9)
- Filter used: Optolong L-Quad Enhance
- Calculated image scale: 2.4 arc-seconds/pixel
- Use case: Portable, wide-field deep-sky imaging
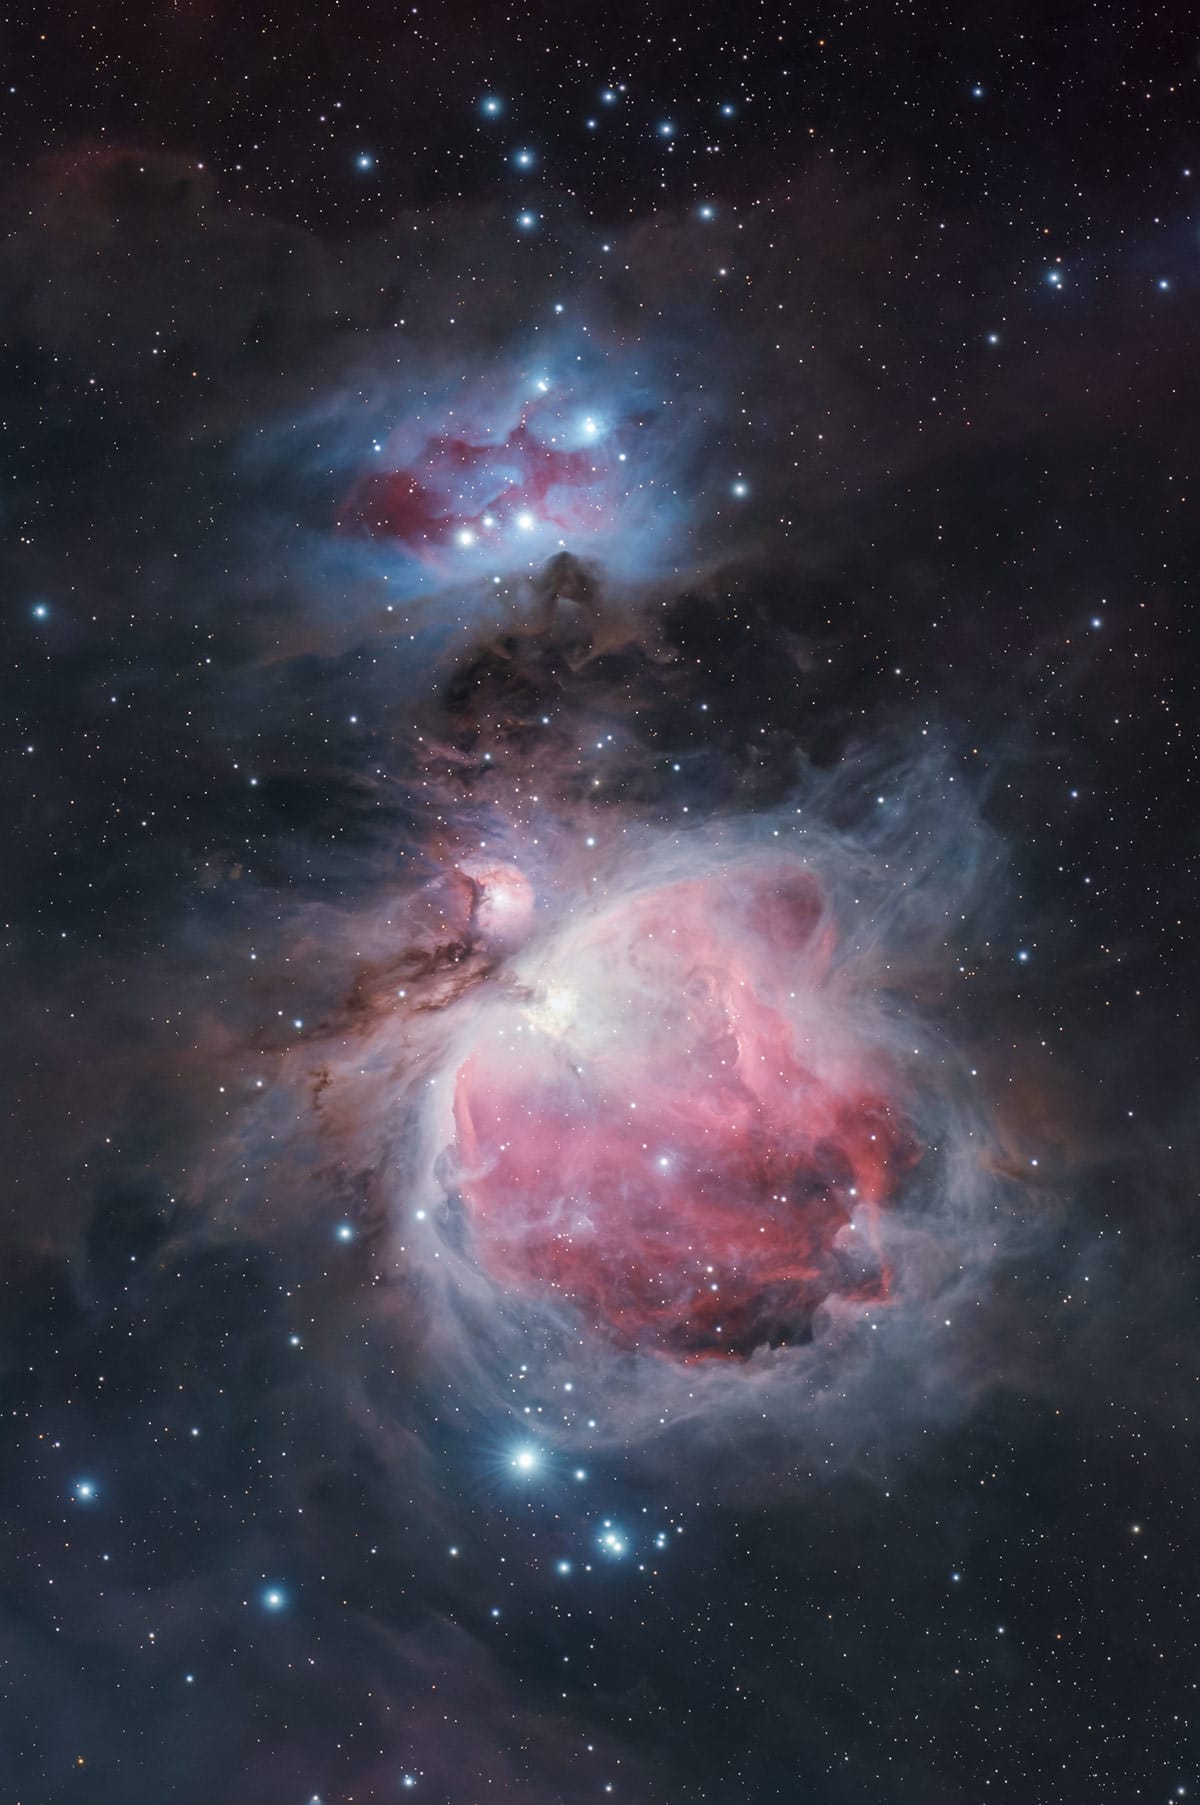
My final image of the Orion Nebula using only 60-second exposures (175 x 60-seconds total).
What Is the ZWO ASI585MC Air?
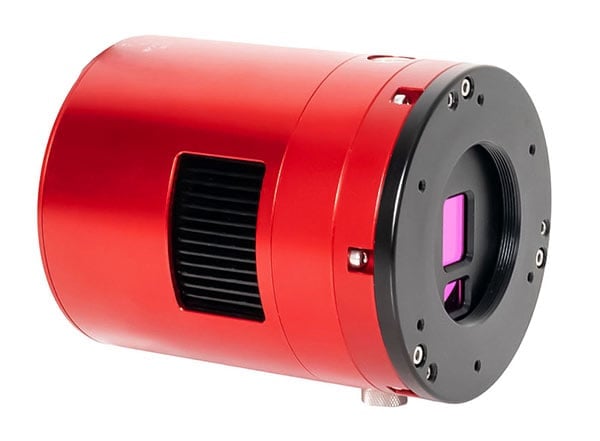
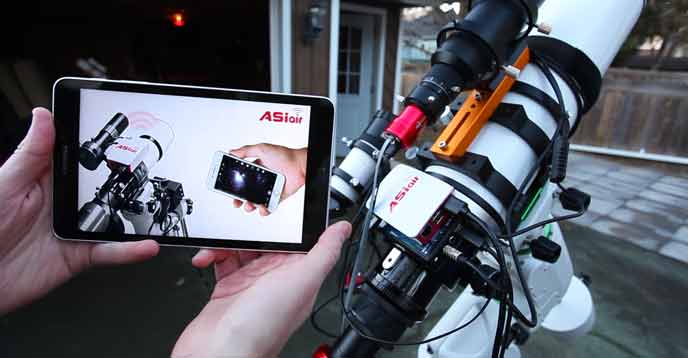
The ASI585MC Air is ZWO’s take on a smart astrophotography camera. Think of it as a hybrid between a traditional dedicated astronomy camera and a modern smart telescope.
Instead of giving you an all-in-one telescope system, ZWO puts the “smart” part into the camera itself. The ASI585MC Air attaches to the telescope you already own, but it brings the brains with it: a built-in computer that handles capture, control, and image processing.
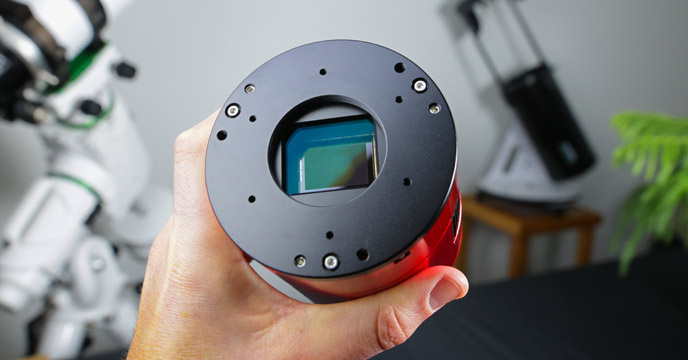
It also includes a secondary guide sensor for on-axis autoguiding. This design is extremely useful for deep-sky astrophotography setups, as you no longer need to attach a secondary guide scope/guide camera to your rig to utilize autoguiding.
That means:
- You don’t need a laptop at the telescope.
- You don’t need an external controller like the ASIAIR.
- You don’t need a guide camera and guide scope combo
- You don’t need a jungle of USB and power cables running everywhere.
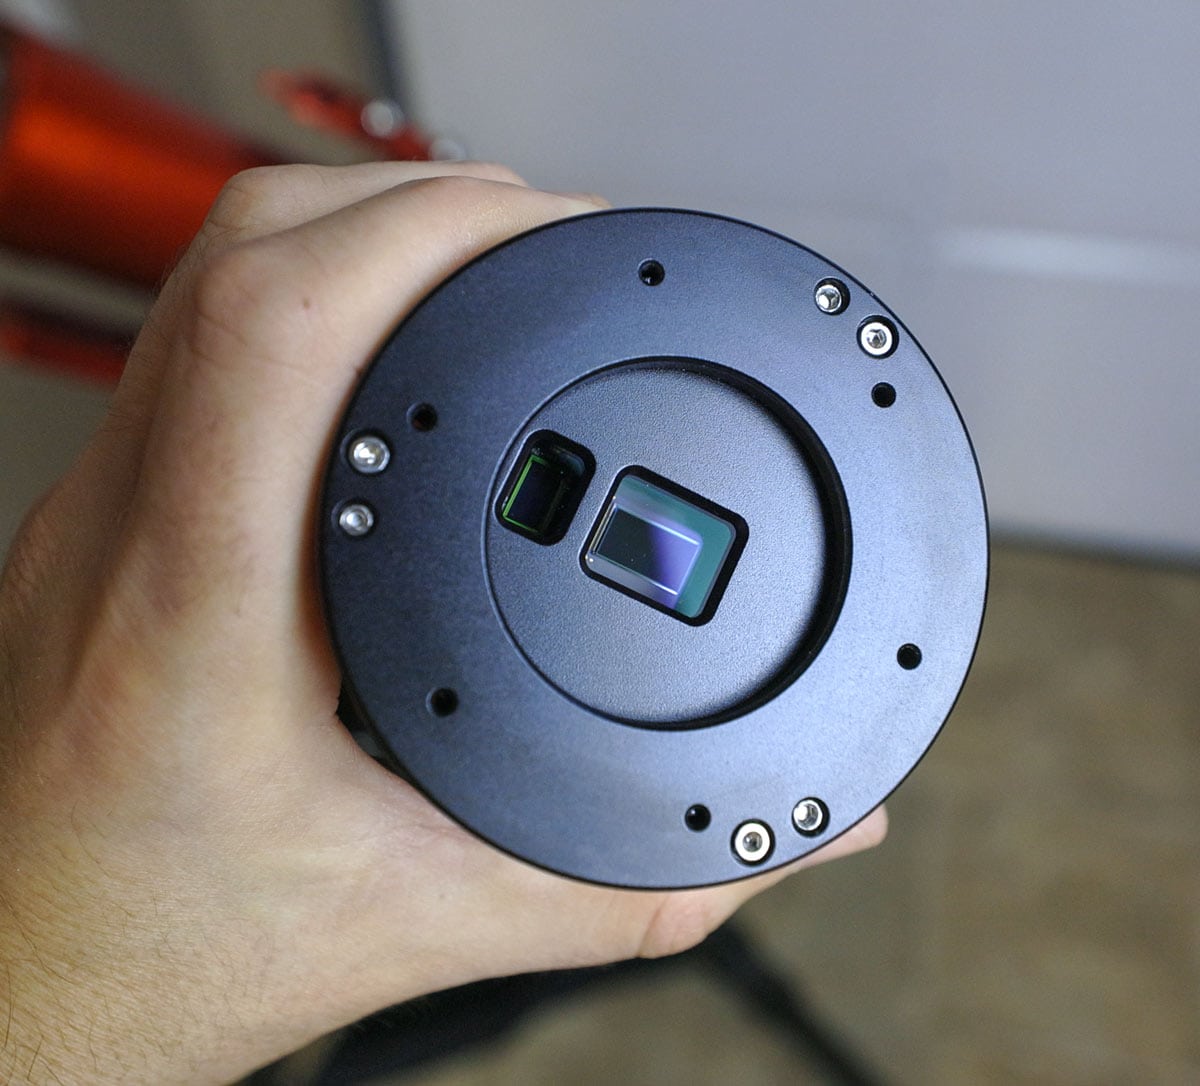
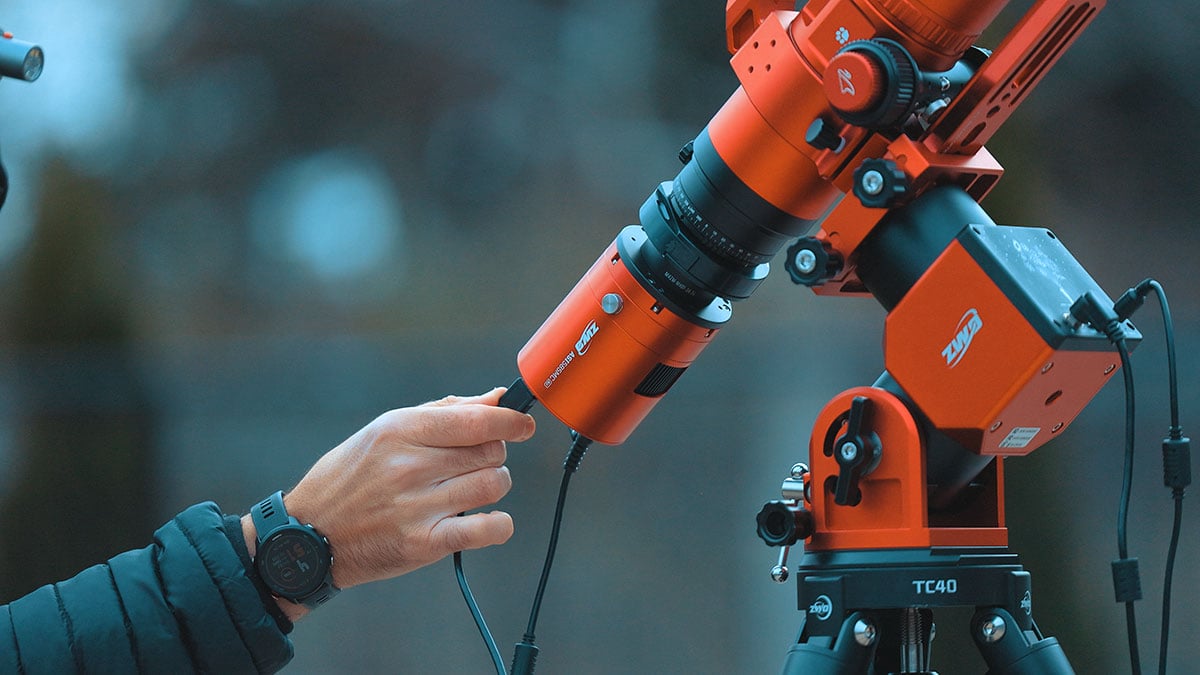
The smaller, secondary sensor on the ASI585MC Air is for on-axis autoguiding purposes.
You simply power the camera, connect to it with your phone or tablet, choose a target, and start capturing. For beginners, that simplicity is huge. There are fewer components that can fail, fewer settings that can be accidentally misconfigured, and far less setup time.
For someone like me who has been doing this for over a decade, it is equally appealing because it streamlines the workflow without locking you into a fixed optical system. I can still choose the refractor, mount, and filters I want, but I gain the convenience of a smart device.
The sensor inside the ASI585MC Air is very sensitive in the visible wavelengths, and the read noise is low enough that short exposures are genuinely practical. That’s one of the key reasons I wanted to push this camera with only 60-second subs on a difficult, high-dynamic-range target.
Related Article: The ZWO ASI2600MC Air Made My Life Easier (Here’s How)
Why This Camera Stands Out
- Smart functionality is built into the camera body.
- No external ASIAIR or laptop required at the mount.
- Secondary Guide Sensor for On-Axis Autoguiding
- Low read noise makes short subs (like 60s) viable.
- Compact form factor suits portable and travel setups.
| Feature | ZWO ASI585MC Air | ZWO ASI585MC Pro |
|---|---|---|
| Camera Type | Integrated smart camera + controller | Dedicated astrophotography camera |
| Sensor | Sony IMX585 (1/1.2″) | Sony IMX585 (1/1.2″) |
| Guide Sensor | SC2210 CMOS sensor (1/1.8″) | None |
| Resolution | 3840 × 2160 (8.29 MP) | 3840 × 2160 (8.29 MP) |
| Pixel Size | 2.9 μm | 2.9 μm |
| Cooling | Yes | Yes |
| Control System | Built-in ASIAIR (Wi-Fi connected, app-controlled) | Requires separate ASIAIR, PC, or laptop |
| Ports / Connectivity | Wi-Fi, USB-C (power), integrated storage | USB 3.0 to computer/ASIAIR |
| Internal Storage | Yes (varies by configuration) | No |
| Weight | Lightweight, designed for portable rigs | Typical uncooled camera body |
| Best Use Case | Beginner-friendly, ultra-portable, simple workflows | Flexible setups, modular workflows, dedicated rigs |
| Price | Higher (camera + controller combined) | Lower (camera-only) |
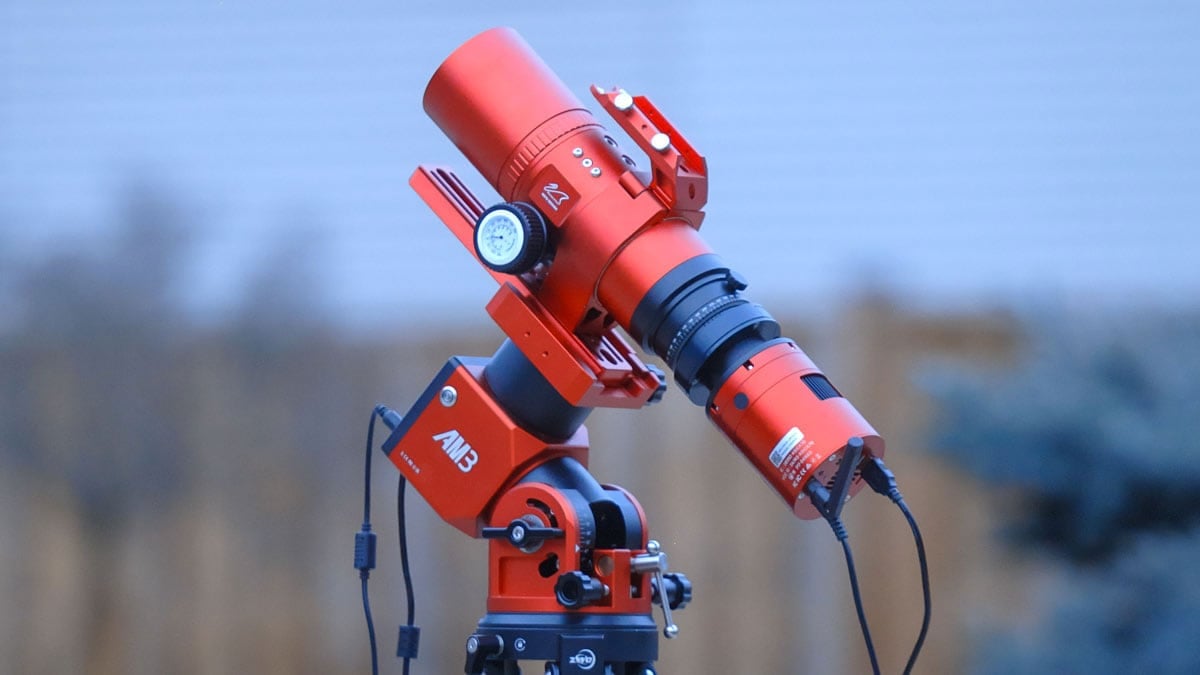
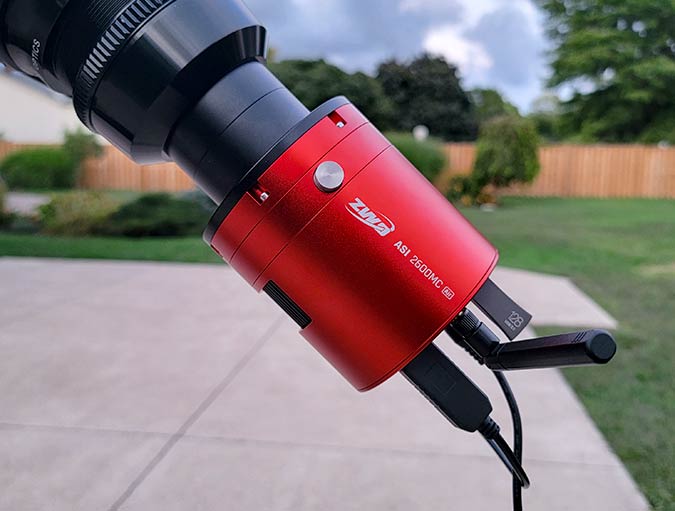
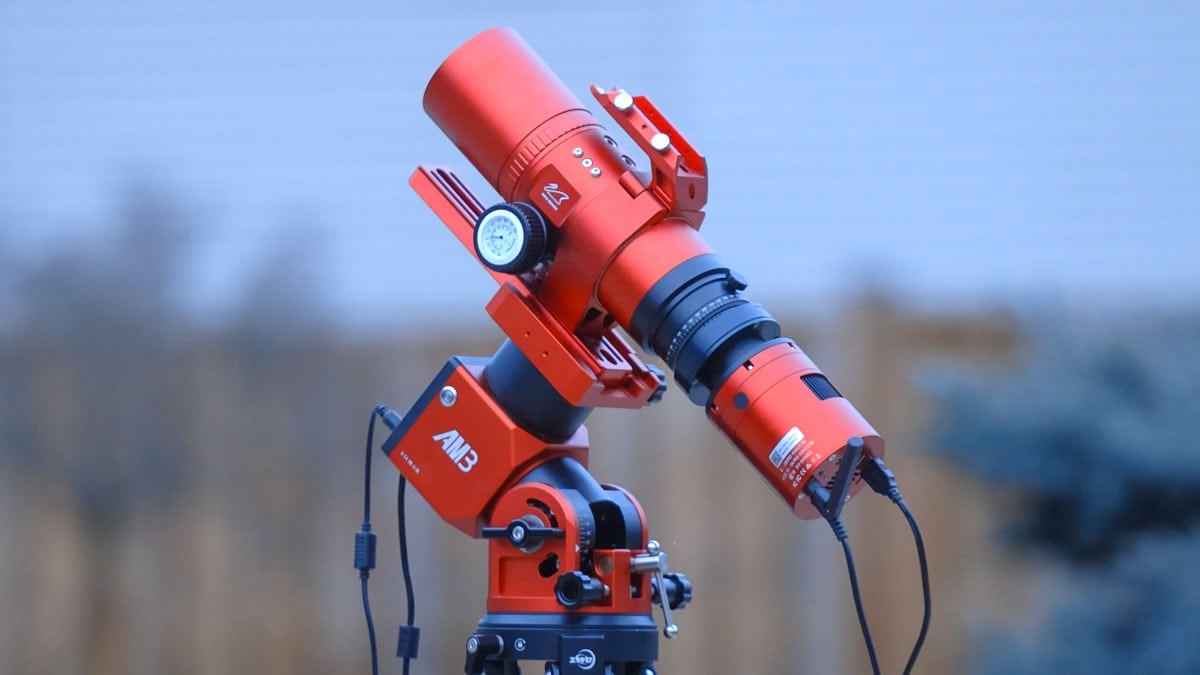
The ZWO ASI585MC Air camera attached to my telescope (RedCat 51).
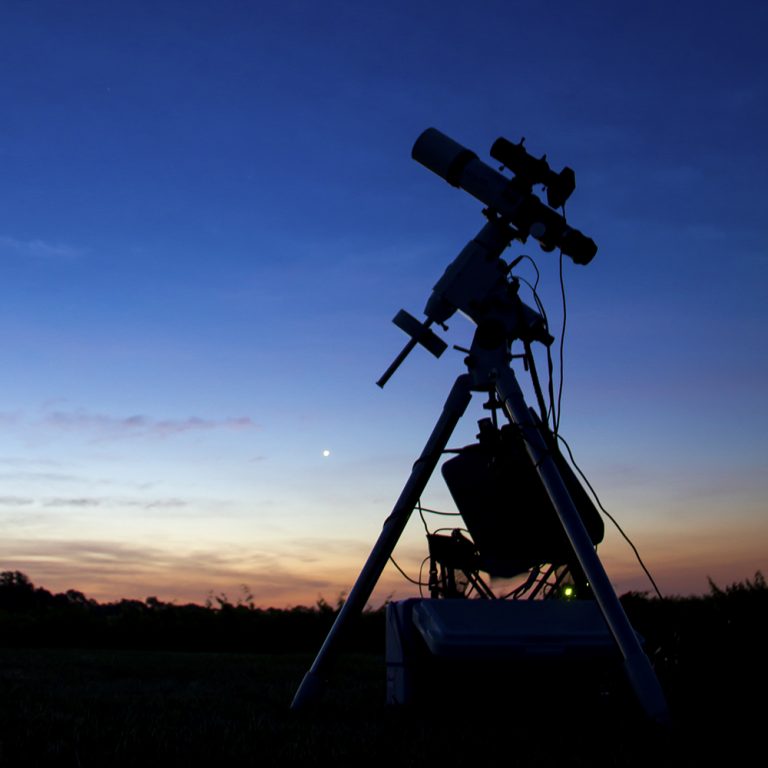
The Test Setup: A Portable Wide-Field Nebula Rig
For this test, I paired the ASI585MC Air with a setup I know extremely well:
- Telescope: William Optics RedCat 51 (250mm, f/4.9)
- Mount: ZWO AM3 Strain Wave Mount
- Filter: Optolong L-Quad Enhance

William Optics RedCat 51
The RedCat 51 is a small, fast, wide-field refractor, perfectly suited to large nebulae like Orion. At 250mm focal length, the field of view is generous, while the f/4.9 focal ratio helps collect a lot of signal quickly.
Optically, it delivers clean, tight stars across the frame, with a flat field and minimal chromatic aberration. When you combine a well-corrected refractor like this with a modern small-pixel camera, you get a setup that punches well above its weight.
ZWO AM3 Mount
The entire rig is light enough that the AM3 barely notices it. Harmonic drive mounts are already an excellent choice for portability, and when paired with a compact refractor, guiding becomes almost effortless.
Short exposures also help here. At 60-second subs, you are not pushing the mount to the limit, and small guiding errors have less time to accumulate.
Optolong L-Quad Enhance Filter
The Optolong L-Quad Enhance filter is one I have used many times before. It does a good job of improving contrast on deep-sky objects while reducing the negative impact of light pollution.
It is less aggressive than a strict dual-band narrowband filter, which is actually beneficial for a bright, colorful object like Orion. You get a boost in contrast on the emission regions, but you still retain enough of the broadband spectrum to keep the nebula’s natural hues intact.
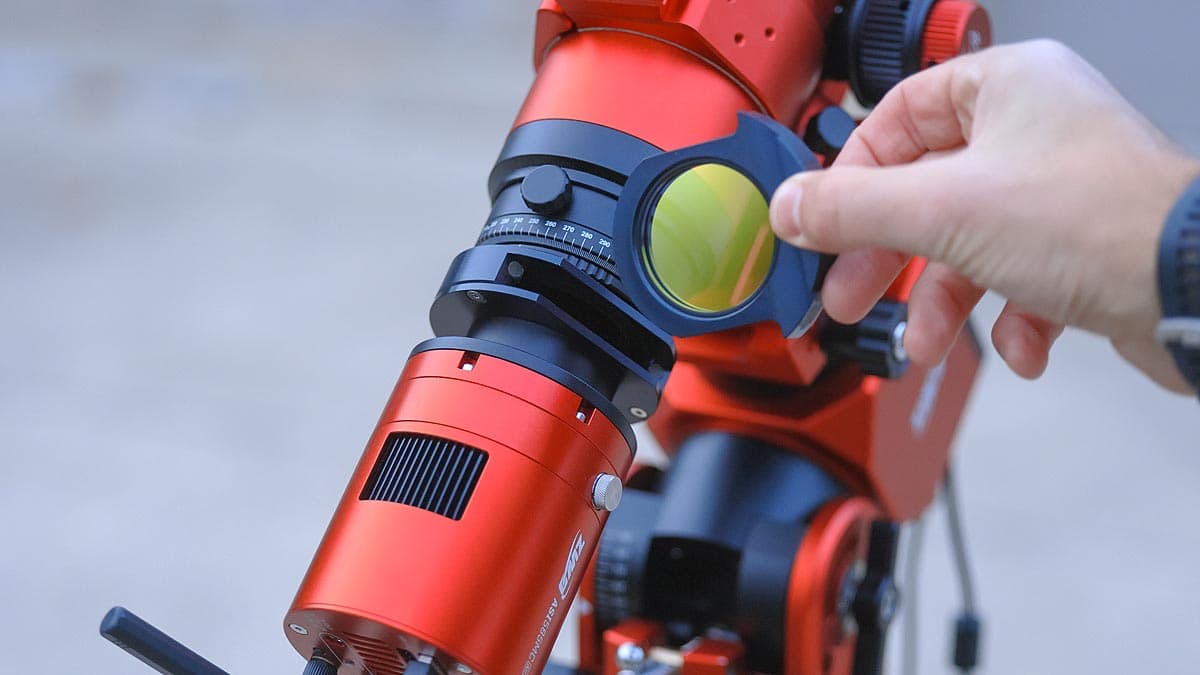
I used a 2-inch filter drawer to place the Optolong L-Quad Enhance filter in front of the ZWO ASI585MC Air Camera.
Together, the RedCat, AM3, and ASI585MC Air form a very capable, highly portable deep-sky imaging system. It is the kind of rig you can carry in one hand, but it is easily capable of producing top-tier nebula images.
Planning the Orion Nebula Shot
Before heading outside, I always plan my framing in Stellarium. This step is easy to skip, but it is incredibly helpful when you are working with a specific sensor size and focal length combination.
With the ASI585MC Air on the 250mm RedCat, Stellarium showed that the Orion Nebula would sit beautifully in the frame. There is enough room for:
- The main body of M42.
- The Running Man Nebula above it.
- Some of the faint outer dust lanes stretching outward.
This is one of the big advantages of wide-field refractors: you are not fighting to cram everything into the frame. By checking the orientation and framing ahead of time, I avoid surprises in the field and can choose a composition that feels balanced right from the start.
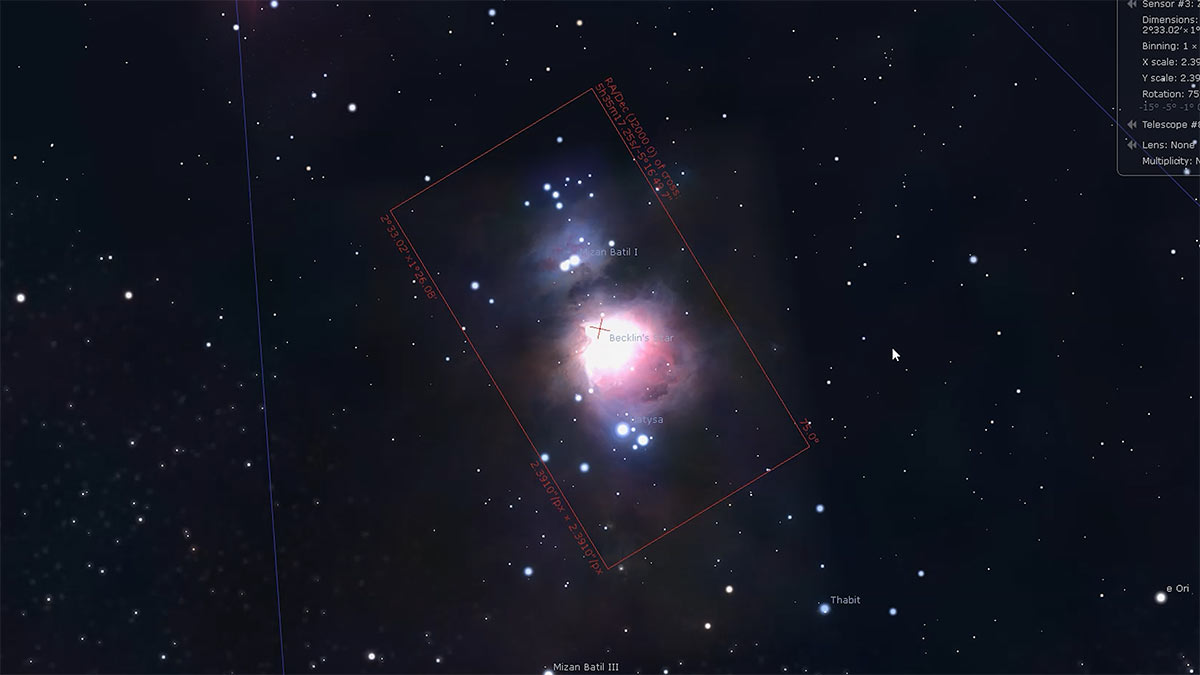
The ‘sensor view’ in Stellarium is handy for planning compositions with a specific camera-telescope combination.
Winter Imaging Reality: Short Windows of Opportunity
Where I live, winter can be a frustrating time for astrophotography. The nights are nice and long, but the weather rarely cooperates. Getting one or two clear nights a month is often optimistic.
Right now, Orion is perfectly placed in the evening sky. It rises high enough to escape the worst of the horizon glow, yet it is still available early in the night, giving you a decent imaging window before it drifts toward the southwest.
The problem is not the target; it is the clouds. You can meticulously plan your gear, framing, and exposure strategy, but you cannot plan the sky. On nights like this, even a partial clearing in the forecast is worth chasing.
Some of my best images have come from short windows of opportunity where everything just lined up. That is another reason I like the ASI585MC Air: it minimizes setup time, so you can jump on those narrow gaps in the weather and still come away with meaningful data.
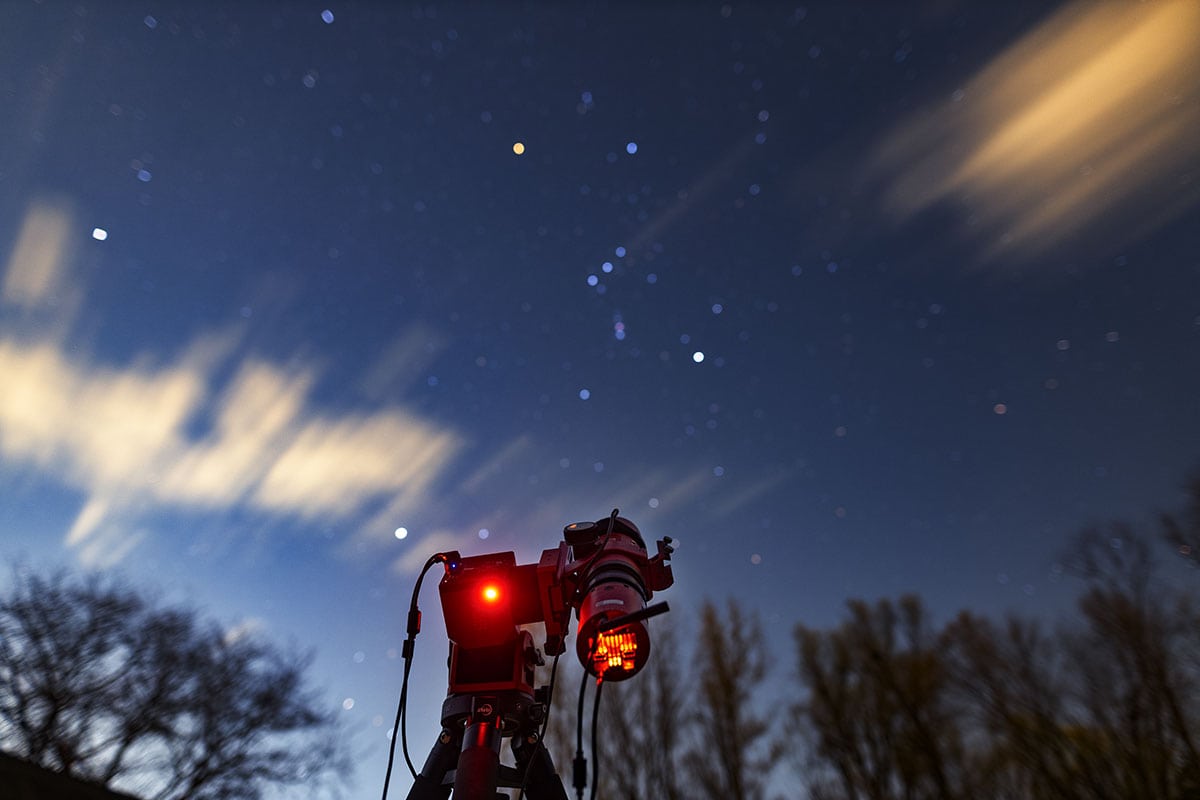
The constellation Orion is full of amazing deep-sky objects, such as the Orion Nebula.
Image Scale: Why This Combo Works So Well
Image scale is one of the most important concepts in astrophotography, especially when pairing a camera with a telescope. It tells you how much of the sky each pixel covers and helps you understand whether your system is well-matched to your typical seeing conditions.
The formula is straightforward:
Image scale (arc-seconds/pixel) = (Pixel size / Focal length) × 206.265
For the ASI585MC Air, the pixel size is 2.9 microns. With the RedCat’s 250mm focal length, the calculation works out to an image scale of roughly 2.4 arc-seconds per pixel.

Most backyard imagers are operating under seeing conditions of 1–3 arc-seconds. If your image scale is in that ballpark, you are sampling the sky efficiently: not throwing away resolution by undersampling, but also not oversampling to the point where the atmosphere, not your optics, becomes the limiting factor.
A value around 2.4 arc-seconds per pixel is extremely well-matched to typical backyard seeing. In practice, this means:
- Tight, round stars across the frame.
- Crisp nebula structure with good fine detail.
- No significant loss of resolution due to mismatched scale.
This is one of the reasons small refractors pair so nicely with small-pixel sensors. The math just works out in your favor.
Shooting Orion with Only 60-Second Exposures
The entire experiment was built around a single idea: capture the Orion Nebula using nothing but 60-second subs.
Short exposures offer several advantages:
- They reduce the pressure on your guiding.
- They help minimize star bloat from overexposure.
- They lessen the risk of completely saturating bright cores.
In the past, short subs often meant fighting against high read noise. You were forced into longer exposures just to rise above the noise floor. Modern sensors like the one in the ASI585MC Air change that equation. They are clean and sensitive enough that short exposures are not only usable, they are often ideal.
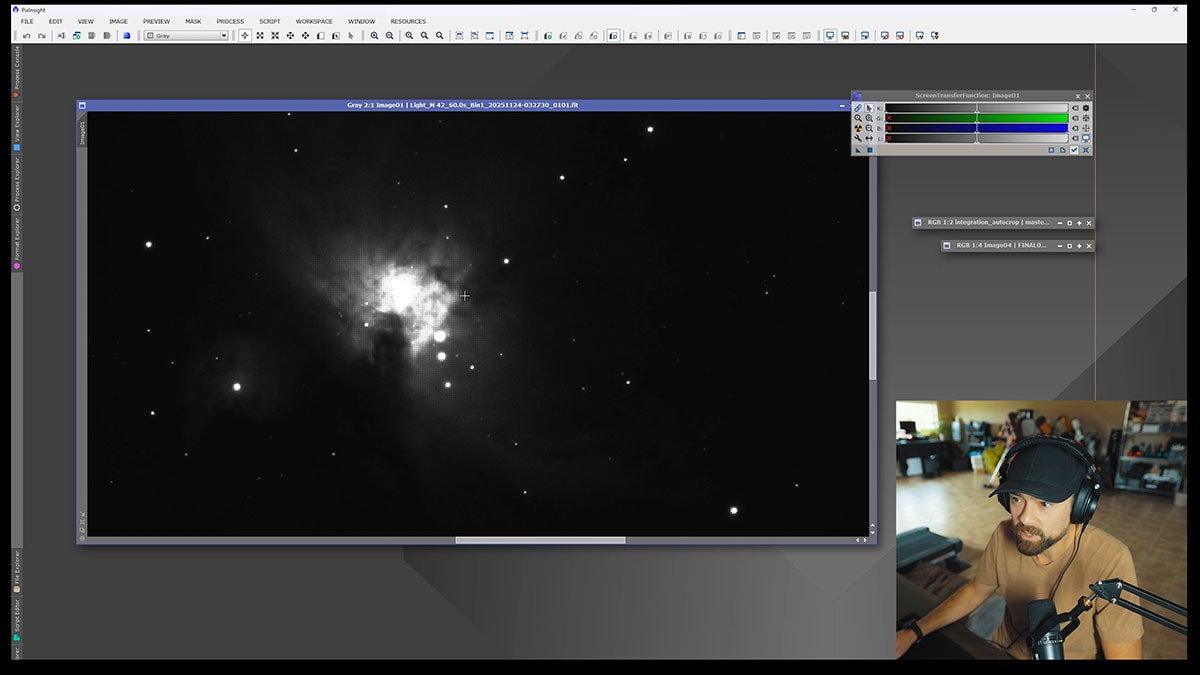
In a single 60-second sub-exposure, you can see that the bright Trapezium is just barely blown out (overexposed).
Using only one-minute frames on Orion is a great test of dynamic range. The bright Trapezium core wants to blow out immediately, while the faint outer nebulosity requires time and signal to reveal itself.
As you can see in the image above, a 60-second exposure using a Gain setting of 200 was just too much to reveal the bright Trapezium core of the Orion Nebula. To properly expose this area, I’ll need to knock my exposure time down to 15 seconds or so.
Results on the Orion Nebula
After capturing a solid set of 60-second frames, the results were impressive.
The core of the Orion Nebula held together extremely well, even without any high dynamic range blending. While the Trapezium was slightly blown out, the mid-tones were smooth, and the faint outer structure looked richer than I expected from relatively short subs.
The Optolong L-Quad Enhance filter certainly helps with contrast, but the star of the show here is the camera’s sensitivity and low read noise. In the stacked image, you can see:
- Subtle color variations throughout the nebula.
- Fine dust lanes and structure in the bright central regions.
- A pleasing amount of detail in the Running Man Nebula above M42.
Considering this was done with only one-minute exposures, on a portable rig, under typical backyard conditions, the performance of the ASI585MC Air exceeded my expectations.
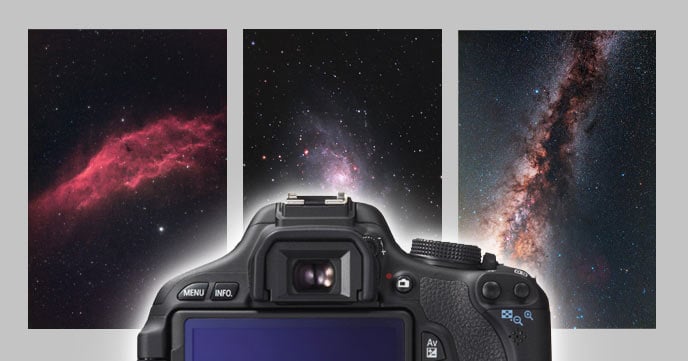
Who Is the ASI585MC Air For?
Based on this field test, here is who I think will get the most value out of the ASI585MC Air:
- Beginners who want a smart, streamlined way to get into deep-sky imaging without a laptop at the telescope.
- Backyard imagers who already own a good small refractor and want to simplify their capture workflow.
- Travel and portable-rig enthusiasts who appreciate a compact, lightweight system that sets up quickly.
- Experienced astrophotographers who like the idea of smart functionality but still want the flexibility to choose their own optics and filters.
| What I like | Things to keep in mind |
|---|---|
| Built-in computer eliminates the need for a laptop or ASIAir at the telescope. | You still need a compatible telescope, mount, and filter system—this is not an all-in-one telescope. |
| Low read noise makes short subs (like 60s) practical on bright nebulae. | For extremely faint targets, you will still want good total integration time. |
| Compact and lightweight—ideal for portable and backyard rigs. | As with any dedicated astro camera, there is still a learning curve if you are completely new to deep-sky imaging. |
| Pairs beautifully with small APO refractors and harmonic drive mounts. | Your results will still heavily depend on sky conditions and basic mount alignment. |
Final Thoughts
The ZWO ASI585MC Air slots into a really interesting space in the world of astrophotography. It offers the convenience and streamlined workflow we usually associate with smart telescopes, but without sacrificing the flexibility of using your own optics.
On the Orion Nebula, using nothing but 60-second exposures through a RedCat 51 and an L-Quad Enhance filter, it produced detailed, well-balanced data with a clean core and rich outer nebulosity. The camera handled the extreme dynamic range of M42 better than I expected for such short subs, which speaks to the quality of its sensor and internal processing.
If you are looking to build a lightweight, portable deep-sky imaging system that does not require a laptop and does not overwhelm you with cables, the ASI585MC Air is absolutely worth considering.
 Trevor Jones is an astrophotographer and a valued member of the RASC. His passion is inspiring others to start their astrophotography journey on YouTube so they can appreciate the night sky as much as he does. His images have been featured in astronomy books & online publications, including the NASA Astronomy Picture of the Day (APOD).

You should use a gain of 0 for that camera. It gives you an extra half stop of dynamic range and you need all the range you can get with M42
I like the idea of an all in one camera but i am not sure if a dual narrowband filter works with the guid system. Will the guid cam get enough light with an 7nm or 5nm filter infornt?
In my experience, the guiding worked great even with a strong dual-narrowband filter in front. I used it with the Optolong L-Ultimate many times (3nm).
Got the ASI585MC Air, FR300 Pro and an EQ-AL55i mount but haven’t been able to get it setup yet.
Hello Trevor
I just ordered the new mono version of this camera, the ZWO ASI 585 MM Air. I’m happy to hear that the guiding works even with 3nm filters. Do you have a favorite filter composition for a 2″ filter wheel as I’m a little bit struggling with all the different options for LRGB and SHO. Many thanks for your excellent posts.
Very good, thanks Trevor. So, I am a Seestar Pro30 user and the built-in sensor is essentially equivalent to the 585. Would the Optolong L-Quad Enhance filter work well with my Seestar? I’m thinking it would, but wanted to get your thoughts before picking one up. Thanks for your content!