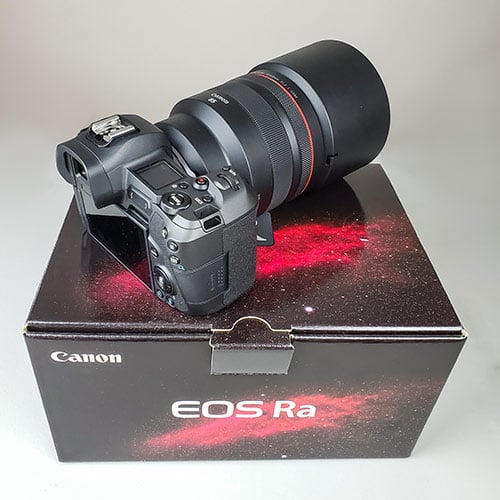
Canon EOS Ra Review

The Canon EOS Ra camera is Canon’s first full-frame mirrorless camera dedicated to astrophotography. It is suitable for deep-sky imaging with a telescope, and night sky photography with a camera lens.
Based off of the extremely popular EOS R, the EOS Ra boasts unique features such as 30x magnification (viewfinder and Live View) for precise focusing, and roughly 4x more transmission sensitivity to the hydrogen-alpha (Hα) wavelength.
- Name: Canon EOS Ra
- Based on: Canon EOS R
- Release Date: November 2019
- Type: Mirrorless System
- Resolution: 30.3 MP
- Sensor size: Full-Frame
- Sensor type: CMOS (specialized IR filter)
- Lens Mount: Canon RF
- Features: 30X Live View, Vari-angle LCD touchscreen
In the following video, I share my results using the Canon EOS Ra camera attached to a small telescope. This camera is suitable for high-resolution deep-sky astrophotography using a variety of optical instruments.
Canon EOS Ra Review
In late December 2019, Canon USA reached out to me to test their new astrophotography camera, the Canon EOS Ra. The “a” in the name of this camera stands for astrophotography.
That is because, unlike the regular Canon EOS R, this camera is 4X more sensitive to the h-alpha wavelength of the visible spectrum (656.3 nm). This helps collect the important deep red hues of many nebulae in the night sky.
As Canon puts it, “positioned in front of the CMOS imaging sensor, The EOS Ra’s infrared-cutting filter is modified to permit approximately 4x as much transmission of hydrogen-alpha rays at the 656nm wavelength, vs. standard EOS R cameras.”

The North America Nebula. 5+ Hour Exposure Using the Canon EOS Ra.
The Canon EOS Ra also includes astrophotography-friendly features such as a unique 30X live-view mode on the vari-angle touchscreen LCD display screen. It’s a color astrophotography camera that was intended to be used for both deep-sky astrophotography, and wide-angle nightscapes.
In this article, I will review the Canon EOS Ra from the perspective of an “ordinary” amateur backyard deep-sky astrophotography enthusiast. As with every review I post, I was not compensated to endorse the product in any way. All of my opinions about this camera are my own.
Before using the EOS Ra for astrophotography, I previously enjoyed using Canon’s last astrophotography camera, the (APS-C sensor) Canon EOS 60Da DSLR. The EOS Ra, on the other hand, is a full-frame mirrorless camera.

The Canon EOS Ra is a full-frame mirrorless astrophotography camera that is capable of producing APOD worthy astrophotography images. It is not a “one-trick-pony”, so to speak, as many of the other options available to amateurs are. Not only can the Ra take incredible deep-sky images through a telescope, but also using a wide variety of lenses, and without computer control.
Having a camera with a long-lasting internal battery and a touchscreen display means that you are able to make adjustments to your exposures and key settings on the fly. You do not rely on third-party software to run this camera, although it can be used with popular software such as Astro Photography Tool, or Canon EOS Utilities.
The tactile experience of the EOS Ra camera body inspires you to focus on creative photography that excites you, and less on micro-adjustments and graphs on a computer screen. To be perfectly honest, the Canon EOS Ra is just more fun to use than any other astrophotography camera I’ve experienced.
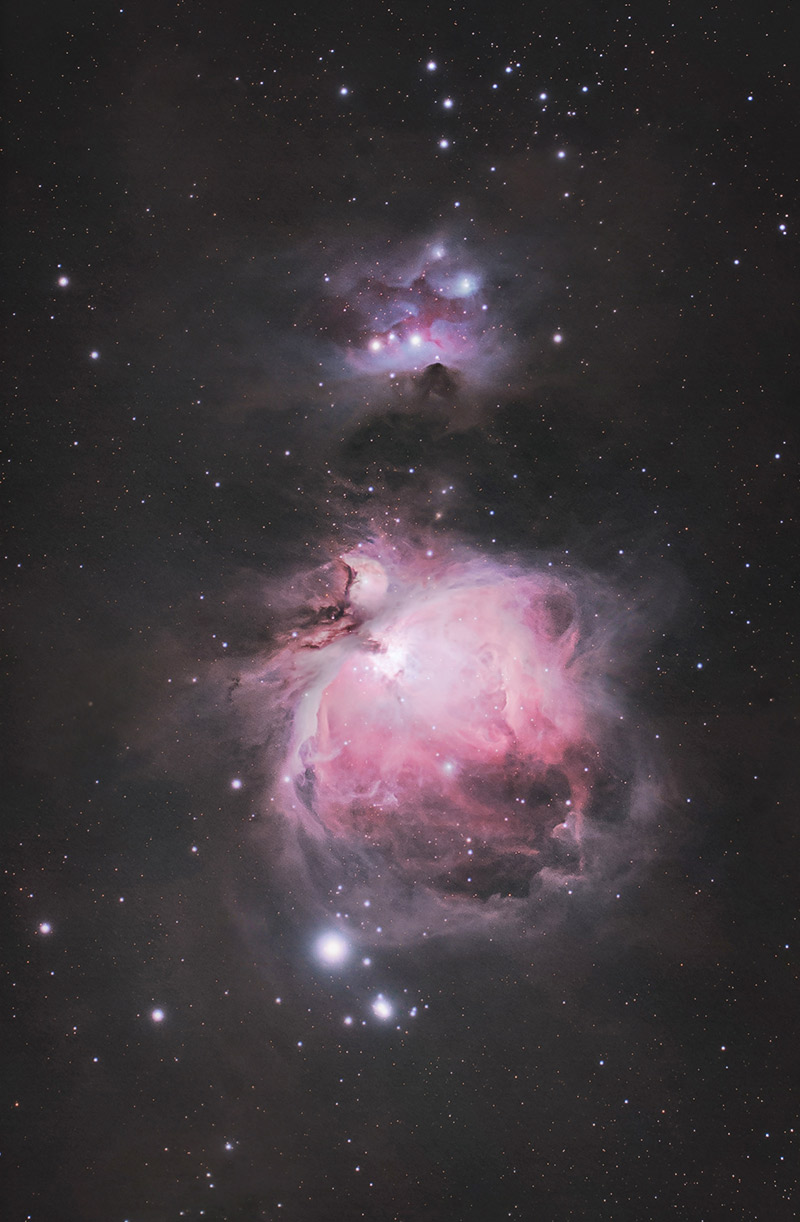
The Orion Nebula using the Canon EOS Ra (40 x 4-minutes at ISO 800).
Camera Features
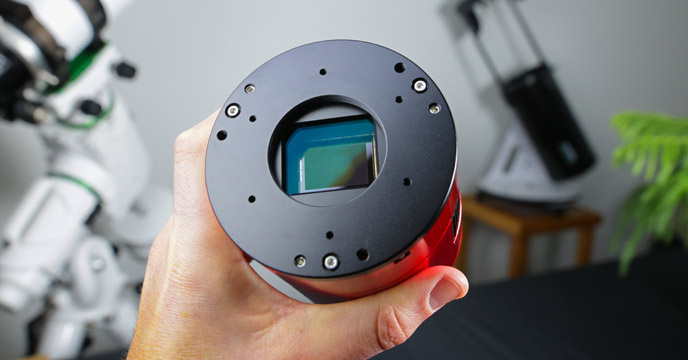
At the heart of the Canon EOS Ra, is a 30.2 megapixel full-frame CMOS sensor. That’s a massive 36 x 24mm sensor, an uncommonly large size in the realm of astrophotography cameras.
This translates into an extremely wide field of view when used with a compact refractor telescope. It utilizes the native focal length of the optical instrument rather than cropping the image as smaller sensors do.
So, if you use a telescope like the Sky-Watcher Esprit 100, you are shooting at the listed focal length of 550mm. This determines the magnification of the deep-sky object and the resolution of your image.
The EOS Ra includes all of the advanced features of the EOS R, including a self-cleaning sensor unit, dust delete data function, and an OLED color electronic viewfinder.
Through this viewfinder, you can monitor key camera settings including exposure information, battery level, ISO speed, histogram, white balance, and much more.
Bluetooth and WiFi connectivity are standard features of the EOS Ra, too. Does your dedicated astronomy camera offer this?
The Canon EOS Ra includes Dual Pixel CMOS autofocus. This advanced focusing system found in the original EOS R will not be utilized in many astrophotography-related shoots, but for video work, AF modes like Face+Tracking are incredibly useful.

Specifications
- Format: Full-Frame
- Sensor Type: CMOS
- Sensor Size: 36 x 24mm
- Pixel Size: 5.36 microns
- Max. Resolution: 6720 x 4480 (30.2 MP)
- ISO Sensitivity: 100 – 40000
- Lens Mount: Canon RF
- Video Modes: 4K up to 30p, HD up to 60p
- Memory Card: Single SD
- Weight: 1.45 lbs.
When comparing the price of the Canon EOS Ra to a dedicated astronomy camera, consider the sheer amount of features this camera has that the latter does not (onboard touch-screen LCD, WiFi, 4K video, dual pixel AF, etc.). Will you use all of these advanced features for deep-sky astrophotography through a telescope? Probably not.
But the Canon EOS Ra is a multi-function camera that was designed to meet the needs of a broad range of amateur astrophotographers from wide-angle nightscape shooters to prime focus deep-sky imagers.
RF Lens Mount
The Canon EOS Ra features the new Canon RF lens mount, which allows you to use the latest RF mount lenses from Canon including the RF 85mm F/1.2L. If you already own Canon glass with the EF lens mount system, you simply need to use the EF-EOS R lens mount adapter to attach them to the EOS Ra.
Yes, the adapter is an added expense to use your existing Canon glass, but you will now be able to experience the impressive RF Lenses available. According to Canonwatch.com, the RF lenses are an improvement over their EF counterparts, as shown in the DxOMark testing (at least on the RF 50mm F/1.2L lens).

The Canon EF – EOS R lens mount adapter for EF-mount lenses.

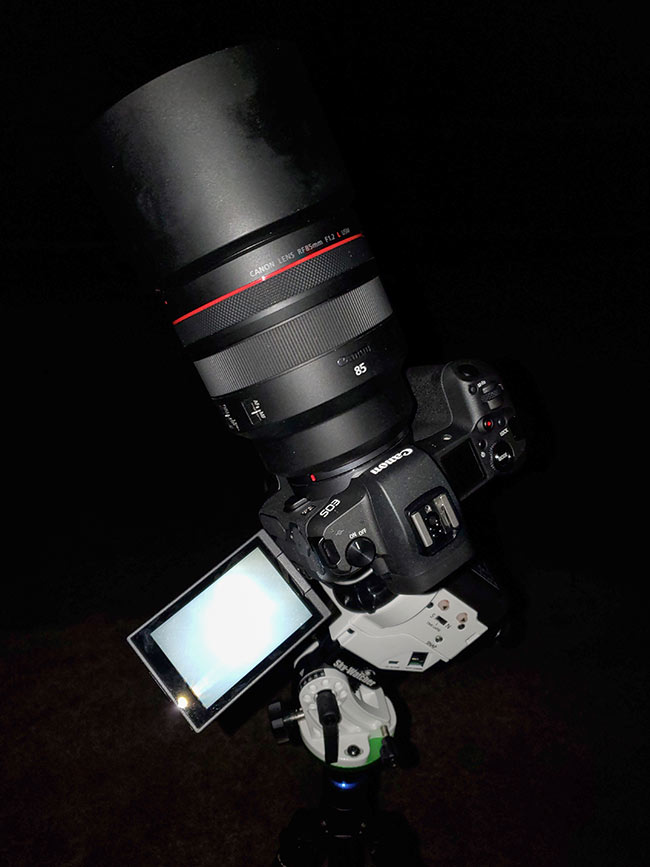
Canon EOS Ra with RF 85mm F/1.2L lens attached.
I won’t go too into detail about the 85mm F/1.2 lens Canon included with the EOS Ra for my testing, but an 85mm prime is certainly an attractive focal length for astrophotographers. In terms of deep-sky imaging, this lens is best enjoyed under dark skies rather than an orange-zone backyard in the city.
Test Images using the 85mm F/1.2 Lens
I had a brief opportunity to test the Canon RF 85mm F/1.2 under semi-dark skies (Bortle Scale Class 5) on a moonless night. The photo I captured that night (watch the video) was really nothing special, until you realize that it was accomplished in about 10 minutes.
Nightscape photographers with access to a dark sky site and enough time will capture amazing images with the EOS Ra this spring. Milky Way season should be very interesting.

The Heart and Soul Nebulae, and the Double Cluster in Perseus. 10 x 30-seconds at ISO 800.
The image quality of the photos taken using the EOS Ra and 85mm F/1.2L lens was impressive. Each exposure was 30-seconds long, and the noise was minimal despite using ISO 800.
The following example image shows the star quality you can expect using this lens at F/1.6, and it is quite impressive if you ask me. Only the top corners show stars that are not absolute pin-points, which is admirable considering the monster-sized image sensor of this mirrorless camera.
Click the image for a large version of the image to inspect the star quality.
New RAW Image Format
The Canon EOS Ra shoots RAW images in .CR3 format. This slight number change (from the previous .CR2 format of Canon DSLR cameras) is actually a big deal. All of the software you use for registration, calibration, and image editing must be able to work with this new file format.
For example, the pre-processing software I use (DeepSkyStacker) accepts .CR2 RAW image files, but not .CR3. That means that I must convert the native RAW image format from the Canon EOS Ra to a .TIF file for the application to recognize it.
Adobe Photoshop 2020 has no trouble opening up the .CR3 files in Adobe Camera Raw or Bridge (or Lightroom for that matter), but I still use DeepSkyStacker for the registration and calibration stages of my images.
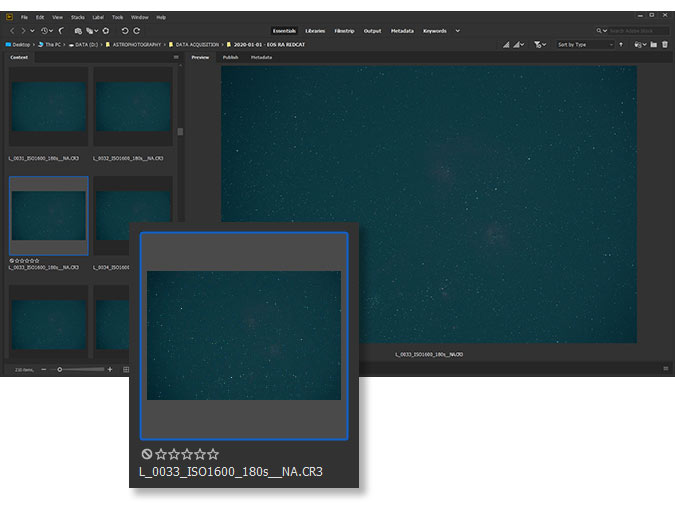
The .CR3 RAW image format is not yet supported by popular stacking software like DeepSkyStacker.
This adds additional time to the processing stages of astrophotography, and I hope that the software available at the time of writing “catches up” to the new image format. PixInsight users will also need to wait for LibRaw to support CR3 files to integrate data (the PixInsight RAW format support module uses LibRaw as a back-end to support digital camera raw formats).
A potential workaround for this matter is to register all of your exposures in Adobe Photoshop, but I am unaware of a way to calibrate images with dark frames or flat frames using this method.
Full Frame CMOS Sensor
The full-frame CMOS hydrogen-alpha sensitive sensor is likely the biggest appeal of the camera overall. If you want to shoot using the field-of-view you are accustomed to with a crop-sensor camera body, you have the option of switching to “crop” mode in the settings.
Until now, the only full-frame camera sensors I had ever used for astrophotography were the Canon EOS 5D Mark II, and the Canon EOS 6D Mark II. Both of these camera bodies, however, were stock.
With the EOS Ra, I was finally able to utilize the large image circles of my apochromatic refractor telescopes like the William Optics RedCat 51 and Radian Raptor 61.
You can manually change the cropping/aspect ratio of the image in the camera settings if desired. Most photographers will simply leave the camera in “FULL” (full-frame) mode, but the option of capturing images at a 1.6X (crop-sensor), 1:1, 4:3, or even 16:9 is there.

Setting the Cropping/Aspect Ratio on-camera.
A full-frame (6720 x 4480 pixel) sensor demands a flat field and large image circle, which should be kept in mind when considering the EOS Ra. If your optical instrument does not have an image circle large enough to accommodate the large sensor, you could always manually set the crop factor on the camera as shown above.
Key Camera Settings
For those using the EOS Ra for astrophotography, there are a few essential camera settings to remember. The most important, in my opinion, is to turn off the built-in long exposure noise reduction and the high ISO noise reduction.
This is a hot topic with amateur astrophotographers and night photographers, as some nightscape shooters that process single exposures may prefer it. For deep-sky imagers that stack multiple exposures, however, you will not want the camera to do any noise reduction before you integrate the data.
If you’re looking for a reliable way to reduce noise in your astrophotos, I recommend giving the Topaz Labs DeNoise AI software a try.
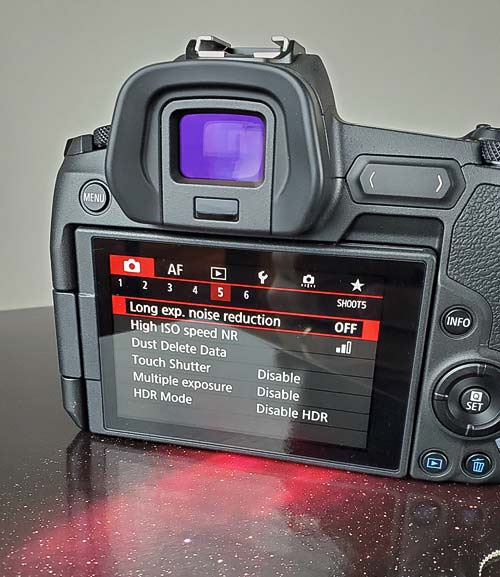
Most astrophotographers will want to turn off long exposure noise reduction and high ISO speed NR.
The other important setting to remember is to ensure you have enabled the setting that allows the camera to take an exposure without a lens attached. When you have connected the EOS Ra to a telescope, it will not recognize that the optical tube is acting as a lens. The feature can be found in the custom settings menu, and it is called Enable Release Shutter w/o lens.
For a detailed look at all of the features this camera includes, you have the option of spending a weekend reading the EOS R Advanced User Guide.
Imaging Sessions and Results
If you are like me, a typical astrophotography imaging session will vary in length depending on the amount of clear sky time available. Some sessions last less than an hour due to incoming clouds. The EOS Ra excels in these situations, as a quick setup process is one of its specialties.
The Canon EOS Ra includes a feature I have never experienced before, one that allows you to take exposures longer than 30-seconds in bulb mode. This is something amateur astrophotography enthusiasts can appreciate, especially when using this camera with a portable star tracker such as the Sky-Watcher Star Adventurer, or iOptron SkyGuider Pro.
Being able to quickly set up the Canon EOS Ra and a wide-field lens on a small star tracker means that you can enjoy spur-of-the-moment astrophotography sessions while traveling. For me, this means being able to escape the light pollution from home and bring the kit to a dark sky site.
The Canon EOS Ra mounted to a Sky-Watcher Star Adventurer at the side of the road.
I find that camera lenses of all focal lengths are best used under dark skies. The wide-field nature of most camera lenses can create challenging image processing scenarios under light-polluted skies, especially if no light pollution filter is used.
Gradients in the night sky due to the glow of the city can make it very difficult to neutralize the background sky across large areas. That is not to say that it isn’t possible to correct harsh gradients due to light pollution in Photoshop, but it can be very time consuming to achieve a natural result.
The best remedy for this scenario is to try and reserve your wide-field, camera lens astrophotography for dark sky excursions during the new moon phase.
Deep-Sky Imaging Through a Telescope
If you want to watch me experience the thrill of unboxing the EOS Ra for the first time, and some backstory behind my image of the Orion Nebula shared at the top of this post, feel free to watch the following video. If my music selection or the sound of my voice annoys you to no end, read on.
For many people using the Ra for astrophotography, you will be capturing a sequence of long-exposure images through a telescope (Here are the ones I recommend). This is standard practice for creating images with a strong signal-to-noise ratio.
But to do this, you will need to expose your images for longer than 30-seconds, and automate the process to maximize your time under the stars. You have a few options here, including a remote shutter release cable, third-party acquisition software, or using the handy standalone feature on the EOS Ra mentioned above.
The EOS Ra includes a USB Type-C input connection (this is the cable you’ll want), which allows you to control the camera from your computer if desired. You can also run a sequence of exposures using a remote shutter release cable. I was delighted to see that the remote shutter cable input was the same one used on my Canon EOS Rebel DSLR’s.

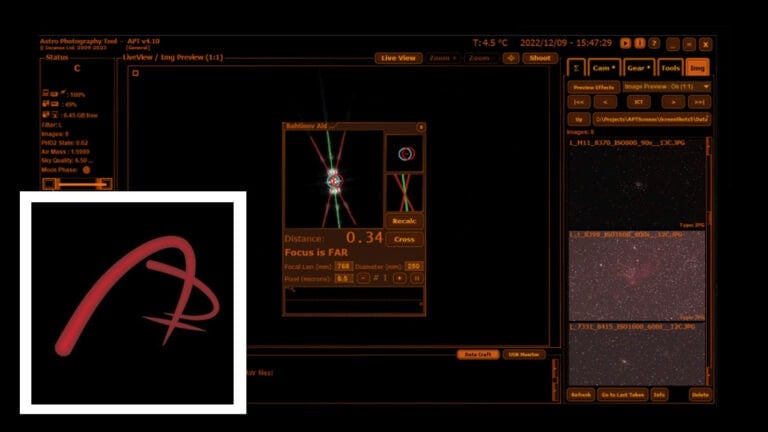
Using Astro Photography Tool (APT) to run an imaging session with the Canon EOS Ra.
For my deep-sky imaging sessions attached to a telescope, I chose to use Astro Photography Tool (APT) to run my deep-sky imaging sessions with the EOS Ra. The camera was recognized by the latest edition of APT (as a Canon EOS R), which meant I could use the software to help focus the camera and telescope, present a live-view image, and set a sequence of long-exposure images.
The CMOS sensor of the EOS Ra is so sensitive using high ISO’s, that the live-view image mirrored the experience of a dedicated astronomy camera. Dim stars, bright nebulae, and galaxies appear in real-time. This makes finding and framing deep-space targets much easier at the beginning of your session.
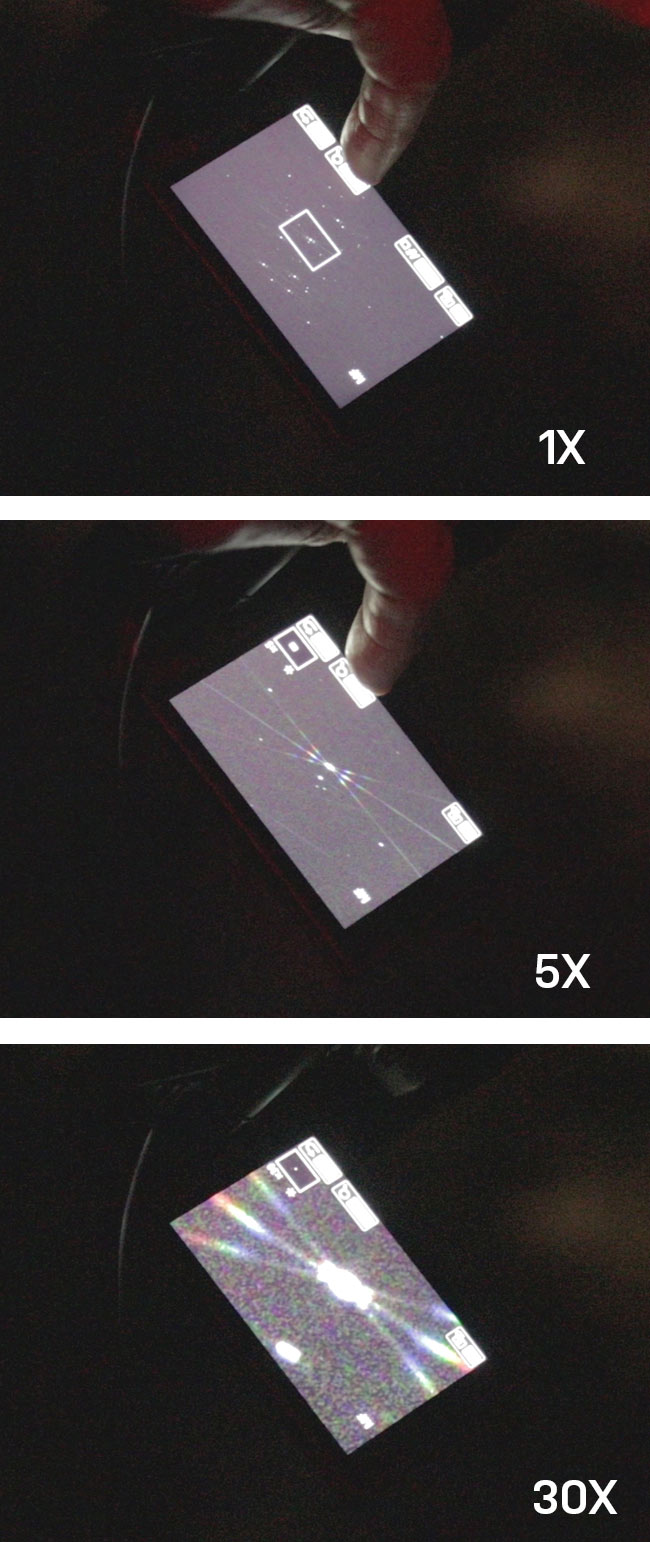
Focusing with 30X Live View
Focusing the Canon EOS Ra on dim stars is easier than with any DSLR I have used in the past. This is largely due to the new 30X live-view mode, which allows me to really look closely at how tight the stars are.
When using a Bahtinov mask, the process is even more precise as you can see the subtle changes in the central diffraction spike as you focus in and out in real-time. The vari-angle display screen makes it easy to tilt the display to a comfortable angle when the telescope is pointed upwards.
The touchscreen means that you can quickly scroll across the frame with a finger swipe to find more stars or your deep-sky target in the field. I found the focusing experience on the camera body itself to be almost as practical as feeding the information to my computer screen using camera control software.
Wide-angle nightscapes shooters or deep-sky astrophotographers running their imaging sessions on-camera will benefit most from this feature.
4K Video at 30 FPS
One of the features many people like to ignore when complaining about how expensive this camera is, is the 4K 30 fps video mode. That’s stunningly high-resolution video footage from a full-frame mirrorless sensor.
Is this feature much less likely to be used by astrophotography enthusiasts? Perhaps. Being somewhat of a videographer myself (I have filmed and edited over 100 videos on YouTube), I consider this to be an exciting option – and what I would put to good use.
In fact, I tested the Canon EOS Ra’s video abilities for some daytime filming for one of my videos. I was quite astonished to observe that the colors were not far off of a “normal-looking” scene despite having nearly 4x the sensitivity to H-Alpha over a standard EOS R.
Surely a natural color correction could be achieved in post, especially if the video is shot in a neutral/flat color profile. The EOS Ra includes a handy color temperature compensation feature that corrects the images/videos’ current white balance setting. The adjustment settings are a blue/amber bias, or magenta/green bias with 9 levels of control for each.

The Canon EOS Ra is a capable video camera with impressive options.
There are a staggering amount of video recording options on this camera, maxing out at 30P shooting in 4K (ALL-I compression). The most practical choice for my style of filming and editing is to shoot in 4K at 23.97 FPS in IPB format.
Shooting at 4K in ALL-I format demands a lot of CPU power and RAM to edit.
Attaching the EOS Ra to a Telescope
For anyone that has ever attached a DSLR camera to a telescope using a t-ring and an adapter, you’ll just need the RF to EOS R lens mount adapter to connect the Ra to a telescope.
This provides the right spacing needed between the camera sensor of the Ra and your field flattener/reducer. You simply thread your existing t-ring to the EF-EOS R adapter and attach the camera as you normally would.
This was the exact configuration I used when I attached the Canon EOS Ra to the field flattener of a William Optics Fluorostar 132 refractor. As you may be able to tell from the photo, the lens mount adapter adds the exact right amount of spacing between the CMOS sensor inside of the mirrorless camera body, and the glass element of the flattener/reducer.
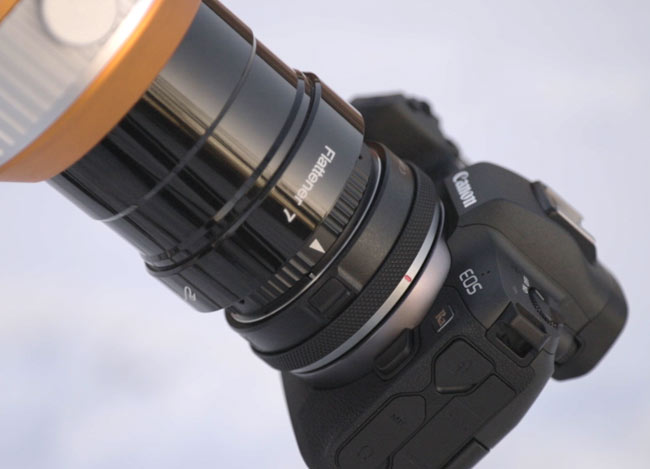
The EOS Ra attached to the field flattener of my telescope using the RF-EOS-R adapter and a Canon t-ring.
I also attached the Ra to a smaller refractor, the William Optics RedCat 51. This was a promising imaging combination for wide-field projects. This telescope offers an incredibly wide 250mm focal length and utilizes the glorious full-frame sensor of the Ra.
My favorite aspect of this setup, however, was how simple it was to put together and start imaging. This is the type of imaging kit that would be perfect for deep-sky astrophotography while traveling.
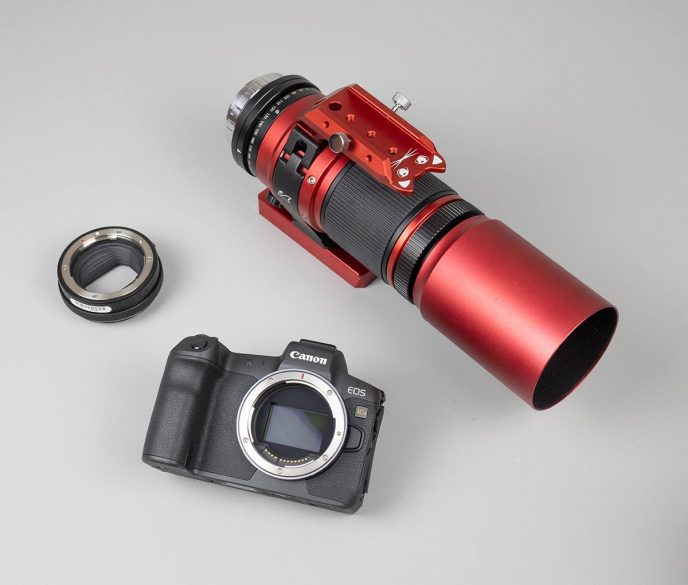
The Canon EOS Ra attaches to the RedCat 51 easily using the EF – EOS R adapter and Canon T-Ring.
Using Filters with the EOS Ra
If you are planning on using a filter with the Canon EOS Ra, there are limited options available. Astronomik offers a CLS filter (city light suppression) for the Canon EOS R (and Ra) in a clip-format. I was not aware of this broadband light pollution filter until it was brought to my attention in the comments section of this article (thank you)!
The great thing about body-mounted filters is the option of using them with a camera lens attached. It also comes in handy in telescope configurations where there is no convenient location for a threaded filter.

The Astronomik CLS XL-Clip Filter for EOS R Bodies.
For a wide variety of filter choices (such as narrowband filters), try using a 2″ round mounted filter in the t-ring adapter or field flattener if possible.
The first image I captured using this camera through a telescope did not use a filter in place of the sensor. There was no practical location for any of my 2″ filters within the imaging train.
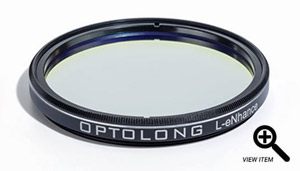
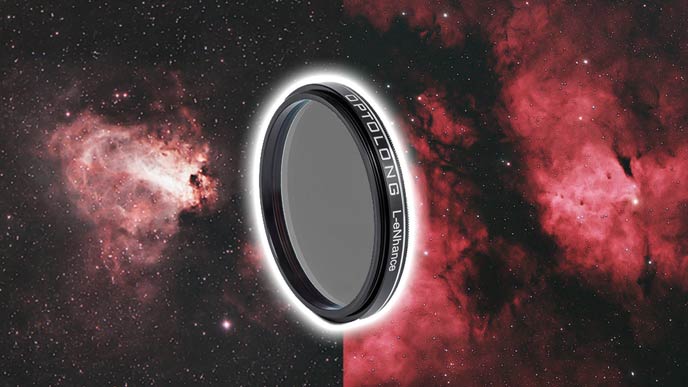
The second time around, however, I was able to thread a 48mm round mounted filter to the inside of the camera adapter of the William Optics RedCat 51 (Optolong L-eNhance).
Astrophotography Results
When it comes to testing cameras, I often get an overwhelming feeling of “imposter syndrome”. I am not a professional photographer by any means, and my test images often leave a lot of room for improvement. I partially blame the imaging conditions I shoot in, which regularly include high clouds and a lot of moisture, on a good night.
Regardless, I like to think that I make the most of my situation. The images I take from my Bortle Scale Class 6/7 backyard are a realistic example of what you can expect. Here is an image captured using the Canon EOS Ra and a small refractor telescope (William Optics RedCat 51).
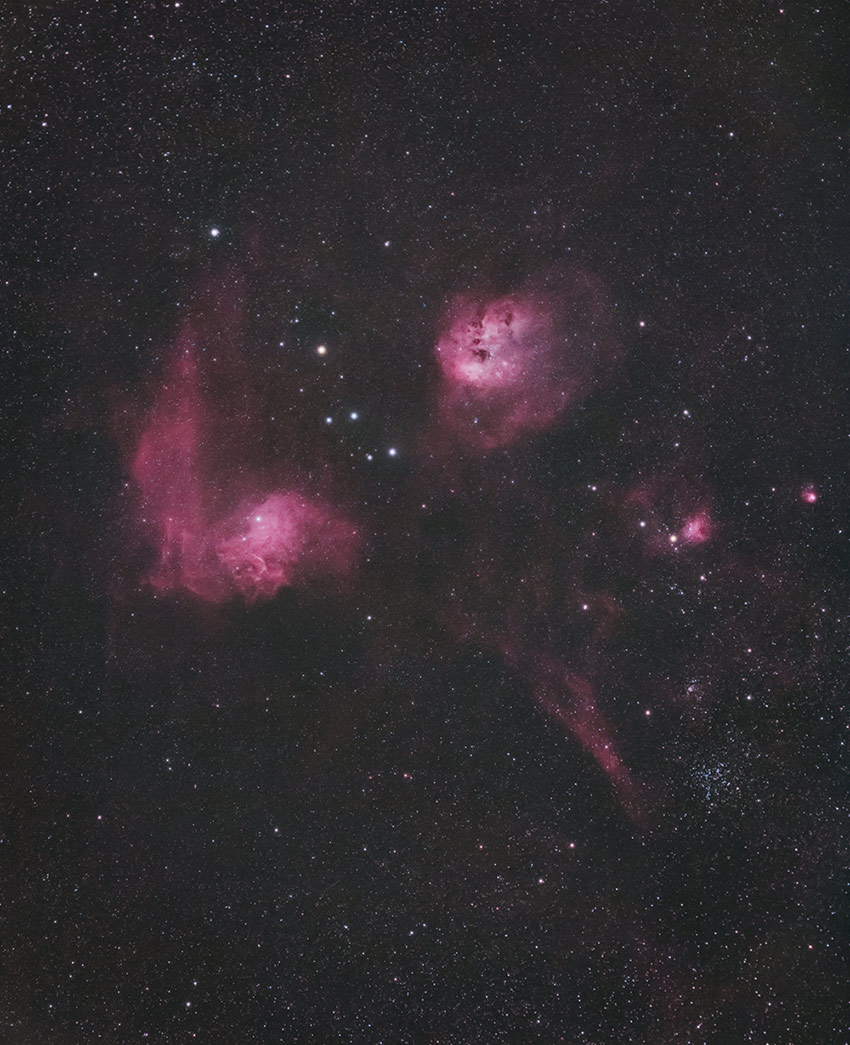
The Flaming Star Nebula and Tadpole Nebula in Auriga. Canon EOS Ra and 51mm refractor.
Image Details:
- Total Exposure: 2 Hours, 30 Minutes (50 x 3-minutes)
- ISO: 1600
- White Balance: Auto
- Filter: Optolong L-eNhance
- Telescope: William Optics RedCat 51
- Stacking and Calibration: DeepSkyStacker
- Processing: Adobe Photoshop 2020
The image of the Flaming Star Nebula region shown above was captured on a night of average seeing, with a 25% illuminated moon present. The filter used was a dual bandpass filter that helps isolates the light emitted in the hydrogen-alpha and oxygen wavelengths of the visible spectrum.
You can see this image in higher resolution on AstroBin. For a complete breakdown of the way I process my astrophotography images, consider downloading my image processing guide.
Noise Performance
It is no surprise that many people would like to know how the Canon EOS Ra handles noise, particularly when using higher ISO values of ISO 800 or more. This camera is not cooled, which means that it is subject to thermal noise due to a warm ambient temperature.
All of my testing with this camera took place during a Canadian winter, so the camera never really got above 5-10 degrees Celcius. However, even under these conditions, the noise performance seemed better than that of my Canon EOS 60Da.
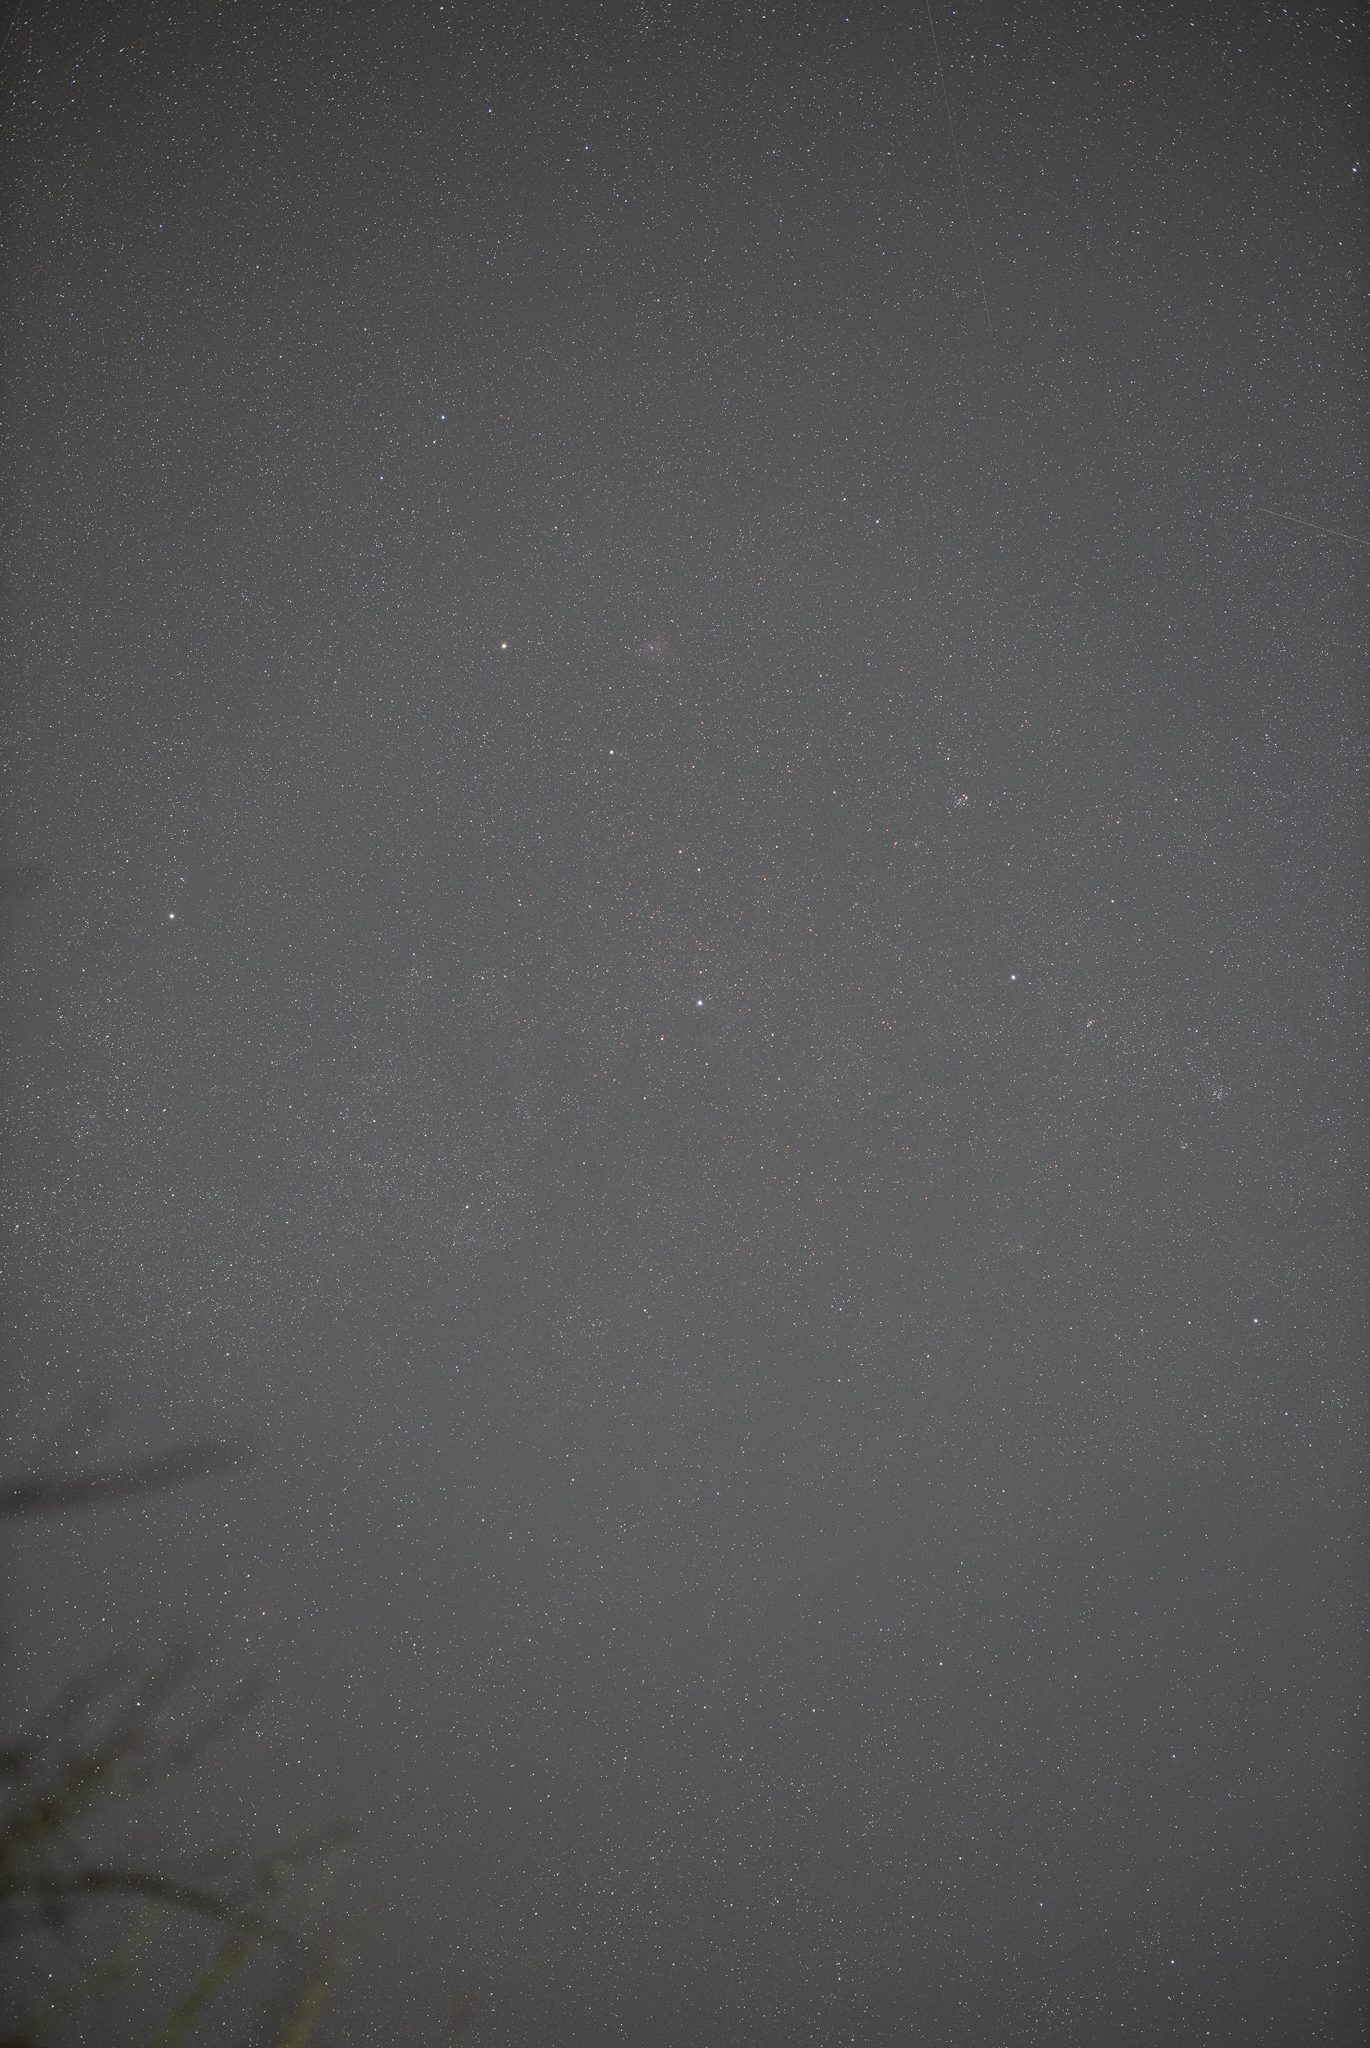
Here is a test image for you to review up close (click on the image). You’ll notice that the noise is minimal in a single 3-minute exposure at ISO 800. Furthermore, this noise is reduced significantly through image stacking.
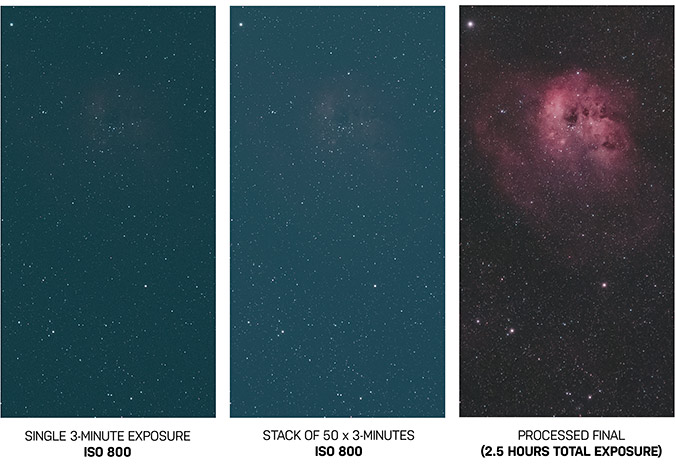
I do not see noise being a problem in the warmer months with this camera, as long as you stack your images to improve the signal to noise ratio.
Alan Dyer (in this Sky and Telescope article) reported that when using the Canon EOS Ra with higher ISO levels, it exhibits noise that is as good as, if not slightly lower than Canon’s 6D MkII (despite the 6D Mark II’s larger pixels).
Final Thoughts
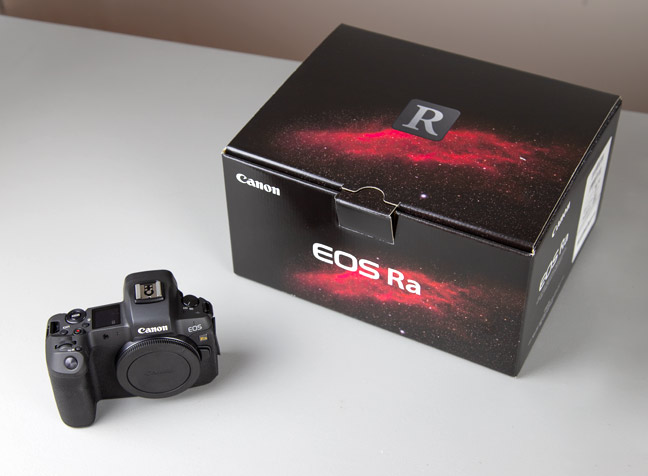
The Canon EOS Ra stole my heart from the very moment I revealed the California Nebula on the astrophotography-themed box. In the past, I have professed my love for Canon’s astrophotography cameras such as the Canon EOS 60Da.
The experience I have had with the EOS Ra was full of memorable moments under the stars. The type of astrophotography that this camera inspires reminds me of why I got into this crazy hobby in the first place.
Now, I have not experienced Nikon’s full-frame astrophotography camera (the D810A DSLR), nor have I ever used a full-frame mirrorless camera from Sony such as the popular A7. So take that for what it’s worth, this is not a detailed comparison between competing cameras in this category.
The only negative aspects of the camera I have found are that the large full-frame sensor can result in substantial vignetting with certain optical systems, and the lack of compatibility in certain software to the new .CR3 file format. If you own a telescope that does not feature an image circle designed for full-frame cameras, you will need to crop your images.
Hopefully, DeepSkyStacker will update soon with the ability to stack, register, and calibrate .CR3 RAW images. Other third-party applications will need to support this file type too, for the best overall experience with the Ra.
The Adobe DNG Converter is a great workaround for the time being, as this tool converts all of the files quickly. DeepSkyStacker accepts Raw DNG files, and you can integrate your data as you normally would.

Use the Adobe DNG Converter to create Raw files that DeepSkyStacker will recognize.
All in all, the EOS Ra is a monumental step up from Canon’s previous astrophotography inspired camera. Fans of the DSLR/Mirrorless camera experience (especially if you own existing Canon glass), will adore the EOS Ra. I purchased my Canon EOS Ra at B&H Photo Video.


What are the considerations for using the Ra for daytime photography & video?
Hey Kent, in the article I mentioned that when I tested the Ra in video mode, the footage was surprisingly “normal” looking. I bet with the right (flat) color profile and the right color grading in post – it could be a useful video camera. If I get a chance to buy this EOS Ra – that’s exactly what I’ll be doing, as this is by far the best camera for video work that I’ve ever used. The same can be said for daytime still images – it wouldn’t take much to correct the colors in post. I wouldn’t suggest it for portrait photography as skin tones are the typically the most off – but landscape and nature photos should be fine.
Hi Trevor. Great review of the EOS Ra. Can you tell me doe’s the camera have a intervolometer built in like Canons Timer Remote Controller TC-80N3 that i use on my Canon 60Da so that i could do say a 5sec self timer then do a 2min exp with 5sec between each exp with 36 frames. So that the TC-80N3 is not hanging loose from the camera.
Hi,
Very interesting review.
I really appreciate the effort of canon producing a specific item for astrophotography. The lenses seem very good as well.
Have you tried it during the day time? It seems the white balance is not adapted for it (I say that from images seen on the canon site).
Do you have more info about the cmos sensor? Is it back illuminated? What the QE…? No advanced cooling system like pelletier? Is it ISO invariant?
Thx for the review.
P.S. : have you tried Siril(www.siril.org) instead of DSS ?
Update : just read your answer about the daytime usage ^^ Thx
Hi Trevor,
There are already clip filters for Canon EOS R:
https://www.astronomik.com/en/news/astronomik-xl-clip-for-eos-r-and-rp
Trevor, I have the EOS R, and have found that Astronomik now has clip-in filters specifically for the Canon RF mount.
FWIW I have a 1D Mark IV and got my Ra just before the holidays. I used the Ra over the break for all my holiday snaps. The AF features, weight reduction, and video quality are all huge improvements. The colours were good enough, after correction in post, that my Mark IV is watching from the sidelines, dejected, but if I had to shoot paying gigs, I would get an R and not try to cheat with the Ra. The Ra’s red channel is definitely excitable. Skin tones look salmony especially under incandescent. I have a green sweater that looks brown. (Will some foliage do this?) And the red cardinal in front of the red bird feeder…well they both look fluorescent! At the moment my fix for stills is a Photoshop action that adds a Hue/Saturation layer with the Reds set to Saturation +40 and Lightness -50. I then adjust the layer opacity to taste. It’s working for me. YMMV. I have not yet worked out a correction for FCP-X. Now if only I could get some clear nights to use the Ra for what I actually bought it for! 😀
$2600 will buy a lot of nice Astrophotography equipment. Buy a used Nikon d810 for $900, have it astromodified for a few hundred dollars and spend the remaining $1300 on a nice William optics triplet.
Hi Trevor,
Any thoughts on using Canon EOS M50 or M100 or M200 (all of them Mirrorless) for Astrophotography. The EOS R body itself costs around Rs. 165000 (INR) (around USD 2322) in India, not seeing the Ra around anywhere online in India. Have been using my old Nikon D50 for astro as well and want to upgrade to a more recent one.
Matthieu,
I do not have the Ra (yet), but from other forums, it appears that both the R and Ra DO NOT have the built-in intervalometer that the Canon 6Dii and some other new models have. Quite disappointing! Seems like that would have been a NO-BRAINER for an Astro Camera. But you can still use an external computer (via USB-C) or external intervalometer to sequence your images.
Jim in Boulder
Trevor –
One thing I noticed when testing the Ra is the significant amount of noise on the view screen when focusing at 30x. I don’t see any at all at 10x on other Canon models like the 5D or 6D. It appears you experienced the same from your set of focusing photos. I haven’t found any settings that reduce it (so far). Maybe Canon can fix this with a firmware update in the future.
About the CR3 issue…
I have read that libraw has a beta version with CR3 support and that the DSS author is waiting for it to be officially released. (And time for him to incorporate it an upcoming DSS release, of course.)
Further, a shout-out for Adobe’s DNG Converter as an alternative to Canon DPP for use as a CR3 workaround. DNG Converter is very fast and DNG files are supported by DSS. It’s what I’ve been using for my Ra files.
Clear skies!
About Ra AF…
I was pleasantly surprised by the sensitivity of the AF…my quick surmise is that I am able to AF on a single star down to about mag 5! Going from memory there though, and another important caveat is that I’m controlling the camera remotely (over USB) so no camera shake during AF, but I would encourage people to try it out. It helps me focus faster than hunting in micro steps.
Hi Trevor, can you post a single 2-5 min exposure from this camera instead of a processed image? Thanks!
do you use Control Ring Mount Adapter EF-EOS R or Mount Adapter EF-EOS R
Hi Trevor
Happy new year!
Thanks for the review on the EOS RA
I just pulled the trigger on buying the camera!
If all goes well , should have it by end of the week.
Support for the camera has definitely increased among a number of software and hardware suppliers which helped me make the decision.
This will give me a new set of images to test your image processing guide steps. ( very helpful by the way)
By the way I purchased mine from B&H Photo also.. maybe you can get some freebies for spreading their name?😏
I wonder if you might respond on any questions I might have using the camera?
Really looking forward to using this camera at the National parks (arches and yellowstone) with my star adventurer pro , ASIAIR pro, setup when we visit the daughter in that area.
Take care and stay safe.
How many radians of optical resolution could one expect from a ~10k setup of telescope and camera?
Hi Trevor, doesn’t the adapter for the RF body create a back focus issue when using EF lenses, such that the stars will look egg-shaped or like tear drops as you get away from the center of the image and toward the the edges of the frame?
Hi Trevor,
I have just purchased the EOS RP ( couldn’t afford the RA ) If I add the Canon EF – R adapter will that increase my backfocus distance?
Will it effect my imaging when attached to my Celestron 5se or the 8” Edge HD?
Thank you.
Hey Steve. The EF-R adapter will actually provide you with the same backfocus as a regular DSLR body in terms of the distance to the sensor. Quite convenient as many of these scopes have instructions for the correct spacing of a DSLR! Hope this helps.