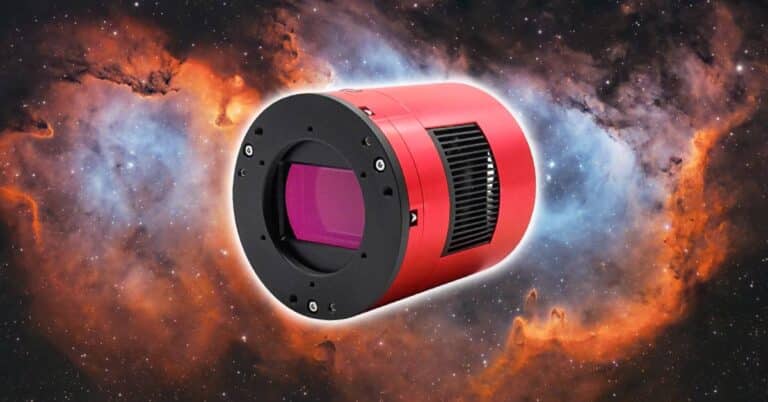
ZWO ASI533MC Pro Review

The ZWO ASI533MC Pro is a one-shot-color (OSC) dedicated astronomy camera designed for deep-sky astrophotography.
Over the past eight years, I have had the pleasure of testing many astrophotography cameras, from entry-level DSLRs to cooled, monochrome CCDs.
The camera you choose for astrophotography will determine the types of subjects in the night sky that you will photograph.
In the case of the ZWO ASI533MC Pro, the subjects will likely include deep-sky objects, including large nebulae.
ZWO contacted me directly with an opportunity to test an early version of the ASI533MC Pro.
I initially thought it would be strikingly similar to my previous color astronomy camera, but as I reviewed the data more thoroughly, the subtle differences became evident.
Previously, I have enjoyed using the ZWO ASI294MC Pro, and took some of my best astrophotography images to date with it. This camera is also offered in a monochrome version (ASI533MM Pro).

In this article, I will do my best to share real results using this astrophotography camera from my backyard in the city.
The images shared on this page were captured using a 100mm refractor (Sky-Watcher Esprit 100 APO) riding on an equatorial telescope mount.
My backyard is classified as a class 6/7 on the Bortle Scale, which is considerably light-polluted. I rely on filters to photograph objects in space from the comfort of my home.
If you find this article useful, please consider signing up for my newsletter to get notified when I share new articles.

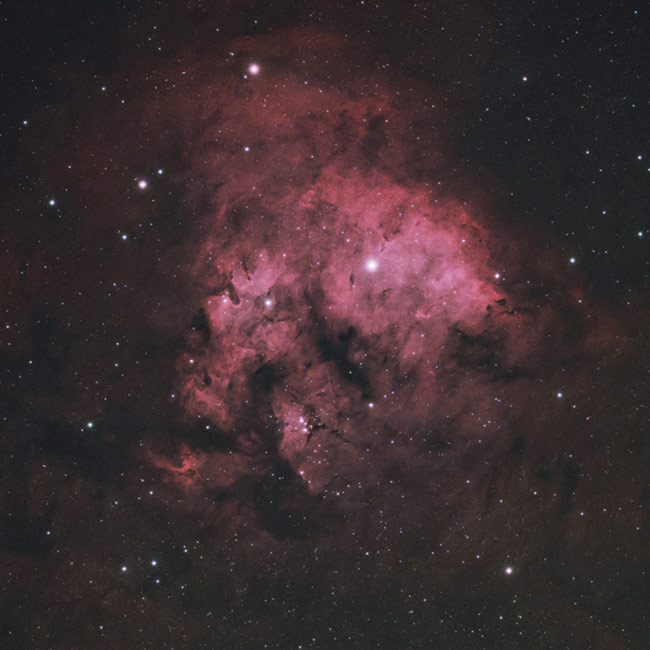
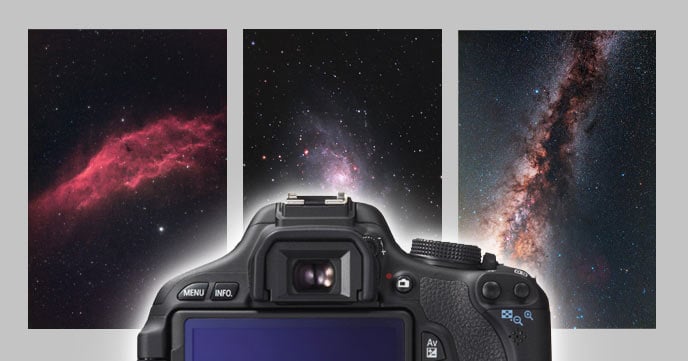
Images captured using the ASI533MC Pro.
The ZWO ASI533MC Pro
The ASI533MC Pro is ZWO’s latest OSC camera, equipped with a 9MP Sony IMX533 CMOS sensor. This camera sensor is quite different from the one in the ASI294 I am used to.
This is a 1″ square (11.1mm x 11.1mm) format with a 3008 x 3008-pixel resolution. The pixel size is 3.76um, which determines the pixel scale you can expect to realize with your imaging system.

There are several key differences between a dedicated astronomy camera and a DSLR or Mirrorless camera. The biggest one is cooling.
This ZWO ASI533MC Pro has a built-in TEC (thermoelectric cooler) that requires a 12V power source. This allows the sensor to reach as much as -35 Celsius below the ambient temperature.
This can dramatically reduce the amount of noise recorded in your images. You’ll know why this feature is so important if you have tried to take a long exposure image using a high ISO with your DSLR on a hot summer night.
Another big difference between a dedicated astronomy camera and a DSLR/Mirrorless system is the back-illuminated CMOS sensor. This design is standard in astronomy cameras because it can improve sensitivity and reduce noise.
Video
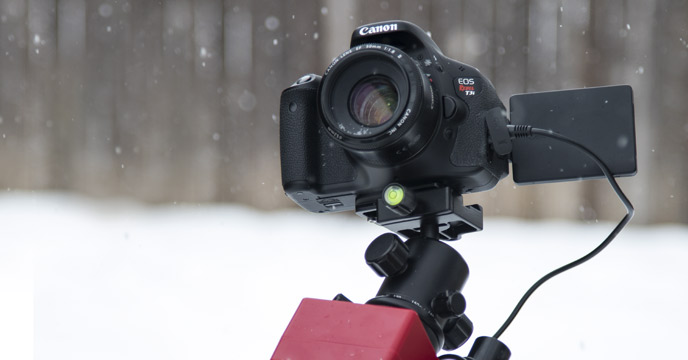
If you would like to see how I have the camera connected to my telescope and get an inside look at my first run with the ZWO ASI533MC Pro, please watch the following video:
Based on the comments for this video, a lot of people wanted to see a comparison between the ASI533MC Pro and the ASI294MC Pro I was previously using.
For the most useful comparison, I will need to shoot the same target (Horsehead Nebula) using the ASI533MC Pro without the APEX 0.65 reducer.
Unfortunately, I have not had another clear night to test this configuration, but the Stellarium sensor view diagrams further down this article should help.
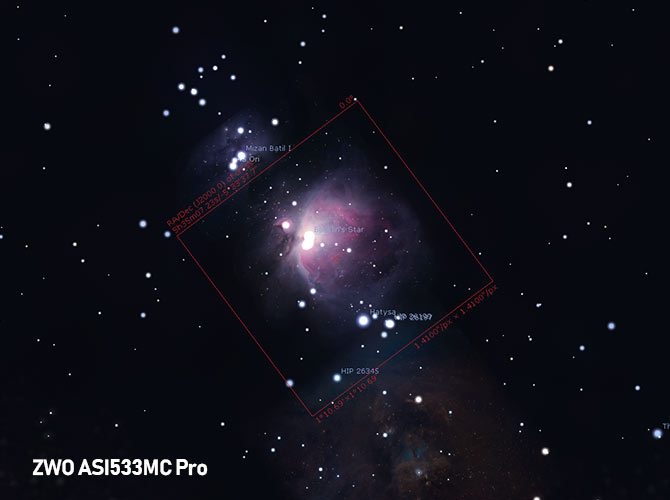
I have put together the following comparison graphic with an overlay of the native field of view you can expect with the 533 sensor.

The 533MC Pro’s sensor size and resolution make it an attractive choice for amateur astrophotographers who wish to photograph mid-size deep-sky objects with refractors in the 400-600mm range.
ASI553MC Pro vs. ASI294MC Pro
One key difference between the ASI533MC Pro and the ASI294MC Pro is that the 533 has zero amp glow. I was very comfortable seeing amp glow in my light frames on the 294, as they were a cinch to remove using calibration frames.
However, the topic of amp glow seems to come up more than I would have expected in the astrophotography community, so it is obviously an issue for some imagers.
I won’t go into detail about all of this camera’s specifications, partly because you can discover all of these details yourself on the ASI533MC Pro product page and partly because I am incapable of providing an intelligent description of why 14bit ADC is important.
For convenience, I have included the handy spec breakdown graphic ZWO puts together for all of their CMOS astrophotography cameras.

This camera shares some similar qualities to the ASI183MC Pro, with the biggest (noticeable) differences being in resolution, sensor shape, and read noise.
ZWO has shared a comparison chart between the ASI183MC (and Mono) and the ASI533MC Pro on their website.
I did not notice an obvious improvement in read noise between the ASI533MC Pro and the ASI294MC Pro, but I did notice that the amp glow was completely gone.
I always use dark frame calibration in the stacking process to help create an image with a stronger signal-to-noise ratio (SNR), so I do not pay much attention to the noise present in the individual light frames.
Connecting the Camera
For my testing, I controlled the camera using Astro Photography Tool (APT). Before connecting the camera using APT, I downloaded the necessary drivers to run the camera on my computer from the ZWO website. This includes the updated ASI ASCOM driver, which was due for an update since the last time I ran through this process.
After connected the camera in APT, I set the Gain and Offset settings to Unity Gain, a setting I have found to work best for my sky conditions and the filters I use most often.

Controlling the ZWO ASI533MC Pro using Astro Photography Tool.
It was strange to see a completely square preview image out of this ZWO camera after using the 4/3″ sensor ASI294MC Pro for so long.
The camera cooled very quickly, and the 256MB DDR3 buffer ensured that my live-view text exposures appeared on the screen for framing and focusing. I usually use a 5-second loop when finding and framing my deep-sky target.
With the duo-bandpass filter in place, objects that glow with hydrogen gas jump off the screen in a short exposure. This makes framing your subject much easier if you are not utilizing plate solving to set up your imaging plan.
Image Scale and Resolution
The aspects of this camera that I can appreciate and understand are the image scale and resolution. The pixel size of the AS533MC Pro can (in theory) create higher-resolution images of nebulae and galaxies than I was used to with the ASI294MC Pro.
The field of view using my refractors has changed significantly as well. Take a look at the image comparisons created in Stellarium with the sensor sizes of the 533 and 294 entered in.
Here is a look at the native FOV you can expect using the ZWO ASI533MC Pro with a Sky-Watcher Esprit 100 APO refractor:
The field of view using the ASI533 with a 550mm focal length refractor.
Now, here is the same target, using the same telescope, but using the ZWO ASI294MC Pro:

The field of view using the ASI294 with a 550mm focal length refractor.
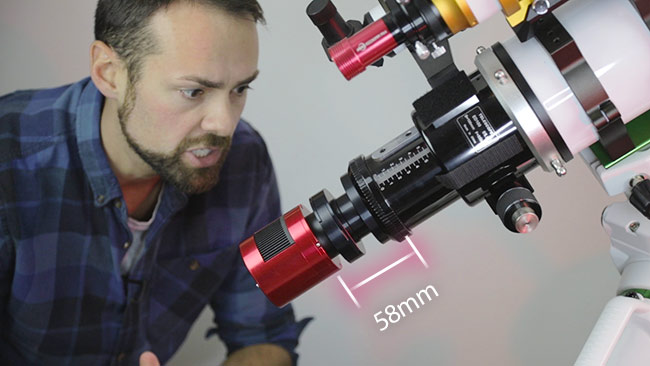
The backspacing diagram on the ZWO website lists that the camera sensor is to be 55mm from the sensor to the field flattener. For the APEX 0.65X reducer/flattener I was using, this distance increased to 58mm as directed by Starizona.
This is a specific distance recommended for this particular telescope and reducer combination. In most cases, stick with the listed 55mm of back focus for your camera.
It was very easy to create this spacing using the included 11mm ring on the ASI533MC Pro, the Starizona adapter and the filter slider drawer.
First Impressions
It seems as though ZWO really wants you to try this camera out with a dual-bandpass narrowband filter, as they are currently (at the time of writing) including a duo-band filter with the camera.
I was not sent the ZWO duo-band filter and opted to use the Optolong L-eNhance filter with this camera in the backyard. Dual-bandpass narrowband imaging with a color camera has quickly become one of my favorite ways to photograph the night sky from the city.
I chose two targets to photograph using the ASI533MC Pro, the Horsehead Nebula and Flame Nebula in Orion, and NGC 7822 in Cepheus. My first night out with the ASI533MC Pro was very cloudy for most of the night. I ended up with just 13 x 4-minute sub-exposures on my target.
This is not enough integration time for a quality astrophoto, but it did give me a great idea of the image scale of this IMX533 sensor.

13 x 4-minutes (52-minutes total exposure) at Unity Gain using the ZWO ASI533MC Pro.
In this image, I simply did not have enough signal to take a fair look at the data. Two nights later, however, I was able to collect a healthy amount of light on another nebula target, NGC 7822.
This time, I shot 30 x 5-minute exposures (again, at Unity Gain) for a grand total of 2.5 hours in one-shot-color. Dark frame subtraction was applied to improve the signal-to-noise ratio of the stacked image, and I was finally able to see what the ASI533MC Pro could really do.
The following image was captured through the same telescope system shown in my video, including the Starizona APEX 0.65 reducer.
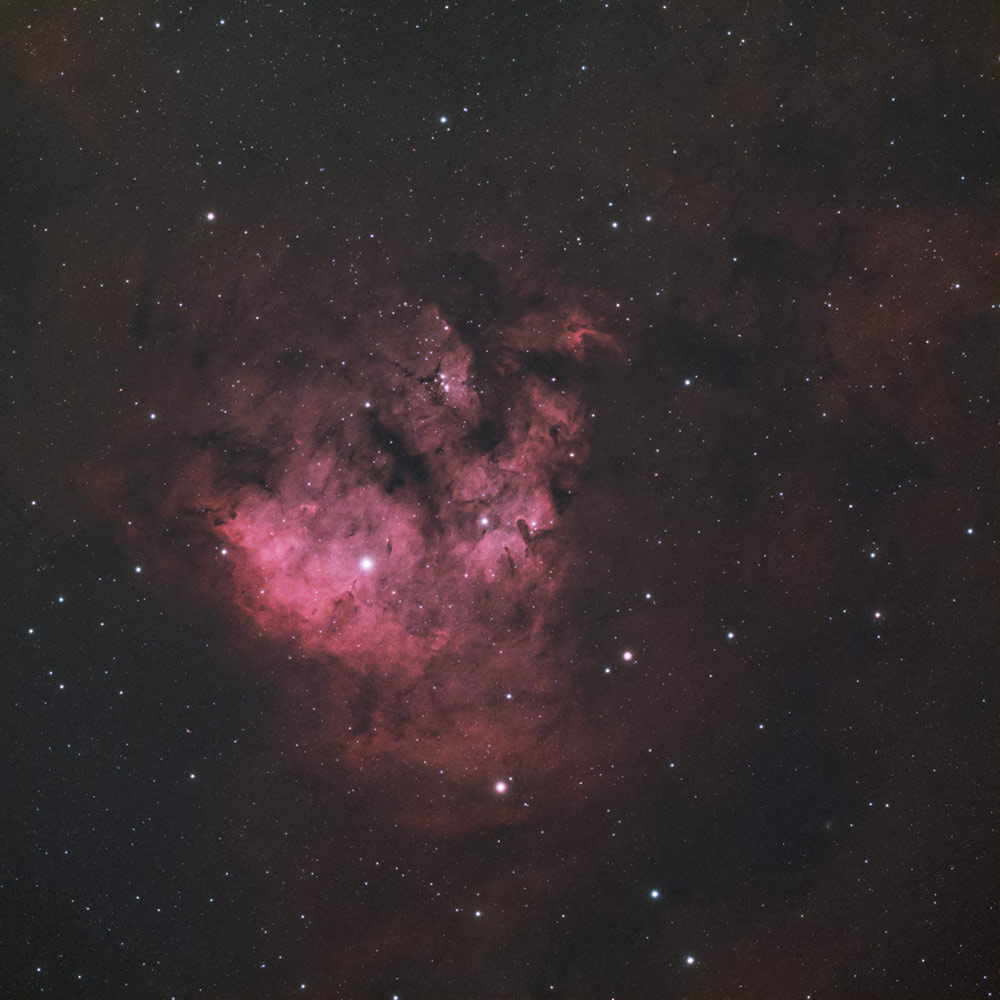
30 x 5-minutes (2.5 hours total exposure) at Unity Gain using the ZWO ASI533MC Pro.
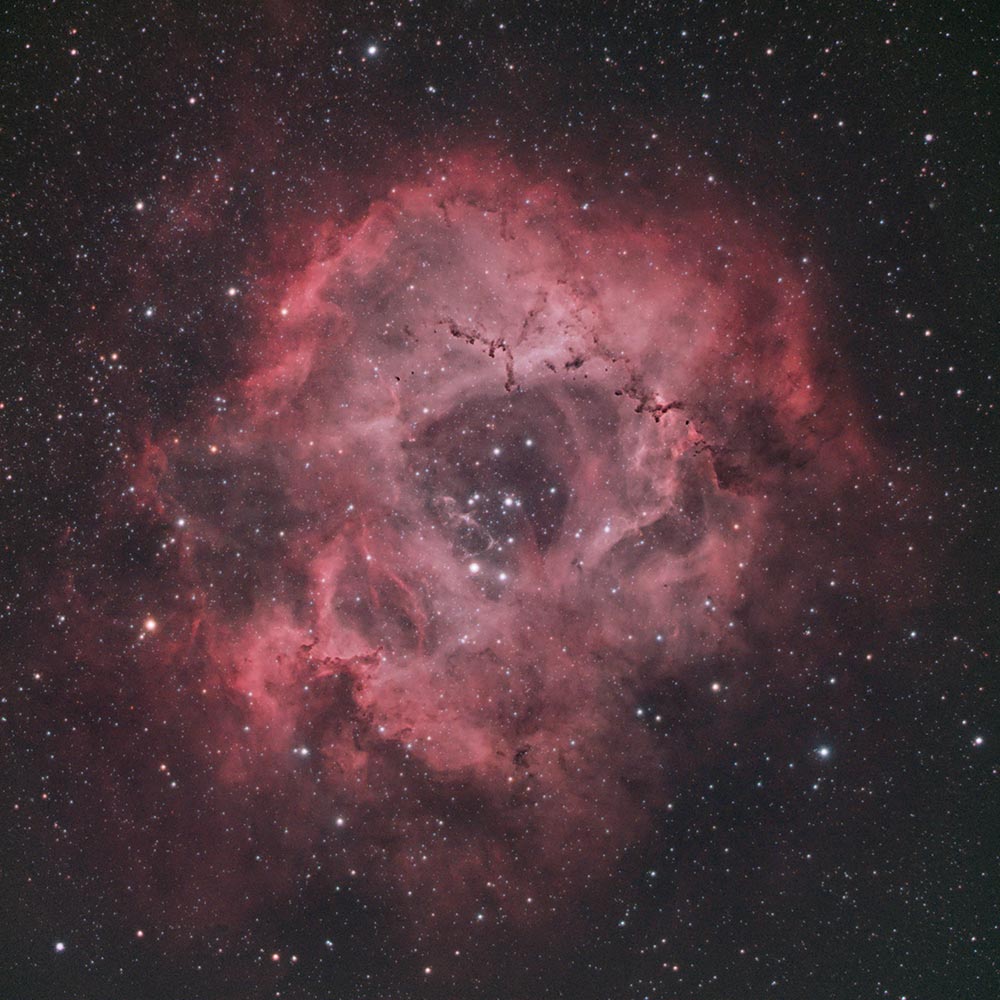
The Rosette Nebula (11 x 5-minutes) at Unity Gain using the ZWO ASI533MC Pro.
As I mentioned earlier, one of the key differences between the ASI533 and ASI294 is the resolution. The pixel scale using my optical system has changed due to the smaller pixels (3.76 um) on the ASI533MC Pro sensor.
To my surprise, I did see a noticeable difference in resolution in the images taken using the ASI533MC Pro. It is difficult to illustrate this in an image shown on my website, but the added resolution became obvious as I spent time processing the image of NGC 7822 up-close.
I believe that the image of the red-channel (with 25% green mixed in for dynamic range) illustrates the impressive resolution of this camera.

The resolution of the ASI533MC Pro was impressive using my optical system.
I am excited to try this camera on the Rosette Nebula in the coming months. The field of view (with the 0.65 reducer in place) looks to be a perfect fit for this object.
Who This Camera is For
As with most dedicated astronomy cameras, the overall practicality of the ASI533MC pro will depend on the optical system you plan on using it with. For those of you that shoot with wide-field refractors as I often do, I think you will be pleasantly surprised with the quality of the data you collect.
With the 550mm focal length of Sky-Watcher Esprit 100 APO, the field of view and pixel scale was a good fit. Now, as many have pointed out, I changed the native pixel scale of this telescope by using the Starizona APEX 0.65 reducer.
If you are unfamiliar with the pixel scale formula, here it is:
pixel size (3.76) / focal length (550) x 206 = 1.4
With the Starizona 0.65X Reducer:
pixel size (3.76) / focal length (550) x 206 = 2.16
In the amateur astrophotography community, a general rule of thumb is to use a pixel scale that is between 1.0 to 2.0 to be “well-sampled”. This is simply a rough guideline and should not be taken too literally.
Using this guideline, the pixel scale of the Esprit 100 + 0.65 means that my images are under-sampled (blocky). If the image looks too blocky for you (see the full-res version on Astrobin), then perhaps this camera is not a good fit for you. Me? I think it’s just right.
The image of NGC 7822 shown below was particularly exciting for me to process. This is partly because it is a new deep-sky object for me, but also because I noticed an increase in image resolution from the images captured using the 294MC Pro.
ZWO ASI533MC Pro Camera Specs:
- Sensor: 1″ SONY IMX533 CMOS
- Diagonal: 11.3mm x 11.3mm
- Resolution: 9 Mega Pixels (3008 x 3008)
- Pixel Size: 3.76µm
- Bayer Pattern: RGGB
- ADC:14bit
- DDRIII Buffer: 256MB
- Cooling: -35C below ambient
- Read Noise: 1.0e
- Full Well: 50000e
- QE: 80%

Great article, Trevor! I recently received my ASI183MC camera which I hope will be ideal (small pixel size) for the Redcat 51. So far, the Minnesota weather has not yielded any clear nights.
Keep up the awesome work. I look forward to every article and YouTube video you release.
Nice review Trevor! What do you think of the square image format? Some objects are just right for it, where other objects might be cut short due to this (or a wider field must make up for it).
Clear skies.
The ASI 183 MC/MM Pro resolution of 5496*3672px is far away from being square.
Why are you angry with your backspacing? 🤣
LOL – I do look rather angry there. Only took me 3 years to get it.
Hello Trevor,
Thanks a ton for this video. I am currently on the fence with ASI294MC Pro and ASI533MC Pro (coming from DSLR imaging).
The second pixel scale formula on this page should read:
pixel size (3.76) / focal length (550 x 0.65) x 206 = 2.16
Cheers from warmer Okinawa,
Robert
Trevor, could you help me understand this? You mention and also ZWO lists it as a 1 inch diagonal sensor. However a search shows “The IMX533CQK is a diagonal 15.968 mm (Type 1) CMOS image sensor with a color square pixel array and approximately 9.07 M effective pixels.” How do the two things add up?
Look at the ZWO product description for the ASI294MC Pro where you can see it listed as a 4/3″ sensor (calc as 33.86mm diagonal) with an actual diagonal of 23.2mm on the drawing. IIRC harks back to when Cathode Ray Tubes were only able to show a smaller subset image than their physical diameter.
As an inexperienced dweeb, I appreciate your videos and try to learn something.
I have the RASA 8 on the way, which you reviewed using your trusty ASI 294 MC Pro. So I tried to purchase that camera, but it’s not presently available.
One guy somewhere in China has commented that the “new” ASI 533 reviewed above, with its 1 inch sensor, is actually a better fit for the RASA 8 than the 294. ??
Aside: I don’t know how you are able to do these professional videos, which must be very time consuming, and still stay up all night with a telescope. You definitely have a full time job doing all this. Hopefully you will eventually earn enough to get the new place in SE New Mexico with the permanent observatory and pier.
Hi Trevor,
Love your videos, they’ve helped me get back into astrophotography. I’ve been using a DSLR with a Borg 76ED, but Santa brought me a Pentax SDUFII f/4 refractor and I’m about to receive a ASI 533MC pro – so this video was particularly welcome at this moment. Question: How do you process your images? It’d be great to see a workflow from you, as the 533 is my first color CMOS camera. I used a SBIG ST2000XM in the day for monochrome images that I used to measure double stars (serious fun!) and now I’d like to hunt some DSOs.
Keep up the good work!
Nice review. Finally, we have a decent sized square format sensor. This is the most efficient use of space on an image circle, short of a round sensor. Also makes the process of selecting a reducer or corrector much more easy. This was the professional format for decades, before the digital camera revolution.
Hello Trevor,
I would much appreciate your advise for a question relative to travel mounts.
I currently use a SAM (SW SA mini) and can’t exposure longer than 20′ with a 300mm Nikon lens (with counterweights, good polar alignment and sound 3pod). I thought to upgrade to a SA adventurer in a first time, then get a guiding system, with a total cost of at least 600-800 euros.
Now I came back to your review on the Fornax mount and noted 1. that the exposure time with the Fornax is rather close to what people obtain with the guided SA (astrobin search) 2. your main concern with the fornax was the need to join a 12v power source, which limited the portability of the whole system, thus being less travel-friendly than the other travel mounts.
However I guess this drawback is much less important now since light and small 12v 20Ah batteries have recently appeared on the market. I already got one.
With this caveat out of the way, and for roughly the same price, would you still recommend a guided SA or ioptron starguider against the Fornax?
Having to reset the mount every 1h1/2 is not a big deal for me and with no guiding accessories (scope, camera, command box + cables), the whole system using the Fornax seems more straightforward. The reported Fornax very good build quality is also a plus and there is also the possibility to add a guiding system later on, though my current main goal is to find the lightest and simplest equipment possible for the best results on DSO’s.
Thanks & regards
francis
Hi Trevor,
Do you think that the ASI533mc will be a good match with my Celestron C8 with 6.3 reducer ??
If not which ZWO camera in the same price range would you suggest ??
Kevin Rea
Lancaster California USA
Hi Kevin,
I just bought the ASI533 last week and have imaged a few targets with various scopes… the one that comes the closest to your C8 would be my 10″RC with a FL of 2000mm. Here’s a link to M27 that I shot last night with it: https://www.astrobin.com/full/rth7v2/0/
Hi Kevin,
On your 10″ rc, do you have a focal reducer ??
Kevin Rea
Lancaster California
Hi Trevor,
Great article.
Thanks.
Currently I shoot with a Nikon D750 attached to a Tamron 150-600(G1).
I am planning to purchase a cooled camera, I wonder if the 533 will be a good choice to attach to this lens.
Thanks.
Hello
I have a 72mm F/6 with a FL of 430mm. In comparing the ASI533 vs ASI183 the Pixel Scale calculation yielded 1.8 and 1.14 respectively.
Based on (ASI533 = 1.8 ASI183 = 1.14) and/or other important factors I may not be considering, which camera would you recommend?
I do live in a light polluted area similar to you. Thank you for your wonderful content, it is much appreciated.
Hi Trevor,
I been following your YouTube channel for quite a while and I enjoy it a lot.
Yesterday my ASI533 arrived and I want to use it with my NIKON 70-200.
I have the Nikon to T2 adapter and I wonder how many spacers I have to use to get infinite focus.
Thanks
Would the ASI533MC be a good camera for my SCT 8″ OTA? I’m trying to stay at or just below $1000 for a camera and this seems to be a good option.
Excelente articulo y hermosas fotos!!!, que ganancia y offset utilizas con la asi533?
Would this camera, ZWO ASI533MC Pro, also be good for planetary photography with a 100 mm scope – like the Askar PHQ 107 – Which I like very much. I would like a color camera that would work for both deep sky and planetary use.
Although I think it will take getting use to the square image.
Thanks,
Jay
How does an 11.1 mm x 11.1 mm (16mm diagonal) = 1″ sensor since 1″ = 25.4mm?
What can I expect using this on my Meade 10″ SCT? I haven’t tried astrophotography yet, would I be taking on too much by getting this? Thanks