Remove Gradients in Your Astrophotos with Photoshop
Adobe Photoshop is the preferred image processing software of choice for many astrophotographers of varying levels of experience. The intuitive user interface and limitless image processing capabilities make it a real contender in the astrophotography world.
The seamless integration with the .RAW image files produced by a Digital Camera make Photoshop an attractive choice for photographers using popular Canon and Nikon DSLR’s.
I have included a section on gradient removal in my premium astrophotography image processing guide for those interested.
It continues to be my personal favorite tool for processing astrophotography images.
 Whether you are brand new to astrophotography image processing, or a seasoned veteran, an uneven field in your image is something that every astrophotographer will deal with at some point.
The steps I will discuss below can be done in Photoshop without using any additional plugins. However, I strongly recommend investing in the Astronomy Tools Action Set, and Gradient Xterminator. They are well worth the expense and can make a monumental difference to your images.
This Photoshop tutorial involves the following:
- Assessing your uneven field
- Removing the DSO from your image
- Creating a synthetic flat frame
- Subtracting the flat frame from your image
An Effective Photoshop Technique for Removing Gradients
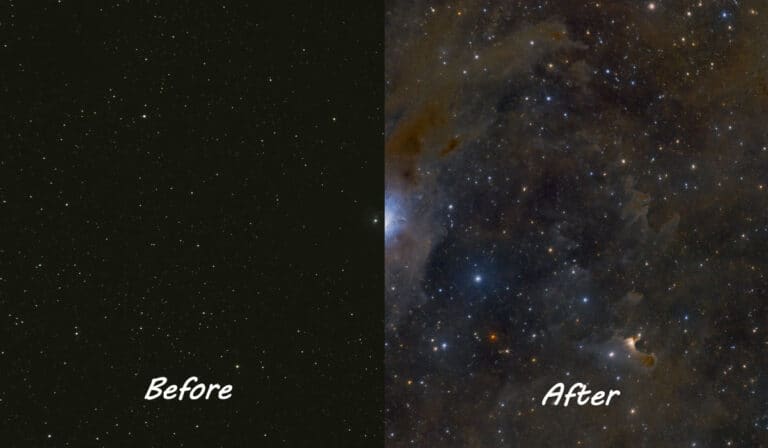
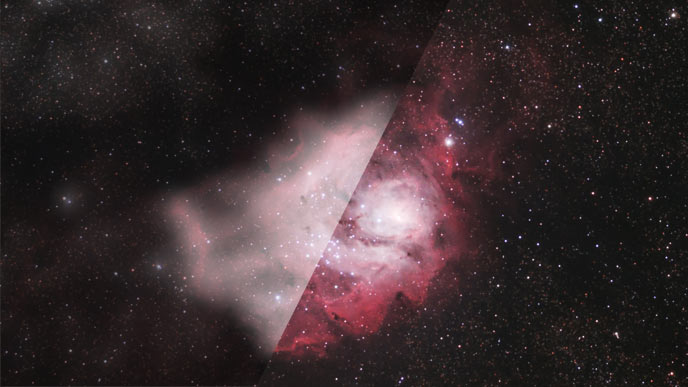
One of the most time consuming and frustrating stages of your image processing workflow can be dealing with gradients. Your background sky goes from a dark blue to pink as the encroaching glow of city light pollution stains your image. Luckily, there is an extremely useful and effective method for removing gradients using Photoshop.
This method involves creating a synthetic flat frame and subtracting it from your original image.
Quickly correct your uneven field
The method you’ll see me use in the video below is a very popular way to remove gradients using Photoshop. Variations of this technique have been used by amateur astrophotographers for years. I do not take credit for this method. Like almost everything else I have learned about this hobby, I picked this up by watching and reading countless image processing tutorials shared by others.
Video: How to Remove Gradients in Photoshop:
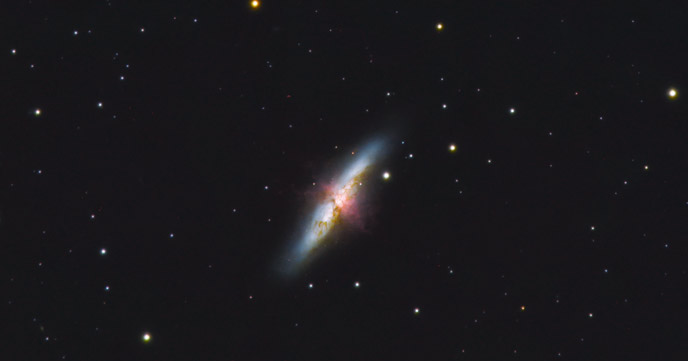
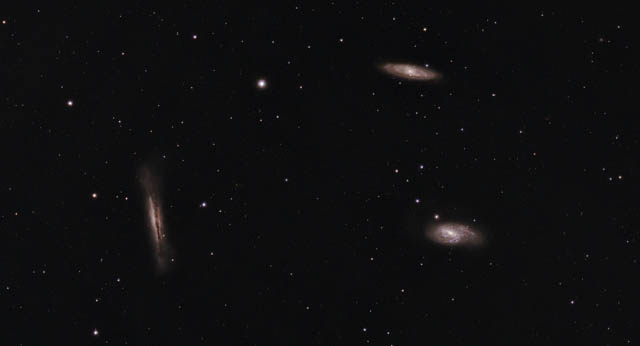
This technique works better on some deep-sky images better than others. Large targets such as nebulae that fill the entire frame will be difficult to tackle using this process. In my example, the Leo Triplet of galaxies worked very well, as they are surrounded by a large area of surrounding space.
Assessing the Data
- Start by opening up your final stacked image. I use DeepSkyStacker to register and stack all of my image frames.
- Crop your image to remove the stacking artifacts and overlapping frames.
- Convert the image from 32bit to 16 bit, to open up further editing options in Photoshop.
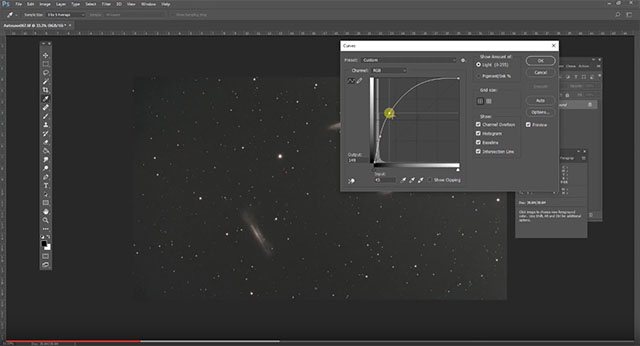
- Perform a quick levels adjustment, bringing the left-hand slider up against the data on the histogram.
- Make a curves adjustment, pulling the details contained in your deep-sky object forward.
- By now, you should have a good idea of how bad the vignetting and color gradients are in your image.
Removing the DSO from the image
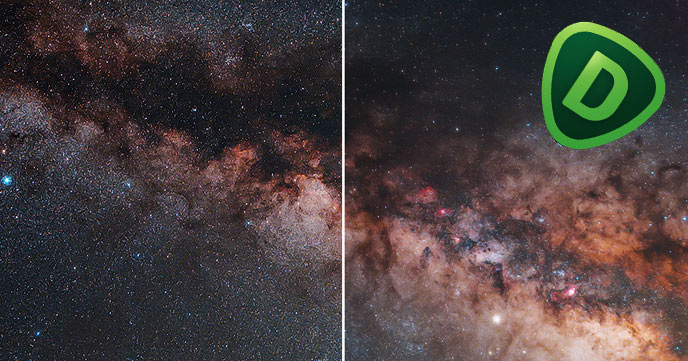
Now comes the fun part. This is where you either have the option of running a third-party plugin such as Gradient XTerminator or tackling the issue yourself. It’s beneficial to learn this method of removing gradients in photoshop for all types of astrophotography including wide field Milky Way shots.
- First, copy your original image layer and paste it on top. Name it “Gradients”
- Copy this layer to a new image. Select All > Copy > File > New > Paste.
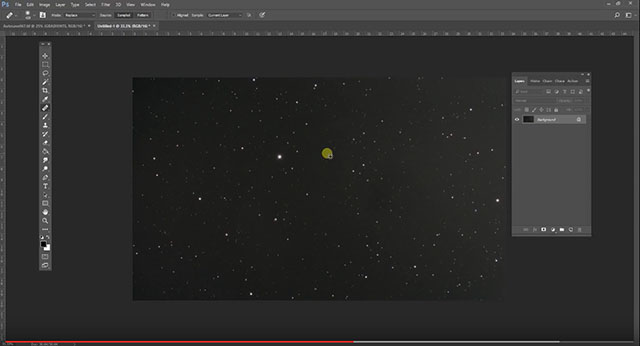
- On the new image that was just pasted, remove the deep-sky objects from the field of view.
This can be done in various ways, but I prefer to use the healing brush. The important part to remember is that we are only interested in the color information of the background sky. We don’t want to change the data found in the deep-sky objects themselves. See this in action in the video above.
Creating a Synthetic Flat Frame
Now that we have a version of our image without our deep-sky object(s), we can correct the uneven field in the background sky. At this point, you may also want to remove any bright stars that may negatively affect the resulting synthetic flat frame.
Richard Hum had this to say on YouTube:
What I usually find helpful is to use Select > Color Range > Highlights to select the stars, and then do a content-aware fill. I find it works better than not removing the stars and just doing dust and scratches. You can use the Select and Mask tool to refine your selection mask.
- Now, we need to blur the details of our copied DSOless image. Choose Filter > Noise > Dust and Scratches.
- For my camera’s resolution in the example, a Radius value of 80 pixels was used, and a Threshold of O.
- You should now see a blurred version of the background sky, with an evident uneven field.

Applying the Flat frame to your Image
- Now, go back to your original image, and make sure you have the “Gradients” layer we created selected
- Next, choose Image > Apply Image.
- From the Source drop-down menu, select the copied, blurred image we just created. (Untitled-1)
- From the Blending Mode dropdown, select Subtract.
- Leave the Opacity at 100%, and set the Offset to 30 and hit, OK.
Your new and improved image
Your new image with the gradients layer on top should look much better. The “Gradients” layer we created can be scaled back by using the Opacity slider on the layer. You may not need to use this layer at 100% to completely correct your gradient issues, but expect to have it set to between 80%-100% in most cases.
This layer can be toggled on and off to review and inspect the improvements to your image. If necessary, you can go back and test some of the variables including changing the Radius value, and/or removing the stars before blurring the frame.
From this point, you can go about your image processing as you normally would, with a much improved, even background sky.
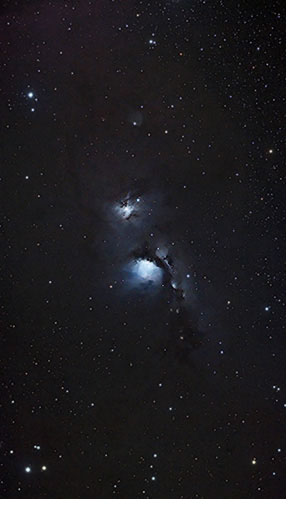
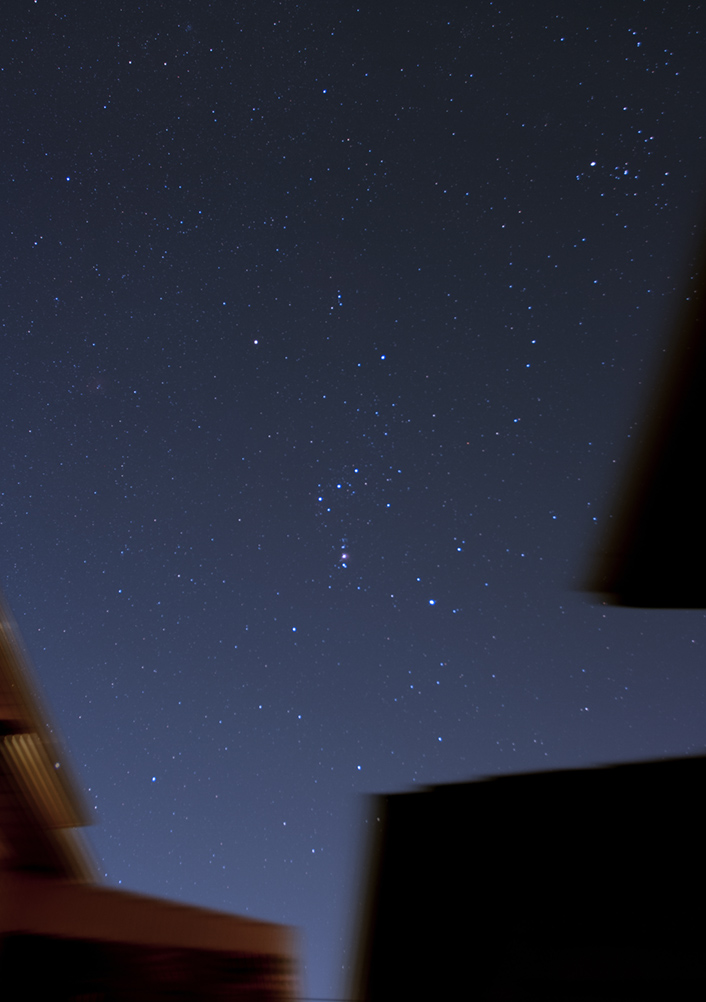
Widefield images captured with my camera lens suffer from horrible vignetting in my backyard. The gradient removal technique above was used on this image of the Orion constellation to correct the background sky:
Try this method on some of your existing widefield images that suffer from a gradient in the background sky. An uneven field is a common problem in almost all astrophotos, so mastering this technique will come in handy in your future endeavors.
Did you know you can sell your astrophotos as stock photography? I have sold several of my images on Shutterstock over the past 3 years. View my portfolio.
You can stay up to date with the latest images and information on the AstroBackyard Facebook page, or by following me on Twitter and Instagram.
Until next time, clear skies!
Related Posts
Astrophotography Tutorials – AstroBackyard
Astrophotography Tutorial – Deep Sky Image Processing in Photoshop
Galaxy Season Target – The Leo Triplet of Galaxies
My Complete Deep Sky Astrophotography Equipment Setup
Beginner Astrophotography Telescopes – My Top Picks
Resources:
Astrophotography Tutorials – PhotographingSpace.com
Excellent video; I can see using this method on Galaxy’s, Globular clusters, some open clusters. Your videos are very well done and to the point. A lot of us don’t know all the nuisances of Photoshop. So watching a video when someone is trying to do the same thing as you; makes it a lot easier and you can always go back for reference.
Nice work as always, please keep the information coming.
Thanks, Terry. The pleasure is all mine. Sharing this hobby with like-minded folks like you gives me great joy. I’m glad you were able to take something away from it. Clear skies!
Hey Trevor, awesome tutorial. I did a comparison using Gradient exterminator and using your synthetic frame method. Here is a link to the results:
http://kurt-zeppetello.blogspot.com/2017/04/gradient-test-with-m94.html.
Cheers Kurt
Fantastic! It’s always good to know a few ways to deal with common issues – so I’m glad you found the tutorial useful. I am really enjoying your blog, Kurt, thanks for sharing!
Thanks for sharing this technique. I’m just starting out in Astrophotography and I’ve tried using the idea in GIMP and it works really well! Very pleased….
My pleasure Rob, thanks!
Hi Rob,
Just wondering how you did the “dust and scratches” part in GIMP? I was never able to find an equivalent way of doing that in GIMP. Would be great if you could share the details on how you accomplished this!
Thanks and cs,
Pat
Wonderful Tutorial, thanks for putting this together! This is obviously one great post. Thanks for the valuable information .
Once again, Trevor, I had a question and I found the right answer in your wonderful site! Many thanks and congratulations for your great work and passion!
As regards GIMP (Rob remark above), you have to create an additional layer for the “synthetic flat” just above the one you want to correct, as a copy of this one. After removing here manually the DSOs present, I used Filters > Blur > Gaussian Blur with a large action size. Then I have set the layer as “Subtract” and gauged the opacity to get the right correction. Hope this helps!
This is amazing. I have spent to long frustrated by sky gradients ruining my images. I can’t say how grateful I am for such a clear and informative tutorial!
I am very much enjoying and impressed with your tutorials. Specifically those on technique and core concepts on post imagining(not just centric to this specific tutorial(All of them).
Everything you are describing has a direct manual application in GIMP that I am able to apply in the GIMP GUI. With your concepts focused on presentation… I am able to cut to the chase on how GIMP implements these manual post imagining processing skill sets.
Do very much agree that photoshop is more intuitive to these manual imagine processing techniques as related to layers and masks.
But I have found them informative enough to apply these techniques to GIMP’s GUI.
It is my estimate, well framed and applied imagining captured work flow of sub-frames(guiding, darks, flats and dithering) ARE forever.
Offering many chances to revisit them in any post imagining processing environment as ones skill sets advance and a budding astrophotographer moves on to better imagining software packages.
Thank you so much, for cutting the mystery out of the jargon.
Sincerely,
Mark
It is my estimate, well framed and applied imagining captured work flow of sub-frames(guiding, darks, flats and dithering) ARE forever.
By guiding I mean guiding on light captures and of coarse how dithering is implemented as a refined noise reduction technique in collecting my light sub frames.
I am still working on optimal sub frames as related to the dark arts of exposure times and my f/5.9 ratio and my imagining train.
However, given the huge bias on aesthetics to imagine post processing, I am not able to make this leap that 3 minute sub frames verses 2.25 sub frames(for example), let alone the gain adjustments tweaks have visible improvements in applicable post imagining data processing.
Now that, would is a tutorial worthy of Astrobackyard.
Sincerely,
Mark