Astronomy Tools Action Set Review
The Astronomy Tools Action Set (sometimes called “Carboni’s Tools“) is a collection of one-click Photoshop “actions” that allow you to save time during the image processing stages of astrophotography.
An action set can pack a lot of complex operations into a few clicks, helping you produce repeatable results that are difficult to achieve manually.
In this article, I’ll share my thoughts on the Astronomy Tools Action Set, having used it extensively for the past seven years. I’ll cover what I believe to be the most useful actions in the set, and when to use them.
I have enjoyed using the Astronomy Tools Action Set on my astrophotography images for over a decade. It remains a valuable tool in my workflow.
What Are Photoshop “Actions”?
A Photoshop action is a series of “recorded” processing steps that you can playback on your image. Anyone can record and playback their own set of actions in Photoshop.
This particular action set was specifically designed for use on astrophotography images of galaxies, nebulae, and stars.
Not only can actions save you time, but they’re often better at making simple to complex edits to your image than you are.
For example, the “Enhance DSO and Reduce Stars” action applies an almost magical change to your image, and it’s almost always an improvement.
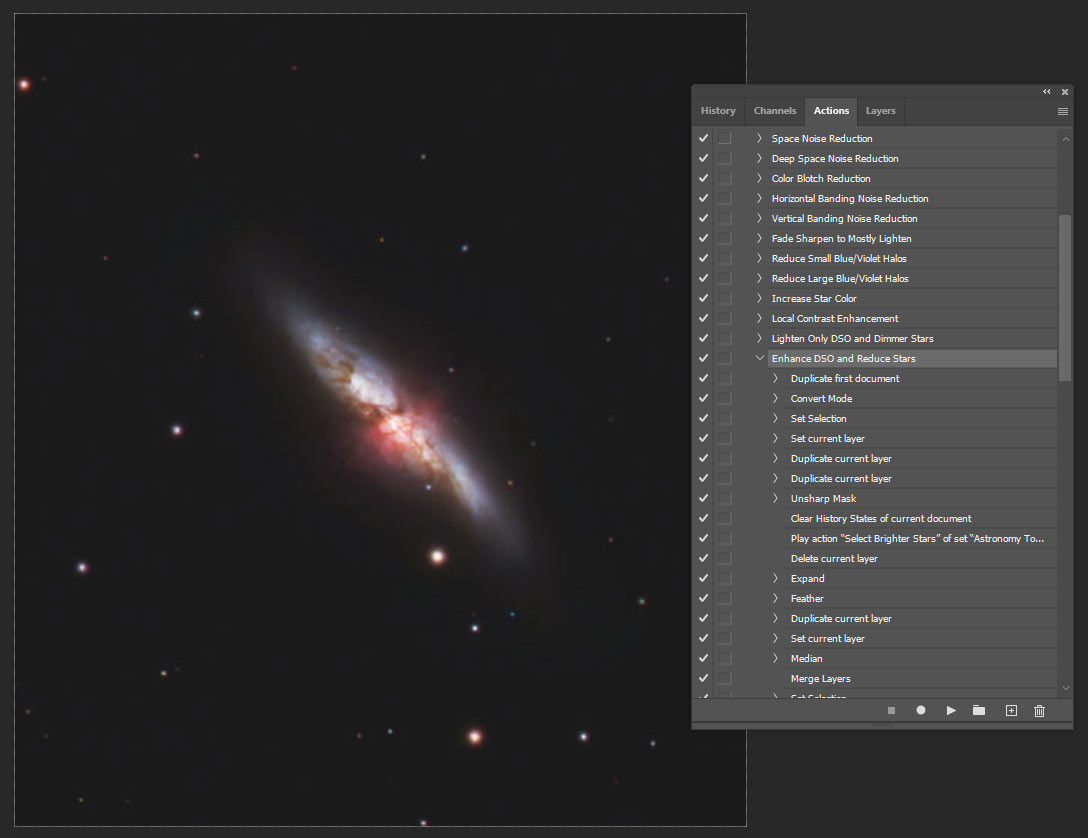
You can open up each action to see which operations are taking place.
These processing actions can be used on deep-sky astrophotography images captured with a traditional camera and telescope system, or data collected using a smart telescope.
Is it Worth the Money?
Although most of the edits I make to my astrophotography images can be done in the vanilla version of Photoshop, action sets and plugins can really take your post-processing skills to the next level.
You may be wondering if a third-party action set for Photoshop is really worth it. I mean, it’s possible to do everything this tool can do yourself with a little effort, right? In my experience, no.
Actions such as being less crunchy and more fuzzy can be incredibly useful in certain situations, and I have no idea how to automate this effect myself.
If you haven’t guessed by now, the answer is yes. I paid full price for the Astronomy Tools Action Set in 2013 and have been using it almost daily ever since.
The Astronomy Tools Action Set is a true asset to any amateur astrophotographer who processes images in Adobe Photoshop. Actions save time and make complex techniques a lot easier and more accessible for beginners.
All of the actions that this plugin “plays” can be accomplished on your own, but many of them would take a very long time to replicate. The Astronomy Tools Action set was recommended to me by a member of my astronomy club in 2013, and I’ve been using it regularly ever since.
Noel regularly offers the action set at a discounted price throughout the year, with a specific discount code to use at checkout.
Astronomy Tools Action Set Product Page
The Astronomy Tools Action Set is compatible with full versions of Adobe Photoshop on both Mac and PC computers. For help installing the action set, the author has provided a support page.
What Types of Images to Use it on
It’s safe to say that the majority of people interested in the Astronomy Tools Action Set will use it for deep-sky astrophotography of galaxies, nebulae, and star clusters. However, I have found the action set to be a real asset when processing wide-angle nightscapes of the Milky Way as well.
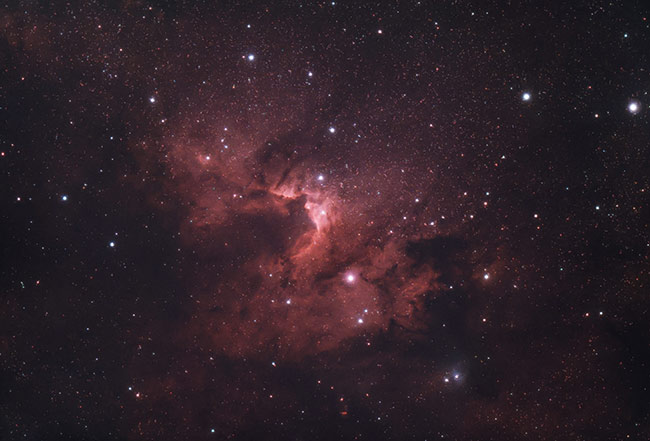
If you mainly process images of nebulae and galaxies photographed through a telescope, I consider the action set a must. Here is an example image of the Cave Nebula, where I took advantage of the four most useful actions listed a little further down this post.
Running the actions on each channel of the image separately is a powerful way to control better the overall effects they have. For example, you could run an action that reduces star size only in the channel where the stars are a little blown out.
You can achieve a balance by combining the original channel data with a 50% opacity layer of the applied effects. It’s a lot of fun to have this kind of control over each element of your photo.
If you shoot wide-angle nightscape images of constellations and the Milky Way, you can still tap into some of the useful operations that work well on a nebula or galaxy.
For the image of the Milky Way’s core shown below, I applied several actions from this set to the image, including “Make Stars Smaller” and “Local Contrast Enhancement”.
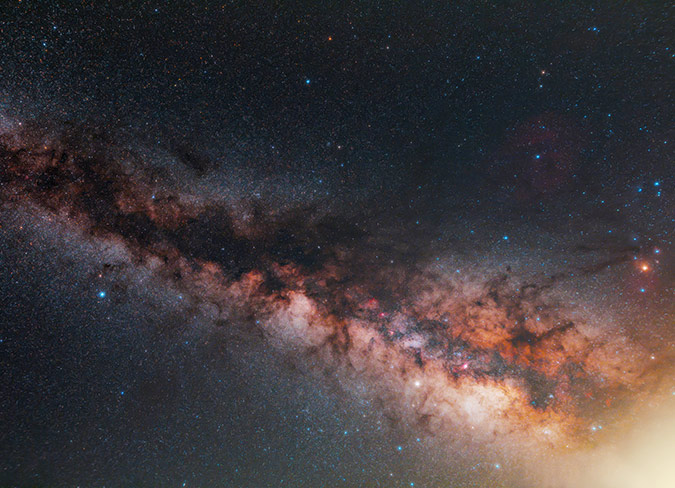
The Core of the Milky Way (Wide-Angle Lens).
Most Useful Actions
I must admit that I don’t use most of the actions contained in the set. In fact, there are only four actions that I regularly use on my astrophotography images. For most of the actions mentioned below, I’ll run them several times to achieve the desired look I am after.
If you’ve watched any of my astrophotography tutorials before, you’ll know that I always apply effects on a new layer and adjust the opacity of that layer after the fact.
Here is a breakdown of what I consider to be the most useful actions in the entire set.

I’ve highlighted the most useful actions in the set.
Make Stars Smaller
Minimizing the size of the stars in an astrophoto is an important technique to learn. When it comes to deep-sky astrophotography images, everyone has their own specific tastes. However, almost everyone can agree that small, focused stars are an attractive feature.
Previously, I have shared a simple Photoshop method for reducing star size that works incredibly well. This technique can be used to achieve similar (or even better) results than this action, but it will take you a lot longer.
I regularly run the “make stars” small action on a specific color channel of my image to balance things out. Most often, it’s the red channel that’s slightly blown out, and this simple action can help normalize things quickly.
It’s also beneficial to run this action once near the end of the image processing process. It’s best to create a new layer with the effect and adjust the overall opacity to taste.
Less Crunchy, More Fuzzy
In my opinion, this action is most effective when used after the “make star smaller” action in many cases. This action softens the stars in your image to give them a “glow” effect.
This can be useful in situations where the stars in your image appear too crunchy (as the name suggests), and you want to soften things up a bit.
It is wise to select and mask any areas of your astrophoto that you wish to protect from this effect. This could be a specific star in the picture, and most often, the deep-sky galaxy or nebula itself.
Usage Tip: One tip I’d like to mention here is to use this action on a per-channel basis when processing (watch my video on this subject for more information). For example, you may want to run this action on the blue channel only, to help balance out the color of the stars across the image and retain the cool colors.
Increase Star Color
This is one of my favorite actions in the set. I’ve always loved images with dramatic, colorful stars in the field, but you need to be careful with this one.
Running the action once may provide a slight boost in saturation to the stars in your photo, but running it several times over can create odd-looking, unnatural stars.
You must also to the time to properly mask your subject in the photo before running this action. Pay attention to the fine details in your galaxy or nebula before/after running this operation.
Usage Tip: Run the “Increase Star Color” action before “Make Stars Smaller”, and then run “Less Crunchy More Fuzzy”. This will effectively make the stars more colorful, reduce their size, and soften them up.
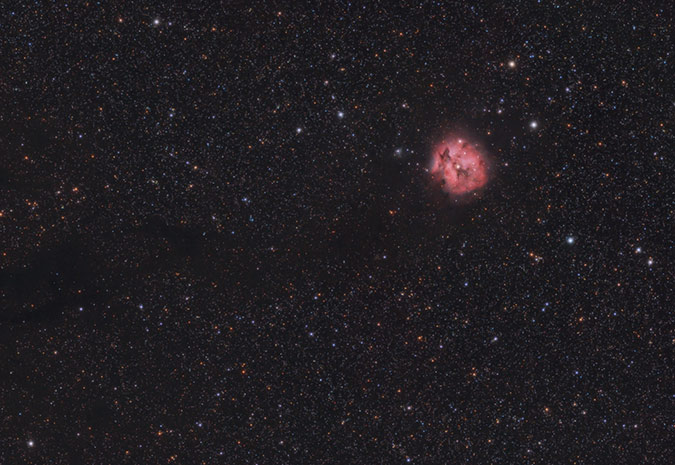
This image of the Cocoon Nebula benefited from the “Increase Star Color” action.
Enhance DSO and Reduce Stars
This is, hands-down, my favorite action of the bunch. Depending on the speed of your computer and the size of your image, this one can take a little while. The best way to showcase the power of this action in use is with a before-and-after photo:

This action can produce some truly sensational results, but it’s easy to get carried away with it. One thing to look out for is any odd color changes (you may need to balance the colors), as well as the possibility of making the stars too small and oddly shaped.
I have found this action to be effective on wide-field images as well, particularly in regions with rich star clouds. The image of the Milky Way towards the constellation Cygnus is an excellent example of when this action can help your photo “pop.”
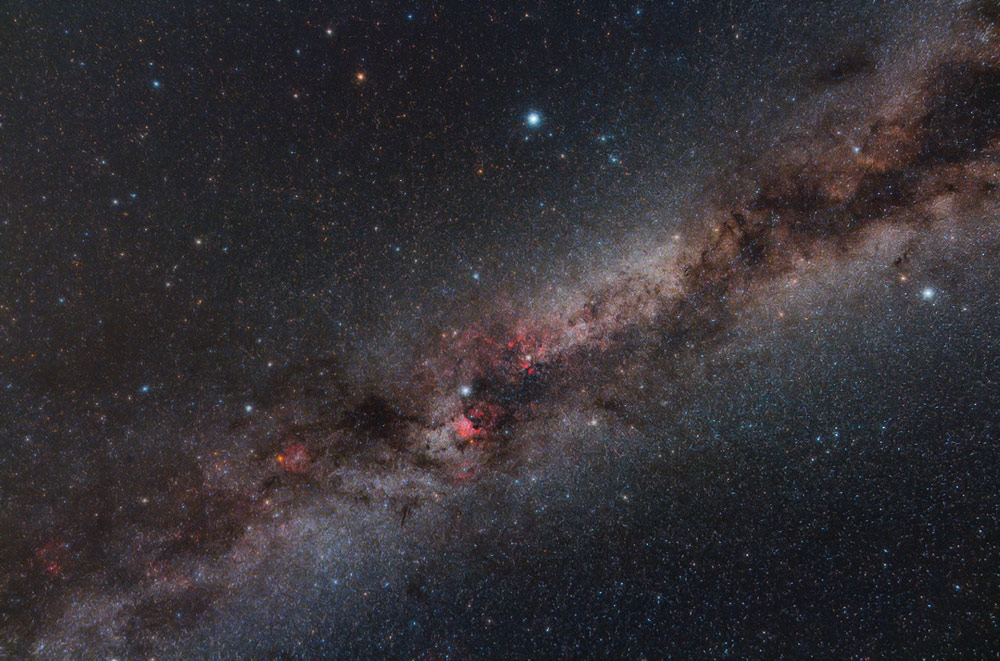
The Milky Way towards the constellation Cygnus.
Final Thoughts
As the old saying goes, the proof is in the pudding. Chances are, some of the best astrophotography images you’ve seen online over the years utilized the Astronomy Tools Action Set.
As for seeing a return on your investment, I think you’ll quickly find that this will come tenfold. Even though your image processing style will inevitably evolve over time, you’ll still find reasons to apply at least some of the actions from this set for the foreseeable future.
If you own a smart telescope like the Seestar S50, I think you will find these automated processing steps extremely useful when processing your data. The one-click nature of Photoshop actions allows you to experiment with each processing step in a ‘before-and-after’ format.
After over a decade of capturing and processing astrophotography images, I still find ways to utilize the Astronomy Tools Action Set in my deep-sky and nightscape images.
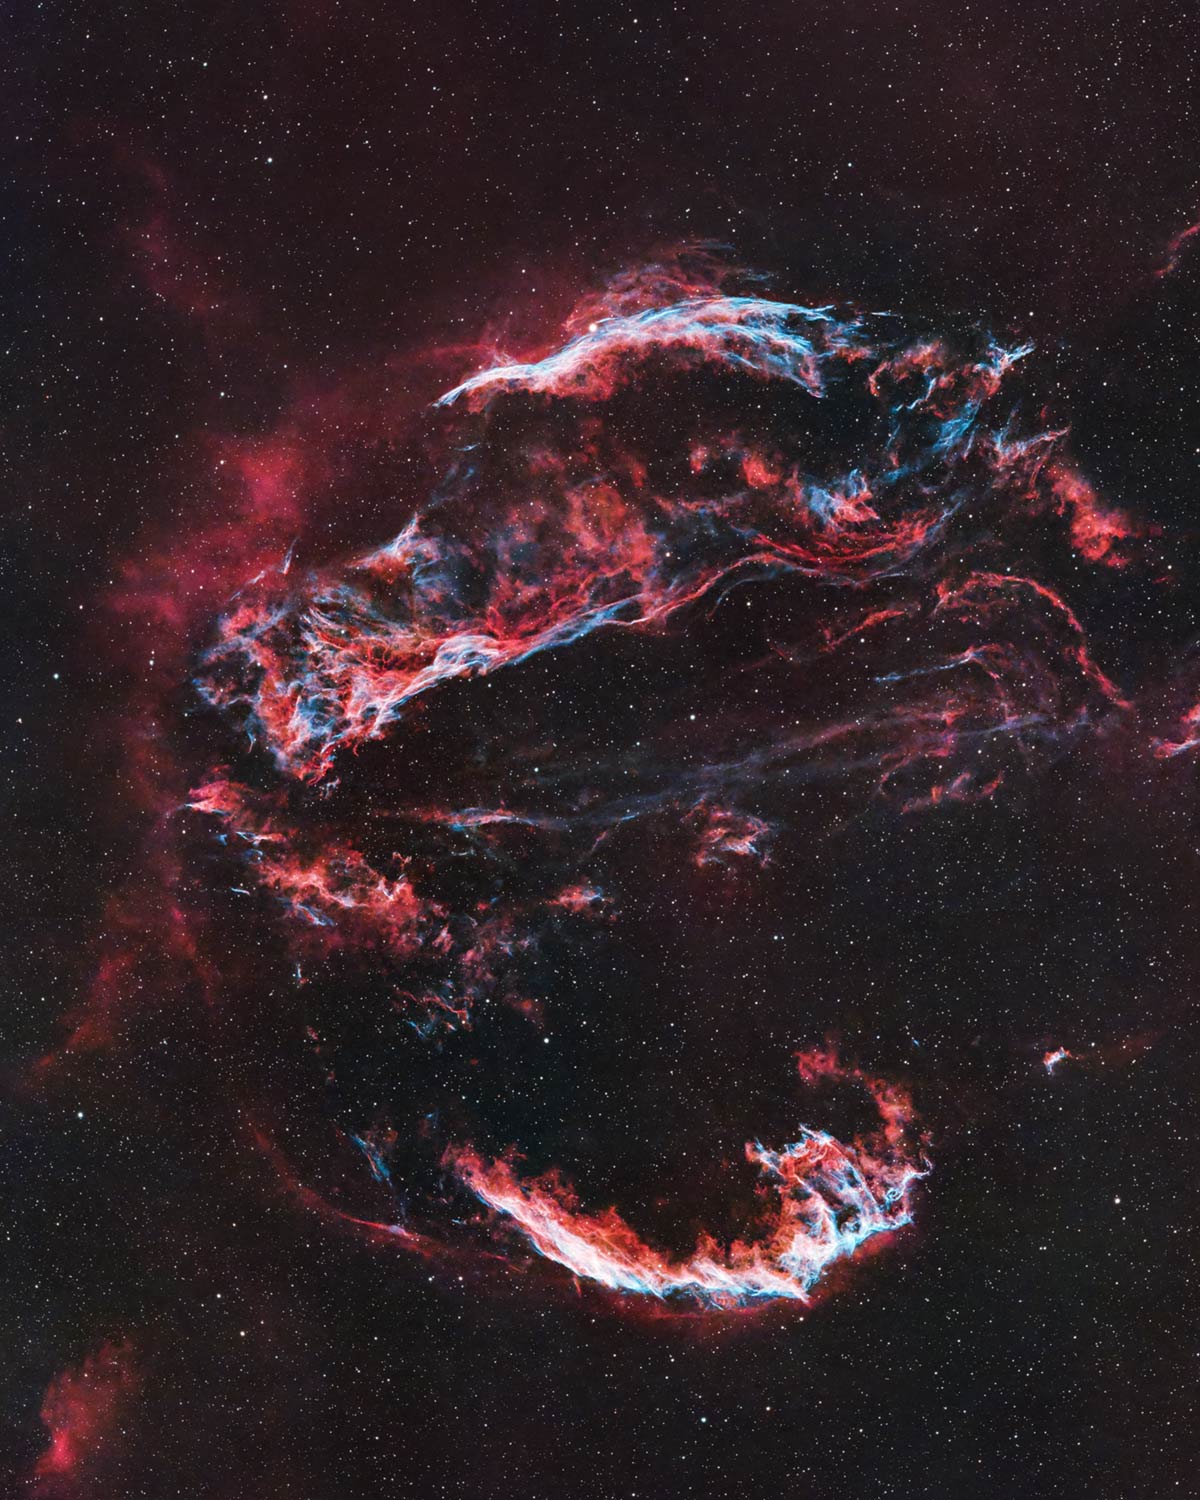
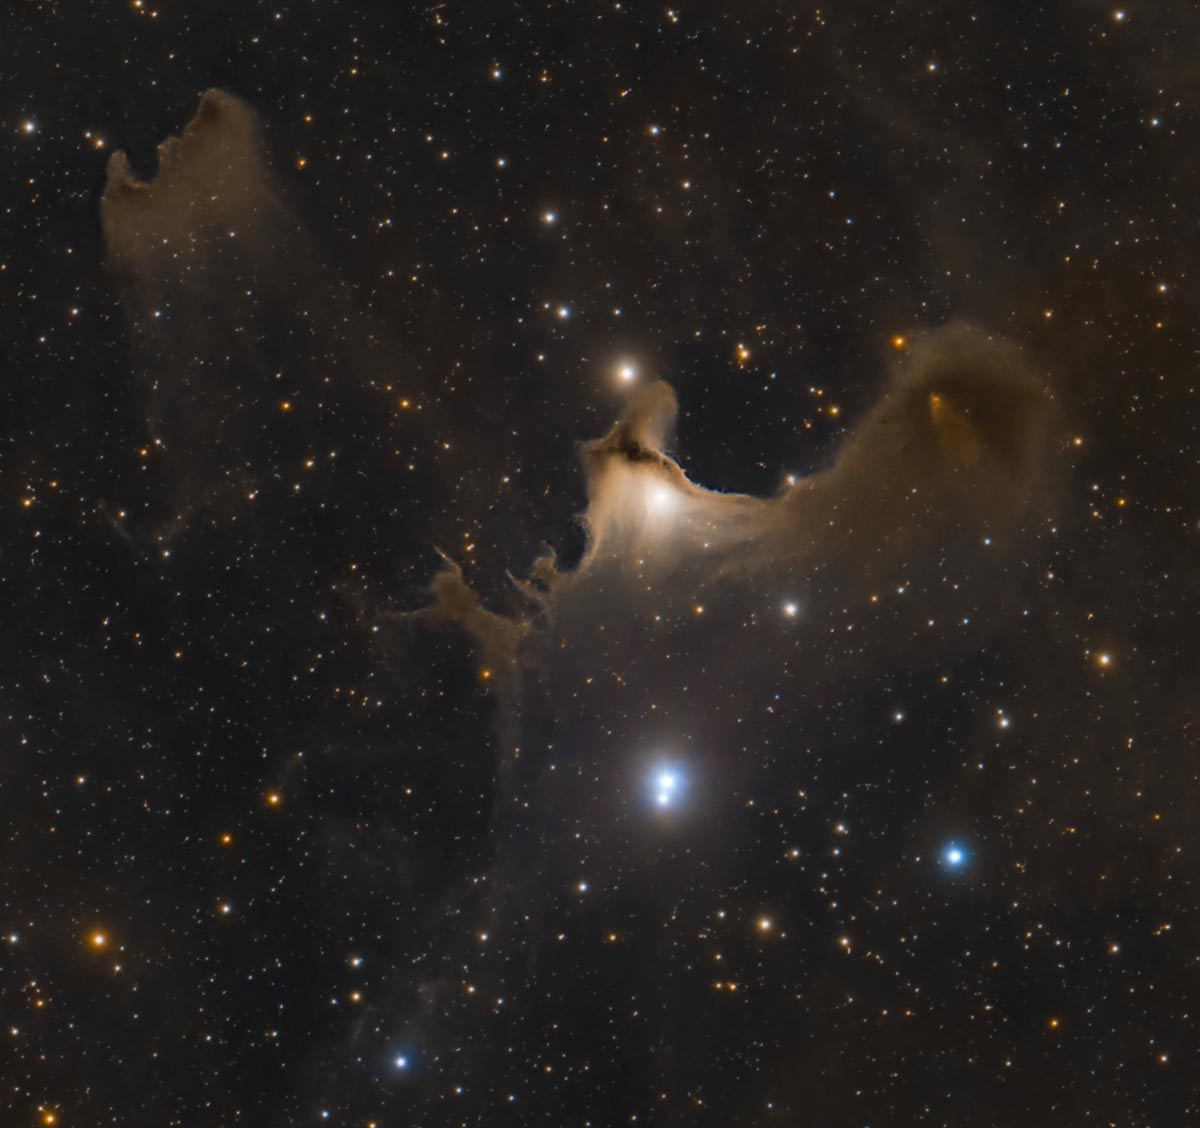
I continue to use the ‘Enhance DSO and Reduce Stars’ actions on my deep-sky images. The Veil Nebula complex in Cygnus.