Use the Select and Mask Tool in Photoshop
The Select and Mask Tool in Photoshop CC is a powerful way to edit selective areas of your astrophotography images. Whether you want to separate the stars from your deep-sky target, or apply subtle noise reduction to the background sky of your image, the select and mask feature will get you there.
Adobe Photoshop CC is an effective way to process astrophotography images, in a very creative and enjoyable way. If you use Photoshop to process your astrophotos as I do, this tutorial should be very useful to you.

Download Photoshop (Subscription)
About a year ago, I experienced the true power of the Select and Mask tool in Photoshop first hand. It has quickly become one of my favorite and most-used features of this application for processing my deep sky astrophotography images.
The Select and Mask tool allows you to get very specific about each and every edit you make to your images. Creating layer masks is one of Photoshop’s core features, and it is especially useful when editing astrophotography images.
The Select and Mask Tool
The Select and Mask tool is Adobe Photoshop’s powerful selection tool with advanced mask refinement options. It gives you complete control over your layer mask and allows you to precisely define the edges of your selection.
When processing a deep sky astrophotography image, it is often beneficial to select different aspects of your images and process them independently from one another. For example, there are times when you will want to increase the brightness of a nebula, without bloating the stars in your image.
When selecting these areas to process, you want to avoid creating a hard, unnatural edge between your selective area and the original. For this reason, being able to accurately feather your selection allows you to control the amount of softness between these areas and naturally blend them together.
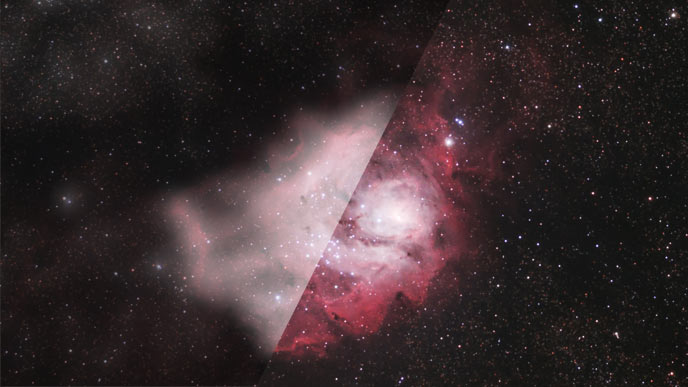
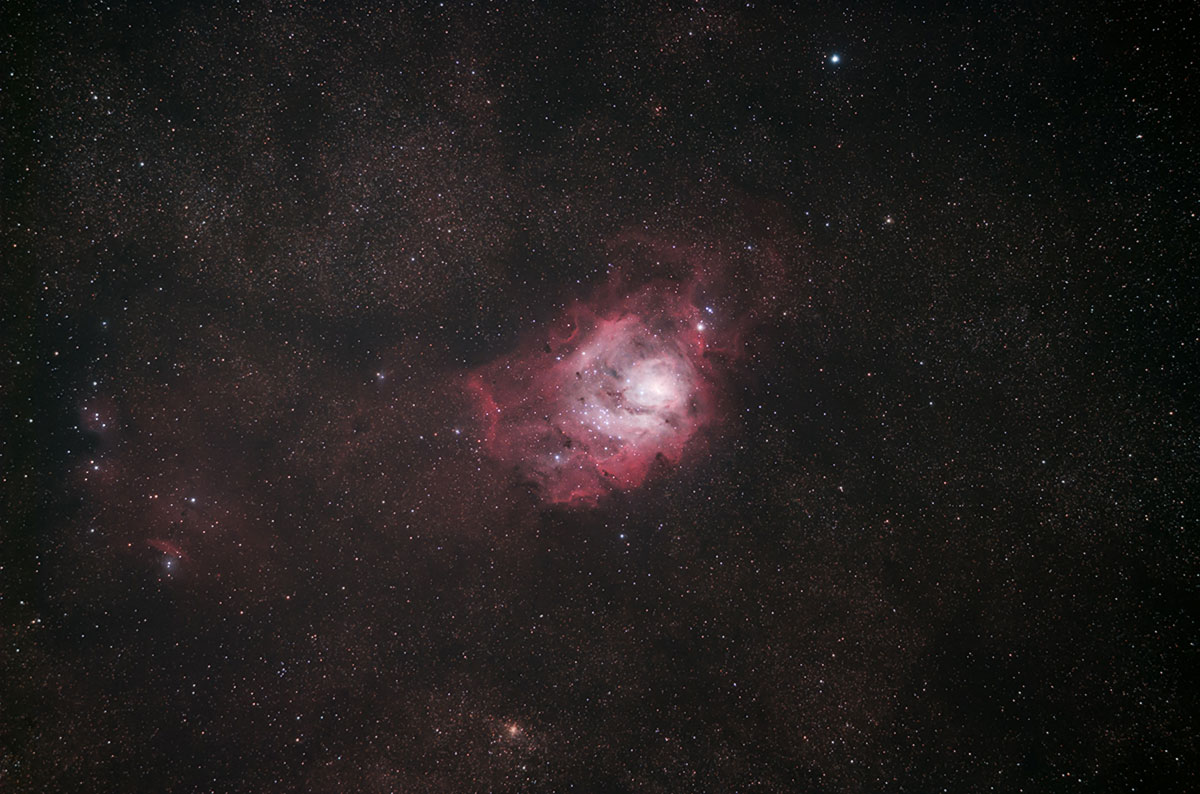
In the example below, you’ll see how I have increased the saturation of the Lagoon Nebula, without adding color noise to the background sky or stars.
By using the Select and Mask tool to define the colors found in your deep-sky target, you have complete control over the amount of saturation applied. By using the selection mask as a reference, you can confirm that you are only applying these effects to the nebula, and not the image as a whole.
Where to Find the Select and Mask Tool
Those that are using the latest version of Adobe Photoshop can navigate to the Select and Mask tool from the Main Menu Bar in a few ways. The most direct route to this feature is:
Select > Select and Mask
This is the path most people will take that are using the Select and Mask for general photography purposes, but not necessarily astrophotography. Here, you’ll find tools such as the Quick Selection Tool and the Refine Edge Brush.
These features are useful for accurately masking a subject and removing them/including them on a new background. The Onion Skin view mode is particularly useful here, as it adjusts the opacity to provide you with a useful view of both layers at a time.
Although this is a “one-stop’ shop” for refining your mask selection, I don’t consider it to be the best way to utilize this tool for astrophotography image processing purposes. Instead, I prefer to start with the following path:
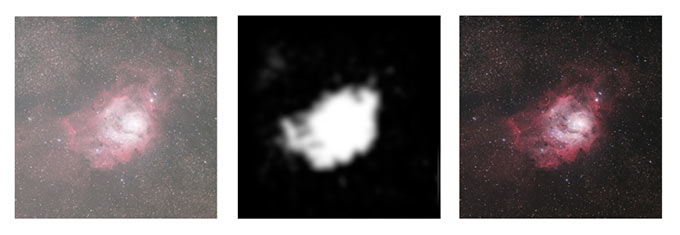
1. Select > Color Range
To start, use the traditional method of making your selection based on my original image processing workflow. This will give us a rough selection to start with, that we can refine further using the Select and Mask tool.
In the example below, I used the Sampled Colors option in the “Select” drop-down menu. When making a selective increase to color saturation, it’s often best to sample the dominant colors of your deep-sky object.
You can also use the Highlights selection mode, and adjust the Fuzziness slider to include the areas of light (signal) in your image. Keep in mind, this method will usually include your stars, as well as your deep-sky target. In many cases, you will want to separate the selections between the two.

With the “Marching Ants” now showing (the dotted lines that Photoshop uses to indicate a selection), we can now refine our selection mask by navigating the Select and Mask button in the Select drop-down menu.
I cover this topic in-depth in my detailed selective color boosting tutorial.
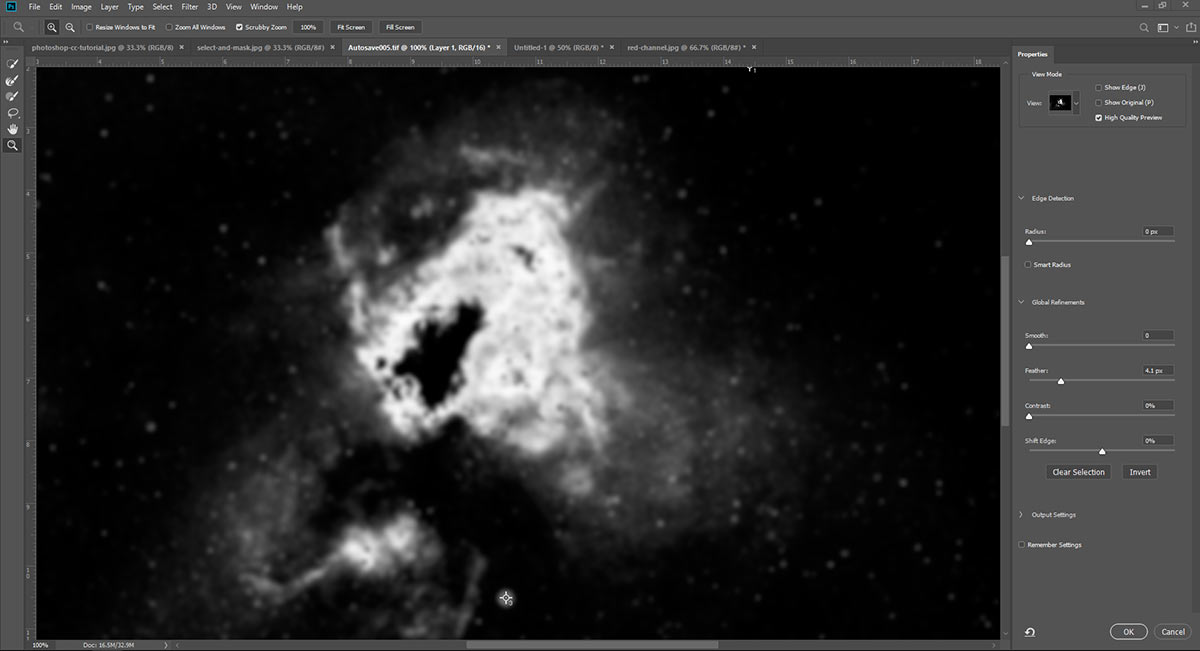
2. Select > Select and Mask
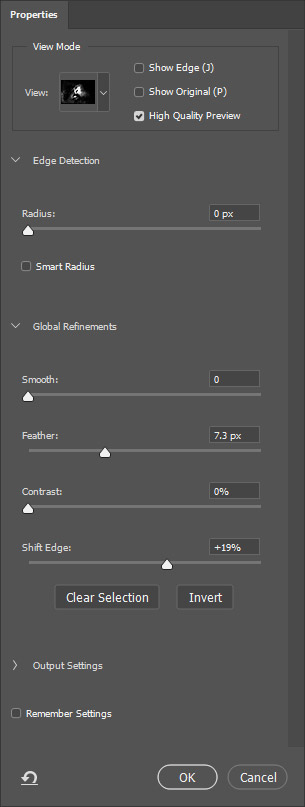
Here is where things get interesting. I suggest using the Black and White view mode, as it is the most helpful masking overlay for our purposes. The black areas of the image are un-selected, while the white areas are where we will isolate our adjustments to.
By far, the most powerful refinement tool here is the Feather slider. This is where we can adjust the amount of blending refinement between our subject and the rest of the image.
Feel free to adjust the Radius slider in the Edge Detection area if desired, although I usually leave this slider alone personally. You may find the Smooth slider found underneath the Global Refinements heading to be useful as well.
The great thing about the Select and Mask feature is the ability to preview changes made to your layer mask in real-time. You can adjust the sliders on the right, and monitor how these changes affect your selection before activating the selection.
I recommend only adjusting the Feather and Shift Edges sliders under the Global Refinements heading to start. In my opinion, these two adjustments have the biggest overall impact on the usefulness of your selection when it comes to astrophotography.
Shift Edges will expand your selection to include even more of your original selection (your subject). In turn, you are also selecting more of the image overall, and becoming less selective about where you will apply edits to.
Feather will increase the softness of your selection at the edges, creating a smoother, more natural blend between the areas you enhance and the rest of your image. I believe that the true value of the Select and Mask tool lies in this feature alone.
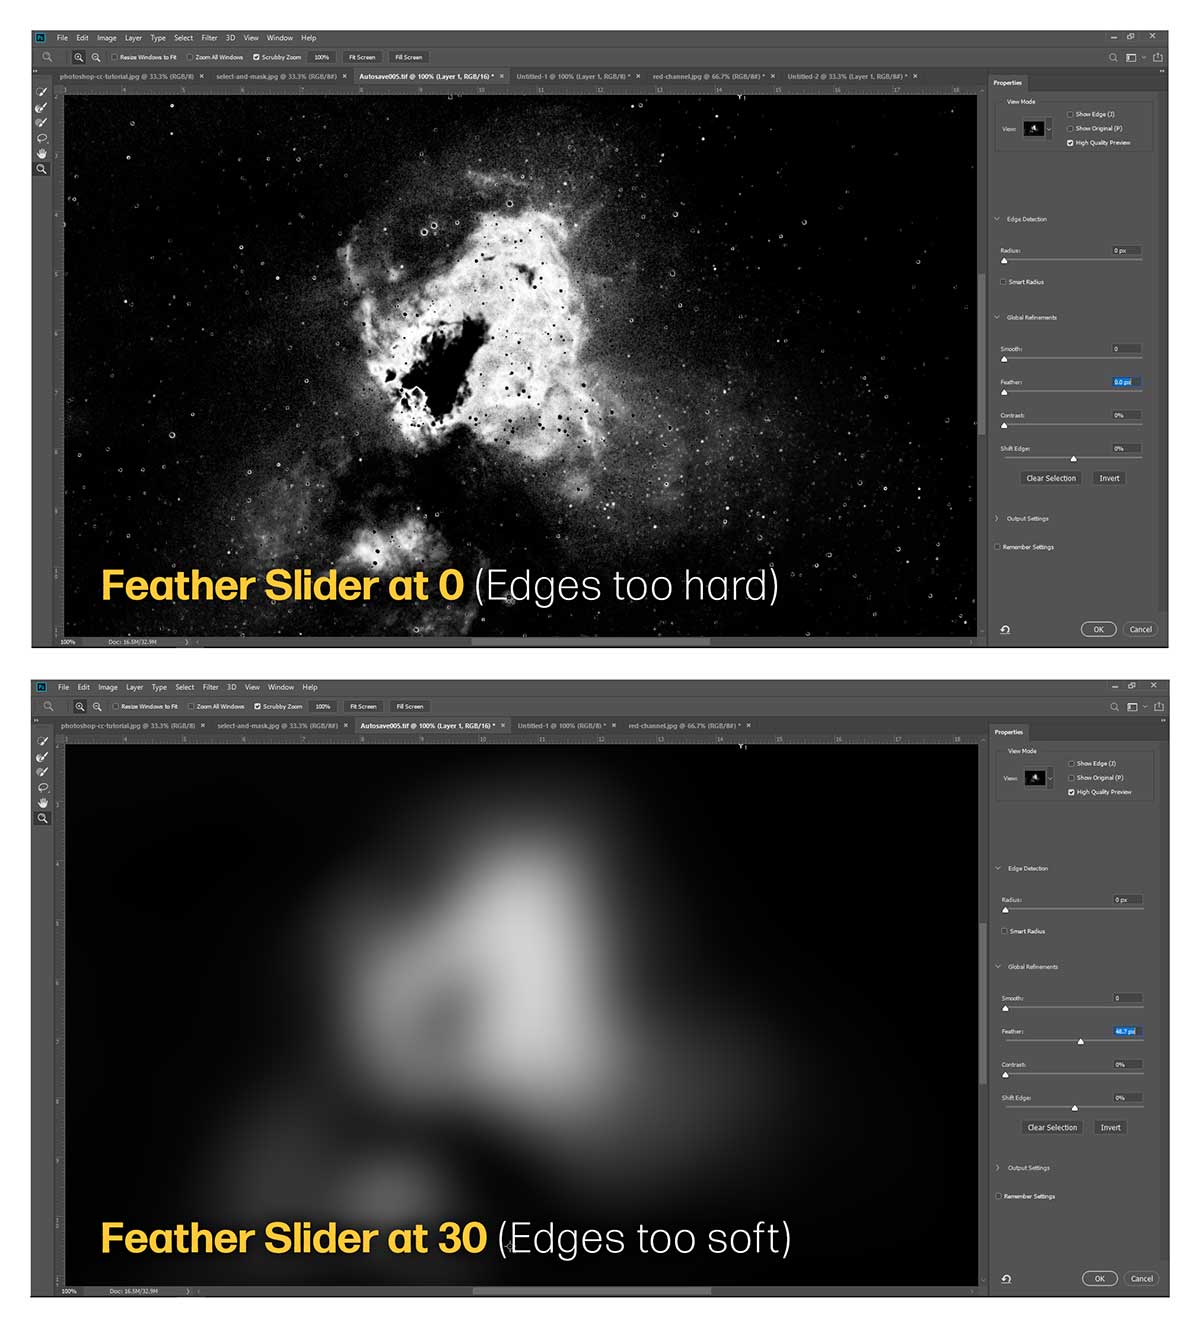
As you can see, you’ve got some decisions to make here. I suggest using a middle ground between the examples above. Here are the exact settings I used to select the Omega Nebula in my example.
Applying Effects to Your Selection
The whole point of spending so much time and effort refining our selection is to make powerful adjustments to the selection from increasing saturation to sharpness. Having the ability to make accurate selections that will blend seamlessly into the original image is an incredibly powerful tool.
Any adjustments made to the selection can then be isolated and organized in its own layer, and the level of opacity can be adjusted to taste. Slowly applying subtle enhancements to your image in a very intentional and responsible way can lead to some incredibly powerful images.
Some of the primary adjustments I apply to selected areas of my astrophotography images include:
- Saturation Increase
- Noise Reduction
- Sharpening
- Star Minimizing
All of these enhancements can be made to specific aspects of the image in an organized way. This technique ensures that you do not apply enhancements in one area, that degrade the image in another. For example, you can apply a stronger level of noise reduction to the areas of your background sky, while leaving the delicate sharpness of details within your deep-sky object intact.
An example of this technique in practice when using a third-party plugin like Topaz DeNoise AI to reduce the noise in your image. Although this took benefits from machine learning and largely understands which areas of the image to “leave alone”, you’ll still want to protect the critical regions of detail in the image using a layer mask before running the tool.
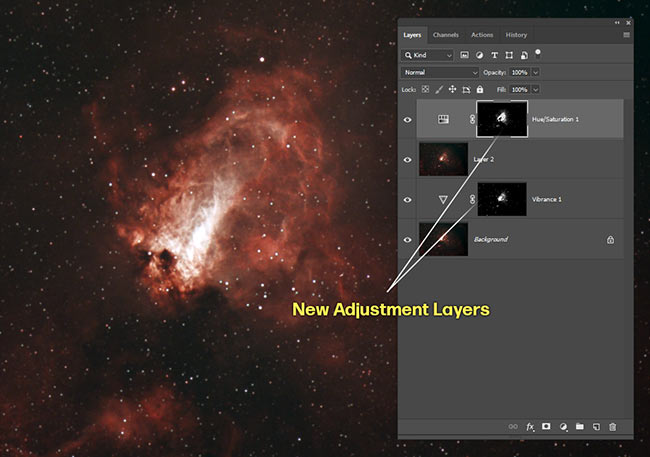
Use it to Create New Adjustment Layers
The Select and Mask tool is best utilized when in combination with an adjustment layer. Adjustment layers are a key element of a non-destructive image processing workflow, as they allow you to go back and make changes to the layer.
One example of an effective adjustment layer is one that sharpens the fine details of your subject, yet does not sharpen the background noise, stars, or any other aspect you do not wish to sharpen.
You can use the Select and Mask tool to isolate the areas of your image you want to sharpen, and feather the edges of your mask to blend the affected area into the background sky.
Use the advanced mask refinement tools to target your area of interest, and apply your sharpening adjustments using the Adobe Camera Raw filter.
By applying the sharpening enhancements to an isolated area, you can sleep comfortably knowing that you have not degraded the quality of your starry background sky.
The same process can be applied to image enhancements such as increasing star color, correcting gradients, and many more useful image processing tasks.
I hope that this tutorial has inspired you to try the valuable Select and Mask tool found within Adobe Photoshop CC. For my latest updates, tutorials, and reviews, please subscribe to the AstroBackyard Newsletter.
Interesting Note:
The photo of the Lagoon Nebula above (and in the video) was captured using amateur, affordable astrophotography gear back in 2013. It is possible to photograph incredible deep sky objects in space using an ordinary DSLR camera and small telescope with the right approach. Here is a breakdown of the equipment used for this photo:
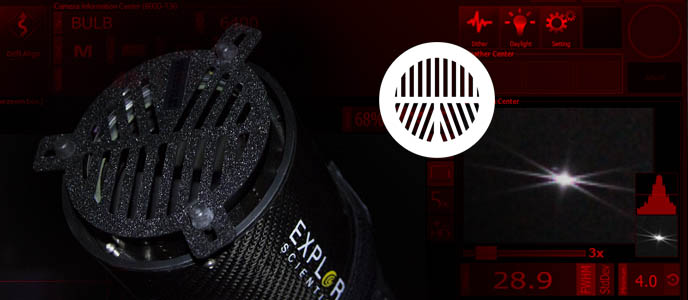
- Telescope: Explore Scientific ED80
- Camera: Canon EOS Rebel XSi (Now the Canon EOS Rebel T7i)
- Mount: Celestron CG-5 (Now the Advanced VX)

The Explore Scientific ED80 Triplet APO Refractor.
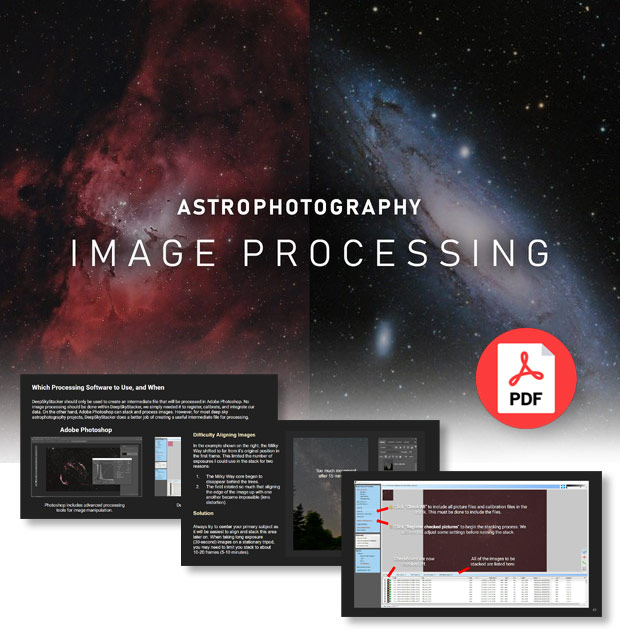
Download My Image Processing Guide
If you would like to learn about every astrophotography image processing technique I use in DeepSkyStacker and Photoshop, you can download my premium guide. The PDF download contains over 100 pages of the specific steps I take to process all of my images:


Hi.
Need some advice !!
I am a newbie to astronomy and I am looking to get my first scope.
Choice is between .. William optics 73 or 71 triplet , is there a lot of difference between the two ? Or should I get the 73 and spend rest of the money on other accessories?
Ps .keep up the good work ..
Thank you, Nehman! There will only be a slight improvement in image resolving/light gathering ability of the 73 over the 71. The 73 has a slightly longer focal length, and show a larger DSO in the field of view.
Both will capture incredible high contrast images of deep sky objects in space. I personally use the 73 and it is an incredible optical instrument that is compact enough to use on a moments notice (My review: https://astrobackyard.com/william-optics-zenithstar-73-apo/)
I understand your concerns about budget, so the 71 might make sense to you if your looking to buy accessories such as a field flattener and filters. You are on the right path, a triplet APO refractor is wise investment and will provide you with the results you’re hoping for!
It seems clear how to select a nebula to enhance while excluding the background. How do you select the background and exclude the nebula (noise reduction). Will the color range tool work for that as well (select the black area)? Or is there an option to mark your selection as included or excluded in the enhancements.
I do my work in gimp, so will need to see if it has a color range option,.
Thanks for all the info you provide.
Thank you. An extremely useful and, as you say, powerful method.
Wanted to add that I used this method on the Andromeda Galaxy (Canon 6D MkII & Redcat 51 – 52x 4min sub, 3.5hrs), but instead of the Colour Range tool I used the Lasso selector around M31 & M32 and a smaller capture on M110. They are well defined, so it made it possible. Then I followed the rest of the method. Worked brilliantly. I managed to get the detail in M31 to really ‘pop’, within the limits of the Redcat, but it made a huge difference. Something I’ve been trying to do for weeks now.