Use StarNet++ To Make Starless Astrophotography Images

StarNet++ is a simple program that allows you to remove the stars from your astrophotography images. I think it is an invaluable tool to have when processing your images, and I personally use it all the time.
I first heard about StarNet++ from Chuck Ayoub on his YouTube Channel. He used it to remove the stars from his image of the Wizard Nebula, and it worked astonishingly well.
Following that, I saw many discussions about StarNet++ and how to use it. Suddenly, I was seeing starless astrophotography images pop up on Instagram and Astrobin daily.
At first, I thought that the StarNet++ application was a plugin for PixInsight, but I soon realized that it was a stand-alone software that can be used without any additional software. What you choose to do with the starless image you create is up to you.
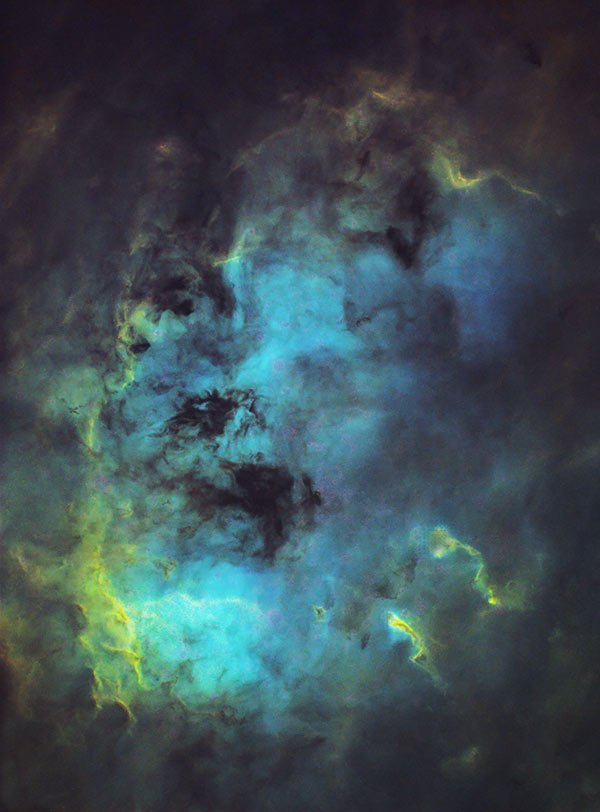
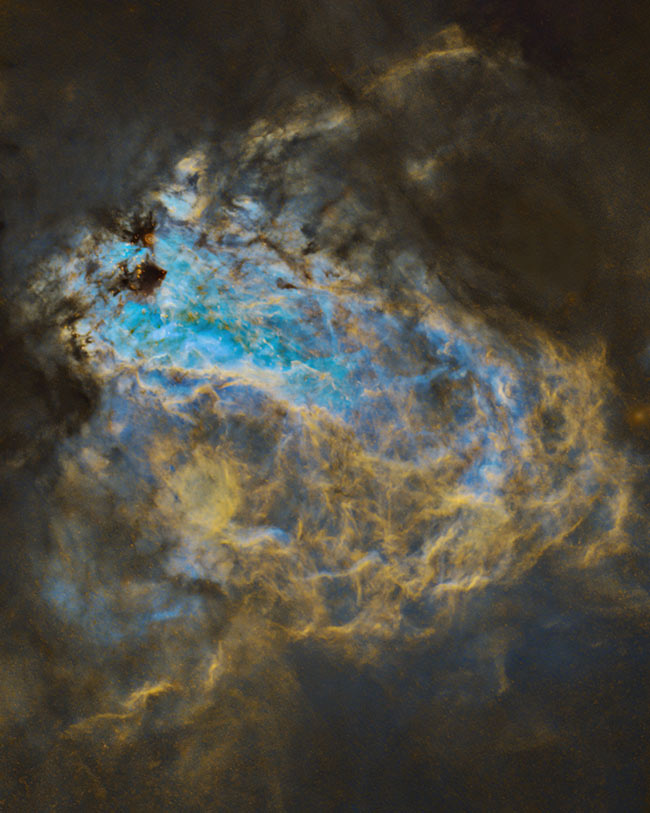
A starless version of the Tadpoles Nebula.
Download StarNet++ (Version 2)
Related: My Complete Astrophotography Image Processing Guide
Why It’s So Useful
The process of reducing or removing stars in an astrophoto is not a new concept in the astrophotography image processing world. This technique is used by many amateur astrophotographers to help reveal the delicate structures of their deep-sky object.
I even wrote a tutorial on removing stars in Photoshop, and it was my goto method for removing/reducing star sizes for many years. Now, I include StarNet++ as a part of my workflow at this stage.
By separating the stars from the nebula or galaxy in your images, you can control and manipulate the data in a more deliberate way overall. A quick example of this would be to brighten the outer regions of the Andromeda Galaxy without making the surrounding stars brighter and overpowering.
Certain subjects are better suited for a starless variation than others. For example, a dim nebula like NGC 7822 (at the top of this post) with small stars within the field.
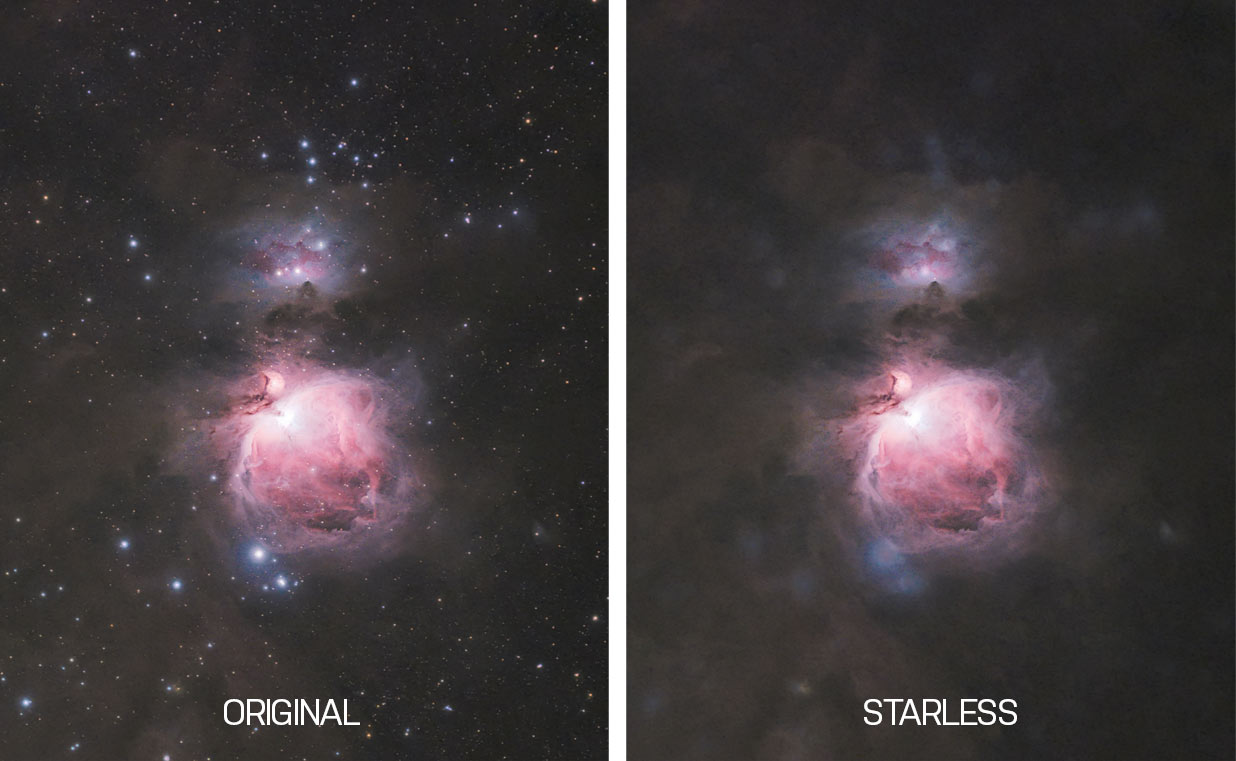
Comparing my original image of the Orion Nebula with a starless version.
Subjects that include large, bright stars (such as the Orion Nebula shown above), can be tricky to process because the “glow” from the bright stars may be left behind.
Personally, I prefer to blend the starless version of my astrophotography image with a regular (“with stars”) version for a hybrid image. This can be a great way to add depth and impactful details to your subject.
In this StarNet++ tutorial, I will show you how to use the software, and how you can use the starless versions of your images to improve your photos.
View All Astrophotography Tutorials
Blending Narrowband Images with Color
StarNet++ is a useful way to blend narrowband images into your regular color (broadband) images. A traditional narrowband image will, of course, include the many stars that surround your deep-sky object.
By removing the stars from your narrowband image (such as h-alpha), you can avoid discolored stars by applying this layer without the worry of introducing black spots or a slight blur.
Combining narrowband images with a full-color image is something I regularly do to add an impactful punch to my images, and StarNet++ allows me to do this in a more efficient way.
Here is a look at an image captured in h-alpha with the stars removed. I can now apply this layer as a luminance layer to my color image to add a dramatic punch to the original image.
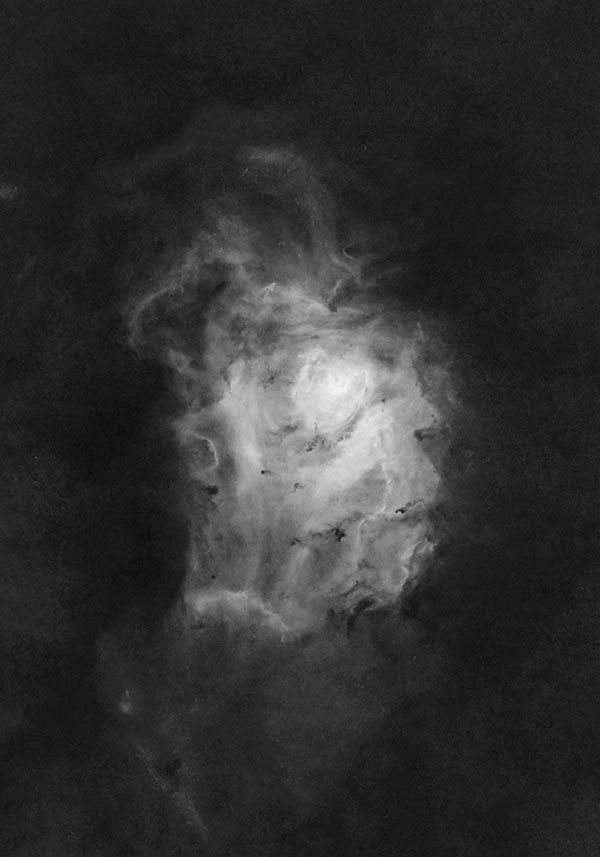
The Lagoon Nebula in H-Alpha (Stars removed).
Related: HaRGB Image Processing Tutorial.
How StarNet++ Works
The author (Nikita Misiura) has provided documentation for the software in this Cloudy Nights thread. Here, you’ll also see a number of example images and best practices for the tool.
Nikita’s description of this program is as follows:
“StarNet is a neural network that can remove stars from images in one simple step leaving only the background. More technically, it is a convolutional residual net with encoder-decoder architecture and with L1, Adversarial and Perceptual losses.”
There is also a PixInsight module for StarNet++, for users of that software. For Photoshop users like me, you can just use the application on its own, and simply drag-and-drop your images into the tool to remove the stars.
How to Remove Stars in Your Images
Running the StarNet++ tool on your images is very simple. You’ll first need to make sure that you have downloaded the tool (here), and extracted the files onto your computer.
In the image below, you’ll see all of the files the folder contains (along with a couple of my own images). The “rgb-starnet++” application file is what we are interested in (circled).

The software is very simple to install and run on a PC.
In order for StarNet++ to work, you’ll need your image to be in a specific file format. The image must be a 16-Bit TIF file. (I think a few other file types work, but stick with this exact format for now.)
You can confirm that your image is this file type and bit-depth in Photoshop under the “Image” menu. (Image > Mode > 16 Bits/Channel)
If your image is currently in 8 Bits/Channel in JPEG format, you can convert the image to 16 Bits/Channel and save it as a TIF in Photoshop. First, convert the images to 16 Bits/Channel (if necessary), then save it in the TIF file format.

Make sure your image is a 16 Bit TIF File before running StarNet++.
Once your image is in this format, you can move on to the next step.
All you need to do now is place the astrophotography image you want to run StarNet++ on in the directory where the application is stored. Then, drag and drop the image file onto the application icon (rgb_starnet++).

You will see a black window appear, and StarNet++ will begin the process of removing stars in your image. You can check the status bar to see the progress of your image.
Once the process has completed, look for a new file called “starless” in the directory. This is a copy of your original image, but without the stars!
If you have previously created a starless image using StarNet++, running the application again will overwrite your original “starless.tif” image.

The starless version of your image will populate in the StarNet directory.
Recommended Workflow
I find it useful to use the StarNet++ star removal tool at the end of my image processing workflow in the “finishing touches” stage. Here is my proposed workflow when using StarNet++ at this stage of the process.
- Register and stack your data
- Process your image with stars intact
- Run the image through StarNet++
- Enhance the deep-sky object in the starless image
- Paste the starless image on top of the original as a new layer
- Select the stars in your original image using a mask
- Carefully blend the starless version with the original
Another method that was brought to my attention on Twitter, is to run the mono version of StarNet++ on the greyscale color channels of your image separately. Once you have run the software on all RGB channels, you can build the full-color image without the stars.
In my experience, this technique produces a better overall result because the tool can better isolate the stars in each color channel. It does take a little longer, however.
Here is an example of the results achieved using this method on the Lagoon Nebula. As I’ll discuss a little later, the starless grayscale channel images are a useful way to increase the brightness/color of specific areas of your image via a luminance layer.

Achieve better results on color images by running the RGB channels through StarNet++ separately.
You may also find it useful to create a starless version of your image during the star minimizing stage of your workflow. Minimizing stars is one of the last edits I make in Photoshop. Using StarNet++ to help create a version of your image with smaller stars is a practical way to perform this task.
For PixInsight Users:
Although I do not currently use PixInsight to process my images, regular contributor Brent Newton had this to say about using StarNet++:
“for the PixInsight master race, check the Sourceforge page for Starnet, it can be installed as a PixInsight process. It still only works on non-linear images but it’s a great way to bootstrap a good star mask. Said star mask with a little tweaking can then be used with Morph. Transformation and MLT to erode stars away in your linear images.”
Blending Starless Images into Your Original
Blending the two images can be tricky, and the process involves using star masks to do it properly (the Select and Mask tool is perfect for this). This can be a very time-consuming process, especially when there are bright areas of your subject (such as the core of the Orion Nebula) that glow at the same brightness as the stars.
Another challenge is dealing with the halos surrounding bright stars in the field. I recommend copying and pasting your original image as a layer on top of the starless version (as shown below).

Separate your starless version into a new layer in Photoshop.
You can simply dial back the opacity of the “with stars” layer if you want, and this will indeed reduce the impact of the bright stars in the field.
However, it will dim all of the stars in a very unnatural way. It’s not a great look. We need to make a precise selection around the stars to control their brightness and overall impact to the image.
To do this, I recommend creating a star mask using the color range tool in Photoshop. Select > Color Range > Highlights. Then, use the Select and Mask tool to refine your star mask as shown in the example below.
The original star mask that you created by selecting the highlights of the image will likely include the brightest areas of your nebula or galaxy. You’ll need to adjust the aggressiveness of the selection using the Fuzziness and Range sliders in the Color Range window.

A simple star mask in Photoshop using the “Select and Mask” tool.
For complete control over your image, create a star mask that allows you to copy just the stars in the image to a new layer. Then, you are able to adjust both the brightness and size of the stars independently from the rest of the image.
At this stage, try lowering the opacity of the original “with stars” image. Because you have preserved the brightness of the “important” stars in the image on the top layer, dimming the smaller stars creates a much more natural-looking image.
Your layers window should look similar to the one below.

My layers window in Adobe Photoshop 2020.
Of course, this technique can have varying degrees of success, depending on the type of object you use it on, and the precision of the star mask you create.
I believe the most powerful aspect of StarNet++ is how easy it is to separate the signal of your deep-sky object from the image. It allows you to manipulate the color and detail of your subject without worrying about increasing the size and brightness of the stars in the field.
I have found it to be a fantastic way to create a luminance layer. You can easily adjust the brightness of the highlights and mid-tones in your image without introducing star bloat or blown highlights.
Final Thoughts
Maybe you’ll use StarNet++ as a way to separate key elements of your astrophoto from each other for further processing. Maybe you enjoy the look of a completely starless image on its own.
Whatever your tastes lie, I think you’ll find StarNet++ to be a brilliant, lightweight, and free tool that you can add to your bag of tricks.
If you want to learn how I process each and every one of my astrophotography images from start to finish, please consider downloading my in-depth image processing guide.
A starless version of the Omega Nebula.
Helpful Resources:
- Guide: Which Astrophotography Image Processing Software is Best?
- Tutorial: How to Remove Gradients in Your Image.
- Tutorial: How to Remove Stars in Photoshop (Manual Method).
- Demonstration: Chuck’s video demonstrating StarNet++ on the Wizard Nebula: