My Latest Wide-Field Astrophotography Processing Tutorial

In this article, I will share my latest wide-field astrophotography processing tutorial using star removal and advanced stretching techniques.
Wide-field astrophotography opens up stunning views of the night sky, capturing vast regions of stars, nebulae, and constellations.
In this guide, I’ll walk you through a game-changing technique to enhance your wide-field images using tools like DeepSkyStacker, PixInsight, and Photoshop.
This method separates stars from nebulosity and allows for more precise processing, revealing breathtaking details hidden in your raw data.
For an in-depth, over-the-shoulder look at my process, watch the full tutorial video on YouTube.
Equipment Used
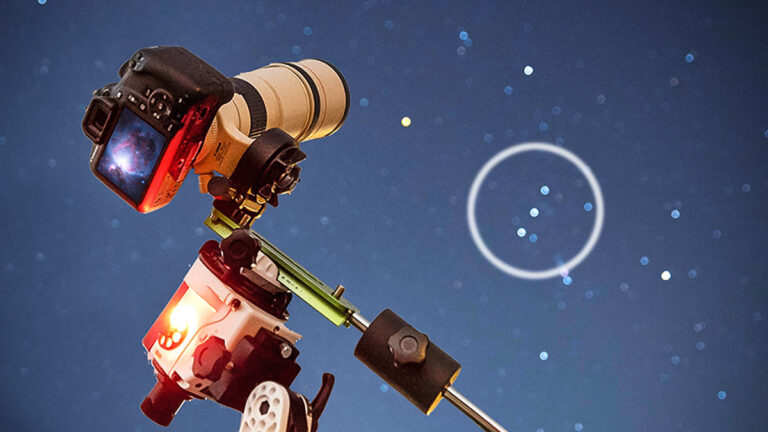
For this project, I used a portable star tracker setup with an astro-modfied DSLR camera and a ‘fast’ camera lens. This is my go-to setup for nightscape projects, including Milky Way Photography.
This kit is completely battery-powered for maximum portability. This is an important aspect when traveling to new dark-sky locations without access to household power.

For image projects like this, a star tracker is recommended to capture longer exposures (60-seconds or more).
I used a simple remote shutter release cable to automate the imaging session. This allows me to select the best camera settings for the target and then tell the controller to continue to take the images over an extended period of time.
- Camera: Canon EOS R (modified)
- Lens: Sigma 24mm F/1.4
- Star Tracker: Sky-Watcher Star Adventurer 2i
- Intervalometer: Remote Shutter Release for Canon
![]()
Recommend Camera Settings
Try these settings on your next nightscape photo with your camera and lens. Remember, that exposures of this length will show star-trailing if a star tracker is not used.
I captured 60 x 1-minute exposures of the Orion constellation. This totaled 1 hour of total exposure time. In general, the more exposure time you collect, the better.
- Aperture: F/1.4
- Focal Length: 24mm
- File Type: RAW
- ISO: 3200
- Shutter Speed: 60 Seconds
- White Balance: Auto
For this project, I did not use a light pollution filter, although it may have helped. While a mild, broadband filter may help ignore some unwanted artificial light, for the best results, go somewhere very dark.
Review the Images
The process begins with capturing a series of long-exposure images using a DSLR or mirrorless camera, a wide-angle lens, and a star tracker. For this example, I used 60-second exposures taken with a Canon EOS Ra camera and a Sigma 24mm f/1.4 lens.
I like to review my RAW images captured on a DSLR camera using Adobe Bridge. This gives me a birds-eye view of all of the image exposures, along with the EXIF data to confirm the camera settings that I used.
For this project, I used just over 1 hour’s worth of total overall exposure time. Each image was 60 seconds long at ISO 3200, with the lens set to its maximum aperture of F/1.4.

Reviewing the Images in Adobe Bridge. See my complete list of astrophotography software resources.
Remember that wide-field astrophotography images will turn out much better when taken from a dark sky location (Bortle 3 or better) away from the city light pollution. Also, make sure that you capture your images under a moonless sky surrounding the new moon phase.
Image Stacking for a Better Signal-to-Noise Ratio
For an image with a stronger signal that is more enjoyable to process, I always recommend using image stacking to your advantage. This improves the overall signal-to-noise ratio and leads to a cleaner image with less noise.
For wide-field astrophotography image projects, you can use whichever image-stacking software you enjoy using most. I find that DeepSkyStacker does an admirable job on wide-field astrophotos, and it’s pretty fast, too.
Be sure to use the scoring tool to get a better understanding of the quality of each sub-exposure. For example, DeepSkyStacker scores the images based on a variety of factors, including star size and background sky brightness.
- Import your raw image files into DSS (in my case, CR3 files taken with a Canon DSLR camera)
- Evaluate the quality of the frames and select the best ones. DSS’s scoring system helps identify images with optimal sharpness and alignment.
- Stack the selected files to produce a single composite image.
The result is an Autosave file containing stacked data. At this point, the image may look underwhelming—a faint outline of stars and nebulae with minimal detail. This is where post-processing becomes essential.
Opening the Data in PixInsight
Once the stacked file is ready, it’s time to reveal the underlying data using PixInsight. If you are new to this software, the user interface can be a little daunting.
I have found that the best way to learn PixInsight is to follow along with one of the many fantastic video tutorials on YouTube. You can follow the video version of this tutorial for the following steps.
After opening the image, I use the following steps:
- Screen Transfer Function (STF): This provides an initial stretch to reveal hidden details in the data.
- Dynamic Crop: I remove unwanted elements, like trees or the horizon, from the edges of the frame.
Now, we’re left with a cropped image showcasing stars, faint nebulae, and structures like Barnard’s Loop and the Horsehead Nebula. However, the image still lacks the pop and vibrancy we’re aiming for.

The ‘before’ image lacks the color and intensity of our desired final image.
While it may be tempting to start enhancing the image in Adobe Photoshop at this stage, I recommend the following step before you do.
Star XTerminator: The Game-Changer
The next step involves using the StarXTterminator plugin to separate stars from the nebulae. This is a paid third-party plugin created by RC Astro, and I think it is well worth the cost ($59.95)
This step is transformative for wide-field astrophotography images because:
- It creates a starless image, isolating nebulae and other structures for more precise editing.
- It generates a separate layer for stars, allowing independent adjustments to their color and intensity.
Run the StarXTerminator plugin with the “Generate Star Image”, and the ‘Large Overlap‘ option checked (this is beneficial for wide-field images). After processing, you’ll have two layers: one with stars and one without. This separation opens up new possibilities for stretching and enhancing the nebulae.
At this stage, any gradients or vignetting in the image may be pronounced. This is a very common problem for wide-field astrophotography images, but thankfully, there are some great tools to help correct it.
Removing Gradients with Automatic Background Extractor (ABE)
Even under dark skies, light pollution and natural gradients can affect your images. To address this:
- Apply the Automatic Background Extractor (ABE) in PixInsight.
- Adjust the function degree to 2 and set the correction mode to “Subtraction.”
This step removes unwanted gradients, resulting in a more uniform background and allowing the nebulae to stand out.
You can also try using Dynamic Background Extraction (DBE) on the image for even more control. I find DBE works even better than ABE if you take the time to plot the sample points carefully.
Stretching with Generalized Hyperbolic Stretch (GHS)
With the starless image refined, we can move on to stretching the data using the Generalized Hyperbolic Stretch (GHS) tool.
GHS is a script that is free to download and use in PixInsight. For a detailed description of how the tool works, I recommend watching the following GHS tutorial video.
This tool offers precise control over brightness and contrast, making it ideal for bringing out faint structures in Widefield images. Here’s how to use it:
- Open GHS and click the “Log” button to analyze the image histogram.
- Select the symmetry point (SP) by clicking in the middle of the data curve.
- Adjust the stretch factor to reveal faint nebulae. Work iteratively, balancing the stretch for optimal detail without overwhelming the image.
After applying GHS, intricate details like the Rosette Nebula, Seagull Nebula, Witch Head Nebula, and California Nebulae emerge, transforming the image into a vibrant showcase of celestial wonders.

Using GHS to carefully stretch the image data in PixInsight.
Final Touches in Photoshop
With the processed starless image and star layer ready, I combine them in Photoshop for final adjustments:
- Open both layers and set the blend mode of the star layer to “Screen.” This seamlessly overlays the stars onto the starless image.
Adjust the stars’ colors using the Color Mixer. For example:
- Reduce magentas if they appear unnatural.
- Shift greens toward blue for a more pleasing hue.
- Boost oranges and yellows to enhance warm stars.
If desired, minimize the stars slightly to emphasize the nebulae further. This can be done by applying a slight blur or reducing the star layer’s opacity.
I created the following annotated version of my image to highlight all of the cool deep-sky objects and notable stars in the frame.

My annotated version of the final image.
Comparing the Results
The difference between the original stacked image and the processed version is staggering. Nebulae that were once faint and barely visible now burst with color and detail.
The dust clouds in the constellation Taurus, previously hidden, add subtle texture to the frame. These results highlight the power of combining advanced techniques like GHS and StarXTterminator with foundational tools like DSS and Photoshop.

The before and after image of the Orion Constellation and surrounding area using this technique.
Conclusion
This method—combining stacking, star removal, gradient correction, and advanced stretching can really help make your wide-field astrophotography images ‘pop’. Whether you’re an experienced astrophotographer or just getting started, incorporating these steps into your workflow can provide new, exciting ways to edit your images.
If you need a complete breakdown of my editing workflow, please check out my premium image processing guide, which includes several exclusive video tutorials.
I hope that by sharing my process, you have learned at least one new technique to apply to your personal astrophotography projects. If you would like to stay up to date with my latest images, please follow me on Facebook and Instagram.
Trevor Jones is a deep-sky astrophotographer from Ontario, Canada. Trevor’s passion is to inspire others to start their astrophotography journey on his YouTube Channel, so they can appreciate the night sky as much as he does. His images have been featured in astronomy books, and online publications including the NASA Astronomy Picture of the Day (APOD).


Wow, this is a fantastic and wonderful tutorial. I will certainly recommend your work, as I have in the past. It describes exactly what I would like to do. Thank you. A further logical step then would be to describe how to take a “step in,” toward items circled in your annotated final image, and describe how to produce the same kinds of images at higher focal length. You see what I mean. This routine would also help a person learn the images in a given region.
As always, I wish you the best.
Dr Mitch Linneman
The final pic is stunning. Yesterday, I decided after seeing your pic that I can’t spend more money on gear except software until I can reproduce your pic. This also goes for your pixinsight update to the processing manual. I love the Iris Nebula and your developing of the Iris was stunning as well. Way more interesting and curious. Now I have to learn how to do that.