DWARF mini Smart Telescope Review
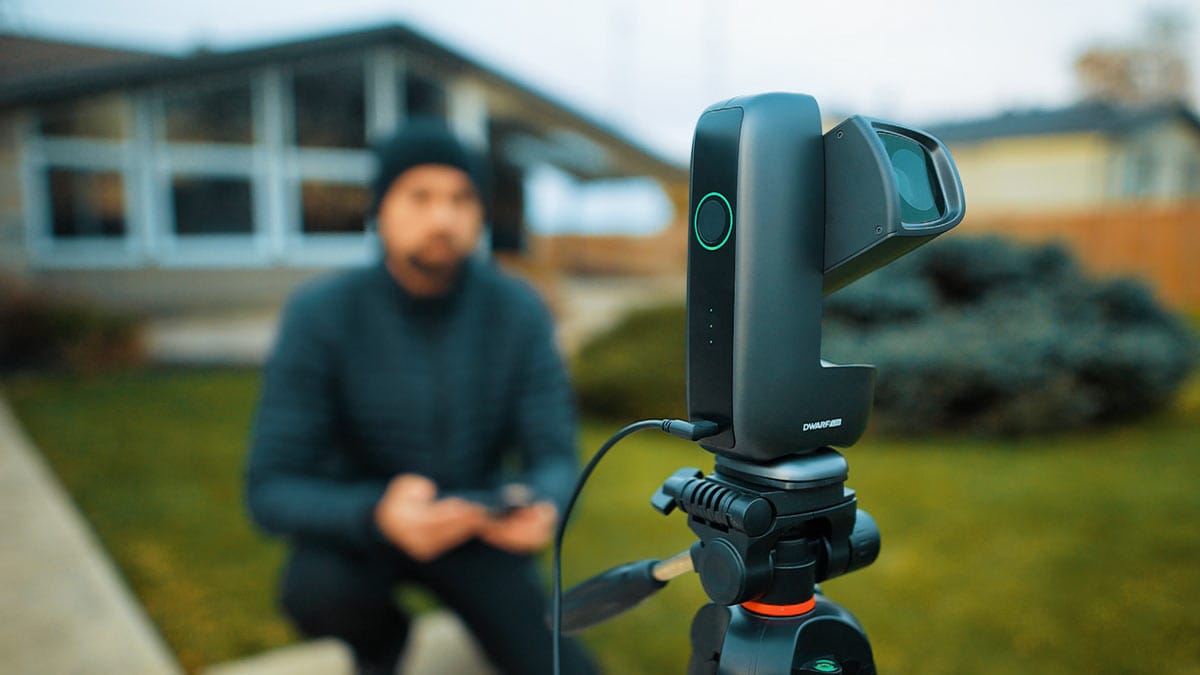
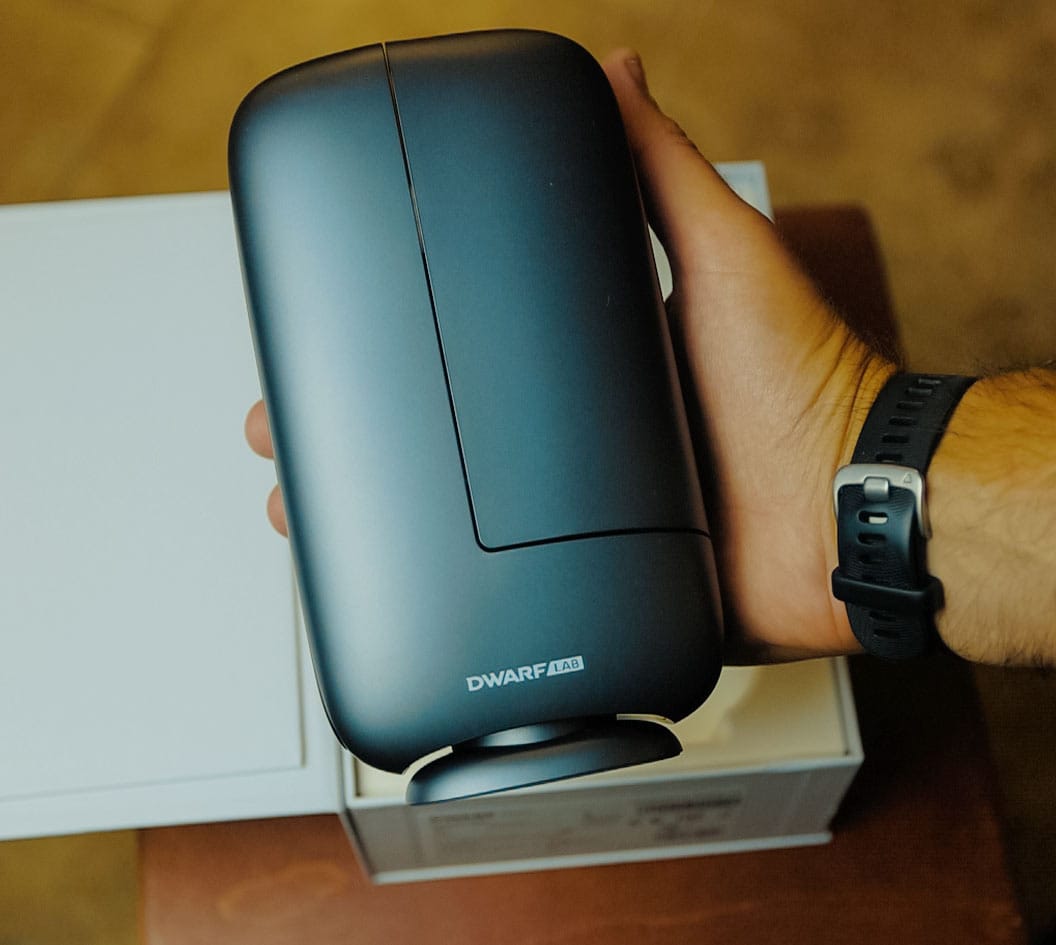
Over the past few months, I have been testing the DWARF mini smart telescope from the backyard and at a dark-sky site. This smart telescope is currently the world’s smallest, weighing just 840 grams.
The DWARF mini is like having an entire imaging rig that fits in your pocket. It packs the camera, lens, tracking, filters, and onboard computer into one tiny unit, and in this article, I’ll show you the amazing deep-sky images I captured using the DWARFLABS app on my smartphone.
You can watch my video to see the DWARF mini in action in my hands-on, in-depth review video below:
Fast Facts: DWARF mini Smart Telescope
- Type: All-in-one smart astrophotography telescope
- Weight: 840 g (1.8 lb)
- Optics: 150mm f/5 telephoto lens, 30mm aperture
- Sensor: SONY IMX662, 1080p (2 MP), 2.9 μm pixels
- Imaging: Telephoto + wide-angle lens in one unit
- Tracking: Alt-az mode and equatorial (EQ) mode
- Max exposure: Up to 90 seconds per sub in EQ mode
- Battery: Built-in 7000 mAh, up to about 4 hours of imaging
- Filters: Dark-Frame, Broadband, Dual Narrowband
- Control: DWARFLAB smartphone app
The DWARF Mini is currently listed at $399 USD on the DWARFLAB website.
What is the DWARF mini Smart Telescope?
My first DWARFLAB product experience was their popular DWARF 3 last year, and it blew me away as a valid competitor in the ‘top smart telescope’ space, in an increasingly competitive landscape. The ‘mini’ version of their flagship smart telescope improves on an already compact design, bringing it to a size you need to see in person to believe.
The DWARF mini is best described as a pocket-sized robotic telescope. Instead of piecing together a traditional astrophotography rig with a mount, telescope, camera, guide scope, and laptop, this little brick-shaped unit combines everything into one compact system you control from your phone.
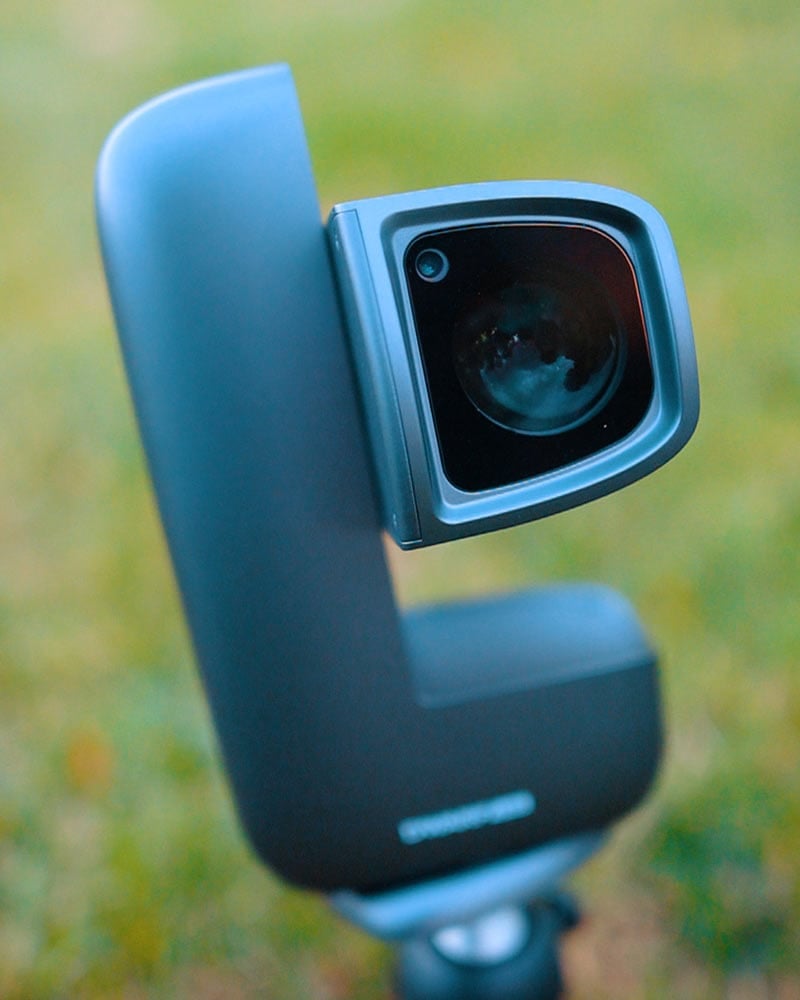
Inside the DWARF mini, you will find a 150mm f/5 telephoto lens with a 30mm aperture paired with a SONY IMX662 sensor. It outputs a 1080p image (roughly 2 megapixels), but the important specs here are the 2.9 μm pixel size and the sensor’s low-noise, high-sensitivity design, which are much more important for deep-sky work than the raw megapixel count.
As you will see in my example images, the deep-sky performance of the DWARF mini is exceptional for its stature. The pictures rival the images I captured with a DSLR camera through an 80mm refractor telescope when I started many years ago.
On top of the telephoto lens, there is also a built-in wide-angle camera for Milky Way and landscape-style images, so you effectively get two lenses in one tiny unit. The whole thing weighs about 840 grams, so it is lighter than many camera bodies and easy to toss into a backpack.
The Complete Package
You are not just buying optics with the DWARF mini; you are buying an automated imaging workflow. The mount, camera, filters, and software are all designed to work together so you can go from live view to a finished image right on your phone.
While other smart telescopes offer this experience (for example, the Seestar S30), the latest DWARF model does it in the most compact way possible. Choosing the right model largely depends on your preferred smartphone app user experience.
DWARF mini Specifications at a Glance
Here is a quick summary of the key specs and features based on real-world use.
| Category | DWARF mini details |
|---|---|
| Weight | About 840 g (1.8 lb), truly backpack-friendly |
| Optics (telephoto) | 150 mm focal length, f/5, 30 mm aperture |
| Sensor | Sony IMX662, 2 MP, 1080p, 2.9 μm pixels, optimized for low noise |
| Resolution | 1920×1080 on both telephoto and wide-angle lenses |
| Battery | Built-in 7000 mAh, roughly up to 4 hours of astrophotography |
| Charging | USB-C, can run and charge at the same time |
| Tracking modes | Alt-az mode and equatorial (EQ) mode |
| Max exposure (deep sky) | Up to 90 seconds per sub in EQ mode |
| Filters | Dark-frame shutter, broadband astro filter, dual narrowband (H-alpha and O-III) |
| Connectivity | DWARFLAB app, 2.4 GHz and 5 GHz Wi-Fi, Bluetooth for discovery |
| Imaging categories | General, Solar System, and Deep Sky modes |
| Processing | Live stacking, Stellar Studio in-app processing, FITS file saving |
Design, Build Quality, and Portability
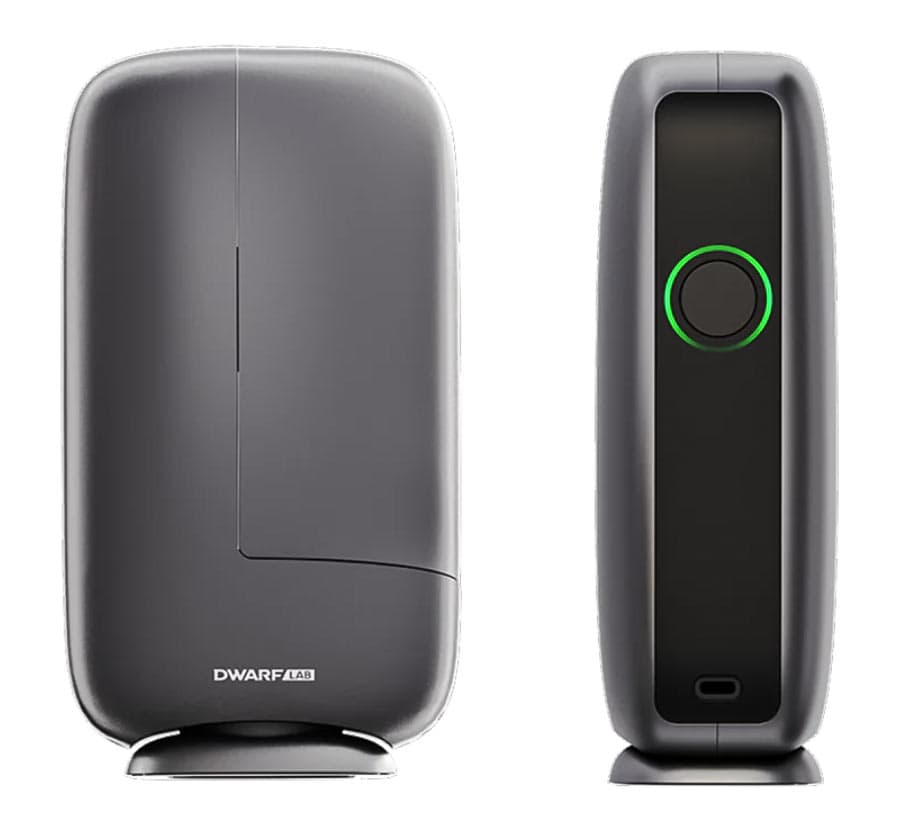
The first thing you notice when you pick up the DWARF mini is how small it is. If you are used to hauling out a big equatorial mount and a refractor, this feels closer to a compact camera than a telescope.
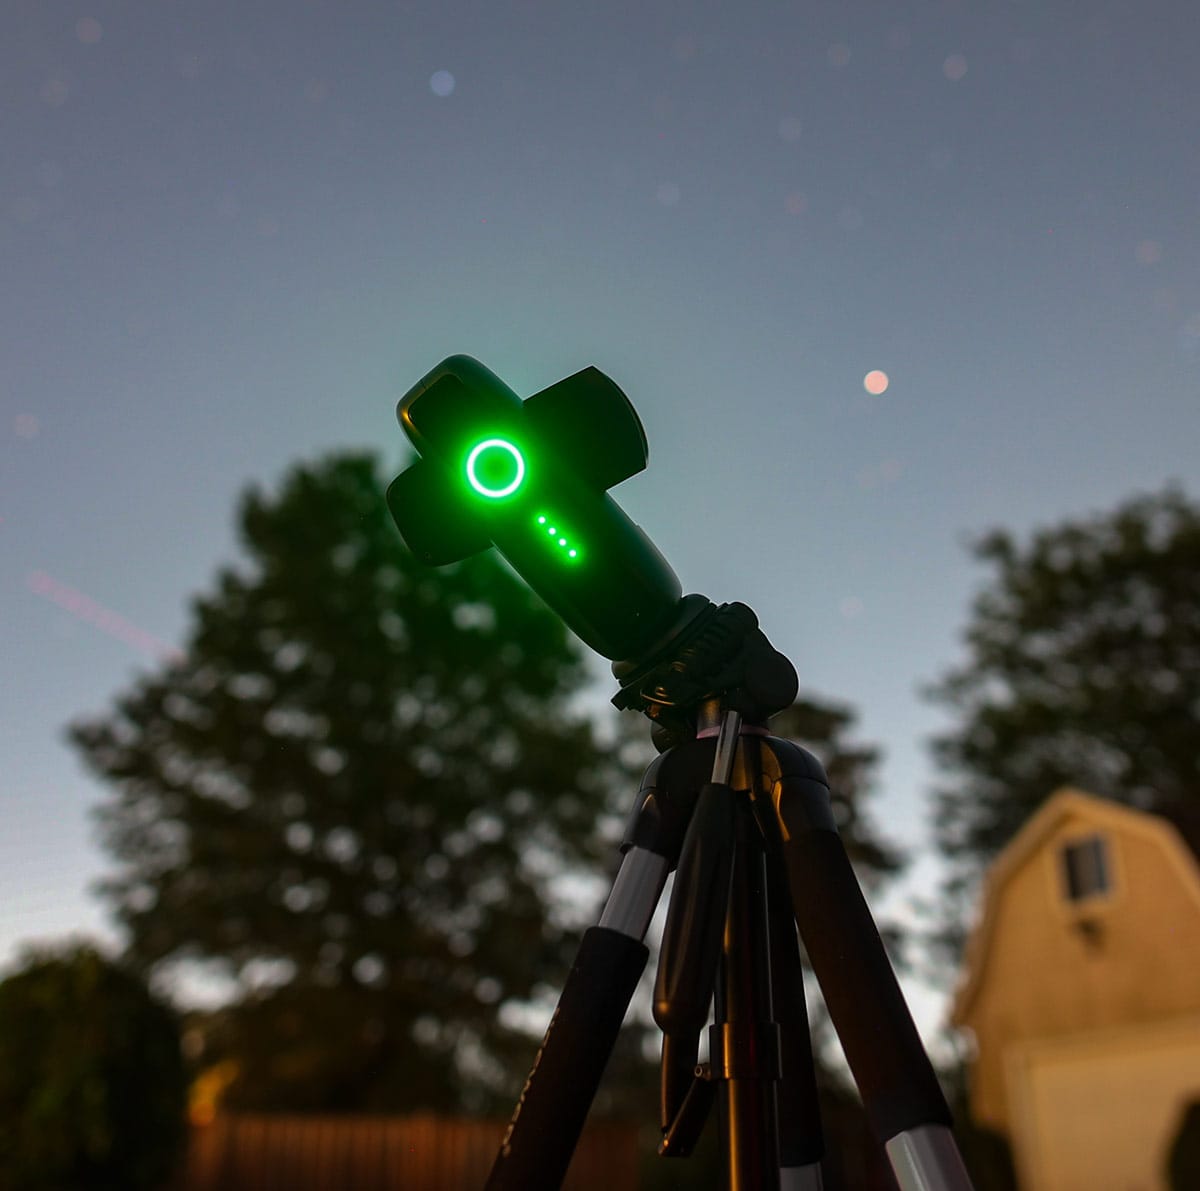
The DWARF mini uses a vertical tower-style design. The lens barrel tilts up and down, while the base rotates a full 360 degrees. This gives you a huge range of motion across the sky without worrying about cables snagging or the mount colliding with itself.
In the box, you get the DWARF mini unit, a USB-C cable, a small solar filter for safe solar imaging, and the manual. There is no hard case included, so you will want to repurpose a camera bag or pick up a padded case if you plan to travel with it regularly.
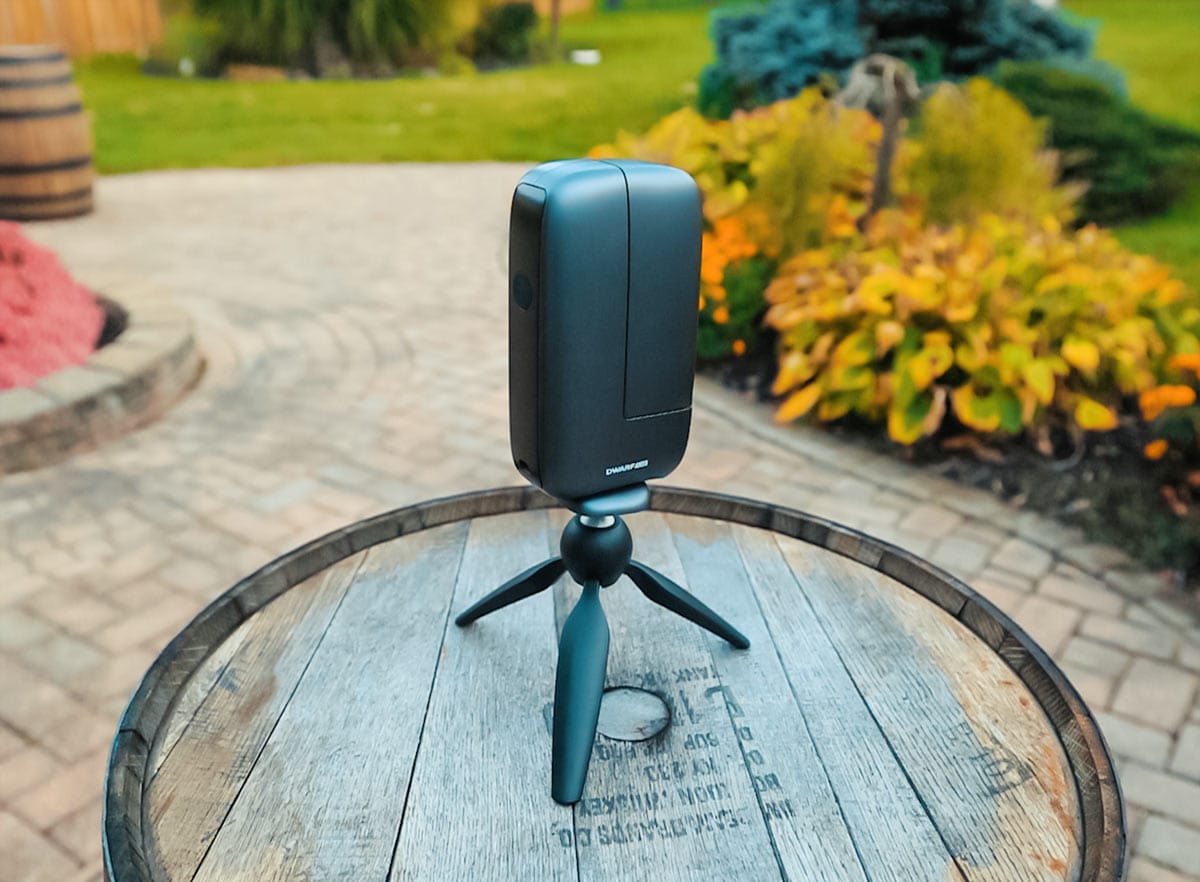
Ultra-portable astrophotography rig
At under 2 pounds, this is a true grab-and-go smart telescope. It fits in a backpack or even a large coat pocket, making it ideal for dark-sky trips, camping, or as a second rig alongside a traditional setup.
How Do You Use the DWARF mini?
The workflow is straightforward and very beginner-friendly. You power on the unit, connect your phone or tablet to the DWARF mini’s Wi-Fi network, and open the DWARFLAB app. The device supports both 2.4 GHz and 5 GHz Wi-Fi, plus Bluetooth for discovery, so connection issues are minimal.
Once connected, the app presents three main imaging categories:
- General – for daytime photos, video, and timelapses.
- Solar System – for the Sun, Moon, and planets.
- Deep Sky – for galaxies, nebulae, and star clusters.
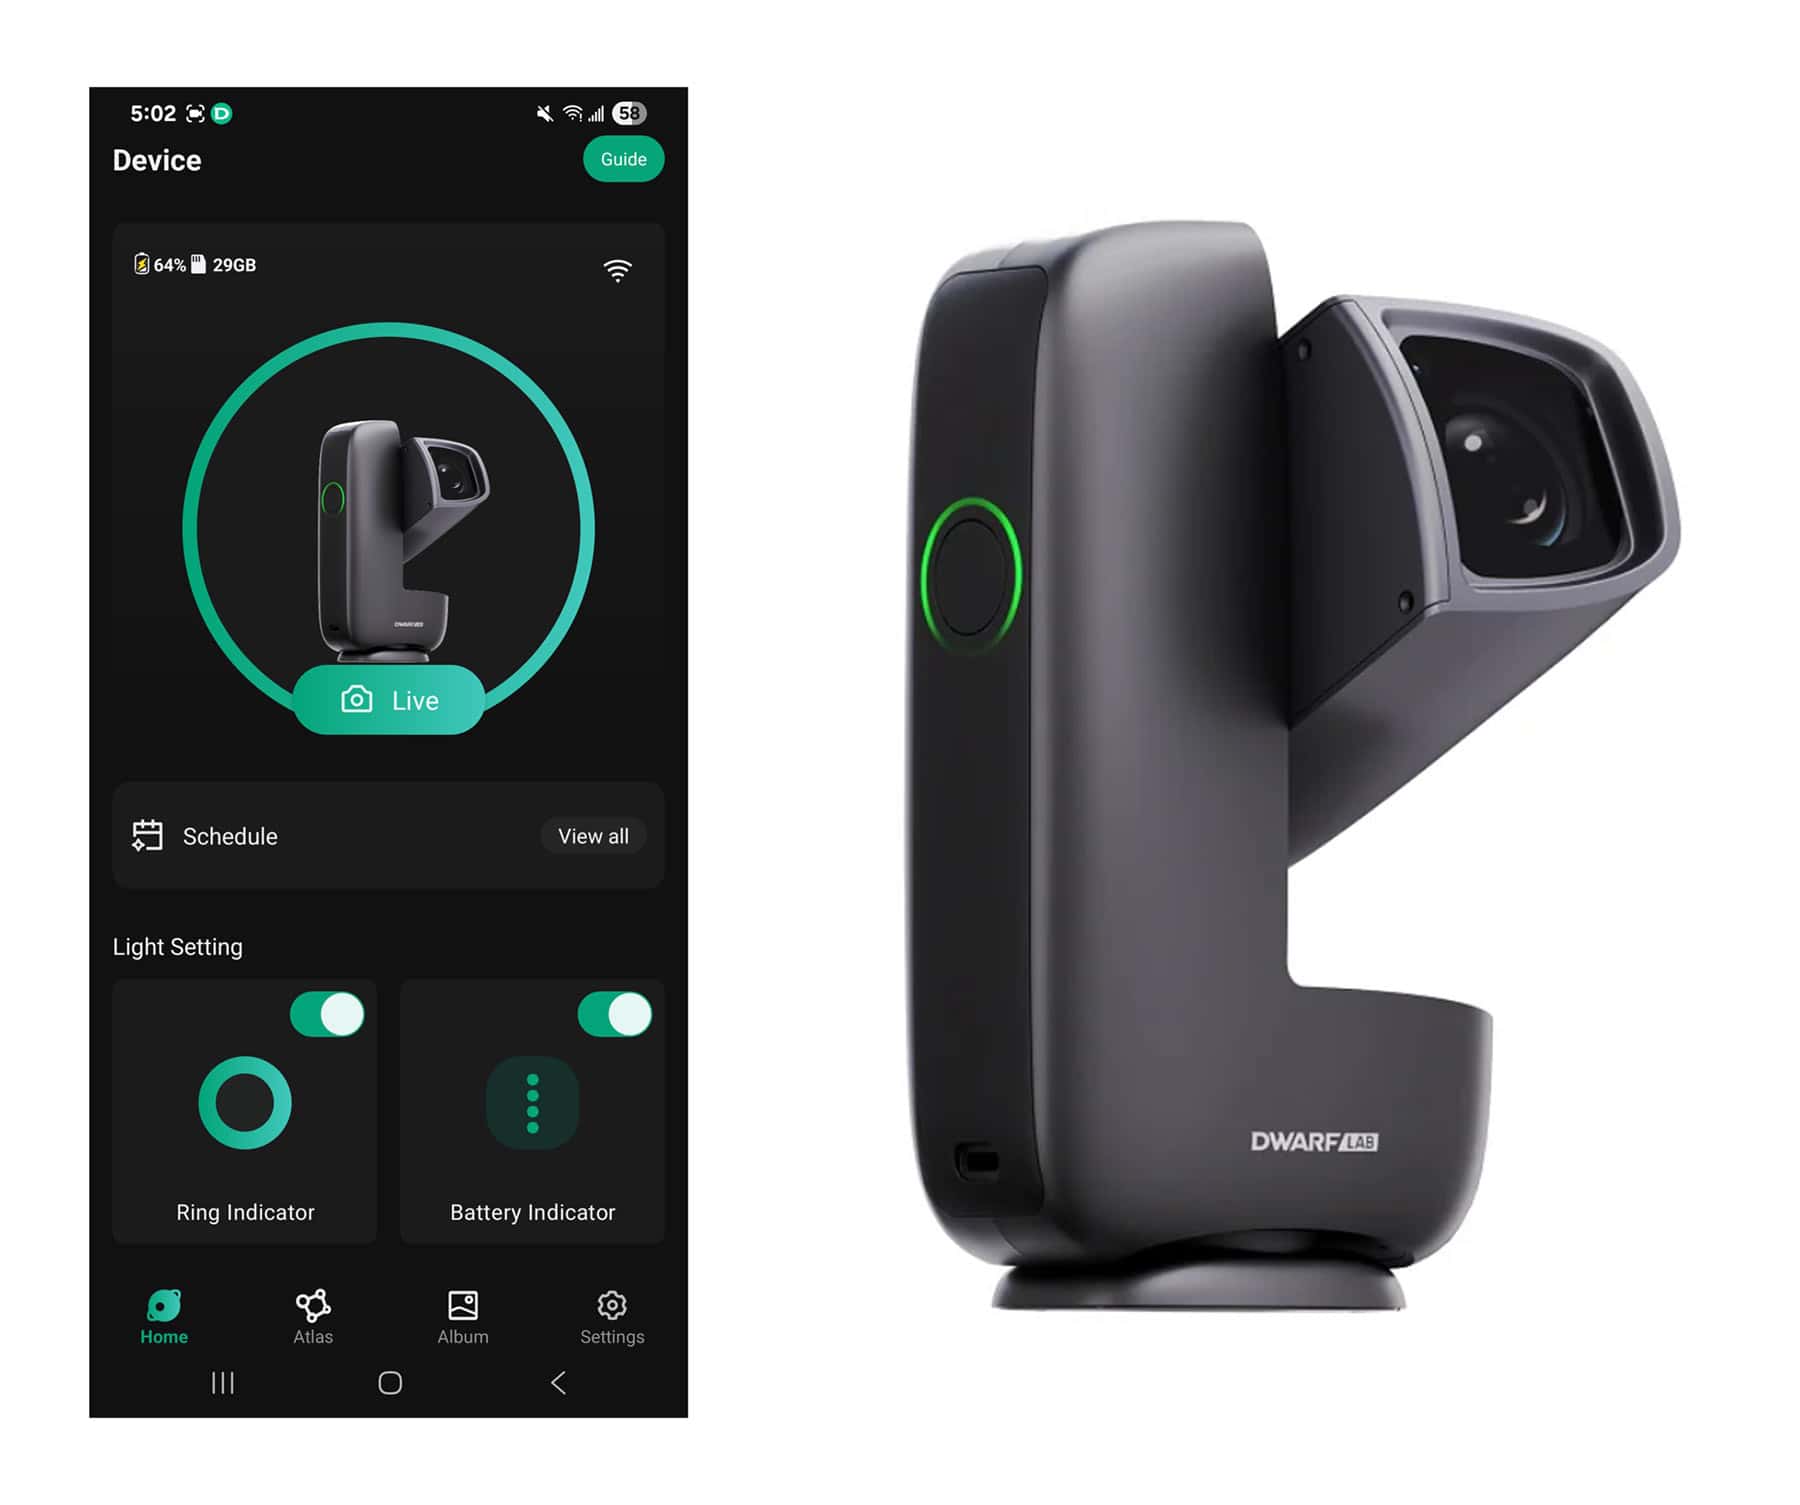
The DWARFLAB mobile app lets you control every aspect of the DWARF mini from your phone, including camera settings, exposure time, filters, tracking, and stacking. You never have to touch the telescope once it is set up. You just frame your target, adjust your settings in the app, and start capturing.
Solar and lunar imaging workflow
In Solar System mode, choosing the Sun prompts an important safety reminder from the app to attach the included ND solar filter. Once the filter is on, the mini runs a short calibration routine and locks on to the Sun, tracking it while live-stacking a series of short exposures for you.
The same idea applies to the Moon. The app guides you to center it, then tracks and stacks hundreds of frames automatically. For most people, this is the easiest way to get clean, sharp lunar and solar images without worrying about exposure times or tracking.
Is the DWARF mini good for beginners?
Yes. The DWARF mini is very beginner-friendly thanks to its automated alignment, GoTo slewing, built-in filters, and in-app live stacking. You do not need to know much about mounts or guiding to start capturing real deep-sky objects.
![]()
Alt-Az vs EQ: How Deep-Sky Imaging Works on the DWARF mini
For deep-sky astrophotography, the DWARF mini offers two main ways to track the sky: alt-az mode and equatorial (EQ) mode. Each has its place depending on how serious you want to get with your data.
Alt-az mode: true grab-and-go imaging
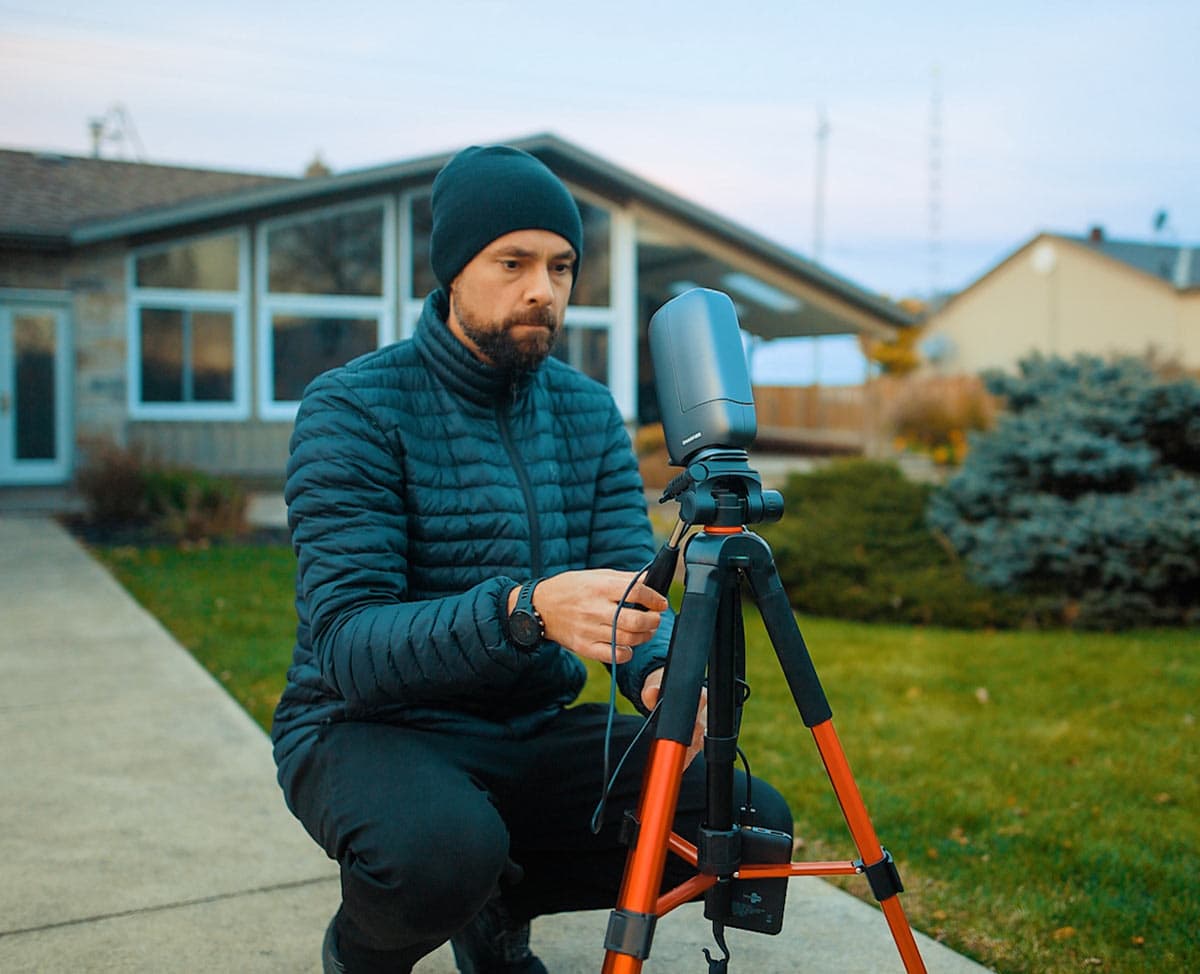
In alt-az mode, you simply place the DWARF mini on a photo tripod, level it, and select Deep Sky mode in the app. From there, you choose a target from the built-in atlas, and the telescope slews to the object automatically and begins tracking and stacking.
This is the mode I usually use from the backyard or when I want something quick and easy. For the Andromeda Galaxy from a darker site, I ran the DWARF mini in this simple “plop it down and go” mode with short exposures of around 10 seconds each. The final image captured the bright core, both major dust lanes, and even a hint of the satellite galaxies with a modest total integration time.
EQ mode: longer exposures and cleaner stars
When you want to push data quality even further, EQ mode is where the DWARF mini really shines. In equatorial mode, the telescope can take tracked exposures up to 90 seconds per sub, which helps gather more signal and keep stars tighter, especially on faint nebulae.
The app walks you through the EQ alignment routine. You point the scope at a patch of stars, it plate-solves the field, and then shows you how to rotate and tilt the unit to improve polar alignment. Once it is satisfied, you unlock those longer exposures without star trailing.
A practical bonus is that you do not need a perfect view of Polaris. You can roughly polar-align, point the scope at a clear patch of sky, and let the software guide you the rest of the way, which is extremely useful if your house or trees block the northern pole.
| Mode | Best for | Typical exposure length | Setup complexity |
|---|---|---|---|
| Alt-Az mode | Quick backyard sessions, casual deep-sky imaging | Short exposures (for example, around 10 seconds) | Very Simple: level it, choose a target, start stacking |
| Equatorial (EQ) mode | Cleaner data, faint nebulae, longer integrations | Up to 90 seconds per sub | Moderate: follow the app’s polar alignment routine |
The user interface of the DWARF mini while in deep-sky mode. Notice the small secondary wide-angle view of Orion clearing the treeline at the top left.
Real-World Deep-Sky Performance
Specifications are nice, but what really matters is what you can see on the screen. I tested the DWARF mini both from my light-polluted backyard and from a darker sky site on several classic targets.
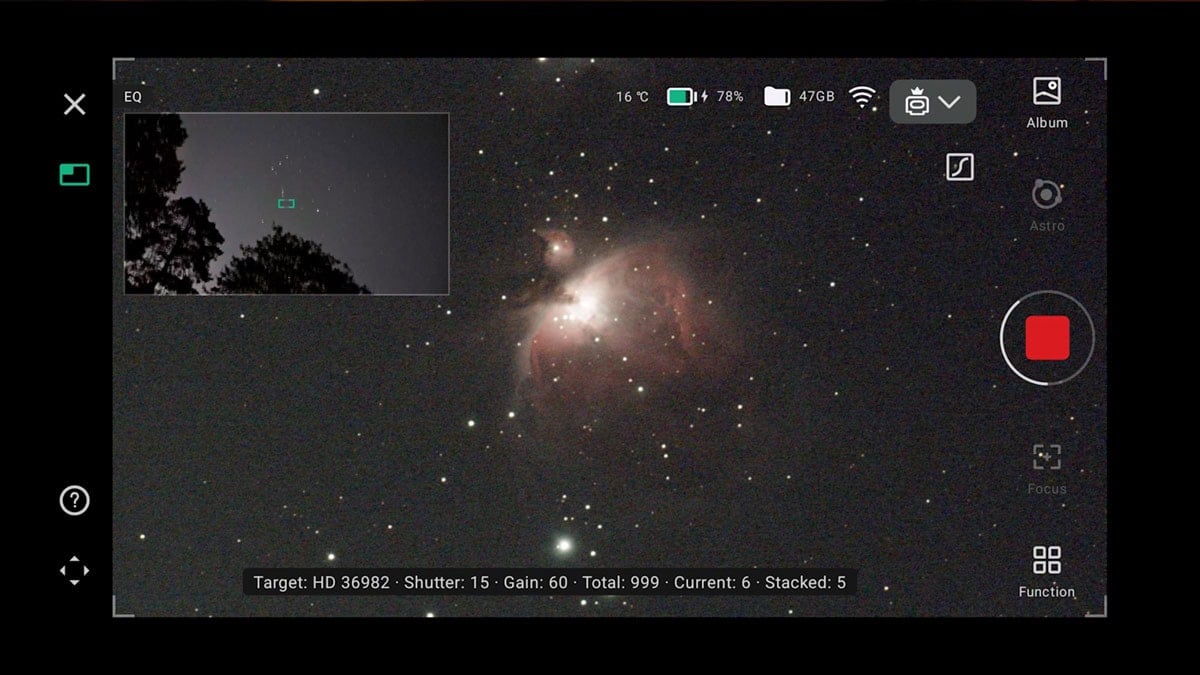
Orion Nebula from the backyard
From the backyard, I pointed the DWARF mini at the Orion Nebula in Deep Sky mode. After a quick autofocus on the stars and a few minutes of live stacking, the familiar structure of the nebula’s core started to appear in real time on the phone.
Letting the stack run longer and using the built-in astro filter, the final image revealed the pink and blue tones around the core surprisingly well for such a small instrument. This is the kind of result that used to require a small refractor, a dedicated mount, guiding, and a laptop.

The Orion Nebula (200 x 15 seconds)
Andromeda Galaxy under darker skies
At a darker site, I aimed the DWARF mini at the Andromeda Galaxy using the simple alt-az workflow. I set it to take 15-second exposures for a while and let the stack build.
The stacked image clearly showed the bright core, the two major dust lanes, and a hint of the satellite galaxies. It is not a high-resolution mosaic, but for a 30mm aperture smart scope, the result is genuinely impressive.

The Andromeda Galaxy (360 x 15 seconds).
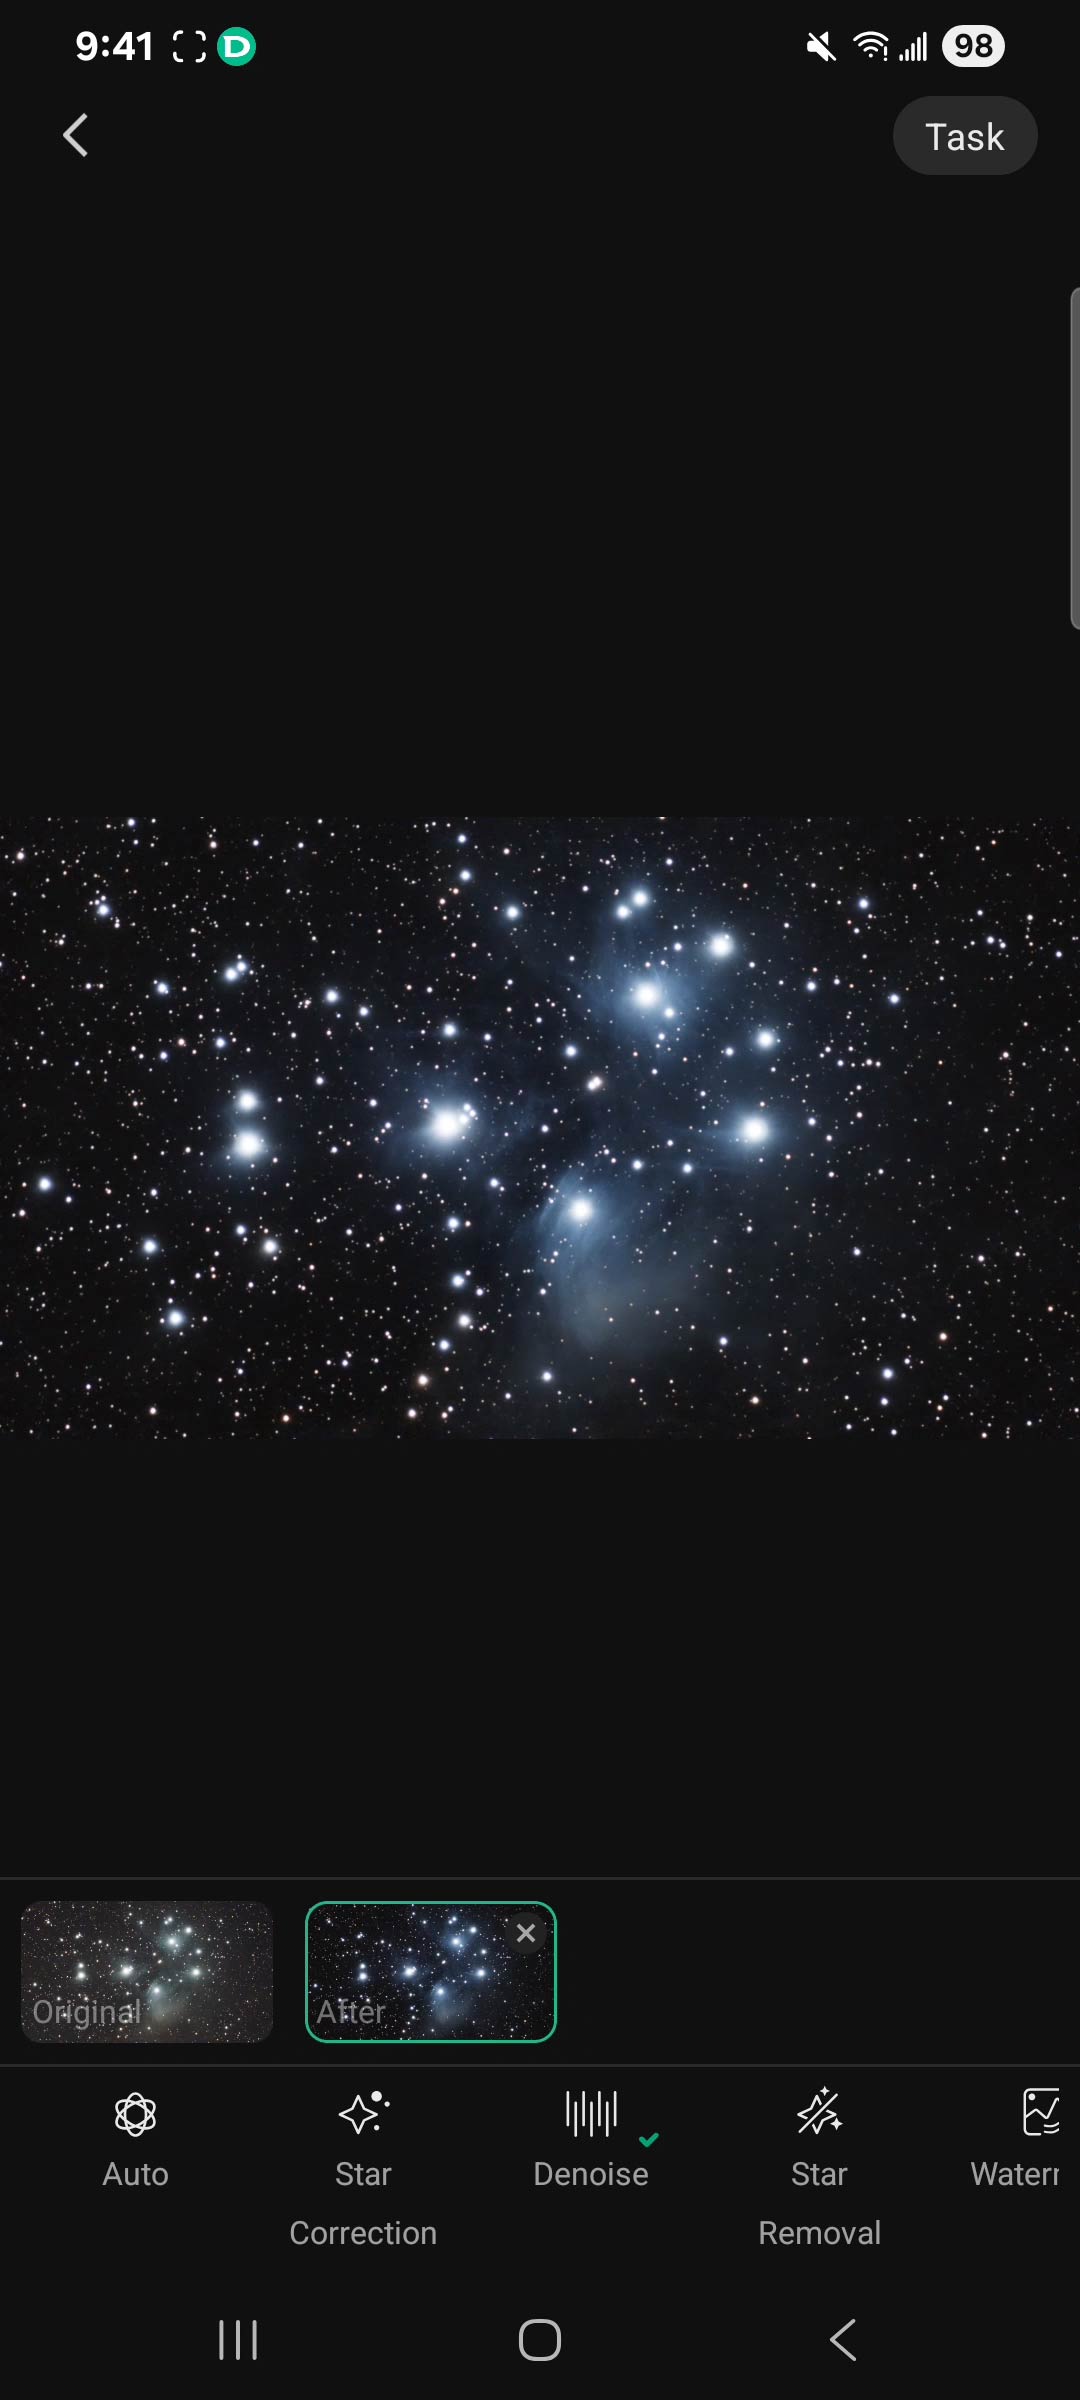
Pleiades: a standout result
Moving on to the Pleiades star cluster, the DWARF mini delivered one of the most impressive images I have seen from a smart telescope in this class. Under dark skies (Bortle 3), the stars were bright and crisp, and the overall image quality really pushed what you would expect from a tiny, automated telescope.
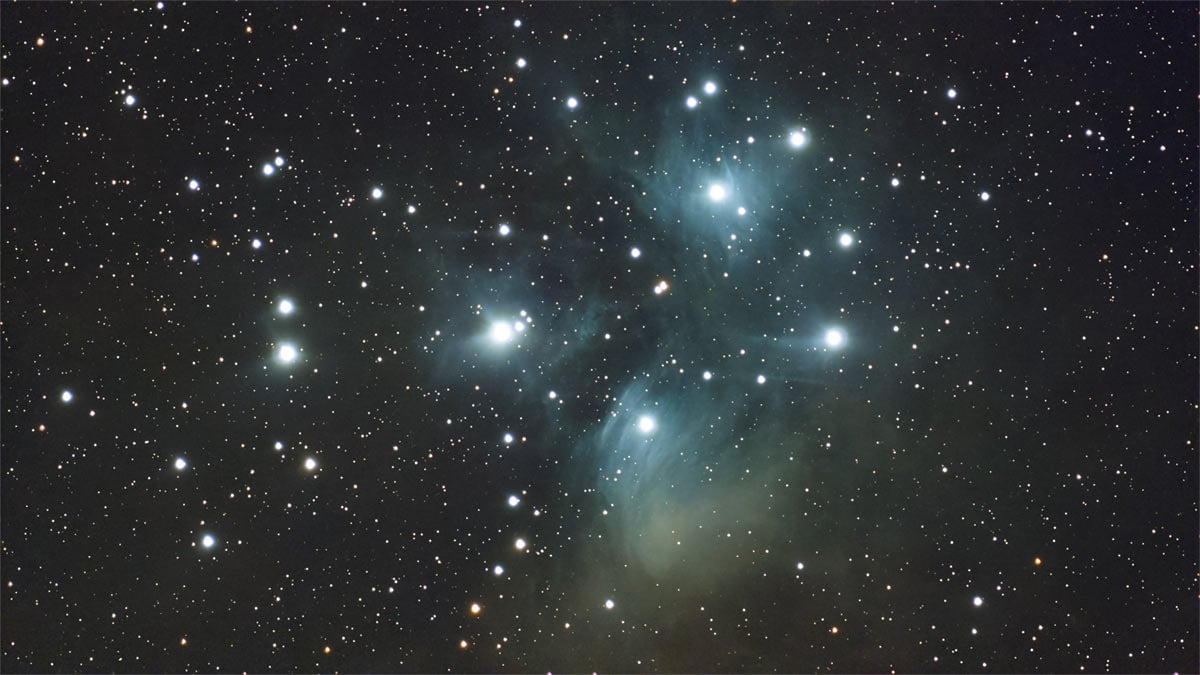
The Pleiades Star Cluster (345 x 15 seconds).
Do you need dark skies for the DWARF mini?
While the DWARF mini can absolutely produce nice results from the backyard, dark skies make a huge difference. The images of Andromeda and the Pleiades from a darker site were a clear step up in contrast and faint detail compared to light-polluted conditions.
Image Quality, Sensor, and Built-in Filters
The DWARF mini’s deep-sky performance is largely driven by its SONY IMX662 sensor and the built-in filter wheel. Compared to the DWARF 3’s IMX678 sensor, the mini’s IMX662 offers slightly larger pixels and a higher peak quantum efficiency.
In practice, that means the sensor is better at turning faint photons into a useful signal, and the larger pixels help keep read noise under control. Beta testers measuring dark frames have seen noticeably lower noise from the DWARF mini’s sensor, and in real processing, the data simply feels easier to work with. You do not have to lean as hard on noise reduction to get a clean image.
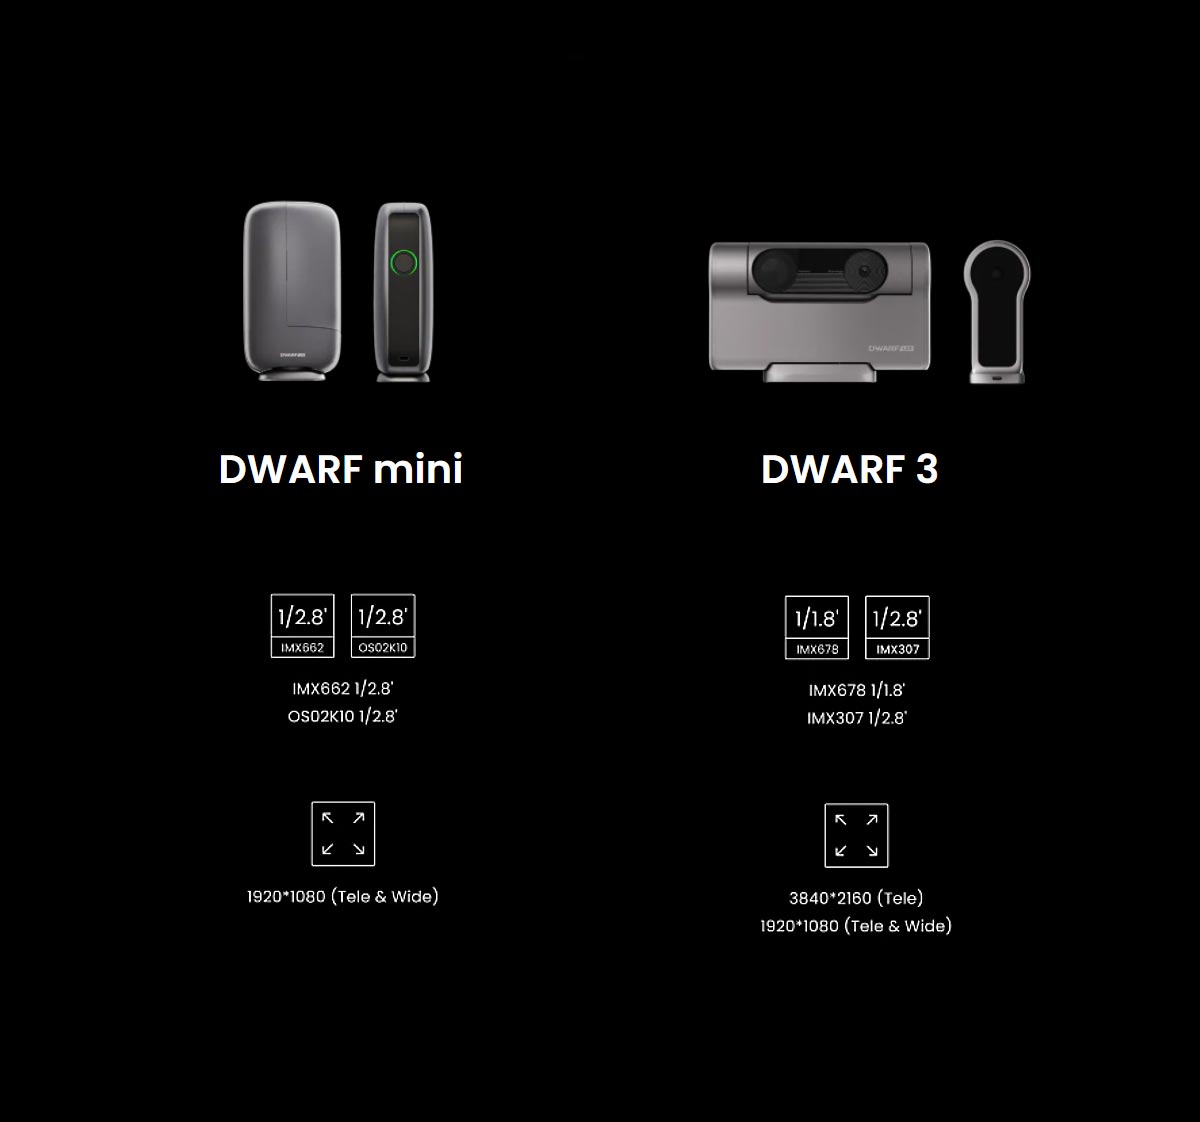
DWARF mini vs. DWARF 3 Sensors
This comparison image shows the different image sensors used in the DWARF mini and DWARF 3. The DWARF 3 sensor is designed for higher resolution and greater detail, while the DWARF mini sensor focuses on compactness and low noise for clean, wide-field astrophotos. Both deliver impressive results, but their strengths are slightly different depending on how you like to shoot.
Triple built-in filters
The motorized filter system is one of the most convenient parts of the DWARF mini:
- Dark-frame filter: This works like a mechanical shutter, allowing the mini to close automatically and capture dark frames during the session. Because the darks are taken at the same temperature and exposure time as your lights, calibration is more accurate without any extra effort.
- Astro broadband filter: This is the workhorse filter for galaxies, star clusters, and broadband targets. It helps improve contrast while keeping natural-looking colors.
- Dual narrowband filter (H-alpha and O-III): This filter is tuned for emission nebulae and is especially helpful when shooting under moonlight or in mild light pollution. It isolates the important emission lines and cuts out much of the background glow.
Being able to switch filters in software, instead of screwing physical filters on and off in the dark, is a huge quality-of-life upgrade that encourages you to experiment more with different targets and conditions.
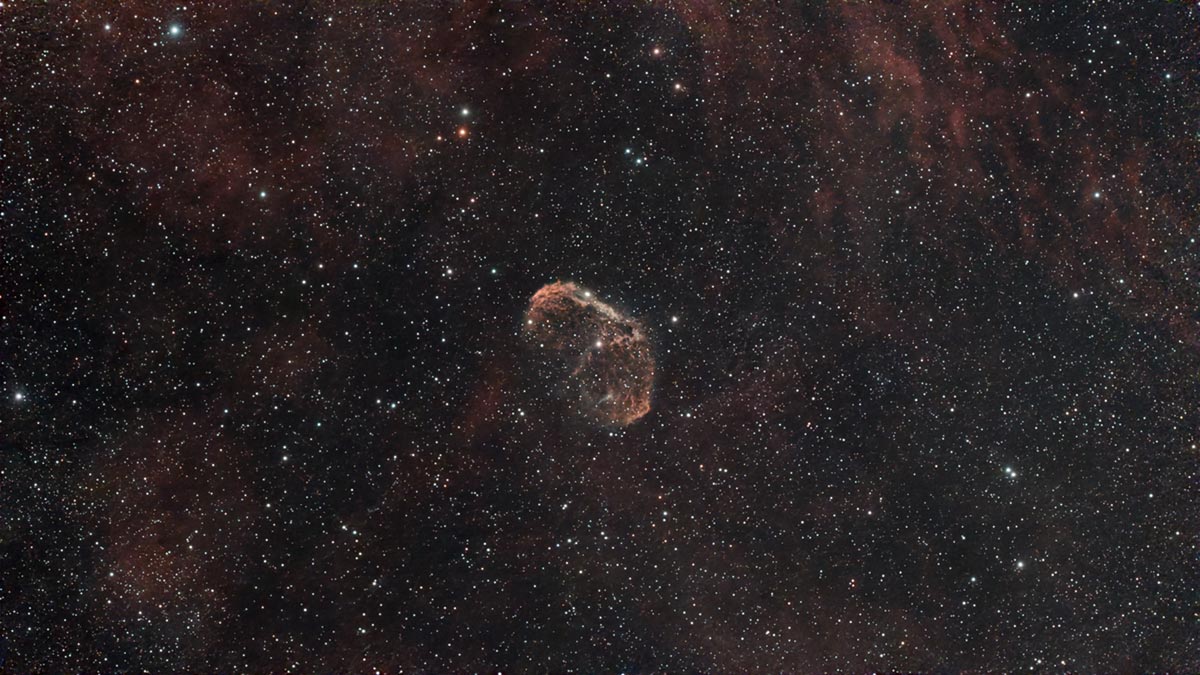
I captured this image of the Crescent Nebula using the dual-narrowband filter from my light-polluted backyard.
Can the DWARF mini capture galaxies and nebulae?
Yes. With the IMX662 sensor, tracking for up to 90 seconds in EQ mode, and its broadband and dual narrowband filters, the DWARF mini is capable of capturing classic deep-sky objects such as the Orion Nebula, the Andromeda Galaxy, and bright emission nebulae, especially with enough integration time.
In-App Processing and Workflow
One of the biggest differences between a smart telescope like this and a traditional imaging rig is the processing workflow. With the DWARF mini, you can go from live stacking to a shareable final image without ever touching a computer.
Once a stack is complete, you can open it in Stellar Studio inside the DWARFLAB app. From there, you can stretch the image, adjust contrast, apply noise reduction, and even add a watermark directly on your phone.
For beginners, this is a huge advantage. You do not need a dedicated astrophotography PC or expensive software to get a pleasing final image. For more experienced imagers, it is a great way to do a quick “field edit” for social media while still saving the data for a full reprocess later.
The DWARF mini also saves FITS files along the way, so you can bring them into PixInsight, Siril, or Photoshop once you are home. This makes it suitable both as a beginner’s first telescope and as a secondary rig for more advanced users.
Enhance Your Images with Stellar Studio
The Stellar Studio tools in the DWARFLAB app let you improve your DWARF mini astro-images right on your phone. After a capture session, you can tweak brightness, contrast, and color balance, reduce noise, and bring out more detail in faint nebulae and galaxies, then save the finished image directly to your camera roll for sharing.
What are the Limitations of the DWARF mini?
As capable as the DWARF mini is, it is important to be honest about where it falls short, especially if you are coming from a larger traditional setup.
- Small aperture: At 30 mm, the aperture is modest. Long integrations and smart processing can do a lot, but it will not match the fine detail and faint-structure performance of a larger refractor or reflector.
- Resolution: Both lenses are limited to 1920×1080. If you love printing huge posters or cropping aggressively, the image size will feel limiting.
- Fixed ecosystem: As with all smart telescopes, you are working inside a controlled ecosystem with fixed optics, exposure limits, and an app-driven workflow. You cannot swap in a different telescope or camera.
Clear expectations for best results
The DWARF mini will not replace a full-size mount and large refractor if your goal is ultra-high-resolution astrophotography. It is designed to make the hobby easier, more portable, and more accessible, not to compete with heavy, high-end rigs.
Who is the DWARF mini smart telescope for?
The DWARF mini makes the most sense for three main types of astrophotographers:
- Beginners: If you want to get into astrophotography without dealing with counterweights, cables, and guiding, the DWARF mini is a very appealing starting point. The app does most of the heavy lifting for you.
- Travelers and hikers: For dark-sky trips where every gram in the backpack counts, a 1.8 lb smart telescope that can capture deep-sky objects is a powerful option.
- Experienced imagers: If you already have a main rig, the DWARF mini works well as a no-stress second setup. While your primary system captures your main target, the DWARF mini can quietly collect “bonus data” on another object at the same time.
| User type | Why DWARF mini works |
|---|---|
| Absolute beginner | Simple app control, automated tracking, no need for a separate mount or computer |
| Casual backyard imager | Fast setup, minimal gear, easy social media–ready images from the phone |
| Travel/Camping | Pocket-sized, internal battery, works well from dark-sky sites |
| Experienced astrophotographer | Great as a second rig for a relaxed, parallel imaging session |
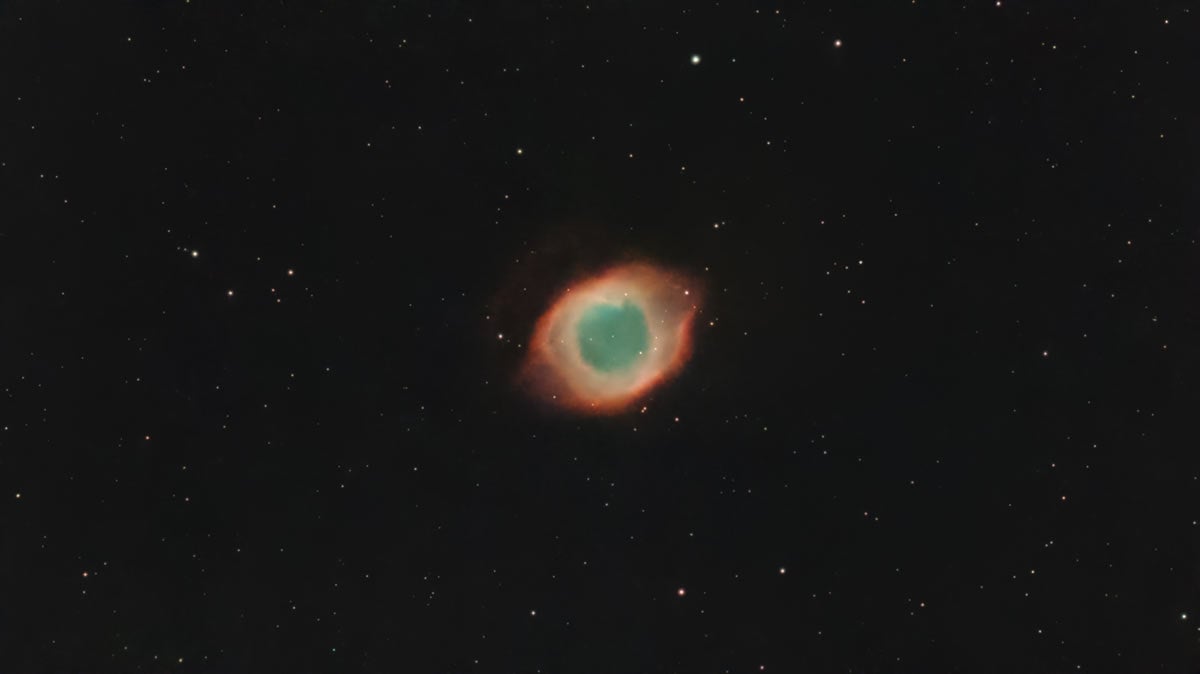
The Helix Nebula captured from my backyard using EQ Mode and the Dual-Narrowband filter.
DWARF mini vs. DWARF 3: Which One is Right For You?
The DWARF mini and DWARF 3 share the same DWARFLAB ecosystem, but they prioritize different things. The DWARF mini is all about portability and simplicity, while the DWARF 3 leans into being a more powerful, all-around smart telescope with a bit more reach in terms of resolution and flexibility.
| Feature | DWARF mini | DWARF 3 |
|---|---|---|
| Optics & sensor | Compact telephoto lens with a low-noise sensor | Slightly larger aperture and higher-resolution sensor |
| Exposure & imaging | Long tracked exposures, great for wide-field nebulae and galaxies | Shorter single exposures but higher overall detail and 4K-friendly output |
| Filters | Astro-focused filters, including dual narrowband for emission nebulae | More “do-it-all” filter set for day and night use |
| Size & weight | Noticeably smaller and lighter; easy to keep in a camera bag | Bulkier and heavier, better suited to more deliberate setups |
| Best for | Travel, grab-and-go, quick backyard sessions | Backyard rigs, more serious mixed-use imaging (sky + daytime) |
On paper, the DWARF 3’s extra aperture and resolution give it the edge for detail, especially if you like to crop, print, or shoot 4K-friendly video. In practice, though, the DWARF mini holds its own extremely well on typical deep-sky and lunar/solar targets, especially when you stack longer tracked exposures.
For the way I shoot, I actually prefer the DWARF mini simply because it is more compact and lives in my camera bag, with very few real-world drawbacks in image quality or performance compared to the DWARF 3.
If you want the smallest, easiest-to-carry smart telescope, the DWARF mini is the one I would choose. If you do not mind a bit more size and weight in exchange for extra resolution and flexibility for both day and night work, the DWARF 3 is the more capable all-rounder.
It really comes down to whether portability or maximum performance matters more to you.

The DWARF 3 is a practical choice for a portable smart telescope, and its additional size and weight over the DWARF mini are negligible.
Considering alternatives?
ZWO’s Seestar S30 Pro is another compelling smart telescope option worth noting. It’s more expensive, larger, and heavier than the DWARF Mini, but it also features the best camera sensor I’ve tested in any smart telescope (Sony IMX585). For astrophotographers who prioritize sensor performance and image quality above portability, the S30 Pro may be the better long-term choice.
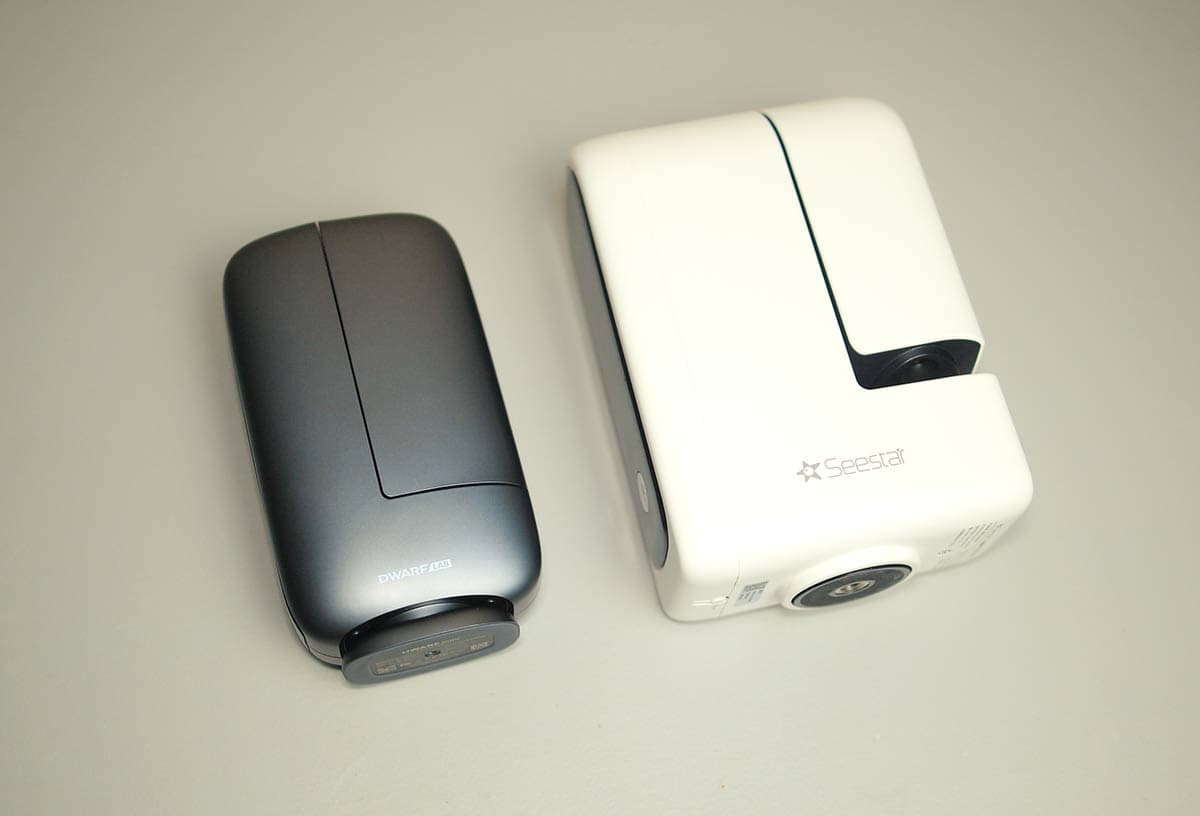
A size comparison between the DWARF mini and the Seestar S30 Pro.
Final Verdict: Is the DWARF mini worth it?
The DWARF mini leans fully into the idea of portable, automated astrophotography. You get a genuinely pocket-sized smart telescope with solid tracking, up to 90-second exposures in EQ mode, low-noise data from the IMX662 sensor, and a built-in motorized filter system that makes it surprisingly capable for the Orion Nebula, galaxies, and bright star clusters.
It will not replace a serious mount and large refractor if your goal is ultra-high-resolution, highly detailed images. But as a travel scope, a beginner-friendly smart telescope, or a fun second rig you can run alongside your main setup, it is an impressive and enjoyable tool.
For anyone who wants to spend more time collecting photons and less time wrestling with cables and software, the DWARF mini is simply too fun to ignore. Until next time, clear skies!
 Trevor Jones is an astrophotographer and a valued member of the RASC. His passion is inspiring others to start their astrophotography journey on YouTube so they can appreciate the night sky as much as he does. His images have been featured in astronomy books & online publications, including the NASA Astronomy Picture of the Day (APOD).
Related Content


Thanks for the detailed, balanced review.
Thanks, Ron! Clear skies buddy
I’d call myself an experienced astrophotographer and was very skeptical of these small scopes. A guy brought a Seestar to one of our club meetings and took about 139 frames (10-15 seconds? I forget) of M16 Eagle nebula.
He sent me the data, and I put it in PixInsight and played with it. I was impressed! The image came out kind of small but the detail was very good. This was from a Bortle 4-5 location (sadly, I think it’s a solid Bortle 5 now – and going downhill fast).
I like how it has the dual filter as well as others, that makes a huge difference with nebula and light pollution. Thanks for the article, very good to see your experiences with the scope! I think I do see one of these in my collection of gear in the future. 😉
Thanks for the kind words, Tom! I had the same skeptical experience with the Seestar S50 when I first tried it – and you’re right, the data is pretty good when you really dig into the processing. I think at the price point smart telescopes are at right now, they deliver the ‘fun’ of astrophotography to the masses – and I like that! Clear skies
How well will the Dwarf Mini cover 100+ Messier objects ? Can you use the scope to record variable stars for AAVSO ? Any thoughts on how this would do on a dark sky trip to Australia or Namibia? Is there a good catalog of southern objects ?
Thanks for a comprehensive review ?
You got me, Richard! I left out of those specific scenarios you thought of! And for the record, I think the DWARF mini would be the perfect companion on a dark sky trip to Australia and Namibia (It has a good catalog of southern targets)
Hey Trevor, I started doing Astro photography back in 2019 from watching your YouTube vids. Honestly, it’s amazing to see how far the technology has come in just a few short years. though it’s been some time since I last imaged, I will definitely be picking up the dwarf in the future! thanks for all you do man!
I been doing aswtrophotography for a while using my Canon R5 and various lens using on aStar Adventurer GTi I process them in Lightroom and then Sequator before finishing them in Photoshop, I usually save them as A4 size.
I understand that there be no need to use Sequator as the images will been stacked as they are taken, can the finished image on the phone be sent to Photoshop or Lightroom CC for further editing up to A4 size at 300 pixels
Great review, Trevor! I’m a newbie to astronomy but went to Rocky Mountain Star Stare this past summer and caught the bug. That said, I’m as far from a tech guy as you can find, so an affordable smart telescope like this one or the Seestar S50 might push me over the edge.
Do you have any experience using this in a tent? I like to hike and have a tent with an ultra clear mesh roof and at only 1.8 lbs the mini would let me hang out all night long in the comfort of my sleeping bag. Of course I could always set it up right outside the entrance.
Thanks Dave! Astronomy camping is my favorite. I’ve spent many memorable nights in a tent with my telescope running just outside all night 🙂 You’ll want to set your smart telescope up with as much sky coverage as possible – this helps for plate-solving (positioning) – and offers the widest assortment of possible targets. I would also get it up off the ground on a tripod if possible, and hang your water jug from the center column for stability (wind can be an issue).
Amazing review!
I like to travel light (and hike, eventually), and I’ve been trying to decide between the Mini and the Dwarf 3. For astrophotography and eventually animals from afar.
So far, D3 wins for me with its 4k resolution. And Mini wins with its portability.
I have a Mirrorless camera that I use for many occasions, but the focal length of these smart telescopes is very tempting for when I wanna travel with just my phone (S23u) and leave the camera.
I have seen some videos of the Mini filming birds/people and they made me think it’s not very difficult to use it to photograph and film animals from a good distance.
How fast can you control the movement during filming?
It appears you have 2 tripods in the photos for the mini here in the blog and the dwarf website appears to have another. What do you recommend and where can i purchase the best ones?
I have the S50. One thing I don’t like is the number of dropped frames. I lose almost 50% at 20 seconds, no matter how often I calibrate and ensure good EQ alignment. Does the Dwarf Mini drop frames?