My Best Image of the Andromeda Galaxy Yet
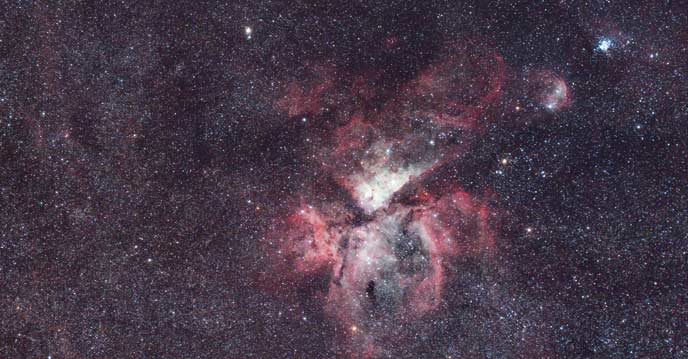
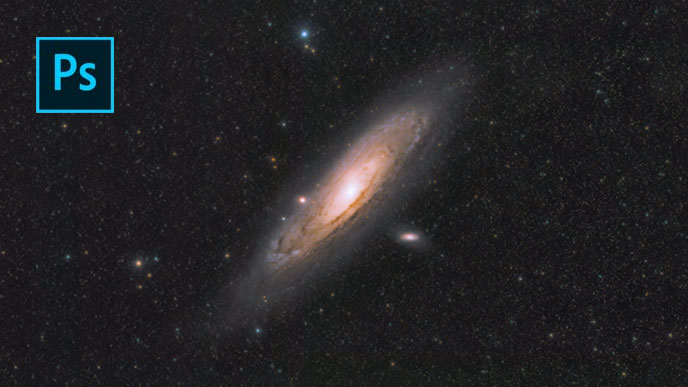
My latest photo of the Andromeda Galaxy is my best effort yet. I have been taking deep-sky astrophotography images for almost 15 years now, and this might be my favorite photo of space I’ve ever taken.
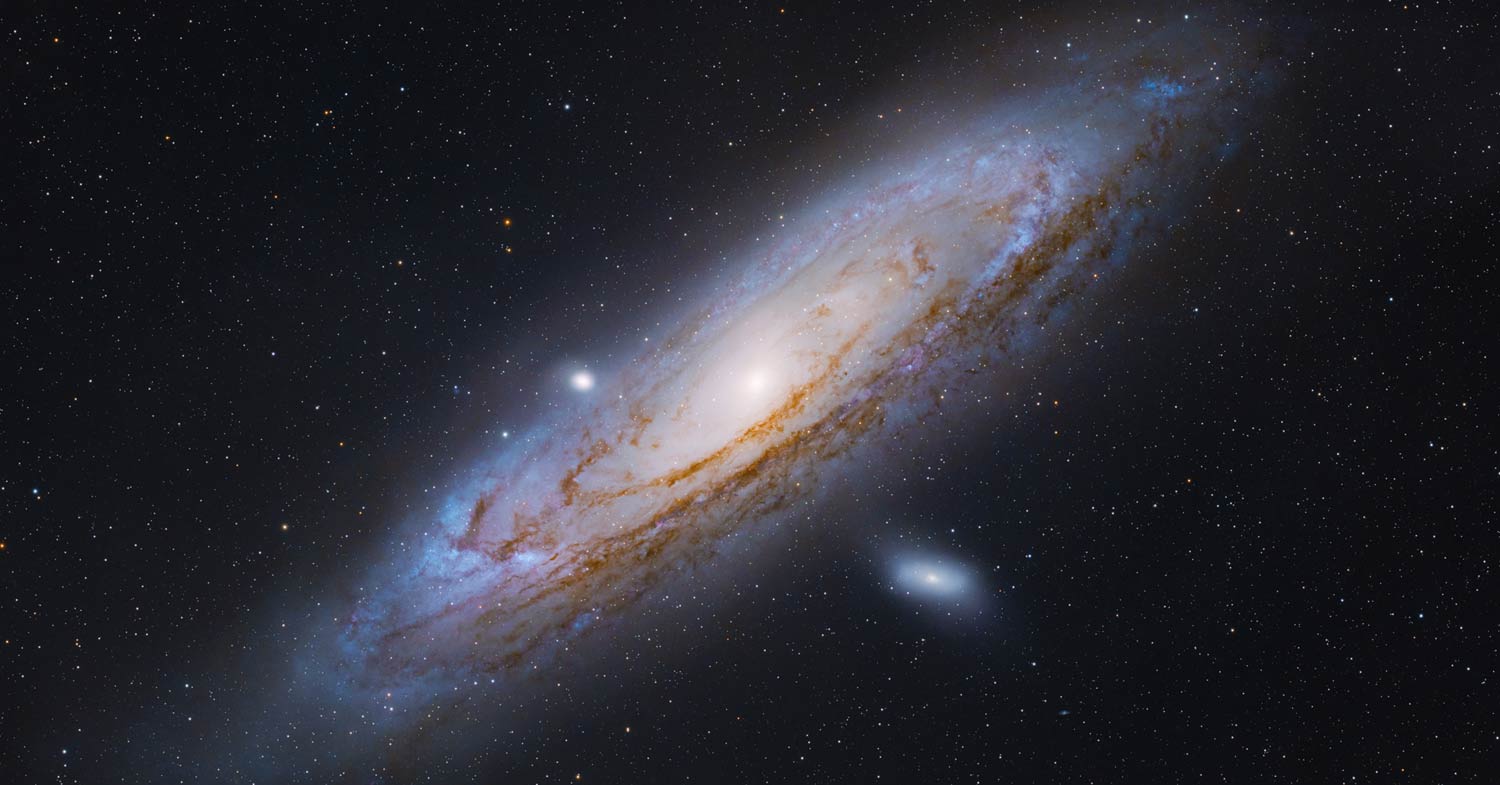
This detailed image was captured with a small refractor telescope and a dedicated astronomy camera. The image reveals the incredible, dusty spiral arms of Andromeda in incredible detail.

The Andromeda Galaxy. Trevor Jones. Click the image to see the full-size version (24MP).
I’ll never take an image of Andromeda that can compete with NASA’s, but I can certainly continue to improve on my previous efforts and capture the best shot I can.
I believe the planning that went into the shot and my always-evolving image-processing techniques are the reasons this shot was so successful. If you have questions about how I captured and processed the image, please feel free to leave a comment.
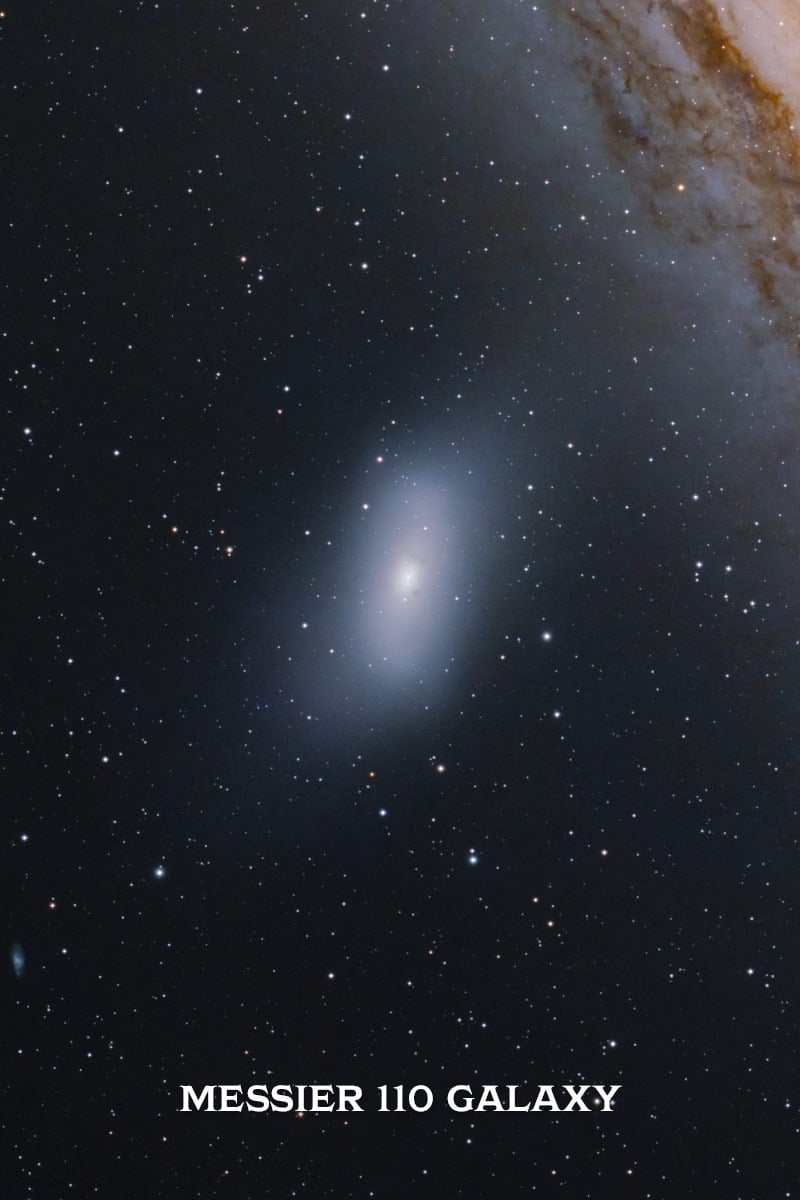
This close-up of Andromeda’s satellite galaxy, M110, gives you an idea of the detail in my latest photo.
The Andromeda Galaxy
Messier 31 is classified as a spiral galaxy, but it appears elliptical because it is tilted from our vantage point on Earth. This galaxy is extremely bright compared to most others we see in the night sky.
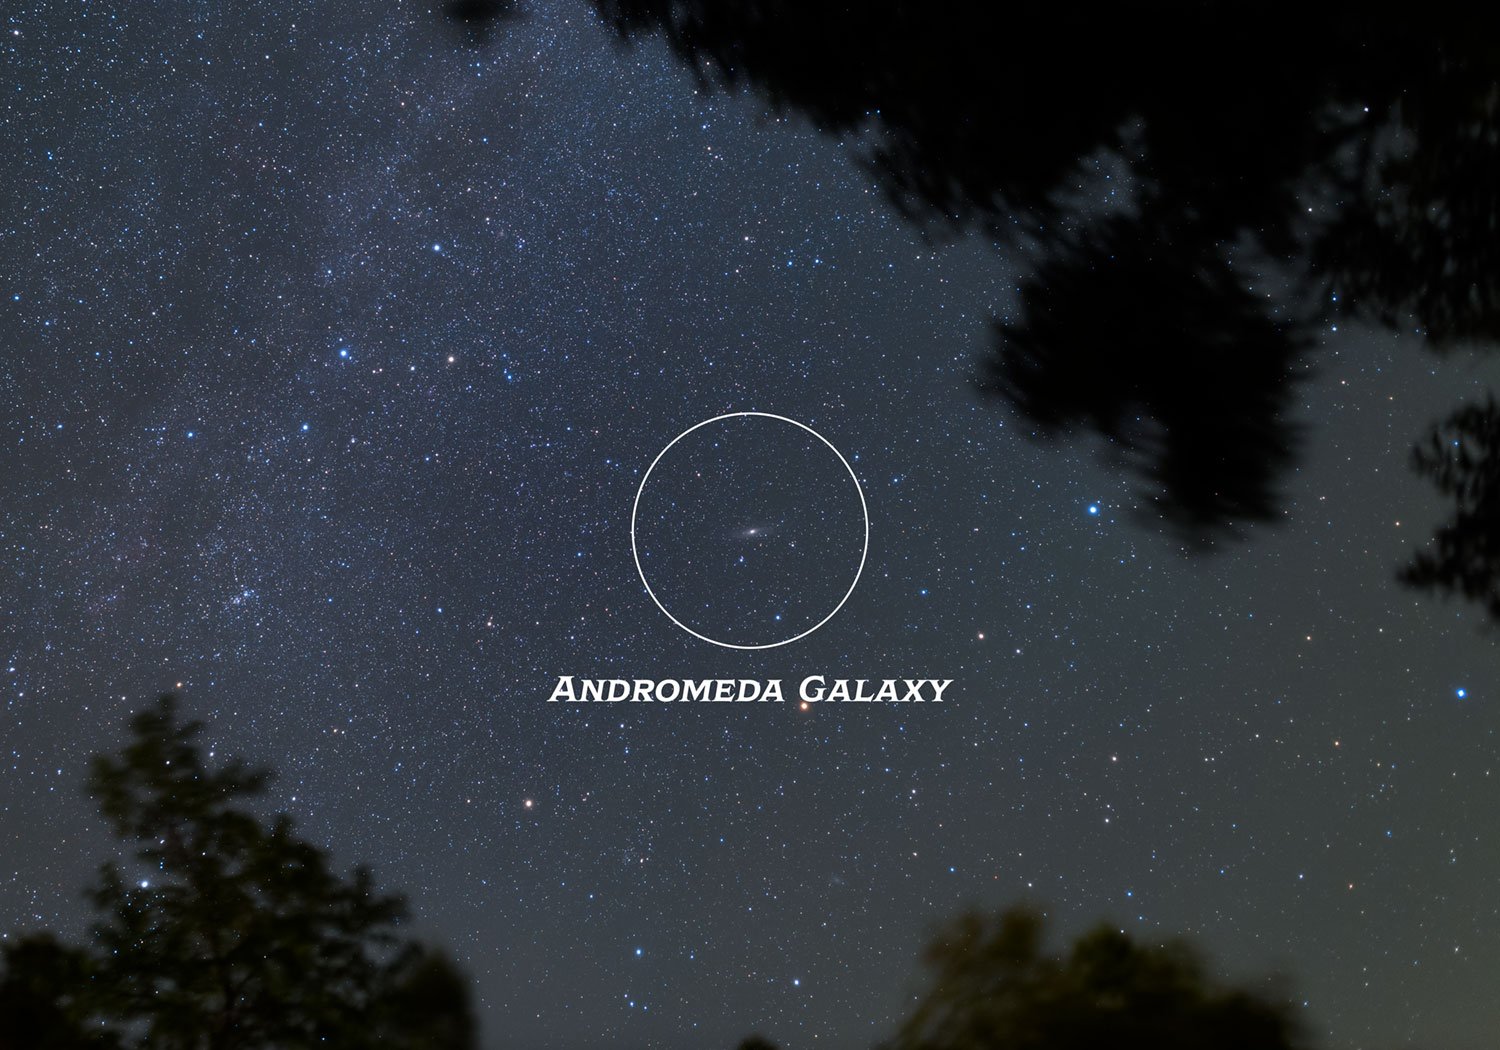
The galaxy lies 2.5 million light-years from us and is similar to our own Milky Way Galaxy. On a clear night under the right conditions, the Andromeda Galaxy can be seen with the naked eye.
Through a telescope or a pair of binoculars, the galaxy will appear as a noticeable “smudge”, which is the bright central core of Andromeda. Only through astrophotography can we reveal the faint outer spiral arms of the galaxy.
Although the sky was clear and beautiful the night this image was taken, stargazing was low on my priority list. I had to make sure all my astrophotography equipment was working properly to maximize the exposure time I could collect on M31 in a single night.
While my main telescope was running, I also set up my smart telescope (ZWO Seestar S50) to capture a few ‘side projects’, including the nearby Triangulum Galaxy (Messier 33). I find myself bringing a smart telescope with me on nearly all astrophotography outings these days, to enjoy EAA astronomy while my primary system is collecting data.
About The Location
Over the past 15 years, I have photographed the Andromeda Galaxy many times, and I am proud to say that my images of M31 are improving each year. The key to this image was planning and the right approach.
This time around, I traveled to a dark sky location to capture Andromeda in all its glory. The site was a Bortle Scale Class 3, which has much less light pollution than my backyard in the city (Bortle 6).
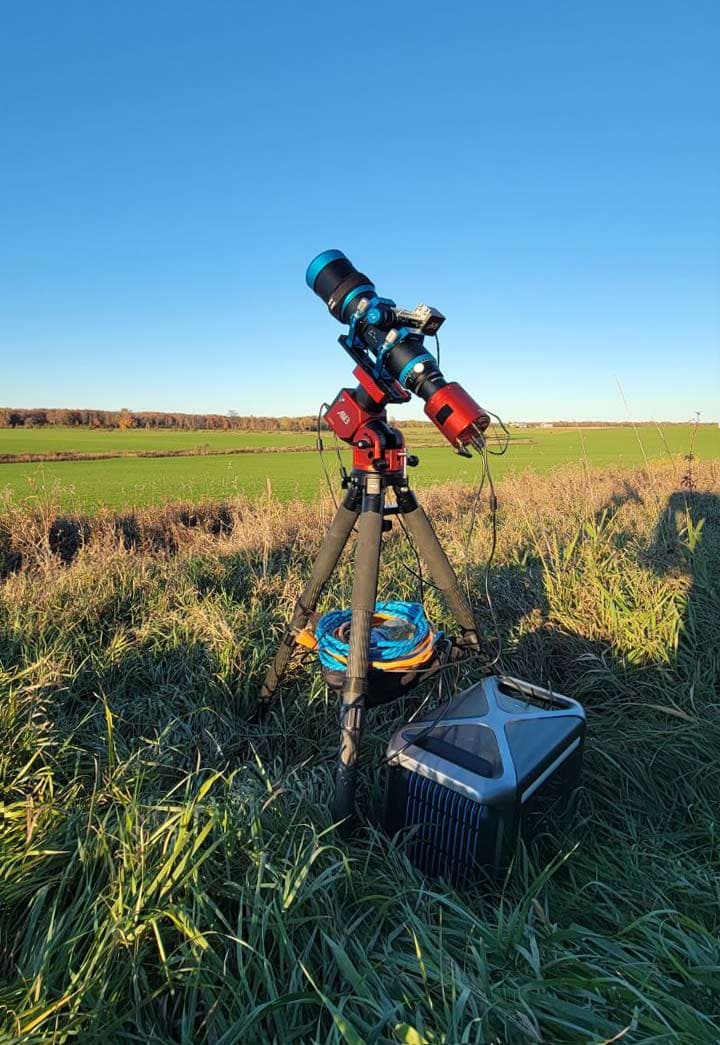
Setting up my telescope at a dark sky location to photograph Andromeda.
Many astrophotographers struggle with light pollution, and escaping to darker skies means packing up their gear and heading out of the city.
I regularly book dark-sky trips around the new moon to remote locations I find on Airbnb. Because I am really only there for the dark skies, I can stay in small cabins and bunkies with very few amenities.
This cabin might be my favorite booking yet, as the property featured unobstructed views of the horizon and an impressive level of privacy.


The Bortle Scale Class 3 rural location where the photo was taken.
The Imaging Plan
The dark, rural skies allowed me to capture longer exposures of my target, with better contrast. This reduced the amount of skyglow and unwanted artificial light captured in each long-exposure photo I took.
To effectively photograph broadband (or broad-spectrum) true-color objects in space, shooting from a dark-sky site will provide the most significant advantage.
Narrowband filters can help you collect great data from the city, but galaxies and reflection nebulae do not benefit from this type of filtering. This is what makes photographing galaxies so challenging.
In total, I collected 227 image exposures, each lasting 120 seconds. Through image-stacking, I knew this would be enough overall integration for my best picture of the Andromeda Galaxy to date.
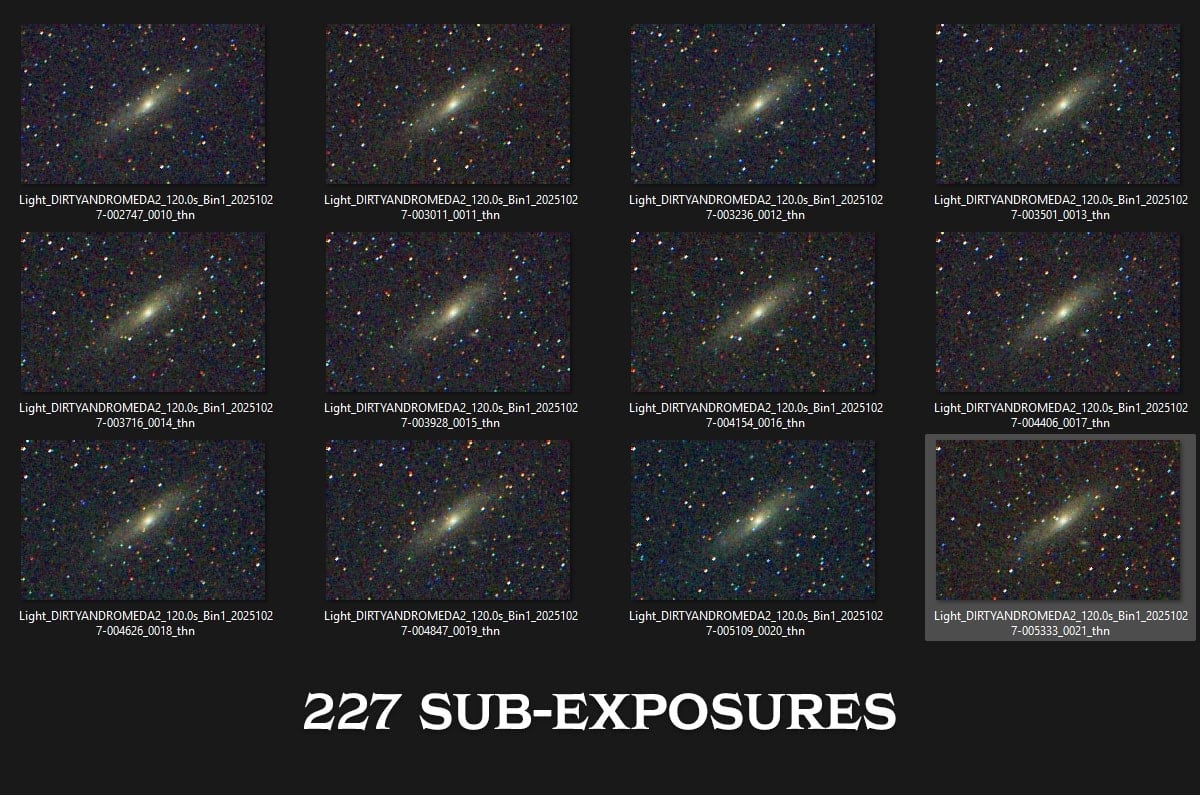
The individual 2-minute sub-exposures (light frames) of my image.
This sub-exposure length was selected to balance dynamic range, noise, and tracking accuracy. The ASI2600MC Air camera used for this image handles noise very well with the ‘medium’ gain setting of 100.
Not only is this a very capable one-shot color astronomy camera, but the built-in ASIAIR controller also lets me run the entire imaging session from my tablet without connecting anything to my laptop. For travel astrophotography, you can’t beat this.
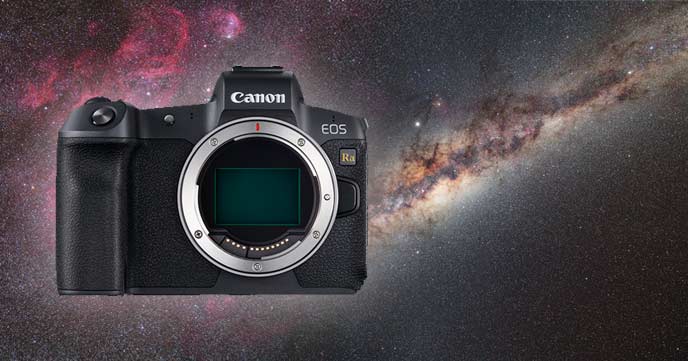
Camera Settings
While I have photographed M31 many times with my DSLR/Mirrorless cameras, this time I chose a dedicated astronomy camera with internal cooling. Here are the basic camera settings I selected on the ASIAIR mobile app.
The “best” exposure length to use for deep-sky astrophotography will be debated for eternity, but the camera settings used for my Andromeda Galaxy photo may be a useful benchmark for you to use during your next astrophotography project.
- File Format: FIT
- Gain: 100
- Focus: Automatic
- Exposure: 2 minutes
- Number of Exposures: 227
The settings above assume you are using an equatorial telescope mount or star tracker to match the apparent rotation of the night sky. These settings will vary widely depending on your telescope/lens aperture, shooting conditions, and the camera you use.
Use the histogram to determine an appropriate exposure length that does not clip the data’s shadows or highlights. By stacking images, it is possible to combine several hours’ worth of exposures into a single image with reduced noise and ample signal (light).

Related Article: The Best Astrophotography Mounts in 2025
The Equipment Used
The deep-sky astrophotography equipment used for this photo was specifically selected for this project. The telescope (William Optics Pleiades 68) has an incredibly wide focal length of 264mm and a focal ratio of F/3.8.
This refractor is capable of capturing stunning, flat-field images of deep-sky objects in space with impressive color correction. When using an APS-C sensor camera like the ZWO ASI2600MC Pro, the backspacing and tilt of the imaging sensor must be perfect for edge-to-edge performance.

I used the ‘Image Sensor Frame‘ tool in Stellarium to preview my exact field of view using my specific camera telescope.
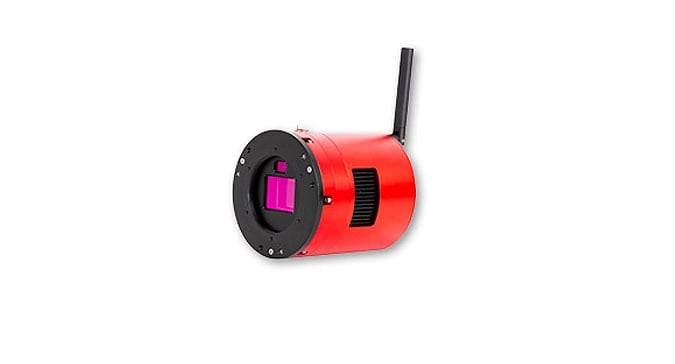
Camera: ZWO ASI2600MC Air
This one-shot color camera combines the proven ASI2600MC Pro sensor with an integrated ASIAIR controller and an autoguiding sensor for on-axis guiding, eliminating the need for a laptop in the field. The onboard ASIAIR cuts down on the amount of gear I need to bring and the overall number of cables to run my setup.
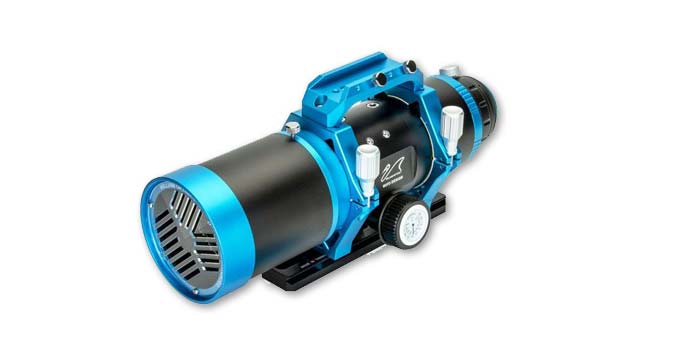
Telescope: William Optics Pleiades 68 Astrograph
A 68 mm f/3.8 apochromatic refractor with a precision 7-element Petzval design, the Pleiades 68 delivers a flat, full-frame field with pinpoint stars. Its compact form factor, rotator, WIFD fouser, and lightweight build make it ideal for travel setups. The fast optics pair beautifully with modern CMOS cameras, offering crisp, wide-field shots of nebulae and galaxies.
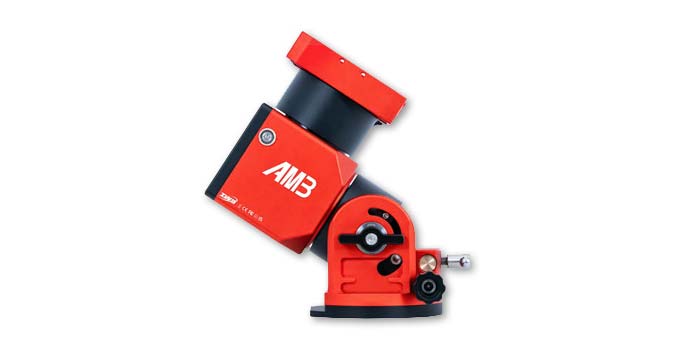
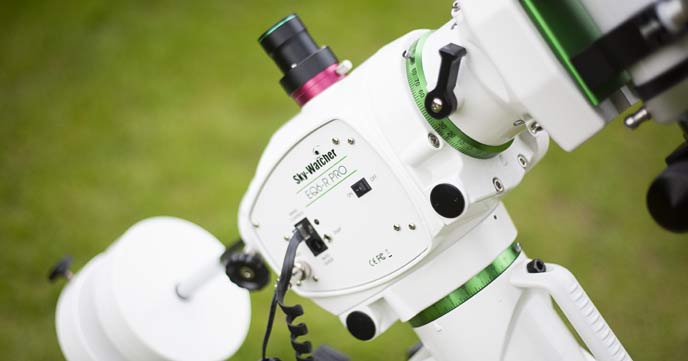
Mount: ZWO AM3 Harmonic Drive Mount
Weighing only 9 pounds, the AM3 packs a harmonic-drive gear system that delivers high payload capacity and precision tracking without counterweights. The integrated ASIAIR compatibility and GoTo control via Wi-Fi streamline the entire setup. This means no hand controller, no guiding cables, no hassle. It’s my absolute favorite grab-and-go mount for road trips and portable deep-sky imaging rigs.
Astrophotography Notes
I did not use a light pollution filter, opting to address any unwanted skyglow during image processing. Collecting 227 sub-exposures was enough to produce a clean image without any serious noise issues.
The camera and telescope accurately tracked the apparent rotation of the night on my strain wave drive mount, the ZWO AM3. I did not use a guide scope and guide camera, as the ASI2600MC Air has one built in for autoguiding.
I recently installed a ZWO EAF autofocuser on this telescope to ensure all of the sub-exposures were razor sharp. This upgrade also allowed me to get some sleep as the telescope ran all night.
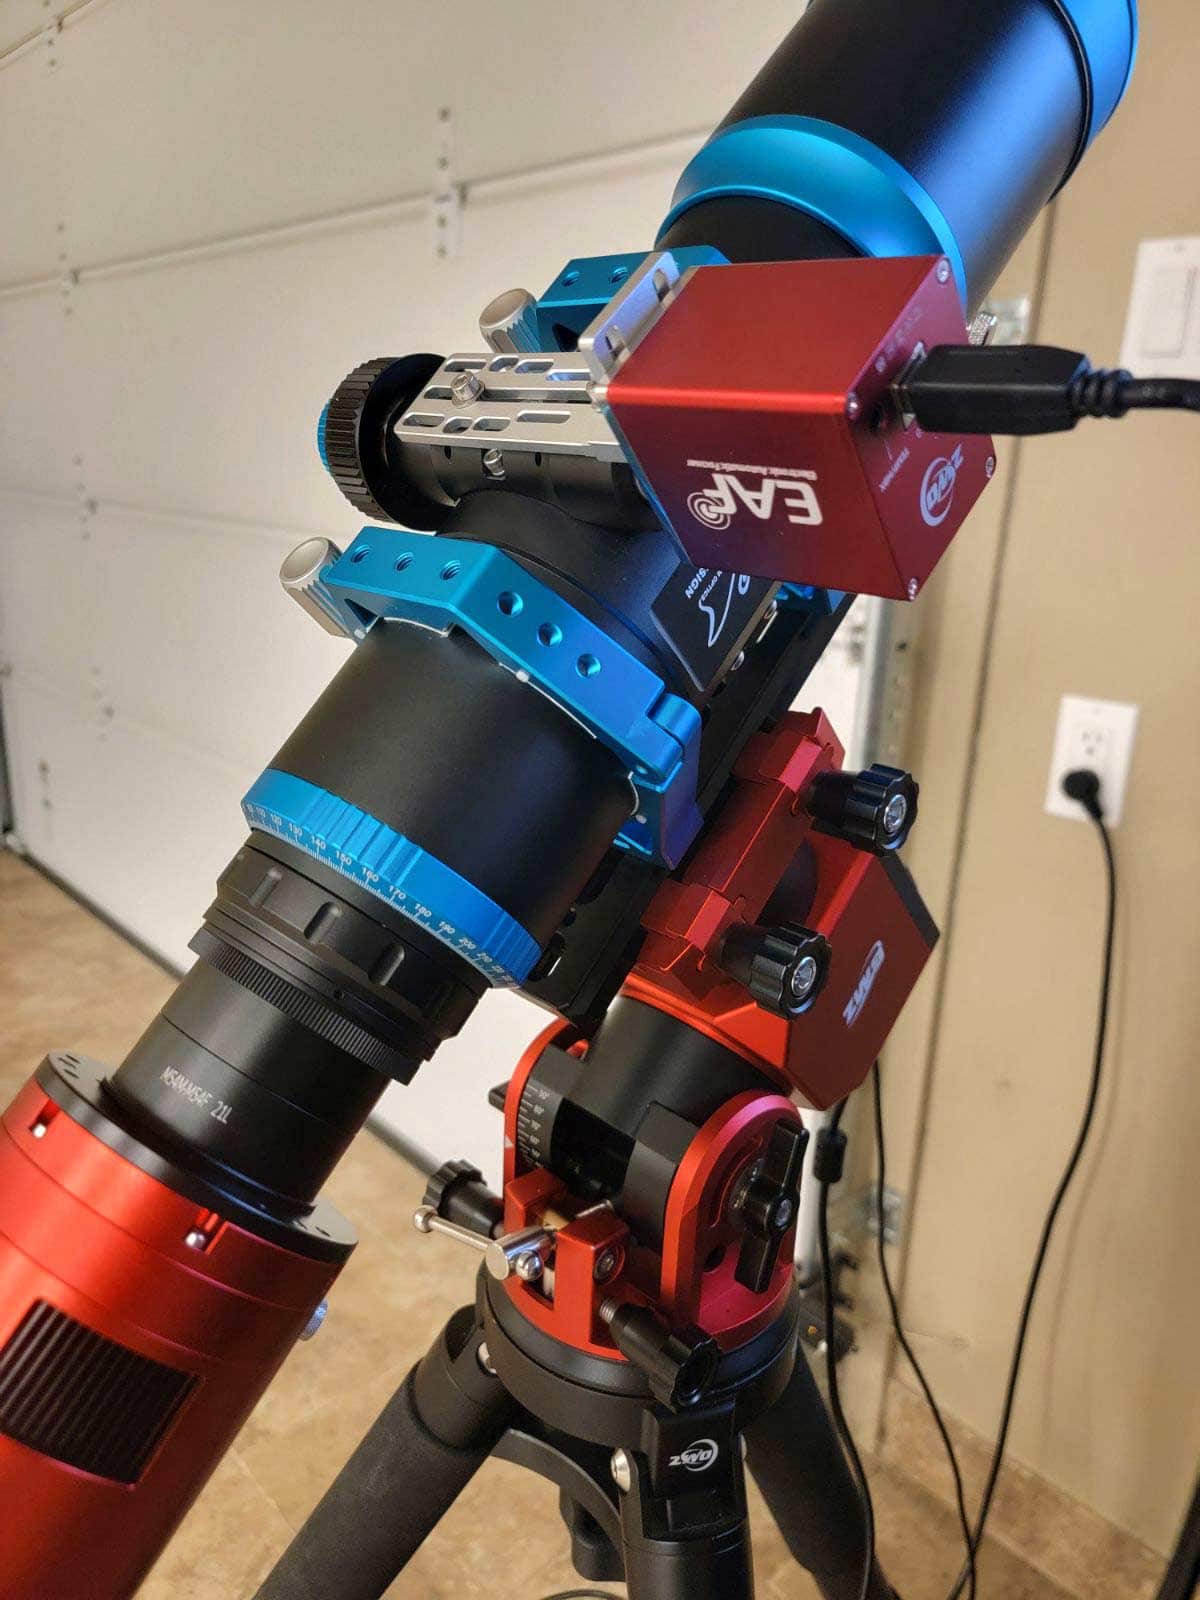
I upgraded my William Optics Pleiades 68 with an electronic autofocuser (ZWO EAF) for more automation and sharper images.
Powering a Portable Astrophotography Setup
When shooting deep-sky targets on the road, a reliable portable power source is just as important as your telescope or camera.
Long exposures, dew heaters, and tracking mounts can drain smaller batteries quickly, and running extension cords isn’t an option at remote dark-sky sites. A high-capacity power station ensures your equipment stays powered through an entire night of imaging.
During my Andromeda Galaxy session, I used the Anker 757 PowerHouse battery pack rated at 1,229 Wh with multiple AC, DC, and USB outputs. It easily powered my ZWO AM3 mount, ASIAIR-controlled camera, and dew heaters for the entire night.
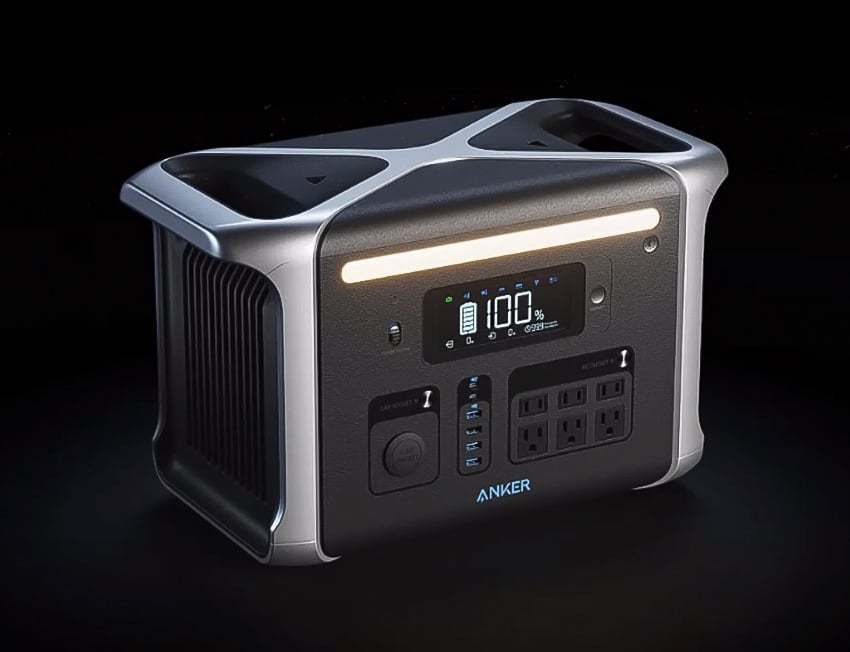
The Anker 757 PowerHouse delivers ample power for a full astrophotography rig, with fast recharging, multiple output options, and long-lasting LiFePO₄ reliability.
Its main trade-offs are weight, higher cost, and slightly reduced performance in very cold conditions. With that said, the temperature dropped to 0°C that night, and this battery pack held its charge very well. (It had 40% battery left when I woke up.)
Image Processing Tips
To process the image, I used many of the techniques I’ve described in detail in my premium image processing guide, along with a few new tricks. The exposures were stacked using the WBPP script in PixInsight.
While dark frames are not necessary for calibration with this camera, dithering and a substantial number of sub-exposures helped create an intermediate file with a healthy signal-to-noise ratio.
In my view, the key to a pleasing image of the Andromeda Galaxy is to reveal the gorgeous, cool colors in its spiral arms and really accentuate them. This creates a beautiful play of warm and cool colors that show the contrasting values of light from the galaxy’s core to its outer rim.

For many amateur astrophotographers, one of the more difficult challenges of photographing the Andromeda Galaxy is fitting the entire disc of the galaxy in a single image frame. For this reason, a wide-field imaging refractor or a telephoto lens of no more than 400mm is ideal.
Reducing star size, using layer masks to protect the bright core, and a saturation boost to taste were all applied several times over to create the final image. Several hours of processing (over many days) were involved in the creation of this image. I hope you enjoy it!
I regularly share my astrophotography adventures on YouTube. You can also see my latest images on Instagram, Twitter, and Facebook.

Fantastic image! I agree about accentuating the subtle colors on the outer areas to make the image pop.
I have just started my astrophotography journey (although I have had an interest in astronomy for over 30 years) with the recent purchase of the WO GT81 and assorted gear. My very first image was of the Andromeda Galaxy, taken only a few weeks back. I’ve not had he opportunity to get out out again since, so it remains my only image so far. I jumped straight in, taking plenty of subs, and dark frames, and even gave auto guiding a go with PHD2, with moderate success.
I have been following your blogs, etc for the last few month or so, and must say, they are very informative and enjoyable to read/watch. They are especially enjoyable to me because I live just across the lake from you in Erie (sorry for the light pollution, on behalf of all Erieites).
I am looking forward to seeing more of your content as things progress with your backyard observatory, but please don’t forget about us newbies!
Thank you so much, Dennis. I am glad to hear that you have caught the astrophotography bug and are well on your way. The next time I am shooting the Milky Way over Lake Erie I may send you a quick message to turn your porch light off! 😀
Hello Trevor!
Very nice image, congratulations!
Please, you were mentioning in the video at 6:43 some research about the beginning of the merger of Milky way and Andromeda galaxies, could you share more? Where were you reading about it?
Also, you said you were only using dark frames (apart from light frames), correct? Do you think one could even do without the dark frames? I mean, did they substantially help?
Thanks and clear skies!
Hello Trevor,
Very nice photo. I am a regular to you youtube channel since last April and your passion inspired me to start my own journey but its so hard to get my hands on a decent telescope here in Melbourne since start of pandemic. I wonder if all Aussies are stargazing while in lockdown
Great image! what a luxury to get into really dark skies, I’m living in the most crowded part of the Netherlands, my backyard is Bortle 8ish 😭, so struggling against light pollution and clouded skies… But about the video; in general I would love to see more about the processing you do afterwards. It’s a huge part from the final result and it stays ‘covered’ in a lot of your videos. From your backyard we suddenly get a beautiful image, but I would love to see more about the processing you did. Maybe a separate video?
Thanks too you I’m taking babysteps into astrophotography, so thank you for that!
Do you sell your images?
I am interested in several.
Just a quick note (I’d like to talk with you, in depth, eventually!) – I’m a, “semi-retired”, Amateur Astronomer, now, writing for Insight Observatory’s website.
Your M31 imaging is, unique, in, your capture of the blue hues at the galaxy’s perimeter. Fabulous!
Hello
I enquire if your Andromeda photo is copyrighted? I am looking for a single image to be inserted in an semi-autobiographical, philosophical, part technical, book I am writing for the general public.
It would be used as a small photo, with epigraph, credited, placed centre in a short Prologue –
Prologue
pic
short explanation of content
Chapter One: The Theatre of Uncertainty
Please advise