William Optics RedCat 71 First Look
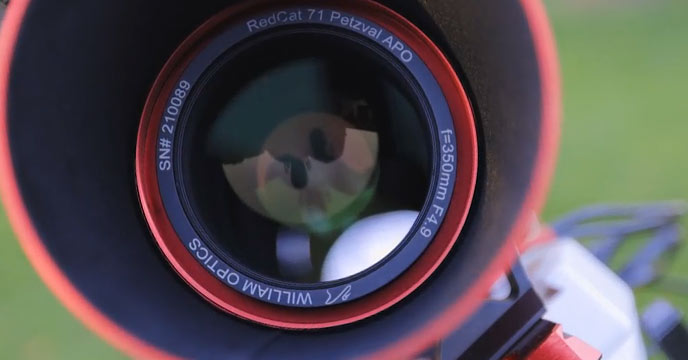
Late last month, William sent me a William Optics RedCat 71 for review purposes. I will continue to share my results using this apochromatic refractor telescope, and will likely purchase it after the testing period if I have the option.
At the time of writing, I do not know when the RedCat 71 will be available for purchase. I would imagine there will be limited stock available before the end of the year, but that is pure speculation.
I know that there are a few RedCat 71 units being tested in other parts of the world right now as well. The Cat 71 was designed to be an ultra-flat, well-corrected imaging APO for modern DSLR/mirrorless, and dedicated astronomy cameras.
In this post, I’ll provide you with an overview of the telescope’s specs, as well as provide a few sample images taken with it. Since testing the telescope from my light-polluted backyard, I have been able to take the Cat 71 on one dark sky trip, and the results were incredible.
It looks like the William Optics website lists a retail price of $1698.00 USD at the time of writing. For what you’re getting (premium optics will all necessary accessories to mount and focus the scope), I think this is a competitive price.
William Optics RedCat 71
In the following video, I test the new William Optics RedCat 71 under light-polluted skies in the backyard to photograph the Flying Bat Nebula. This may give you a better idea of what my complete deep-sky setup looks like, including the backspacing of the camera, and how I run the system using the ASAIR Plus.
When I first made a video about the William Optics RedCat 51 nearly three years ago, my YouTube audience was very skeptical about the scope. The RedCat 51 was designed to be a hybrid between an apochromatic refractor telescope and a telephoto lens, and many believed it was a little too “niche” to be a success.
The helical focuser design in a compact (lens-like) package made the first-generation RedCat feel closer to a camera lens than any other telescope I had ever used. William presented the telescope as a dual-purpose instrument that could also be used for wildlife photography, thanks to the practical focuser design and small size.
It was lightweight enough to use on a portable star tracker, and this was one of the reasons I believe the RedCat 51 was so successful. Several small apochromatic refractor telescopes have since followed suit (including the Radian 61 APO).
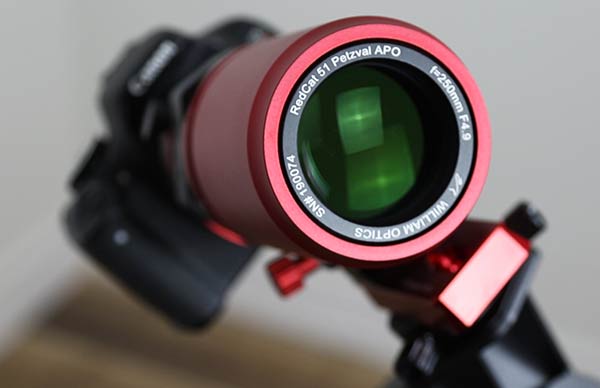
The original William Optics RedCat 51.
The focal length and f-ratio (250mm at F/4.9) of the RedCat 51 were comparable to many of the telephoto lenses astrophotographers were previously accustomed to.
The RedCat 51 (and all of its variations and upgrades) was an extremely popular and well-received optical instrument in the amateur astrophotography community. In a small way, I believe the RedCat 51 was responsible for the current ultra wide-field deep-sky trend.
I’ve seen some incredible images captured with it from around the world. I personally enjoyed photographing large deep-sky objects with the original RedCat, and it is still one of my favorite astrophotography telescopes of all time.
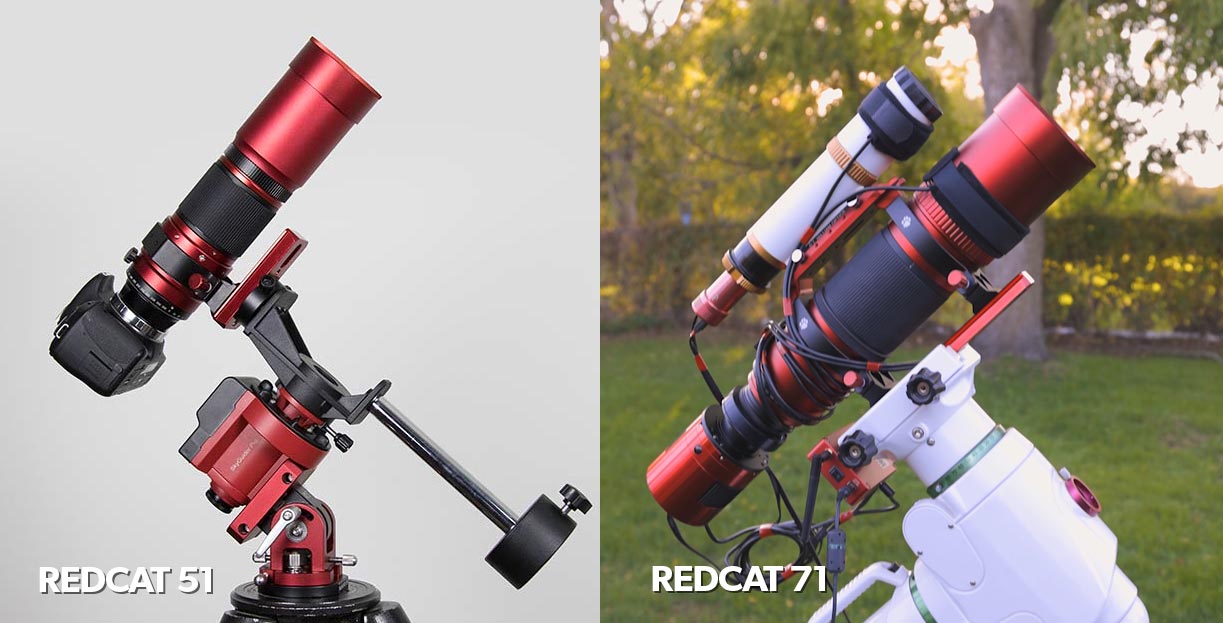
Differences Between RedCat 51 and the Cat 71
The new, larger RedCat 71 has a 71mm diameter objective, and a focal length of 350mm at F/4.9. This is enough to pull smaller nebulae in for a closer look, and medium-to-large targets are captured in detail.
I am sure a lot of RedCat 51 owners would agree that there are times that 250mm seems just a little too wide, and a little extra aperture would be nice.
The William Optics RedCat 71 is the same ultra-flat, color corrected Petzval APO you love, with more power. Just like the 51mm version, the Cat 71 includes the handy built-in diffraction spikes focus mask in the lens cap.
For those shooting with DSLR and mirrorless cameras, this is an essential tool as focusing on the fly can be tricky without and long-exposure loop of images.
At just over 8-pounds (with the mounting rings, and dovetail), the Cat 71 is definitely not suitable for a portable star tracker and will require an equatorial telescope mount designed for deep-sky astrophotography.
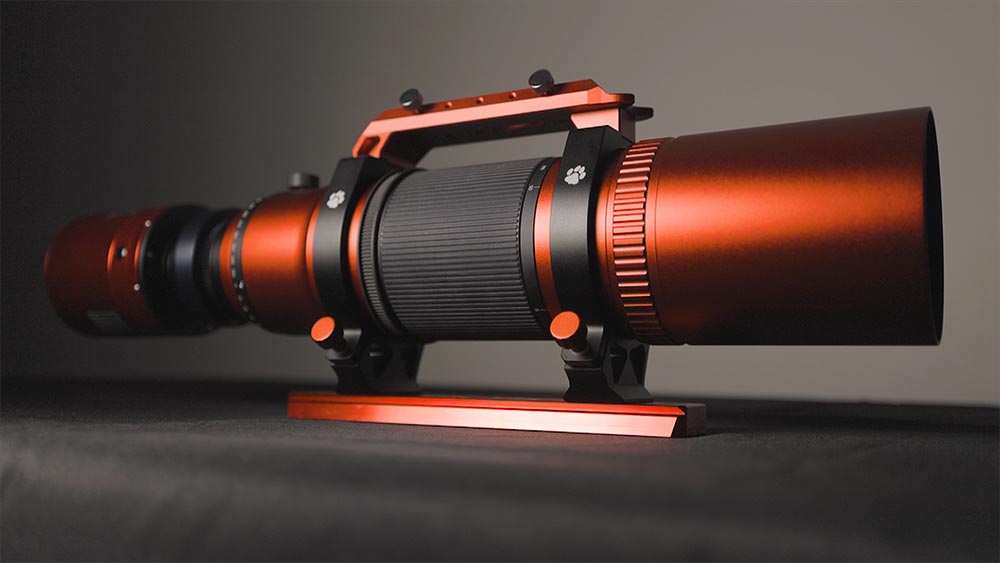
You’ll notice that the 71mm version continues with the helical focuser design, but this time around the lens moves internally, independent of the outer dew shield. This wasn’t an issue for me on the 51, but I think some folks will appreciate this.
Another nice little tweak is the separate gear ring for an autofocuser. A company called ‘DeepSkyDad‘ made a custom electronic focuser for the original Redcat, and I am sure there is something already in the works for this one.
I never sprung for an autofocuser with the original RedCat 51, but I know that this option is a big deal for others.
William mentioned that the Strehl ratio is 0.95+, and I imagine the Strehl report will be included when these start shipping. Attention to detail is the name of the game when it comes to William’s scopes, right down to the custom padded bag.
I expect many Cat owners will choose to grow their feline family.
Specifications
- Objective diameter: 71mm
- Optics: Petzval APO
- Focal Length: 350mm
- F-Ratio: f/4.9
- Focuser: Helical
- Image Circle: 45mm
- Weight: 6.5 lbs (OTA only)
- Included Accessories: Mounting rings, V-style dovetail, Cat saddle.
The Set-Up
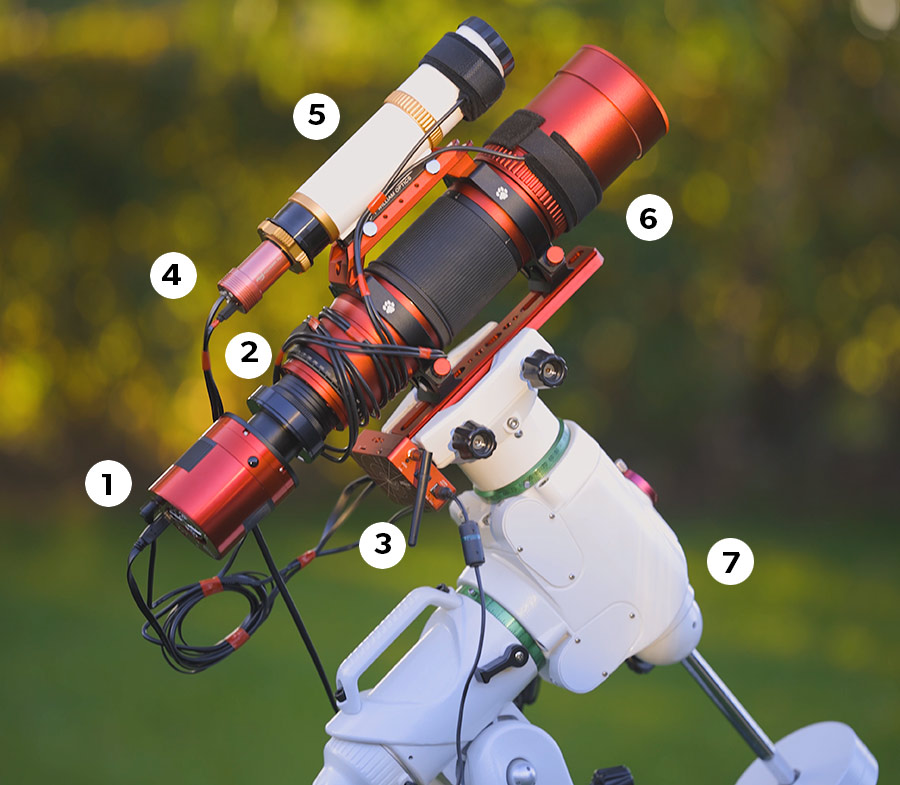
When the Cat 71 arrived, I mounted it to the Sky-Watcher EQ6-R Pro and attached a ZWO ASI2400MC Pro one-shot-color camera. This telescope has a large image circle (45mm) and is just begging you to put a big sensor on it.
I used a Starizona filter drawer between the camera and scope along with an Optolong L-eXtreme filter. When using the Cat 71 for the first time, it was almost a full moon, so I focused on collecting h-alpha data from the backyard.
- ZWO ASI2400MC Pro
- Optolong L-eXtreme Filter
- ZWO ASIAIR Plus
- ZWO ASI120MM Mini
- William Optics Uniguide 50
- William Optics RedCat 71
- Sky-Watcher EQ6-R Pro
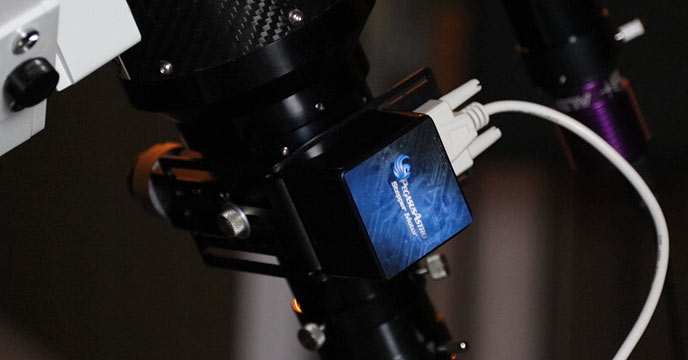
I mounted a small guide scope on top of the Cat 71 using the included “cat’ saddle” mounting bar. I’ve run every imaging session with the Cat 71 using the ASIAIR Plus from my phone.
Believe it or not, this is one of the cleanest deep-sky astrophotography rigs I’ve ever put together. I suppose removing the laptop and all of the cables streaming into it had a lot to do with that.
I’m usually hesitant to commit to a particular deep-sky configuration for an extended period of time, but I have a feeling this setup will get a lot of use this winter.
Astrophotography Results
If you’re in the northern hemisphere, my first selection should come as no surprise to you. The constellation Cepheus is in a great position right now (October) to collect some serious exposure time.
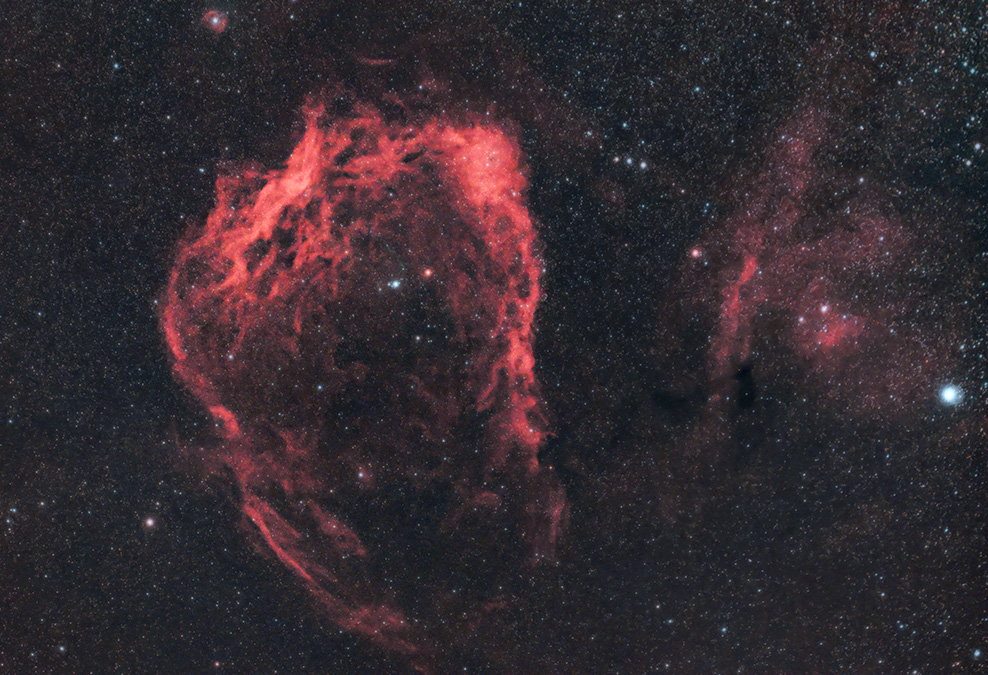
All of the beautiful nebulae in Cassiopeia, Cepheus, and Auriga are in prime position for imaging in the fall season. I chose the Flying Bat nebula because it has a strong hydrogen signal (which is great on a moonlit night) and I’ve never shot it before.
The Blue Squid Nebula, inside the Flying Bat Nebula, is incredibly faint and I have a feeling it might be too faint to capture from my Bortle class 7 backyard even on a moonless night. I’ll have to attempt photographing this nebula again using a dedicated 3nm OIII filter for several hours to find out.
Here’s a look at a quick process on the Flying Bat Nebula from my backyard. The large formation of the hydrogen nebula (the flying bat) is prominent, but sadly, only the slightest hint of the Squid Nebula is present.
The Flying Bat Nebula.
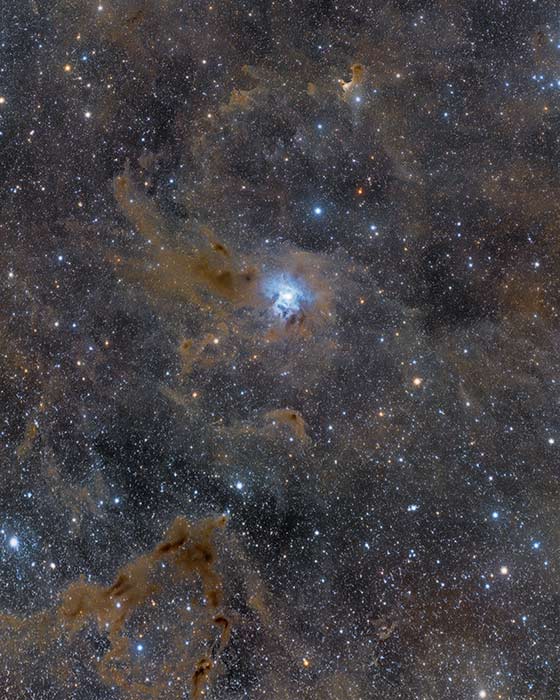
For my next target, I traveled to a Bortle Scale Class 3 location, during the new moon phase. My wife and I spent 3 clear nights at this location, and I photographed two deep-sky objects through the William Optics RedCat 71 while we were there.
The first object is quite small, but it is surrounded by a lot of interesting areas of dark dust. The Iris Nebula has always been one of my personal favorites, and I am thrilled to have finally captured it in such detail.
The Iris Nebula in Cepheus.
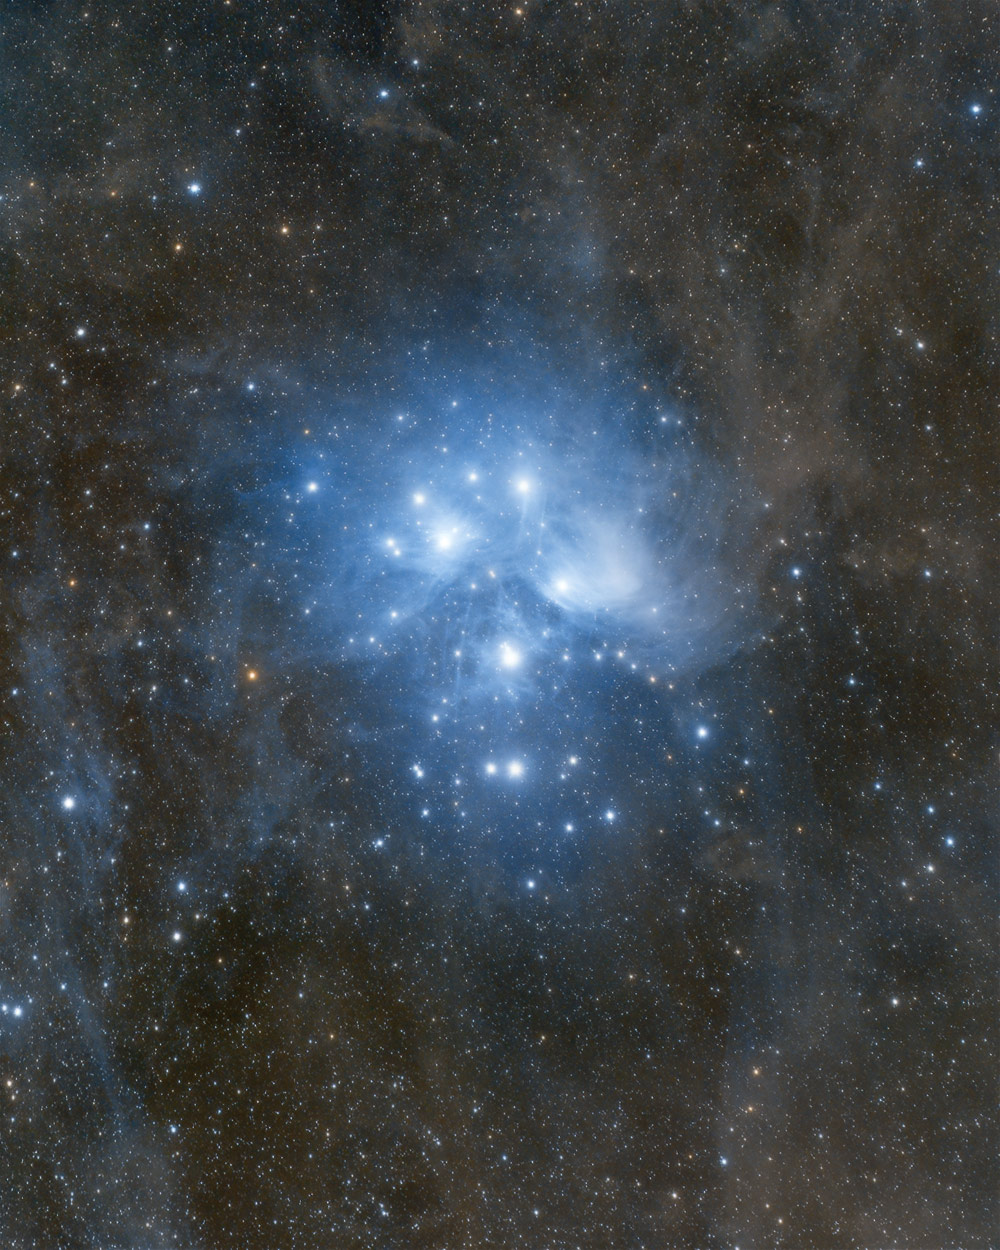
The next target I photographed is the stunning Pleiades star cluster. This image includes 4.5 hours of total exposure time using the ASI2400MC Pro and RedCat 71.
A dark sky is essential to reveal the faint clouds of dust that surround the seven sisters. For a better understanding of the way I process my astrophotos, please consider my premium astrophotography image processing guide.
The Pleiades Star Cluster in Taurus.
Final Thoughts
The William Optics RedCat 71 is the real deal. It’s an ‘if you can only bring one telescope with you, bring this one’ kind of ‘scope.
The optics are sharp, flat, and I did not see a hint of chromatic aberration in my photos (including shooting unfiltered in broadband RGB). A full-frame one-shot-color camera is the great test of a refractor’s optics, and the Cat 71 passed with flying colors.
The image circle is large enough to accommodate a full-frame camera sensor and I did not experience any vignetting when capturing images with the ZWO ASI2400MC Pro.
I did experience some very minor camera sensor tilt issues, but I believe they could be easily corrected with further testing and some adjustments. When the Cat 71 is officially out of the bag (I couldn’t resist) I doubt users will find very much to complain about.




Hi Trevor, you’re the reason I’ve got into astrophotography this year. I’ve always wanted to but thought it was impossible from London until I stumbled across your YouTube videos. Since then I’ve been using a canon 800d, sky adventurer mount and sanyang 135mm lens as you recommended. I use a svbony clip in filter which has helped but I do struggle with some processing issues in PS.
Anyway, I wanted to ask what do you think would be a good next step in terms of an actual scope? I was thinking about the redcat 51. My main targets will be andromeda and nebula (p.s. my camera is coming back from an astro conversion tomorrow also!)
Trevor,
This scope has me hyped. What’s up with the risque ads on your site though? lol
I the ads are determined on your browsing history.
In your opinion, would this scope be light enough to be used on an EQ35M Pro mount for imaging?
You have been my go to resource for equipment reviews and decisions; thank you! I just received a RedCat 71 and I’m also mounting it on the EQ6 Pro. My question is, how did you attach your ASIAIR Plus to the whole setup?
I believe he posted another video that explained he used velcro
I would think that a ‘if you can only bring one scope’ would have a visual option, is this possible with the redcat 71?
It should be. WO sells an erecting prism for the 51 for visual use, so I would think it would work on the 71 as well. Worst case, get the GT71 and after you buy the field flattener and accessories for astrophotography, you won’t be out anymore than getting the red cat 71. Also the added benefit of a 335 focal length(with the .8X reducer) compared to the 350 of the red cat and the native 419 focal length without the reducer for visual. So you could make the argument it’s better for both AP and visual
I’m a photographer and really want to get into astrophotography. I currently shoot with a Fuji GXF100 Medium Format camera. I understand that the RedCat 71 boasts an imaging circle diameter of 45mm. The GFX sensor is 43.9mm x 32.9mm. In your professional opinion, will this work with minimal cropping? If so, can you point me in the right direction for the applicable mounting adapter? Thanks in advance for the help!
I only have a canon t7i which is not a full frame camera. Would I be okay with that and my redcat 71 that’s coming in?
Absolutely! The field of view will be slightly smaller, which is certainly not an issue when shooting at 350mm. That should work out great!
I recently purchased the Deep Sky Dad kit for the RC 71. It was an easy install. Something I wasn’t really thinking about is focusing. Do yourself a favor and focus your scope before installing the focuser. Otherwise, focusing may take longer.
Hi Trevor, Great review (as always) but now I have a problem. I’m considering replacing my Radian Raptor 61,and was thinking about the new Radian Raptor 75. But now with the Redcat 71 in the mix I’m not sure which one to choose. Would you be able to give me a recommendation or advice how to proceed. Any information would be greatly appreciated.
Thank you.
Gerry – you can’t go wrong with either. Both Petzval APO’s. The RedCat comes in a more premium package, but the Radian has a slightly larger aperture and more reach (350mm vs. 405mm). The only thing to consider is the helical focuser on the RedCat 71. I enjoy it, but it is something to think about if you plan to add an autofocuser in the future.