Use a DSLR Ha Filter for Astrophotography
After almost a decade of taking pictures of space with a DSLR camera, I have come to the realization that a DSLR Ha filter is quite possibly the most important astrophotography filter in your kit. Traditional light pollution filters designed to help you photograph deep sky objects in broadband (true-color) are useful, but a hydrogen-alpha filter makes the single greatest impact on your astrophotography overall.
Beginners often ask me which narrowband filter (line filter) I recommend buying first, and it’s always a Ha (or “Hα”) filter. H-alpha is a specific deep-red visible spectral line with a wavelength of 656nm. Many nebulae in the night sky (and even some galaxies) emit a strong signal of light in this wavelength and a hydrogen-alpha filter helps to isolate and record this signal with your DSLR camera.
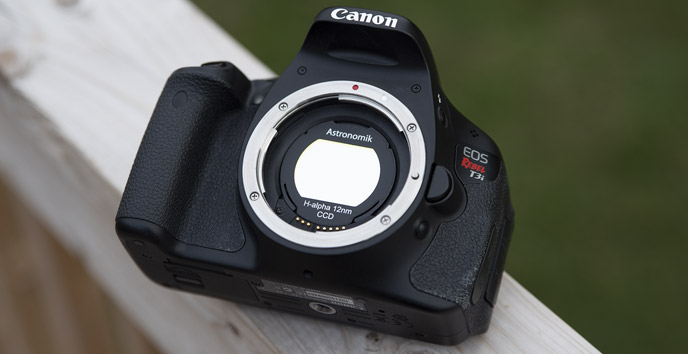
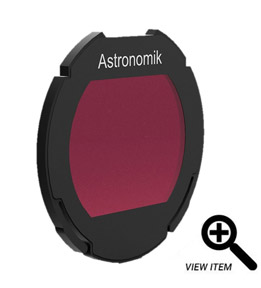
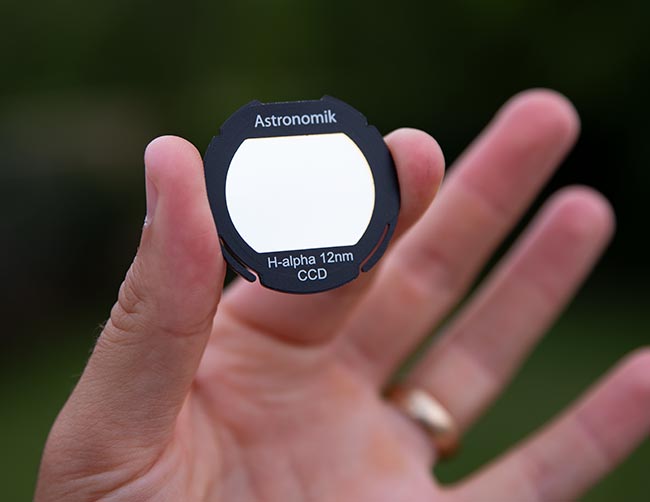
In this post, I’ll explain why a clip-in DSLR h-alpha filter is not only the most powerful filter in your kit, but the one you’ll probably use the most. The DSLR Ha filter I use and recommend is the Astronomik 12nm Ha filter (Canon EOS). There are several versions of this clip-in DSLR filter available, including models for Canon full-frame bodies like the popular Canon EOS 6D and 5D Mark III.
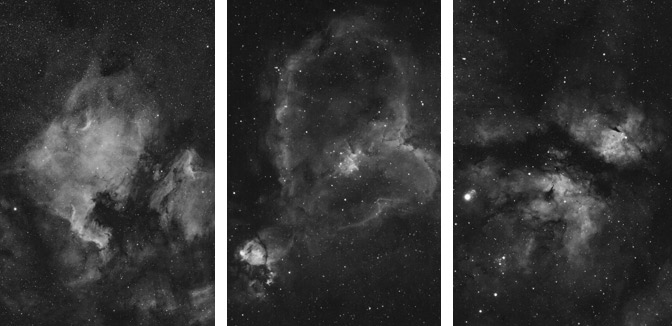
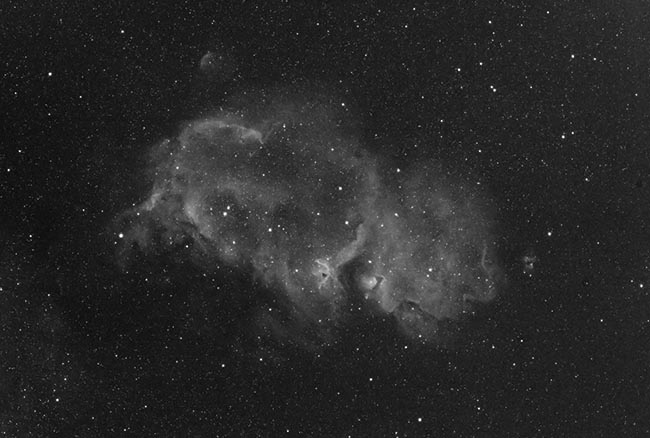
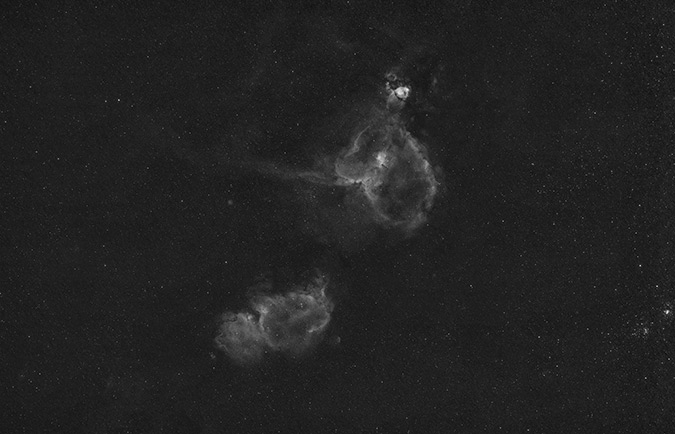
All of these images were captured with a Canon DSLR and an Astronomik 12nm Ha filter.
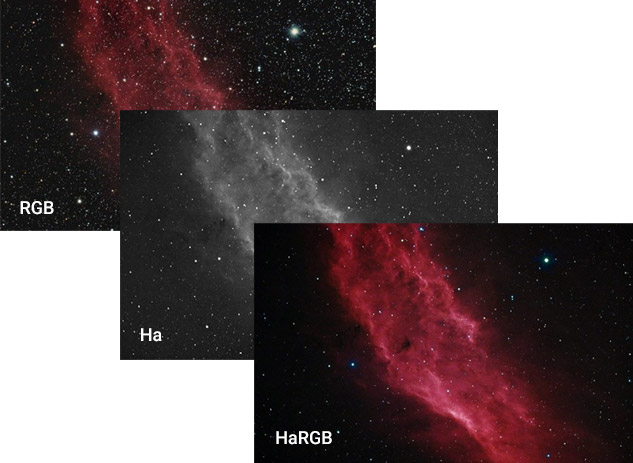
Not a fan of black and white images? No problem, use the data you collect in Ha as a powerful luminance layer to your color images. As with other narrowband filters, such as O III and S II, capturing data from a precise bandpass offers many creative opportunities to improve your existing images.
I’ve previously covered narrowband filters that collect multiple wavelengths (dual bandpass, quad bandpass, etc.). This time, I’m focusing on the most important emission line of them all, hydrogen-alpha.
The Effectiveness of a DSLR Ha Filter
Before I share my 7 reasons why I think everyone who shoots with a DSLR camera should have an h-alpha filter, I want to highlight what I believe is the most important feature of all. You can use a clip-in hydrogen-alpha filter with a camera lens, and images collected in h-alpha through a short focal length are absolutely breathtaking.
I’ve reviewed many astrophotography filters in the past, including broadband (or “broad spectrum”) filters that help to achieve a natural-looking image from a light-polluted sky. With so many incredible types of filters out there, how can one filter possibly be any more useful than the rest?
Here are 7 compelling reasons:
-
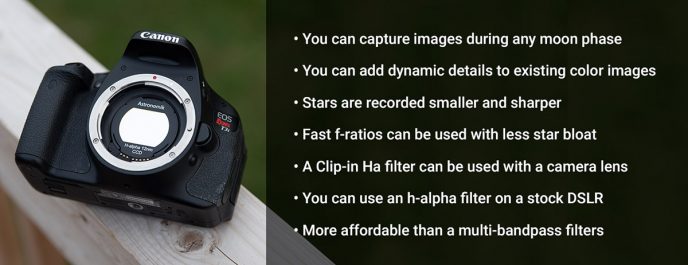
- You can capture images during any moon phase
- You can add dynamic details to existing color images
- Stars are recorded smaller and sharper
- Fast f-ratios (F/2.8) can be used without star bloat
- A clip-in Ha filter can be used with a camera lens
- You can use an h-alpha filter on a stock DSLR (signal is much weaker)
- Single bandpass filters are usually more affordable than a multi-bandpass version
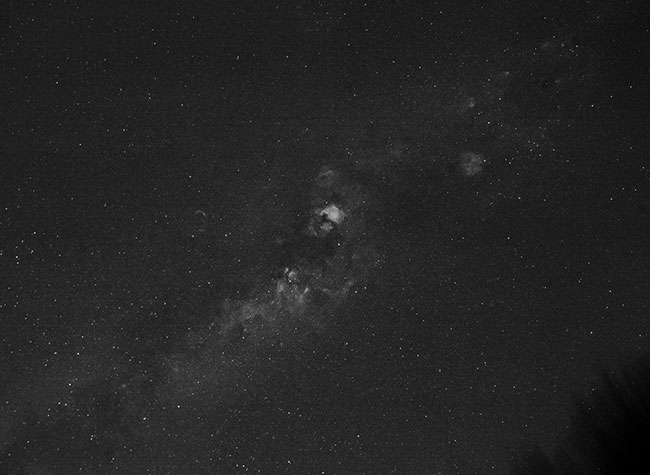
Have you ever seen your backyard sky through an h-alpha filter? It’s pretty astonishing. You can finally see the hidden structure of the Milky Way behind the veil of light pollution in the city. Here is a photo of the constellation Cygnus from my Bortle Scale Class 8 backyard using a 17mm camera lens.
Although the 48mm (2″) filter format can be utilized in more imaging configurations (such as a dedicated astronomy camera) a DSLR clip-in filter fits underneath your camera lens.
Taking wide-field astrophotography images using a camera lens in place of a telescope is one of the most rewarding experiences in this hobby. For example, I captured this image of the North America Nebula under a nearly full moon using the Rokinon 135mm F/2.0 ED UMC lens.
The North America Nebula (& Pelican Nebula) captured using an h-alpha filter and a 135mm camera lens.
You can use a clip-in DSLR filter with a telescope as well, making it a practical solution for amateur astrophotographers looking to collect narrowband data. The key to the image acquisition stage is to expose the images long enough so that the histogram shows that the data is separated from “the wall”.
Optical systems with faster f-ratios, whether it’s a telescope or a camera lens, are better suited for narrowband astrophotography with a DSLR. The slower the focal ratio of your lens, the longer the exposure will need to be to adequately expose the image in h-alpha.
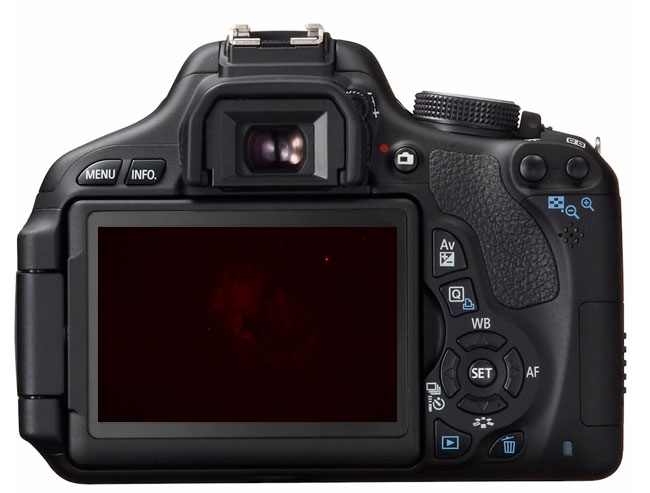
For reference, here is a look at a single, unstretched (linear) sub-exposure of the DSLR image captured in Ha. The data observed in the red channel is the most important, as this is where all of the useful image data lies.
A single 3-minute exposure from a DSLR camera using an H-Alpha filter.
Notice how the entire image has a red cast over it? If you look at the histogram, you’ll see that the majority of the signal (light) has been captured in the red channel. The signal in the blue and green channels is almost non-existent.
Narrowband H-alpha with a DSLR
You may be asking yourself, is it worth it to use an h-alpha filter with a DSLR? After all, the experts in the astrophotography forums will tell you that you can’t use a narrowband filter with a color camera and if you do, you’re crazy.
Perhaps I am crazy, but I have personally enjoyed shooting narrowband images with a color camera for many years, and I’ve been thrilled with the results (…maybe my standards are too low?)
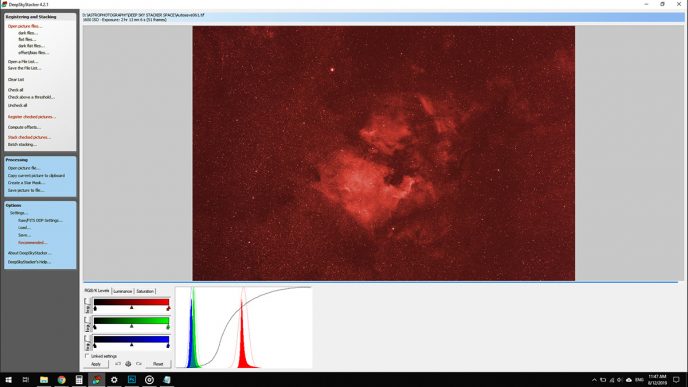
The truth is, you can capture and stack narrowband images taken with your one-shot-color DSLR, RGB Bayer filter, and all, in DeepSkyStacker. Once the images have been registered and stacked using calibration frames, you should end up with an intermediate file that looks a little something like this:
The stacked result of 51 exposures using a DSLR camera and h-alpha filter.
From here, you can bring the stacked TIF file into Adobe Photoshop to extract the red channel and process in the monochrome image.
Use a Clip-In Filter with a Camera Lens
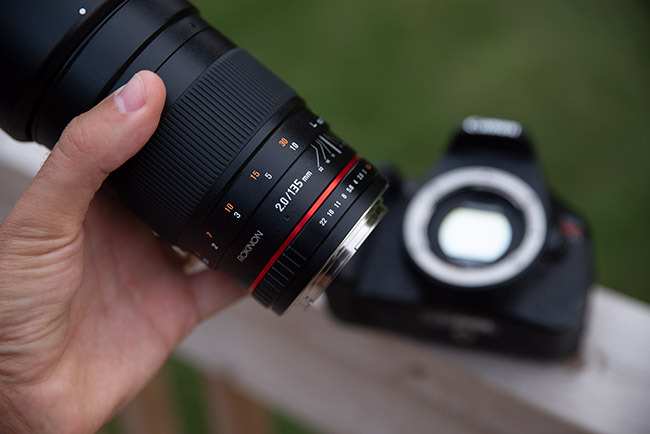
One of the most understated benefits of a clip-in Ha filter is the ability to capture h-alpha images with a camera lens attached. This opens the door to impressive, wide-field projects revealing the hidden H II gases in the night sky. Combining the Astronomik 12nm Ha filter with a 135mm lens is an incredibly effective combination.
A clip-in filter is a convenient solution when using a camera lens for astrophotography.
Some telescopes, like the William Optics RedCat 51, include an internally threaded slot for a 48mm filter in the imaging train. However, the only possible spot for an h-alpha filter with a camera lens attached to your DSLR is inside the camera body.
Narrowband filters designed to thread externally to the large lens objective are not common, are a filter of that size (77mm) would be very costly. The Astronomik clip-in filters snap into the body of the DSLR securely, and most lenses will fit on top (be sure to check the compatibility of the lens you intend to use).
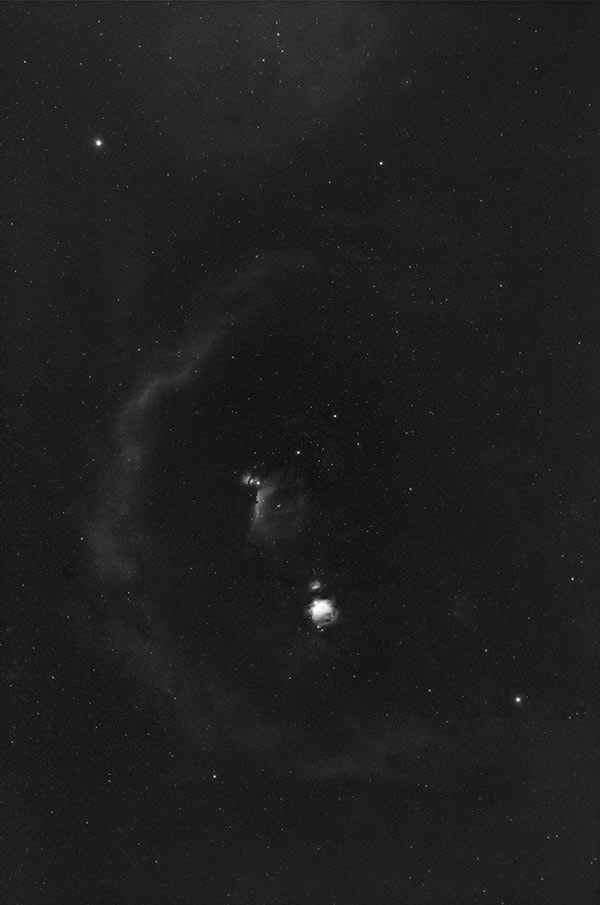
I’ve used the Astronomik 12nm clip-in Ha filter with several cameras lenses including the “nifty fifty” (Canon EF 50mm F/1.8), and the ultra-wide-angle Rokinon 14mm F/2.8. Here is a look at Barnard’s Loop captured using the clip-in Ha filter in my Canon EOS Rebel T3i.
Barnard’s Loop in Orion. Canon EF 50mm F/1.8 with the clip-in Ha filter beneath the lens.
How To Process the Images
Capturing images using a clip-in hydrogen-alpha filter with your DLSR is a lot of fun. No matter how light-polluted your skies are, and how bright the moon is, you should see the distinct features of your deep-sky object that are emitting light at the 656nm bandpass. Since DSLR cameras collect light through a Bayer filter, the signal is divided up into RGB channels that would normally build a full-color image.
However, the h-alpha emission line is very specific, and will only record useful data in the red channel of your images (the other channels will be almost 100% noise). Knowing this, we need to extract the data from the red channel only, and process that channel as a monochrome image of its own.
Stack, Register and Calibrate the Image
The first step is to stack, register, and calibrate your raw images the way you normally would with a color image taken with your DSLR camera. This includes using darks, flats and bias frames to help produce a calibrated image with a healthy signal to noise ratio.
The sub-exposures will look extremely red as shown in the example above, and so will the intermediate file that DeepSkyStacker spits out.
Extract the Red Channel in Adobe Photoshop
After opening your stacked TIF file in Adobe Photoshop, open up the Channels Tab (If you do not see this tab, click on Window > Channels from the main menu), and have a look at the data. You should see that almost all of the pixel information resides in the red channel.
Simply select the red channel from the “Channels” tab, and copy the information (On a Windows computer, CTRL-A (select all), CTRL-C (Copy). Then, select File > New, and Paste (CTRL-V) the information saved on the clipboard (the red channel layer).
Process the Grayscale Image
The image pasted should default to grayscale mode, with only one channel (gray) in the Channels Tab. You can process this image the same way you would a color image, including adjusting the levels, curves, and even using dedicated astronomy actions.
From here, you can either save and share the image as a black and white hydrogen-alpha photo (which are beautiful, by the way), or you can apply this image to an existing color image to give it a dramatic punch. (See my HaRGB Tutorial).
The Difference H-Alpha Makes
Some of the most incredible DSLR deep-sky images ever produced were created using narrowband filters to isolate specific emission lines in the visible spectrum. You can use the same signal isolating techniques to enhance your existing RGB data.
A narrowband filter lets the h-alpha light of emission nebulae pass through to the camera sensor, and blocks almost all of the other wavelengths of light in the visible spectrum.
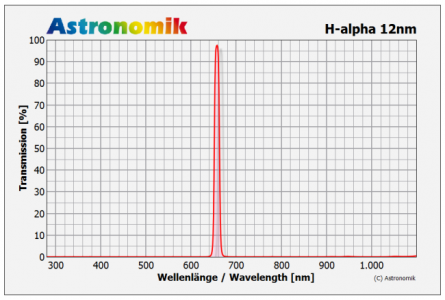
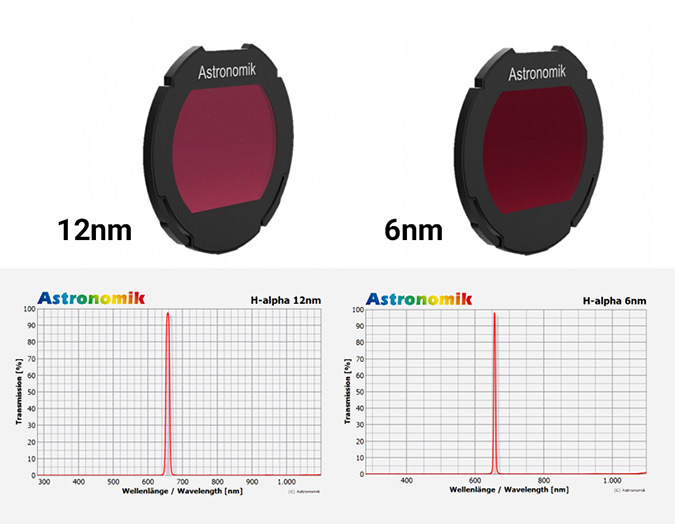
To be more specific, the Astronomik 12nm Ha filter allows 97%+ transmission of the H-Alpha line and blocks nearly the entire remainder of the visible spectrum. This includes blocking unwanted wavelengths in IR (infrared).
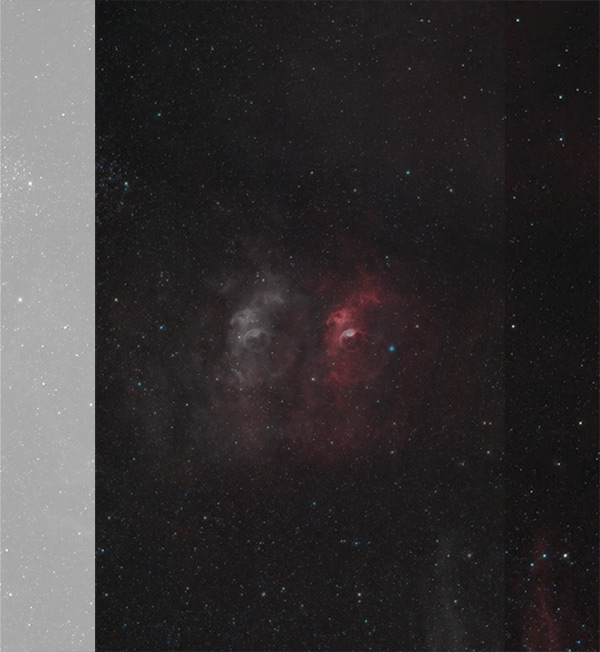
For objects like the Bubble Nebula (shown below), you can collect impactful signal that can be applied to your broadband images.
What does this mean?
It means that city light pollution and moonlight are largely ignored. This opens up the doors to imaging during the full moon, and from a city backyard. You no longer have to wait for the full moon/nearly full moon phases to pass to capture deep-sky astrophotography images.
Emission Nebulae and Hydrogen-Alpha
Emission nebulae are clouds of glowing H II gas, and they emit light at a very specific wavelength. This information is beneficial to astrophotographers, as we are able to isolate this wavelength for photography. The light from an emission nebula is created when the atoms in the gas are ionized by the formation of hot young stars.
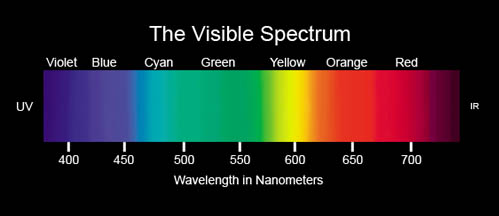
The dominant wavelength in a hydrogen nebula is the deep red portion of the spectrum known as the hydrogen-alpha line (656nm to be exact).
Why this is important for DSLR astrophotography
By using a Ha filter in your DSLR, it is possible to increase the contrast between objects in the h-alpha emission line and the skyglow background. The filter completely suppresses the emission lines of artificial lighting such as mercury (Hg) and sodium (Na).
The particulars of the Astronomik ha filter can be understood in the transmission graph below. The chart shows that the Astronomik filter allows 97% transmission of the h-alpha wavelength
Images captured using a narrowband Ha filter have some pleasing characteristics.
At the top of the list is reduced star size. This further emphasizes the detail and contrast of a deep-sky image by allowing it to stand out from the surrounding sea of stars.
Filtering out skyglow and light pollution means that longer exposure times of 5 minutes and beyond from the city are possible from the city. You will likely capture more detail in your emission nebula targets than ever before.
Challenges and Best Practices in the Field
Earlier in the post, I mentioned that you’ll want to shoot exposures that capture enough signal to produce a quality image. Specifically, you’ll need to make sure that the red channel data is not being clipped in the shadows portion (left-hand side) of the histogram.
Slower optical systems will demand longer exposures to reach this value, and that puts added importance on tracking accuracy and the need for autoguiding. If your telescope is in the F/6-F/7 range or slower, expect to collect images that are at least 3 minutes or more to create a useful sub-exposure.
This is one of the many reasons I recommend using a DSLR Ha filter with a camera lens like the Rokinon 135mm F/2.0. A fast aperture lens will collect more light in a single shot, and suddenly only a 2-minute exposure is enough to collect a healthy SNR.
Framing and Focusing Targets
The light-blocking qualities of narrowband filters mean that you will no longer see faint stars through the viewfinder of your DSLR or when using the live-view function. This can make finding targets and focusing your camera lens or telescope difficult.
In the image below, you’ll see an example of what a single test exposure of about 30 seconds may look like at ISO 1600. There is really only one bright star and a very faint indication of nebulosity in a 30-second image.
To frame up my image of the North America Nebula, I used a bright star (Deneb) as a reference.
I find that the most practical solution to this challenge is to find the closest bright star to your intended deep sky object as a point of reference. Even using a 7nm Ha filter (which is stronger and more targeted than the 12nm version), the brightest stars in the night sky will still show up in live-view.
The camera settings must be set to expose as bright an image as possible, which is typical of any framing and focusing routine with a DSLR. Use ISO 6400 or greater, with the maximum aperture of the camera lens. Make sure the camera is set to bulb exposure mode so that it lets as much light as possible.
Once you have located a bright star (you can use the Moon, too), take your time focusing on the star using the 10X zoom in live-view. If you are using a camera lens, you may want to use tape to secure the focus adjustment ring to avoid knocking it out of position in the next step.
Use a planetarium mobile app or a physical star map to locate the rough position of your target. If you’re lucky, there will be a bright star near your nebula to use as a reference like my example of NGC 7000 above. If not, you may need to take as many as 10+ test shots before you are happy with the framing of your target.
A 30-second exposure at ISO 6400 should be more than enough time to indicate where the areas of hydrogen gas are concentrated.
Choices – 12nm or 6nm versions
The 6nm version of the Astronomik Ha filter has an extremely narrow emission-line filter. This version targets an even narrower portion of the visible spectrum, blocking nearly the whole remainder of the spectrum. So wouldn’t the 6nm version the obvious choice?
Despite the increase in contrast and more light-blocking power of the 6nm version, there were a few reasons I went with the 12nm. For starters, the 6nm version is more expensive, and that was a big reason why I decided to invest in the 12nm filter.
A major step in my pre-imaging routine includes framing my deep-sky target to include as much of the object and surrounding elements as possible. BackyardEOS or Astro Photography Tool can streamline this task with the frame and focus feature.
It’s not the end of the world, but it does take longer to get up and running than it would using a broadband filter that allows more light to reach the sensor. The 6nm would double these impacts and increase this setup time.
Many backyard astrophotographers would disagree, wishing they had gone with the 6nm instead. I’ve shot images using a 7nm Ha filter (Optolong 7nm Ha), and the results are not drastically different. There is more contrast in the images that used a 6nm filter, but the exposures also need to be longer.
List of Compatible Canon EOS Cameras:
Here is the official camera compatibility list for the Astronomik clip-in Canon EOS Ha filter directly from the High Point Scientific website. I have personally used this Hα filter on a number of Canon camera bodies including full-spectrum modified Canon EOS Rebel Xsi and T3i’s, and a stock Canon EOS 7D.
- 7D
- 7D Mark II
- 20D
- 20Da
- 30D
- 40D
- 50D
- 60D
- 60Da
- 70D
- 77D
- 80D
- 300D (Rebel)
- 350D (Rebel XT)
- 400D (Rebel XTi)
- 450D (Rebel XSi)
- 500D (Rebel T1i)
- 600D (Rebel T3i)
- 700D (Rebel T5i)
- 750D (Rebel T6i)
- 760D (Rebel T7i)
- 1000D (Rebel XS)
- 1100D (Rebel T3)
- 1200D
- 1300D
- 100D
- 200D
Lens Compatibility
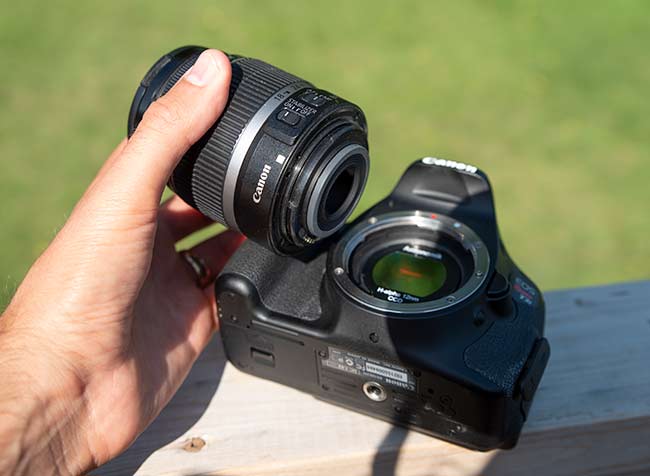
The Astronomik clip-in hydrogen-alpha filter is not compatible with Canon EF-S mount lenses. The EF-S series of Canon lenses were designed to be used solely with Canon APS-C (crop) sensor DSLR’s, and have a smaller image circle.
They fit deeper inside the camera body, which means that they’ll run into the height of the filter if you try to attach the lens. In the photo below, you can see how the base of the lens mount is protruding too far to be compatible with a clip-in DSLR ha filter.
Stick to full-frame lenses on your crop sensor DSLR. The EF-S lens mount won’t work with a clip-in filter!
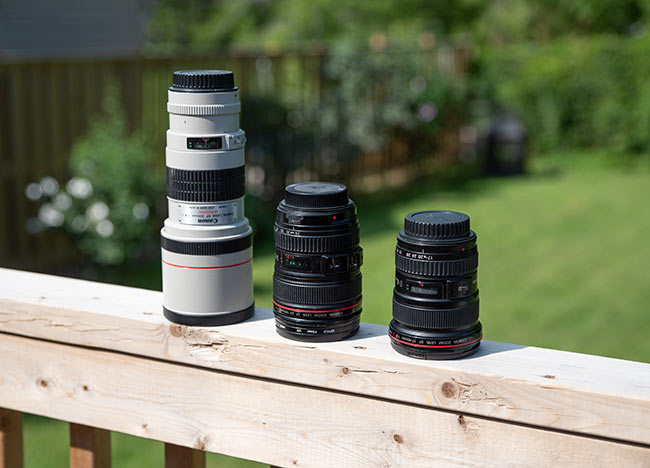
On the other hand, Canon EF series lenses were designed to be used with both full-frame camera bodies and crop sensor models. I’d recommend sticking with EF lenses for astrophotography in general, from a quality perspective.
I enjoy Canon’s L-series lenses, which is why several years ago, I began purchasing used L-series lenses to cover every possible photography situation. Third-party full-frame lenses with the EF mount design, such as the Rokinon 135mm F/2.0 ED UMC I mentioned earlier, are compatible with DSLR clip filters like this.
Clip-in filters like the Astronomik 12nm Ha (and similar clip filters) are compatible with Canon EF lenses.
Stick to full-frame lenses such as the Canon EF lineup and the many third-party lenses that mount to Canon cameras from Rokinon, Samyang, Sigma, etc. One way to tell if your lens is a suitable design for Canon clip-in DSLR filters is the small red indicator at the base of the lens.
Does my camera need to be modified for astrophotography?
No. The same benefits of an H-alpha filter can be realized with a stock DSLR. However, the amount of red light your camera will be able to record will be reduced.
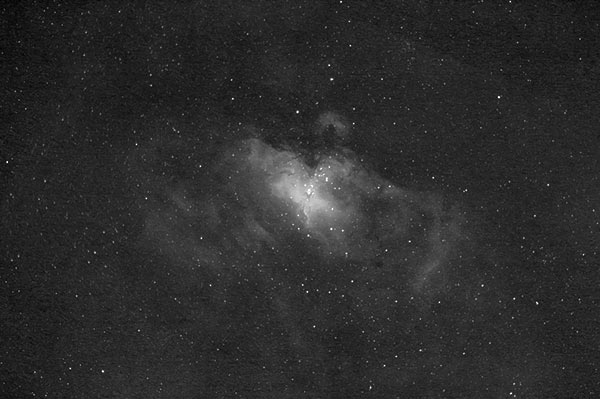
If you are serious about your astrophotography, it is worth thinking about modifying your camera either yourself or by a professional. Here is a shot of the Eagle nebula using the Astronomik Ha filter and a stock Canon EOS 7D.
Example of using a Ha filter with a stock (unmodified) DSLR camera (Canon EOS 7D).
This is typically what a frame looks like taken using a Ha filter through an unmodified DSLR. This emission nebula could have been captured in greater detail using a modified camera, but the skyglow and wavelength suppression capabilities of the filter are still present.
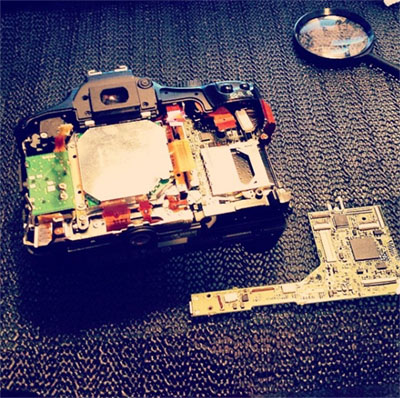
I am a huge promoter of DSLR astro-mods. If your camera is used for astrophotography exclusively, why not modify your camera yourself? That’s exactly what I did to my Canon EOS 450D (Rebel Xsi) camera in 2014.
I carefully removed the IR cut filter on my Canon Rebel 450D by watching this video from Gary Honis. If you have either a light pollution or h-alpha filter covering your DSLR sensor at all times, you are not required to install any extra replacement filters.
This is known as a full spectrum “naked sensor” mod, and it made a huge impact on my astrophotography images.
The Bottom Line
If you own a DSLR camera that has been modified for astrophotography, a clip-in Ha filter should be on your shopping list. I waited far too long before making this decision.
Combining H-alpha exposures to your existing RGB data can greatly increase the amount of detail and contrast in your nebula images, and even add dramatic details to certain galaxies.
The ability to image during the full moon and surrounding week results in much more time under the stars. No more wasted moonlit clear nights.
If you live in the city, a Ha filter cuts through even the most severe light pollution. My Astronomik 12nm Ha filter cuts through my red-zone (Bortle Class 8) skies to reveal beautiful structures of hydrogen gas in the emission nebulae I photograph.
Narrowband filters allow you to collect impressive deep sky images from a light-polluted backyard, and that’s a beautiful thing.
The clip-in versions offered by Astronomik are a perfect fit for several Canon and Sony cameras.





Hi Trevor,
Awesome site, outstanding pictures, and I appreciate your openness and willingness to share your hard earned experience. I am a one year old when it comes to AP, and I too image from a Red Zone with an XSI through a refractor.
I am slowly getting my equipment together and recently upgraded to a decent mount, a CGEM DX, though my camera is yet unmodified and my telescope is a simple C80ed.
I plan to do the full spectrum mod soon however, but thought that I needed the CLS CCD to block some of the IR necessary to focus with a refractor. I plan to follow your advice also about using the HA filter, but can I use it alone?
Thanks,
Darryl
Thanks, Darryl! Nice to hear that you are resilient in your efforts against light pollution. I use the IDAS LPS clip-filter by Hutech for LP (it also protects the sensor) for my regular RGB imaging – And then I swap it out for the Astronomik 12nm Ha filter when imaging Hydrogen alpha. I would recommend getting the CLS (clip-in version) filter before doing the full spectrum mod. I’m very happy with the Astronomik filter – well worth the money:) Cheers!
Hi Trevor,
I have a 5D MKII, unmodded. So will this filter help with my imaging in the heart of Edmonton? (A complete red zone). So far the images I have been getting are washed out white glowish messes, with a DSO somewhere in the frame. IF I was to add one of these clippable filters, would it help eliminate that whiteish glow? I would love to get the Camera modded, but there is no way I am capable of modding it, I would destroy the camera in about 30 seconds haha. Also, you mention Ontario Telescope sells these filters, but I can not see them on their site. Do you have a link to the purchase page? Thanks, and keep it up, your site has been so helpful. the tutorials are amazing.
Cheers,
Danny
Ps. I am using an 8″ EdgeHD.
Danny, so sorry for the late reply. Light pollution filters and narrowband filters are a MUST from a light polluted area like Edmonton. I’ve found that by shooting RGB images with a light pollution filter such as the Skytech CLS-CCD – and adding images in ha (using the Astronomik 12nm Ha Filter) – you can really get some amazing results from a red/white zone. OTA does not currently sell Astronomik filters – I bought mine from OPT in the States. Clear skies man.
Hello Trevor,
I wondered if you could please share tips/experiences on how you achieve focus using NB filters? I have read in several threads that it’s quite complicated because you basically can’t use Live-View mode unless you focus first on a bright star like Vega.
Thanks in advance,
Diego
Hi Diego. As you mentioned – focusing on a very bright star is helpful. Ideally, you’ll use a bright star that is nearby, lock your focuser – and then slew to your target. Taking short text exposures (Say 5 seconds at ISO 3200) is helpful too, and then you can make small adjustments between each test shot. It is a bit of a pain – but well worth the effort in the end!
Hi,
I’m trying to find more information about the H-Alpha conversions that I see offered, or more specifically, if they’ll be of any use to me. I don’t use telescopes or anything to shoot deep space astrophotography. I just shoot standard astrophotography, usually with a 14mm wide angle lens. what I’m not sure about is if the h-alpha conversion would help me, or is it really just for people shooting deep space. any input would be greatly appreciated. Thanks!
If you want to drizzle with DSS and you have a x64 processor and 8Gb+ of Ram…..you need to use the “large address aware memory tool”. This allows DSS to use up to 4Gb of your Ram. I followed the instructions in this link:
https://www.techpowerup.com/forums/threads/large-address-aware.112556/
and was able to perform a 2x Drizzle.
As with any tweaks to software/OS do this with caution. 🙂
…..if you were to use PixInsight…….Drizzle Integration is built in 😉
Thank-You for the write up, just bought the Baader Ha & S-II 2″ filters to use with my Nikon D5300, as I only use this camera now for AP I will take out the hot-mirror myself again and go naked sensor. what filter would you recommend for my color shots, I did once try the Idas-P2 but had big problems with reflections with that filter, something I’ve not had with my Baader filters, I do have the Baader Skyglow and the UV/IR-Cut/L to try but just wondered what filter you use.
Thx Paul
Trevor: I have an Ha filter but also an Hb as well. Both Astronomik clip ons to my modified Canon D70. Is it worth using the Hb along with the Ha? Not together of course but on different nights to collect more data. For the RGB photos should I just use a CLS or UHC? I am currently imaging IC434 and noticed that my Hb images are coming out very blue. I have not yet overlayed the Ha images on top of the Hbeta. I did notice however that the Halpha images had much more detail to them. What is your ideal method given the filters I already have? Should I be getting another filter to add the collection? Also wanted to mention I really enjoy your videos.
Great article … am looking into getting one of these now to help with nebula work.
Just curious, as I also have a solar filter which goes over the end of my scope (and conveniently same size as my tele lens hood), could this Ha filter work to show Solar prominences and details on the Sun? I’ve been shooting the Sun in just white light and wanting more detail. Do you have any examples of shooting the Sun with this filter?
Trevor,
I have been using the Ha 12nm clip filter with my Canon T6 on a Sky Watcher Adventurer since June. I was blown away when I captured a decent shot of the North America Nebula with June’s 90% illuminated moon. Last night I used a 50mm lens to capture 60 2 minute subs of the Southern sky and the four eye popping nebulae – Eagle, Omega, Trifid, and Lagoon. This filter is akin to wearing night vision goggles.
Thanks to your earlier reviews for opening my eyes to this incredible product.
Mark – Love the night vision goggles analogy, my thoughts exactly! I’m glad to hear that you are getting a lot of use out of this filter when the moon is bright. Collecting H-alpha details to add to an existing color image is always a great use of time under a clear sky :). Cheers
Hi Trevor, I am a beginner and I have a modified 650d (naked sensor, both filters removed). If I add the Ha clip in filter and I want to use a flattener/reducer how do I calculate what distance is needed between the sensor and the reducer? Does the fact that the camera is without the 2 stock filters affect the distance? Thanks!
Hi Trevor,
I saw the you are using a SS of 3 or more minutes. However, I do not see stair trails. How is it that you do not use the 500 rule?
Hi Craig. The images are tracking the apparent movement of the sky on a polar aligned, equatorial mount.
Thank you for the fantastic info! IVe been looking for ages. You mentioned the canon 6D Mark II but I didn’t think that’s astronmik made a filter for that camera. If you know something I don’t, can you please clarify? Thanks!
Hi Trevor,
Great write up. I’m imaging with an astro modded 450D, star adventurer and L series lens (70-300L f4-5.6, 24-70L f4 and an ef 50mm f1.8). With the exception of the 50mm prime the lenses are not considered fast so require me to expose for much longer than at f2.8 for example. However as I’m in a bottle 8 zone really long exposures are not really possible as the subs are just a washed out mess. Would the addition of a Ha clip in allow me to expose much longer in my light polluted garden?
Additionally if I capture regular RGB subs to combine with the Ha channel do these need to be the same exposure length or does it not matter once each of the two channels (RGB and Ha) are stacked?
Hi Trevor,I am a beginner and I have always wanted to get into astrophotography.I purchased a Explore Scientific AR-127,I have a Canon DSLR T3i modified,a Orion 80mm guide scope,a Bresser EXOS 2-GT mount,what filters do you recommend I get for over all use.I live in the country in the US,Indiana very dark.Thanks for your time,you are the one that got me going in this,your pictures blew me away,now I gotta try.I know it will take me along time to get where you are at but I will enjoy it.I also purchased your processing guide,it is awesome,thanks for your knowledge,I will always be watching your videos,bye be cool.
Hi Trevor,
thank you so much on this wealth of information on Ha and DSLR. I bought a 12 nm filter for Christmas and am now eager to try it out. Being a beginner in AP I’m happy with my modified DSLR and I expect a big step forward with the Ha filter. I always thought that for Ha you need a mono camera – I’m not yet ready for that given the fact that AP is challenging as for taking photos and processing them. I surely will come back to your website! Clear skies!
Hi Trevor,
Does it need to be cleaned up ? And if yes… how 🙂
Clear skies !
Marcus
Hi Trevor, what a great tutorial on Filters. I just had my EOS80d modified by removing stock filter. I had them put in a Baader Planetarium H-alpha Conversion Filter for Canon EOS to replace stock IR cutoff. Now that I have done that, do i still need to add an Ha CLIP filter to my modified 80d and if i do does it improve my captured images or should I not add an Ha clip filter with my Baader glass ?
Thanks so much
Frank
Would you recommend a h-alfa filter with a osc camera. I know its not optimal but I expect similar (or better) results to a DSLR?
Hi.
I have always loved astronomy and I want to start astrophotography. I have a Canon EOS 90d. Can you please guide me as to what entry level equipment I will need for astrophotography including filters etc?
Also do I need to process my pictures to look like yours or the setup will be enough?
Thanks!
Thank you so much for this. I’m a newbie to astrophotography and I have a Canon R with the Samyang 135 lens (among others) and was beginning to think I had wasted my $500 on the Astronomik Ha filter. Now that I know it wasn’t a waste, have you a recommendation for what the next filter should be or am I fine with just the one? I’m also enjoying your Image Processing Guide – very well laid out. Thanks for that too!
hey Trevor
i just recently started taking my night sky photography more seriously ,
i took a great stacked image of the milky way between 2 trees in my backyard, i live in Australia,
any idea where i can buy the HA filter for my camera? i have a Canon Eos 760D and a Canon Eos 6D.
cheers Peter
I am very interested in narrow band filters, but I’m having trouble finding available options my Sony Alpha 6000 camera. I see Sony Alpha 7 and 9 offerings, but no 6000 family. Can someone help?
The Alpha 6000 is a hugely popular camera – you’d think this would be easy to find.
Hi Trevor
thanks for all the work you put into your website, it’s very helpful. One question I couldn’t find answered is: Can I use a HA-filter to shoot landscape astrophotography including a foreground? Would the post-processing steps be the same as those for deep sky images? Or any page or link that explains this? Much appreciated.
Matt
Hi Trevor. I have a couple of questions. My current rig is the sky watcher star adventurer, and mounted on it is my canon t3i with tamron 75-300mm lens. I would like to ask how do I modify my camera. I live in bortle 5 skies and I’m thinking about buying the skytech cls- ccd clip in filter to combat the light pollution skies. Do you think this filter would improve the quality of my images? I only process in photoshop. I also love your channel and videos. Keep it up! 👍