The Horsehead Nebula in HaRGB
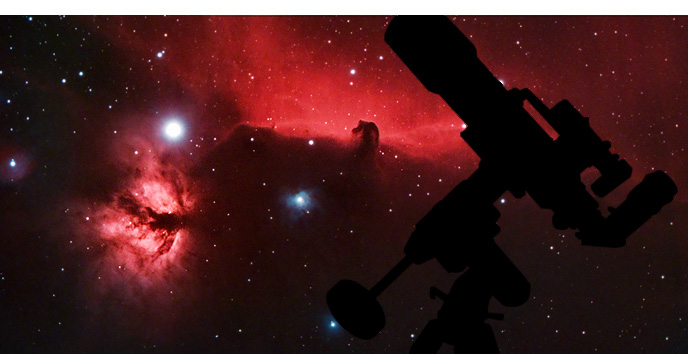
Over the past 2 months, the Horsehead Nebula has been the focus of my astrophotography attention. The winter weather has set in, with cold nights and frequent cloud cover. Despite these challenges, I have been able to take photos from my backyard on 3 separate occasions in November and December.
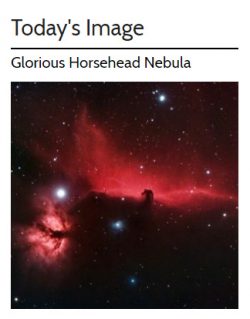
On December 13, 2016 – My image of the Horsehead Nebula was Today’s Image on EarthSky! I have followed EarthSky since before I owned a telescope, and it is a huge thrill to see my image grace their website! The article even includes the video from my backyard, so I hope to expand my audience of the AstroBackyard YouTube Channel.
This is by far my biggest publication since I began DSLR astrophotography. Make sure to follow EarthSky on Facebook, as they will keep you informed about all of the latest celestial events including meteor showers, eclipses, and a plethora of information about our night sky.
The Horsehead Nebula is a popular winter deep-sky astrophotography object, and I hope that my experiences will give you some tips for photographing this nebula with your DSLR.
Latest Image: The Horsehead Nebula
Before owning a DSLR Ha filter, I didn’t think a photo like this was possible from the city. With the Moon creeping back into the night sky over the next two weeks, I hope to add some more Hydrogen Alpha exposures to my image. I’ll discuss how I combined the RGB and Ha images to produce this composite a little further down in this post.
 Photography Details
RGB: 2 Hours, 40 Minutes – Ha: 1 Hour, 20 Minutes Ha
Total Integrated Exposure: 4 Hours
Camera: Canon EOS T3i (600D) Modified
Telescope: Explore Scientific ED102 CF
Mount: SkyWatcher HEQ5 Pro SynScan
Guide Scope: Orion Mini 50mm
Guide Camera: Meade DSI Pro II
View all of the astrophotography equipment needed for this shot.
Astrophotography in the city
If you’ve been following me on Facebook or Instagram, you’ve probably noticed that my image of the Horsehead Nebula is an on-going project. I encourage beginners to spend time on longer projects rather than hopping around from target to target. This way you can hone your capturing skills, and soak in as much time on your deep-sky object as possible.
Jerry Lodriguss posted an interesting article about compensating exposure times for brighter skies. He relates sky brightness (magnitude) to the overall exposure time. His summary suggests that the amount of exposures needed to compensate for light pollution increases drastically by each magnitude. I have experienced this phenomenon first hand as I have imaged in varying sky brightness conditions.
Dealing with light pollution!
Wait until you see a single exposure of this object in the video…
It is an unfortunate reality that my backyard is cursed with heavy light pollution, yet I am able to bring these deep-sky objects forth using filters. The Horsehead Nebula benefits from Hydrogen-alpha data integrated with regular color (RGB) frames. The photo above is considered to be HaRGB, as it is a composite of images captured in RGB and Ha.
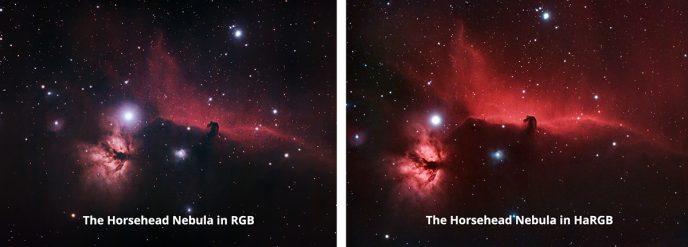
Reasons to start adding H-Alpha to your astrophotos:
• Brighter nebulosity and Enhanced Detail
• Not affected by moonlight or light pollution
• Can shoot much longer exposures
More: How a DSLR Ha Filter can Improve Your Astrophotos
The benefits of a portable mount
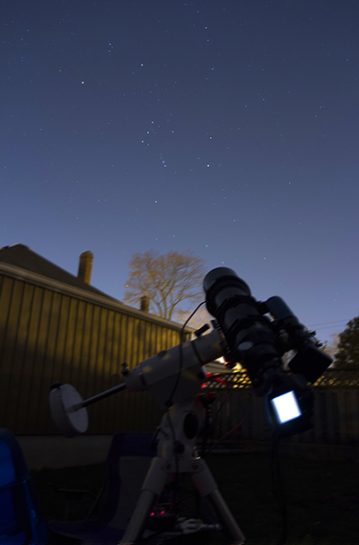
I moved my astrophotography equipment to an area in my backyard that allowed me to shoot towards Orion’s belt for hours with no obstructions. This was a new spot (I had to move my firepit!) that I was pleasantly surprised to see had a clear view of the mighty hunter. My previous imaging location in the yard was obstructed by my neighbor’s house and my garage. Watch the latest video on my YouTube channel as I attempt to capture more light frames on the Horsehead Nebula during New Moon.
Astrophotography in the city
The night of the video was cut short by clouds, but I was able to talk a little bit more about the filters I use to capture RGB and Ha images from the backyard. As usual, the video sparked a number of DSLR astrophotography questions including “why even use a light pollution filter at all?” I had to laugh at this comment because I totally understand why it was asked.
A single exposure of 3 minutes or more from the backyard looks almost completely white. Luckily, the detail is in there and just needs some help to be brought forward through image processing. An important thing to remember in this situation is the histogram. Even though the frame appears overexposed, the histogram shows that the data has not been clipped.

The data captured using the clip-in ha filter is what brought the image to life. Using the HaRGB processing method outlined by Starizona, I used the H-Alpha image as a red channel in the RGB version, as well as a luminance layer for enhanced detail and reduced stars. This involves first separating the red channel from the original RGB image and combining it with the H-Alpha version. I have outlined the entire process in the following astrophotography processing tutorial:
Create a HaRGB Composite in Photoshop

About the Horsehead Nebula
The Horsehead Nebula is a well-documented emission nebula in the constellation Orion. It lies closely to the star, Alnitak in Orion’s belt. The large cloud of illuminated red gas (IC 434) that resides behind the “horses head” is what gives this nebula it’s striking appearance. Cataloged as Bernard 33, the Horsehead Nebula is part of an enormous cloud of molecular gas and dust that creates a silhouette in front of the emission nebula behind it.
Read More: The Horsehead Nebula in Infrared (EarthSky)
The Flame Nebula
You will also notice an interesting feature to the lower left of my image. The bright glowing nebula is known by astronomers as the Flame Nebula or NGC 2024. I have framed my image to include both the Flame and Horsehead Nebula in the same image. The star cluster responsible for lighting the Flame Nebula lies approximately 1,400 light-years from Earth. This emission nebula in the Orion constellation is a combination of glowing gas and dark dust.
The framing I chose for the image is a popular orientation of this object for astrophotography telescopes in this focal range. The 714mm focal length of my Explore Scientific ED102 CF excels at wide-field deep-sky astrophotography.
Thank you all for your continued support and feedback about this website. Please subscribe to my e-mail newsletter to stay up-to-date with the latest DSLR astrophotography information and images. For a better understanding of how I process my images in Adobe Photoshop, watch my tutorial on YouTube.
Additional Resources:

 Photography Details



Hey man – your online presence is incredibly useful. You are the man. Thanks for helping me to continue to look towards the skies. I am just now (at 50) moving from mirrorless astro to real astro – I have a HD edge c-11 on the way and i can’t wait!! But I could use a suggestion on a wide field telescope if you have one. I wanna shoot things like the California, Pelican, North American and so on…and I don’t wanna haul a c-11 around with focal reducers. Anyway thanks for teaching me so much. It’s very unselfish of you.