Photographing the Fox Face Nebula from My Backyard
I recently took on a fun backyard challenge: photographing the Fox Face Nebula (NGC 1788) using the William Optics UltraCat 76.
It’s not a target you hear about very often, and that’s exactly what drew me to it. While Orion is packed with famous, high-contrast objects, this one tends to fly under the radar, especially for backyard imagers.
The reason becomes obvious pretty quickly: this nebula is dim. Really dim. It’s a subtle reflection nebula that doesn’t jump out at you, and that’s what made it such an interesting test.
It felt like the perfect target for seeing what’s realistically possible from a suburban backyard, using accessible gear, imperfect skies, and a practical, repeatable approach.
Why the Fox Face Nebula?
The Fox Face Nebula is a broadband reflection nebula located in the constellation Orion, cataloged as NGC 1788. Unlike emission nebulae, it doesn’t glow on its own. It’s made visible by starlight reflecting off fine dust, which is part of what makes it such a subtle and challenging target from light-polluted skies.
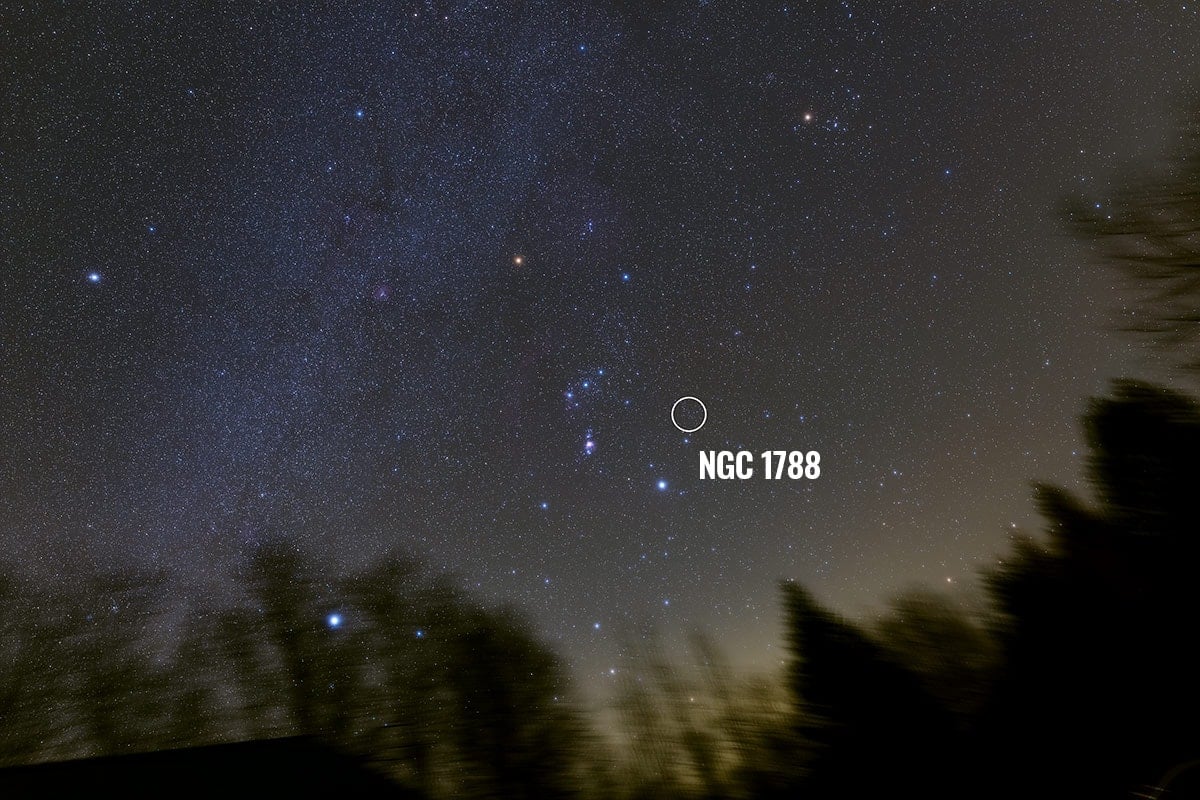
It sits just above the ultra-bright star Rigel, and very close to the much more famous Witch Head Nebula. In fact, I’d already captured part of this region by accident in a recent Witch Head image. If you’ve ever photographed the Witch Head with a wide-field refractor, there’s a good chance you’ve picked up the Fox Face as well.
This object doesn’t get nearly as much attention as the heavy-hitter targets we usually go after this time of year. But sometimes, those overlooked objects are the ones that teach you the most. They force you to slow down, manage expectations, and really focus on technique.
Quick Facts:
A few quick facts about the Fox Face Nebula:
- Catalog name: NGC 1788
- Type: Reflection Nebula
- Constellation: Orion
- Nearby landmarks: Just above Rigel, and very close to the Witch Head Nebula (IC 2118)
- Best suited for: Wide-field imaging with fast optics
Setting (Very Low) Expectations
The best images of the Fox Face Nebula I’ve ever seen were captured from remote observatories with 30 hours or more of total integration time, under pristine, dark skies.
That kind of data is incredible, but it also sets a very high bar that just isn’t realistic for most backyard imagers. Competing with that was never the goal of this session.
This image was captured in my backyard under Bortle 6 skies, with the moon at about 77% illumination for much of the night. In other words, the conditions were far from ideal.
Between the light pollution, moonlight, and a faint broadband target, everything was stacked against me, and that’s exactly why I wanted to try it. What I really wanted to explore was what’s achievable with:
- Gear that a lot of people can realistically own,
- A night that’s nowhere near perfect, and
- A workflow that’s accessible and repeatable for backyard imagers.
This is the real astrophotography experience for most of us.

Camera: ZWO ASI585MC Air
For this session, I used the ZWO ASI585MC Air again, and it continues to impress me the more I use it. It’s a one-shot color camera, which keeps things simple and efficient, especially for backyard imaging where clear skies can be unpredictable.
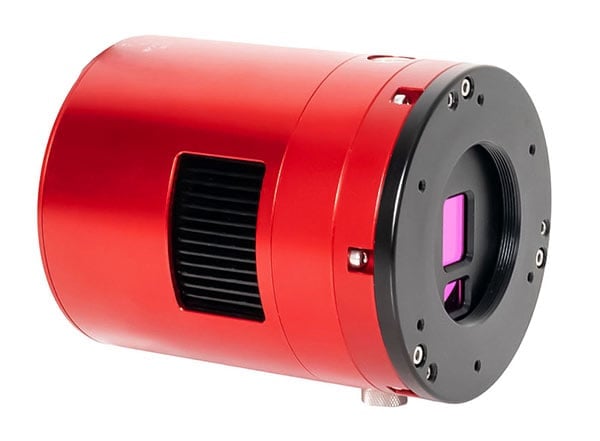
Despite its small size, the sensor is surprisingly sensitive and handles broadband reflection targets very well, even under moderate to heavy light pollution.
One of the biggest advantages of the ASI585MC Air is how streamlined it makes the entire setup. With built-in control and wireless connectivity, it’s incredibly easy to manage sessions remotely, monitor incoming subs, and make quick adjustments without constantly running outside.
For short winter sessions or nights with questionable weather, that convenience really matters. It’s quickly become one of my go-to cameras for quick, low-friction backyard imaging.
To give myself a bit of an edge against the city glow and moonlight, I paired the camera with the Optolong L-Quad Enhance filter. This isn’t a magic solution for broadband objects (reflection nebulae still rely heavily on dark skies and long integration times), but the filter does a nice job of taming harsh gradients and suppressing some of the worst sky glow.
On bright, moonlit nights like this one, that extra contrast can make the difference between fighting the data and actually enjoying the processing.
Telescope: William Optics UltraCat 76
I paired the camera with a telescope I’d been really excited to use: the William Optics UltraCat 76. At the time of this session, it was the smallest model in the UltraCat lineup, although that changed shortly after I started filming for this night.
Even so, the UltraCat 76 really hits a sweet spot for backyard astrophotography. It’s a 5-element Petzval APO, which means the field is fully corrected right out of the box, no separate field flattener required.
With a 365mm focal length and a fast f/4.8 focal ratio, it’s designed to gather a lot of light quickly while still delivering sharp stars edge-to-edge.
That combination makes it exceptionally well-suited to wide-field reflection nebulae, where speed and clean star shapes matter more than extreme magnification.
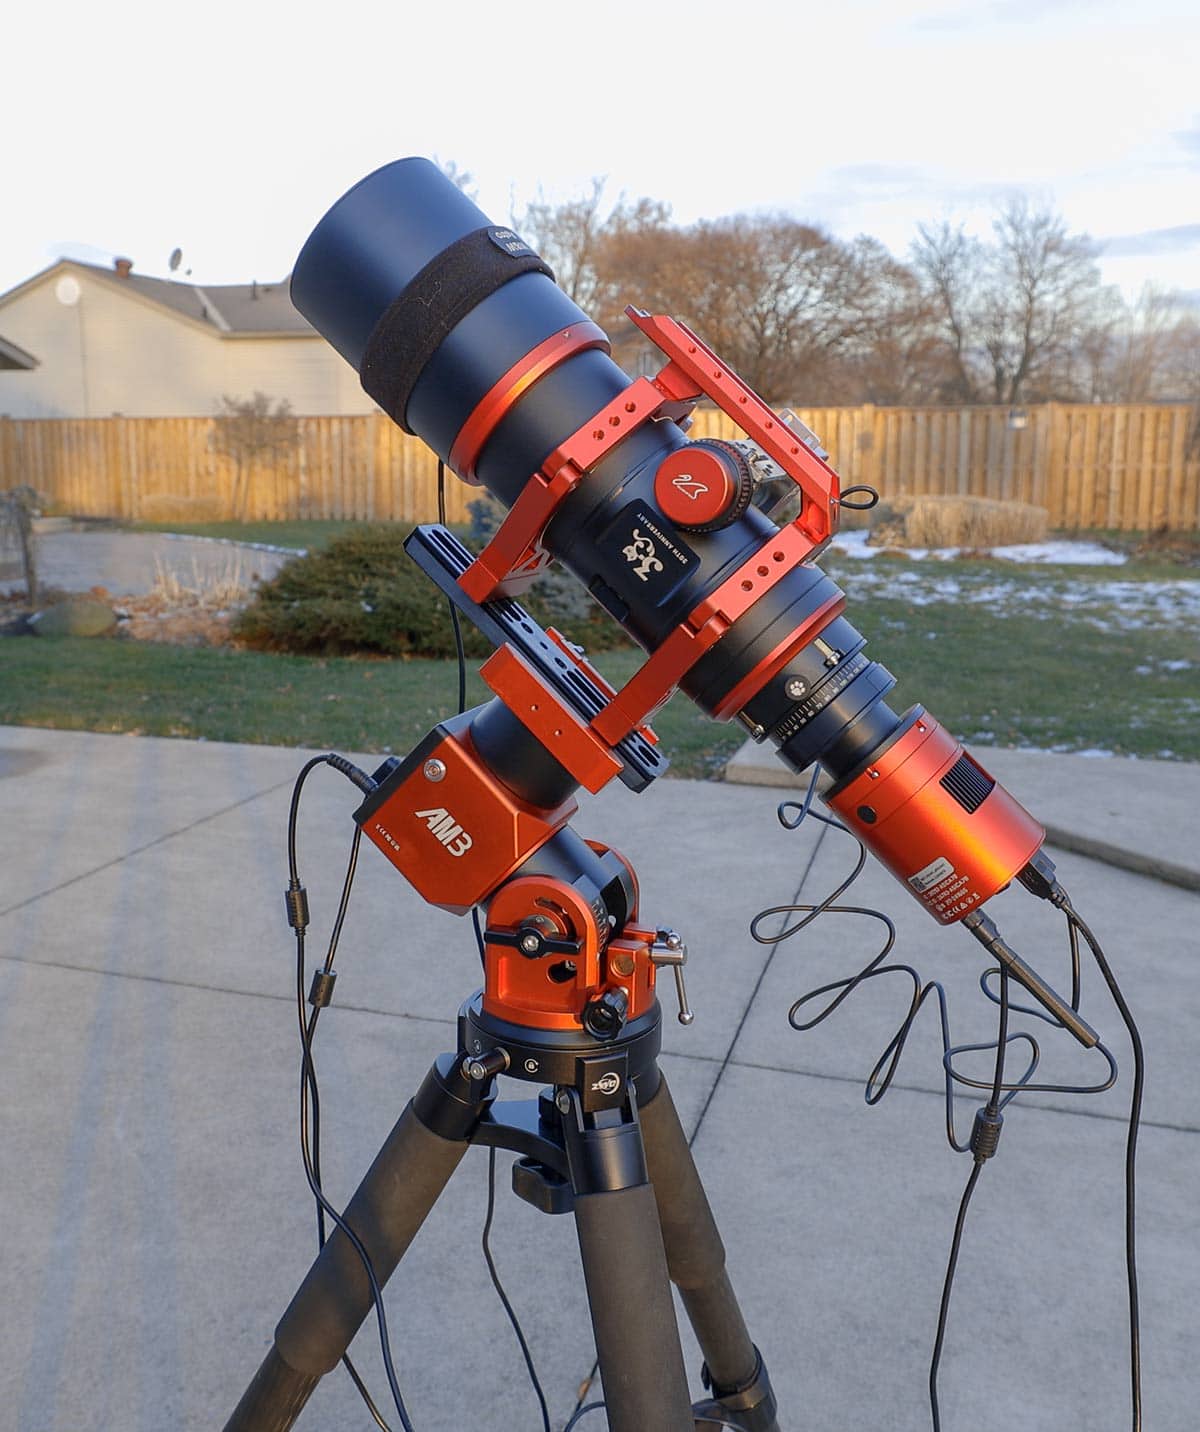
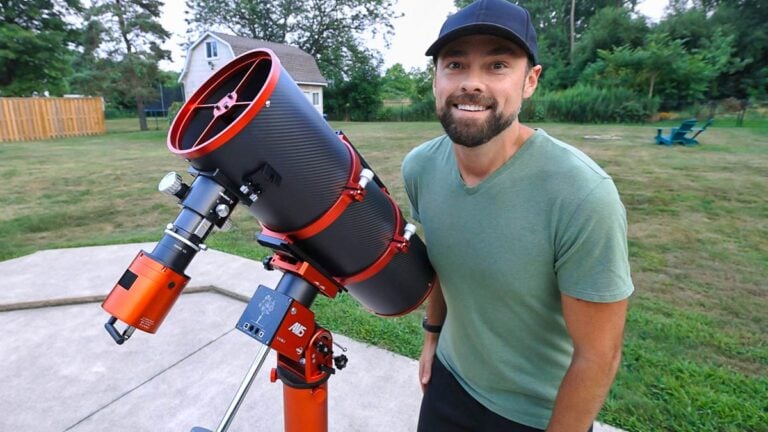
The William Optics UltraCat 76 ready for imaging.
Another significant advantage of the UltraCat 76 is how well it pairs with compact, lightweight mounts like the AM3. The scope is easy to balance, forgiving on tracking, and quick to get up and running – all things that matter when you’re imaging in cold weather or less-than-ideal conditions.
For this kind of backyard session, it felt like a near-perfect match.
Mount Setup: ZWO AM3
The entire rig was mounted on the ZWO AM3, which has become one of my favorite mounts for lightweight, portable imaging setups. I’ve talked about this mount before, but it really shines on nights when you want the focus to be on imaging and not wrestling with gear.
The AM3 is a compact, strain-wave (harmonic drive) equatorial mount that delivers exceptional stability and precision in a very small package. Despite its size, it’s more than capable of carrying a lightweight refractor like the UltraCat 76, along with a camera, filter, and accessories, without breaking a sweat.
That kind of performance-to-weight ratio makes a big difference for backyard setups. It’s quick to level, fast to polar align, and easy to get up and running, which is exactly what you want on cold nights or when the forecast is questionable.
When setup is simple and predictable, you’re far more likely to actually get outside and image, and for sessions like this one, the AM3 felt like the perfect match.

Related Post: The Best Astrophotography Mounts Available Today
Autofocus Upgrade
I also added a ZWO EAF Pro autofocus motor, and it’s honestly been one of the biggest quality-of-life upgrades I’ve made to my imaging setup.
Once you’ve used reliable autofocus, it’s really hard to go back, especially on nights when conditions are changing quickly. For this session, I set autofocus routines to run automatically throughout the night, including refocusing whenever the temperature dropped.
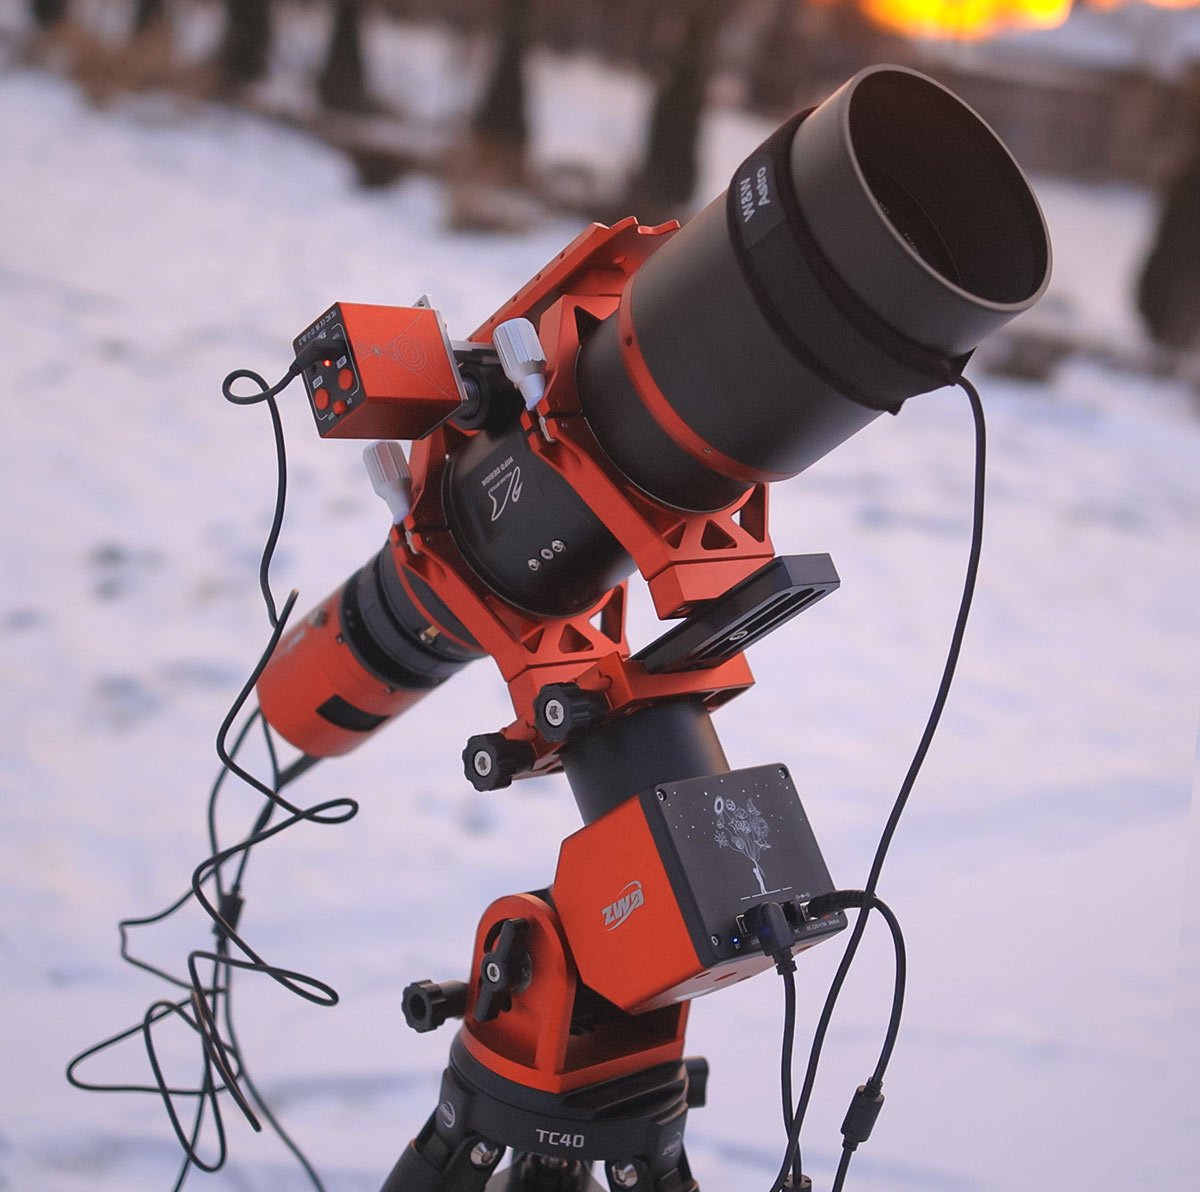
I installed a ZWO EAF Pro electronic autofocuser on the UltraCat 76.
That’s a big deal during winter imaging, where even small temperature changes can slowly throw your focus off and soften the stars without you realizing it. On a brutally cold night like this, autofocus meant:
- Tighter, more consistent stars across the entire session,
- Far fewer trips outside to manually tweak focus, and
- A much more comfortable imaging experience overall.
It’s one of those upgrades that doesn’t just improve image quality – it makes the whole process more enjoyable, which goes a long way when you’re imaging from home in less-than-ideal conditions.
The “Smart Telescope” Approach
Because the Fox Face Nebula is such a faint target, I leaned on what I like to call the “smart telescope” approach: collect lots of short exposures, stack everything together, and let the total integration time do most of the heavy lifting.
This method works especially well for backyard imaging, where conditions can change quickly and long, perfect subs aren’t always realistic. For this session, I stuck with 60-second exposures, just as I did last time I used this camera.
That length gave me a good balance, enough signal to build meaningful data, without blowing out the brighter stars in the field. Shorter subs also meant that if clouds rolled through, guiding hiccupped, or something went wrong, I wasn’t losing large chunks of valuable imaging time.
If conditions cooperated, the plan was to collect 250 or more individual subs throughout the night. Individually, each exposure doesn’t look like much, but once stacked together, they add up quickly.
For faint broadband targets like this, that cumulative signal is often far more important than chasing longer single exposures.
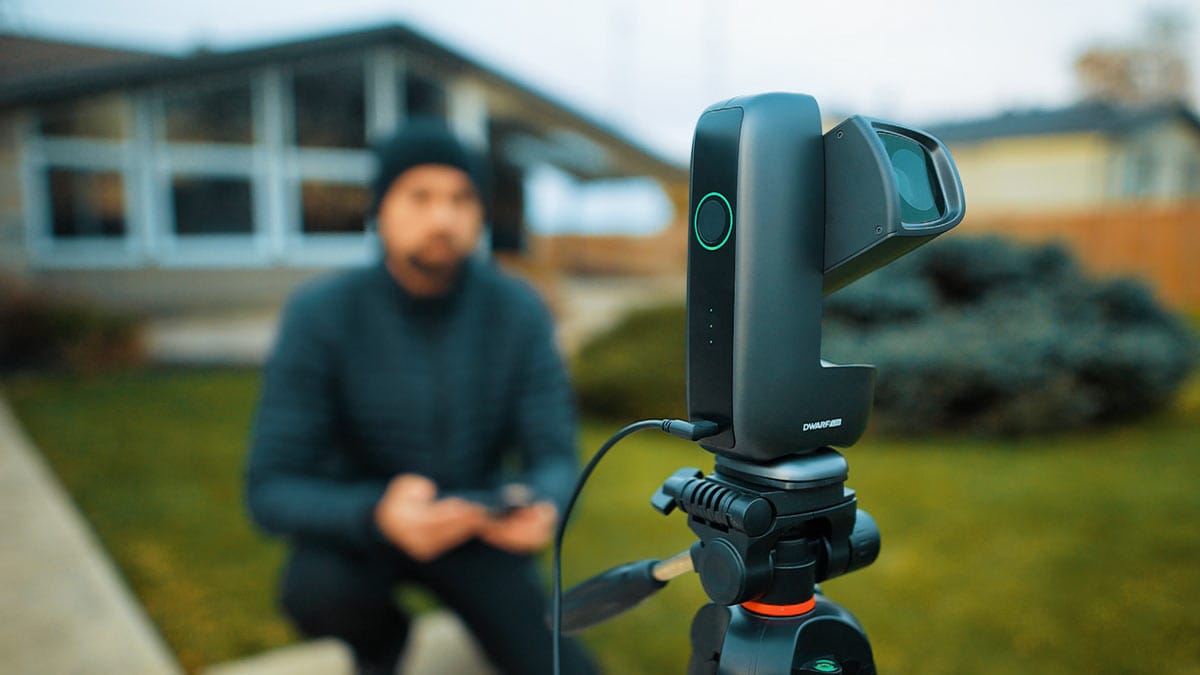
I’ve been using the DWARF mini quite a lot lately, which has opened my eyes to the benefits of using shorter subs.
Weather Reality Check
The forecast leading into this session was…not encouraging. High, thin clouds were expected to drift through for most of the evening, with only a slim chance of things clearing up after 1 a.m.
It wasn’t the kind of forecast that inspires a lot of confidence, especially when you’re trying to capture an extremely faint broadband target.
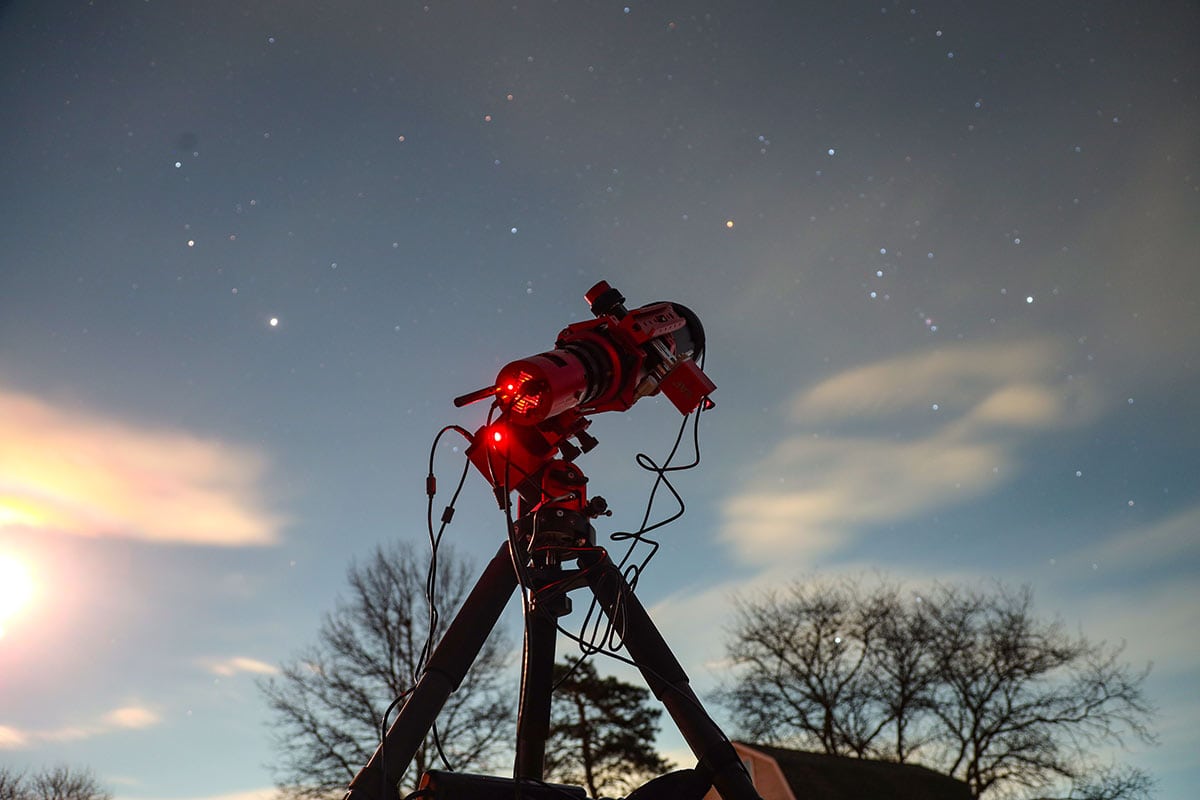
Astrophotography in the winter season can be challenging, with very few clear nights in the forecast.
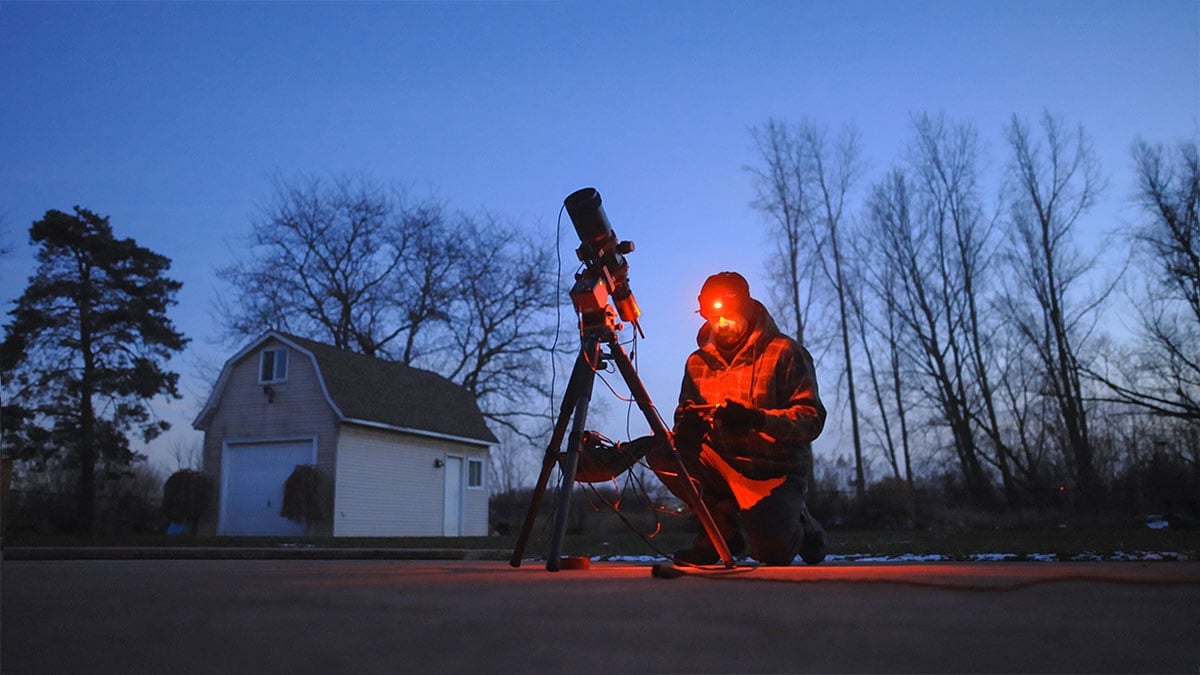
On top of that, temperatures dropped to around –15°C with the wind chill, which adds an extra layer of challenge to everything – from setup, to focusing, to simply staying motivated long enough to collect meaningful data. Nights like this test your patience just as much as your gear.
It definitely wasn’t a crisp, textbook winter imaging night, but it was very typical of backyard astrophotography. These are the conditions most of us end up working with: imperfect skies, unpredictable weather, and cold that makes efficiency matter.
This was a good reminder that getting results from home often comes down to persistence and smart choices, not perfect conditions.
Monitoring from Indoors
Once everything was polar aligned and properly focused, I headed back inside, where it was warm. On nights like this, minimizing time outdoors isn’t just about comfort; it helps you stay focused and patient long enough to actually collect good data.
I monitored the incoming subs from the basement on my tablet, letting the rig quietly do its thing outside. This is easily one of my favorite parts of winter imaging: checking in on the data every so often while doing something completely unrelated.
It takes a lot of the pressure out of the session and makes the whole experience feel more relaxed. That night, I was working on a late-stage mage build in Oblivion – a game that’s worth playing for the soundtrack alone.
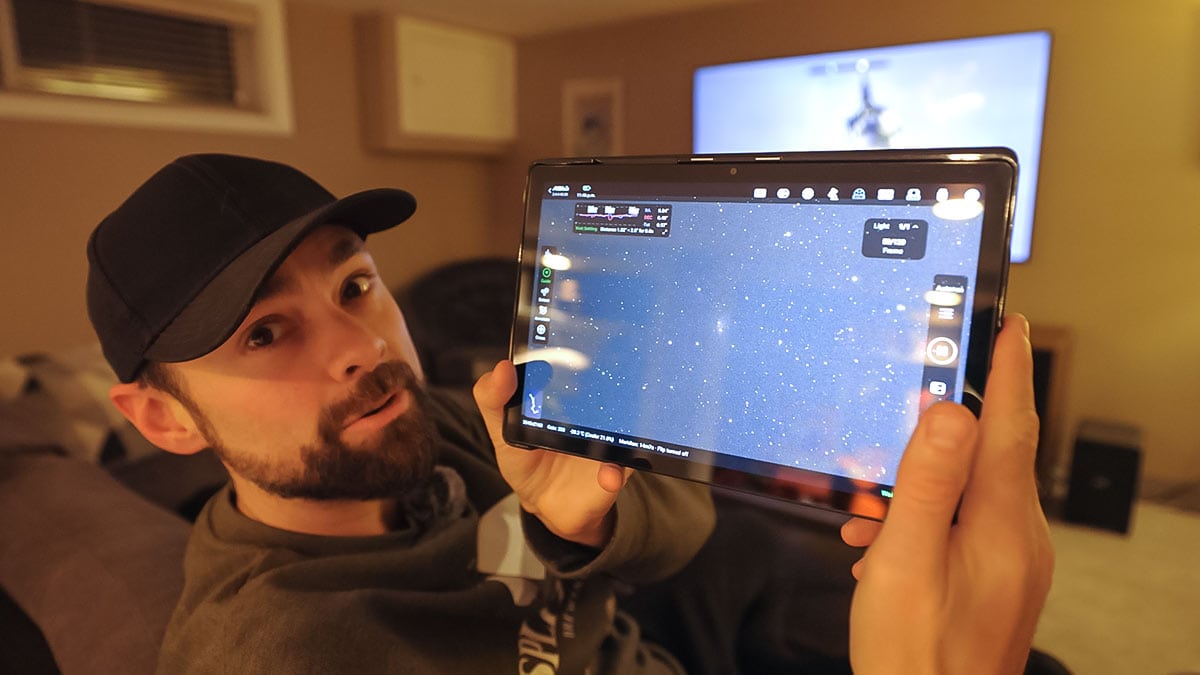
I like to run the ASIAIR using my tablet in ‘station mode’ so I can monitor my progress in the basement.
There’s something genuinely calming about knowing your gear is outside doing slow, patient work, while you get these small updates every few minutes as the stack gradually improves.
Instead of using autorun, I chose Live mode, which gave me a much better sense of how the session was progressing in real time. It allowed me to:
- Watch the live stack improve as each new exposure came in,
- Still save every individual FITS sub for proper processing later, and
- Continue using guiding, dithering, and autofocus throughout the session.
It’s a great middle ground – you stay connected to the data and can spot issues early, without having to babysit every single exposure.
Final Thoughts
This entire session was really about realism. A faint reflection nebula, lots of short exposures, a bright moon, questionable weather, and brutally cold temperatures – none of it was ideal, but all of it was familiar.
This is the kind of night that most backyard astrophotographers end up working with, whether they plan to or not. I wasn’t expecting a masterpiece, and that was never the goal. What I did hope for was an honest result, something that shows what the Fox Face Nebula can look like from a Bortle 6 backyard, using a practical setup and a straightforward workflow.
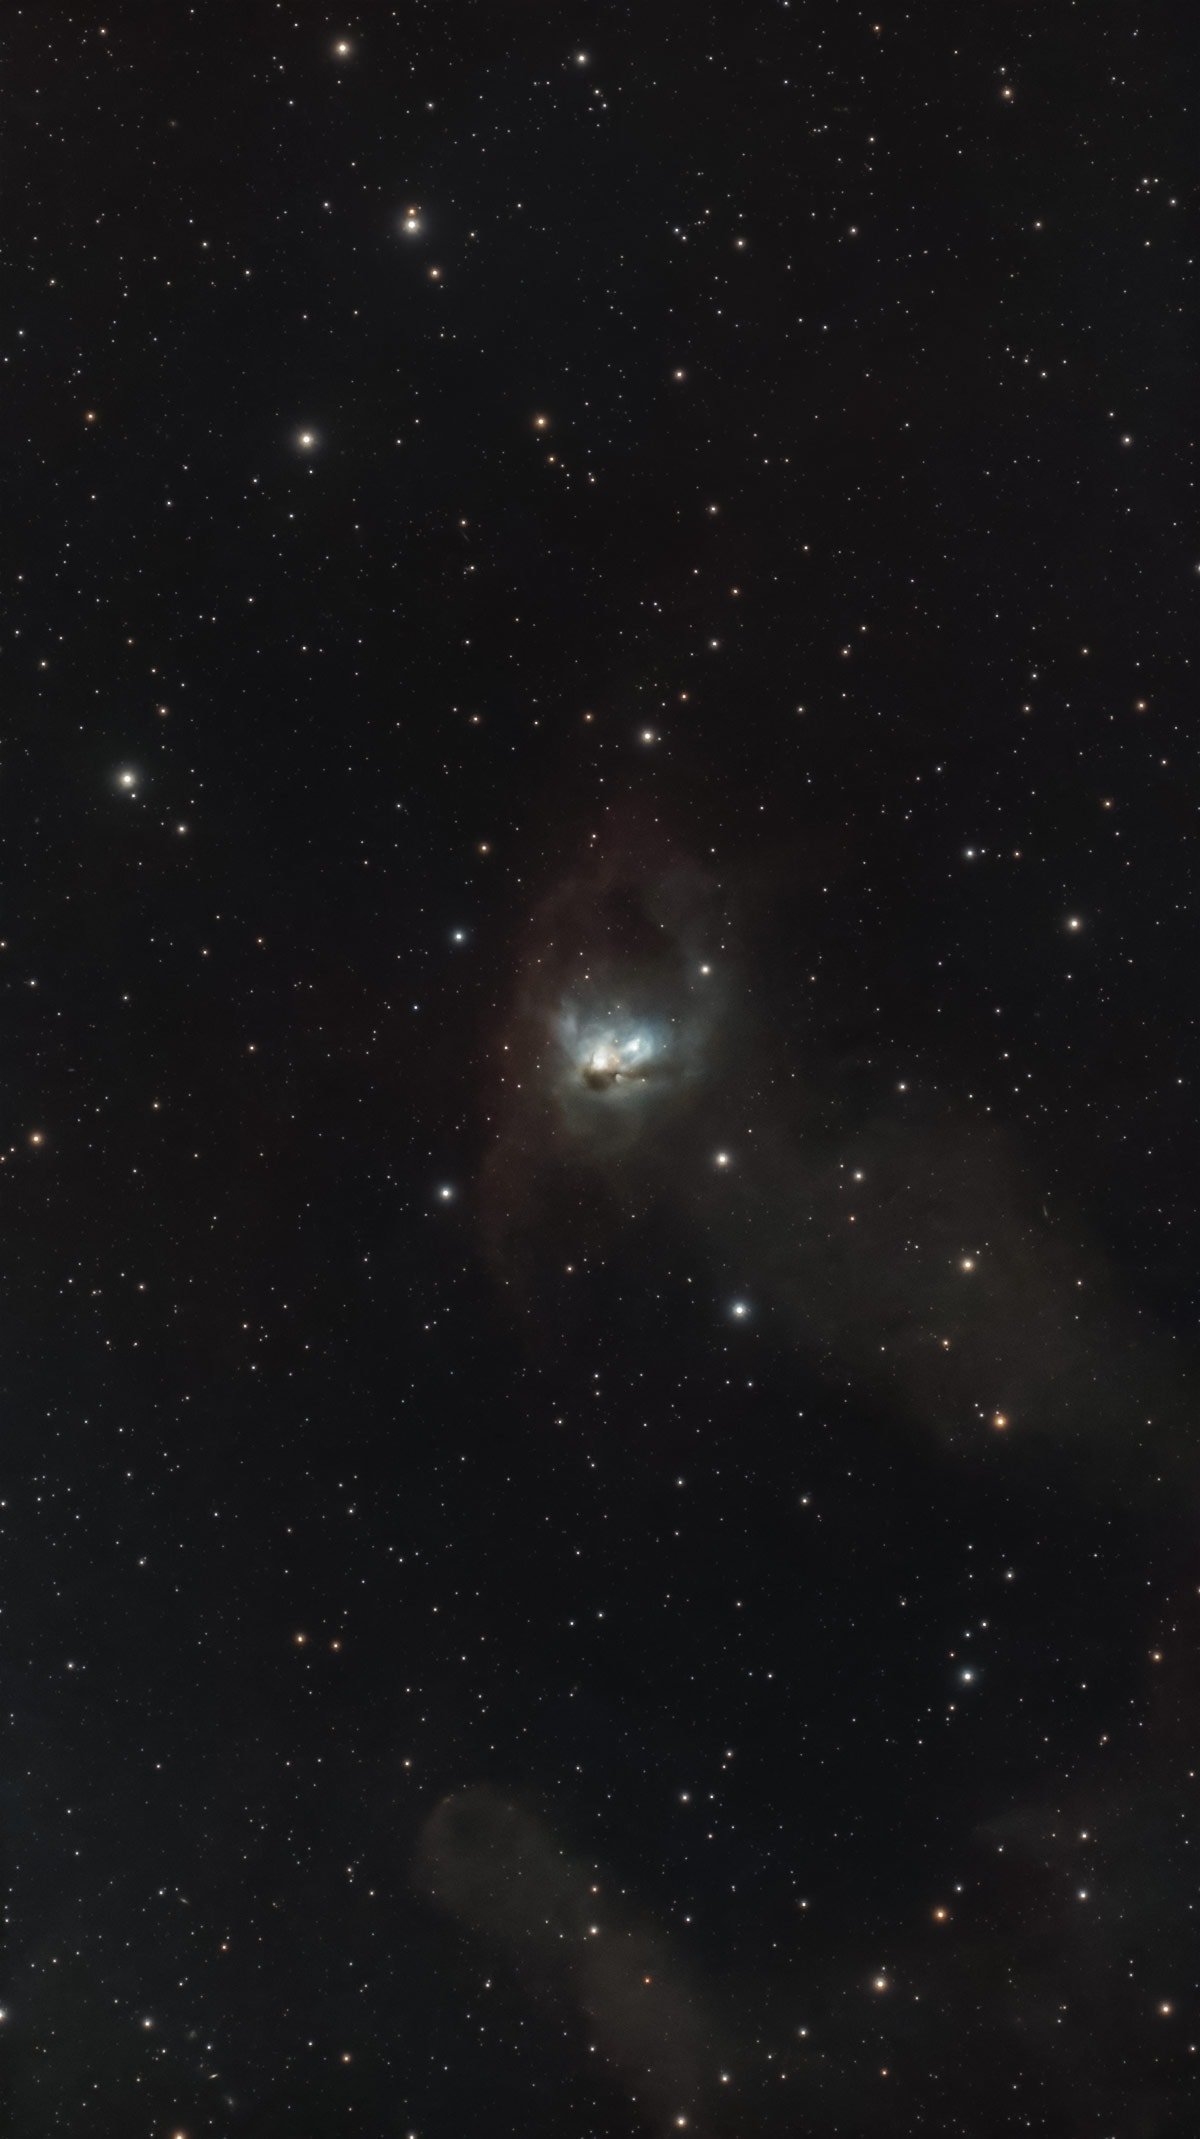
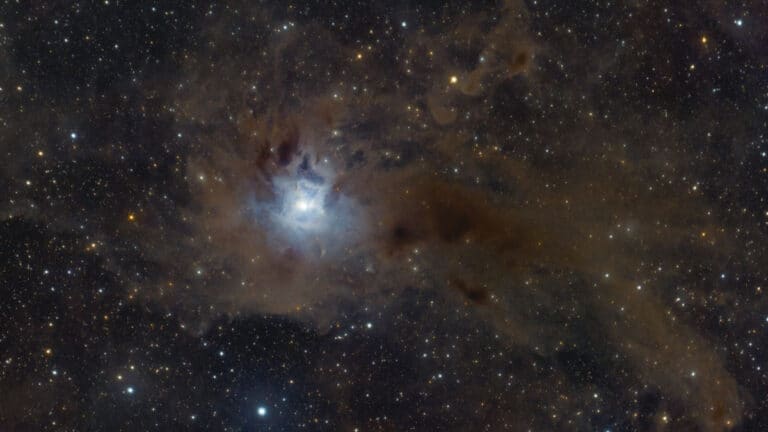
My final image of the Fox Face Nebula captured from the backyard.
Even teasing out a hint of that soft, dusty structure was enough to make the effort worthwhile. Challenges like this are a big part of why I love astrophotography. They force you to adapt, make smart choices, and work with what you have instead of waiting for perfect conditions.
This session was a great reminder that there’s a lot of satisfaction to be found in simply getting out there and seeing what’s possible, and for me, this one was absolutely worth trying.
 Trevor Jones is an astrophotographer and a valued member of the RASC. His passion is inspiring others to start their astrophotography journey on YouTube so they can appreciate the night sky as much as he does. His images have been featured in astronomy books & online publications, including the NASA Astronomy Picture of the Day (APOD).


Hi Trevor,
I have the ASI585MC pro. Most on the web say that the best set up is Gain 200 for HDR. I still beginning with the camera and at gain 200, I have lots of noise still.
I tried gain 100 for the Orion nebula with 60s exposures with less noise, but maybe with less HDR. Are you still using gain 200?
Some says as well that they have connection problems with the ASIAIR and that’s the WIFI is not powerful enough to monitor inside. They added a Mini Multi-Functional Wireless Portable Wifi Router to be able to monitor properly. Are you just using the MC Air antenna or ASIAIR antenna to monitor from your basement?
Hey Trevor! What tablet do you use? Is it still the Samsung Galaxy?