This Telescope Autofocuser Took My Astrophotography to the Next Level
Over the years, I’ve spent countless nights under the stars chasing crisp, deep-sky images from my backyard. But this fall, I added something new to my telescope that completely changed the way I capture the night sky: an electronic telescope autofocuser.
In this post, I’ll walk you through my latest imaging session on Melotte 15, the open star cluster at the heart of the Heart Nebula, using my most advanced setup yet.
I’ll explain what a telescope autofocuser is, how it works, why it’s such a game-changer for deep-sky imaging, and share some extra astrophotography tips I’ve learned along the way.
What Is a Telescope Autofocuser?
A telescope autofocuser is a small motorized unit that replaces your telescope’s manual focus knob. Once connected to your imaging computer or controller (like a laptop computer running N.I.N.A., or the ZWO ASIAIR), it automatically fine-tunes your telescope’s focus based on precise feedback from the stars in your images.
Instead of walking outside every hour to tweak focus after a temperature drop, the autofocuser does it all for you. You can set the autofocuser device to re-focus before each imaging run, after a meridian flip, and whenever the temperature changes by a few degrees.
If you’ve ever woken up to an entire night of slightly soft data, you’ll understand why this upgrade is worth every penny. While I have been happy to focus my astrophotography telescopes manually using a Bahtinov mask for many years, I now realize that my image data has been suffering as a result.
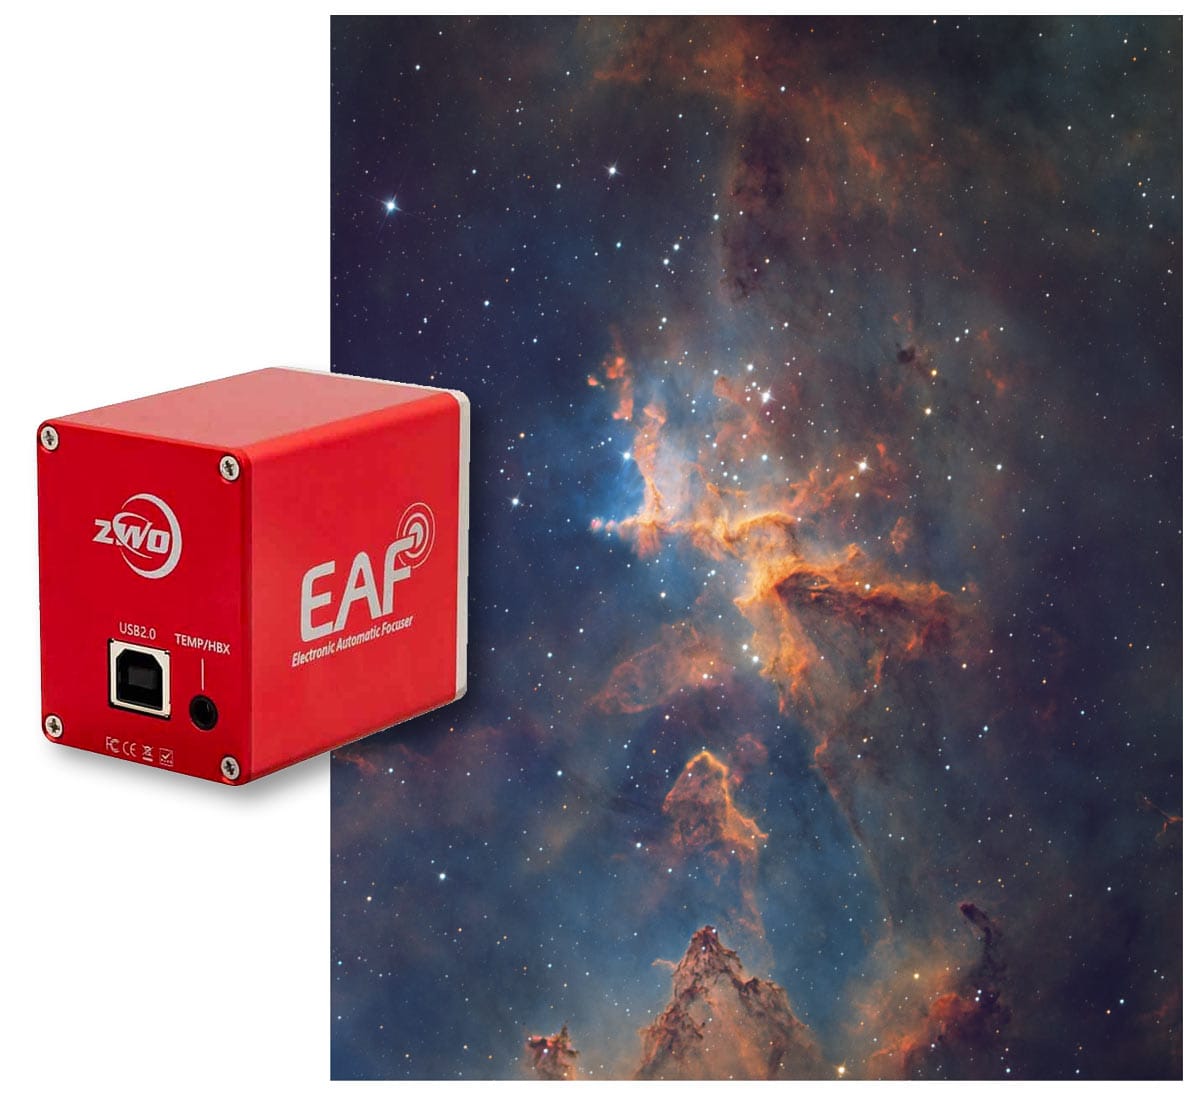
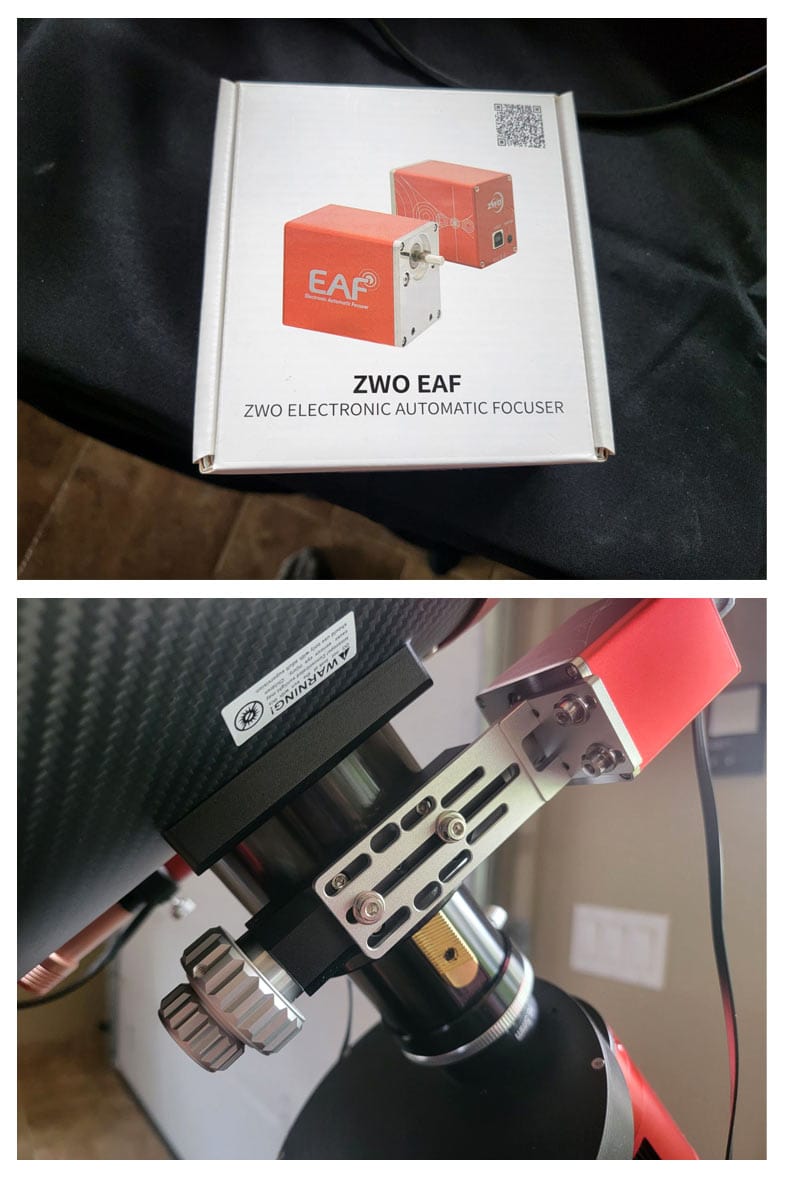
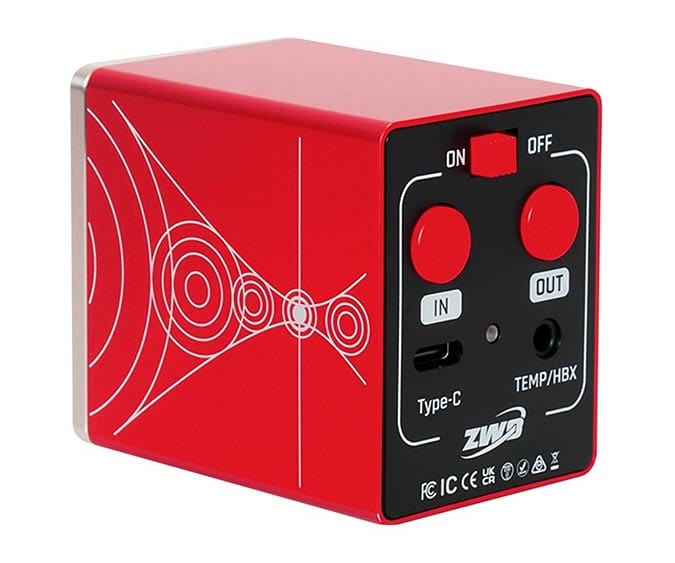
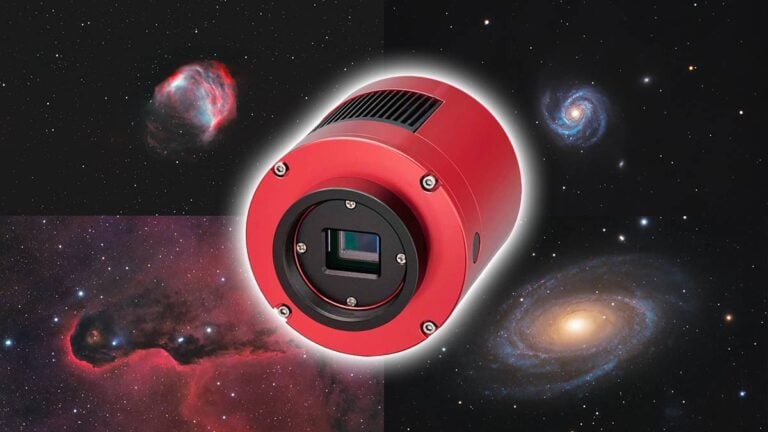
The telescope autofocuser I use is called the ZWO EAF (electronic auto-focuser).
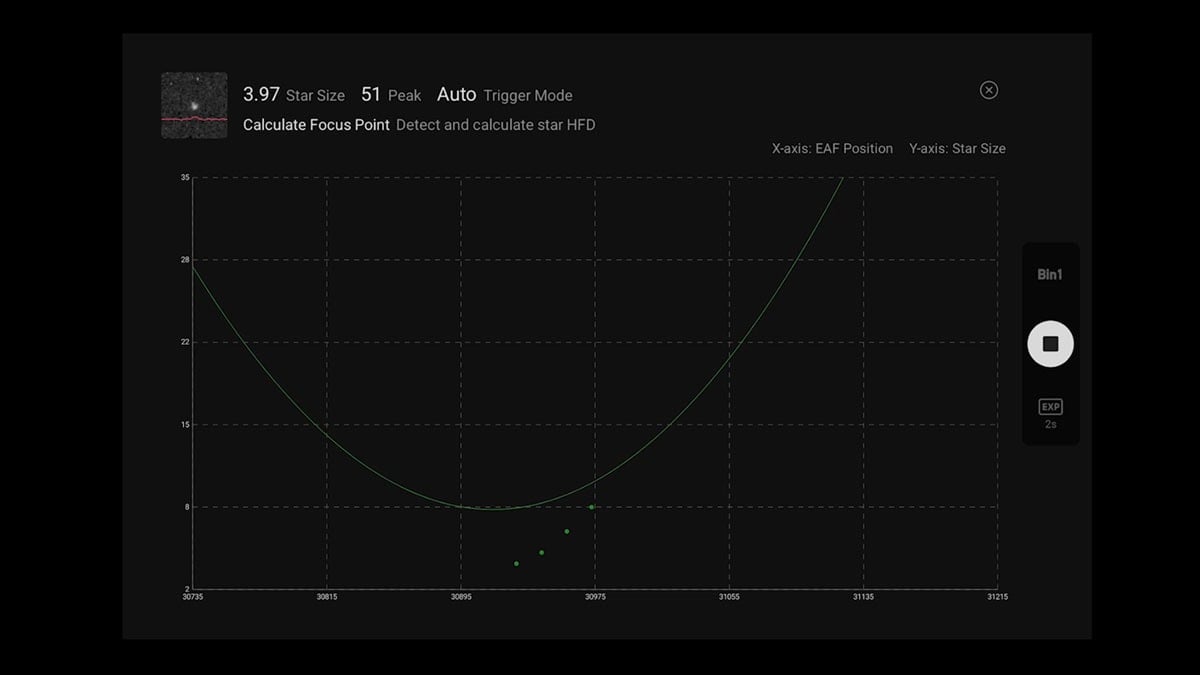
A telescope autofocuser’s V-curve graph shows how star sharpness (or Half-Flux Radius) changes as the focuser moves through different positions. As focus improves, the measured star size decreases until it reaches the narrowest point (the bottom of the “V”). That’s the precise focus position your autofocuser locks onto for the sharpest possible image.
My Deep-Sky Astrophotography Setup
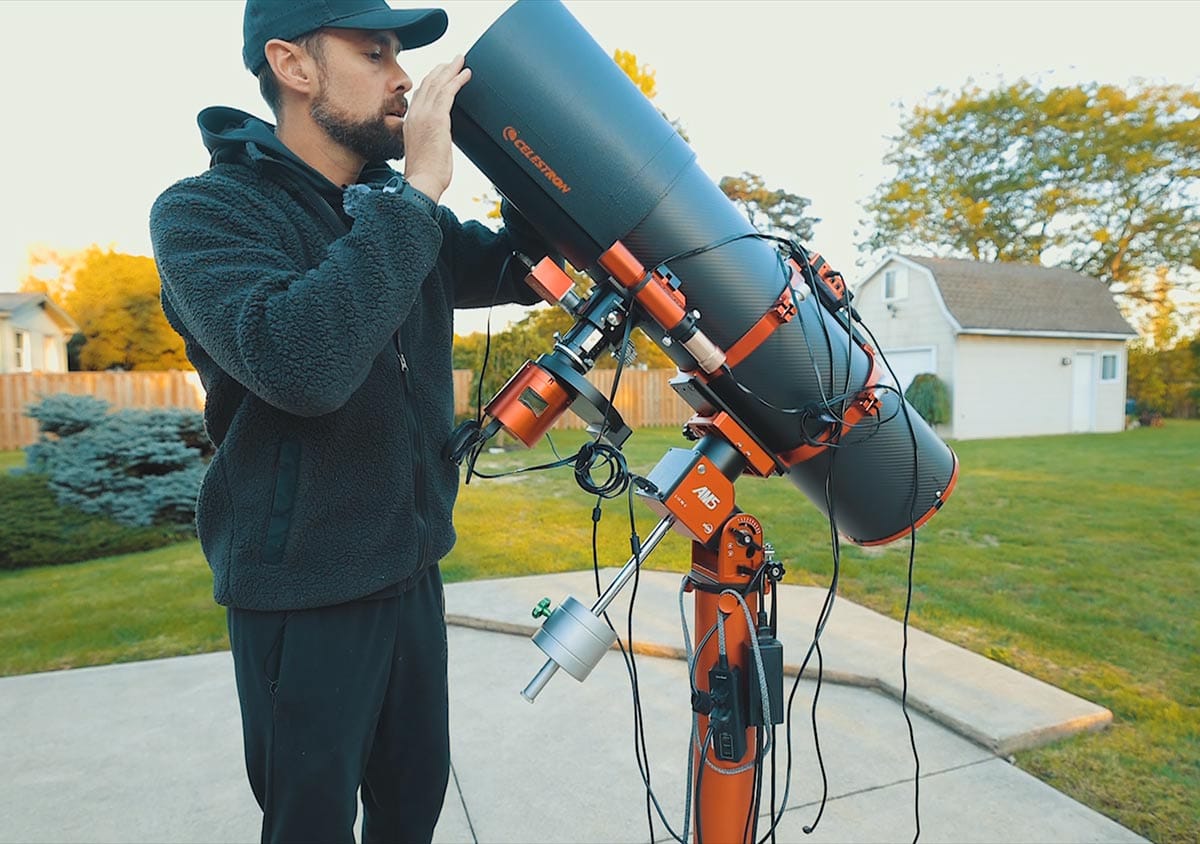
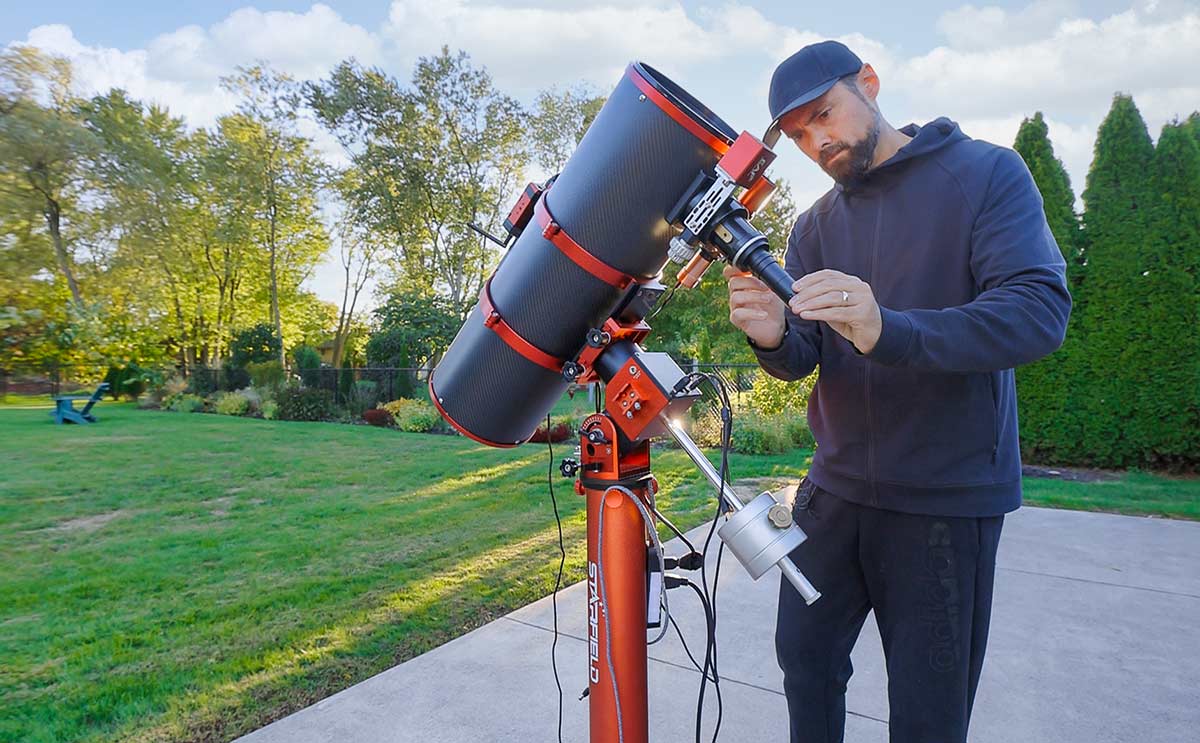
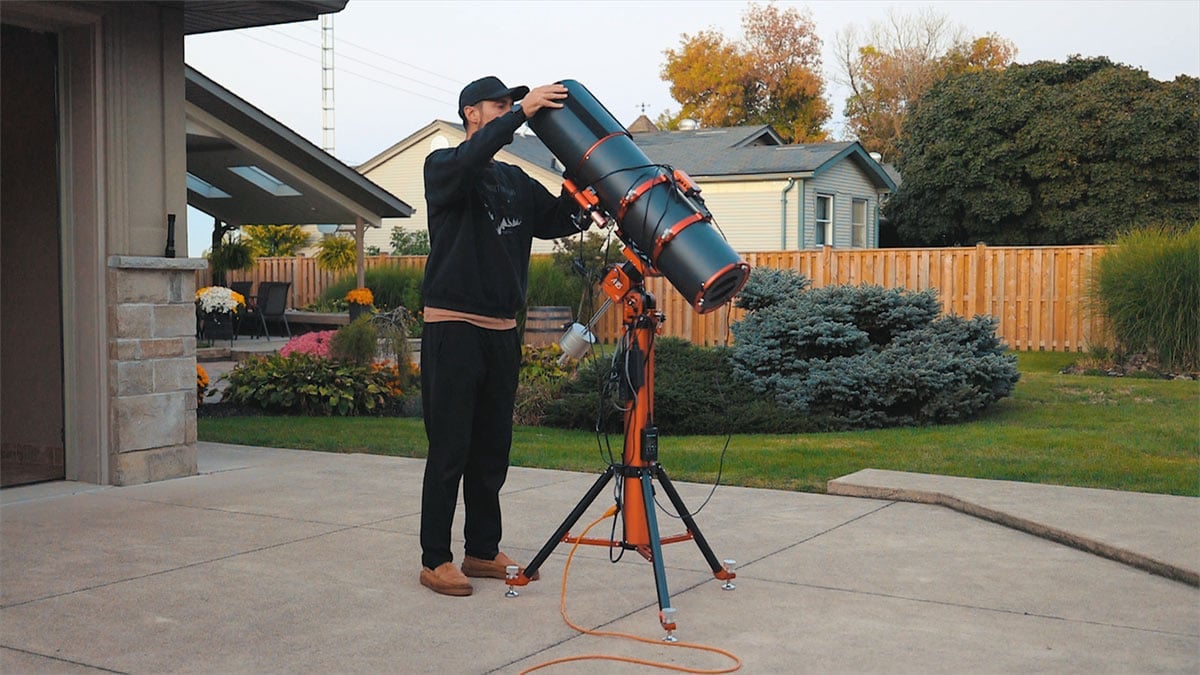
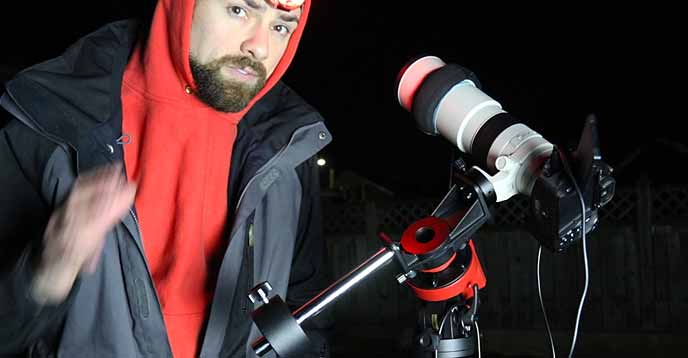
For this project, I used the Apertura CarbonStar 200 f/4 Newtonian reflector paired with the ZWO ASI2600MM Pro camera. The CarbonStar’s 8-inch aperture and 800mm focal length provide a great mix of light-gathering power and close framing on large nebulae like the Heart Nebula.
This telescope will track the sky riding on a ZWO AM5 strain wave mount, with a simple autoguiding system onboard. I mounted a mini guide scope (William Optics 32mm guide scope) with a ZWO ASI290mm mini guide camera to the finder scope bracket on the CarbonStar.
The ASI2600MM Pro camera has been updated with improved specifications and features a new matte finish. The latest version of this camera is said to have better read noise performance, although I must admit I haven’t noticed a big difference in my data yet.
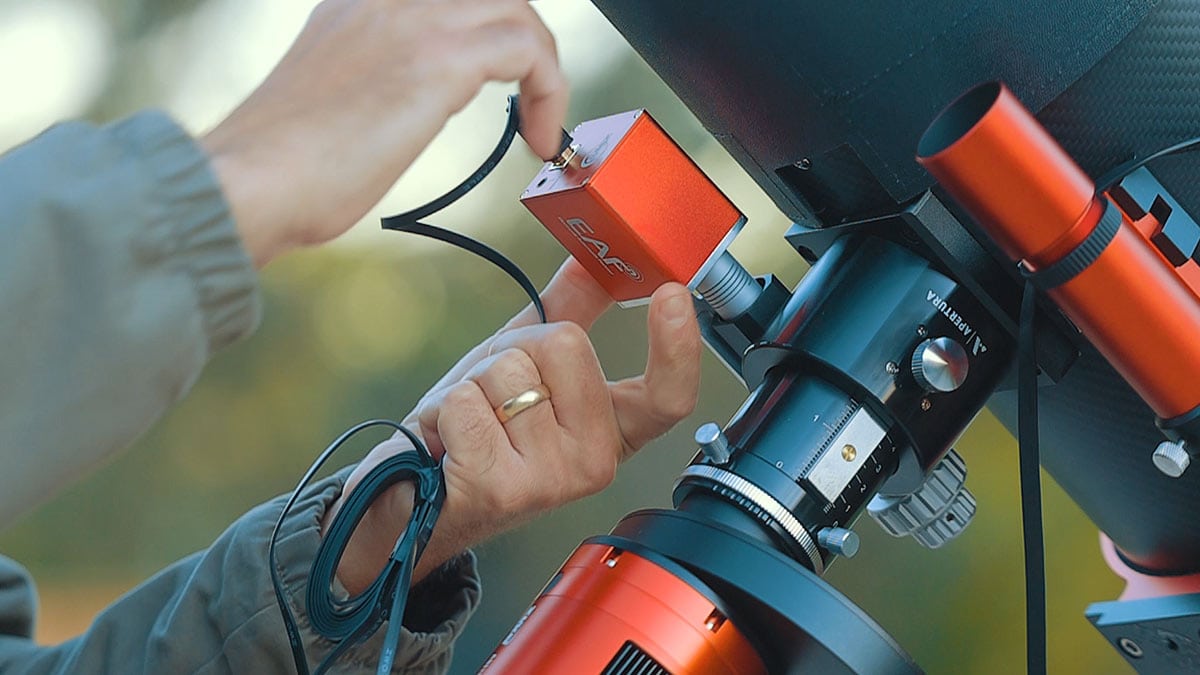
I also added a ZWO EAF (Electronic Automatic Focuser), the real star of this session. My setup puts a lot of strain on the EAF, but it handled it just fine. Just make sure your focuser is well-balanced, your drawtube is tight, and your scope is angled so the load doesn’t slip downward.
I was relieved to find that the EAF could perform smooth autofocusing with a rather heavy camera payload.
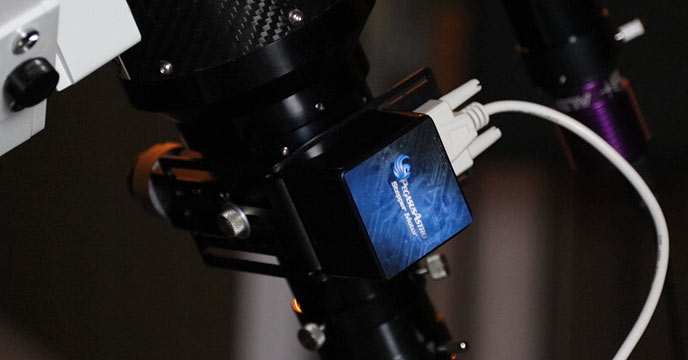
ZWO EAF Installation
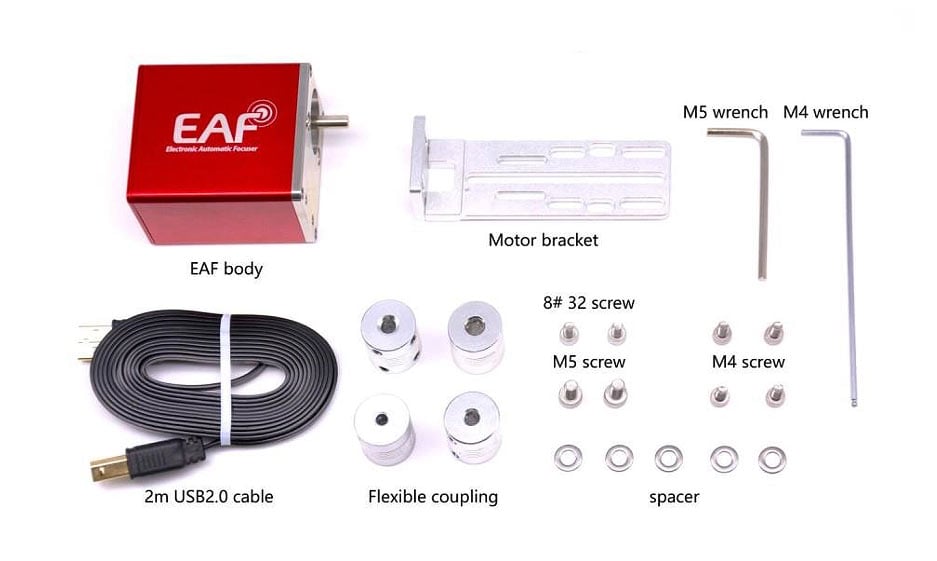
Installing the ZWO EAF on my telescope was pretty straightforward. I started the process by removing the stock coarse focus knob on the CarbonStar with an Allan key. Then I attached a small bracket and the coupler to the focuser knob shaft, and bolted the motorized unit to it.
The kit includes a few different sizes of couplers to fit your telescope focus knob shaft. You need to use a small Allan key (the EAF included one in the box) to tighten the grub screws on the coupler.
Most telescope manufacturers recognize that astrophotographers will upgrade their systems to include an autofocuser, so they design the coarse focus knobs to be easily removed.
I didn’t have any trouble fastening the L-bracket to the base of the focuser assembly and the motorized focuser unit using the supplied screws. The exact process of installing the EAF on your telescope will depend on its design.
The autofocuser is powered and controlled via a USB Type B cable, which you plug into the ASIAIR or your computer of choice. If you plan on using the EAF without the ASIAIR, make sure you download the ASCOM driver so your computer recognizes the device.
If you use it with the ASIAIR WiFi controller like I do, you don’t need to worry about any drivers.
For complete installation instructions using a variety of astronomy software tools, check out the official ZWO EAF manual.
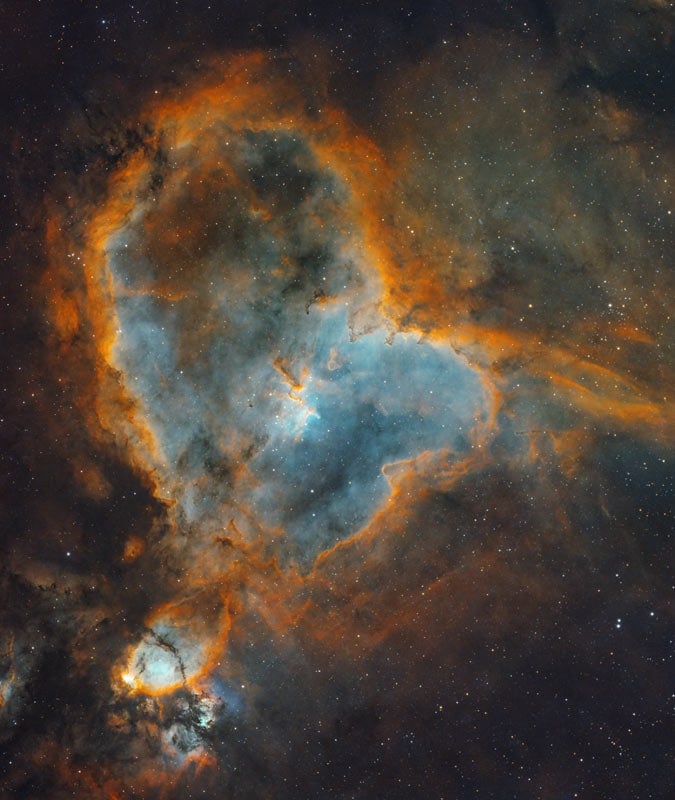
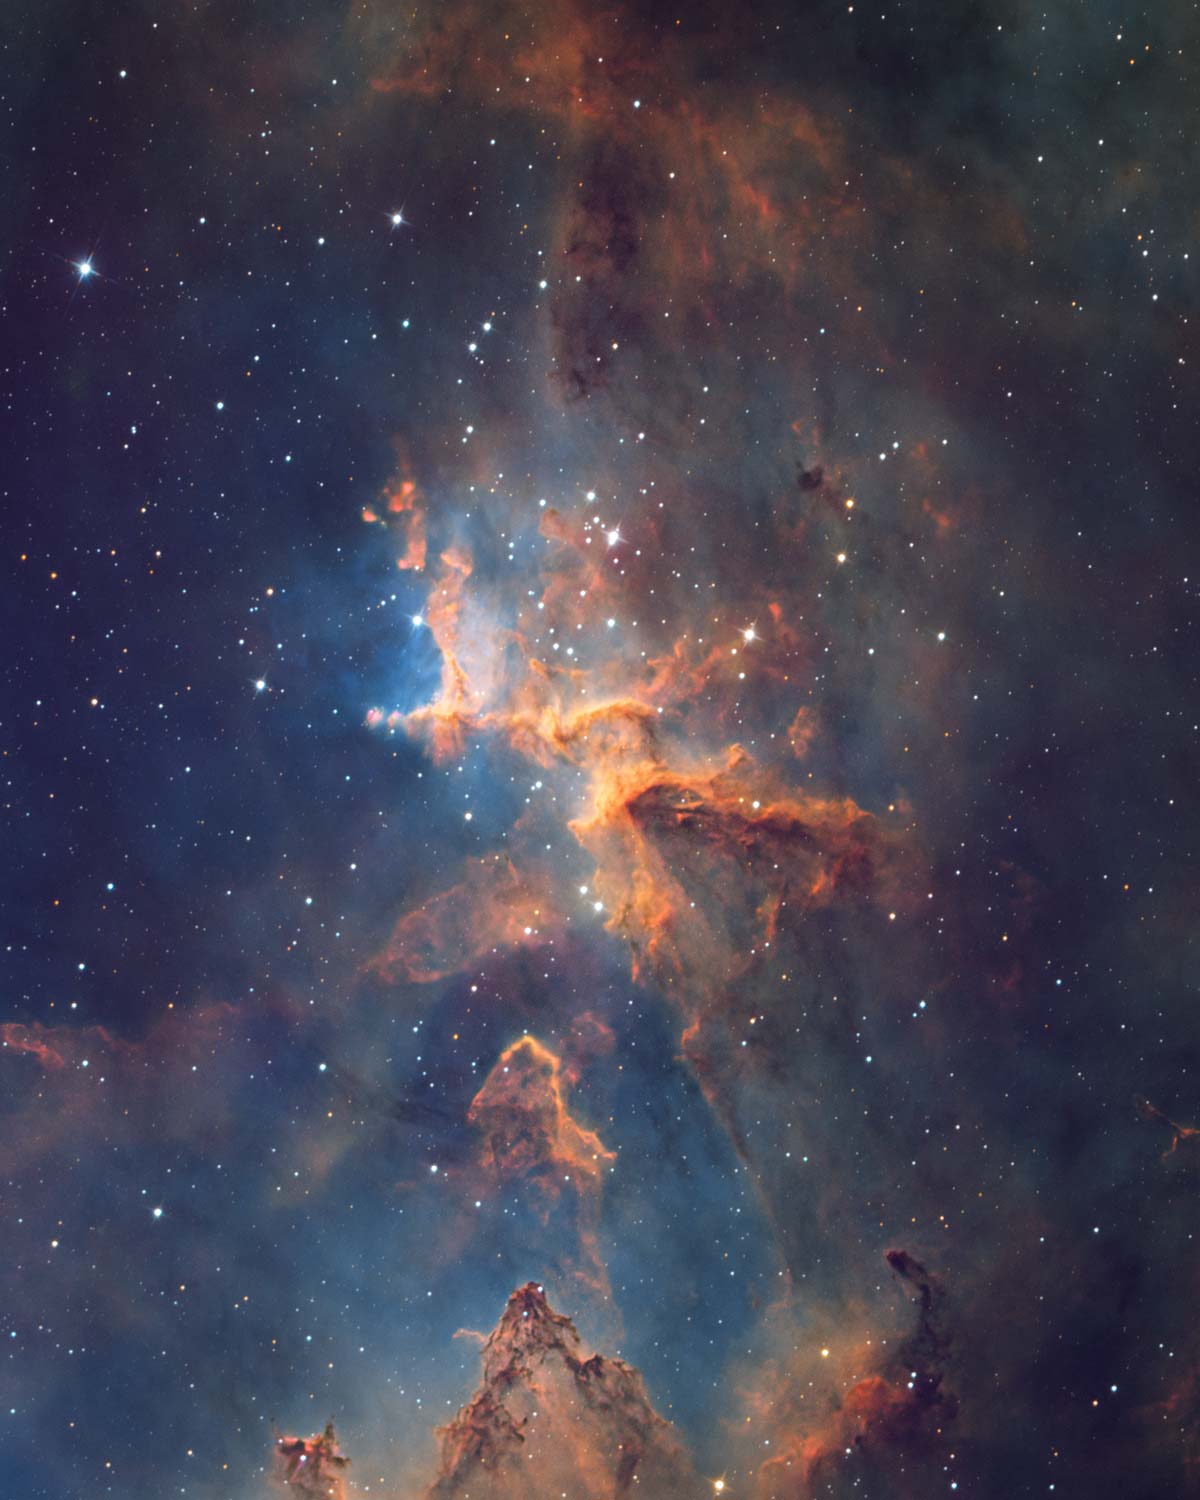
The Target: Melotte 15 in the Heart Nebula
Melotte 15 sits about 7,000 light-years away in the constellation Cassiopeia, surrounded by billowing clouds of hydrogen and sulfur gas carved by stellar winds. It’s one of those deep-sky objects that truly shines through narrowband filters.
For this project, I used 3 m H-alpha, OIII, and SII filters, the same trio used to create the classic Hubble Palette (SHO). Each sub-exposure lasted 240 seconds, with approximately 100 frames per channel collected over several clear autumn nights.
Ontario weather can be hit-or-miss in the fall, but this season has been phenomenal. We’ve had an amazing stretch of clear, cool nights with stable seeing. Perfect conditions for a long-haul astrophotography project like this.
While I have photographed the Heart Nebula several times before, this time I chose to shoot deeper than ever before with a longer focal length (800mm). Here’s a wider look at the entire Heart Nebula for reference.
Why Autofocus Matters in Astrophotography
Focus drift is one of the most common causes of soft stars and mushy details in long-exposure images. As the temperature drops, metal components contract slightly, shifting the focal point.
Before installing the autofocuser, I’d step outside every hour or two to check the star sharpness with a Bahtinov mask, refocus, and then restart the imaging plan. It was tedious and easy to forget.
Now, I simply tell the ASIAIR when to trigger autofocus, and it handles everything. Watching the system run an autofocus curve (the signature V-shaped plot of focus position versus star size) is oddly satisfying.
The software tests multiple positions, calculates the minimum star size, and locks focus with sub-micron precision. This results in sharper stars and consistent focus throughout the night.
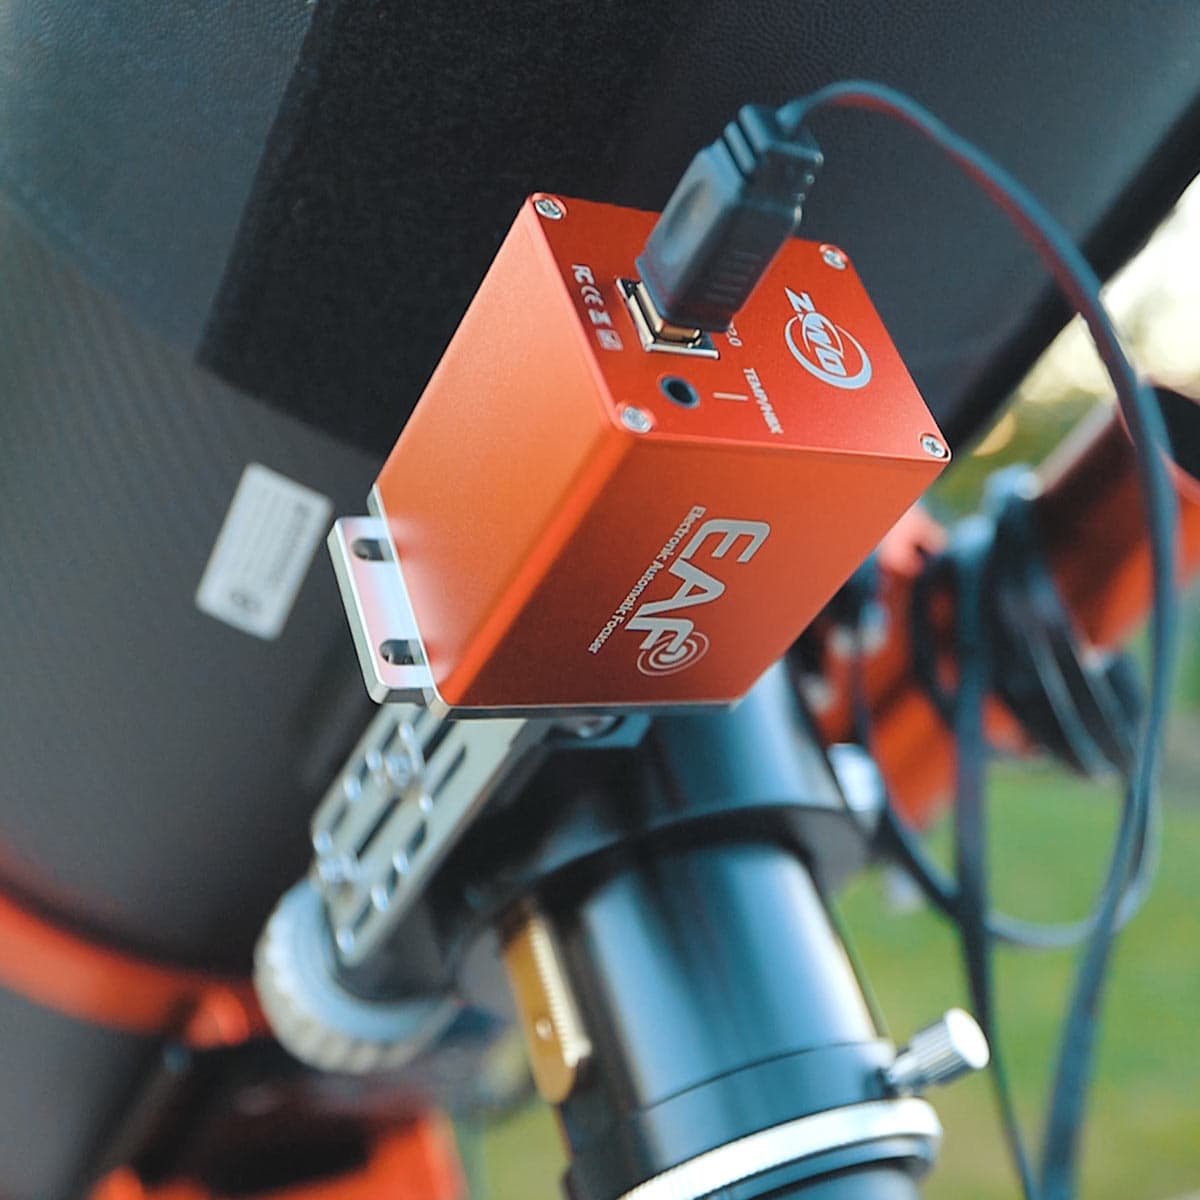
I use a USB cable (type B) to plug the EAF into one of the USB 2.0 ports on the back of my ASI2600MM Pro camera.
Using the ‘Autofocus’ Feature
The EAF integrates directly with the ASIAIR, letting me program focus runs automatically. I take full advantage of the autofocus settings to ensure that my stars are always tight throughout the entire project.
It takes about 2-3 minutes to finish the autofocus routine that determines the smallest possible star size. While it takes longer than manual focusing with a Bahtinov mask, it does a better job.
I set the autofocus to kick in each of the following scenarios:
- Before each imaging plan
- After a 2 °C temperature change
- After a meridian flip
- After switching filters
That level of automation means I can run my entire session from inside the house, and yes, it still feels strange watching my telescope focus itself.
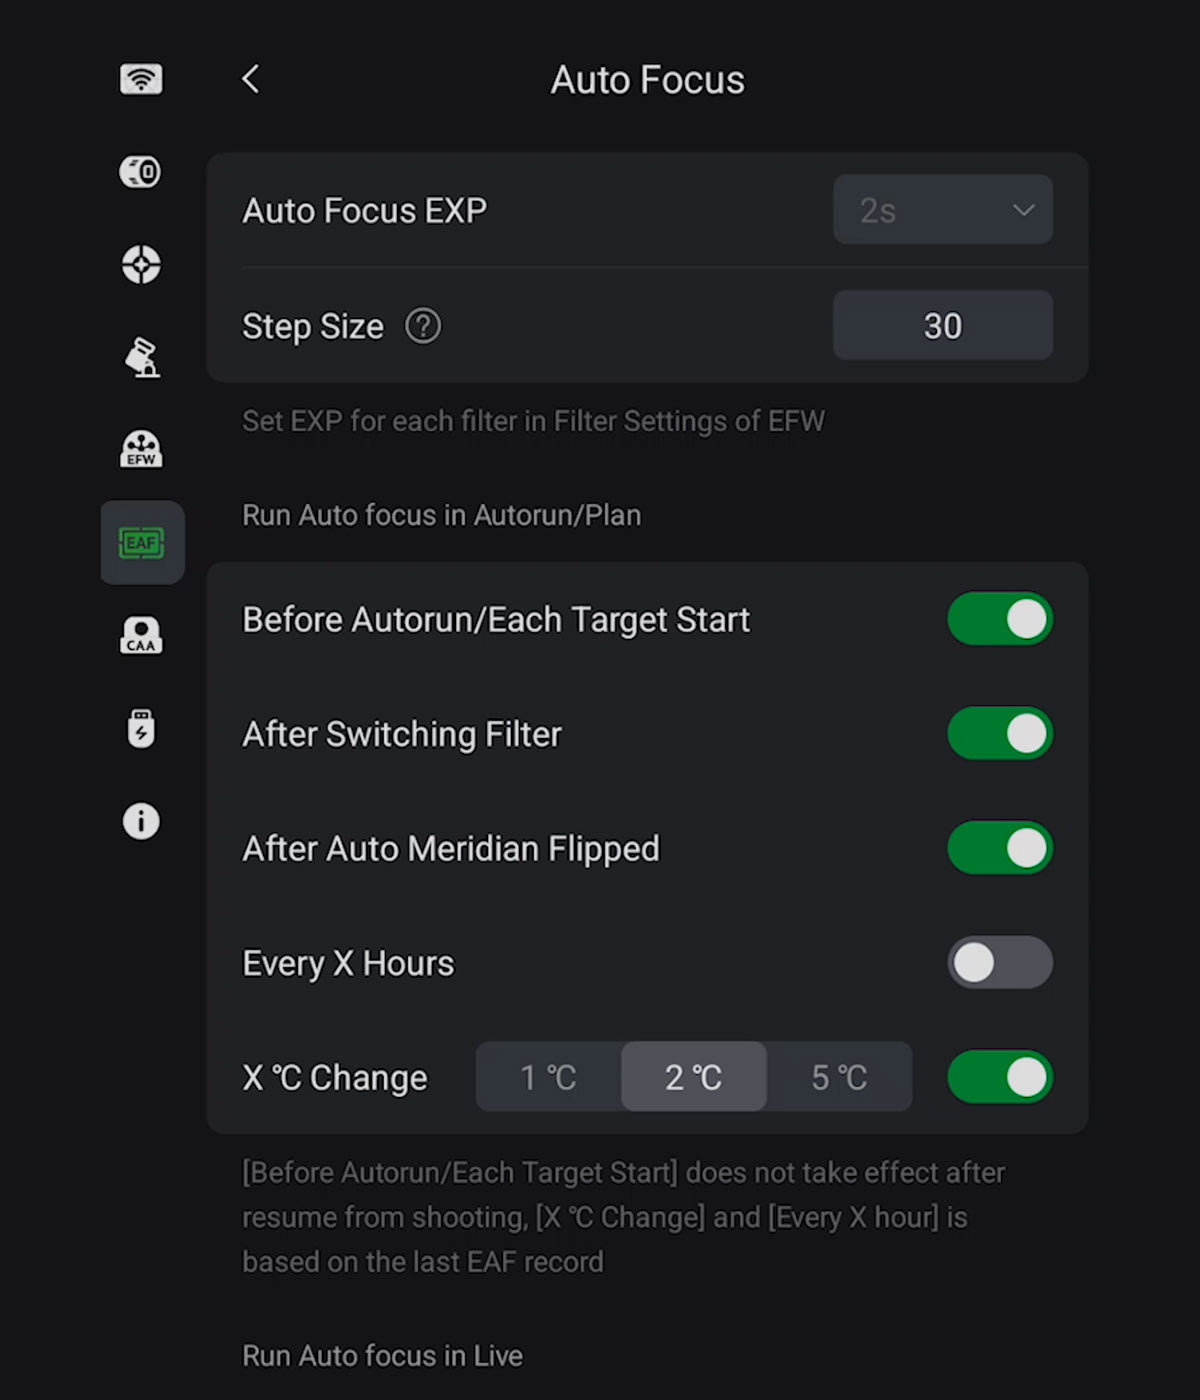
I take full advantage of the autofocus settings in the EAF tab of the ASIAIR mobile app to ensure sharp images throughout my entire imaging session.
The Temperature Probe
The ZWO EAF includes an internal temperature sensor, which I’ve found to be sufficient for my backyard astrophotography sessions.
While ZWO sells an optional external temperature probe that can provide slightly more accurate ambient readings, it’s not essential.
My autofocus routine still works reliably after temperature changes using only the built-in sensor, so unless you’re imaging remotely or in environments with extreme temperature swings, you can safely skip the external probe.
Imaging and Automation from Indoors
With my telescope, mount, and autofocuser connected to the ASIAIR Plus, I can control everything (except polar alignment and camera rotation) from my tablet inside the house. Here are the steps I can control wirelessly on my deep-sky setup in the backyard.
- Plate solving
- Guiding
- Autofocus routines
- Filter changes
- Imaging sequences
While there is currently no way to automate the polar alignment process (as far as I am aware), automatic camera rotators exist, such as the popular ZWO CAA (Camera Angle Adjuster).
This level of automation feels like the future of backyard astrophotography, even if it does take away from the traditional outdoor astronomy experience. The only manual steps left are the initial collimation of my Newtonian and a simple polar alignment routine at dusk.
Processing and the Final Image
After stacking and calibrating each filter’s data, I aligned and combined them in PixInsight in a traditional Hubble Palette. To me, there’s something nostalgic about this target in this palette. Maybe because it reminds me of the early days of astrophotography when we first saw nebulae in these surreal colors.
The final image of Melotte 15 might be my favorite capture of 2025 so far. It’s detailed, balanced, and, best of all, it represents a fully automated workflow from start to finish. The final image includes a whopping 30 hours of total exposure time, a full 10 hours through each narrowband filter.
Real-World Use Across Multiple Telescopes
I’ve installed the ZWO EAF on several different telescopes in my imaging lineup, and that versatility has been one of its biggest strengths.
From smaller refractors to larger, more demanding setups, the EAF has adapted well with the appropriate brackets and spacing. Installation has generally been straightforward, and once mounted, the unit feels solid and dependable with no noticeable flex or slippage during long imaging sessions.
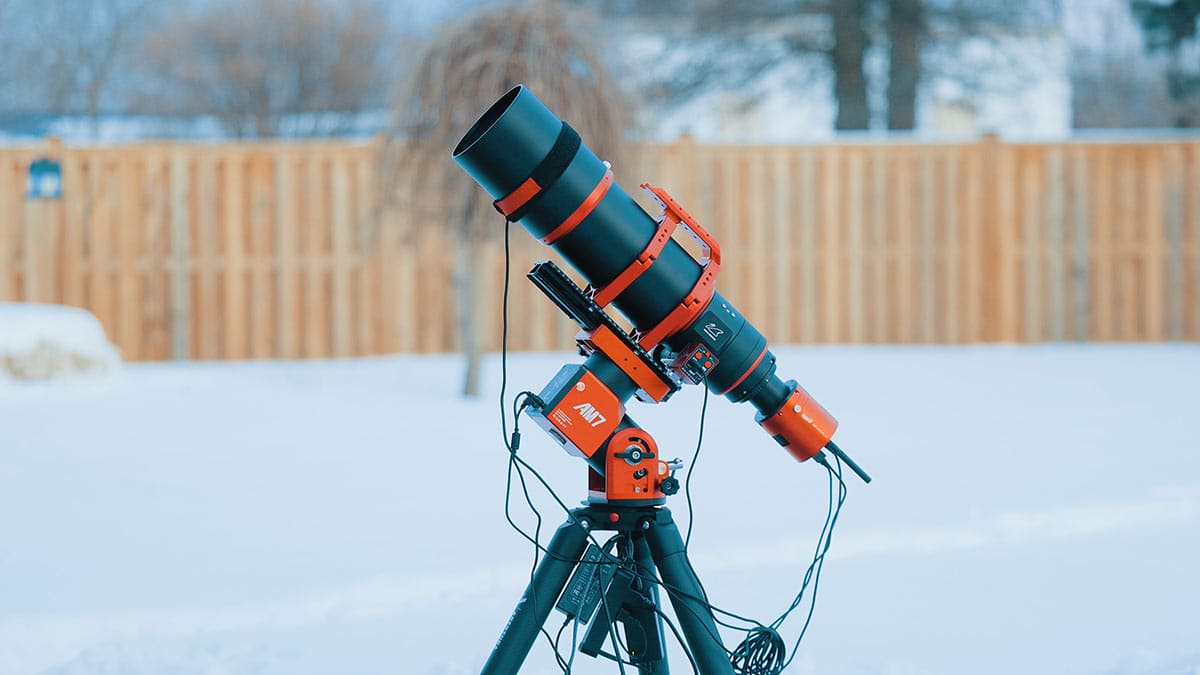
Most recently, I paired the ZWO EAF with my William Optics UltraCat 108 riding on the AM7 mount.
This combination has performed exceptionally well, especially during longer nights when temperature changes would normally require manual focus adjustments.
With the EAF handling precise, repeatable focus runs, I’ve been able to maintain sharp stars throughout the session. In real-world use, it has become one of those upgrades that quietly improves every image, and I can see the difference in my overall image quality.
Final Thoughts
Adding a telescope autofocuser might not sound as exciting as buying a new camera or mount, but it’s easily one of the most impactful upgrades you can make to your imaging rig.
It ensures every sub-exposure is sharp, removes the stress of refocusing, and lets you spend more time processing and enjoying the results (instead of freezing outside with a Bahtinov mask).
If you’re on the fence, start with an affordable option like the ZWO EAF. It works with most focusers, integrates seamlessly with modern software, and can be installed in under an hour.
Once you experience truly hands-free focusing, you’ll wonder how you ever imaged without it. I’m a believer now, and there’s no going back!
Looking for a wireless, battery-powered solution? ZWO now offers the ‘EAF Pro’ model, which provides multiple control options. I hope to test this version in the near future—stay tuned!
 Trevor Jones is an astrophotographer and member of the Royal Astronomical Society of Canada (RASC). Through his AstroBackyard YouTube channel, he inspires beginners to start their own astrophotography journey and capture the beauty of the night sky. His work has been featured in NASA’s Astronomy Picture of the Day (APOD), astronomy books, and major online publications.
Related Content:
- ZWO ASI2600MM Pro Camera Review (Updated Version)
- The Best Smart Telescopes in 2025 (And Which One I Recommend)
- Building a Deep Sky Astrophotography Kit (With Example Setups)

Hi Trevor – Excellent picture with a lot of details and stunning colors – Congratulations.
I’m actually using two EAFs – one for my ASKAR 103 APO and one for my Celestron Edge HD 8″. The autofocuser was easy to install to the APO and works flawlessly.
But as the Celestron has a different focuser design you have to use a special set to attach the EAF to the telescope. Furthermore I had more difficulties to find the right settings in the ZWO ASIAIR for the EAF to get a sharp image. So I’m still using the Bathinov mask to check the focus of the EAF before I start a session.