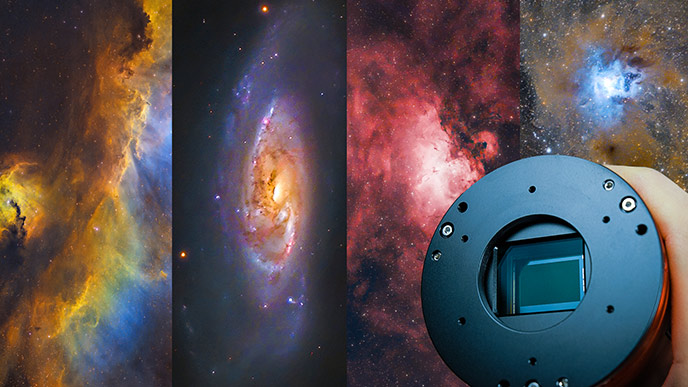
I Captured The Same Nebula with a DSLR, Astro Camera, & Smart Telescope
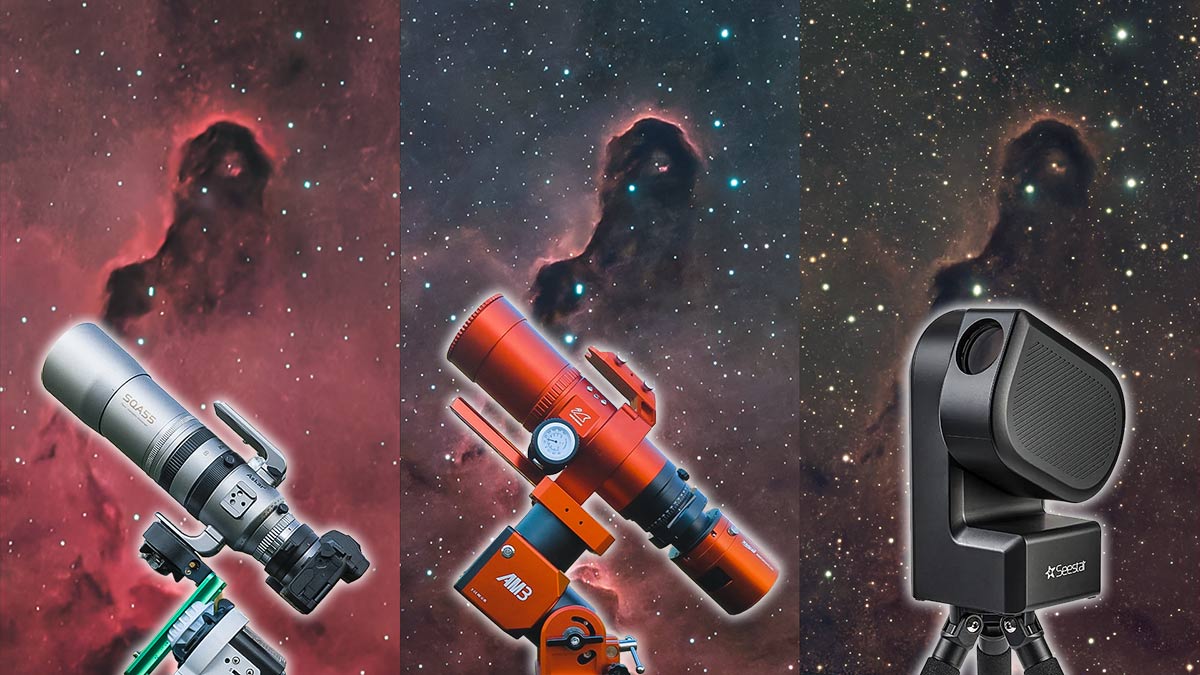
Recently, I captured the same deep-sky object using three very different camera systems.
- A full-frame mirrorless DSLR-style astrophotography setup.
- A dedicated astronomy camera rig with autoguiding.
- And a smart telescope that handled almost everything on its own.
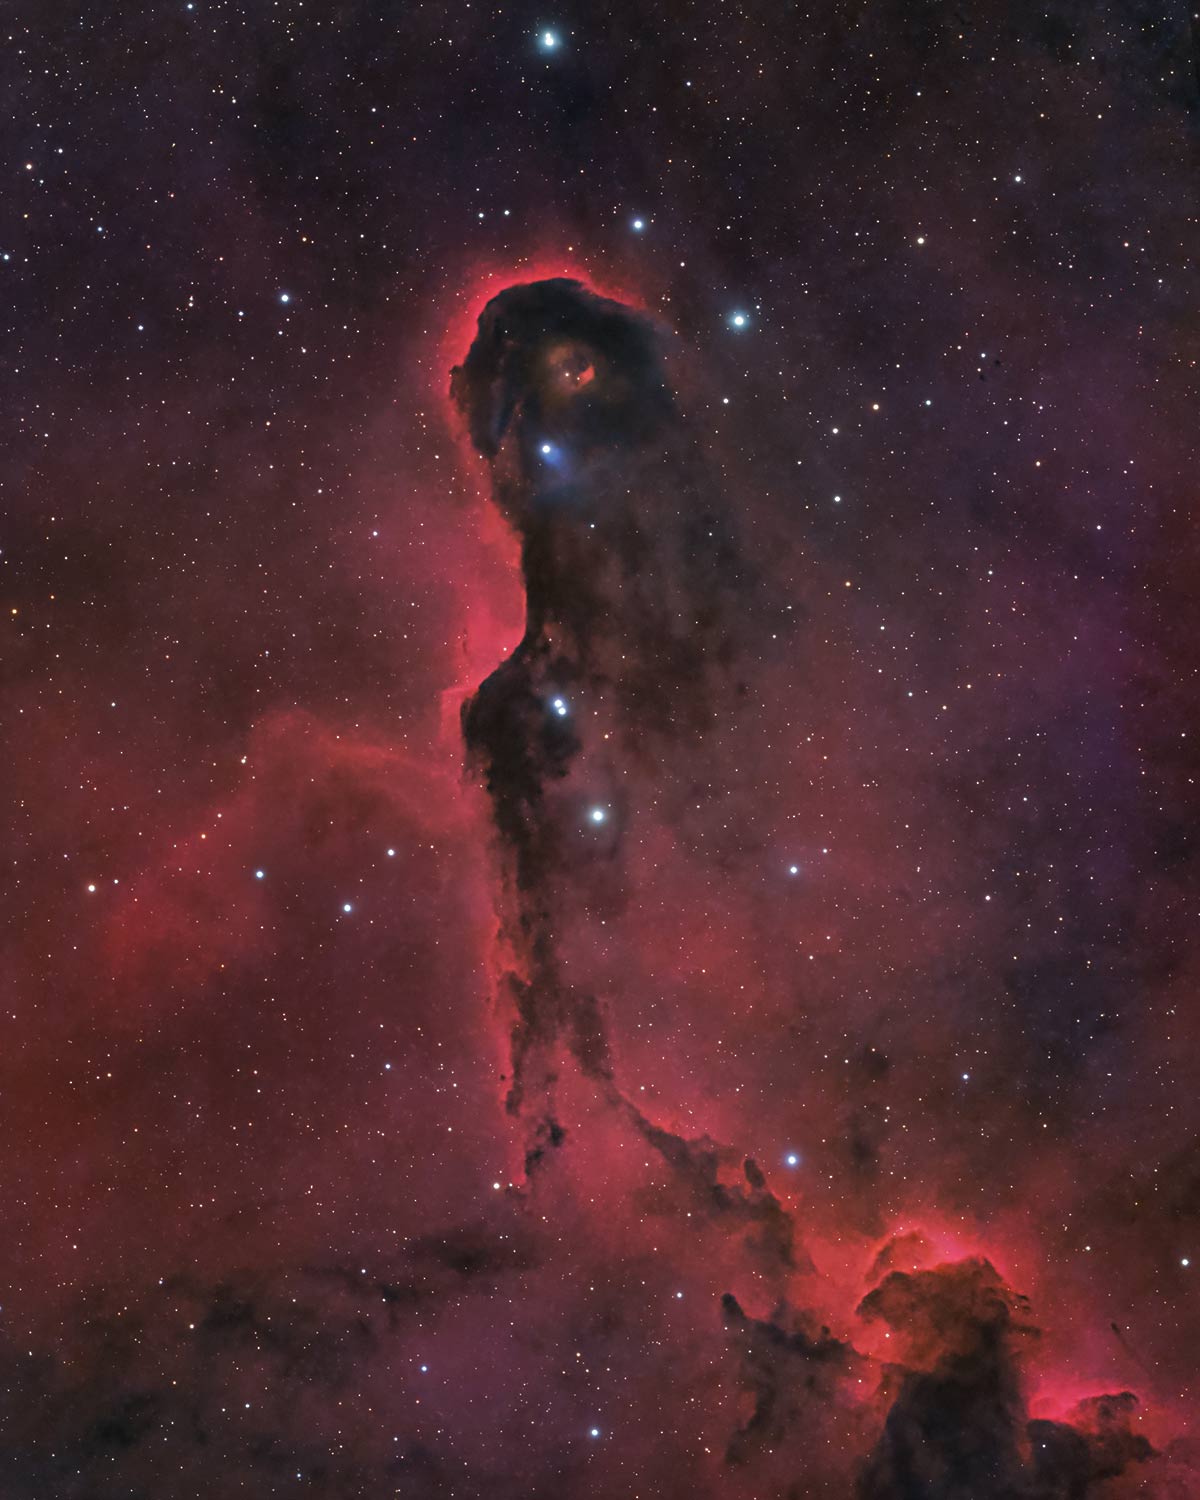
The target was the Elephant’s Trunk Nebula, a beautiful emission nebula in the constellation Cepheus.
Each setup collected about 2.5 hours of total exposure time. Same target, same night, same type of filter, but three very different ways to get there.
Once all of the data was collected, I compared the final images side by side. Not just to see which one looked best, but to better understand what each system was actually giving me. Because this comparison was not as simple as DSLR vs astro camera vs smart telescope.
There were huge differences in sensor size, focal length, tracking, guiding, automation, and overall workflow.
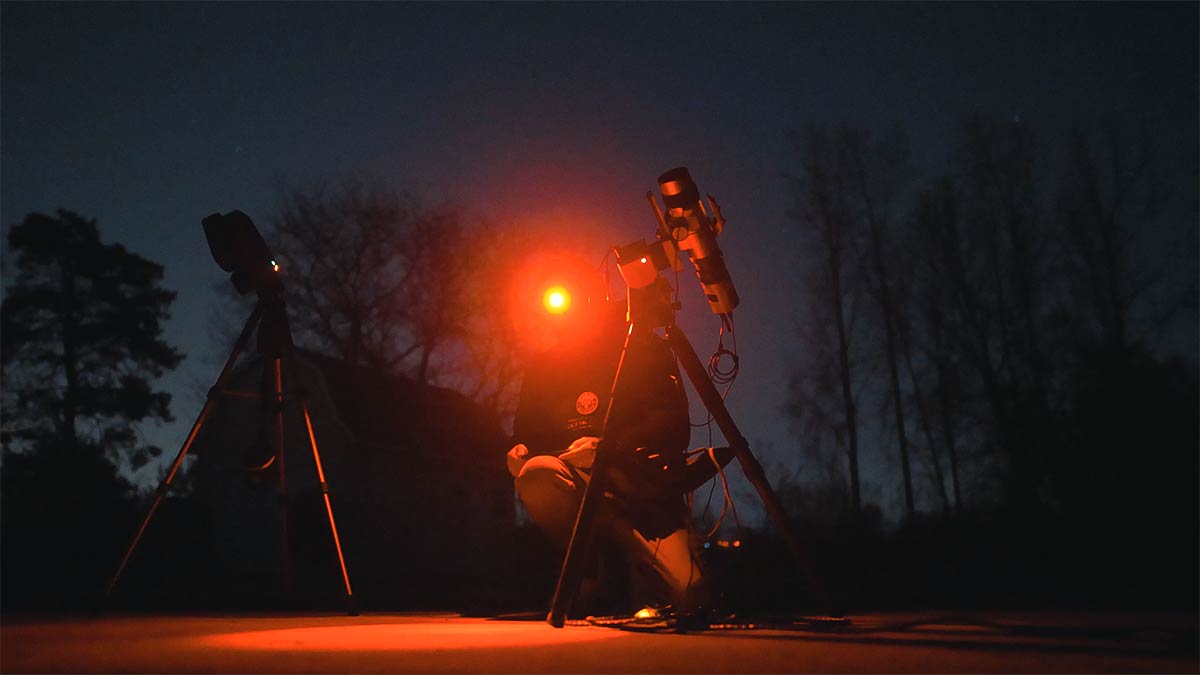
And some of the biggest trade-offs only became obvious after spending a full night using these systems side by side in the backyard.
The DSLR Rig
The first system I used was my lightweight DSLR-style astrophotography rig.
This setup included:
- Sky-Watcher Star Adventurer 2i star tracker
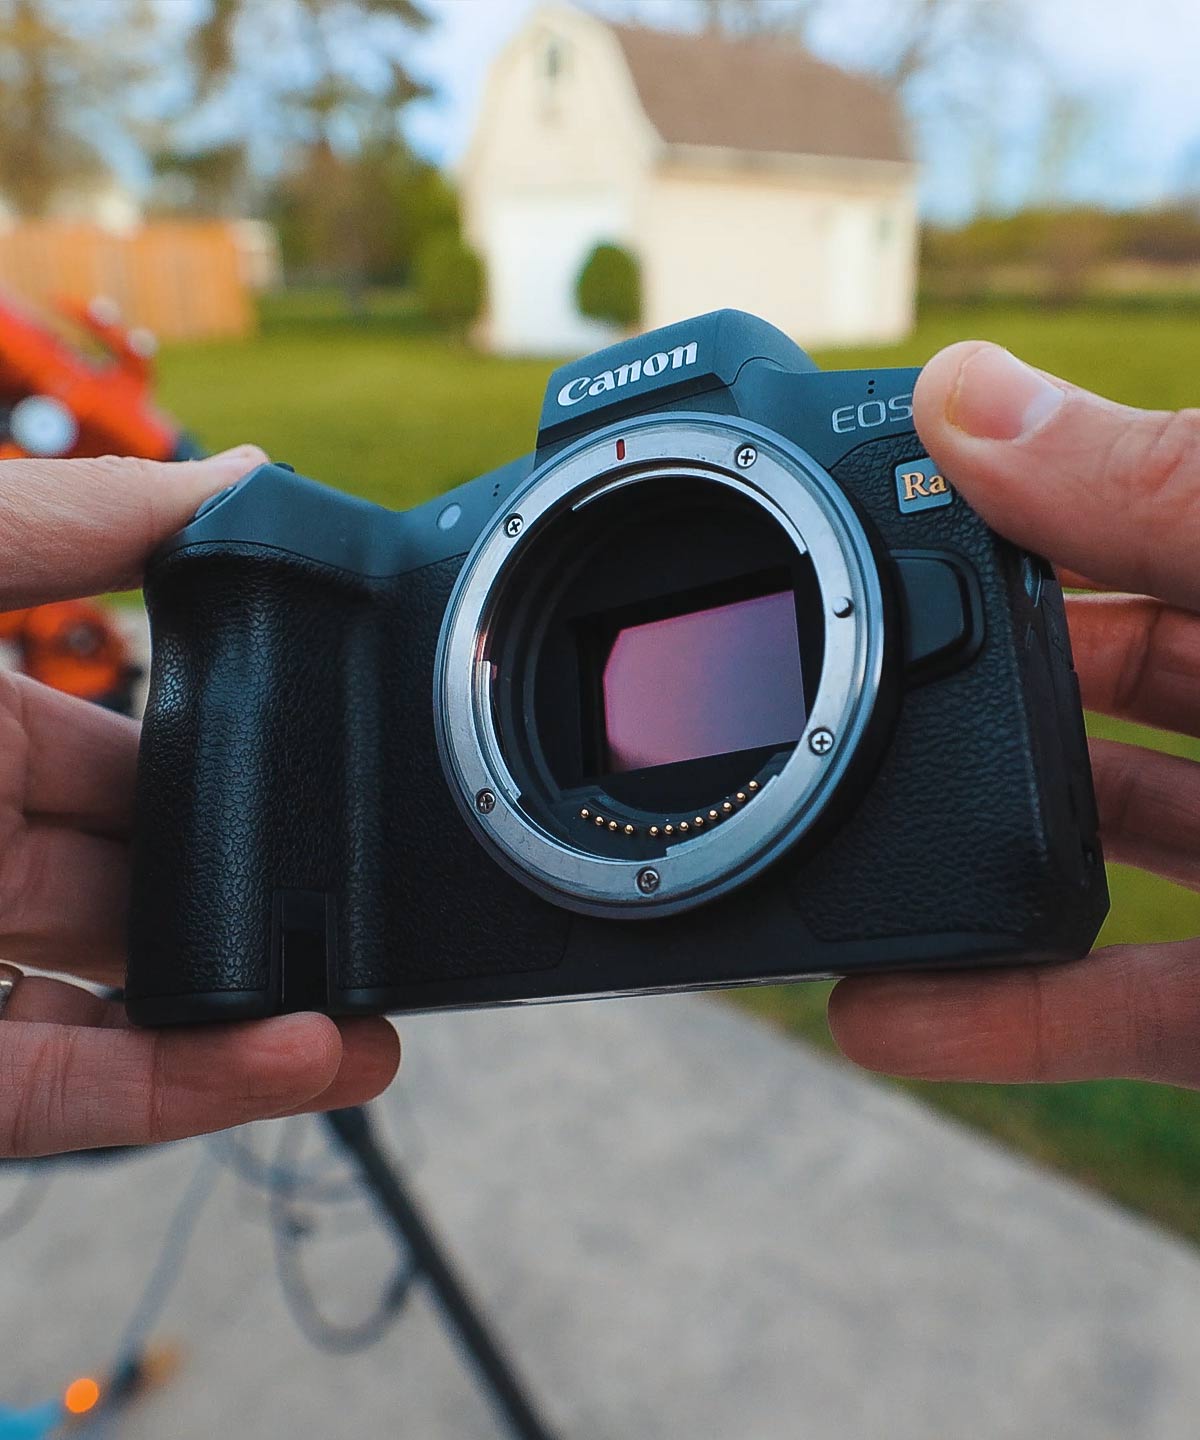
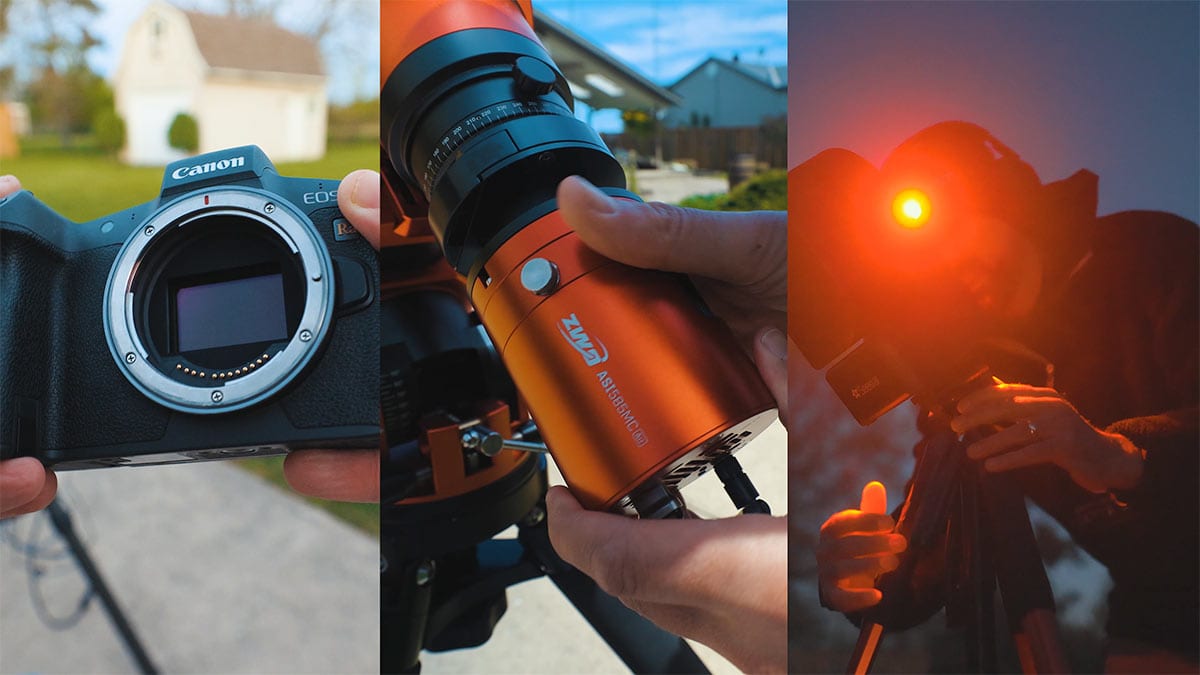
- Canon EOS Ra full-frame mirrorless camera (astro-modified)
- Optolong L-eNhance dual-narrowband filter
- Askar SQA55 refractor telescope
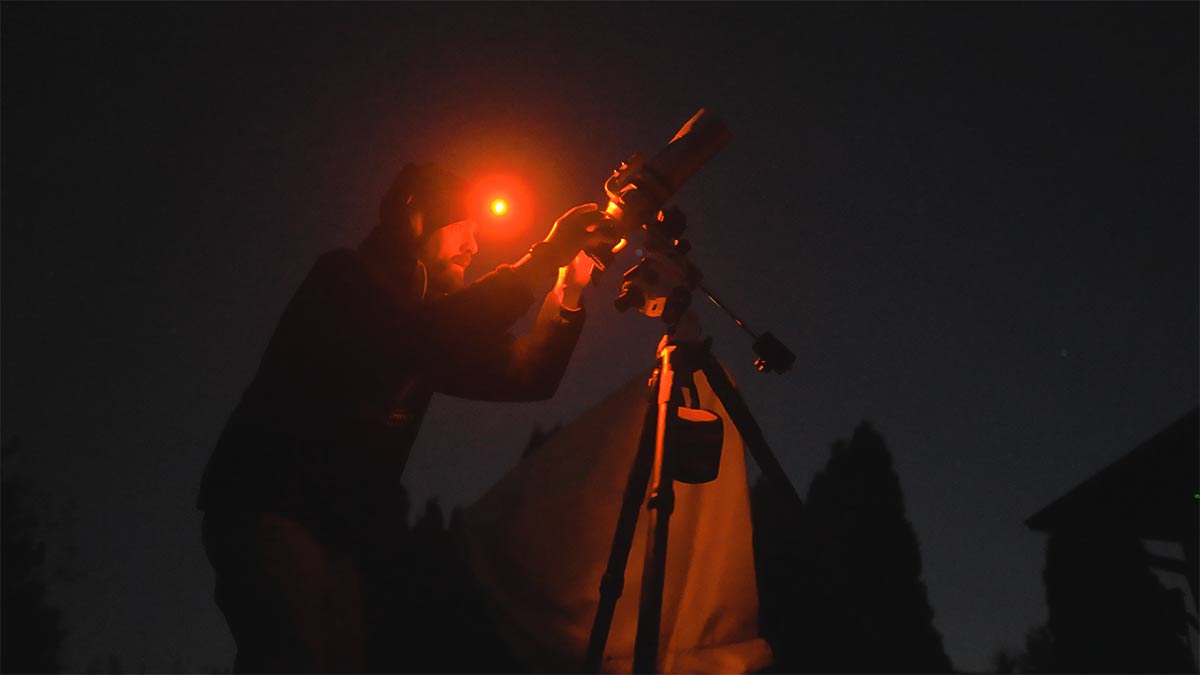
This was the kind of setup that still felt very connected to traditional astrophotography. There was no computer controlling the mount, no plate solving, no autoguiding. It was just a camera, a small refractor, a star tracker, and a lot of patience.
And honestly, that is part of what made this type of setup so rewarding, but also a little frustrating. To find the Elephant’s Trunk Nebula, I had to manually move the rig around the sky, take test exposures, review the image on the back of the camera, adjust the framing, and repeat that process until the target was where I wanted it.
That experience felt completely different from using a modern computer-controlled astrophotography rig.

I was not typing in the object name and letting the mount slew there automatically; I was hunting for it. And when you are using a narrowband filter on a faint nebula, that process can be tricky.
The Elephant’s Trunk Nebula does not exactly jump out at you in a short test exposure. I had to rely on nearby star patterns, faint patches of nebulosity, and a bit of trust that I was pointed at the correct area of the sky.
The Full-Frame Advantage
But there was one major advantage to this setup: the full-frame sensor in the Canon EOS Ra. As many people pointed out in the comments of my video, it is indeed an astro-modified camera with sensitivity in the H-alpha spectrum.
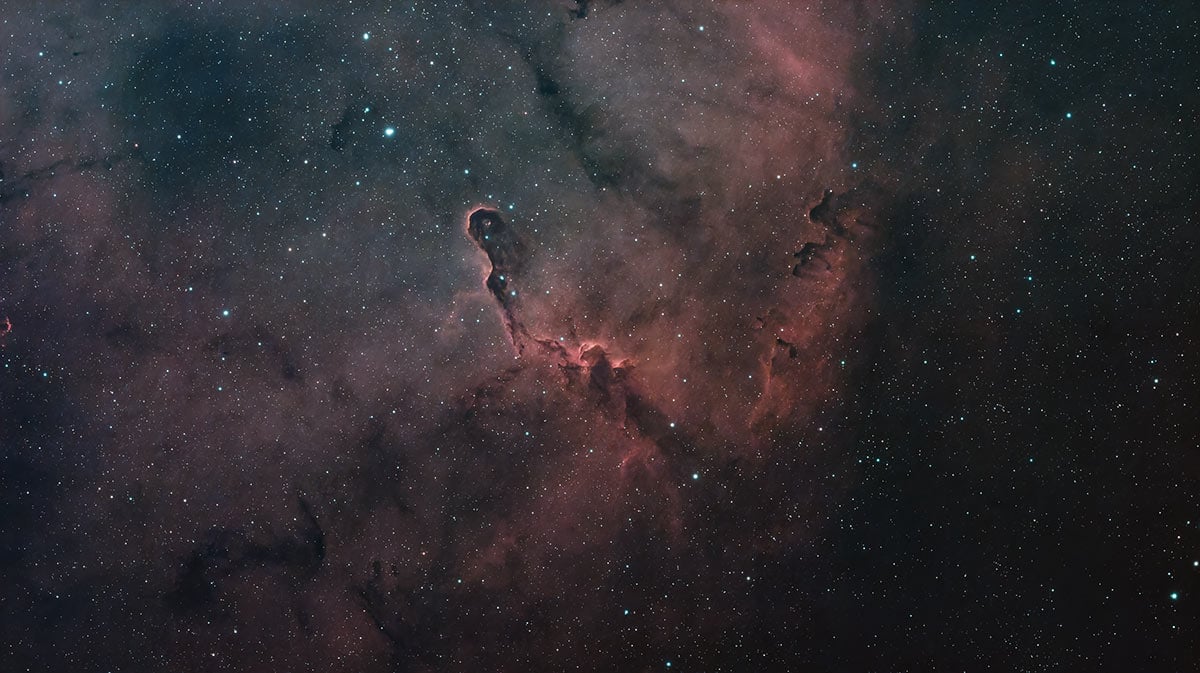
Compared to the cameras used in the other two systems, the EOS Ra produced a much wider field of view. I was not just capturing the Elephant’s Trunk itself; I was capturing more of the surrounding nebula, the star field, and the environment around the target.
That larger sensor completely changed the feel of the image. Instead of looking like a tight close-up of the nebula, the image felt more like a wide-field portrait of the entire region. This is something that can be easy to overlook when comparing cameras.
Many people focus on resolution, sensitivity, or noise performance, but sensor size dramatically affects an image’s composition. A full-frame camera gives you room to breathe; it gives you more sky. And for a large nebula complex like IC 1396, that can make a huge difference.
The Trade-Offs
Of course, there were trade-offs.
This setup was completely unguided. The Star Adventurer 2i is a very capable little tracker, but without autoguiding, everything depended on accurate polar alignment, careful balance, and the mount’s tracking performance.
That meant I had to stay conservative with exposure length and keep a close eye on the stars throughout the night. If the tracking started to drift, the stars showed it immediately. So while this rig was lightweight, portable, and relatively simple, it also demanded much more from the person using it.
I was manually finding the target, checking images on the back of the camera, making framing decisions by hand, and trusting the tracker to do its job without guiding corrections. It was a very real, very hands-on version of astrophotography.

I used the Sky-Watcher Star Adventurer 2i star tracker in the DSLR-style astrophotography rig.
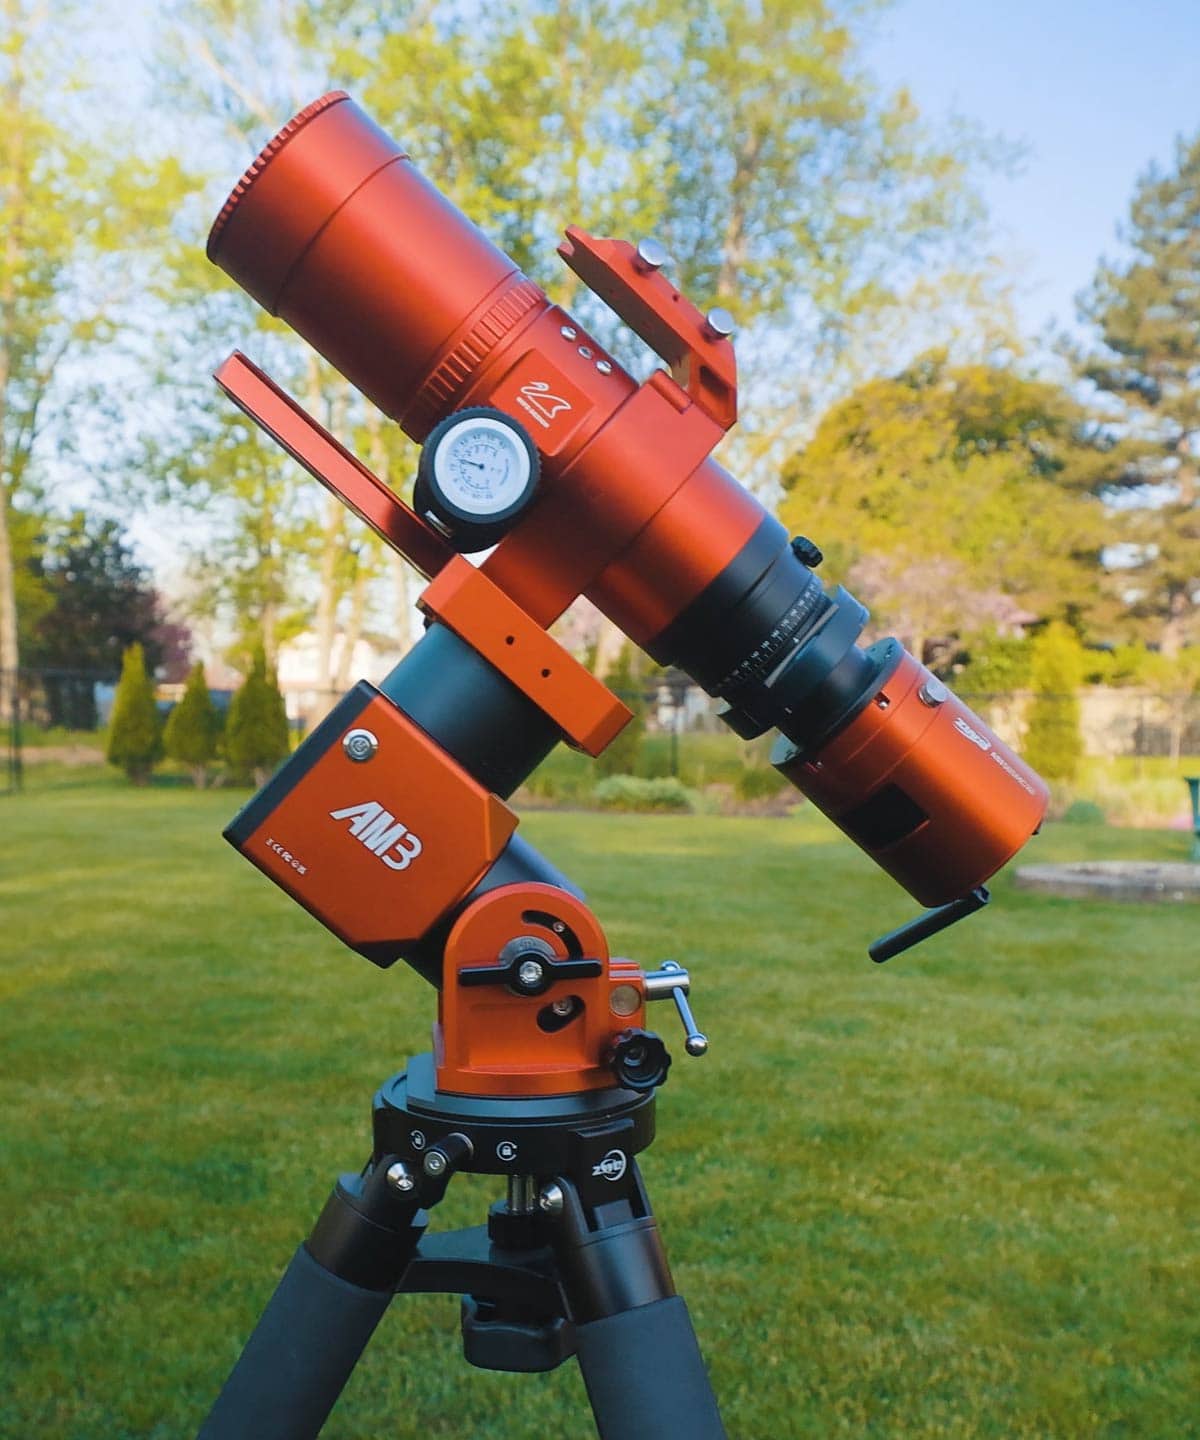
The Dedicated Astro Camera Rig
The second system I used was the dedicated astronomy camera rig, and this setup felt much more automated right from the start.
For this setup, I used:
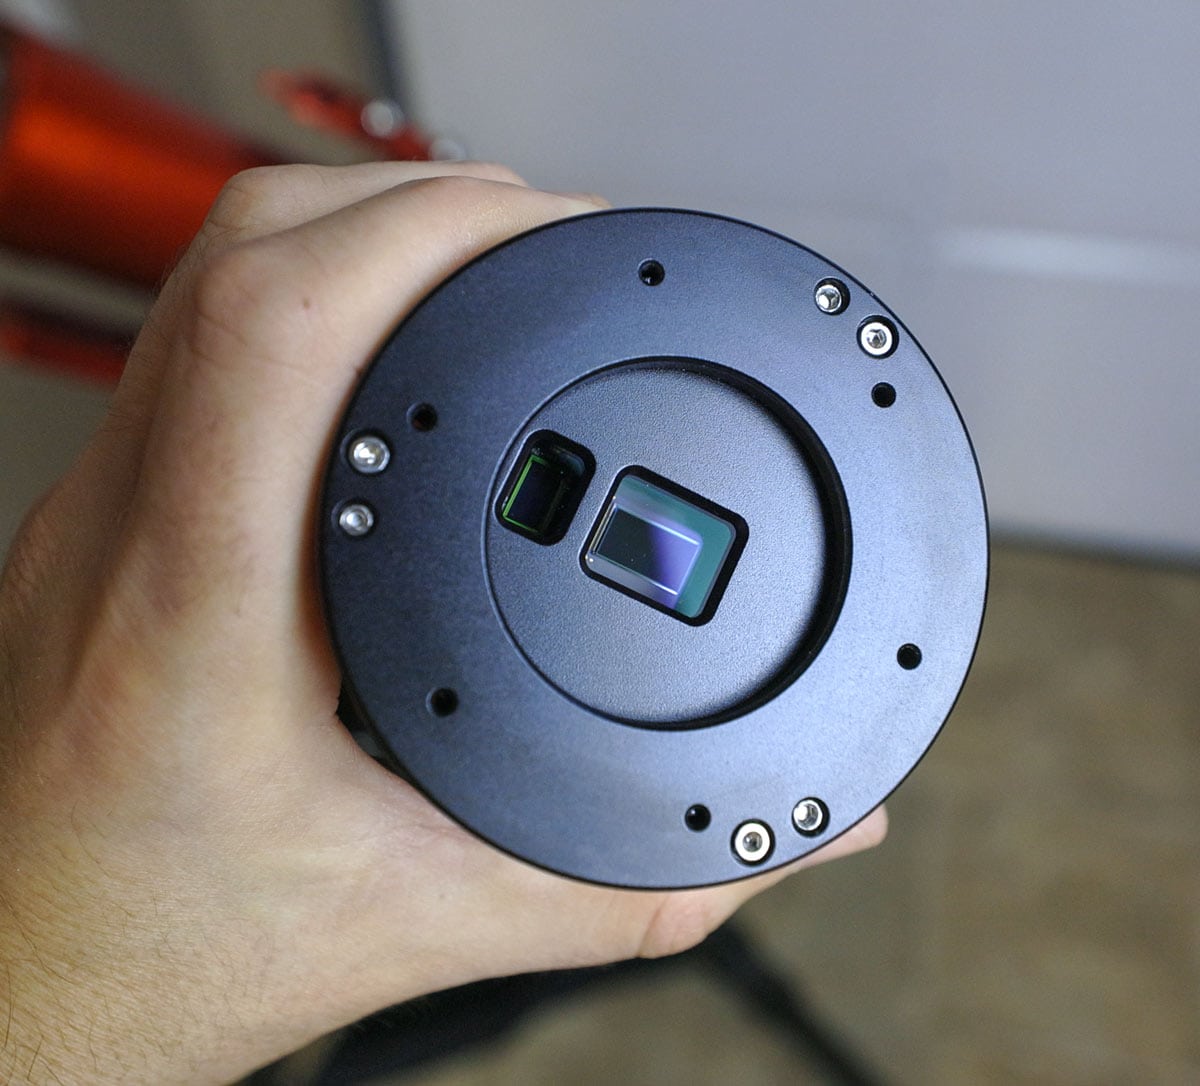
- ZWO ASI585MC Air
- William Optics RedCat 51 Refractor
- Optolong L-eXtreme Dual-Narrowband Filter
- ZWO AM3 Harmonic Drive Mount
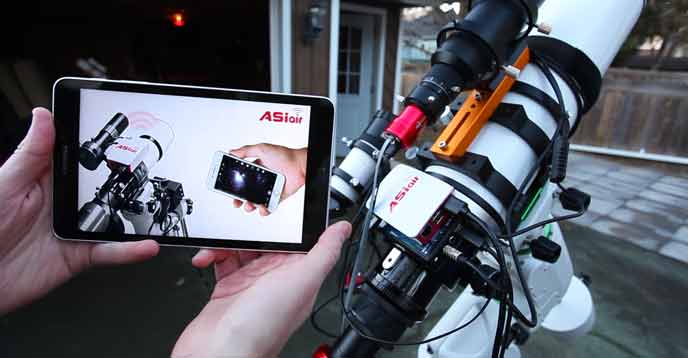
The entire rig was controlled using the ASIAIR.
Compared to the DSLR setup, the experience felt completely different. Instead of manually searching for the target, I used plate solving to frame the Elephant’s Trunk Nebula automatically. The mount slewed to the target, the ASIAIR captured an image, solved the star field, corrected the framing, and placed the nebula exactly where I wanted it.
Plate solving removes a lot of the guesswork. Instead of wondering whether you are pointed at the correct area of the sky, you know immediately. And that means you spend far less time searching and much more time collecting usable data.
The Benefits of Autoguiding
This rig also used autoguiding, which was another major difference compared to the DSLR setup and the smart telescope.
With autoguiding enabled, the system continuously monitored a guide star and applied small corrections to the mount throughout the imaging session. That helped keep the stars round over longer exposures, improved consistency across the dataset, and gave me much more confidence that the data I was collecting would actually be usable.
This is one of the biggest advantages of a dedicated astrophotography rig. These setups are definitely more complicated; there are more components involved, more setup time, more cables, and more software working together throughout the night. But once everything is running properly, they are incredibly capable.
The ZWO ASI585MC Air is a dedicated astronomy camera designed specifically for deep-sky astrophotography. It is not a daytime camera adapted for the night sky. When paired with the ASIAIR, the AM3 mount, a small refractor, and autoguiding, the entire system felt very controlled and repeatable.
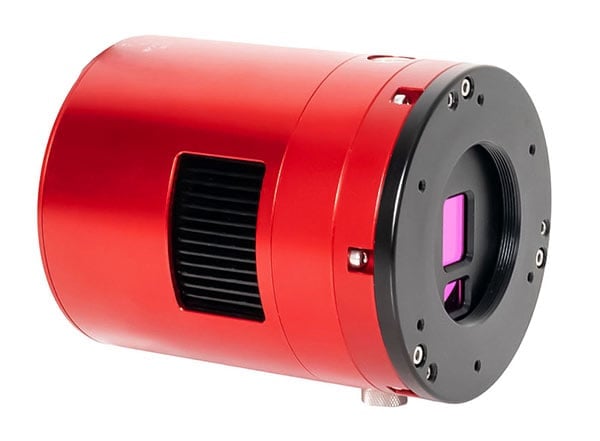
The ZWO ASI585MC Air includes a secondary ‘guide’ sensor to improve tracking accuracy.
A Much Tighter Field of View
This is also where the comparison started to get really interesting.
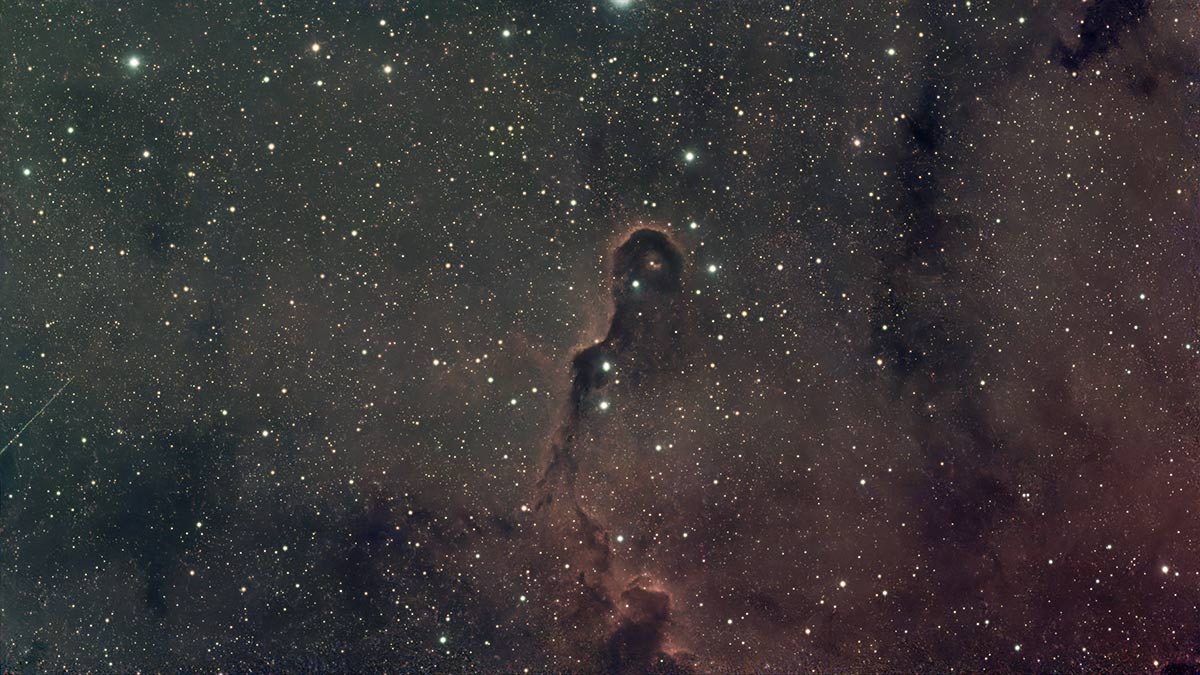
The sensor inside the dedicated astro camera is much smaller than the full-frame sensor in the Canon EOS Ra, which created a much tighter field of view.
The Elephant’s Trunk Nebula appeared much larger in the frame, giving me a closer look at the structure of the nebula itself, but losing some of the surrounding environment captured by the DSLR setup. That is important to keep in mind when comparing the final images.
The DSLR rig and the dedicated astro camera rig were not really producing the same composition. The Canon EOS Ra created that wide, full-frame view of IC 1396, while the dedicated astro camera naturally produced a more zoomed-in look at the nebula.
Neither approach felt better or worse; they simply produced different image styles.
The Narrowband Filter Setup
For this rig, I used the Optolong L-eXtreme filter. Like the filter used in the DSLR setup, this is a dual-narrowband filter designed to isolate the important emission lines from nebulae, primarily hydrogen alpha and oxygen III.
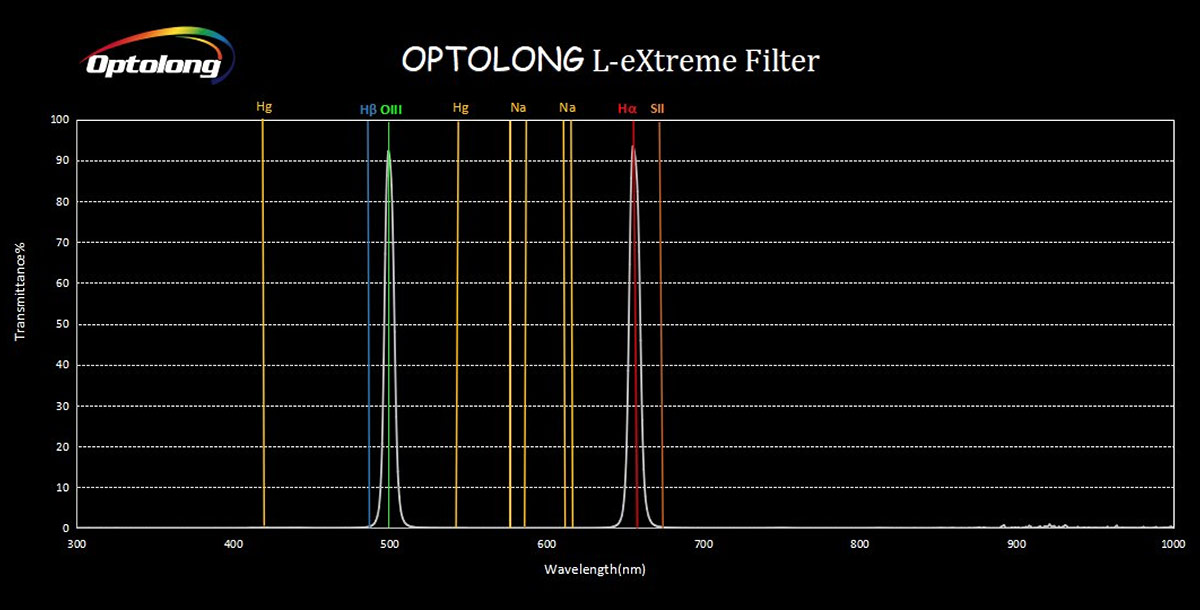
That makes it extremely useful under light-polluted skies and especially effective on emission nebulae like the Elephant’s Trunk.
By this point in the comparison, the dedicated astro camera rig clearly had some major advantages:
- Plate solving
- Autoguiding
- Dedicated astro camera control
- High-quality mount
- Narrowband imaging workflow built specifically for deep-sky imaging
But it was also noticeably more complex than the DSLR setup. There were more components, more cables, more software, and more opportunities for something to go wrong. That was really the trade-off.
The DSLR rig felt lightweight, simple, and hands-on. The dedicated astro camera rig felt technical, precise, and extremely controlled.
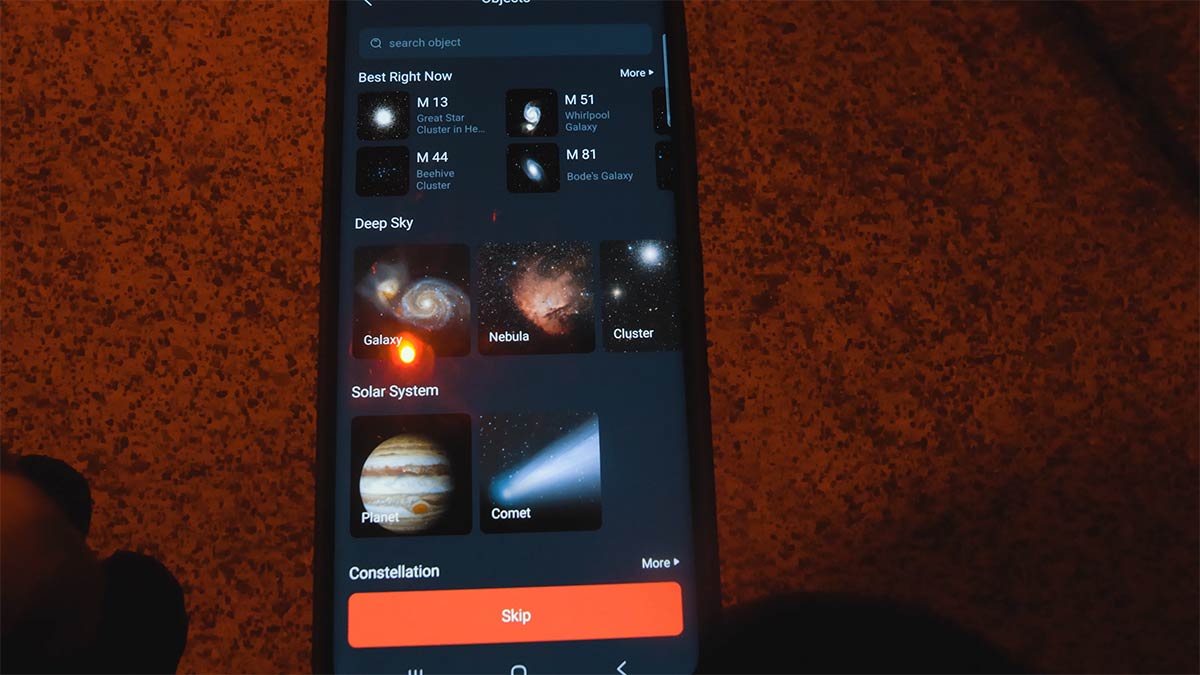
The Smart Telescope
The third system I used was the ZWO Seestar S50, and for this session, I ran it in EQ mode. That is important because using the Seestar in equatorial mode allows it to track the sky in a way that is much better suited for longer deep-sky imaging sessions.
Of the three systems, the Seestar was easily the most compact and automated. It is a smart telescope, which means the telescope, camera, mount, computer, and software are all built into one small package.
There was no need to assemble a full imaging rig, balance a telescope on a mount, connect a separate camera, attach a guide scope, or manage a control box full of cables.
I simply set it up, selected the target, and let it start collecting light. That felt completely different from the other two systems.
Because of that, it is easy to see why smart telescopes have become so popular. They remove many of the barriers that normally slow people down when getting started in deep-sky astrophotography.
Finding the target is easy. Focusing is easier. Stacking happens automatically. And you can watch the image slowly build on the screen in real time. For someone just getting started, that experience is incredibly powerful.

The Seestar S50 is a capable smart telescope with a proven track record.
A Different Imaging Experience
But once again, sensor size played a huge role in the final image. The sensor inside the Seestar S50 is much smaller than the full-frame sensor in the Canon EOS Ra, and much smaller than what many people picture when they think about a traditional deep-sky imaging camera.
That resulted in a much tighter field of view and a very different image scale. The final image simply had a different look compared to the DSLR setup. And that is really the point.
The Seestar is not trying to be a full-frame astrograph or a fully customized deep-sky imaging rig. It is designed to be a portable, self-contained, easy-to-use astrophotography system. And naturally, there are trade-offs that come along with that.
The Seestar handled a huge amount of the process automatically, but it also did not provide the same level of control as the dedicated astronomy camera rig. I was not using a separate autoguiding setup, and I was not manually framing the shot in the same way I was with the DSLR rig.
The Seestar handled the entire imaging session within its own ecosystem, and that is both its biggest strength and its biggest limitation.
The Narrowband Imaging Approach
For this session, I used the same general filter approach across all three systems: dual-narrowband imaging.
The DSLR rig used the Optolong L-eNhance. The dedicated astro camera rig used the Optolong L-eXtreme. And the Seestar also used a dual-narrowband style filter approach.
That consistency was important because the Elephant’s Trunk Nebula is an emission nebula, and emission nebulae respond extremely well to narrowband imaging, especially under light-polluted backyard skies. So while the cameras, sensors, mounts, and workflows were all very different, the type of light I was trying to capture remained very similar: Hydrogen-alpha and Oxygen-III.
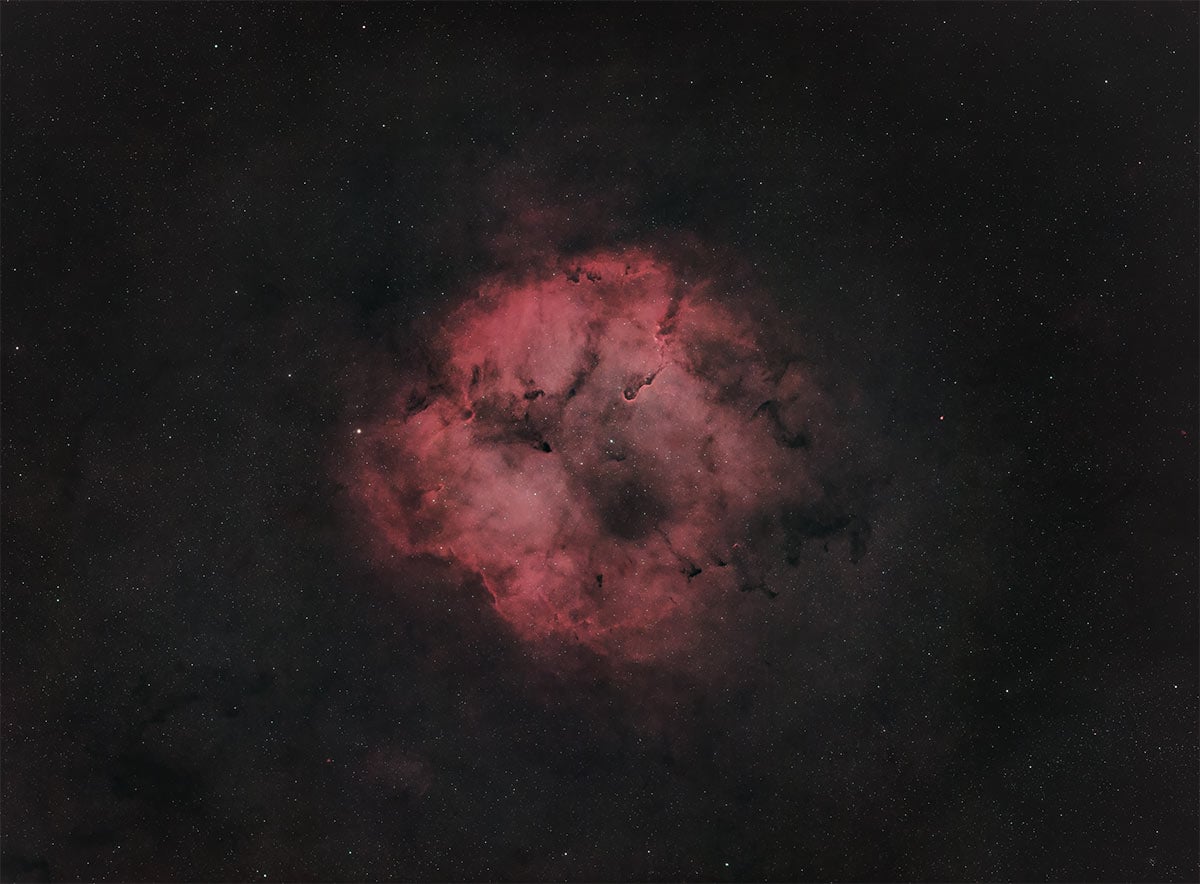
The Target: Elephant’s Trunk Nebula
The Elephant’s Trunk Nebula is one of those targets that looks fairly simple at first glance, but the more time you spend imaging it, the more interesting it becomes.
It is part of a much larger emission nebula region known as IC 1396. The actual “Elephant’s Trunk” is a long, dark, twisting structure of gas and dust that stands out against the glowing background of hydrogen gas surrounding it. And it is one of the most recognizable deep-sky objects in the northern summer and fall sky.
This also made it a perfect target for a comparison like this. The object itself is large, filled with faint nebulosity, dark dust lanes, and bright areas of hydrogen emission. And depending on the camera and telescope combination, it can be framed in completely different ways.
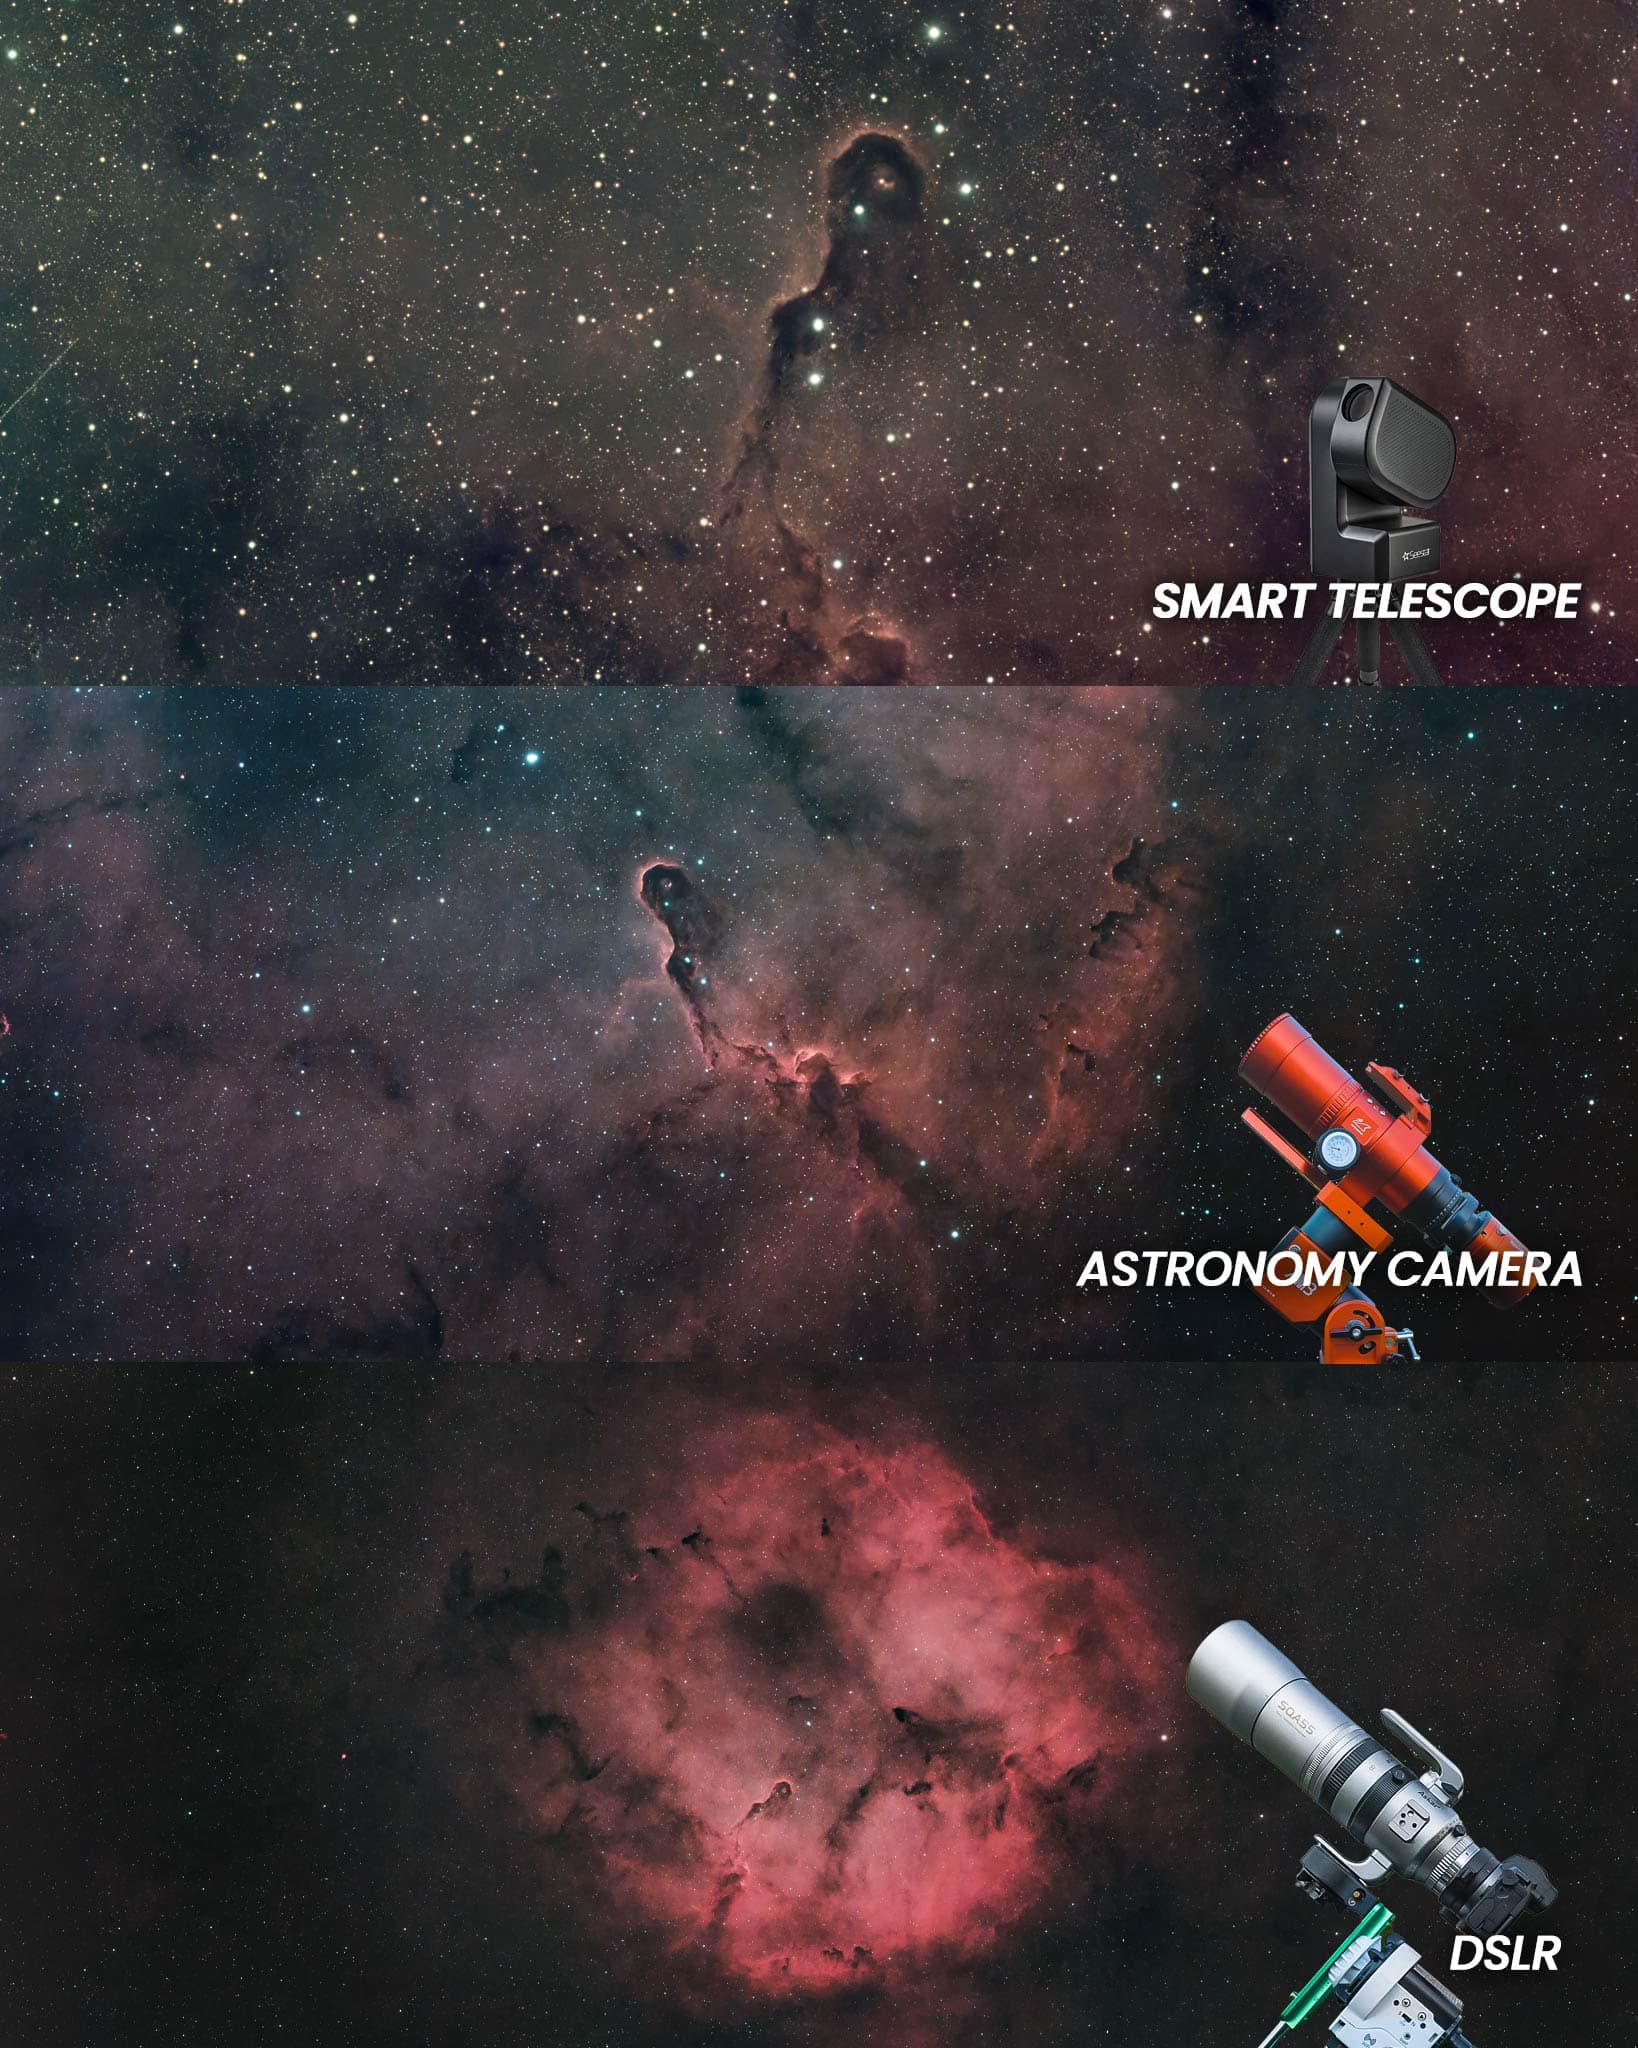
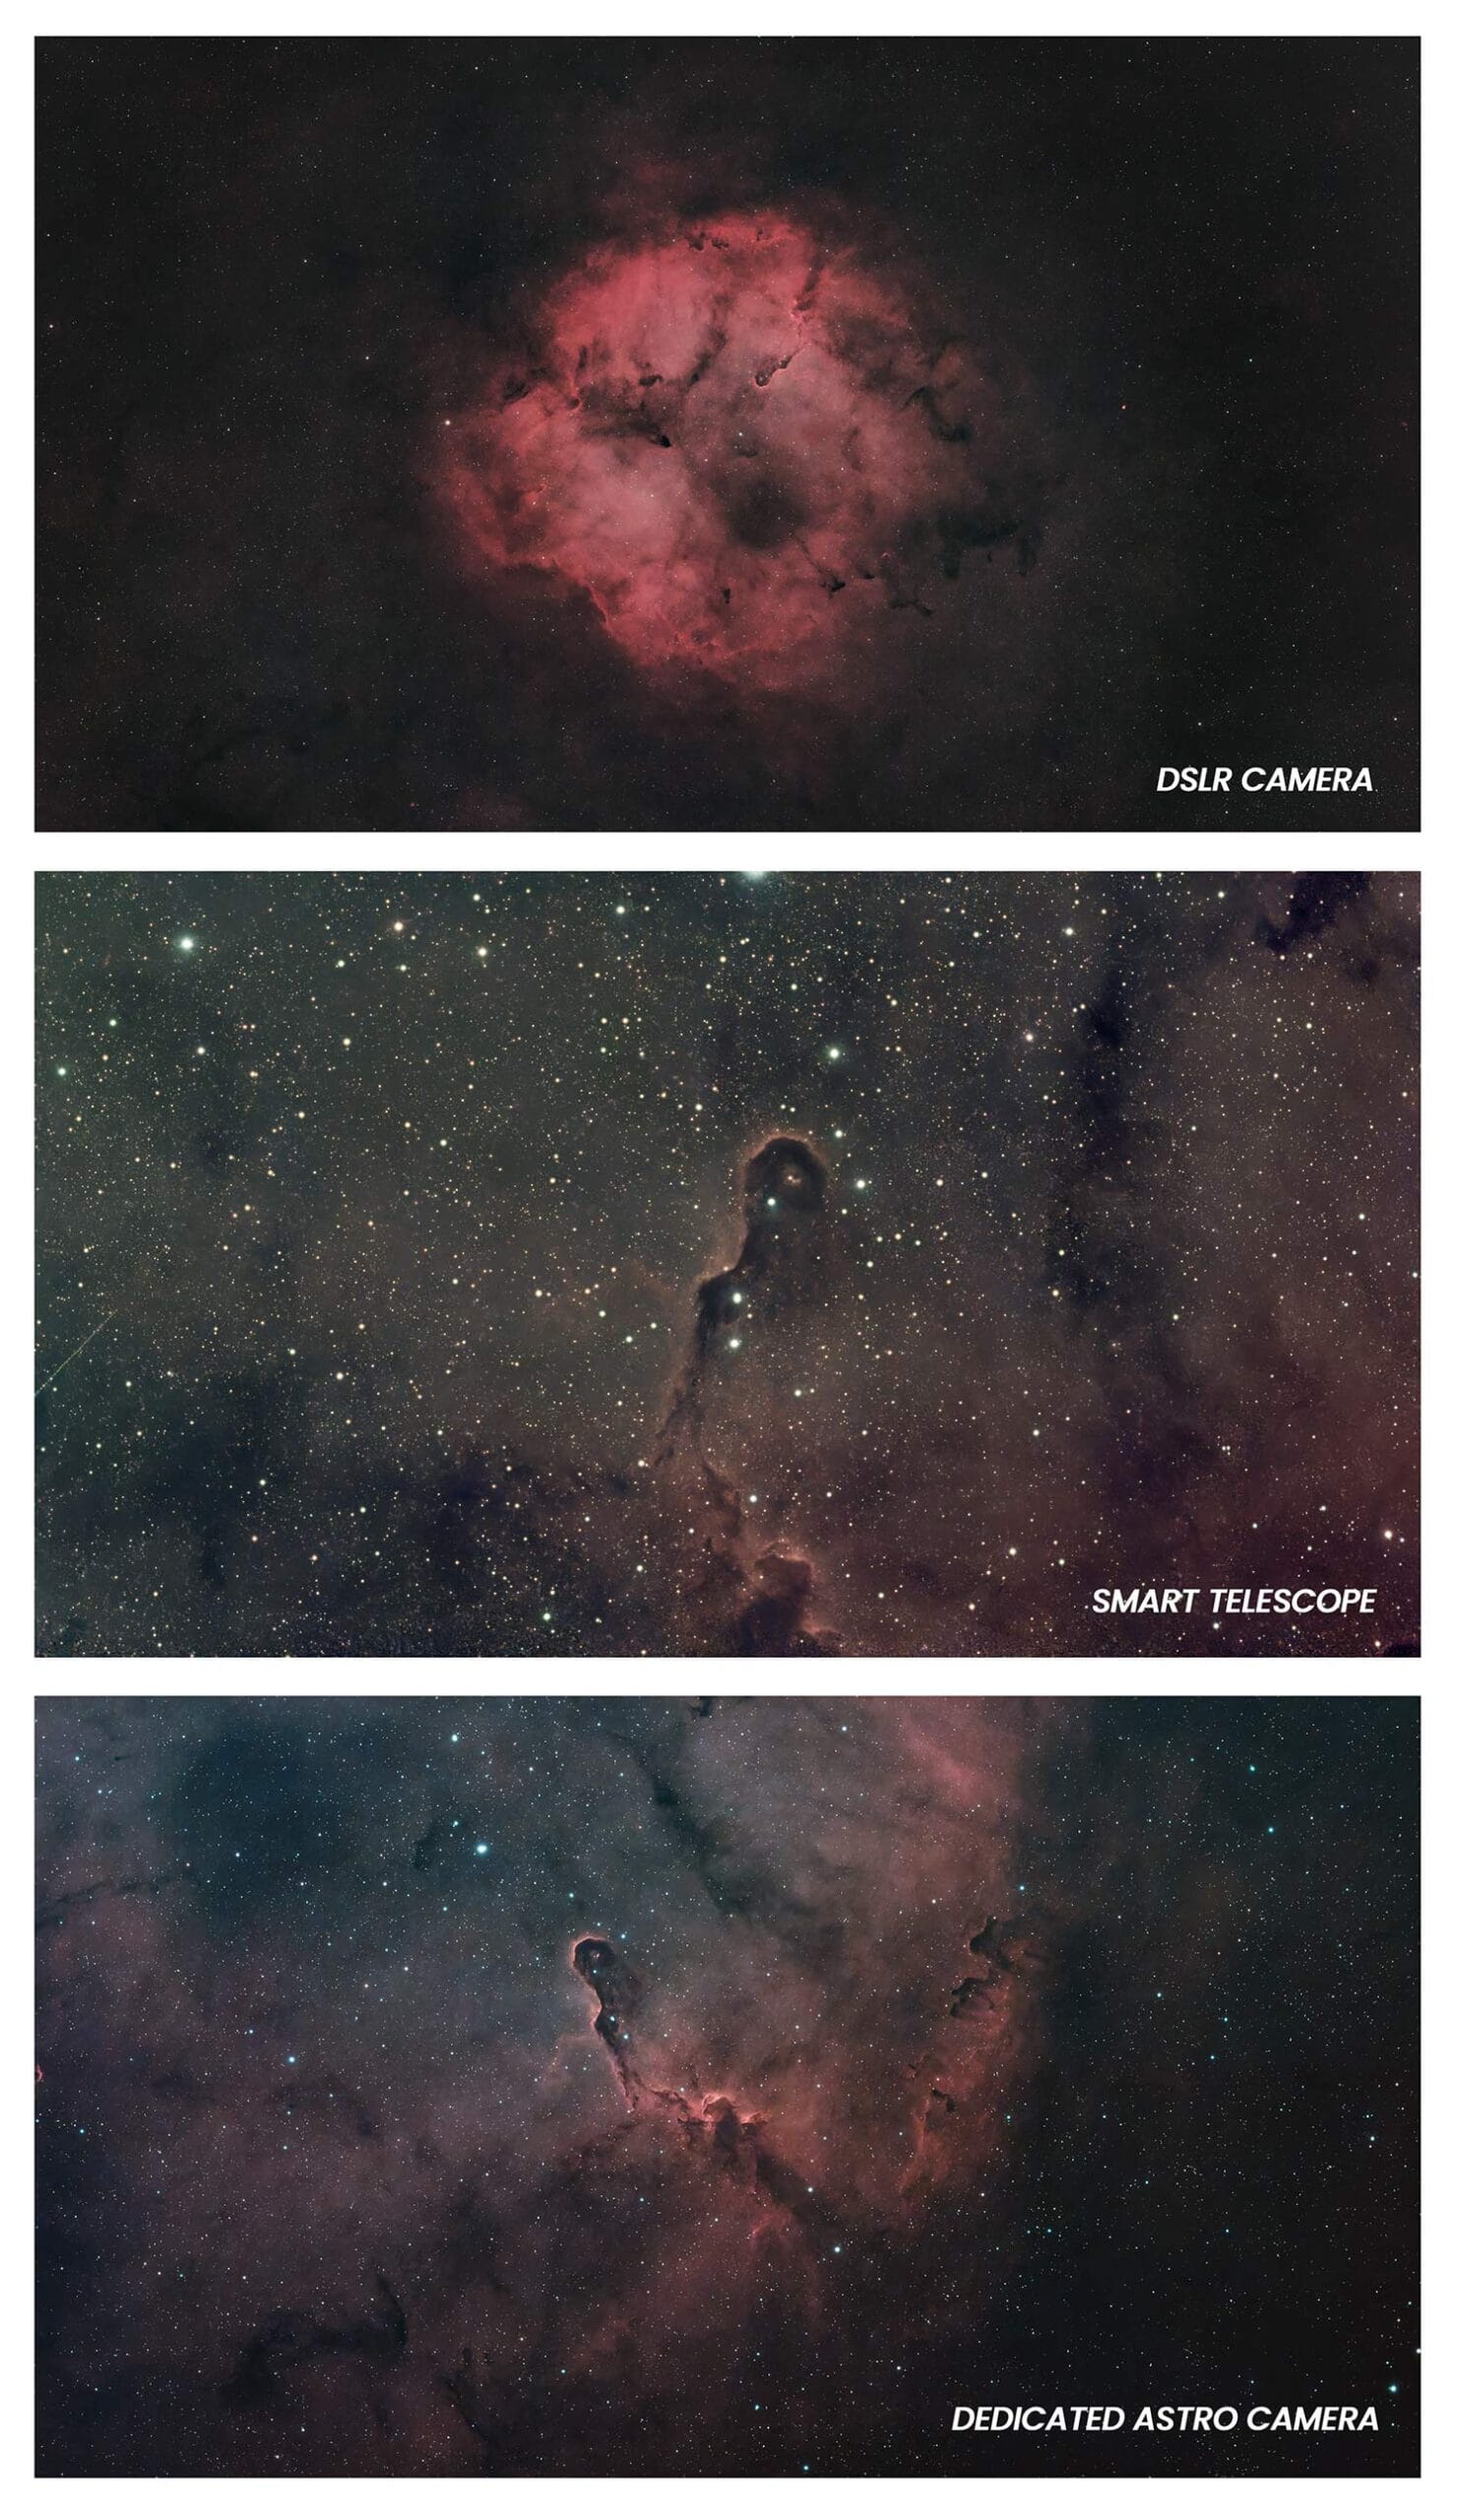
With the full-frame Canon EOS Ra, the Elephant’s Trunk became part of a much larger nebula scene. With the dedicated astro camera rig, the composition tightened up and focused more attention on the structure of the nebula itself. And with the Seestar, the result became a compact, highly automated version of the same target.
That is why this comparison ended up being about much more than simply deciding which camera looked “best.” A more interesting question started to emerge throughout the night: What kind of image did each system naturally want to create?
Collecting the Data
For each setup, I collected about two and a half hours of total exposure time. That gave me enough data to make a fair comparison. Not perfect, but fair.
Because in real-world backyard astrophotography, conditions are never perfectly controlled.
- The sky changes.
- Transparency shifts.
- The target moves across the sky.
- And every setup behaves a little differently throughout the night.
Each system also had its own strengths and weaknesses.
The DSLR rig required the most manual effort. I had to find the target myself, frame it manually, check the back of the camera, make adjustments throughout the session, and trust the tracker to keep everything aligned without autoguiding.
The dedicated astro camera rig was the most advanced traditional astrophotography setup of the three. It used the ASIAIR for control, plate solving for accurate framing, autoguiding for improved tracking, and a dedicated astronomy camera built specifically for deep-sky imaging.
The Seestar S50 was easily the most automated system. It was fast to set up, easy to run, and required the least amount of hands-on interaction once the imaging session started.
Why Workflow Matters
That difference in workflow became a huge part of this comparison. Because, of course, the final image quality matters, but the experience of collecting the data matters too.
- How long did it take to get everything running?
- How difficult was it to find the target?
- How much confidence did I have in each exposure?
- How many things could potentially go wrong?
- And how much did I actually need to know to make the system work well?
Those are the kinds of questions that really matter when you are trying to decide which astrophotography path makes the most sense for you.
First Impressions from the Data
Once I started reviewing the raw data from each system, the differences became obvious very quickly.
The Canon EOS Ra produced that beautiful wide-field composition I was hoping for. The large full-frame sensor made the Elephant’s Trunk feel like part of a much larger cosmic landscape rather than a tight close-up of the nebula itself.
That is one of the things I still love most about using a full-frame camera for astrophotography. You can capture both the target and the surrounding region in a way that feels much more spacious and immersive.
Because the DSLR rig was completely unguided, the results also depended heavily on accurate polar alignment and careful exposure length throughout the night.
The dedicated astro camera rig felt much more locked in by comparison. The framing was accurate, the autoguiding kept the stars under control, and the ASIAIR made the entire session feel smooth and repeatable. This is the kind of setup that gives you a lot of confidence once everything is running properly.
You can monitor the guiding graph, check your exposures, and know the system is consistently producing usable data. But once again, the smaller sensor created a much tighter composition around the Elephant’s Trunk itself.
Compared to the DSLR image, the result felt more like a close-up of the nebula region.
The Seestar’s Biggest Strength
From a convenience standpoint, the Seestar data was probably the most impressive of the three. Because when you step back and look at what this little telescope is capable of doing on its own, it is honestly pretty remarkable.
It’s small, portable, finds the target automatically, tracks, and stacks.
And it produces a recognizable image of a faint emission nebula without requiring a traditional astrophotography rig. That is incredibly appealing, especially for someone just getting started.
But the smaller sensor and highly automated workflow also mean you are working within the limits of the system.
You do not have the same flexibility as the DSLR rig or the dedicated astro camera setup; you are not choosing every component individually or optimizing every part of the imaging train, and you are letting the smart telescope do exactly what it was designed to do.
And for a lot of people, that is exactly the point.
The Sensor Size Difference
One of the biggest takeaways from this comparison was sensor size. And I do not want to gloss over this, because it had a dramatic impact on the final images.
The Canon EOS Ra is a full-frame camera, which means it uses a much larger imaging sensor than both the dedicated astro camera and the Seestar S50.
And even when you are using similar telescope focal lengths, that difference in sensor size can completely change the field of view.
The small sensor size of the ZWO ASI585MC Air dedicated astronomy camera.
With the Canon EOS Ra, the Elephant’s Trunk Nebula sat inside a much larger scene. The image captured more of IC 1396, more surrounding nebulosity, more stars, and much more of the overall structure around the target.
With the smaller sensors, the field of view became much tighter. The Elephant’s Trunk itself appeared larger in the frame, and the image naturally felt more zoomed in. And depending on the target, that can either improve or hurt the overall composition.
For the Elephant’s Trunk Nebula specifically, I actually think both approaches worked well. The wide-field image helped show the nebula as part of the larger IC 1396 complex. The tighter compositions drew much more attention to the dark structure of the trunk itself.
Why Camera Comparisons Can Be Misleading
This is also why camera comparisons can sometimes be misleading online.
You cannot simply say one camera is better because the target appears larger in the frame. And you cannot say another camera is better simply because it captures more sky. Those are completely different imaging choices.
The full-frame camera provided more scale and context around the target, while the smaller sensors naturally produced a tighter, more focused view.
And the best choice depends entirely on the target, the telescope you are using, and the style of image you are trying to create.
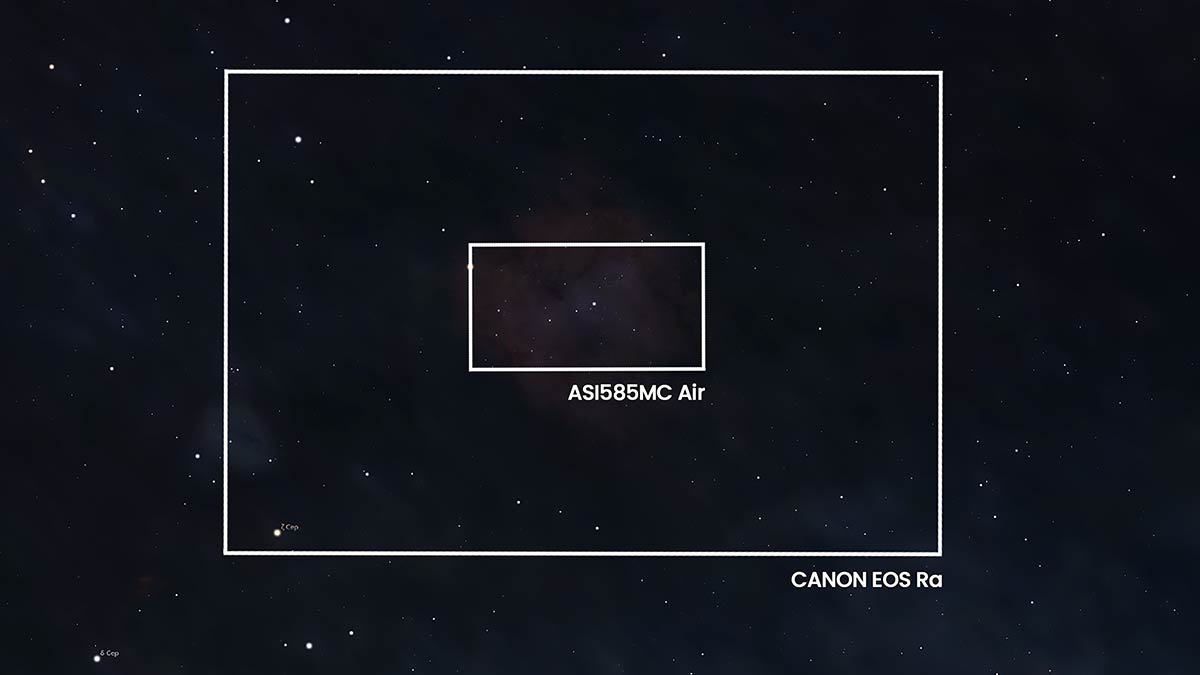
The dramatic difference in sensor size between the Canon EOS Ra mirrorless camera and the ZWO ASI585MC Air.
Which One Was the Easiest to Use?
As you may have guessed, the easiest system to use was definitely the Seestar S50. There is really no question about that.
It was the most beginner-friendly setup of the three, the fastest to get running, and the one that removed most of the technical setup from the imaging session.
For someone who wants to capture deep-sky objects without building a full astrophotography rig, the Seestar is incredibly appealing.
The Seestar dedicated mobile app is incredibly easy and fun to use.
The dedicated astro camera rig felt the most capable and controlled. It definitely required more effort to set up than the Seestar, but once everything was running, it became the most confidence-inspiring system of the night.
Plate solving, autoguiding, and ASIAIR control made a huge difference throughout the session. This setup felt the most like a serious deep-sky imaging platform.
The DSLR rig was easily the most hands-on, and in a lot of ways, it was also the most satisfying to use.
When you manually find the target, frame it yourself, and collect the data without a computer controlling every part of the process, there is a real sense of involvement in the session.
But it also required more patience and leaves more room for mistakes, especially when using a star tracker without autoguiding.
Three Very Different Experiences
By the end of the night, each system felt like it had its own personality.
- Seestar felt simple, approachable, and highly automated.
- DSLR setup felt lightweight, immersive, and very connected to the hands-on experience of backyard astrophotography.
- Dedicated astro camera rig felt precise, technical, and extremely capable.
Comparing the Final Images
Once all of the data was collected, the real test became the final images. I processed each dataset separately and tried to give each one a fair treatment, but I also wanted to keep the comparison realistic because these systems were not identical.
They did not use the same sensor size, optics, tracking system, or level of automation. Rather than treating this like a perfectly controlled scientific test, I found it much more useful to approach it as a real-world backyard astrophotography comparison.
What actually happens when you use three very different astrophotography setups on the same target, for the same amount of time, under the same sky conditions? That felt like the more interesting question to answer.
Because this is how most people actually do astrophotography. They use the gear they already have, work with the conditions they get, and try to make the best image they can from their backyard.
The Big Takeaway
After spending a full night moving between all three systems, my biggest takeaway was how many different ways there are to approach astrophotography right now.
You can start with a smart telescope and begin capturing nebulae almost immediately. You can build a lightweight DSLR setup and learn the sky in a much more hands-on way.
Or you can use a dedicated astronomy camera rig with plate-solving, autoguiding, and full control throughout the imaging session.
And all three approaches are valid, and all three systems produced meaningful results on the Elephant’s Trunk Nebula. That is why I do not think the real question is which one counts as “real” astrophotography. They all do.
A much more interesting question is what kind of imaging experience you actually want.
- Do you want the simplest path to an image?
- Do you want the most control possible over the imaging session?
- Or do you enjoy the more hands-on process of setting up the rig, finding the target yourself, and collecting the data manually?
For me, that is what made this comparison so interesting.
The final images were important, of course, but the process of capturing them revealed just as much.
The Canon EOS Ra reminded me why I still enjoy wide-field camera-based astrophotography so much.
The dedicated astro camera rig reminded me how much of a difference autoguiding and plate solving can make during a long imaging session.
And the Seestar S50 reminded me just how far smart telescopes have come in a surprisingly short amount of time.
Final Thoughts
Now I would love to hear from you. Which image did you like best? Let me know in the comments of this article.
And maybe more importantly, which setup would you actually want to use in your own backyard?
Because that answer might be completely different from the image you preferred most. Image quality is only part of the experience. Setup time, portability, complexity, ease of use, and overall enjoyment all matter too.
I have included the final images below so you can compare them side by side for yourself, and I would genuinely love to know which setup surprised you the most.

Trevor Jones is an astrophotographer and a valued member of the RASC. His passion is inspiring others to start their astrophotography journey on YouTube so they can appreciate the night sky as much as he does. His images have been featured in astronomy books & online publications, including the NASA Astronomy Picture of the Day (APOD).

I have all three options, the Seestar S50, a good tracking mount with goto that I use occasionally with a modified mirrorless DSLR and an EQ6R-Pro mount with several OTAs including an 80mm apo refractor and 200mm SCT. What I don’t have is any option for a permanent location, so setup has become an important consideration especially, I feel, because of climate change. Autumn/winter especially see far fewer clear nights and buying the Seestar and a Dwarf 3 might not give results that can compare to my one shot TEC camera on a good guided mount, but I can have smart scopes out to make use of even very short clear spells to collect data over multiple sessions while the other rigs can’t be put out at very short notice or take too long to set up to be practicable. So, if the best telescope is the one I use the most, ultimately it’s not image quality that decides it any more.
Trevor, thanks for the comparison, to me the dedicated astro camera seems to have to most detail. I have a Seestar S50, a Dwarflab Dwarf3 and a DSLR rig/Rokinon 135/Canon 70-200 F2.8/Skywatcher GTI/ASIAir that I use. Here is the Elephant Trunk I captured with the Dwarf3: https://photos.app.goo.gl/67jbkQmAE8YhUP2Y8
I have a question though, what filter holder/adapter do you use for the DSLR setup?
Thanks,
Del