ToupTek StellaVita Review: Better Than Ever, But Not Perfect
What is the ToupTek StellaVita?
- Main camera
- Guide camera
- Mount
- Electronic focuser
- Filter wheel
- 12V-powered accessories
This type of all-in-one controller isn’t new, but the idea is to simplify your setup by replacing a laptop with a dedicated, purpose-built device designed specifically for astrophotography.
Once everything is connected, the StellaVita creates its own Wi-Fi network. From there, you connect using your phone or tablet and control everything through the app.
The goal is simple – run your entire imaging session wirelessly, ideally from inside the house, while keeping your setup outside organized and self-contained.
StellaVita Specs
Here’s a quick look at what the StellaVita offers:
- USB Connectivity: 2 × USB 3.0 ports, 2 × USB 2.0 ports
- Power System: 12V input (8A), 4× 12V outputs (3A each)
- Storage: SD card (UHS-I/UHS-II supported)
- Wireless Connectivity: Dual-band (2.4GHz / 5GHz)
- Software & Control: StellaVita App 2.0
- Compatibility: ToupTek, ZWO, QHY, Player One, etc.
How the StellaVita Works
- Monitor connected devices
- Adjust camera settings
- Control the mount
- Start guiding
- Run autofocus
- Plate solve and frame targets
- Build and run imaging sequences
Camera Compatibility
This is where the StellaVita really stands out.
Instead of locking you into one brand, it supports a wide range of equipment, including ToupTek, ZWO, QHY, Player One, and many mounts, focusers, and filter wheels. That’s a big deal, because most astrophotographers build their setup using gear from multiple manufacturers, not a single ecosystem.
The StellaVita is designed around a more open approach, aiming to bring different pieces of gear together into one workflow. In contrast to systems that are built around a single brand, this gives you more flexibility when choosing cameras and accessories.
Of course, that flexibility can also introduce some variability depending on your setup, but the ability to mix and match gear like this is one of the main reasons the StellaVita stands out in the first place.
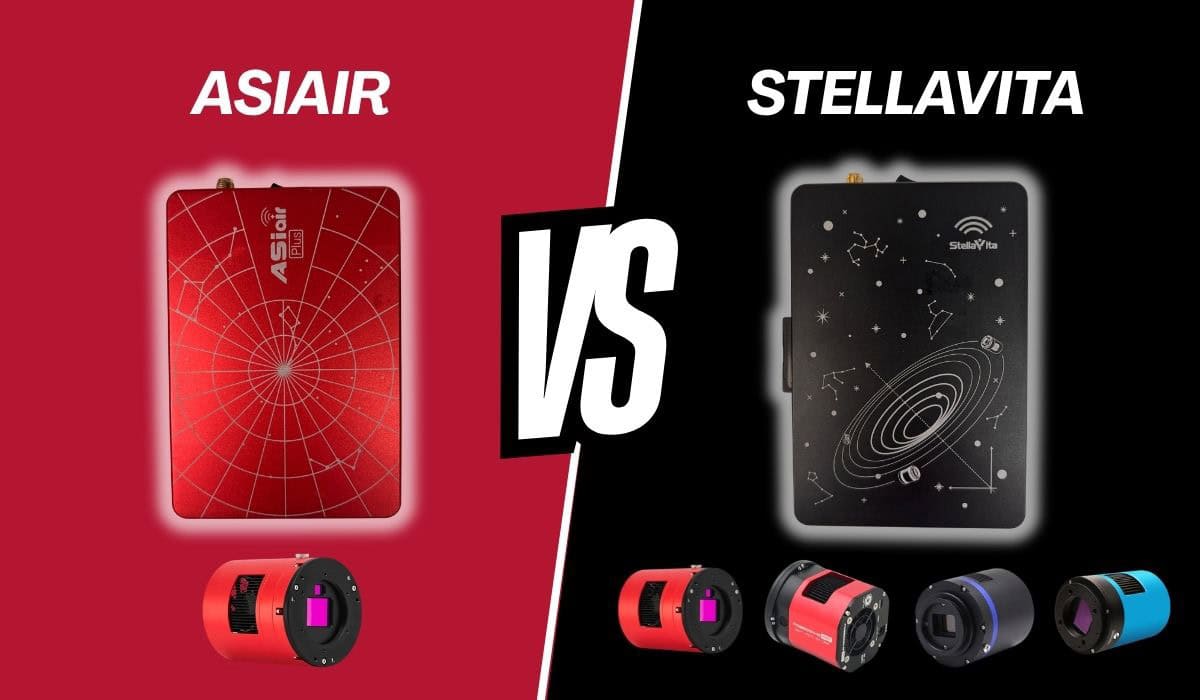
ToupTek StellaVita vs. ASIAIR
If you’re considering the StellaVita, there’s a good chance you’re comparing it to the ZWO ASIAIR — and for good reason.
Both systems aim to do the same thing: run your entire astrophotography setup wirelessly from a mobile device.
In practice, they feel very similar in day-to-day use, but there are some important differences in how they approach the problem.

Comparing the ZWO ASIR (left) to the ToupTek StellaVita (right)
The Core Difference
If you’re searching for a ToupTek StellaVita vs ASIAIR comparison, this is where the biggest differences show up.
- ASIAIR is a closed ecosystem
- StellaVita is a more open ecosystem
The ASIAIR is designed to work best (and often only) with ZWO gear. In return, you get a very polished and predictable experience.
The StellaVita, on the other hand, supports a wide range of brands, which gives you more flexibility, but can introduce a few quirks depending on your setup.
| Feature | ToupTek StellaVita | ZWO ASIAIR |
|---|---|---|
| Ecosystem | Open (multi-brand support) | Closed (ZWO-focused) |
| Camera Compatibility | ToupTek, ZWO, QHY, Player One (varies) | ZWO only (with limited exceptions) |
| Mount Support | Wide compatibility | Wide compatibility |
| User Interface | Clean, modern (still evolving) | Very polished and refined |
| Ease of Use | Moderate learning curve | Beginner-friendly |
| Wi-Fi Setup | Requires dongle for best performance | Built-in + station mode |
| Autofocus Reliability | Improving, some inconsistencies | Very reliable |
| File Transfer | Wi-Fi / SD card | USB drive + Wi-Fi |
| Firmware Maturity | Still evolving | Mature and stable |
| Flexibility | High | Limited (by design) |
Which One Should You Choose?
The StellaVita makes the most sense if:
- You use equipment from multiple brands
- You want an ASIAIR-style wireless workflow
- You value flexibility over a closed ecosystem
- You’re okay working through some early quirks
If you’re currently using (or planning to use) mostly ZWO gear, the ASIAIR still offers a more polished, reliable experience — especially for unattended imaging.
On the other hand, if your setup includes a mix of different brands — or you simply don’t want to be locked into one ecosystem — the StellaVita is a very compelling option.
If your current setup already works perfectly within a closed system, there may not be a strong reason to switch right now.
Real-World Experience Using the Stellavita
Rather than just listing features, here’s what it was actually like using the StellaVita over a few nights of imaging.
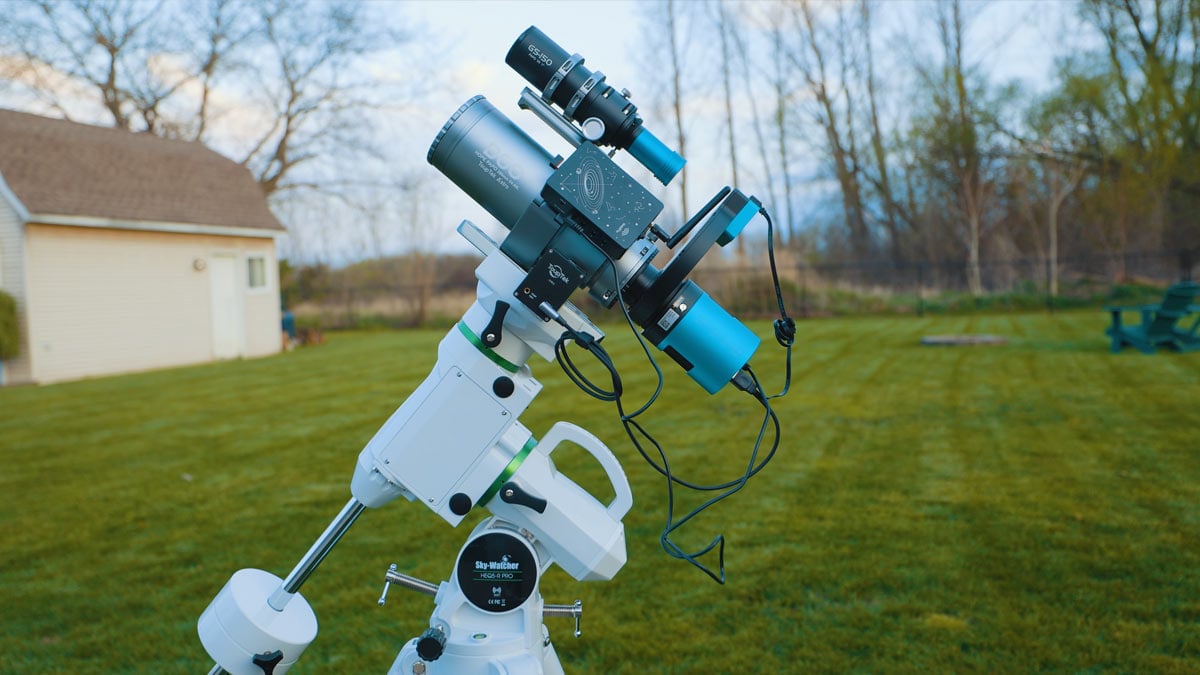
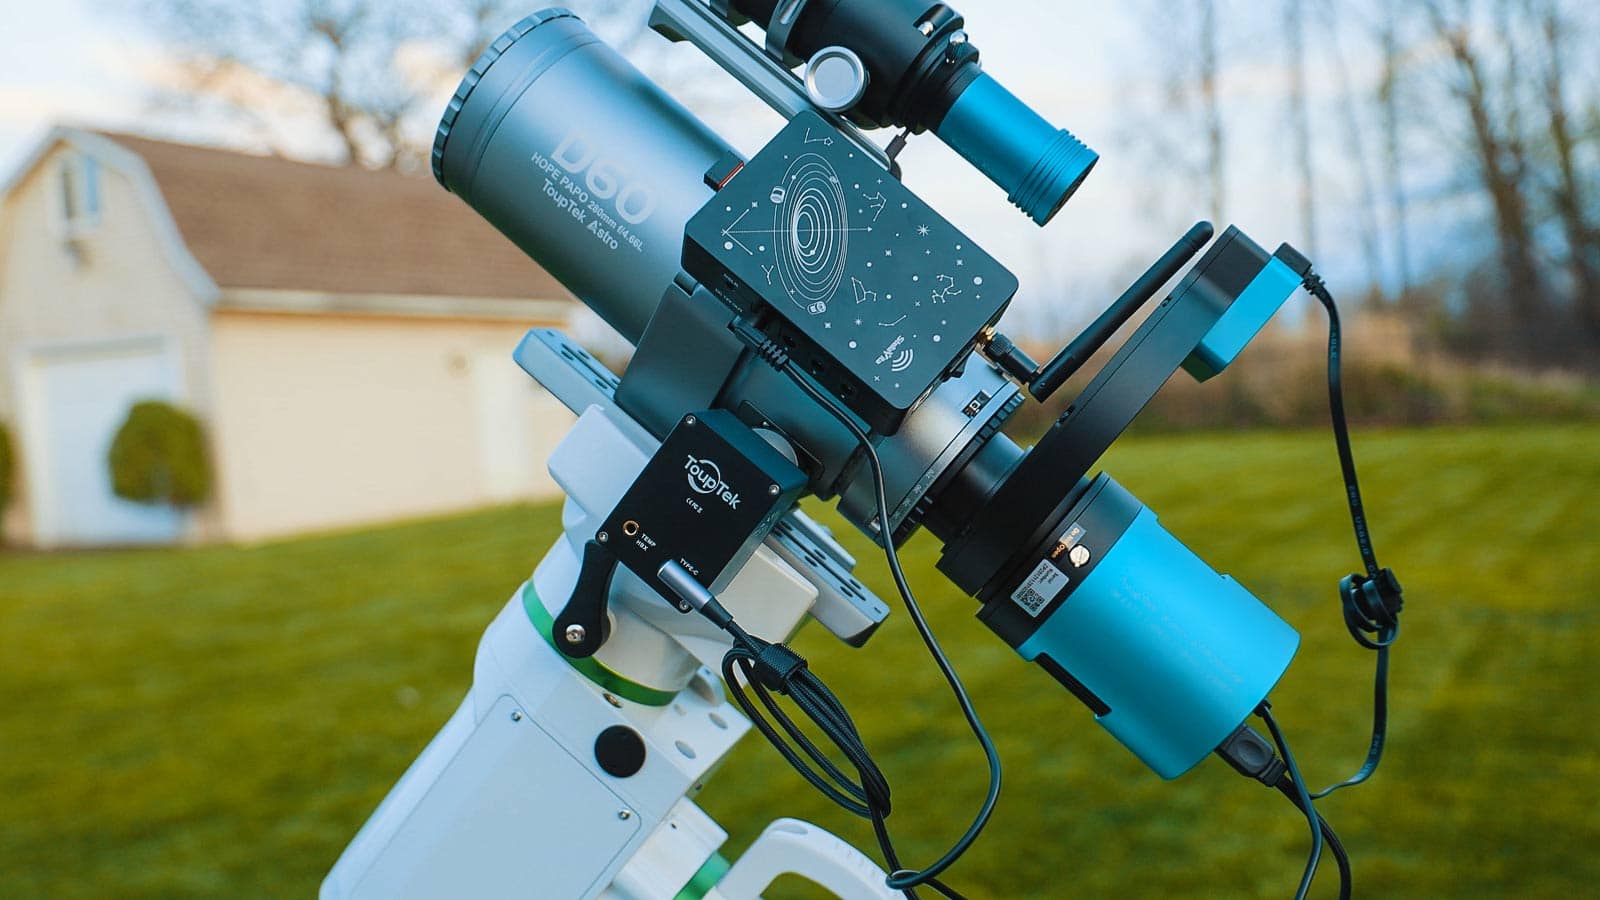
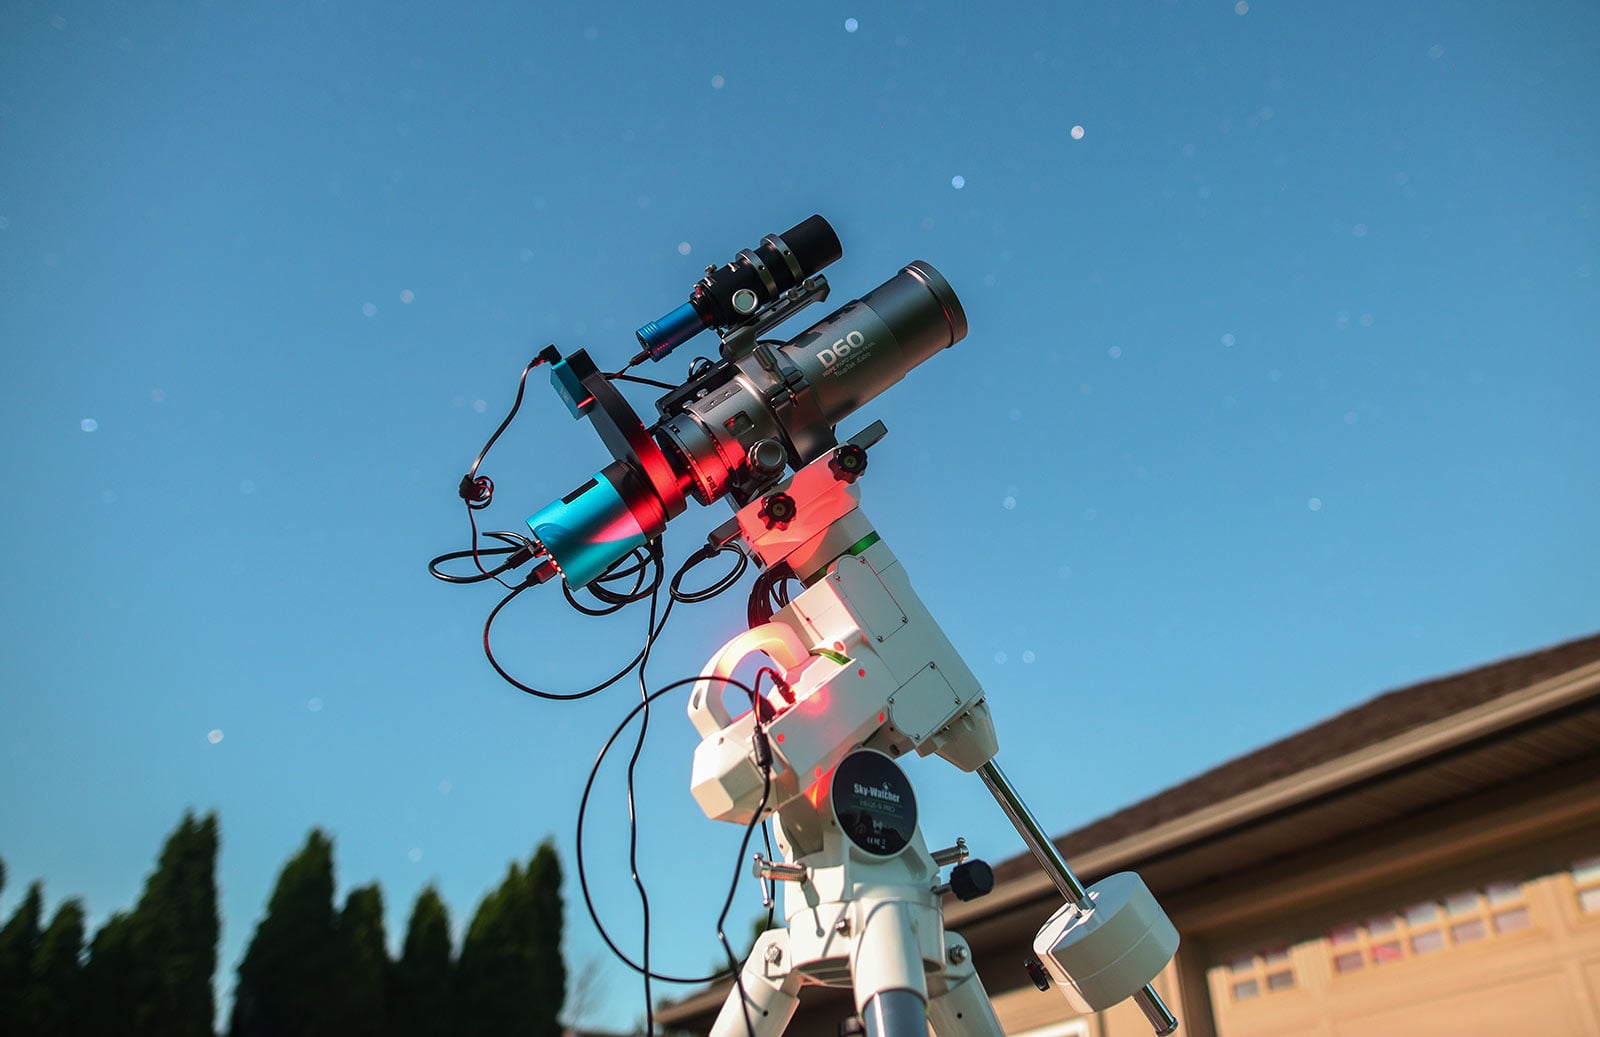
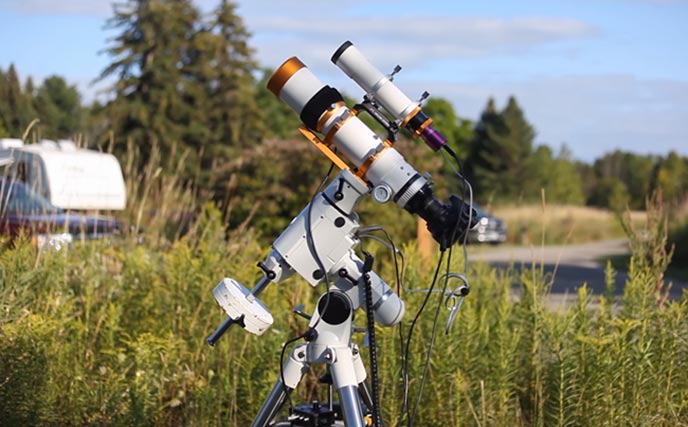
For this review, the setup included:
- ToupTek StellaVita controller
- ToupTek ATR2600M camera
- ToupTek HOPE D60 refractor (260mm, F/4.6)
- ToupTek AAF autofocuser
- ToupTek 662M guide camera
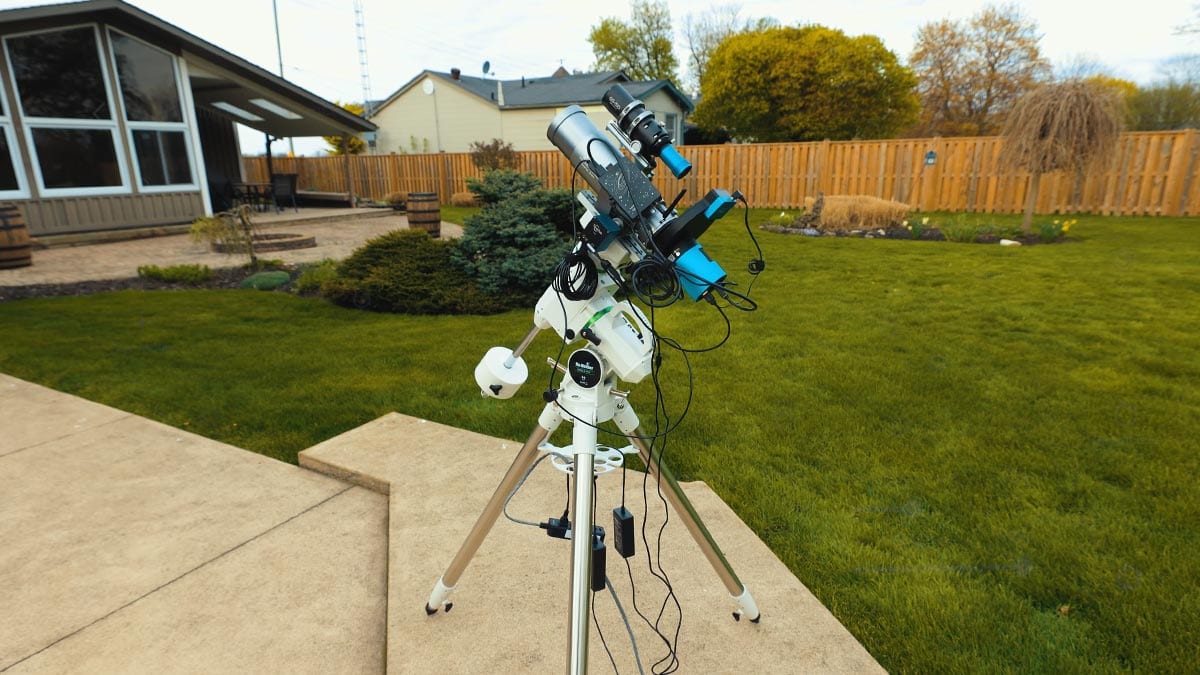
- Sky-Watcher HEQ5 Pro mount
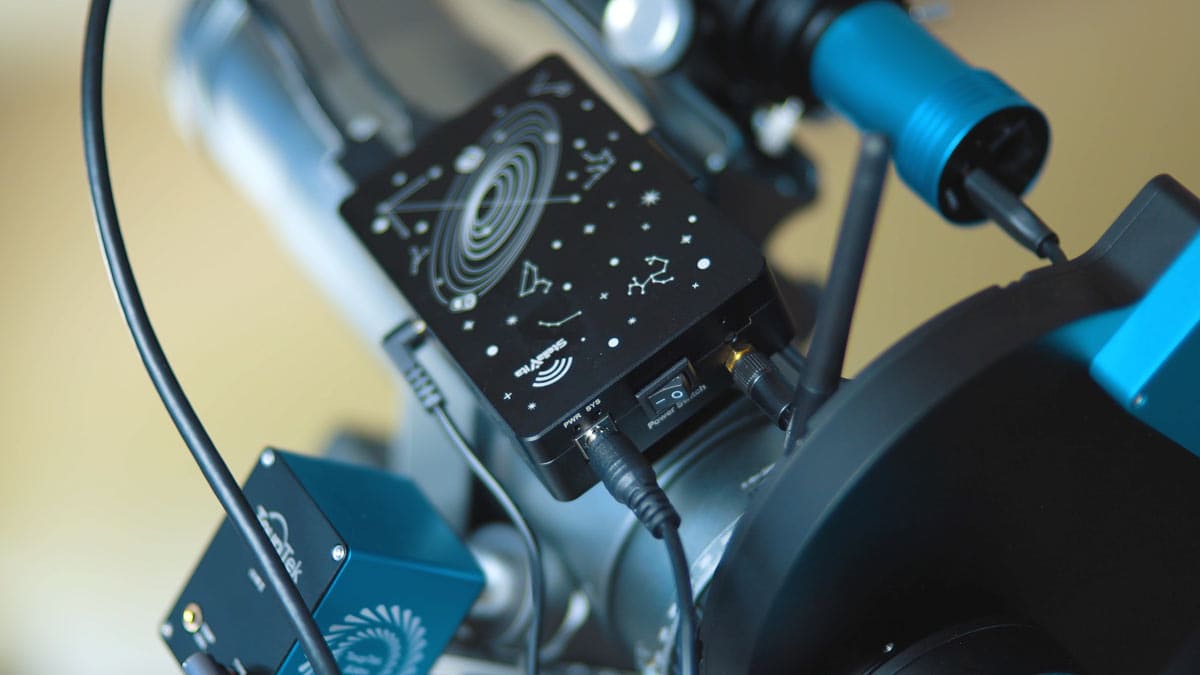
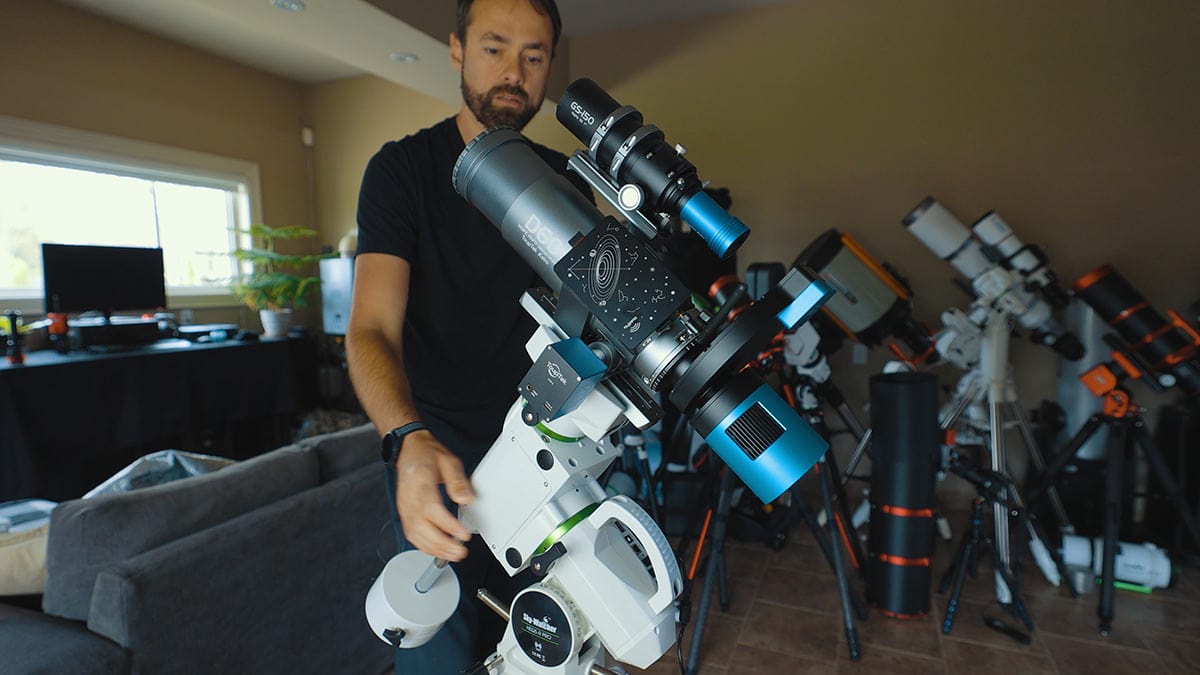
Getting everything connected was straightforward. Once powered on, the StellaVita became the central hub for the entire rig, which immediately cleaned things up. Fewer cables, fewer connection points, and a more organized setup overall.
Connecting to the app and getting familiar with the interface took a bit of time, but once everything was recognized properly, it was smooth to navigate.
Mount Control & Imaging Workflow
One of the biggest concerns going into the first night was mount control — and thankfully, this part just worked.
Using the HEQ5 Pro, everything from polar alignment to plate solving, tracking, and guiding performed flawlessly from the very first night, which was honestly a bit of a relief when trying a new system. There were no connection issues or unexpected behavior — it just worked.
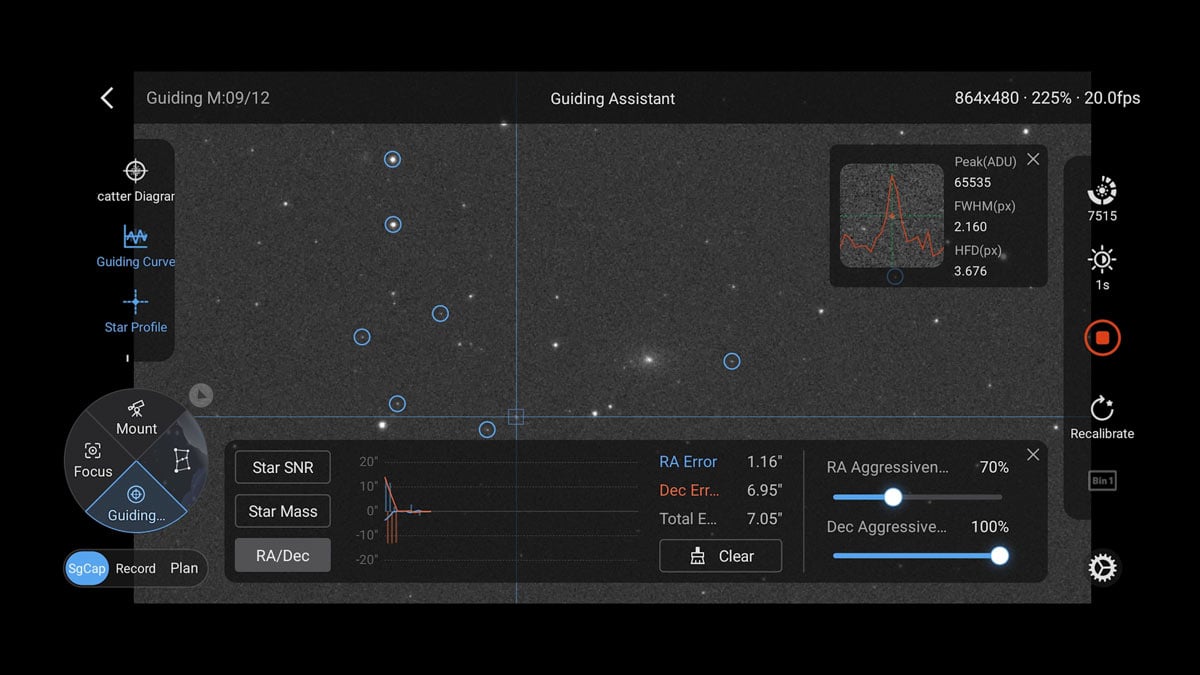
Guiding was equally solid with the 662M guide camera. Calibration was quick, and once it was running, it stayed consistent throughout the session. Multi-star guiding and dithering behaved normally, and there were no surprises in how the system handled corrections.
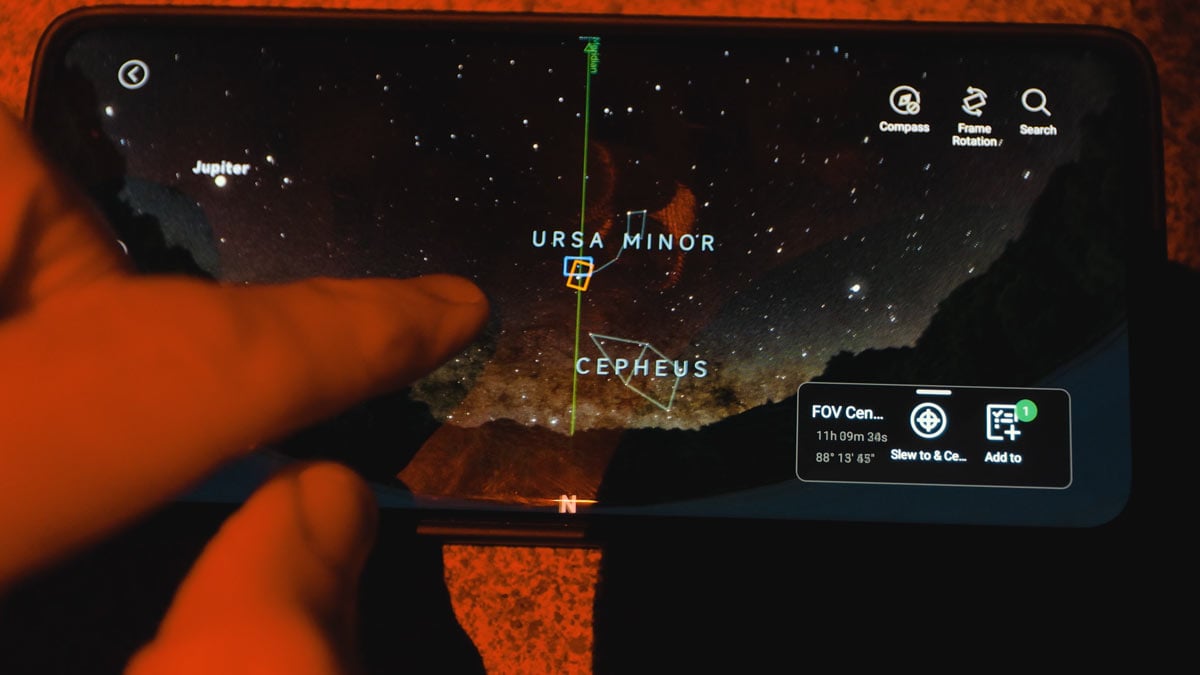
Framing targets using the built-in sky map worked as expected, as long as the location data was set correctly. Once everything was dialed in, building an imaging plan was straightforward.
Running a mono sequence with multiple filters is something you definitely don’t want to manage manually, and this is where things really came together. Once the plan started, the StellaVita handled filter changes, exposures, and sequencing without any intervention.
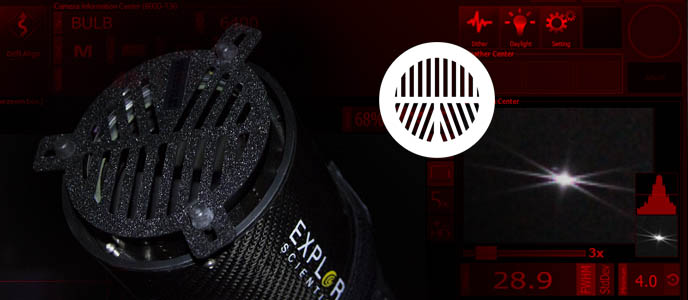
Autofocus & Overnight Performance
Autofocus was where things got a bit more unpredictable.
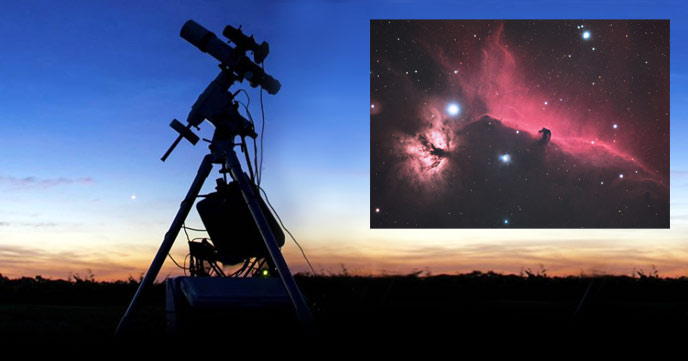
Manual focusing and initial setup worked fine, but during an automated imaging run, issues showed up. In one session imaging the Pinwheel Galaxy (M101), the system failed to properly focus the green filter, while red and blue came out fine.
Since this happened during an overnight run, it wasn’t something I could catch in real time. The result was a full set of out-of-focus green frames, which meant no proper color image from that session.
This stood out because autofocus is one of the key features you rely on when running unattended. When it works, you don’t think about it, but when it doesn’t, it can cost you an entire night of data.
Connectivity & File Handling
There were also a few practical things that stood out once the system was running.
Controlling the StellaVita wirelessly worked, but only within a limited range. The connection dropped off at around 20 feet from the rig, which meant using it from inside the house required a bit more setup. Adding a Wi-Fi dongle and connecting to the home network made a big difference, and it’s something you’ll want to configure early on.
File handling took a bit of getting used to as well. During testing, images were initially saved to internal storage after forgetting to switch to the SD card — which isn’t ideal.
Transferring files required connecting to the StellaVita’s Wi-Fi network, which worked, but meant I couldn’t use a normal internet connection at the same time. With the rig left assembled outside, this process felt noticeably less convenient than simply removing a USB drive.
This is one of those things you don’t really think about — until you’re trying to grab your files the next morning.
Things to Know Before You Buy the StellaVita
Before jumping into a system like the StellaVita, there are a few things worth keeping in mind – especially if you’re expecting a completely plug-and-play experience.
- It’s Not Fully “Set It and Forget It” (Yet): The StellaVita handles a lot of the heavy lifting, but it still takes time to dial in. The real test isn’t the first night, it’s whether you trust it to run while you sleep. Right now, a few areas (like autofocus) still need more consistency.
- The Learning Curve is Real: This setup simplifies a lot, but there’s still a learning curve – especially if you’re new to automation and sequencing. Expect some trial and error in your first few sessions.
- Open Compatibility Comes With Tradeoffs: Broad compatibility is one of its biggest strengths, but it also introduces some quirks. Closed systems tend to feel more polished, while open systems like this give you more flexibility with a few more variables to manage.
- Wi-Fi Setup Requires Extra Planning: The built-in Wi-Fi works, but the range is limited. If you want to control your setup from indoors, you’ll need a proper network setup using a dongle and bridge mode.
- File Transfer Isn’t the Most Convenient: Transferring files over Wi-Fi works, but it’s not as quick or simple as using a USB drive. If your rig stays outside, this becomes more noticeable.
- Firmware Updates Will Matter: This feels like a system that will improve over time. Many of the quirks seem like things that could be refined through updates, so keeping it up to date will be important.
- You’re Still the Weakest Link (For Now): Like any astrophotography setup, results still come down to how everything is configured. The StellaVita simplifies the process, but it doesn’t remove the need to understand what’s going on.
Community Notes & Viewer Feedback
The following community notes are based on the feedback, questions, and discussions shared by viewers and fellow astrophotographers in the comments section of our StellaVita YouTube review video.
- Open Hardware Compatibility: Many viewers liked that the StellaVita supports equipment from multiple brands instead of locking users into a single ecosystem. Compatibility and flexibility were repeatedly mentioned as major advantages over the ASIAIR.
- Software Improvements: Several users noted that the StellaVita software has improved quickly through recent updates, with many saying the newer app versions feel much more polished and capable than earlier releases.
- Comparisons to ASIAIR: The StellaVita was frequently compared to the ASIAIR. Most viewers felt ASIAIR is still the more refined platform overall, while StellaVita stands out for its openness, flexibility, and broader hardware support.
- Stability & Reliability: Some commenters reported occasional bugs or connection issues, while others said their systems worked reliably. Overall, many users seem optimistic but are still watching for continued software improvements.
- Guiding Performance: A number of experienced users praised the guiding performance, with some reporting excellent results and smooth tracking during imaging sessions.
- Beginner-Friendly Appeal: Viewers appreciated the compact, app-controlled workflow and simplified setup process, especially for portable astrophotography and users newer to the hobby.
- Common Feature Requests: Frequently requested improvements included better Wi-Fi stability, live stacking support, additional automation tools, and continued app refinement.
- Overall Community Sentiment: The general consensus was positive. Most viewers see StellaVita as a promising and flexible alternative in the smart astrophotography controller space, particularly for users who want broader equipment compatibility.
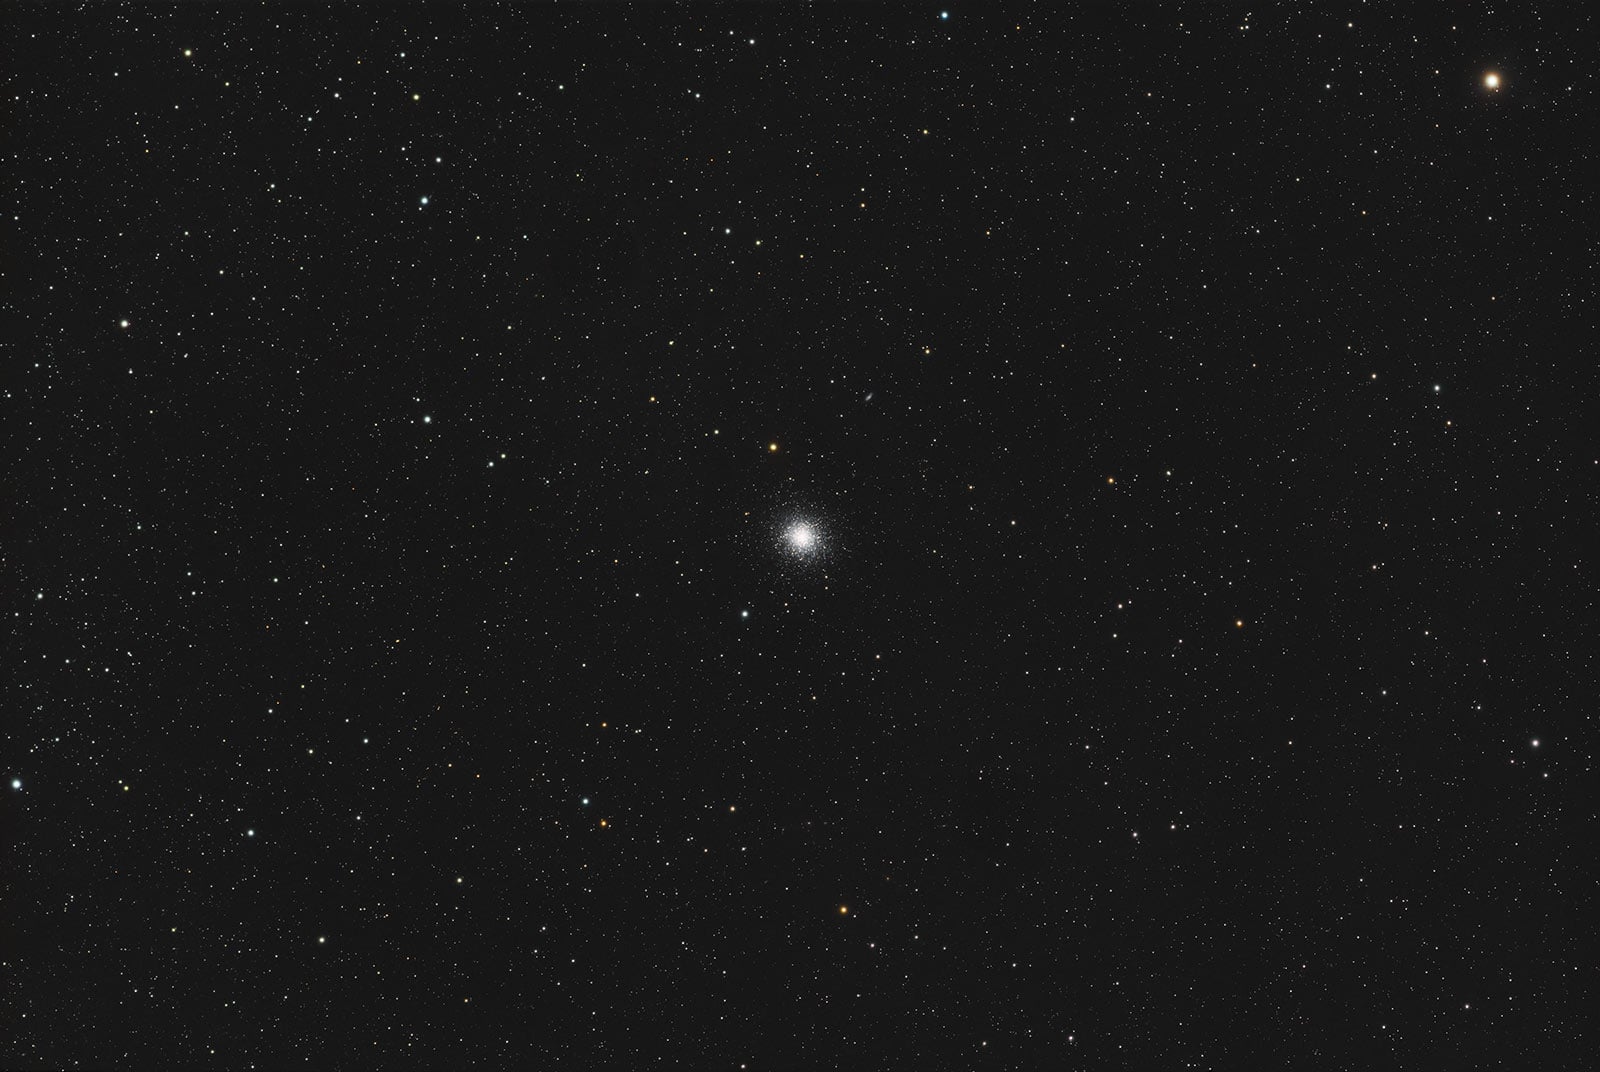
M13: The Hercules Cluster (Captured using the ToupTek StellaVita Rig)
Final Thoughts
 Trevor Jones is an astrophotographer and a valued member of the RASC. His passion is inspiring others to start their astrophotography journey on YouTube so they can appreciate the night sky as much as he does. His images have been featured in astronomy books & online publications, including the NASA Astronomy Picture of the Day (APOD).


Great write up (and video), thanks for sharing! I’m just getting started and bought the Stellavita today but have not tried it yet.