Astrophotography with a DSLR Camera and Small Telescope
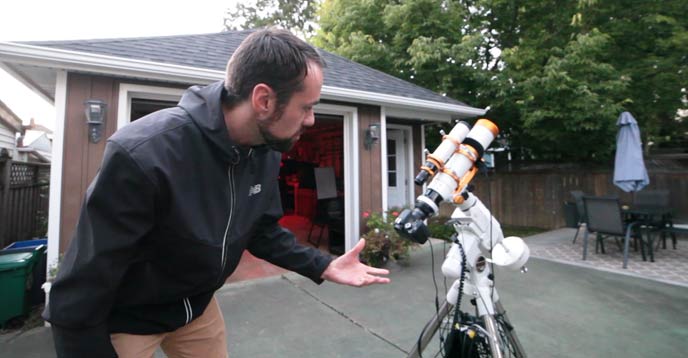
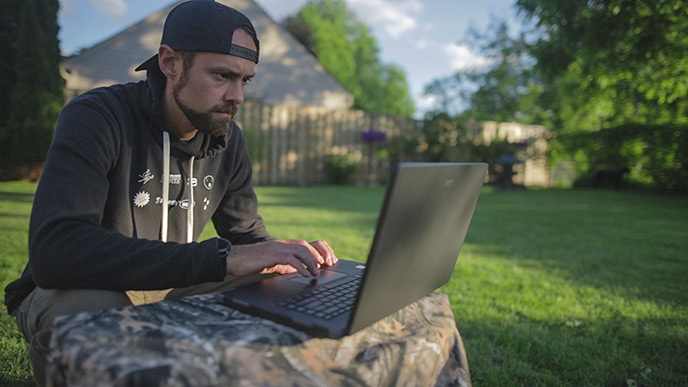
This week, I returned to my roots and enjoyed some deep-sky astrophotography using a DSLR camera and small telescope. Don’t get me wrong, dedicated astronomy cameras and heavy-duty mounts are great, but my latest imaging session in the backyard was a breath of fresh air.
In this post, I’ll share my early results with a new compact refractor telescope, the William Optics Zenithstar 73 APO. I’ve managed to collect some exposure time on a number of deep-sky objects using a crop-sensor (modified) DSLR.
My experiences with the Z73 have reminded me how much I enjoy deep-sky imaging through a wide field refractor with a DSLR. This is where my astrophotography journey began, and it has not lost its appeal over time. Not one bit.
Returning to my roots…
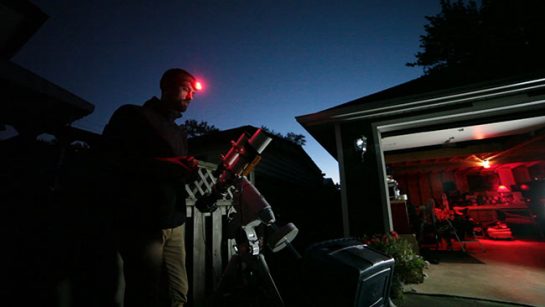
The cooler nights of fall have allowed me to begin using my DSLR camera again for astrophotography. The overnight low has dropped to about 8-10 degrees C, a welcome relief from the scorching, humid nights of summer.
The temperature of the sensor in my Canon EOS Rebel T3i has been hovering around 25 degrees C during my imaging sessions, which is still warm enough to produce quite a bit of noise. A 5-minute exposure at ISO 1600 is a lot to ask of a camera designed for daytime photography.
But enough about my old DSLR for now, let’s get to the fun part. (My new telescope). To stay up to date with my latest endeavors in deep-sky astrophotography, please subscribe to my email newsletter.

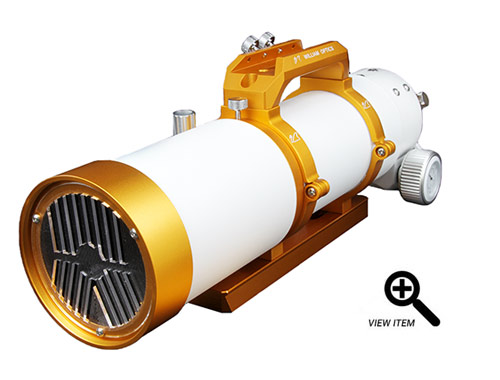
The William Optics Zenithstar 73 APO
The William Optics Zenithstar 73 is a compact doublet APO refractor designed specifically for astrophotography. Owners of full-frame DSLR cameras will appreciate its 45mm diameter illumination circle for edge-to-edge images.
After picking up the Z73 from the William Optics booth at NEAF, I am finally using this premium refractor for astrophotography at home in the backyard. A series of rained out camping trips and even a clouded-out star party put a lid on my summer plans to use this portable APO under dark skies.
This compact and lightweight apochromatic doublet refractor have a lot going for it, including an ultra-wide field of view and high-end Ohara FPL-53 objective lens construction. I was fortunate enough to receive a complete package that includes the dedicated Flat73 field flattener, 50mm Guide Scope and more.
When asked which color I prefer, I had to keep the tradition of white and gold alive to match the Z61 APO and FLT 132 refractors. This “big brother” to the Z61 uses a new mounting ring and guide ring design, that match the gold Vixen-style dovetail bar.

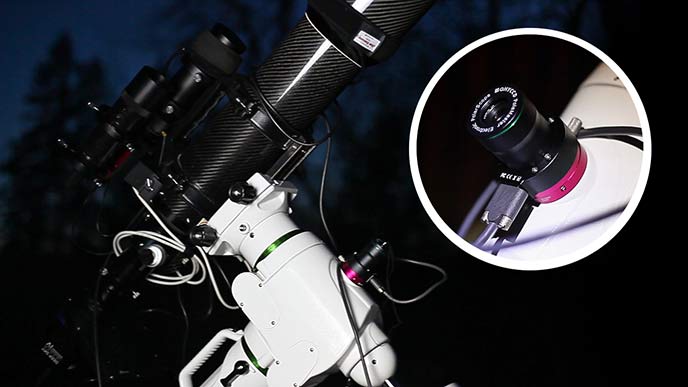
After taking the Zenithstar 73 out of the neatly packaged soft carry case, the first thing I did was separate the guide scope rings a notch to provide a more balanced hold of the 50mm guide scope. I removed the Rotolock (which is an added accessory from the standard package) to thread the dedicated field flattener in for astrophotography.
A great place to thread a 48mm filter (such as the Baader Moon and Skyglow filter pictured below), is on the Flat73. Then, you can attach the field flattener to the telescope with the filter inside.

I must say, I was spoiled with a totally complete package that included all accessories. These are additional items to consider when calculating the overall price of the package. The accessories for the Zenithstar 73 include:
Optional accessories:
- Soft carry case
- Flat73 1:1 Full frame flattener
- 2” Rotolock with M63 threads
- 50mm F/4 Rotolock Guiding scope
- 48mm T mount for Nikon or Canon
What’s nice is, William Optics outlines everything you’ll need for a deep sky astrophotography system – and you can order it all together. You don’t need to go searching for field flatteners or guide scope rings that will fit your telescope. Astrophotography is the number one priority behind everything William Optics makes.

William Optics Zenithstar 73 APO Specs
| Glass Type: | FPL-53 |
| Focal Length: | 430mm |
| F-Ratio: | F/5.9 |
| Weight: | 5.5 Lbs |
| Retracted Length: | 310mm |
| Focuser: | 2.5" Rack and Pinion |
| Dew Shield: | Integrated |
| Mount: | Vixen-Style Dovetail |
Deep Sky Images from a City Backyard
The timing of the full moon and the ever-present glow of my urban sky meant narrowband filters were the obvious choice. Even with a color DSLR camera, astrophotography can be enjoyed a great deal more with a simple clip-in ha filter.
The primary DSLR I use for deep sky astrophotography is an old Canon EOS Rebel T3i that has had the full spectrum modification performed. To compare it with a dedicated astronomy camera or CCD, you could consider it to be an un-cooled one-shot-color camera.
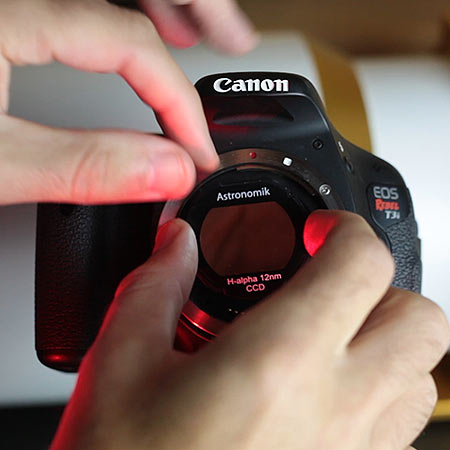
An Astronomik 12nm ha filter was snapped into the body of my APS-C sensor Canon T3i for the following images. With the Flat73 field flattener in place, it should come as no surprise that the stars in my image were recorded as pinpoints top the very edges of the image.
Sadr Region in Cygnus (Butterfly Nebula)
The Butterfly Nebula (IC 1318) is a rich emission nebula region in the constellation Cygnus. It is part of a much larger complex of gas and dust residing in the Sadr region. The photo below shows off the wide field of view and crisp stars you can expect when using an entry-level DSLR with the Z73.
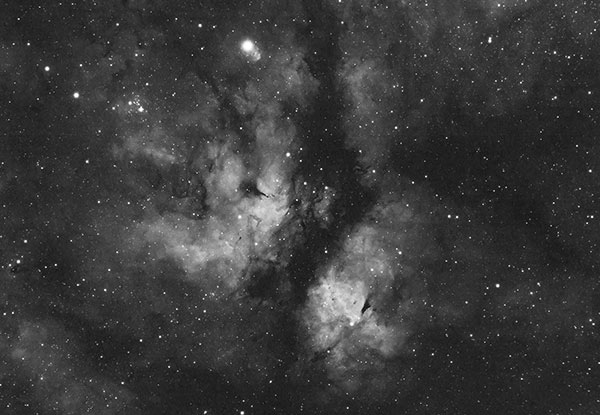
I captured roughly 2 hours worth of exposure time in Ha using my Canon T3i through the Z73. The images are free of star-trailing and elongated stars thanks to the accurate tracking of my Sky-Watcher HEQ Pro Synscan mount.
This mount is a twin to the Orion Sirius EQ-G GoTo, which I often recommend to beginners as a robust, astrophotography-worthy mount for a setup like the one shown on this post. With a sound polar alignment routine, this equatorial mount can consistently provide sharp images of 5-minutes or much more. (The longest I’ve shot was 10)
The iOptron CEM60 center-balanced mount I used for the past 12 months has been returned to its rightful owner after a generous extended loan from Ontario Telescope. Luckily, the 5.5-pound William Optics Zenithstar 73 is nowhere near the limits of the HEQ5’s payload capacity.

The Heart Nebula in Cassiopeia
Next up is a rather dynamic looking nebula in Cassiopeia known as the Heart Nebula. As you can see, this massive target fits within a single field of view using the Zenithstar 73 with a crop-sensor DSLR camera. The F/5.9 aperture of the Z73 provides a healthy balance between light gathering ability and sharpness.
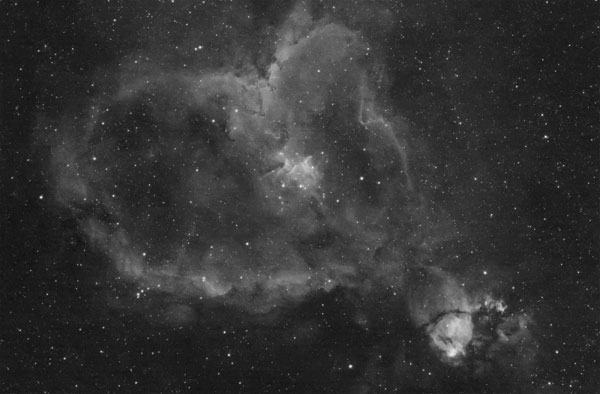
Both the Butterfly Nebula and Heart nebula images were produced using 5-minute image exposures at ISO 1600. Astro Photography Tool was used to automate the image captures, with PHD2 guiding helping to accurately guide my HEQ5 mount during each sub.
Dithering between each image and stacking multiple light frames helped to improve the overall signal to noise ratio in the images. The individual light frames were very noisy, but using dark frames in the stacking process (DeepSkyStacker) can really help to correct this.
Why I love a DSLR Camera and Telescope Setup Like This
For the type of astrophotography I’m most interested in these days, it’s hard to beat the photography opportunities available at the 400-500mm focal length. At 430mm and F/5.9, the Zenithstar 73 fits the profile of the ultimate wide field APO for deep sky.
I’ve repeatedly mentioned how much I love to use APO refractor telescopes, and I believe that they offer a better user experience and more consistent astrophotography results than any other telescope type.

Telescopes that offer a longer focal length (of 1000mm or more) are great for small DSO’s and galaxies, but deep sky objects that cover a large area of the sky such as the Heart Nebula are impossible to photograph with a DSLR without creating a mosaic.
One of the advantages of having a wide field of view is the ability to capture multiple deep sky objects in a single shot. It allows you to get creative with the framing of your target next to a star cluster or some interesting nearby nebulosity.
The photo opportunities are endless, and you may find a lifetime of ideas before feeling the need for a telescope with an increased focal length.
Image Processing Narrowband Images from a DSLR
Here is a look at the individual light frames using the Canon T3i through the Zenithstar 73. The images have a red cast because of the strong narrowband filter that was used (h-alpha). I have registered and stacked the images just as I would with a color image in DeepSkyStacker.
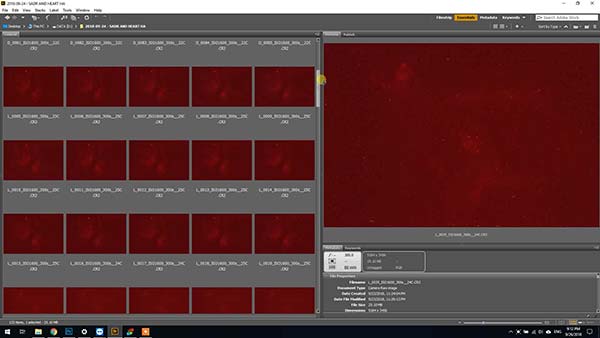
Reviewing my RAW images in Adobe Bridge
DeepSkyStacker
For the Heart Nebula, I’ve got about 5 hours of total integrated exposure time. This is two nights worth of shots that I’ve separated into their own tabs in DSS. I captured matching dark frames of the same temperature, and also bias and flat frames to help produce the highest quality stacked image possible.
Extracting the Red Channel from an RGB image
The trick after that is – to extract the red channel with the strongest signal in Photoshop. Have a look at the difference in the image quality of the red channel alone vs. the full RGB image with weak Green and Blue channels.

Notice the difference in signal from the red channel to blue when using a 12nm h-alpha filter
I copied the red channel out to a new image canvas and processed it using many of the same techniques as a traditional deep sky image such as minimizing stars, a curves stretch and a bit of noise reduction. This greyscale image can then be added to existing color data, or become a part of a complete narrowband project that include SII and OIII.
For now, I’ll just enjoy the black and white image in good old Hydrogen Alpha.
Final Thoughts
It felt great to use my DSLR camera for some astrophotography again. I began my journey many years ago with a camera and telescope like this. If you are a beginner that’s thinking about taking the plunge into deep sky astrophotography – I think you should go for it – and a setup like this is likely the best way to get started.
Next, I’ll shoot some broadband color images using a full-frame DSLR with the Zenithstar 73 to really take advantage of the fully illuminated image circle. The Sky-Watcher HEQ5 has proven to be a reliable GoTo mount over the years and continues to deliver incredible results for me. I look forward to more sessions like this in the coming weeks as the longer, cooler nights usher in the new deep-sky targets of Fall.


Hi Trevor,
I’ve been enjoying your posts and videos since (I believe) you had less than 1000 Youtube subscribers. So long in fact that when you post a new video I often say to my wife that “my buddy Trevor” has a new video up. We really enjoy them, Thanks!
Quick comment about the use of the term APO by manufacturers these days, by an only moderately informed observer (me).
Abbe’s original definition of the term APO is:
1. Three widely spaced wavelengths are brought to the same focus.
2. Two of the wavelengths are corrected for SA and Coma.
3. One of the crossing points for color correction coincides with one of the crossing points for SA and Coma and this crossing point is as close as possible to the Fraunhofer e-line.
The fairly recent evolution of the term APO or ED APO when describing a doublet, is in reference to the perceived “visual” color performance. I think the consensus view is that a doublet refractor won’t meet the definition of APO when used with CCD or CMOS sensors due to there increased sensitivity.
Here’s an interesting discussion of the topic:
https://www.cloudynights.com/topic/503032-apo-doublet-vs-triplet/
Thanks Again!
Mark
Mark – thanks so much for coming along for the ride man. It’s comments like this that really motivate me to keep going. Interesting point about how the term “APO” is thrown around these days. I definitely think of an APO in terms of the visual color correction performance (whether its a doublet or triplet). I am sure its one of many ramblings I make that drive the purists nuts. Just when I thought I learned my lesson about CCD’s…
I was hoping for a review on this scope. In your experience, is the iOptron Skyguider Pro capable of carrying this scope with camera (500-700 g), without guiding scope? Or is the William Optics Zenithstar 61 APO already near the maximum practical load of the Skyguider?
I’m considering both the 61 and 73 as a starting scope for astrophotography, but I do want to have a mobile setup, without adding a dedicated tripod to my photography gear (therefore the Skyguider).
The specs of the Skyguider indicate it can go to 5 kg + 3kg balance, but that doesn’t mean it still functions optimally.
Id stick with the Z61 on the SkyGuider Pro. With a DSLR connected the counterweight is already at the end of the shaft. I’ve personally seen great results with the Z61 + SGP combo (3-minute subs, unguided). I think the Z73 is just is too heavy for consistent results on a mount of that size. Cheers
I’m confused. He’s using an HEQ5.
Trevor, Thanks once again for a great show. It was particularly pertinent for me as I just received my WO 73mm scope packaged with the WO EQM-35 Mount. One question I have is what are your DSLR exposure and live view settings during alignment? I have trouble seeing the target star on the live view screen on my Canon 70D. I’m not using any filters, yet, so I do have quite a lot of light pollution.
Even when I’m shooting the moon I have to center the moon to see lunar details otherwise live view blows out the moon. I usually shooting at f/5.9 through the WO 73mm at 1/160 – 1/320 depending on the lunar phase.
Hi Ed – congrats on the new WO scope! My live view settings on the T3i are ISO 6400, exposure set to 30″. That’s usually enough to see the bright stars in real time. To see any of the actual DSO’s requires a quick test shot of anywhere between 10-30 seconds – and I usually bump the ISO down to 3200 or below to not cook the sensor:) Cheers!
I really enjoyed this video and article, as I do all of your stuff. My main question to you is this: given the availability of dedicated CMOS cameras, what benefit would someone have spending 600 dollars to buy a DSLR and then get it modified versus about the same money for CMOS? Sensor size? I have an old Canon 450D lying around, and I might take a crack at modifying it myself, but I just don’t see the reason to pay 200+ to have the camera modified.
Hi, I have enjoyed your demo for about 2 years now and lately considering Z73. Looking at the budget and for crop sensor question was do I really need the dedicated field flattener Fl73 or can one still use an existing one from Orion used in 80mm ED?
Z73 is right at a sweet spot on price for the size and focal length for some or the larger targets in my opinion as long as one can reuse all the existing gear and also great for DSLR.
Hi Trevor,
For 430mm f/6 refractor, would you recommend a 1:1 flattener? or x0.8? I know it comes down to a personal preferences but which do you think is better? I have a modified cropped DSLR at the moment, but I am hoping to step up to a 4/3″ camera in the future. Thanks in advance!
James – Personally, I’d stick with the 1:1 flattener as the field is already huge with your DSLR. With that being said, an 0.8X reducer could come in handy with a smaller sensor. I’d like to use my full frame camera with the Z73 soon, so the 1:1 is a good fit!
Thank you very much for the advise Trevor!
Thanks so much Trevor..!
Hi Trevor ,
Firstly , thanks for all the You Tube vids .. for someone , like me who really wants to get into Astrophotography they are priceless.
I’ve just bought a WO Z73 , but as yet have had no luck imaging with it . I’m so new to this side of astronomy so its taking a bit of time to set everything up perfectly. But , i’m getting there and , finally , seeing “my ” perfect little scope in action , from yourself was great .
The fact that you achieve such great results from an urban site gives us all hope.
Once again , Many thanks .
Hello Trevor, thank you for posting all your content. You have sparked my neurons to thrive on Astrophotography and Astronomy.
I dont know where to correspond with you so I am hoping you can give me some feedback.
I am very interested in the new svx080mm from stellerview. Do you think optically it will be any better than the sv80t? How nice of a setup would losmandy g8 and this telescope be? How long of an exposure do you think it would pull off with a guide camera.
Would you be inclined to go for the svx80 or a sv102t?
Any thought about Altair’s Starwave 70-EDQ-R to be used with the skyguider pro as a first (portable) setup instead?
Hey Trevor, I’m new to Astrophotography, your blog has taught me everything I need to know, thanks so much. I’m going to buy my first small telescope for my skyguiderpro soon and decided to detocate to the William optics z61. Because I am planning on shooting the heart nebula, from the research I have done I was sure from the online focal length calculators that the z73 would not be wide enough to capture the full heart nebula. But after seeing this article it seems the heart nebula fits just fine into the z73 sensor on a aps-c sensor like my canon t6s. If this is true, would it be unrealistic to mount the z73 to the skyguider? William optics is selling a bundle with the z73 and the sky guide so I assume that the weight isn’t too much right? I just don’t want too wide of a field of view if you know what I mean, but the z61 might do just fine for now. Please don’t feel like your obligated to respond, your probably very busy, but I thought it was worth asking a beginner friendly expert like you for advice. Thanks for everything!
Hello Trevor! All right? Congratulations on your beautiful work! I learn a lot from your tips and your videos. I have a question about the Zenithstar 73 APO. I’m buying it now but I’m in doubt on the mount. I have the complete SKYWATCHER STAR ADVENTURE mount and a tripod that supports 16kg (35lbs). Is this enough to make astrophotographs? Is it worth buying another set? Goto?
Thank you for your guidance.
Success and happiness
Wagner
Trevor,
Great website and YouTube channel. Just getting started but have learned a lot from your awesome content.
Regarding using DSLRs, can you give some advice on DSLR settings like white balance and noise reduction. For instance, do you think we should use the built in noise reduction, or turn it off and handle it via stacking, dithering, etc? Any other recommendations on DSLR settings?
Thanks a bunch!
Can you connect telescope to computer direct via mount to use ascom prog
Trevor, What is the back focus length used with the Flat73 and a DSLR? I’ve seen 54.8mm for some CCD cameras.
Can you use a unmodified Canon T7i with this setup?
Hi Trevor love the work your doing and the gear ! OMG lol 😉 I am just starting out and have had some success in a Bortle 7 driveway in Mississauga. I have been however overexposing my images. So in my research I found the formula for min. exposure time for my location. Which works out to ~10.3 sec. I will of course be testing between 10 and 30 seconds … I have however now entered the decision to be made regarding gain. I am shooting with the 6d mark ii, and have decided on 800… though 1600 looks promising in regards to less noise on stack. In your article you are using long exposures and reasonable gain numbers and not over exposing ? (I am using the L-Pro which in post gives nice darkness). (f5.9) If you have time can you comment on gain, Kindest Regards, Michele.