Sky-Watcher Heliostar 76 Hα Solar Telescope | In-Depth Review
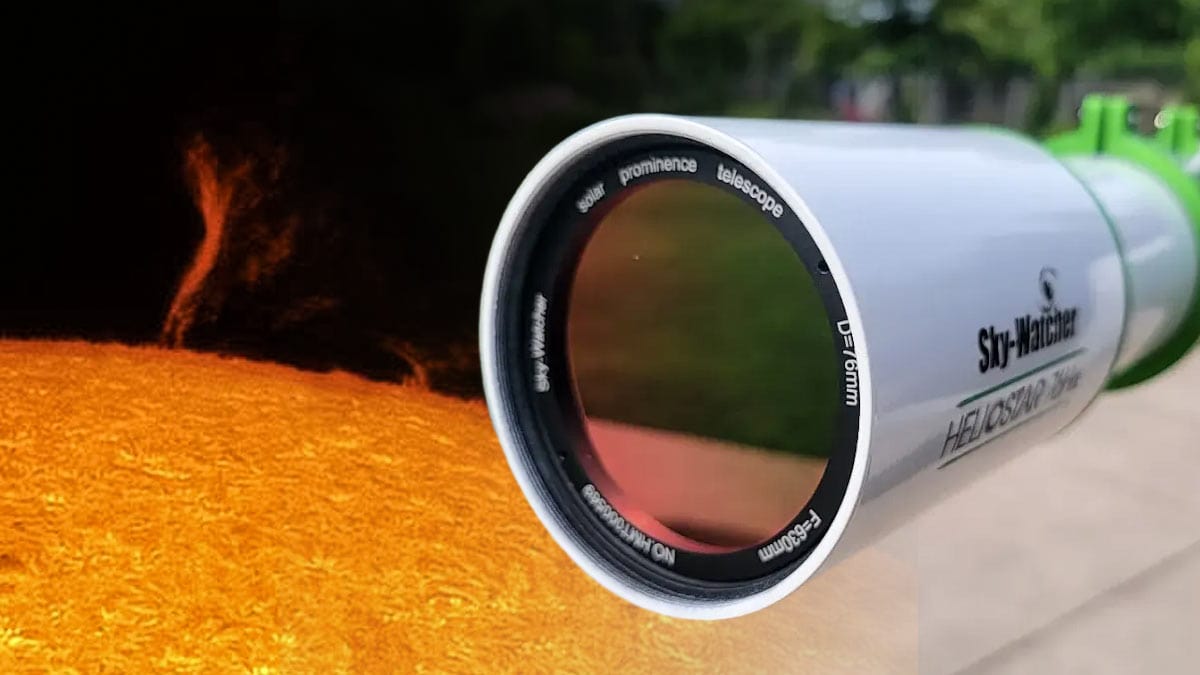
Sky-Watcher has added a dedicated Hydrogen-alpha (Hα) solar telescope to their lineup, and if you’ve never seen the Sun in H-alpha before, you’re in for a treat.
Unlike basic white light filters, H-alpha lets you dive into the details on the surface of our star. Things like solar prominences, active sunspot regions, and plasma filaments drifting across the surface. It’s a whole new way to experience the Sun.
The Heliostar 76 Hα is a great fit for beginner to intermediate solar observers and imagers who are ready to take their view of the Sun to the next level.
What makes it stand out is its ability to deliver double-stack performance using just a single etalon, giving you rich surface detail and incredible contrast.
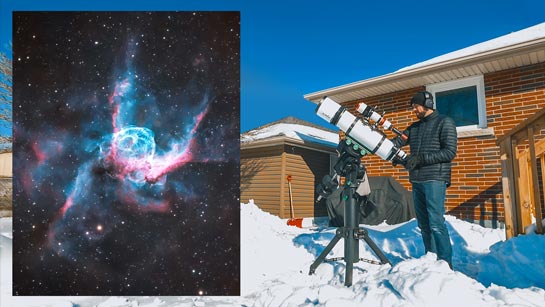
The Sun in H-Alpha. Sky-Watcher Heliostar 76 solar telescope + ZWO ASI290MM Mini (6 panels, stitched together in Photoshop).
Overview of the Heliostar 76 Hα
With the Sky-Watcher Heliostar 76 Hα, you’re getting double stack-level performance, without needing to actually buy a second filter.
In solar astronomy, most H-alpha telescopes start with a single etalon filter. This special filter isolates a very narrow slice of light around the Hydrogen-alpha wavelength (656.28 nm), which is what reveals all that stunning surface detail on the Sun. But with just one etalon, you often get more contrast at the edge of the Sun, and a little less on the surface itself.
That’s where double stacking comes in. By adding a second etalon filter, you narrow the bandpass even more, bringing out much richer surface features and details – like filaments, granulation, and plage. The downside? It usually means more complexity, more tuning, and a much higher price tag.
I mounted the Heliostar 76 to the Sky-Watcher SolarQuest Sun Tracking Mount. This made it extremely quick and easy to find the sun using its built-in GPS and HelioFind solar finder technology.
The Heliostar 76Ha is tuned to a bandpass of <0.5 Å right out of the box, which is in the range you’d expect from a double-stacked system. That means you’re getting incredible contrast and detail, especially on the Sun’s surface, without needing a second etalon.
That said, this is still a dedicated solar telescope. And while it’s priced competitively for what it offers, it’s definitely an investment.
You’re paying for high-end, Hydrogen-alpha performance, with one very specific purpose: viewing and imaging the Sun. It does that one job, and it does it really, really well.
Feature |
Specification |
|---|---|
| Aperture | 76 mm |
| Focal Length | 630 mm |
| Focal Ratio | f/8.3 |
| Optical Design | Achromatic doublet, H-alpha optimized |
| Etalon & Tuning | Solis Etalon Technology with integrated Triffid pressure tuner |
| Bandpass | < 0.5 Å |
| Lens Coatings | H-alpha fully multicoated |
| Focuser | 2″ dual-speed Crayford |
| Blocking Filter | 11.5 mm (1.25″ diagonal format) |
| Finder | Integrated Heliostar solar finder |
| Included Hardware | Tube rings with carry handle |
| Weight | 8.4 lb (3.8 kg) |
Included Accessories
The Heliostar 76Hα comes with everything you need to start observing the Sun right out of the box.
It includes mounting rings, a V-style dovetail bar, a Heliostar solar finder, a smooth dual-speed Crayford focuser, and an 11.5mm blocking filter for safe and detailed views. You’ll also find a clip-on sunshade and a wide-field 20mm 70° eyepiece (1.25”).
Everything fits neatly into a hard-top carrying case, making it easy to take your solar setup anywhere. Pair it with the Sky-Watcher SolarQuest mount and you’ve got a fully portable, auto-tracking solar telescope system that’s perfect for grab-and-go observing.
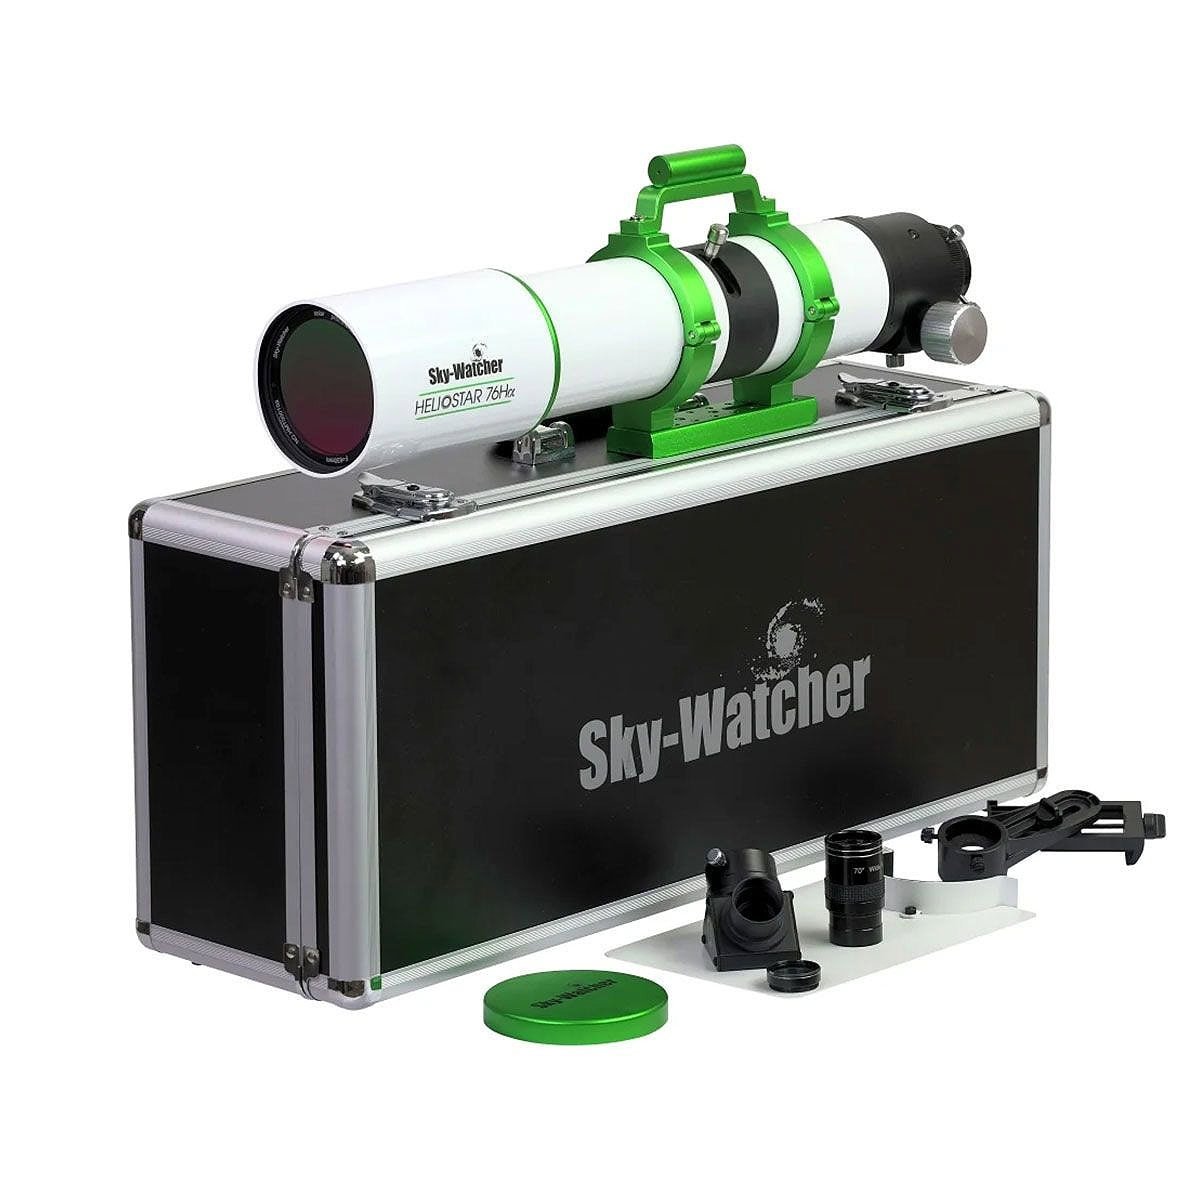
The Heliostar 76 package includes a hard carry-case, diagonal, clip-on sun shade, and a 20mm eyepiece.
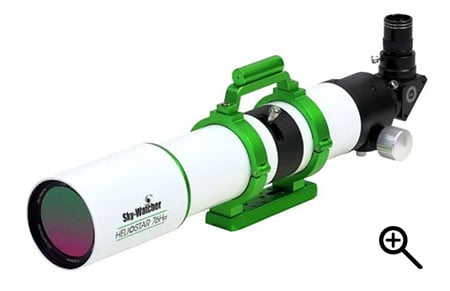
Build Quality & Design
The Heliostar 76Ha feels solid the moment you take it out of the case. The overall construction is sturdy with quality materials, while still being light enough to grab and go.
At just 8.4 lbs, it’s easy to transport – whether you’re setting up in the backyard or taking it to a solar outreach event. The included hard case keeps everything together and safe.
The telescope features high-end finishes, including a raised ‘Sky-Watcher’ logo on the side of the scope and on the lens cap.
One of the standout features is the Trifid tuning system, which lets you easily adjust the etalon to bring out different layers of solar detail. You can shift from sharp, high-contrast surface features to crisp, detailed prominences along the Sun’s limb.
The Heliostar is also refreshingly user-friendly for a dedicated H-alpha scope. There’s no complicated setup process, no pile of extra adapters to figure out – you can be observing within minutes of unboxing.
For beginners, that means less time troubleshooting and more time actually enjoying the Sun’s incredible details.
Public Outreach
One of the biggest “wow” moments you can give someone at a public astronomy event is their first view of the Sun through an H-alpha solar telescope.
Most people have never seen our star in this level of detail – the prominences, dark filaments across the surface, and active regions bristling with energy. It’s an unforgettable experience that changes the way people think about the Sun.
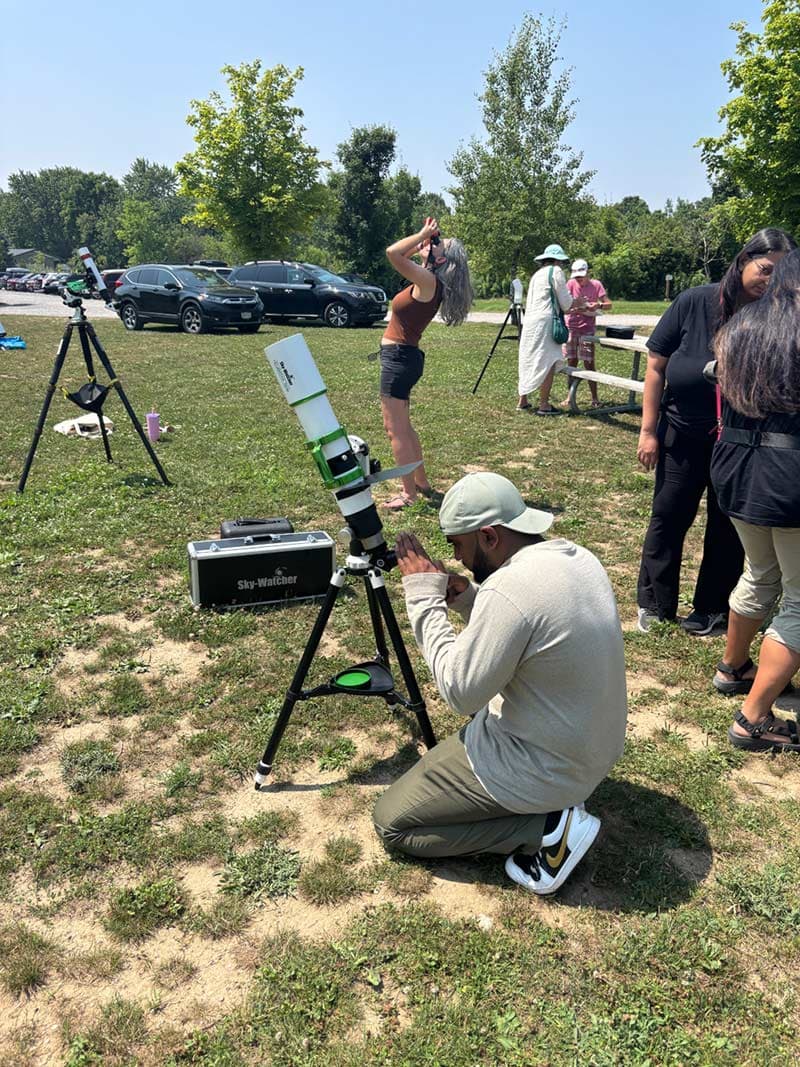
Ashley brought the Heliostar 76 to a public astronomy event. Everyone was impressed with the views through the eyepiece!
This telescope is great for public outreach because it’s quick to set up, easy to operate, and provides that instant “wow factor” without having to wait until nightfall. Solar astronomy can happen anytime there’s clear daytime sky. This makes it perfect for school visits, daytime festivals, and science fairs.
Its integrated blocking filter and tuned H-alpha etalon ensure that the view is both spectacular and safe, so you can focus on sharing the experience without worrying about complicated safety add-ons.
Setting Up for Solar Viewing
Safety First
The Heliostar 76Hα is a dedicated solar telescope built specifically to observe the Sun in stunning Hydrogen-alpha (Hα).
But just because it’s designed for solar viewing doesn’t mean you can skip the safety steps. In fact, solar telescopes follow different rules than white-light solar filters.
The Heliostar has a built-in Hα etalon and a permanently installed blocking filter/diagonal – this combo is what makes the view safe for your eyes. Never remove or forget to install the blocking filter, ever. It’s a critical part of the system, and taking it out, even just once, can cause permanent eye damage.
Unlike night scopes, where you might swap out accessories, solar scopes are precisely tuned systems. Always double-check everything before aiming at the Sun.
It’s an amazing experience, but remember: safety first, always when observing the star at the center of our solar system.
Mounting Options
You can mount the Heliostar 76 to your existing equatorial tracking mount using the included tube rings and V-style dovetail bar. This is an excellent option if your telescope mount is already polar aligned from the night before, or in a permanent backyard observatory.
Sky-Watcher offers a package that includes the SolarQuest tracking mount. Once you turn it on, it will automatically use a GPS signal to understand its location and point to the sun for you.
While the Heliostar 76 Ha is within the payload capacity of the mount (11 pounds), it feels a little unbalanced overall. You will need to be careful not to tip the mount over when the weight of the telescope is leaning to one side.
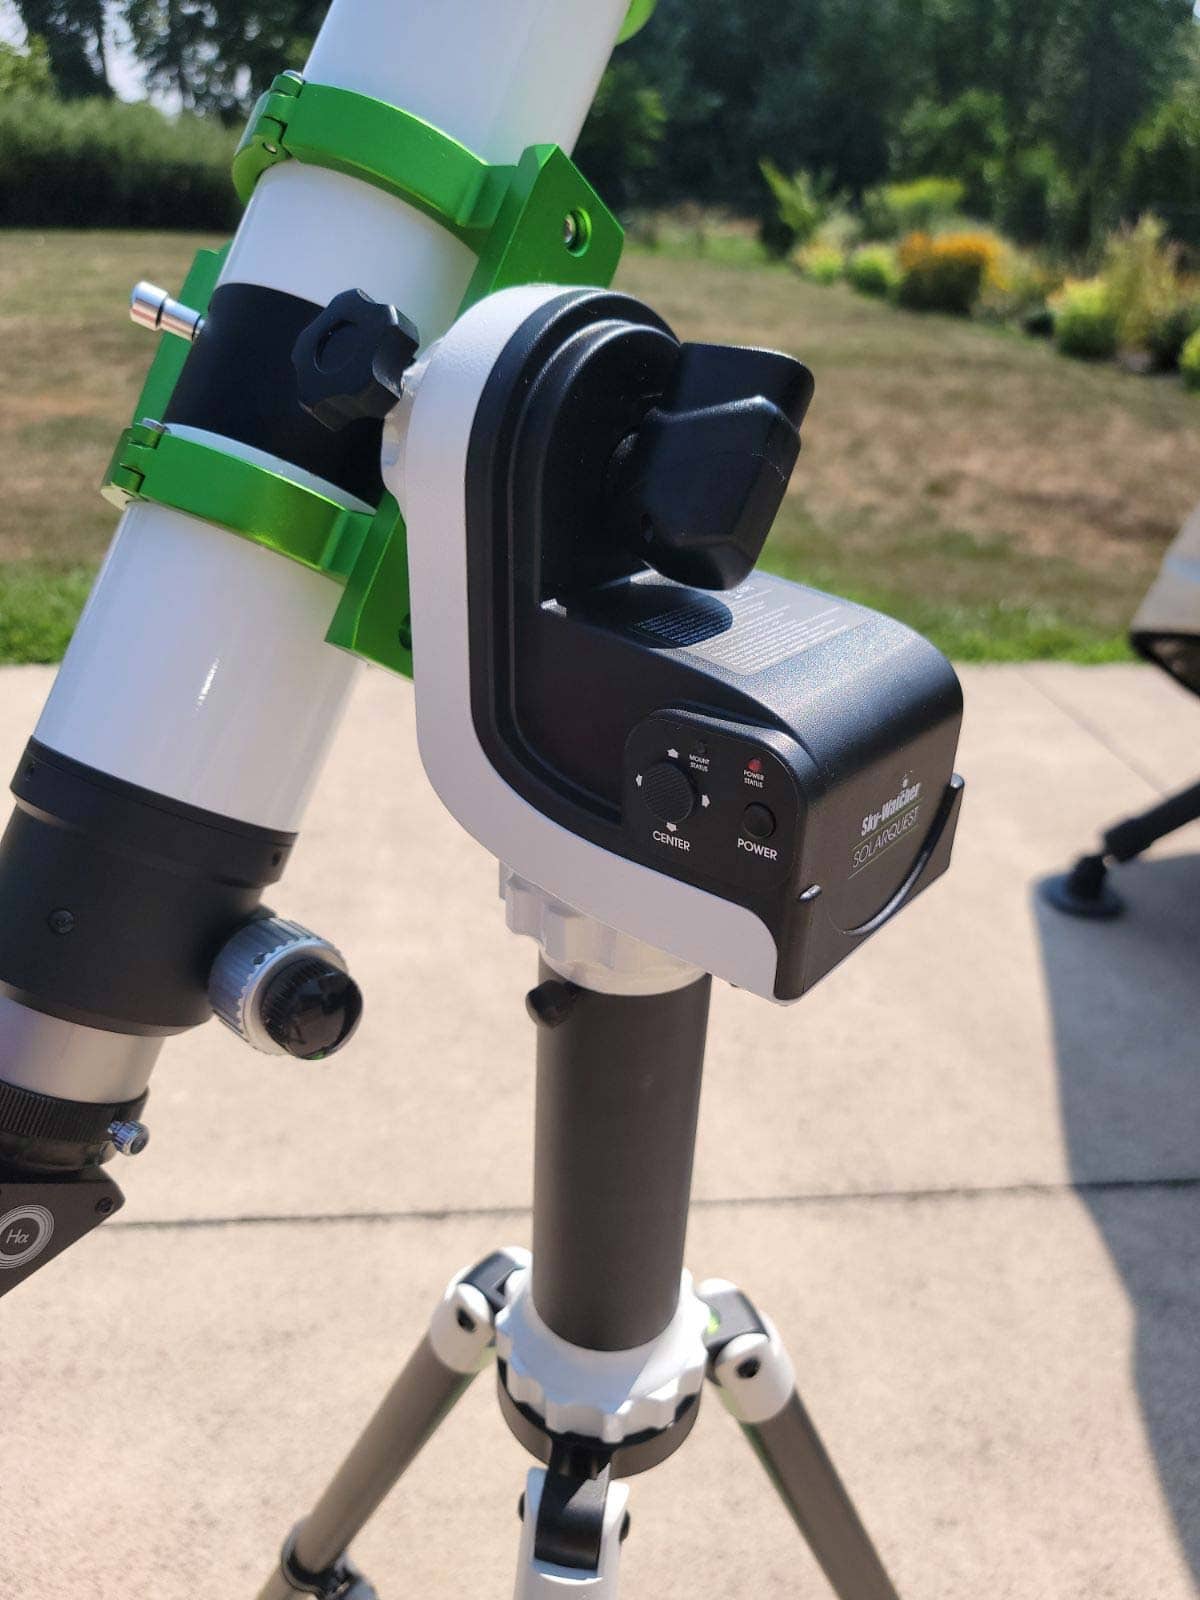
The SolarQuest mount offers ‘one-button’ alignment. You just turn it on, and the mount automatically finds and tracks the sun. There is a little joystick on the unit you use to fine-tune the positioning.
First Light: What You’ll See
With a 76mm aperture, you’ve got plenty of resolution for both high-quality visual observing and imaging.
When you look through the Heliostar 76Ha, you’ll see the Sun come alive with amazing features like towering prominences reaching out into space, delicate filaments weaving across the surface, and dynamic active regions buzzing with energy.
The fine details of the chromosphere (the Sun’s fiery atmosphere) really pop in this scope, giving you a front-row seat to solar action you just can’t get with regular filters.
To get the best views, you’ll spend a little time tuning the etalon using the built-in Trifid system. It’s a simple back-and-forth dial that sharpens contrast and brings out those subtle features in stunning detail.
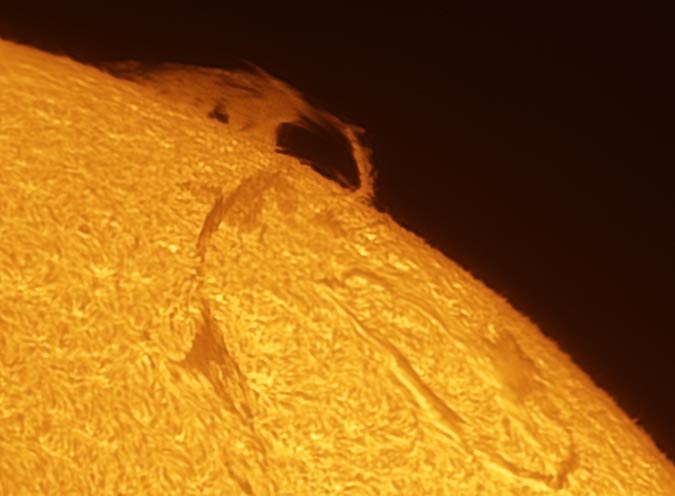
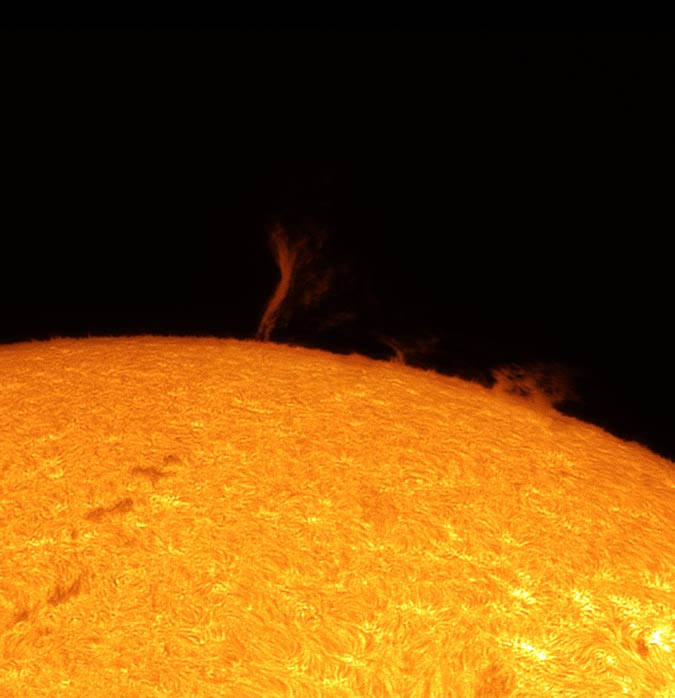
A solar prominence captured using a ZWO ASI290mm Mini astronomy camera through the Heliostar 76 Ha.
Capturing Solar Images
Creating solar images has a similar workflow to planetary photography of solar system objects like the moon and planets. It involves taking short video files of the sun using a high frame rate.
The idea is to capture a short video with as many single frames as possible (anywhere from 500-10,000 frames), so that you can extract the single frames during moments of good seeing. The ‘best’ frames are then stacked to improve the signal-to-noise ratio and reveal better details on the sun.
I use software called FireCapture to control the camera settings and record the video files. I run the software on my laptop computer outside, connected to my planetary astronomy camera (ZWO ASI290MM Mini) via a USB cable.
Related Article: How to Photograph Planets (With Any Camera)
Choosing a Camera
For solar photography, a dedicated astronomy camera is best. These types of cameras can record the high frame rates needed to create a detailed image of the sun. a
While you can still photograph the sun through a solar telescope with a DSLR camera (or Mirrorless), you’ll want to invest in a planetary camera like the one shown below to fully utilize the Heliostar 76.

The ZWO ASI120MM Mini is an affordable choice for anyone looking to try solar imaging for the first time.
A monochrome planetary camera is recommended to capture the best possible signal through a solar telescope. You can always ‘colorize’ the image afterward if you don’t like the idea of a black and white photo of the sun.
Acquisition Software
For solar imaging, most astrophotographers use FireCapture, or SharpCap. FireCapture has everything I need to fully control the camera settings on my ZWO AS290MM Mini, and the user interface is easy to understand.
The primary settings you need to choose during the acquisition (video recording) stage are the frame size, exposure, and gain settings. Astrophotographers often use the ROI (region of interest) setting on their camera, which is usually a smaller image with a higher frame rate.
Framing and Focus
Focusing the Heliostar on the surface of the sun is pretty straightforward. Once you have found the sun (this was a non-issue for me using the SolarQuest mount), you focus your camera the same way you would on any astronomical telescope.
The 2-inch dual-speed focuser on the Heliostar is nothing special, but it feels smooth and secure. A slight turn of the focusing knob was all I needed to see the incredible surface of the sun come into view.
File Types and Format
The recommended file format for solar imaging videos is ‘SER’. This is a high-quality video format that creates the best possible file to extract image frames. The only downside of this format is the extremely large file sizes it creates.
A typical 60-second video of the sun can be upwards of 1-2GB, depending on the frame size. This adds up quickly as you take more and more video files, so make sure that your laptop computer has plenty of hard drive space before a day of solar imaging.
For this solar image, I chose a 600 x 600 frame size to find a balance between field of view (FOV) and frame rate. Ideally your frame rate will hover around the 50 FPS mark to capture brief moments of clarity. The larger your FOV, the slower your camera’s maximum frame rate will be.
Processing Solar Images
The image processing side of solar photography is quite different than my typical deep-sky astrophotography workflow. Rather than stacking a series of dark, long-exposure images of the night sky, this process uses bright, ultra-short (less than 1-second) images.
There are two main tools that solar system photographers use to create sharp images of the sun. The first tool, AutoStakkert, is used to analyze video files, extract the best individual image frames, and align them together. This creates a stack of image frames, usually in the 500-1000 range.
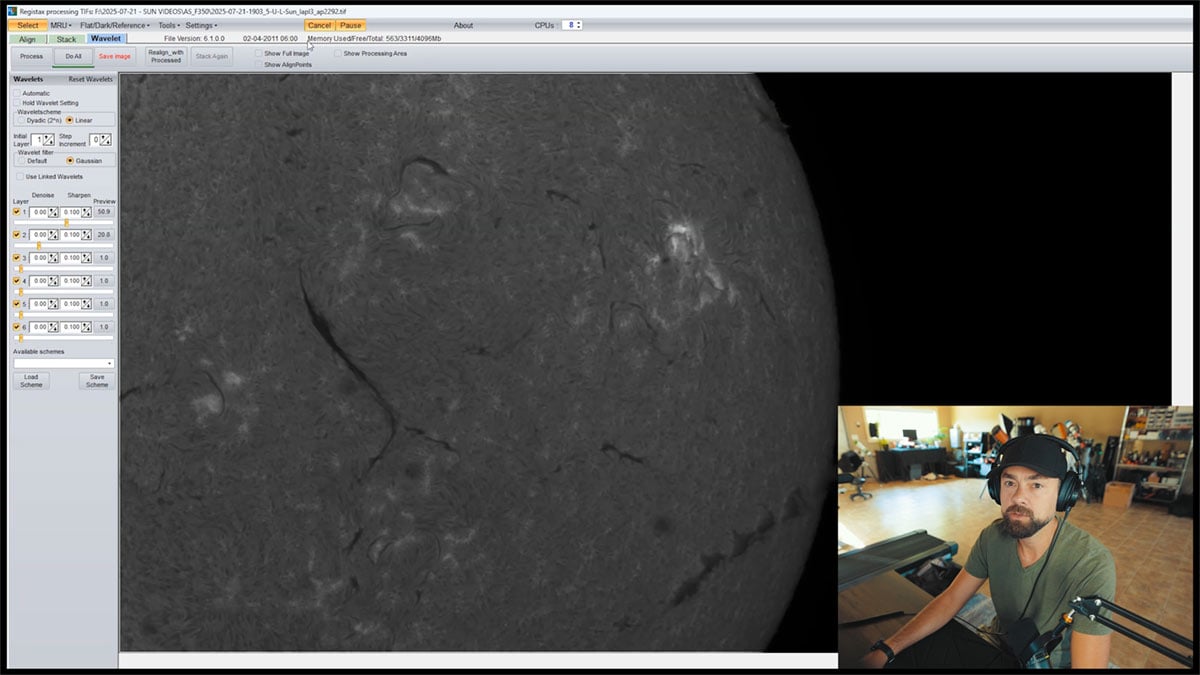
From there, the image stack is brought into a tool called Registax to sharpen the image using ‘wavelets’. From my experience, this step is more of a creative exercise than an exact science. It is a lot of fun to see your blurry image of the sun come into clarity.
Stacking Your Data
Using AutoStakkert is a relatively easy process. The software automatically analyses the video frames and scores them. You can choose how many frames you want to stack based on the number of quality frames you’ve captured.
I usually stack between 250 and 500 frames for a solar image. This feels like the sweet spot, and it’s usually about 25-30% of the total number of frames captured. Autostakkert provides the option of drizzling your data by 1.5X to 3X if desired.
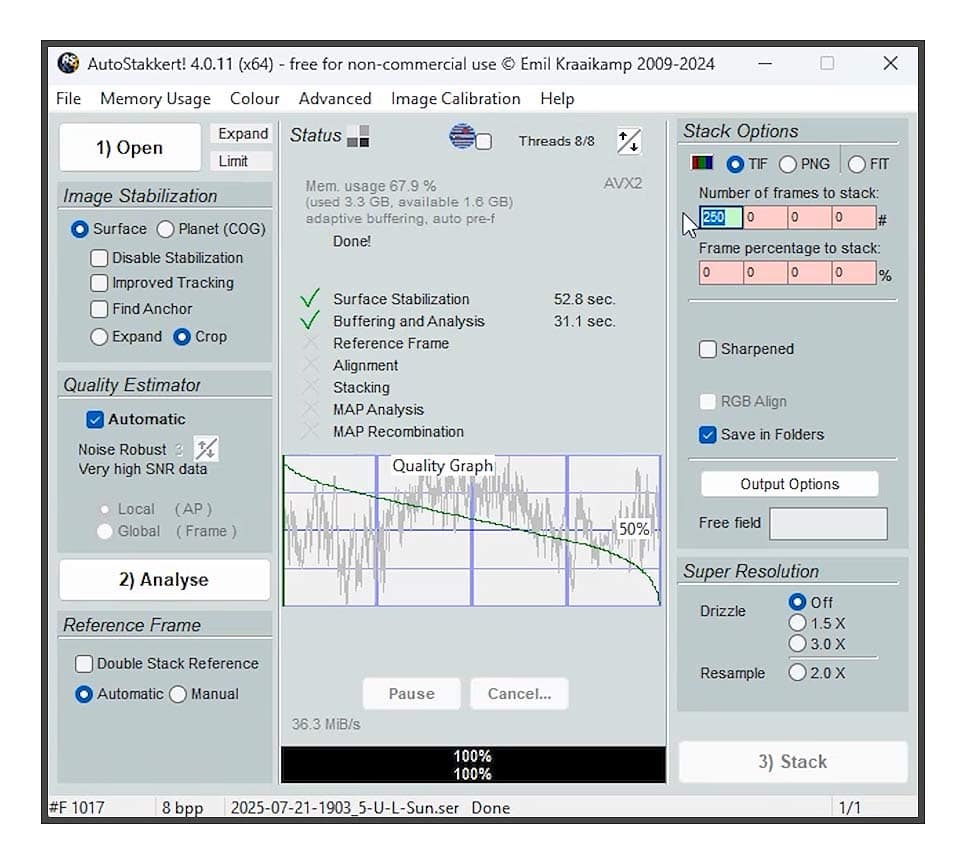
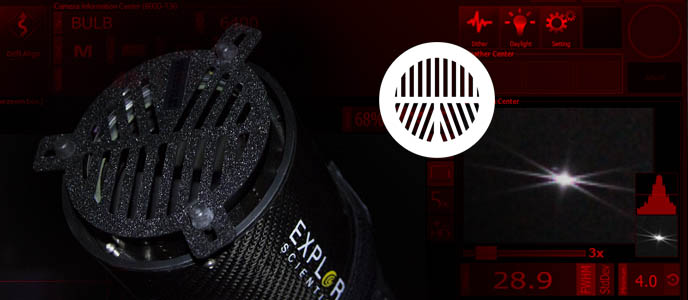
My Autostakkert settings for stacking a solar surface/prominence image.
Sharpening & Enhancing
For sharpening and enhancing my solar images, I use a free tool called Registax 6. The wavelet sliders allow me to tighten up the surface details on the sun, as well as sharpen the edges of the solar disk and solar prominences.
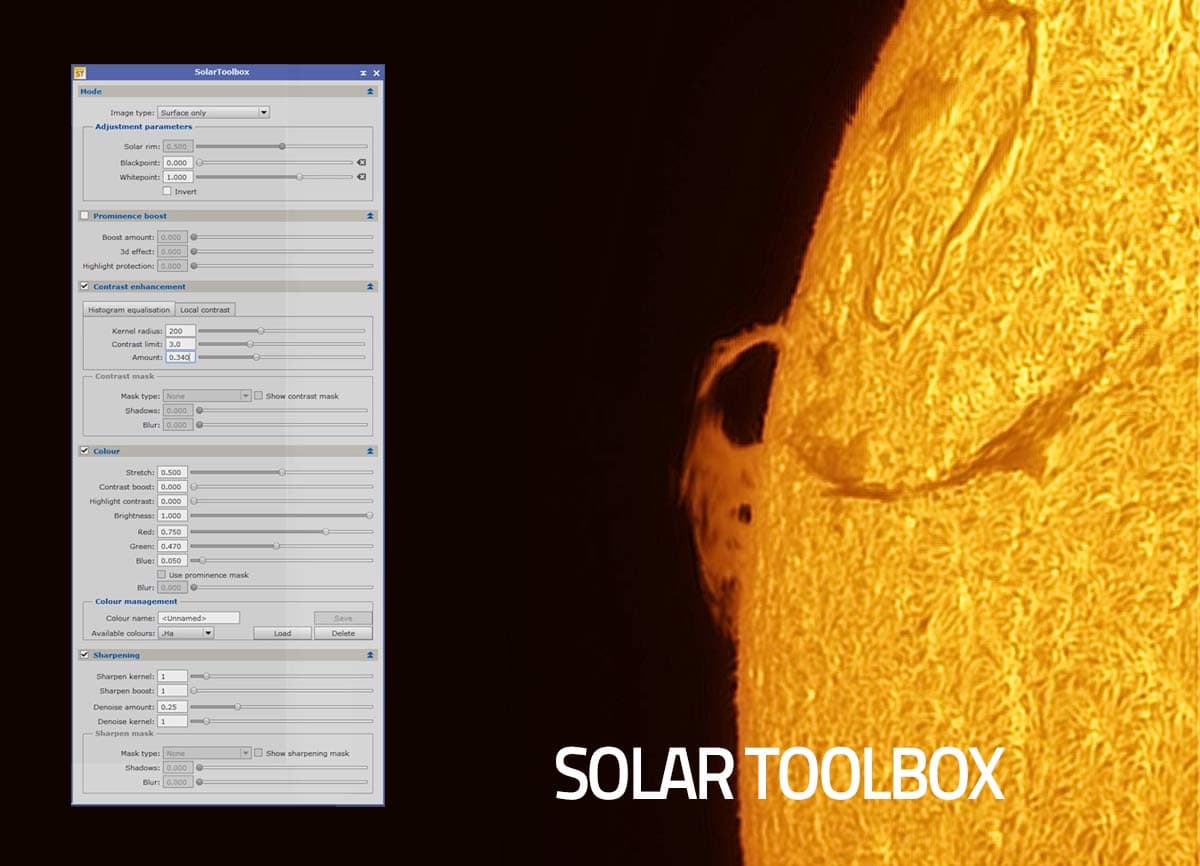
To add color to the image, I use a PixInsight script called the ‘Solar Toolbox‘, which has some fantastic tools to create a polished image ready for sharing. The colorization tool allows you to adjust the overall hue of your colorized monochrome image, and the solar photography community widely uses it.
Community FAQs and Insights
How large is the “sweet spot,” and can I image the full solar disk in one shot?
Many users report that the sweet spot (the area of uniform contrast) does not cover the entire solar disk. For full-disk imaging, a mosaic of 4–5 panels is often needed. One Cloudy Nights member noted: “The sweet spot is still smaller than the entire solar disk. I would likely need to create a mosaic of four images.”
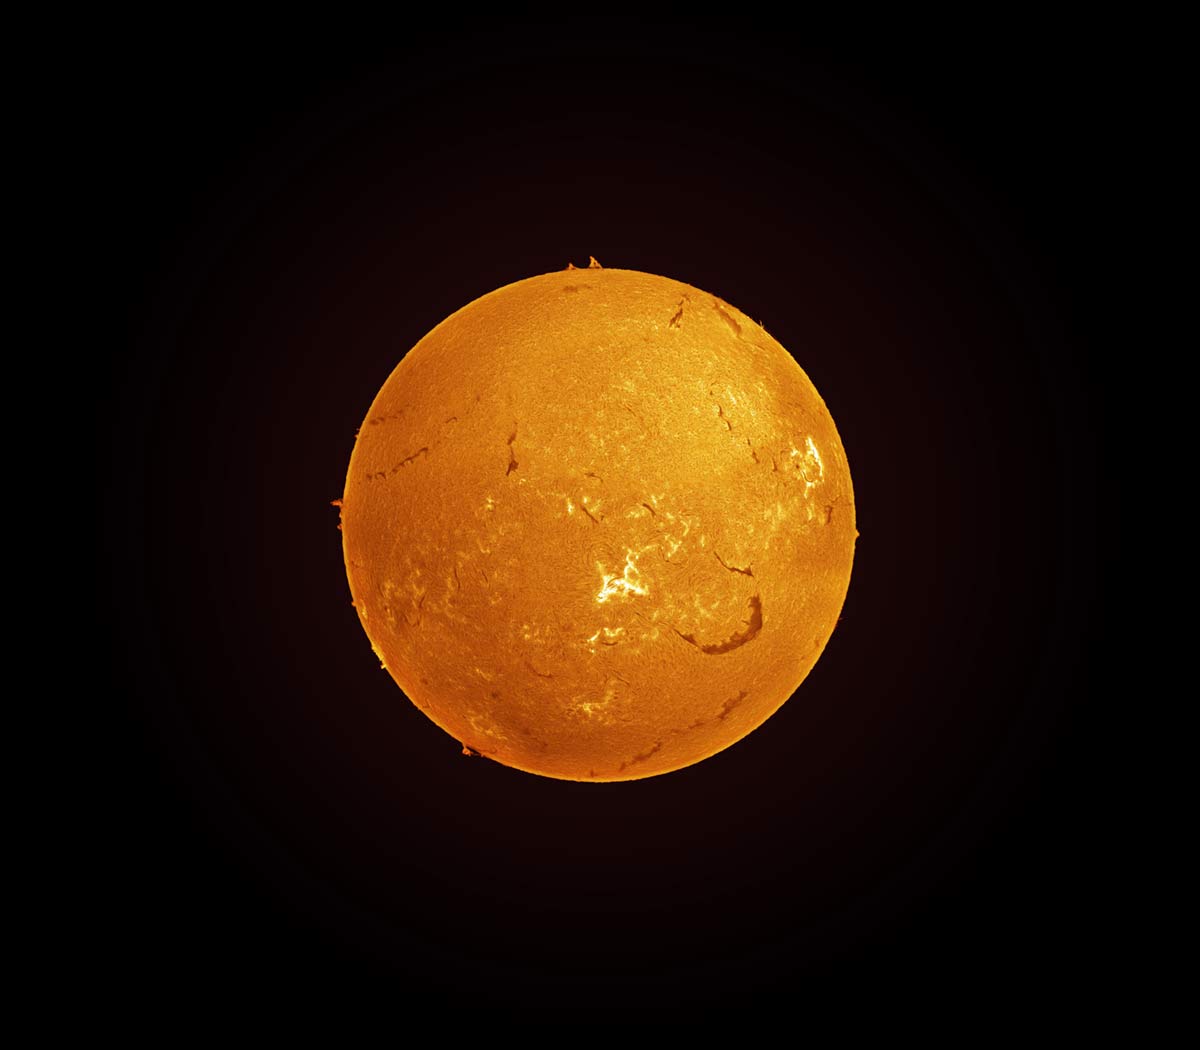
While this didn’t stand out to me during my tests, when I look at the full-disk images of the sun captured using the ASI585MC camera, it appears to be a valid point. Notice the darker, less detailed portion of the sun at the top right.
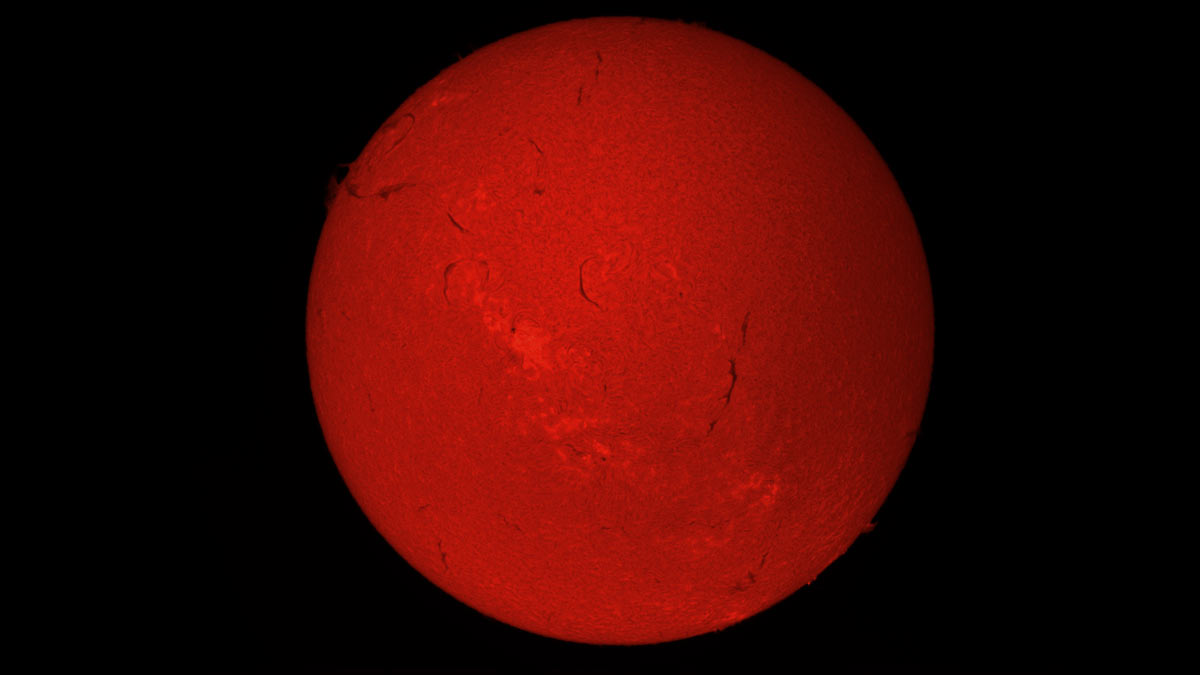
A full-disk image of the sun using the ZWO ASI585MC (color) camera and the Heliostar 76 H-Alpha solar telescope.
What bandpass and tuning system does it use?
The Heliostar 76 features Sky‑Watcher’s Solis etalon technology, offering a <0.5 Å bandpass, delivering “double‑stack performance for the price of one” even in a single stack. It uses a Trifid (pressure‑based) tuner with a mechanical knob that allows smooth fine-tuning. Many users describe it as easy and intuitive to use.
I haven’t found it necessary to adjust the Trifid tuner much after I have focused on the sun, especially when using a smaller sensor camera with a tight field of view (FOV).
How fast must it acclimate before performing at its best?
Some experienced users have asked whether early uneven contrast might stem from the etalon needing time to warm up. One thoughtful forum reader recounted that early unevenness seemed to vanish after an hour in the sun, and lab testing under hot ambient conditions (32–35 °C) only occurred after similar warm-up times.
While I didn’t really notice a difference myself (I wasn’t looking for any changes, to be honest), waiting a half hour or so before photographing the sun with the Heliostar 76 sounds like a good idea.
What cameras are recommended for full-disk imaging?
Imaging the entire disk requires careful camera selection: An Altair GPCam3 with 2.9 µm pixels typically covers it with four captures. For fewer panels, cameras like the ZWO ASI183MM (2.4 µm pixels) are a better fit for f/8.3, while larger pixel sensors like the 533 MM may produce oversampled results.
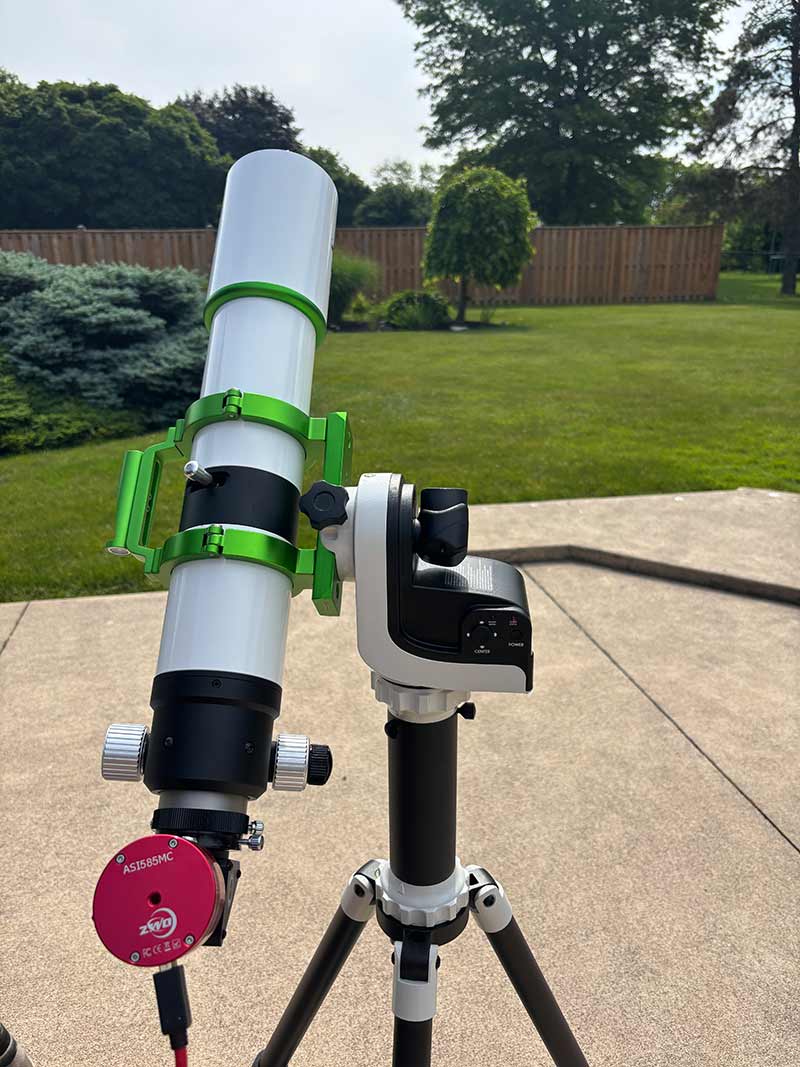
I used the ZWO ASI585MC camera to capture the full-disk image of the sun below. While this is a color camera (not ideal), it was nice to test that the SONY IMX585 sensor does indeed fit the entire sun in the FOV using the Heliostar 76.
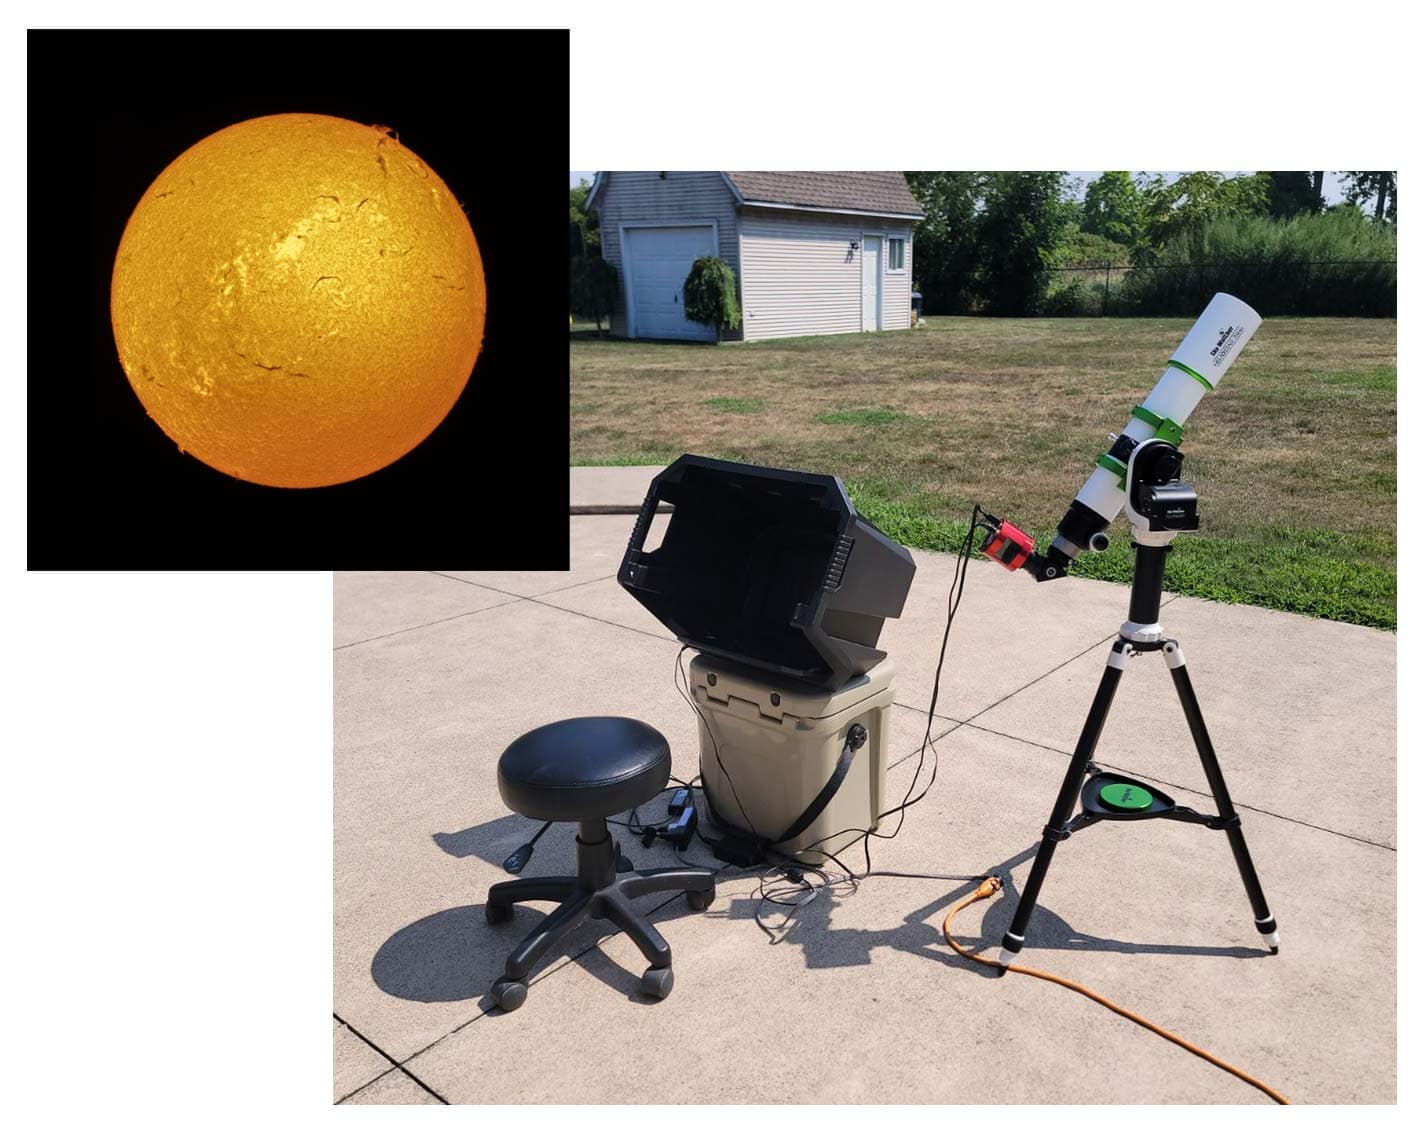
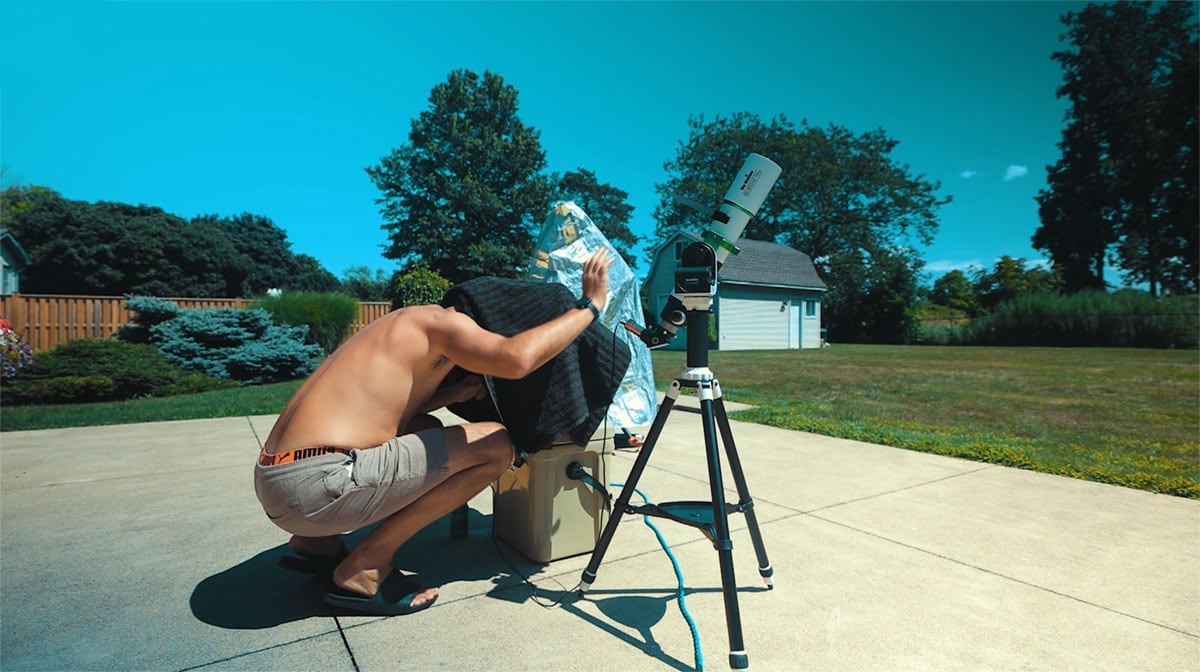
My solar photography setup in the backyard includes the Heliostar 76, and a laptop computer running FireCapture.
Conclusion
The Sky-Watcher Heliostar 76 Ha is a ‘gateway telescope’ to an entirely new form of astrophotography. If you are like me and have only ever used a telescope to take pictures at night, you’re in for quite a ride.
With this new adventure comes a new set of challenges to overcome, like learning how to use new image capture software and how to edit solar images. However, like deep-sky astrophotography, the rewards are well worth the time and effort.
The Heliostar 76 package offers incredible value compared to other solar telescopes on the market, delivering exceptional views and images. It’s a great option to use for a spur-of-the-moment observation in the backyard or at a public astronomy outreach event.

Trevor Jones is an astrophotographer and a valued member of the RASC. His passion is inspiring others to start their astrophotography journey on YouTube so they can enjoy the night sky as much as he does. His images can be seen in astronomy books & online publications, including the NASA Astronomy Picture of the Day.


How good is this scope for visual use ? No “sweet spot” issues with visual use ? Thanks.