Understanding Signal-To-Noise-Ratio in Astrophotography

As a full-time astrophotographer, I understand how much there is to learn during the beginning stages of your journey. Along with learning how to use an entirely new set of equipment, you also have to learn a number of astrophotography-specific terms to fully understand the process.
Thankfully, it will all click eventually, even if you are not overly tech-savvy (like me). With that being said, the most important concept in astrophotography to understand is known as the signal-to-noise ratio, or SNR.To understand why SNR is so important in astrophotography, let’s break it down step by step.

Astrophotographers use image-stacking software to improve the signal-to-noise ratio of their images.
Signal-To-Noise Ratio in Astrophotography
In astrophotography, the “signal” is the light from celestial objects, like stars or galaxies, while the “noise” is anything that interferes with or hides that light. Astrophotography noise can come from various sources, such as the camera’s electronics, light pollution from city skies, or even the natural glow of Earth’s atmosphere.
The signal-to-noise ratio (also labeled as ‘S/N’) measures how much useful signal you have compared to unwanted noise. A high SNR means the signal is strong and clear. A low SNR means the noise overwhelms the signal, making it difficult to see the details of the celestial objects you’re trying to capture.
In astrophotography, achieving a high SNR is essential for producing sharp, detailed, and beautiful images of the night sky.

When you average exposures (multiple photos of the same subject are combined into a single image), you reduce the noise by the square root of the total number of exposures.
For example, 4 exposures will have twice the SNR of a single exposure, and 9 exposures will have three times the SNR of a single exposure.

Helpful Resource: Astrophotography: Of Signals and Noise (Sky and Telescope)
How it Works
Let’s dive into the science of the signal-to-noise ratio as it relates to astrophotography. The “signal” is the light collected from the object you photograph. This is why it’s a good idea to take as many exposures of your subject as possible (to a point, of course).
For example, If you browse images of deep-sky-object on AstroBin, you will quickly realize that all of the best images have something in common: they include several hours of overall exposure time. Some images contain over 100 hours of imaging time!
When you point your telescope at a nebula, the faint light from that nebula travels across space and reaches your camera’s sensor. The longer you expose the camera to that light, the more signal you collect. However, noise is also collected during this process.

Jon Rista created an exquisite animation of the signal-to-noise ratio at work. For an advanced description of SNR, along with the formulas used, visit Astrophotography Basics: SNR.
Noise can come from different sources:
- Thermal noise: This is caused by heat in the camera’s sensor, which can create random “false” signals. Cooler sensors, like those in dedicated astrophotography cameras, reduce this kind of noise.
- Read noise: This occurs when the camera’s electronics convert light into digital data.
- Light pollution: Artificial city lights can brighten the sky and compete with the faint light from celestial objects.
How to Improve SNR
Do yourself a favor and create an image with a healthy signal-to-noise ratio before you bring it into your image processing software of choice. Here are some simple ways to improve the SNR:
- Increase Exposure Time: The longer your camera collects light, the more signal you capture. However, longer exposures can also increase noise, so it’s a balancing act.
- Stack Several Images: Instead of taking one long exposure, astrophotographers take many shorter exposures and combine them using software. This technique averages out the noise while enhancing the signal, producing a clearer image.
- Use Filters: Light Pollution Filters can block unwanted wavelengths of light, such as those from streetlights while allowing the light from celestial objects to pass through.
- Use a Cooled Camera: As mentioned earlier, thermal noise is reduced in cameras with sensors that are actively cooled, making them ideal for astrophotography.
- Use Calibration Frames: Astrophotographers often take calibration frames, such as dark frames (images taken with the camera’s lens cap on), to measure and subtract noise patterns from their final images.
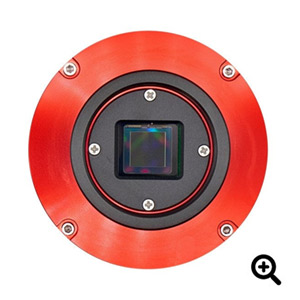
Consider using a cooled, dedicated astronomy camera for reduced noise. (ZWO ASI533MC Pro)
Example Project
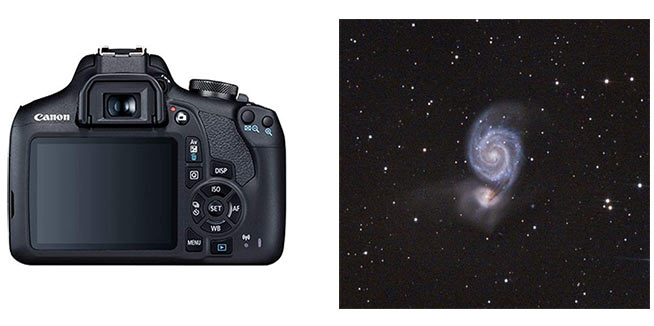
Here’s a great example of the singal-to-noise-ratio at work on my image of the Andromeda Galaxy. Without stacking a series of images to improve the SNR, my single 60-second image looked like an underwhelming faint smudge surrounded by grainy specks of noise.
But by stacking 120 exposures, that smudge into a breathtaking image showing the galaxy’s sweeping arms and bright core. The example images below were taken with a mirrorless camera (Canon EOS Ra) and a Rokinon 135mm F/2 lens.

An example of the signal-to-noise-ratio at work (click to enlarge).
The power of the signal-to-noise ratio is best experienced through the image-processing stages of astrophotography. Using a simple tool like DeepSkyStacker allows you to witness the massive improvement image stacking makes and just how much better your stacked image is over a single exposure.
The best part is that it doesn’t matter which camera or telescope you use. The benefits of image stacking and improved SNR can be enjoyed by anyone who takes the time to implement the process. Your master image will be much more enjoyable to process further.
 Trevor Jones is an astrophotographer and a valued member of the RASC. His passion is inspiring others to start their astrophotography journey on YouTube so they can appreciate the night sky as much as he does. His images have been featured in astronomy books & online publications, including the NASA Astronomy Picture of the Day (APOD).