How to Travel with Astrophotography Gear

We are often asked how we fly with our astronomy gear when we travel to new locations for astrophotography. While traveling to a dark-sky site with our telescopes is exciting, it also involves a lot of planning.
Traveling with any photography equipment can be challenging, but there are some added considerations when flying with items like a telescope and a ‘go-to’ mount.
In this article, we will cover how we prepare and travel with our telescope equipment, including some of the tips we have learned through our years of experience. We will also share a few of the camera bags we have used to pack our gear.

Traveling to dark-sky sites for deep-sky astrophotography involves some series planning.
If you’re looking for the quick and dirty, here are some tips that have worked well for us:
- Research your location and select your targets ahead of time. This will help you decide on your telescope focal length.
- Choose a good-quality camera bag that can fit most of your equipment. Remember that this will house all your expensive gear, so consider this an investment in protecting your equipment.
- Travel light and bring travel-friendly mounts and small refractors to avoid having to check luggage with gear
- You should consider using additional baggage to accommodate some of your less fragile and larger equipment items, like tripods, extension cords, power bars, etc.
- Have photos that show what you’re equipment looks like when it’s all set up, as some items may look suspicious
- If traveling internationally, be prepared with a list of items you are bringing into the country, including serial numbers
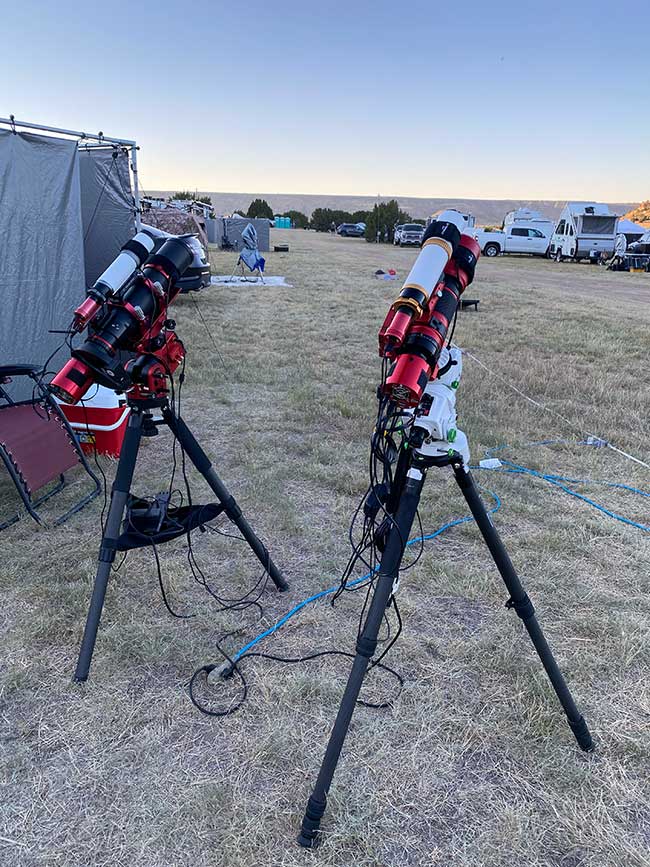
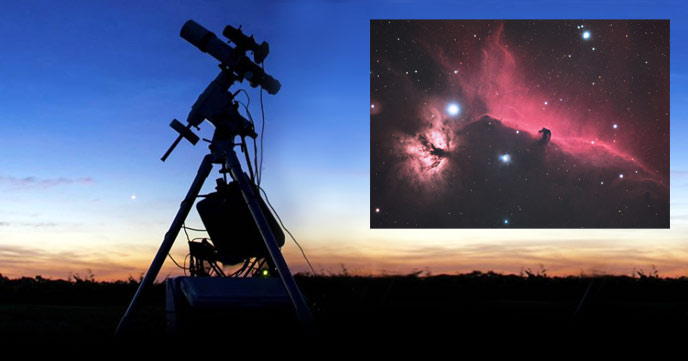
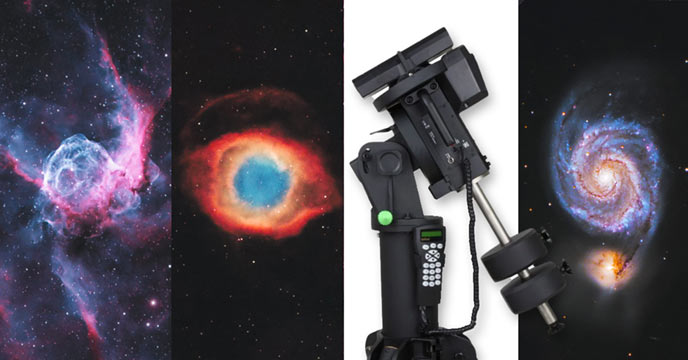
The astrophotography rigs that we flew with to the Okie-Tex Star Party
Preparation
You’ll need to gather your gear and start packing, so you’ll need to figure out a few pieces of information.
First, you’ll need to narrow down the target(s) you plan to shoot. It can be helpful to make a list of the available targets for your location and then narrow it down to the ones you want to capture.
This might include targets you’ve never photographed before, targets that can only be captured under a dark sky, or targets that aren’t available from your home location.
Keep in mind that shooting targets that rise earlier and set later will give you more integration time. Targets that rise higher in the sky will also be easier to shoot, so you don’t have to worry about surrounding structures or landforms (i.e., mountains, tree lines, etc.).
You can use astronomy apps like Stellarium to help determine both the landscape and the window for certain targets.

Fitting a dedicated astro camera, mount, guide scope, and camera in my backpack.
Once you’ve decided on your targets, you can start to plan which focal length telescope to bring. Be sure to keep these factors in mind:
- Weather: Wind can impact shooting at longer focal lengths, so shorter focal lengths are better suited for windy weather.
- Size of your bag: you can only bring what will fit in your personal/carry-on bag
- Mount: depending on your mount, you’ll need to keep your telescope under a certain weight.
Choosing Your Camera Bag
We opt to pack (most) of our astro equipment in our camera backpacks, which are considered our personal carry-on items. We would not recommend checking any of your equipment to be stored under the plane to avoid anything being broken.
There are so many options for camera bags out there, and selecting the one that works best for you is really a personal preference.
We have owned several over the years, but we use the same bag now. I’ll include a few of the bags we’ve used, what we didn’t like about them, and why we chose the backpack we have now.

Peak Design 20L, McKinnon x Nomatic 25L and PolarPro Boreal 50L.
Peak Design 20L Everyday Backpack
Both Trevor and I have used this for astrophotography travel (i.e., St. Lucia, Okie-Tex Star party, Texas Star Party).
At 20L, this backpack is on the smaller side to fit an astrophotography kit. It does have a customizable main compartment with velcro dividers that can be moved around.
It has a weatherproof shell and an easily accessible top compartment with a mag-latch that acts as a quick passthrough to the main compartment.

I inherited this bag when Trevor got a new one, and my biggest reason for wanting to switch from this bag was the side access. I would prefer rear access to my gear when traveling with so much equipment.
It makes it easier to organize and prevents things from falling out when opening the zippered side compartment. However, because I wasn’t using this bag out in the field, the side access wasn’t necessary or convenient for me.
At 18″ H x 14″ W x 8 ” D, this bag fits under the seat in front of you on your flight without issue. But with the side access, I see this as a better option for photography excursions, day trips, or shooting events.
Noteworthy Features:
- 15-inch laptop sleeve (back)
- Clean silhouette with minimal dangling straps
- External side pockets for water bottles, tripods, etc.
- Widened top and side access points
- Weatherproof, 100% recycled 400D nylon canvas shell
- The price is $280 USD
PolarPro Boreal 50L Backpack
PolarPro sent us their Boreal 50L backpack to test with an astrophotography setup. Rated for 65 lbs, this bag was designed for the largest setups.
We packed Trevor’s astrophotography setup for the Cherry Springs Star Party in this bag, which fits everything.

The PolarPro Boreal 50L holds an impressive amount of astrophotography gear (if you can handle the weight of it all).
- Camera: ZWO ASI2400MC Pro
- Telescope: William Optics RedCat 61
- Mount: Sky-Watcher Star Adventurer GTi
- Camera Controller: ZWO ASIAIR Plus
- Tripod: Collapsible Carbon Fiber Tripod
- Accessories: Dew Heaters, Adapters
The main compartment of the bag is huge. It has sturdy dividers to help you organize all your equipment and internal zippered pockets to store small accessory items.
There is a roll-down top storage area that can be separated from your main storage compartment or used to access the main compartment by undoing a zipper.
This bag has handles on every side, exterior tripod straps, and very thick back and waist padding to help carry the load. Remember, the more gear it can hold, the heavier the bag will be.

Even though this bag could fit all of your gear, due to its size, it would definitely not fit under the seat on an airplane and would maybe even have trouble fitting in the overhead bins above.
It doesn’t claim to be airplane travel-friendly, but I thought it was an interesting bag to include for size comparison, having used it for aero travel on the road.
This bag was purposefully designed to carry large amounts of photography gear deep into the wilderness, making it better suited for packing for a road trip or getting gear from the car to your photography spot.
Noteworthy Features:
- 16-inch laptop sleeve (front)
- 15L of quick-access storage at the top of the bag
- Depth of 6.25 inches for larger photography gear
- Ability to transform into a weekend hybrid/travel bag
- Price is $249 USD
McKinnon x Nomatic 25L Backpack
Trevor has been using this bag for all our flight trips since receiving it from the Nomatic team for testing. You can watch the video review of this backpack on YouTube.
Seeing all the gear he was able to fit made me a bit jealous. I looked at a lot of bag options with easy (rear) access, lots of room, and great organization, and I just kept coming back to this bag. So Trevor brought me one for Christmas in 2023.
As a lover of organization, the McKinnon 25L bag spoke to me. At only 5L more than the Peak Design bag mentioned above, the rear opening gives the bag a feeling of extra space.
The large main compartment is organized into a ladder system that allows you to break up the bag into different storage sections depending on your needs.

Nomatic Peter McKinnon Bag with optional cube storage dividers.
There are also two large zippered pockets for accessories and a top storage area with a magnetic closer that passes through into the main storage part of the bag.
For even more customization, we purchased the two small cubes sold separately. These cubes allow you to compartmentalize your gear and add some additional protection.
The side pockets for water bottles or a small tripod also have a magnetic closer, which is a nice touch to keep the profile of the bag smaller when they’re not in use.

The luggage handle passthrough is great, taking the heavy load off your back while walking through the airport. At 11′ W x 8 ” D x 19″ H, this bag fits under the seat in front of you without issue.
Noteworthy Features:
- 16-inch laptop sleeve (back)
- Luggage passthrough
- Waterproof exterior
- Ladder system for space redistribution
- Customizable interior
- Exterior carry options
- The price is $305 USD ($396.96 USD with the 2 cubes)
Carry-on Baggage
In addition to your personal item (camera backpack), you can also utilize carry-on luggage.
We try to utilize our camera bags for the majority of our gear, but if we want to bring a longer focal length telescope, it sometimes goes into our carry-on luggage (wrapped in clothes for added protection)—again, not in checked luggage.
Keep in mind that airline overhead bins are starting to fill up with most passengers bringing carry-on bags. This means that some passengers are forced to check their carry-on luggage when the overhead bins are full.
This happened to us on the way home from the Winter Star Party. We had to remove our telescopes from our carry-on luggage before having to check those bags. This meant carrying our telescopes onto the plane and carefully placing them under the seat in front of us for the flight.

This is something to keep in mind when deciding what equipment to bring and what to pack in your carry-on bag. You don’t want to be left with a large telescope on your lap for your flight.
Checked Baggage
If we are traveling internationally for a star party, we usually also bring a larger suitcase with our less fragile items. In our checked bag, we will pack things like tripods, extension cords, power bars, reusable mugs, towels, hats, warmer jackets etc.
We don’t love bringing a checked bag simply because it doesn’t always make it to your final destination. But there are just some items that won’t fit in a carry-on suitcase.
Pelican cases seem to be a popular choice for traveling with photography gear thanks to their hard exterior and foam-padded interior. However, we have no experience using these cases or checking any sort of bag with gear in it.

Security and Customs
Keep in mind security and customs while packing and traveling.
Your gear will be packed away in your personal item backpack and carry-on suitcase, which will go through the security checkpoint with you. Expect your bag to get flagged, and be ready to explain your equipment as a staff member inspects your bag.
Have a photo on your phone of what it looks like when completely set up. While we have never had to use something like that, I have heard of people having issues with certain pieces—like their star tracker bar and counterweight—which looked like weapons to security staff.
If you’re traveling internationally and going through customs, having a list of all your equipment and the value of the goods you are traveling with would also be a good idea. This will give them an idea of the equipment you bring into the country. Having the serial numbers listed might also be a good idea.

The Milky Way Photography gear we brought to Australia in our backpacks.
Extra Items for Astrophotography
It’s always important to make sure you pack everything you need. This includes all necessary cables but also a few extras just in case something stops working.
In addition to camera and mount power cables (x2), here are some things that we make sure we bring on every trip:
- Red headlamp and batteries
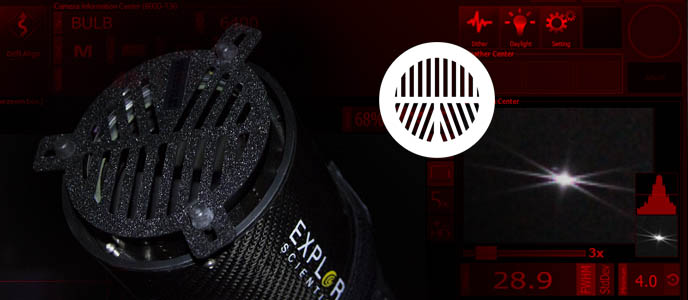
- Extension tubes and ruler (for back focus)
- White T-shirt and elastics (for flat frames)
- Velcro (for attaching our ASIAIR to the scope/mount)
- Velcro ties (for shortening and cleaning up cables)
- Telescope covers
- Extra screws
- Electrical tape
- Multi-set Allen keys
We typically pack these items with our camera gear in our camera backpacks.
Remember that rechargeable/lithium batteries cannot be packed in checked luggage, so you will need to make room for them in your carry-on luggage.
Power Supply
Most of the equipment you plan to pack requires power, but traveling with battery packs is not really an option since lithium batteries cannot be in your checked bags.
Most often, when we fly for astro, we go to a star party where we can plug in. This means that we don’t have to worry about a power source. But we do need to make sure we pack a few extension cords to reach the power from wherever we set up. We do the same thing when we drive to Airbnb.
We also make sure to bring our small power bars (x2), which have two outlets to power the mount and ASIAIR and two USB slots to power our dew heater bands.
If you are traveling to a remote location where you will need to supply your own power, I would suggest picking up a battery when you arrive or bringing equipment that can run off batteries, like the Sky-Watcher Star Adventurer 2i.
Travel-Friendly Equipment
As you’ve probably figured out, we try to travel light when it comes to astrophotography. There are loads of capable travel options available for compact mounts and small refractors.
Mount
In the last few years, several new options have become available for portable EQ mounts. With the release of harmonic drives, they have become much more portable without sacrificing payload capacity.
Mounts like the AM3 and AM5 are extremely compact and don’t require counterweights! This makes traveling with a go-to mount so much easier (and lighter). We can fit both of these mounts (minus the tripod) in each of our camera bags.
Star trackers are also popular and have the added advantage of using battery power. These types of mounts are best for camera and lens kits or light refractors, like the William Optics Redcat 51.
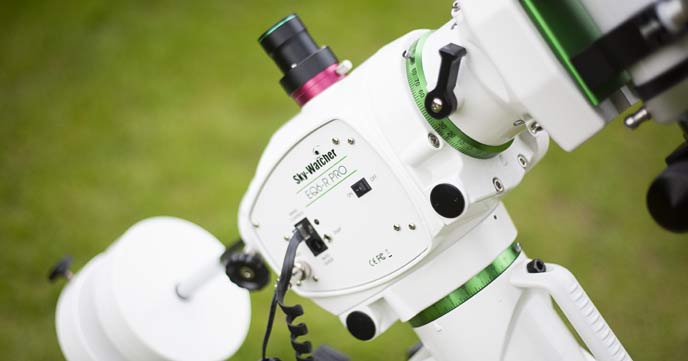
The Sky-Watcher Star Adventurer GTi is an extremely portable mount with added go-to functionality.

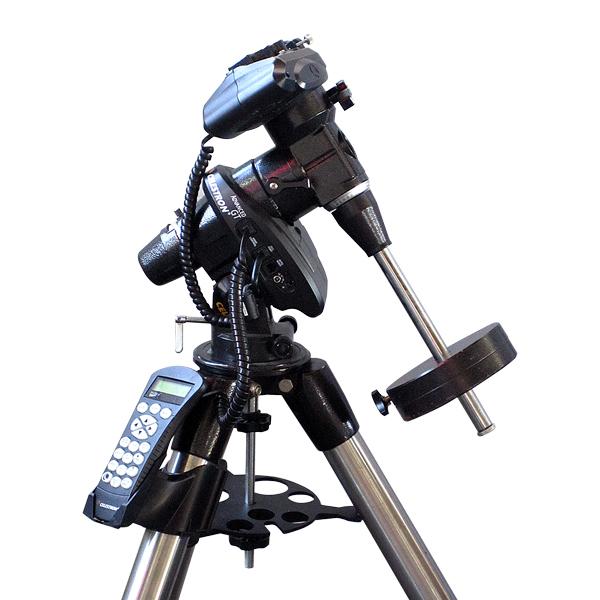
Star Adventurer 2i, Canon 400mm lens, and Canon R camera packed for the solar eclipse
Telescope
As we have mentioned above, small refractors are the best type of telescope for traveling. William Optics telescopes are great options, and there are loads to choose from.
On our trip to the Winter Star Party, I brought the William Optics Redcat 51 V3, and Trevor brought the William Optics Pleiades 68. Both were mounted on our AM 3 and AM5 mounts.
If we were bringing smaller mounts, like a star tracker, the original Redcat 51 would be another great choice, or a DSLR and the Rokinon 135mm lens.
The William Optics Redcat 61 and 71 are also options, though these are the heaviest and largest telescopes we have traveled with.
Conclusion
While most of our plane trips are international, we pack the same as if we were on a domestic flight in Canada.
Airlines can be unpredictable, so it’s important to have a plan when traveling with expensive telescope equipment.

Ashley is an environmental educator, communication professional, and beginner astrophotographer. She has extensive experience writing for diverse audiences to increase public awareness and engagement. Ashley is an active Advocate and Delegate with DarkSky International, helping to protect the nighttime environment from the harmful effects of light pollution through advocacy and outreach.
Solid Advice!
Thanks, John!
Hiya,
Does the McKinnon x Nomatic 25L side pouch hold the ZWO tripod for the AM5?
I am planning to get the bag but need to be sure it can hold the tripod.
I am hoping to store the AM5, Redcat 51, ASI 294mc pro and an ASIAir Plus in the bag.
Do you think it will all fit?
Hi Kyle. The side pouch can hold only two of the tripod legs, with the third outside of the pocket. When in the pocket, it also sits considerably higher than the top of the bag – it could work but maybe not the best fit. I believe there are additional straps you can order too that are meant for securing a tripod to the bag.
Thank you for this article! Contemplating my first airport trip with my gear and this article was very helpful in helping me determine my gear/load out and considerations…thank you!!