Astrophotography from the City vs Dark Sky

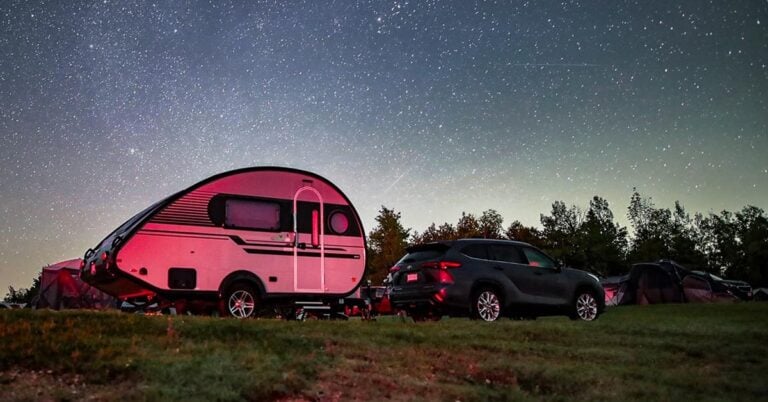
If you are like me, you spend most of your time photographing deep-sky objects from your backyard. While I love a good dark sky trip, the backyard is where the majority of my astrophotography projects take place.
The backyard is a convenient option for an impulsive night of astrophotography, but what are we missing out on when we set up our telescopes at home? How much better could the images be if they were taken under a dark sky?
In this article, I’m going to show you a head-to-head comparison of the same nebula taken under two very different skies. One of them was captured from a dark sky site (Bortle 3), and the other one was taken from my backyard (Bortle 6).
For a true head-to-head comparison, I used the same telescope, the same camera, and the same settings to capture the object. Everything was the same for each image, except the sky quality.
How Dark is Your Backyard?
The night sky continues to get brighter across the globe. Aside from the negative impacts this has on wildlife and human health, backyard astrophotographers are feeling the sting of perpetual daylight as well.
Do you know how dark your backyard is? The most common way of describing the light pollution levels of a location is to use the Bortle Scale.
According to the light pollution measuring tools I use, my backyard is considered to be a Bortle Scale Class 6 (and I expect to hit 7 soon). This appears as a yellow zone on the light pollution map.
While my backyard appears to be rural on camera, our house is located at the edge of town of a medium-sized city. It’s light-polluted, but it could be a lot worse.
You can use the light pollution map to see the light pollution levels in your area, or even measure the brightness yourself using a Sky Quality Meter.

We measured the brightness of our backyard sky using a Uranus Meteo Sensor.
The Bortle Scale
Most people I talk to who do astrophotography from their backyard are in the Bortle 6-8 range. This is a very common level of light pollution for people living in the city.
If you live in a large city or are close to downtown, the light pollution may be even worse. I created this graphic to show what the Orion constellation looks like in the sky from a Bortle 1-8.
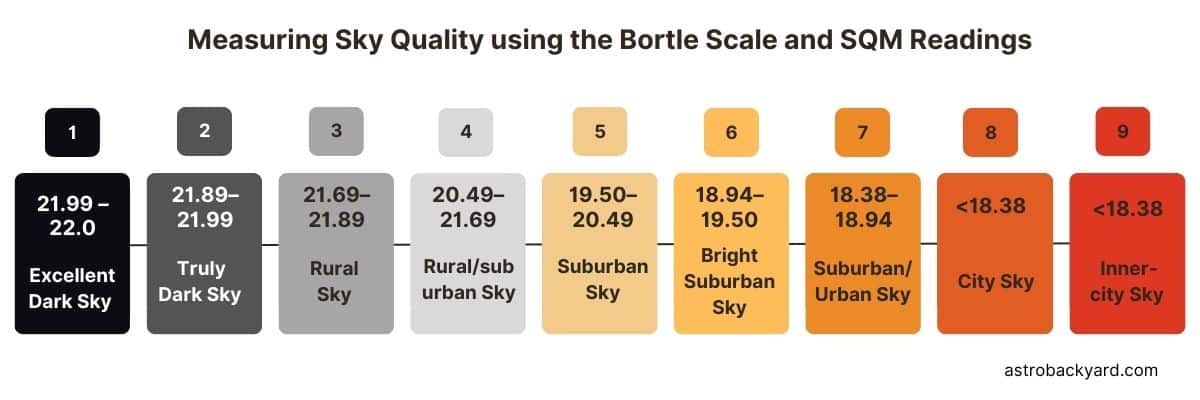
If you’re lucky enough to live somewhere dark (Bortle 4 and below), you get to experience nighttime. You get to see the Milky Way and a sky full of stars, from the comfort of home.
If you live somewhere like this, I hope you appreciate how rare it is, and do your part to make sure it stays that way by using responsible outdoor lighting.
While a bright backyard sky is unfortunate, there are still plenty of great projects you can take on under skies like this, so don’t let it get you down.
My backyard is a Class 6 on the Bortle Scale (Suburban City Sky)
Amateur astrophotographers have come up with a simple formula to correlate overall exposure time and the Bortle Scale. It is said that 2.25 X the amount of total integration is needed to collect as much signal from a 1 Bortle Scale class below the one you’re shooting in.
For example, for me to capture 2 hours’ worth of quality signal from a Bortle Scale class 5 sky, I would need to collect 4.5 hours of total exposure time. This is not an exact formula, but a useful general rule of thumb.
Using Light Pollution Filters
You can use filters to ignore a lot of the light pollution around us. There are many great options available now, including multi-bandpass narrowband filters that isolate all the good bits of most nebulae.
One of my favorite light pollution filters is the 2″ Optolong L-eXtreme filter. This filter allows wavelengths of light in two important 7nm bandpasses to reach the sensor, H-Alpha and OIII.
This is a great choice for astrophotographers in the city who want to capture emission nebulae and supernova remnants. The image data is punchy, with a distinct separation from the object and a city sky.
But what about when you want to capture a natural-looking image of a target without using harsh filters? Many broadband deep-sky objects (such as galaxies and reflection nebulae) can not utilize dual-band filters for a better image.

The Optolong L-Quad Enhance and Antlia Quadband light pollution filters.
A mild, broadband light pollution filter (such as the Optolong L-Quad Enhance or Antlia Quadband) may help to collect a more natural-looking image from the city.
Shooting without a filter from a light-polluted backyard is challenging, but it can be done. In fact, I prefer to capture certain targets this way, and to deal with the light pollution during the image processing stages.
A Head-to-Head Comparison
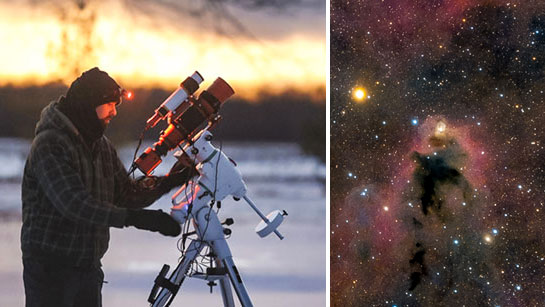
The deep-sky object I used for the comparison is the jaw-dropping Horsehead Nebula in the constellation Orion. This area of the sky includes a variety of deep-sky nebulae types including dark nebulae and reflection nebulae.
I used the exact same camera and telescope Ashley used to take her photo from a Bortle Scale Class 3 site last month. It’s an ultra-portable, wide-field astrophotography kit that can be used for a wide variety of projects.
While I did my best to ensure that this is an ‘apples-to-apples’ test, some slight variables may have affected the differences in quality between the two datasets.
Matched Settings
- Sub-Exposure Time (3-minutes)
- Gain (158)
- Total Integration (3 hours)
- Moonless Night
Variables:
- Air Quality (Transparency, Astronomical Seeing)
- Elevation
- Apparent Altitude of Object
I’ll compare the same exposure times and a matching overall integration to truly reveal the differences in sky quality. While the object was a little higher in the sky from the dark sky site (which can lead to a clearer image) both image examples were captured on a moonless night.
If you weren’t already aware, a bright moon in the night sky can have a negative impact on your deep-sky astrophotography projects as well. Capture your broadband subjects during the new moon phase for the best results (from any sky).
Normally, I would use different camera settings (exposure time, gain, etc.) from the city than I would at a dark sky site, but for comparison’s sake, I kept them the same.
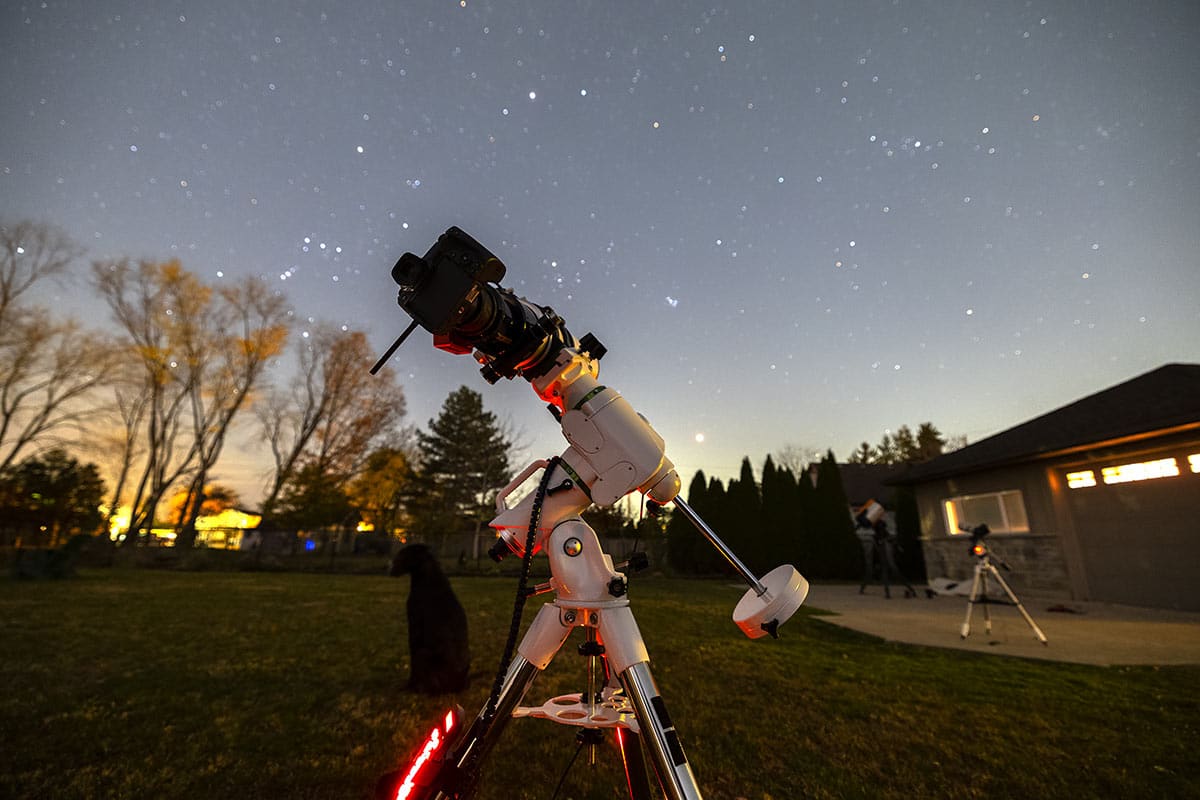
The Astrophotography Kit
The setup I used included a William Optics RedCat 51 III refractor (WIFD) and a ZWO ASI294MC Pro. This wide-field deep-sky astrophotography setup captures images at a focal length of 250mm, with a substantial crop due to the image sensor size.
The RedCat 51 (all versions) is one of the best telescopes for astrophotography today. The latest version ditches the helical focuser for the robust WIFD design. While I believe it is an improvement overall, this RedCat is substantially heavier.
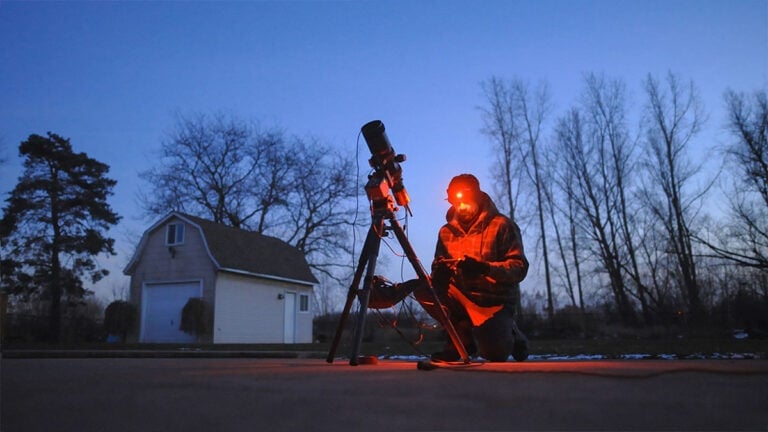
The camera and telescope were mounted to a ZWO AM3 strainwave drive mount, essentially a smaller ZWO AM5. Like Ashley did at the Winter Star Party, I used an ASIAIR Plus to control the camera and automate the imaging session.

The camera and telescope used for the project. RedCat 51 III and ZWO ASI2400MC Pro.
Equipment Used:
- Camera: ZWO ASI294MC Pro (Color)
- Telescope: William Optics RedCat 51 III
- Mount: ZWO AM3 Strain Wave Drive EQ Mount
- Camera Control: ZWO ASIAIR Plus
Compared to some of the deep-sky astrophotography setups I use, this setup is extremely lightweight and portable. For autoguiding, I used a miniature William Optics 32mm guide scope, with a ZWO ASI120MM camera inside.
Some have asked why we chose the ZWO ASI294MC Pro camera for this project rather than one with a larger sensor. The answer is simple: the full-frame ZWO ASI2400MC Pro was in use, capturing the Witch Head Nebula through the Pleiades 68.

The William Optics RedCat 51 III has a focal length of 250mm and a focal ratio of F/4.9.
Results
It should come as no surprise that the dark-sky data was much better overall, pixel for pixel. However, it may shock you to see the massive improvement only 3 Bortle Scale classes make.
In the graphic below, you can see how much more detail was captured in a single sub-exposure. Both images were 3 minutes long, without a filter.
The images are single, uncalibrated exposures with an ‘auto stretch’ applied to them using the Screen Transfer Function in PixInsight.

Single Image Comparison. Bortle 6 vs. Bortle 3. (Click to Enlarge).
While calibration frames (especially flat frames) would help to reduce the nasty gradients and dust motes on the images, I wanted to provide a ‘straight out of the camera’ comparison of the image data.
If you take a closer look at the data, you can see just how much more detail is collected near the reflection nebula known as NGC 2023. Although a single exposure is still noisy, there is much more signal present.
To really appreciate the difference dark skies make to the data, have a look at the stacked data. Both images include exactly 3 hours of total integrated exposure time.
Each image set was stacked, registered, and stacked using the Weighted Batch Pre-Processing script in PixInisght. Once again, only an auto stretch was applied for a better look at the underlying data.

Difference between a 3-hour integration of the Horsehead Nebula Bortle 6 vs. Bortle 3. (Click to Enlarge).
Processed Comparison Image
The image below compares the final processed version of the Horsehead Nebula from both locations. I did my best to match the image processing steps and order of operations for a head-to-head comparison of sky quality.
Personal processing style comes into play when looking at a ‘final’ image. This includes everything from the size of the stars to the overall color hue of the photo.

To see the final processed version of the image data captured at the dark-sky location, check out Ashley’s version on Instagram. This is a great representation of what is possible when you have great data to play with.
Related Post: Image Processing Software for Astrophotography (Which One is Best?)
Dark Sky Places
Dark Sky International (formerly International Dark Sky Association) protects ecologically sensitive areas and our universal heritage with its certified places program.
The International Dark Sky Places (IDSP) program certifies communities, parks, and protected areas worldwide that preserve and protect dark sites through responsible lighting policies and public education.

Milky Way taken from Cherry Springs State Park, which is a Dark Sky Park
These places are required to use quality outdoor lighting, effective policies to reduce light pollution, ongoing stewardship practices, and more.
There are 5 categories for DarkSky Places:
- International Dark Sky Communities: cities and towns with outdoor lighting ordinances that educate residents about the importance of dark skies.
- International Dark Sky Parks: public or private conservation areas that implement good outdoor lighting and provide dark sky programs.
- Urban Night Sky Places: urban sites that promote an authentic nighttime experience
- International Dark Sky Reserves: dark ‘core’ zones surrounded by a populated periphery
- International Dark Sky Sanctuaries: the most remote (and often darkest) places in the world
All certified Dark Sky Places offer a quality nighttime experience that lets you connect with nature.
When you visit a nearby International Dark Sky Place, not only will you have a breathtaking experience, but your tourism dollars also help sustain and protect these rare and fragile areas for the benefit of future generations.
Trevor Jones is a deep-sky astrophotographer and a valued member of the RASC. His passion is to inspire others to start their astrophotography journey on his YouTube Channel, so they can appreciate the night sky as much as he does. His images have been featured in astronomy books, and online publications including the NASA Astronomy Picture of the Day (APOD).


Yup, dark sky is ideal, but every time I pack up my gear for a trip to the mountains, it clouds over. 🤣
Great comparison, very helpful. Thanks!
This is a really interesting comparison, but not too surprising. You should also try using your rule of thumb on increasing integration time to compensate for light pollution with this image and see how close you can make your image from your backyard approach that from a dark sky. So with. 6 times the integration time will it be the same as a dark sky? Or will some features still be lost?
That’s a great idea, Paul. I’d like to think that the image with 2.25X the integration would be very close, but I am not so sure.