IC 2118 – Witch Head Nebula
Last Updated October 2, 2025
The Witch Head Nebula is a faint reflection nebula in the constellation Eridanus, bordering Orion. Its appearance resembles the side profile of a Witch’s face, complete with a long nose and pointy chin.
The dusty areas of this nebula are lit by the nearby star Rigel, a Blue-White Supergiant Star. Radio observations of the Witch Head Nebula indicate the presence of molecular clouds and star formation in the nebula.
It is difficult to view this nebula through the eyepiece of a small telescope. Some observers have reported seeing an extremely faint glow from the object using 10×50 binoculars under a dark sky.
Through astrophotography, we can reveal the faint dust and gases in this area of the night sky. I captured the photo below using my camera and telescope from a dark sky site.
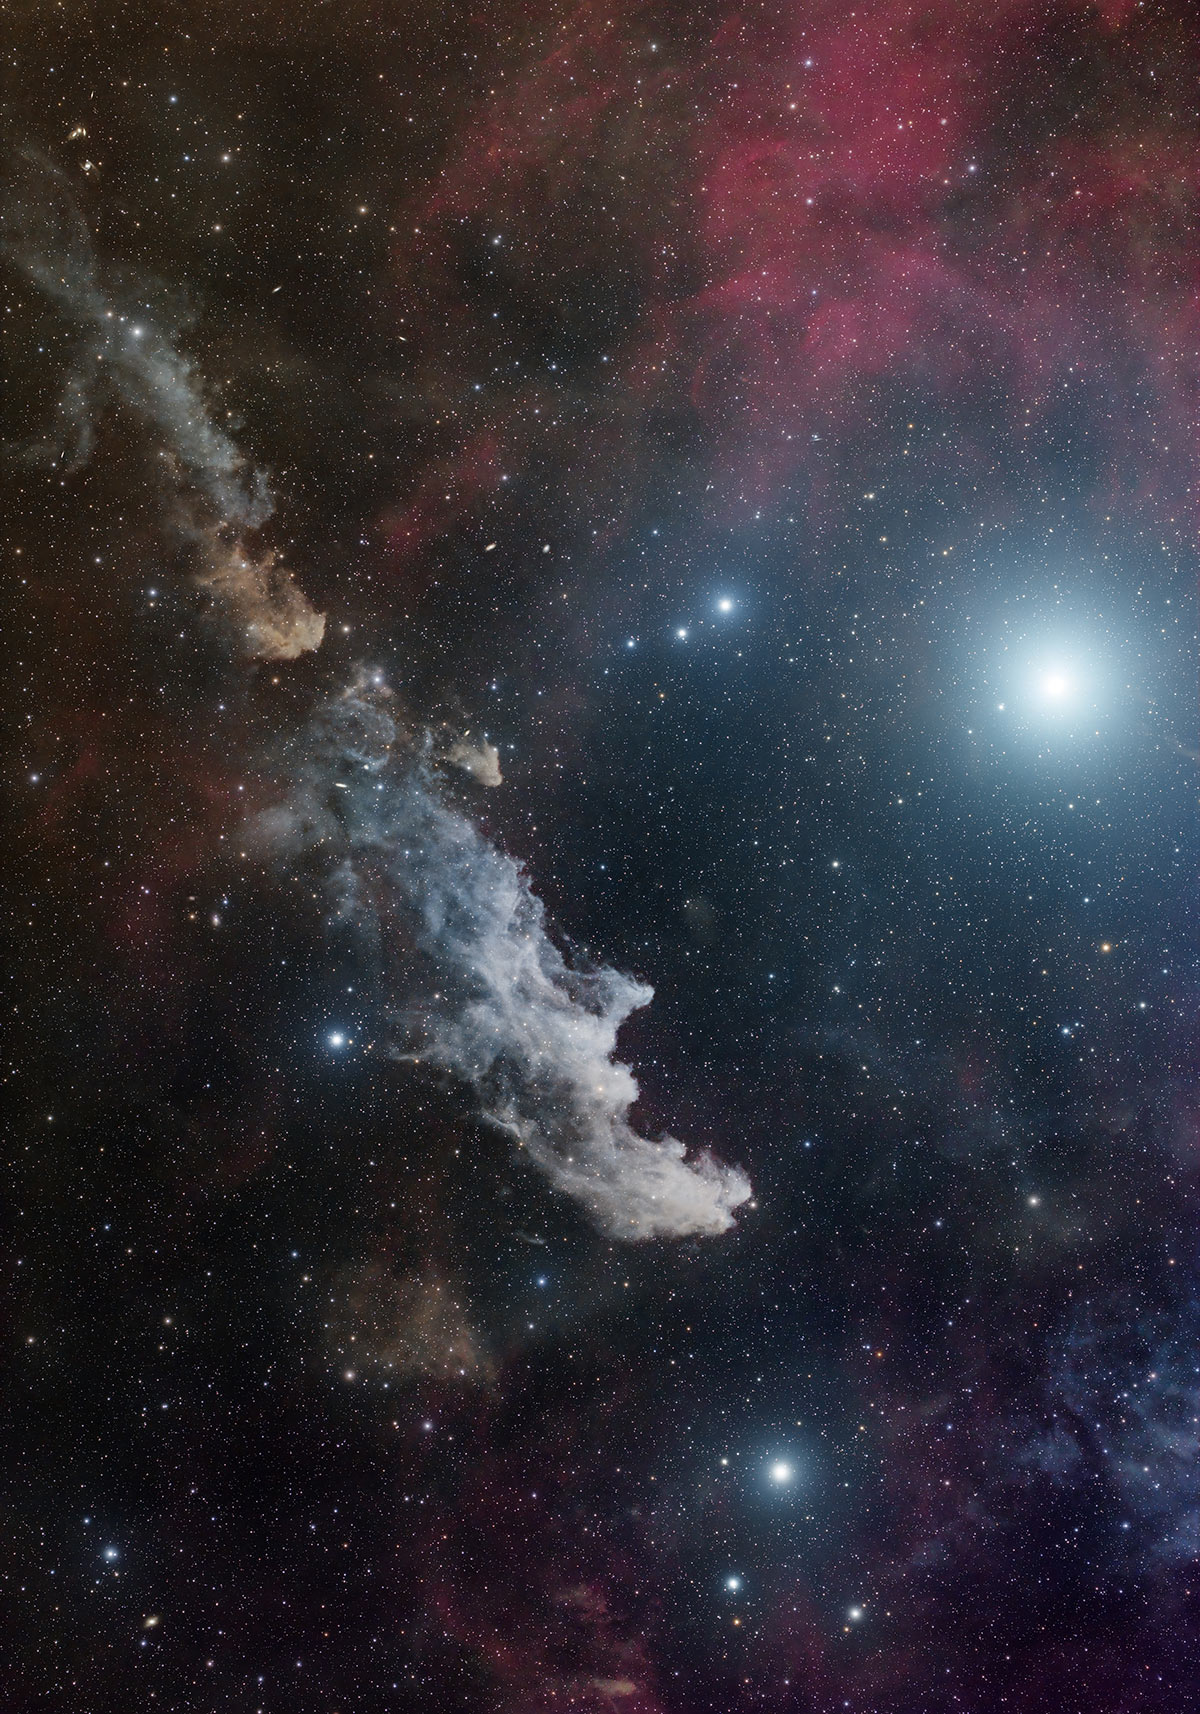
The Witch Head Nebula. 3 Hours Total Exposure. Pleiades 68 + ZWO ASI2400MC Pro.
IC 2118 – The Witch Head Nebula
- Object Type: Reflection Nebula
- Constellation: Eridanus
- Designations: IC 2118
- Common Names: The Witch Head Nebula
- Visual Magnitude: 13
- Size: 50-70 light-years
- Distance: 900 light-years from Earth
In the graphic below, you’ll see the location of the Witch Head Nebula in relation to the constellation Orion, right next to ‘The Left Leg of the Giant‘, Rigel. It may surprise you to see just how large this object is.
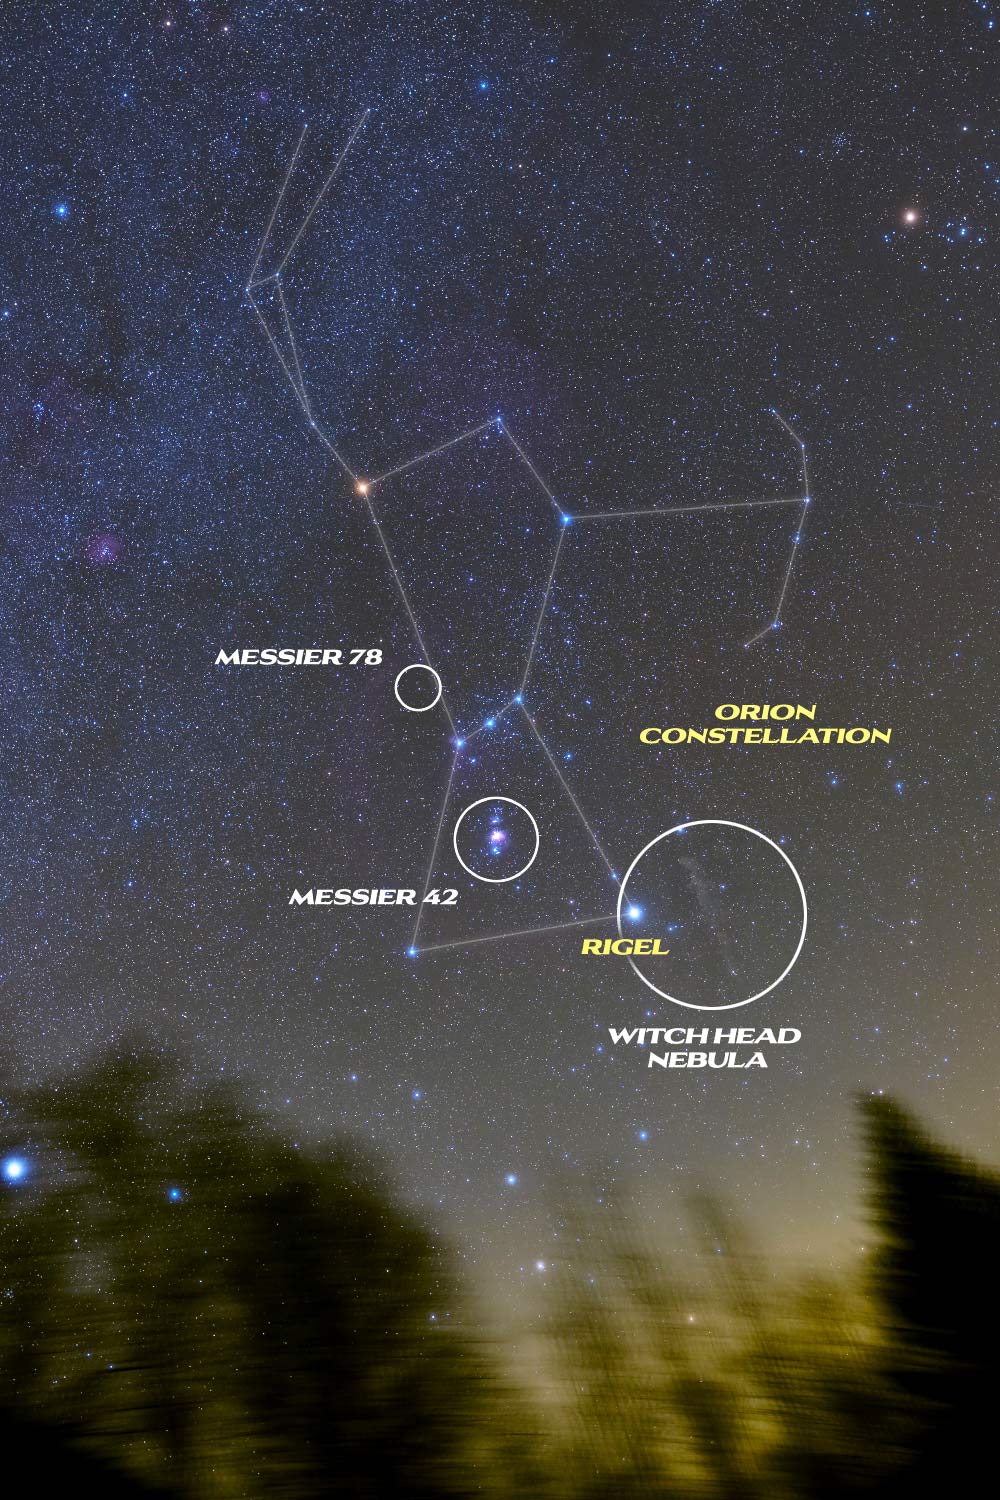
The location of the Witch Head Nebula in the Night Sky.
The Witch Head Nebula is cataloged as a reflection nebula, and it is an excellent example of this nebula type.
The blueish color of the Witch Head Nebula is caused by both the reflected blue starlight of Rigel and the fact that dust grains scatter blue light more efficiently than red.
It is a dim astrophotography target for those shooting with a DSLR camera or dedicated astronomy camera and telescope, and it’s also quite large.
To fit the entire nebula complex in a single image frame, a camera lens or telescope with a focal length of 200-300mm is recommended.
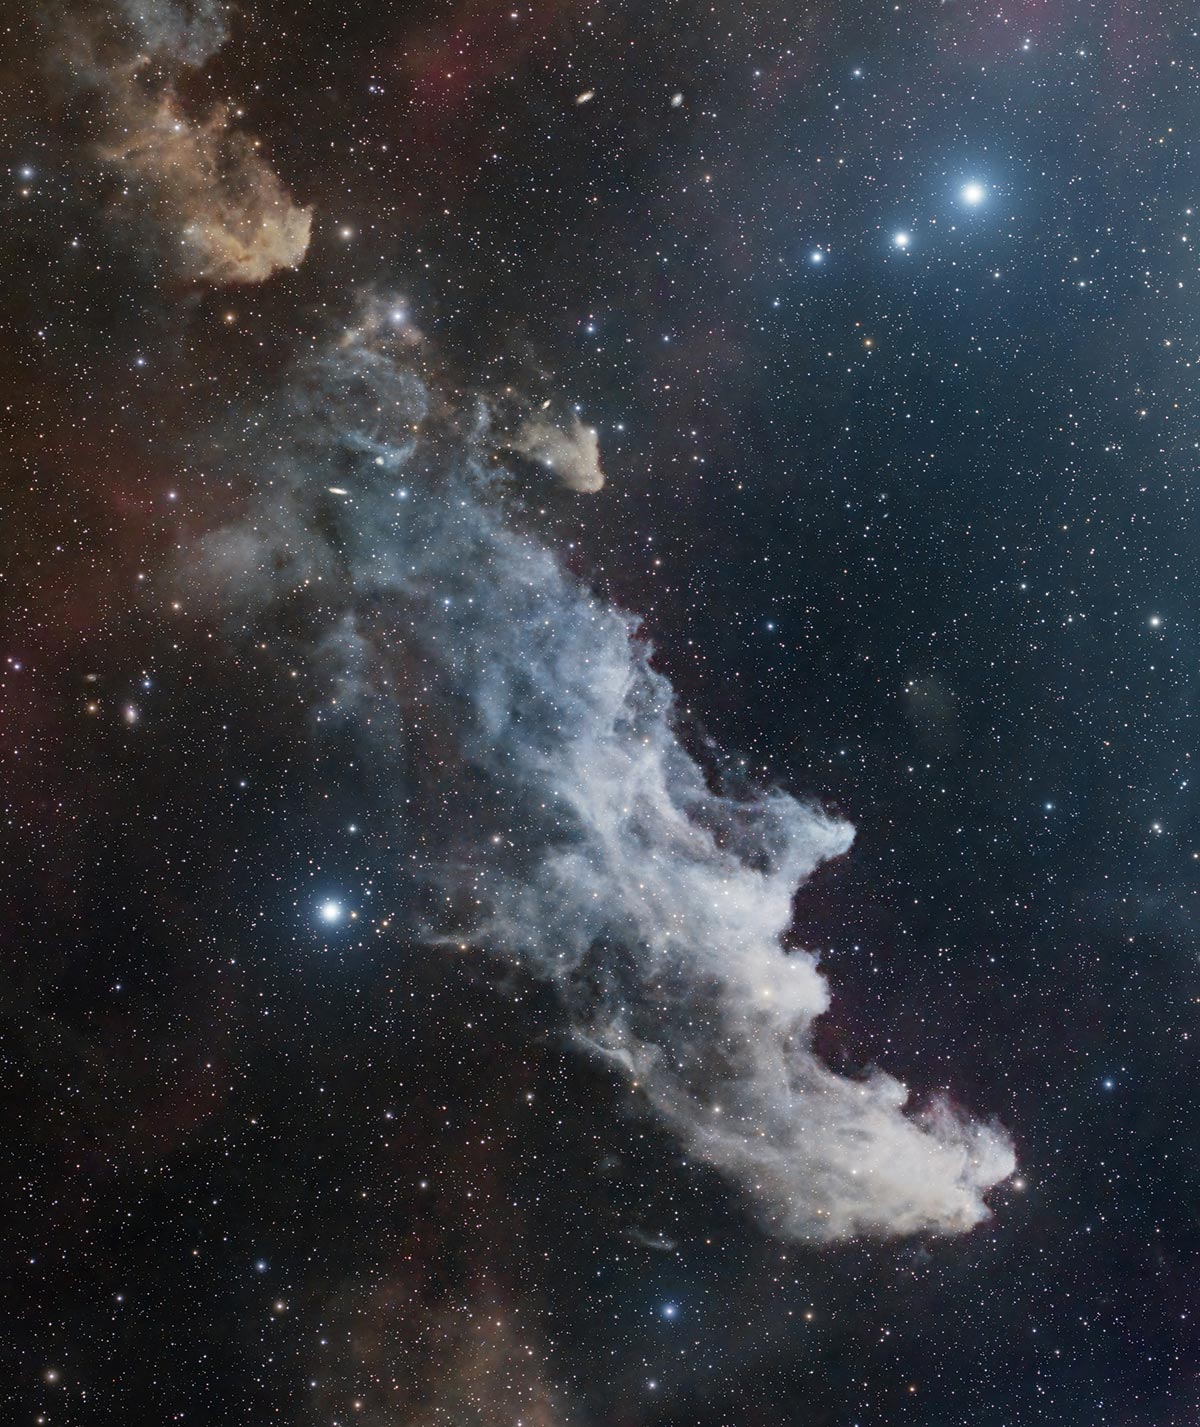
This photo was taken using a refractor telescope with a focal length of 270mm and a full-frame CMOS camera. Here is a crop showing the shape of the “Witch’s Head’.
My latest image of the Witch Head Nebula was captured during the Winter Star Party in Florida. I used a William Optics Pleiades 68 telescope, mounted on a ZWO AM5 Strainwave drive mount.
For this target, stick to the wider-field options, such as the William Optics RedCat 51, or the one I used, shown below. The Pleiades 68 APO has the benefit of shooting at F/3.8, which gathers more light in less time.
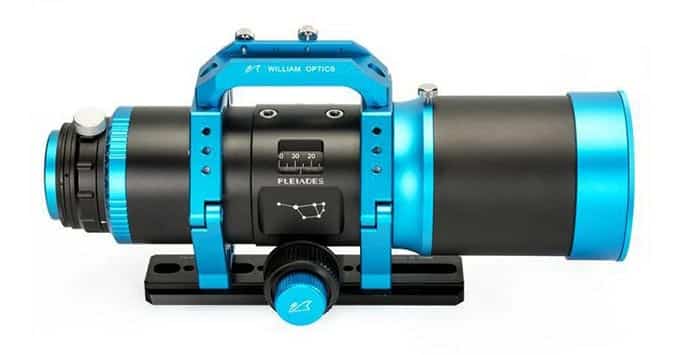
The Telescope Used for my Image: Pleiades 68mm F/3.8 Astrograph.
For a better idea of the telescopes I use to photograph deep-sky objects and planets, be sure to read: The Best Astrophotography Telescopes Available in 2025.
Astrophotography
I have captured the Witch Head Nebula on multiple occasions using a range of astrophotography equipment, from star trackers to advanced deep-sky imaging systems. While it is a challenging subject to capture, it can be done with an entry-level camera lens, such as the Canon EF 75-300 zoom lens.
For the best results, try to find a dark sky location far away from the perpetual daylight of a light-polluted urban area. Being a broadband subject, a strong light pollution filter (or dual narrowband filter) won’t help with this one.
I would recommend shooting this target with your camera from a location that is Bortle 3 or better. My latest attempt was captured from a Bortle 3 site, making the image-processing stages of the project much more enjoyable.
If you would like to practice your image processing skills, you can download the raw image data for my image and process it yourself. You can also see the full-size version of IC 2118 on AstroBin.
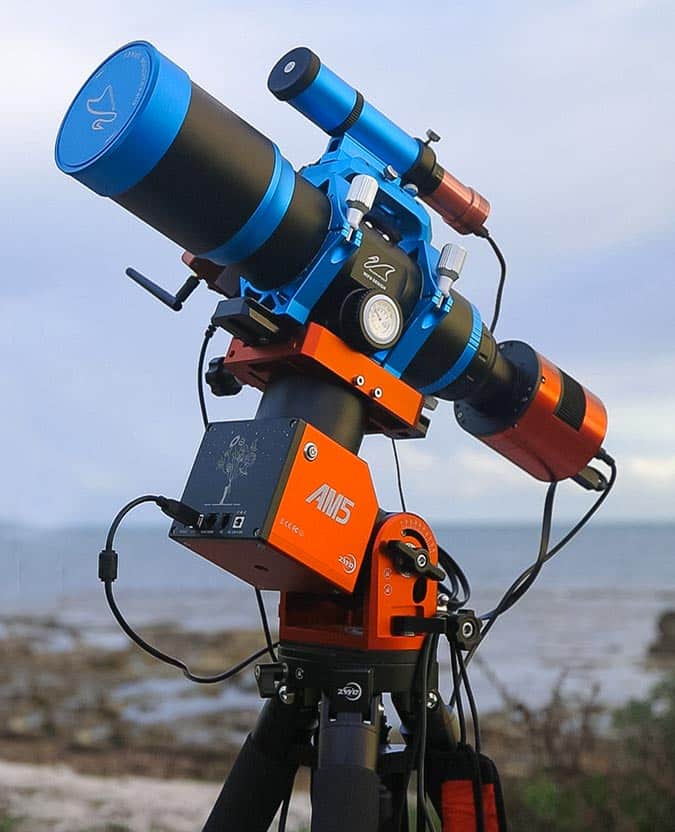
The Camera and Telescope used for my latest image of the Witch Head Nebula.
To me, one of the most important aspects of a great image of the Witch Head Nebula is framing. I rotated my camera (ZWO ASI2400MC Pro) to ensure that I captured the full length of the nebula, with room to include Rigel as well.
I use the ZWO ASIAIR Plus device and mobile app to fine-tune my image framing. The Sky Atlas feature of the app is extremely handy when taking on projects that involve dim, dusty nebulae like this.