Upgrading My Computer for Astrophotography
I enjoy using a laptop for astrophotography over some of the other choices that are available. The latest computer I use for my deep-sky astrophotography sessions is the Acer Enduro N3.
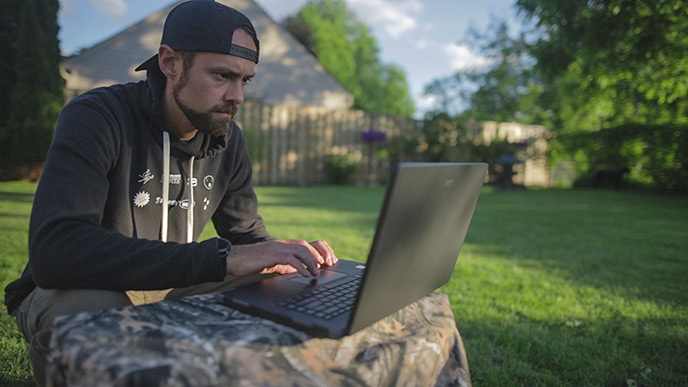
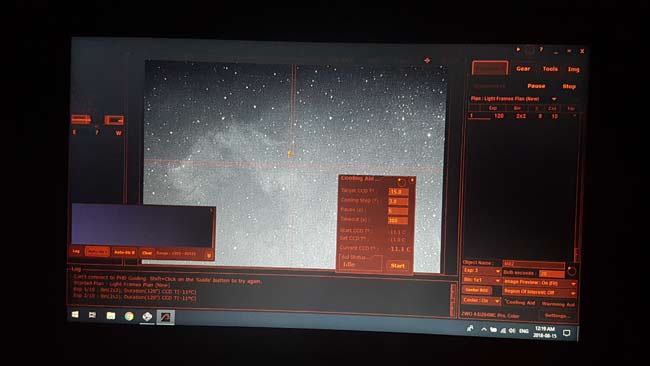
Acer reached out to me to test their new line of rugged laptops in 2020, and I am happy to report that it is a great fit for my imaging location. The photo below was captured by controlling my Canon EOS Ra camera with the Enduro laptop outside.

IC 1396 (5.4 hours total exposure)
In this article, I will describe some of the options available to amateur astronomers right now. As I said, I prefer the full control of a laptop for astrophotography, but you may want to build a kit with something a little more streamlined.
When this post was written, I had just upgraded my nearly 10-year old laptop to an affordable Lenovo Thinkpad. My decision-making process should be of value to anyone that finds themselves in this situation.

I use an Acer Enduro N3 laptop to control my imaging sessions (Summer 2020)
Related Article: Choosing a Computer for Image Processing
Upgrading My Computer for Astrophotography
The computer I’ve used for astrophotography until now was a Sony VAIO with USB 2.0 ports, 2GB RAM, and a severely outdated processor. With new astrophotography hardware products hitting the market that demand faster and more capable machines, I knew the old Sony’s days were numbered.
The most recent of these products being the impressively small and powerful Pegasus Astro Pocket Power Box. I had some issues connecting to the device early on that I am convinced are related to my aging computer with USB 2.0 ports.
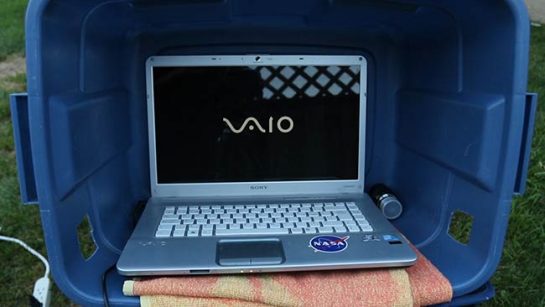
My aging laptop computer for astrophotography
The USB drivers are a complete mess on this old laptop. I probably could have wasted a few more nights under the stars troubleshooting the issue, but instead decided to channel the experience as a catalyst for a new machine.
(It’s amazing how certain situations in astrophotography result in the necessity for new equipment).
Update: July 2020
I’ve been sent a new outdoor laptop for astrophotography, the Acer Enduro N3. This is a rugged, military-grade (IP-53) notebook that was designed to handle the demanding conditions of the outdoors. The Acer Enduro N3 will replace the ASUS model I have been using to capture images with my semi-mobile setups.
You can watch me walk through the process of capturing images with my telescope with this laptop in the following video:
Controlling the Telescope, Camera, and Mount
I should state this right out of the gate, so there is no confusion about this post. The computer I recently upgraded to is for controlling my camera and telescope mount, not for processing deep sky images.
I use a more powerful (and much less portable) computer for photo and video editing, as I am sure many of you do. (It’s an ASUS ROG GL752 for those interested.)
The computer I’ll be discussing in this post is destined to spend countless nights next to my telescope. It needs to be lean and mean, so I can rely on it produce consistent astrophotography images with my equipment.
It must be able to withstand the elements and connect to all of my current and future imaging cameras and devices.

My old computer for astrophotography on a cold night in March
A truly efficient computer for astrophotography will ideally only have the essential applications needed for camera and telescope control installed. A jack-of-all-trades machine that includes image-editing software, multimedia, and other unnecessary applications can slow down PC performance and introduce potential headaches.
The perfect astrophotography computer should be a no-nonsense PC with only one purpose, to reliably control your telescope and collect images. In this post, I’ll do my best to compare the most popular choices against the solution I ended up pulling the trigger on.
Options for Deep Sky Astrophotography
In July of 2018, I reached out the AstroBackyard Facebook community for advice on a new PC to control my telescope mount and camera.
The popularity and availability of portable “Mini PC’s” piqued my interest, but the thought of not having complete control of the device accessible at all times raised a few questions.
- What are the advantages of a “stick” PC for astrophotography?
- How do I Install and update software on a mini PC?
- What are the advantages of a dedicated astronomy control unit?
Needless to say, I had some serious decisions to make about the way I will be controlling my imaging sessions over the next few years.
After some great advice, I began leaning towards a high-end Intel Mini Compute Stick. Naturally, I loved the portability and size of this option, as it’s hard to imagine getting an astrophotography computer smaller than a pack of gum.
Mini PC Sticks
The ASUS VivoStick and the Intel Compute Stick are 2 popular “mini PC” options for running the Windows operating system. Raspberry Pi mini-computer systems are also quite popular, but I won’t be covering these as I don’t have any experience using one for astrophotography.
The Intel Compute Stick (pictured below) had the most attractive options for someone in my position. The model I was drawn to included a pre-installed copy of Windows 10, 4GB of RAM and an integrated wireless adapter. These specs already topped those of my previous imaging laptop at the size of a USB drive.
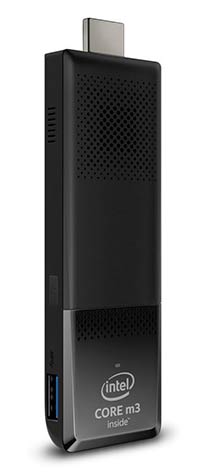
The Intel Compute Stick with a Core m3 Processor
However, the price tag of the high-end CS325 model competed with laptop computers with similar specs (that include an integrated keyboard and mouse). I understand that the power and convenience of such advanced technology in a small size comes at a premium.
The slightly larger Intel NUC mini PC was referred to me by several happy customers, but again, the price tag is steep if you’re looking to get the model with high-end specs. The Core i7 version I was interested in included SSD/HHD bays but did not include any onboard storage out of the box.
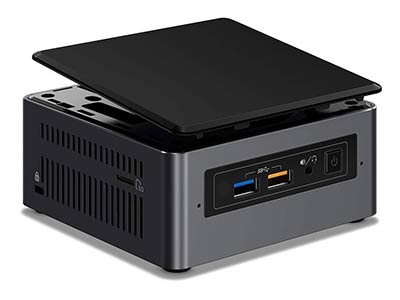
The Intel NUC with a Core i7 Processor
In the end, I concluded that a mini PC was not critical to my astrophotography configuration. My setup is non-permanent and having a single cable running to a powered USB 3.0 hub on the mount does not bother me. (for now)
My need for a new computer to control my astrophotography sessions was instigated by outdated hardware, not a desire to reduce the size of my imaging footprint.
Dedicated Astrophotography Computers
A number of astrophotography control computers have hit the market over the past few years, with the Prima Luce Labs EAGLE Core becoming a household name. (Well, in my household anyway).
I’ve seen the results of the Eagle Core control unit used by Sara Wager of Swag Astro, and Corey Schmitz of Photographing Space, and they both had great things to say about this product. As Prima Luce Labs puts it, this control unit is “much easier than a computer”.
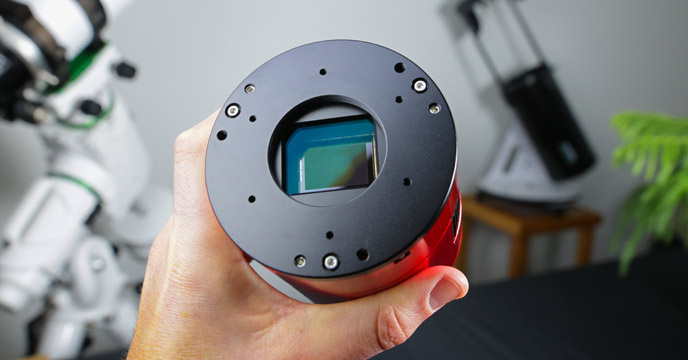
The ASIair is another interesting computer control option, and another product I first saw mentioned at NEAF. The ASIair can autoguide, plate solves, and of course capture images. It’s extremely small.
What I found interesting about this option is that ZWO specifically mentions that the ASIAir was designed for wide-field astrophotography. In all of their demos and product images, they show a compact APO refractor on a GoTo mount.
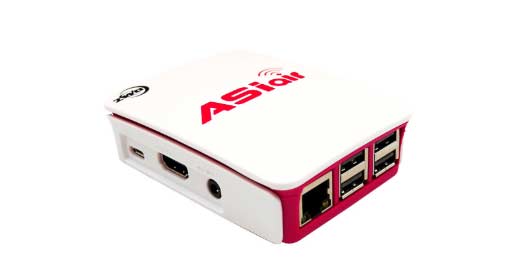 The ASIAIR imaging control unit
I’ll keep an eye on this one as it is a brand new product at a reasonable price. I know there is a huge market for these types of units and I expect future iterations to follow.
My Final Decision
After digesting all of the helpful information provided by vendors, peers, and fellow imagers, I finally landed on a decision to control my equipment I could live with.
I had a clear vision of the best astrophotography computer for my needs. Another Laptop.
Perhaps I am just too stuck in my old ways to embrace the incredible new solutions available for deep sky astrophotography. Or maybe I just like the thrill of a great deal.
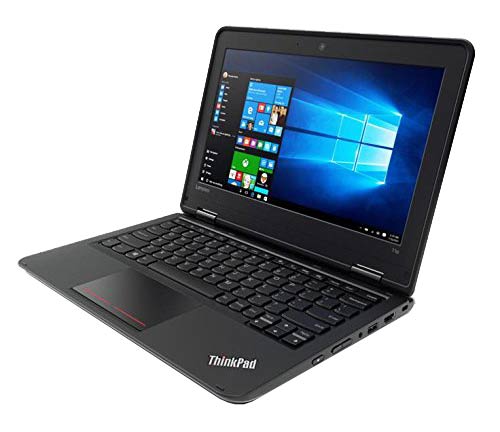
The replacement for my beloved old Sony VAIO laptop is a Lenovo ThinkPad 11e. Just a quick note, this is an older generation model that has since sold out, but the link listed is the closest comparable model I could find.
As cutting edge and impressive as the Intel NUC and Compute Sticks are, the lack of integrated display and steep price tag lead me to explore more options. I enjoy controlling my mount from inside the house on Team Viewer as much as the next guy, but I also want to be able to have complete control over each software tool while sitting next to my rig.
When I found a no-nonsense laptop with speed and performance in a small package on Amazon, I pounced. The Lenovo ThinkPad 11e has a 128 GB Solid-State Hard Drive – which means there is no fan to make noise or fault in the extreme temperatures of my backyard.
It also boasts a respectable 8GB of RAM, an Intel Celeron N2920 processor and an internal wifi adapter. All this in a highly portable 11.6” package – for $250 (CDN). The model I ordered was certified refurbished – which certainly helped reduce the price.
Lenovo ThinkPad 11e Specs:
- 1.86 GHz Intel Celeron N2920 Processor
- 8 GB RAM
- 128 GB SSD
- 2 X USB 3.0 Ports
- HDMI Port
- 11.6-inch HD LED anti-glare Display
- 1366 x 768 HD Resolution
- Integrated Wireless Network Adapter
With a clean slate on a Windows 10 machine, it was time to download each and every software tool I use for astrophotography.
This proved to be a great opportunity to share the current software tools I use for camera and telescope control, as I had to reinstall each and every application on a brand new laptop.
Software Downloads:
- Astro Photography Tool
- AltairCapture
- SharpCap
- PHD2 Guiding
- Pegasus Astro Power Box Software
- Pegasus Astro Focus Controller
- Team Viewer
Driver Downloads
- iOptron Commander
- ASCOM Platform
- USB to RS232 Prolific COM Driver
- ZWO ASI Camera Driver
- Altair Astro Camera Driver
To summarize, the new laptop will control virtually every aspect of my deep sky imaging sessions using APT, PHD2 and the Pegasus Astro software. My early tests using the Pocket Power Box have been promising. So far, I’ve utilized the temperature sensor, onboard 12V outlets, and even the dew heater controllers.

A More Organized Approach
My goal for the remainder of this year is to get my imaging rigs organized in an effort to save time. With new telescopes and cameras to test and review each month, I have grown tired of scrambling to make things work under the pressure of a rare clear sky.
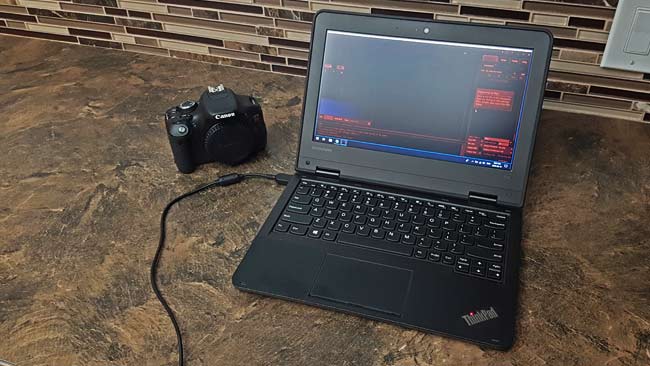
I’ll have two rigs ready to go that can be controlled using the new Lenovo laptop. Here is the new computer in use for an imaging session on the North America Nebula.
The new computer in use with my camera and telescope
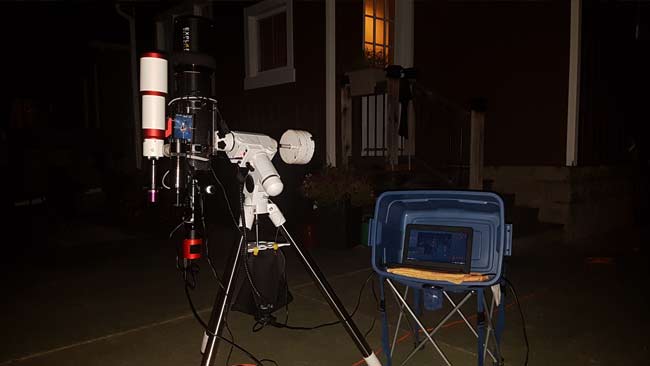
I’ve still got some bugs (and cable management) to work out on my “ready for anything” rig that involves the Sky-Watcher HEQ5 equatorial mount and Explore Scientific ED 102 telescope. This setup includes the Pegasus Astro Pocket Power Box and Motorized Focuser.
This kit will be deployed for wide field deep sky astrophotography on nights when lugging the big CEM60 and a large telescope isn’t possible.
I captured 26 minutes of unguided subs on the Lenovo ThinkPad 11e laptop with this rig as a test to make sure everything was working properly.
Capturing NGC 7000 using APT on my new imaging computer
Final Thoughts
The bottom line is, invest in the type of imaging control solution that works best with your style and equipment profile. For example, if you have a highly-automated imaging setup in a permanent observatory, an onboard mini PC connected to a wifi tablet is probably the most convenient option.
The EAGLE Core and ASIAIR offer an impressive user experience for amateur astrophotographers who want to control everything from their smartphone. This option may seem like the obvious best choice, but for backyard astrophotographers without a permanent setup like me, it’s nice to have the practicality of a traditional laptop computer.
I spend a lot of time outside with my rig while it’s running. It will be interesting to see if the new mini PCs and dedicated control units like the EAGLE Core are the preferred choice for beginners getting into the hobby. Anything that can streamline a complex and involved process is sure to be a hit with consumers.
Having been in this game for nearly a decade, I guess you could say I’m “old school”. If you’ve used a mini PC or any of the specialized astrophotography computers mentioned in this post, please let me know how it’s working for you in the comments.


Hi Trevor,
Have you had the ZWO ASIAIR in your hands? Have you played with it? I’m asking because this device looks very promising and very mobile-friendly (no laptop, only astrophotography rig in the field). I think there are many people around who would like to read some real-world review of this product (including myself). And it would be great to make it work with other cameras, not only with ZWO’s (or they changed their minds and added that support?).
Congrats on the new hardware!
Take a look at Stellar Mate. It looks like ZWO copied it, like took it and just painted it a different color. I also read that the ZWO ASIAIR only works with ZWO cameras. Stellar Mate works with most all cameras. It comes wit/runs a software called Ekos. Its a control all in one type deal, camera, guiding, mount, dome, etc. The guy who designed it did a presentation on The Astro Imaging Channel if you want more info.
Thanks Trevor for a timely post as I just ordered the same laptop! You’ve confirmed that it’s going to fill my telescope control needs and I can keep my big old Dell i5 back in the office.
I’m also hoping the power consumption will be less with this smaller LT but that remains to be seen.
I generally agree with your conclusion. I have a 3 year old 15″ MacBook Pro as a work computer. It doubles as my image capture computer. Because it is a Mac, I had to pick some Mac applications (or at least preferred to – I do have parallels to run Windows apps). For capture I use AstroImager 3.2. I am happy with it. It is simple and works well. I had a bug that was very inconvenient in an earlier version. I reported it. They immediately responded with a beta version with that bug fixed – so great tech support. I also run PHD which has a native Mac version. For planning I run Sky Safari 6 Pro which I love.
On the rare times that I use a DSLR, I do run Backyard EOS in Parallels on my Mac. That runs fine.
For processing, I also use a desktop running Windows. I run DSS and Pixinsight on it. It is a fairly fast gaming system (2+ years old now)
Soon I will need to get a new work computer. My work now only buys PCs. So I will be switching to a PC and getting a new capture program. I will likely switch to Sequence Generator Pro but not positive yet.
My only slightly different view from you is that it would be nice when at a star party to also process the image. In those rare cases, the machine does not have to be as fast as the desktop. But it would be nice if it could run the same programs. So I would not buy a laptop that just barely meets the capture requirements. But it does not need to be a gaming laptop either.
Keep up the articles and videos.
Eddie
I’m just starting up. I wanted to use my MacBook and iPad but doesn’t seem to fit my needs lol. I’m looking at two options or ideas. A fzg1 toughpad. Being it runs windows and that seems to be the better option of os between that and Mac. And using raspberry pi. I’ve seen some promising stuff on building them. And with the ability to add sensors to say kick on the dew heater when it reaches a temp or humidity is at a certain point. I basically want to be able to use software to locate and control tracking as well as the focusing. Anyway you can email me? Lol
Trevor, an excellent blog. I am just getting into this hobby having purchased a 1984 Celestron C8 super with Tuthill Star Trap module so no GoTo. While it tracks accurately I can see it is far from the optimum set up for photography. I am on the cusp of purchasing a lap top to control a ZWO camera so your blog is spot on. I sit back and read and realize I am at the very beginning of a long learning curve. I cannot believe some of the stunning photos you and others post. Thank you for sharing your knowledge.
Hi Trevor. I use a NUC and love it. It stays in the dome. I shopped for a computer for astro primarily looking at desktop resolution of the display since I run so many apps and windows at one time. My lower res laptop didn’t have enough real estate to display everything I wanted to see. With the NUC I typically access if via team viewer or remote desktop in the house. It works great and sat out there 24/7 last winter in sub freezing temps. (like you get there). Easy access to upgrade it. I Also needed “auto boot” meaning, I didn’t want a power button that required I press it. Since I power it on remotely, I want to be able to boot it up by just toggling on AC power. It’s worked great.
Excellent article, but I’m a little confused with the setup. I don’t know what you use TeamViewer for.
Do you use your new laptop AT the computer to control it? Or, do you use TeamViewer inside your dome and have it control a computer hooked up to the scope and camera? Where does the TeamViewer come into play?
Thanks
Love your website and information. Good Job!!
Bruce L.
This comment is from Jo: Thanks, Bill, for mentioning StellarMate. Jasem Mutlaq built a fantastic astrophotography suite there.
In addition, please also check out http://indilib.org
That software suite will run on a Raspberry Pi and allow you to completely control your mount, focuser, and camera from inside your house. It includes a scheduler, plate solving, mosaic imaging, in short, everything you need to collect tons of data, even without having to sit next to the telescope, even while sleeping.
Thanks to Jasem and his team for putting together this software suite! It stands head over shoulders above anything else out there!
Nice upgrade Trevor! I was wondering how well your old PC performed so I wasn’t exactly surprised to see that you bought a new one. I’m kinda in the same boat lost a night of imaging due to crashes and the classic: “Working on updates: 100% complete”
Clear Skies and keep up the good work!!
Hello. Thanks for sharing this info. A few ideas there I want to test/integrate with my rig.
At the scope/mount, I use a RaspberryPi running The SkyX Pro. I really enjoy having the power of everything in The SkyXPro, I only have two wires coming from the ground components (Power and the data cable for the mount). All Wires from the computer to the components are cut to length. The RaspberryPI connects to WiFi. I then use my higher end laptop (I use for processing as well) to connect to the Raspberry Pi via VNC. I can then go anywhere within WiFi reach to hang out and control the scope. About half the time, like you, I stick close by to the rig to work focusing and other variable issues. This is all dis-assembled right now as the mount awaits its new home in the observatory I am working on. Hopefully, will have everything online for early fall, 2018.
the only laptop spec I would differ with is the screen size and resolution. Better with a minimum of 15″ and full HD resolution. Particularly if you are videoing the screen!
Great point, Ian. Yes, the 11.6″ screen is a little small but it seems to be just enough for my needs! Cheers
I think Team Viewer allows you to run your computer remotely from another computer (like inside the house). I have not tried it yet but I’m guessing you also would need your own remote Wifi setup.
Hi Steve. Yes, I use Team Viewer all the time to control my imaging laptop. It’s been really reliable and convenient! Having an integrated wifi was an important feature I was looking for in a laptop.
I have ordered a Explore Scientific FDC100 127 Refractor with and Explore Scientific PCM 8 GOTO Tripod. Ahead I already bought a small Microsoft Go 8 ram 128 GB. Can I add a external hardrive to run the go to mount and telescope. And necessary software
Finding this post 6 months late (while off to look at small computer systems for scope control). I have been looking at newer variants of these netbooks.
My concern was their capabilities. For me I just need Stellarium to work (it’s better than the hand controller).
Anyway. Thank you for this article. It is a help in the decision.
Fascinating, thank you for all the detailed info.. I wonder if folks here would like to share the specs on their image processing equipment too please as that is the next BIG decision I am about to make….. So much to think about. Cheers, Claire
At last found the info i need and not late yet ,as im still looking for a computer as we speak , i have a Mac but im not that savy as you guys ,so i might as well get a nooby friendly windows based comp, i am a novice but i been “watching” the night sky for some years now ,but i would like to get into astrophotography so im gathering “parts” to assemble my rig ,so this post is a heaven sent ,thanks Trevor and the rest of you guys for all the much needed knowledge , at the moment im looking at a HP ,since my old Dell won’t keep up ,thanks again guys
Hi, Trevor. Do you have any videos dealing with motorized focusing? I am a beginner (I spoke with you briefly at NEAF 2019…If you remember, I said you looked taller in person) and find that as soon as I get familiar with PHD2, Sharpcap and Pixinsight, I get hit with all these new “necessary” programs. Thanks.
Hi, Trevor – It’s been a little while since you posted this article… I am looking for a laptop solution and saw this article form 2018. I was just wondering if you are still happy with your Lenovo ThinkPad or if you have switched to something else. Please let me know…
Thanks,
George
Hi George. I am happy to report that YES, I am still very satisfied with this choice. This little laptop runs my most important rig these days (Sky-Watcher EQ8-R Pro, Sky-Watcher Esprit 150, and Starlight Xpress Trius 694). It’s the size of a tablet, yet can run all of the software I need for acquisition with plenty of room to spare (and store images!).
So as new as new can be to Astrophotography. Looking at a like new used EQ35 mount with scope and GOTO. Also can convert mount for camera and lens.
So my question is….still get a laptop for this or can I start out with the above mentioned. Camera would show images on iPad as taken. Stack images at home.
Does one use the GOTO when utilizing a laptop or does it become redundant.
How can connect my delicated camera and guide cam such as zwoasi 1600 and 120mini guide cam to pc ?
I see that the lenovo only has 2x usb ports. Do you use a usb hub to connect everything to it? If so, what has worked for you?
You will have to use a powered usb hub since your laptop only has 2 USB ports. This approach works.
Sir,
As someone who is new to EAA and astrophotography, your article is very helpful. I’ve seen many of your YouTube videos, and am still learning a great deal.
I have one question for now –
I also prefer to use a laptop for the same reasons you’ve mentioned here, and my question is this: I am most studied up on SharpCap for “streaming” imaging camera footage (I don’t have a guide camera at this time), but I wanted to ask you – what software program, if you were to pick one, would you recommend for scope/mount control? I can connect the camera to a USB 3.0 port and view on my laptop, but should I use a separate software program and scope to PC line connection for scope control.
Going from simple observation of the night skies to capturing images is a lot more involved than I first imagined it would be, but now I can’t wait to get smarter and begin capturing much more detailed images.
I’m using an SE8 right now (still have the Nexstar SLT 130 – my first telescope), so I’m currently looking at go-to EQ platforms. I have an ASUS Zenbook 14” with 8Gb/256Gb as well as an older MSI GT-73 (much higher specs, though). So, I guess the question remains – which software program to run the scope, and which program to capture live images (ZWO 183 or 294)?
Thanks for any advice you have to offer. I can imagine you’re a busy man!
Does your system use the native power of the telescope? (ie. just the telescope without the individual eyepiece). If not, how do you collect the image seen through said eyepiece?
My current interest in astrophotography only includes the sun and moon; solar and lunar eclipses, specifically. My first ‘bite from the bug’ was the 2017 coast-to-coast solar eclipse in the States – failed miserably except for a short recording on a digital camcorder, of all things.
My gear includes a Tasco Galaxsee 375x telescope(D=114mm, F=500mm), a HP notebook(17-X051NR), and a StarShoot Solar System Color Imager IV telescope camera(Orion product)
Exactly, yes. Prime focus astrophotography uses the native focal length of the telescope without any additional magnification with eyepieces. This is ideal for deep-sky astrophotography.
I am surprised that the tough book by Panasonic isn’t listed in your potential choices.
The Toughbook looks like a great choice for a field laptop (image acquisition). Those rugged laptops are handy for what we put them through outside!
Thanks for the very helpful article Trevor! I just bought a new onstep box and stepper motor control system ( terran ind. V4 lite w bluetooth and wifi) and was planning to connect wirelessly to the mount and to my guidecam( via a small wireless router), wondering if you’ve ever tried something like this?
Thanks
Steve