Pegasus Astro Stepper Motor Kit Review
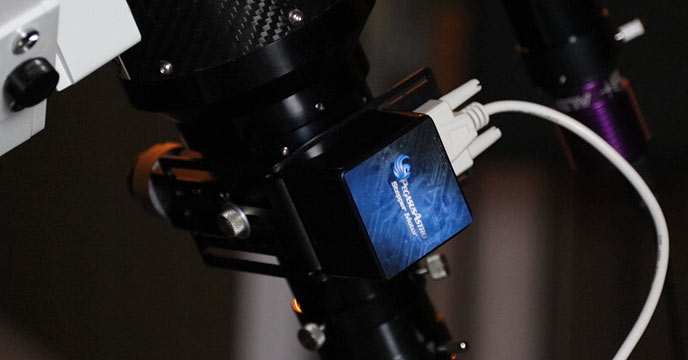
The Pegasus Astro stepper motor kit is an affordable way to give your astrophotography telescope a huge upgrade. Once installed, it allows you to make precision adjustments to your telescope focus without touching the telescope. Achieving (and maintaining) focus is one of the most important aspects of deep-sky imaging, which means that this small upgrade can have a profound impact on your astrophotography images.
The Pegasus Astro stepper motor kit is easy to install on an imaging refractor telescope, and the included software works as intended right out of the box. For me, the process of installing the stepper motor to my telescope involved disassembling the focuser drawtube. It can be a bit daunting to take apart your telescope at first, but once the motor is installed you can enjoy the enhanced precision and remote focusing options now available.
Pegasus Astro Stepper Motor Kit Review
Astrophotography enthusiasts looking to automate their focusing procedure have a few options. You can either purchase an entirely new focuser kit that includes a motor (such as a MoonLite Focuser) or upgrade your telescope’s existing focuser with a stepper motor like the one available from Pegasus Astro.
The point of the upgrade or modification is to better control the focus of your telescope, which is especially important for astrophotography. There are many benefits to making this upgrade, but the most important aspect is to produce consistently sharp images with your DSLR or dedicated astronomy camera.
Adding a Motorized Focuser to My Telescope
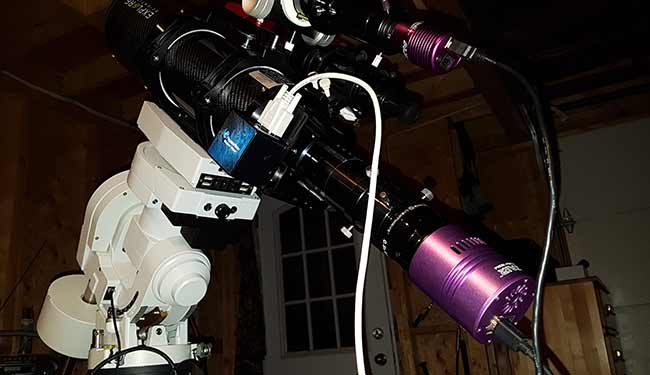
In this video, I take you into the backyard for an imaging session using my latest telescope upgrade. I was able to control the telescope remotely from inside the house using Team Viewer on my imaging laptop out in the cold. The addition of a Pegasus Astro Dual Focus Motor controller means that I can now adjust my focus on the fly, without venturing back outside once everything is set up.
Update:
I updated my laptop for astrophotography to a newer machine with more power and USB 3.0 ports. I’ve also added the Pegasus Astro Pocket Powerbox to the mix, and it now powers everything from my camera to the dew heaters.
Benefits of a Motorized Focuser
I must admit, when I was first approached by Pegasus Astro to try out their stepper motor and dual motor focus controller, I only thought of the idea of focusing remotely. It wasn’t until I connected the focus motor to Astro Photography Tool that I realized I could do much, much more. Here are some of the main advantages of using a motorized focuser and controller:
- high precision control
- the telescope is not touched
- focus remotely using PC
- use “autofocus” features
- compensate for changes in temperature
There is really only one drawback in the upgrade, and that’s added hardware and wiring to your rig. That means another USB connection to your PC, and 2 more wires running to the telescope and mount. Those of you that own a personal observatory with a permanent setup are more likely to invest in an automated focus solution.
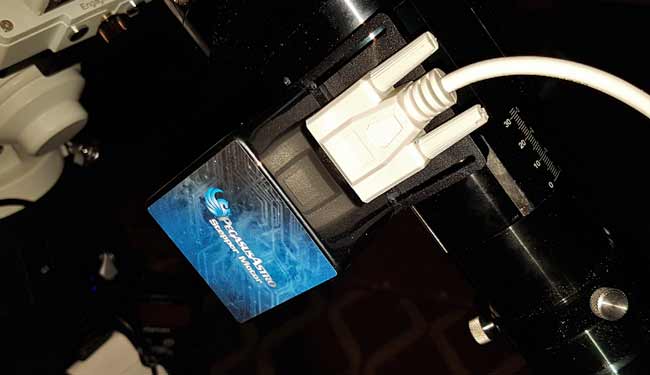
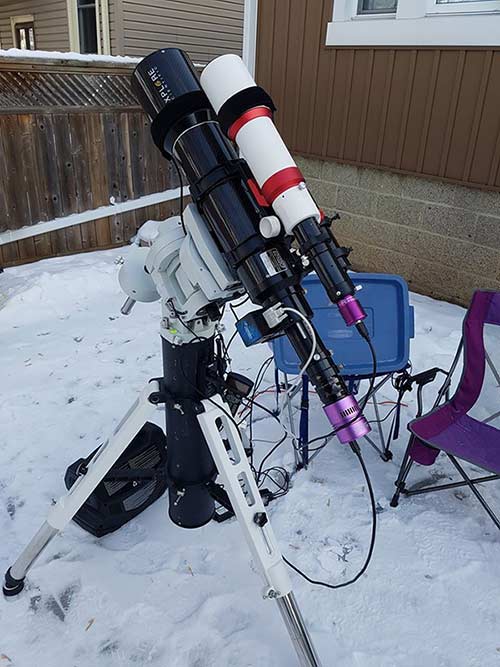
On the night of January 6, 2018, I used the Pegasus Astro DMFC to adjust the focus of my Explore Scientific ED 102 refractor from inside the house. This was accomplished by accessing my imaging laptop outside remotely using TeamViewer. The computer outside ran the focus motor controller, which was plugged into the stepper motor via a D-Sub connection.
The Focus Motor Controller allows me to make fine adjustments without going anywhere near the telescope.
The timing couldn’t have been better for this upgrade, as the outside ambient temperature dropped below -20 degrees Celcius. Once the mount was polar aligned and ready to go, all further imaging steps were taken remotely from in the house. This includes framing my target using Cartes Du Ciel to control the mount.
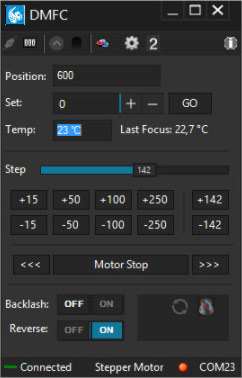
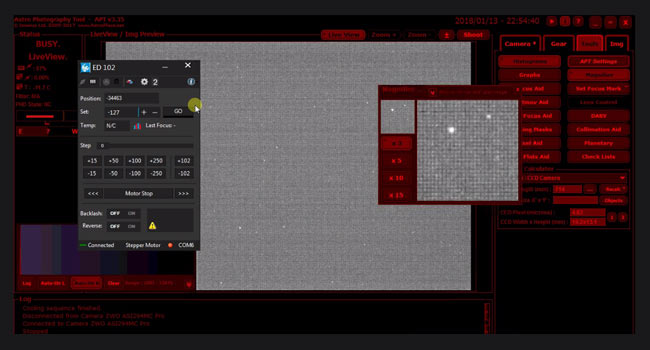
The stand-alone software that comes included with the Motor Controller works exceptionally well and is very straightforward. I watched the star size change using Live View in Astro Photography Tool until I reached a sharp focus with the Altair Hypercam 183M.
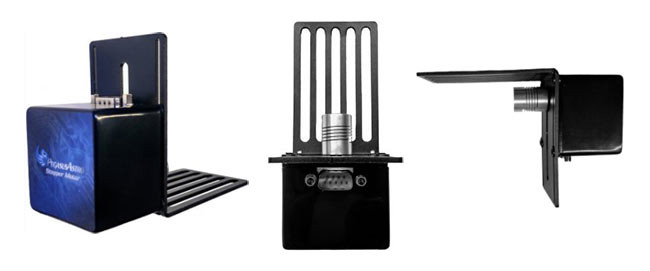
There are a number of ways to install the stepper motor and controller to your telescope. See more configurations on the Pegasus Astro website.
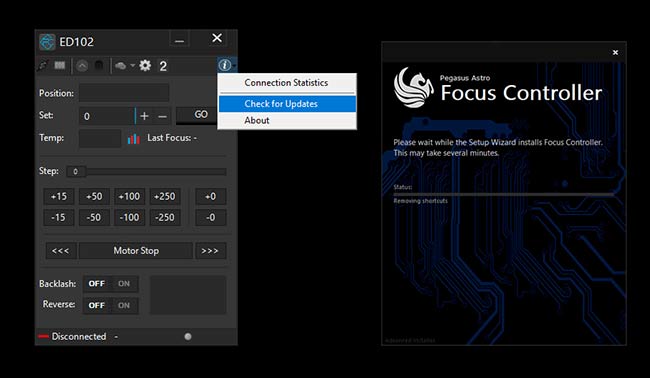
Below is a screenshot of the software I use to control the focus of my telescope. I found this application to be useful and responsive and was able to fine-tune my focus when looping a live-view 10-second exposure in APT. The DMFC will communicate directly within Astro Photography Tool, but I experienced some hiccups early on. More on this below.
Pegasus Astro Dual Motor Focus Controller
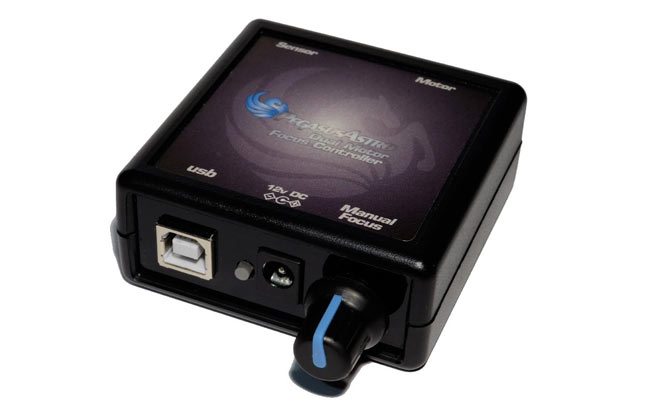
The Dual Motor Focus Controller (DMFC) was designed to maintain the optimal focus position during a night of imaging. It’s ASCOM compliant, so you’ll be able to use it with your favorite camera control and image sequence software.
The standalone DMFC software is compatible with Windows operating systems only, so keep that in mind. You can update the controller’s firmware using a USB 2.0 connection to your PC if updates become available in the future.
It communicates with the motor from my PC application commands and includes the temperature probe for a reading of the ambient temperature in my backyard. It works the way it should, but I do not have anything to compare this to, as I have never owned a focus motor controller before.
Although I mainly control the stepper motor using the Focus Control software from Pegasus Astro, I certainly appreciate the ability to make manual adjustments using the dial. As long as the controller is powered up, the dial is a great way to retract the focuser in a hurry when you’re packing things up.
Software Updates
You’ll find up-to-date drivers and software downloads for the focus controller on the Pegasus Astro website under “support“. In early 2019, I updated the focus controller software to the latest version. To find out if you need to update the software, just click on the “i” (information) icon within the standalone software, and click “check for updates”.
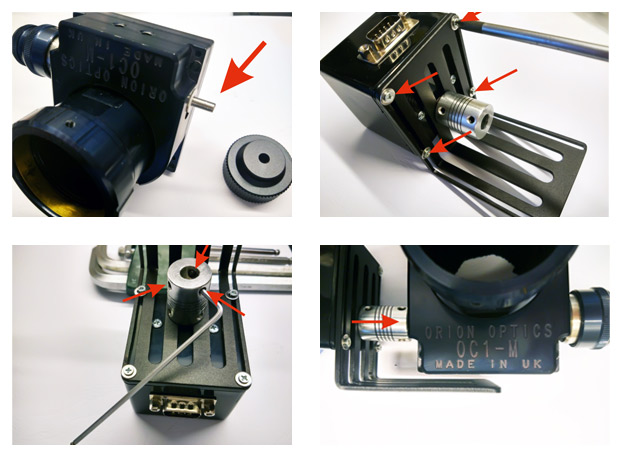
Installing the Stepper Motor
The process of installing the stepper motor involved removing the focuser of my Explore Scientific ED102. This was something I had never done before and definitely felt a little strange. Imagine the feeling of disassembling a high-end telescope that you use almost daily.
The team at Pegasus Astro was quick to respond to the early questions I had about installing the stepper motor. The process will be straightforward to anyone who has ever upgraded a telescope focuser before but might be a little confusing to newbies of this procedure.
It is best to remove the stock focuser from the optical tube first, so you can access the tight spots you’ll need to get into better. You’ll only need 2 tools, a small Phillips head screwdriver, and an Allen key set.
Pegasus Astro offers step by step instructions for installing the focuser on their website.
Controlling the focuser on my PC
Although I successfully connected to the focuser using APT (Astro Photography Tool), I had some issues when using it to control the focuser. The focuser would only move one direction (outwards) no matter which command I sent. This is likely an issue due to an outdated version of APT, and/or lack of the proper settings.
Many others have had success using APT with the DFMC, and the team at Pegasus has been very helpful on this issue.
However, using the Pegasus stand-alone software for the focus motor controller worked like a charm. I simply leave this application running during my imaging session to control the focus. Having the ability to adjust the focus of my camera while sitting indoors still blows me away!
You’ll find the necessary software to run the camera on your PC here: http://pegasusastro.com/support/
Final Thoughts
The Pegasus Astro Stepper Motor Kit is an affordable way to upgrade your existing telescope with remote focusing abilities. This installation process was straightforward on my small refractor telescope, but owners of other telescope types and sizes will need to research the Pegasus Astro website to make sure a motor focus kit is a good option.
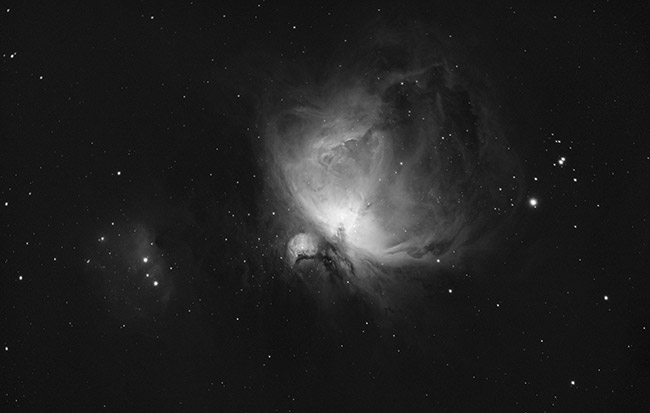
The image above was captured using the Stepper Motor Kit to focus the telescope
The Focus Motor Controller works as it should, and worked brilliantly with the standalone software provided with the kit. I expect others will want to integrate the focuser with their existing capture software such as APT or Sequence Generator Pro.
I’ll continue to share my experiences using the stepper motor kit and controller over the coming months. One thing is for sure, I appreciate the warm hands while focusing in this harsh Canadian winter we’re having!
The Pegasus Astro Stepper Motor Kit and Controller is available to order online at Ontario Telescope and Accessories



Hi Trevor, I just finished watching your lastest youtube video and notice you are having trouble getting color out of the zwo asi 294mc pro.
I am new to ccd/cmos imaging and have the same camera and turned to your channel for advice. Im am using the exact same settings as outlined by you in the ” stacking fits files in deepskystacker ” video. I am using bin 1×1 and have no trouble getting color. Maybe is a problem with the camera itself. Thank you for the great tutorials. Love the channel.
Matt.
That’s reassuring! Thanks Matt, I will continue looking into it:)
Trevor have gone completely CCD now..?
Not completely, no! I still use the DSLR all the time:)
Check out the settings of the ASI camera. I have the ASI1600MC and I can shoot in 8bit Raw, 16bit Raw, Luma and 24bit RGB. If you have the camera set on Raw it will only shoot b&w, no color. You need to set it to RGB.
I’ll double check my settings there Jo, thank you!
Hi Trevor. I love your web page and have learned a lot from you. Quick question. I am new to all this so every step is a learning process. Why are there so many variations of positions of targets in astro imaging? A good example is the pic above of the Orion Nebula and Running Man, which is I think, rotated 180 counter clockwise or taken very very early in rising. Is it all just personal preference, or is it because horizontal images are bigger on computer screens? Are there any official gudelines? Thanks for the great web page!!
Hi Scott, I saw your question to Trevor and think I can explain. The Orion Nebula as seen by someone in for instance Seattle (N 47.8°) would be tilted about 85° compared to the view of someone in Melbourne (S 37.8°). Physically speaking you are effectively looking at it from a different angle. Basically there is no up or down in space, so orientation of a nebula or any other DSO is more of an artistic freedom than a guideline. Just frame it as it suits you best.
Hi Trevor, great video again. I do have a quick question though. In the video I saw that the actual focuser position is shown in the window of the software package. Imagine you are shooting narrowband filters and you have to tweak focus slightly between different filters. If you have written down the focuser position corresponding to each filter, could you then delay the flats until the end of the session ? I can imagine that if outside temperature is the same and you have a cooled camera, you could even postpone them to the next day (if you didn’t remove the camera from the scope). Or not ? Thanks and clear skies !
Do you know a good place online to buy this? I can’t seem to find one.
Hey Drew – Sorry about that, I’ve added a link in the post. OTA has this kit: http://www.ontariotelescope.com/Pegasus-Astro-Dual-Motor-Focus-Controller-v3-Full-Kit_p_1337.html&Affid=2 – Clear skies
Thank you so much, I missed seeing it at the bottom of your post about it. Thank you for such a quick response!
Do you know any places that ship to the United States?
Hey, Trevor, i just installed the pegasus focuscube onto my GSO 8″ RC mounted on the CEM60. Did you have any issues with the pegasus causing your computer to crash when you routed the connection through the CEM60 hub?
Hey Ken – I didn’t route the connection for the Pegasus focuser into the CEM60 (or any connections for that matter) I’ve been using a separate powered USB hub (ANKER) and that’s been working well. Please let me know how you make it with this issue. Customer support from Pegasus has been great in my experience!