Moon Photography: A Lunar Photo Gallery
The moon is the perfect target for beginners, as its detailed surface and captivating phases beg to be photographed as it travels along the ecliptic.
The best part about taking a picture of the moon is the variety of creative compositions possible, whether it be a landscape photo or a high-magnification close-up through a telescope.
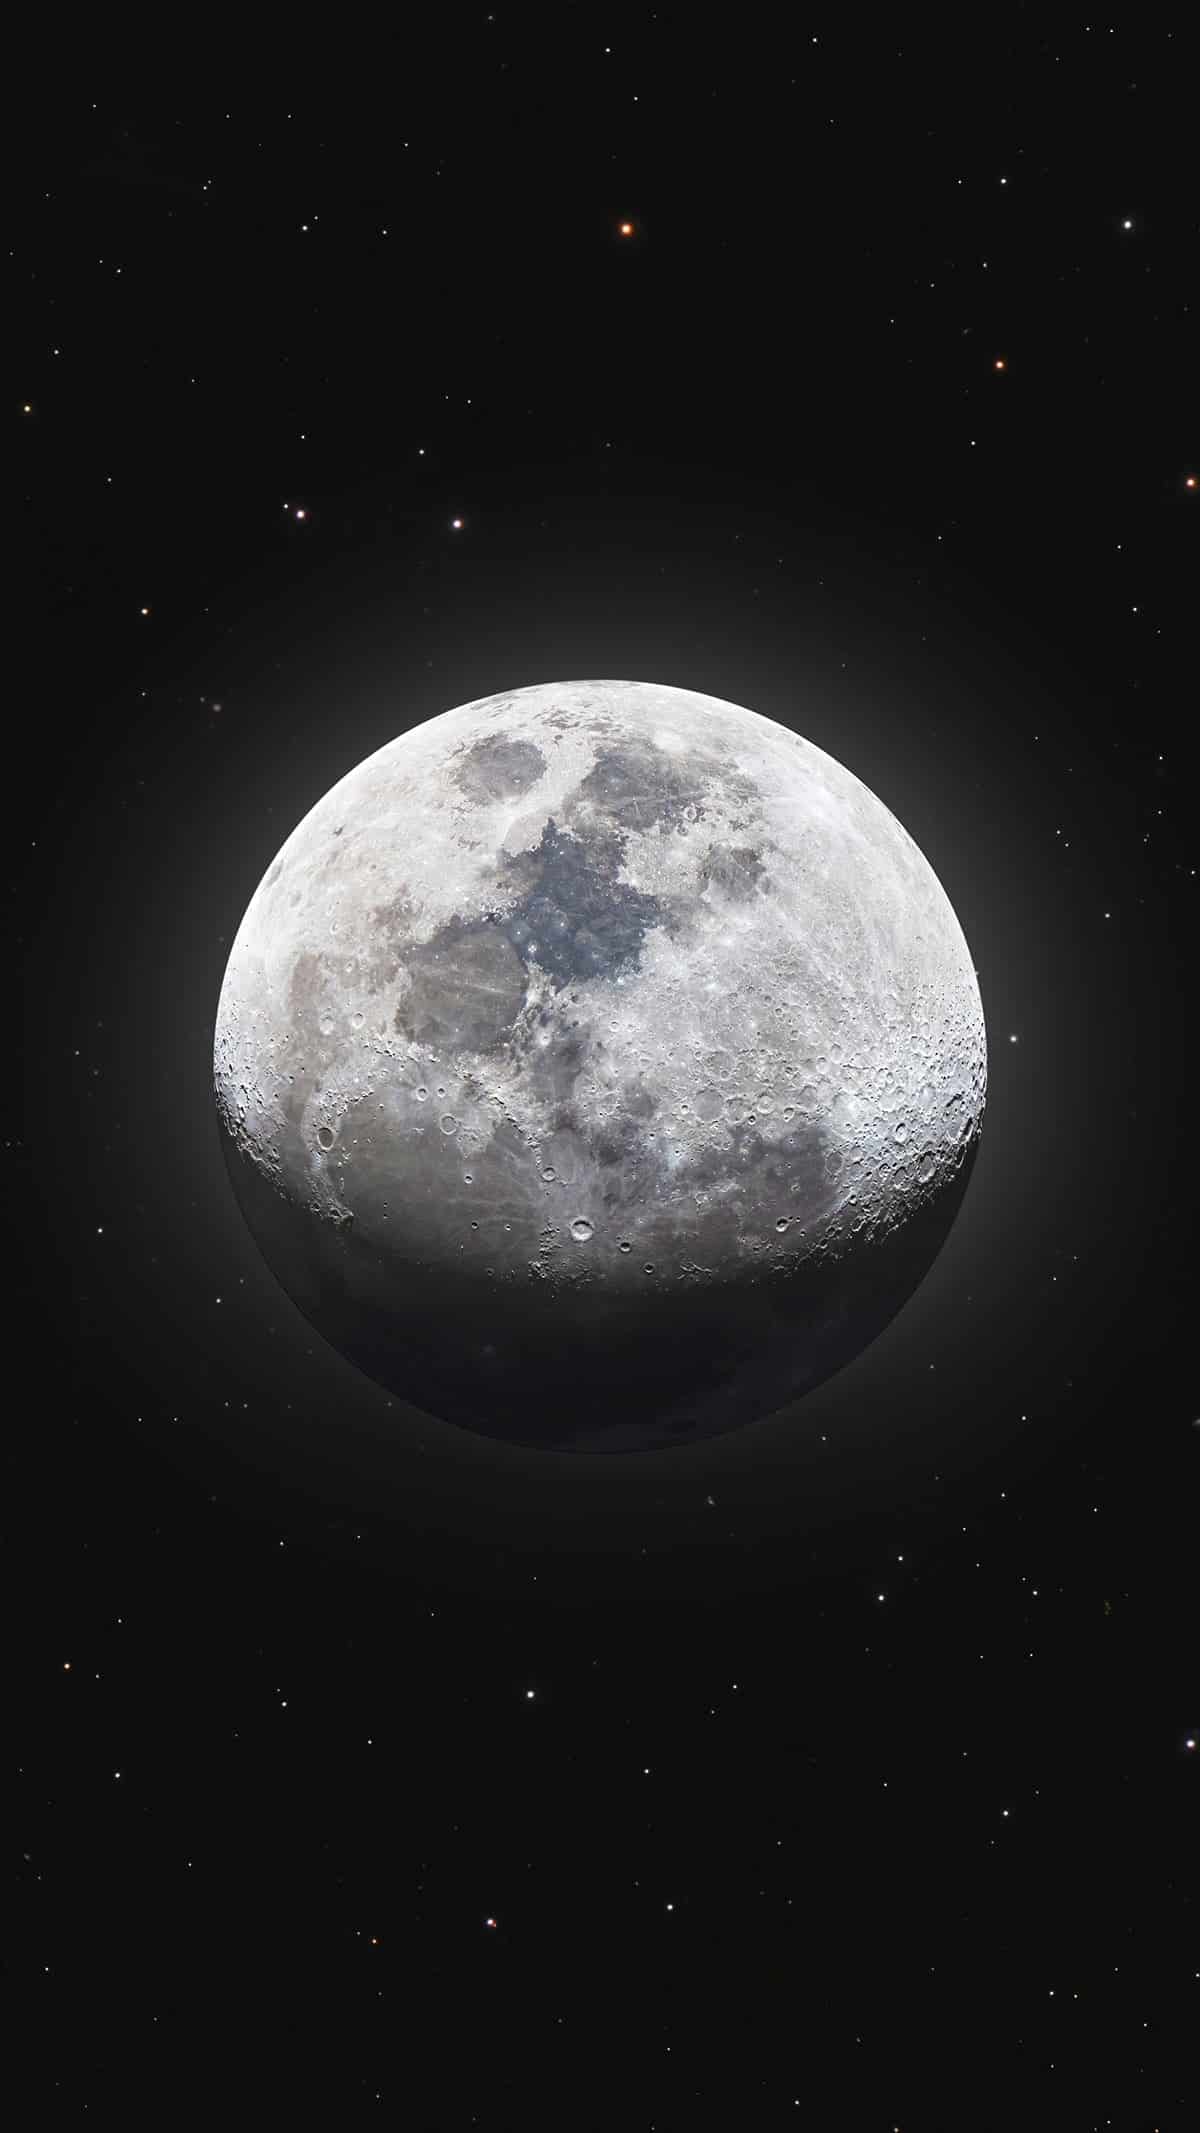
A picture of the waxing gibbous moon through my telescope (composite).
Photographing the moon often leads to other forms of photography, including solar system and deep-sky astrophotography.
Mastering the art of capturing objects in the night sky does not happen overnight. It may become a lifelong passion and learning experience as it has for me.
The moon was the very first object in space that I personally photographed, and I am still as captivated by it today as I was then.
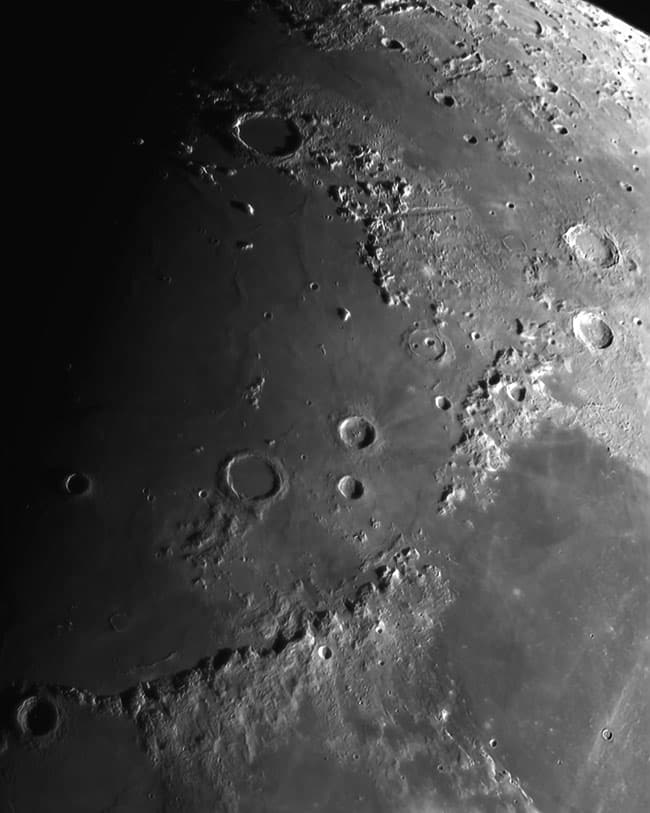
The surface of the moon captured through a Dobsonian telescope.
When I am not photographing deep-sky objects with my camera and telescope during the new moon phase, I like to take pictures of the moon in its various phases.
Moon photography allows me to avoid much of the specialized astrophotography equipment used for deep-sky imaging and focus on the basics of night photography.
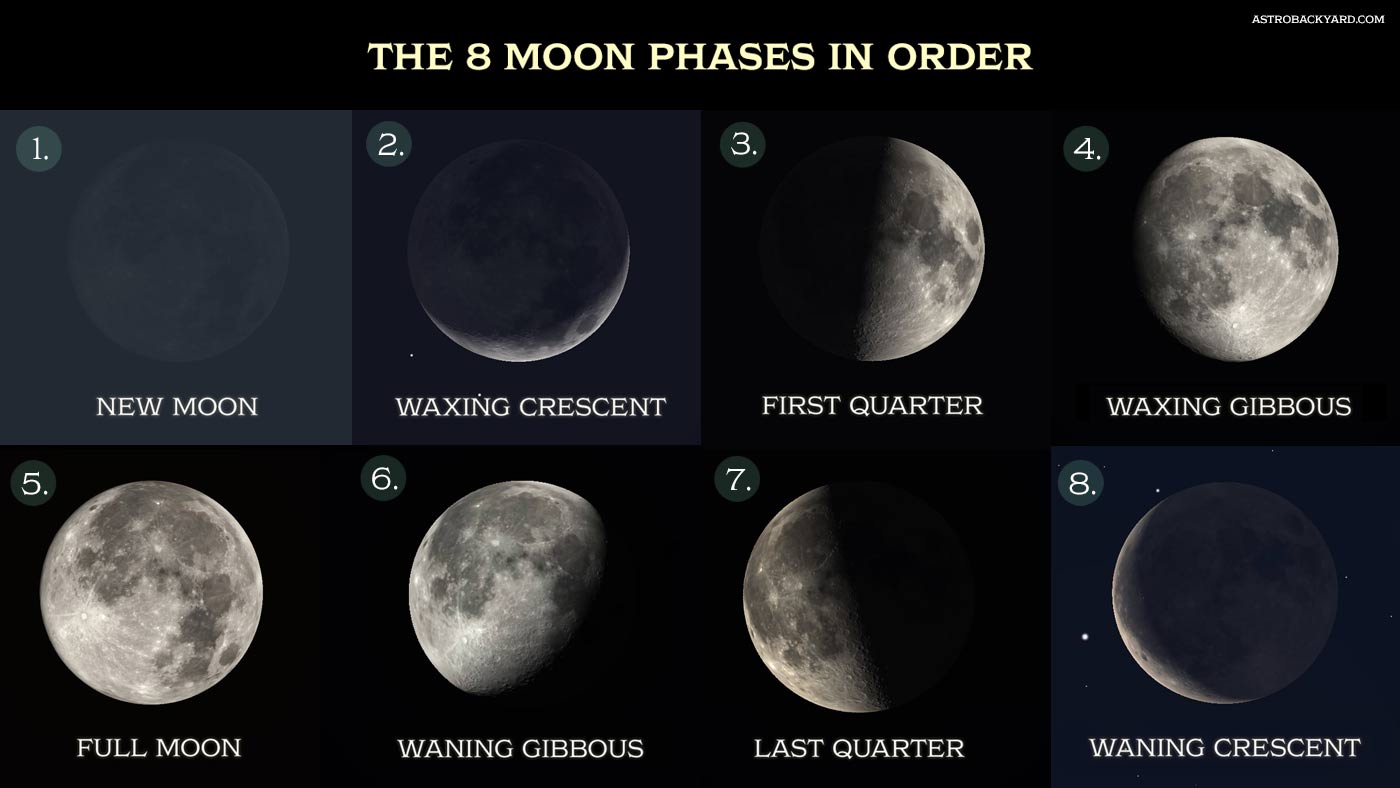
There are 8 moon phases in total, and each of them provides an opportunity to capture the moon in a different light.
Moon Landscapes
A landscape photography image (a nightscape) that includes the moon can create an incredibly narrative scene. The
The moon makes everyone take notice. It is the one celestial event that even the most focused Earth dweller can’t ignore.
A full moon is universally recognized and admired, and that is a beautiful thing. There are names for each full moon of the year.
Whether the event is labeled a Supermoon a Harvest Moon or anything in between, this glowing rock is a constant reminder of our place within the solar system.
I have been photographing Earth’s natural satellite in various orientations for the past 7 years, and I have some tips to share with aspiring night sky photographers.
The tutorial below shares tips and tricks for capturing a beautiful shot of your own using a digital camera and a tripod. If you own a telescope, it’s possible to take even better shots through the eyepiece.
Related Article: How to Take Pictures of the Moon: Beginner’s Guide
Moon Pictures Throughout the Years
On top of being an astrophotographer, I like to consider myself somewhat of a nature and landscape photographer as well.
I am passionate about our natural environment and the plants and animals that call this planet home. You’ll notice that I like to combine the night sky in my landscape photos.
Now that I’ve explained why I love photographing the moon so much, let’s have a look at some of my favorite shots that I have taken throughout the years.
First Quarter Moon:
A first-quarter moon.
To produce this image of the moon in its first-quarter phase, I blended two exposures to create a high dynamic range.
I used a short exposure image to capture the brightly lit portion of the moon (about 1/500 of a second) and a longer exposure to reveal the dark half (about 3 seconds).
The camera and telescope used were tracking the apparent motion of the night sky on an equatorial telescope mount, so the moon remained still during the pictures.
Golden Moonrise:
This shot was taken with a Canon Rebel XSi and an 18-200mm lens (200mm) on a tripod. This is an old photo from April 2011. I remember pulling over on the side of the road in Niagara-on-the-Lake to capture it. I often get in the car and drive to a location with a clear view of the horizon on the night of the full moon.
It is important to use a shutter speed fast enough to freeze the moon’s motion when using a stationary tripod with a telephoto lens. A 200mm telephoto lens is quite forgiving, but a 400mm or longer lens increases the risk of a blurry shot. After all, the moon is a moving target!
The Moon through a Telescope:
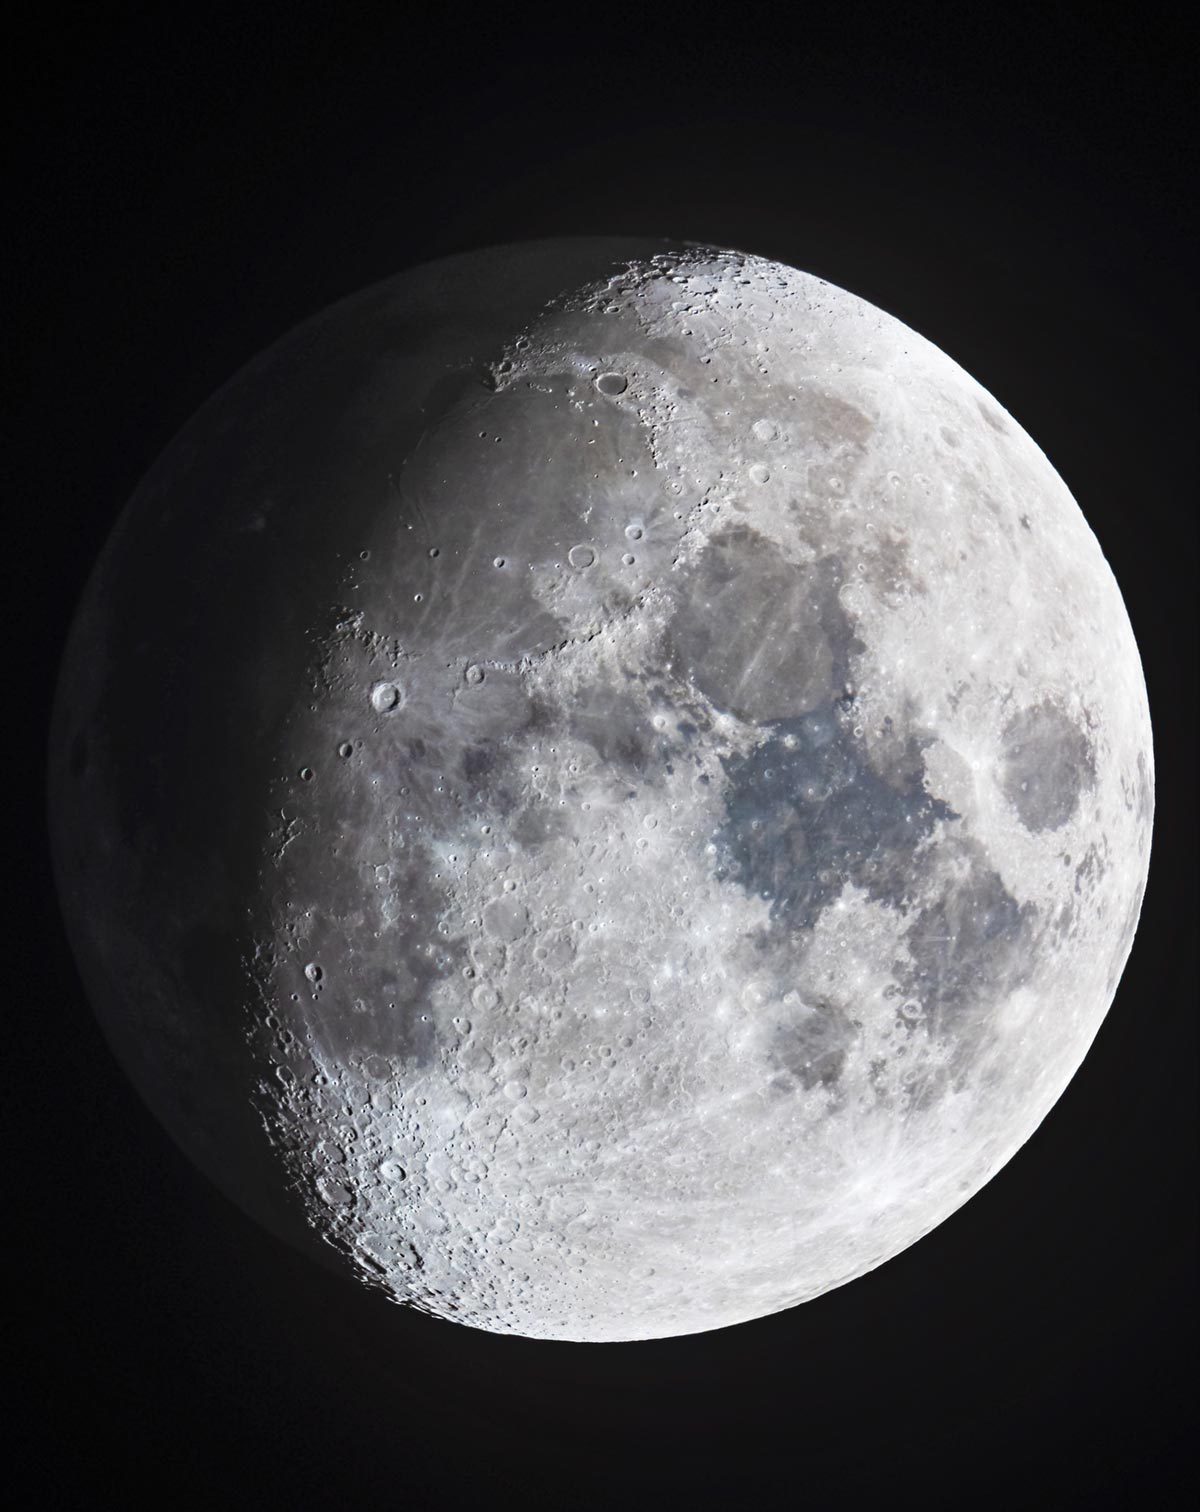
A Picture of The Waxing Gibbous Moon Through a Telescope.
This is what the moon looks like through a telescope. In the early days, I would place my Canon Powershot digital camera into the 32mm eyepiece of my Dobsonian telescope to photograph the moon. This is called eyepiece projection astrophotography.
Now, I have the adapters to connect my DSLR camera directly to the telescope for prime-focus imaging. This photo was taken using the prime focus method with a Canon 70D.
Telescopes are the ultimate prime telephoto lenses. They offer a long focal length and the perfect focal ratio for a crisp shot of the moon; that is what telescopes were designed for. With this long focal length also comes increased shake and weight.
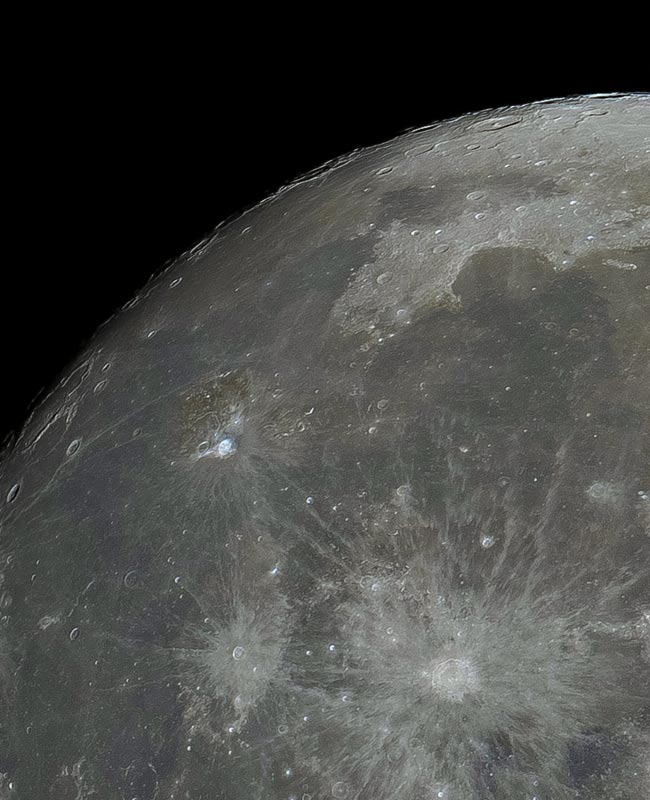
A close-up photo of the Moon’s surface through a telescope.
Most telescopes are far too heavy for a traditional tripod. A tracking equatorial mount is best, as it will keep the moon in view and allow you to shoot longer exposures.
The Moon using a Smart Telescope
A smart telescope is a great way to take your first crisp picture of the moon. These devices make the process much easier by addressing some of its biggest challenges, including achieving a sharp focus and choosing the correct exposure.
The following image of the Waxing Gibbous moon was taken using a ZWO SeeStar S50 smart telescope in ‘moon mode’. This telescope can automatically locate the moon in the night sky and autofocus the camera for you.

A Waxing Gibbous Moon captured using the SeeStar S50 smart telescope.
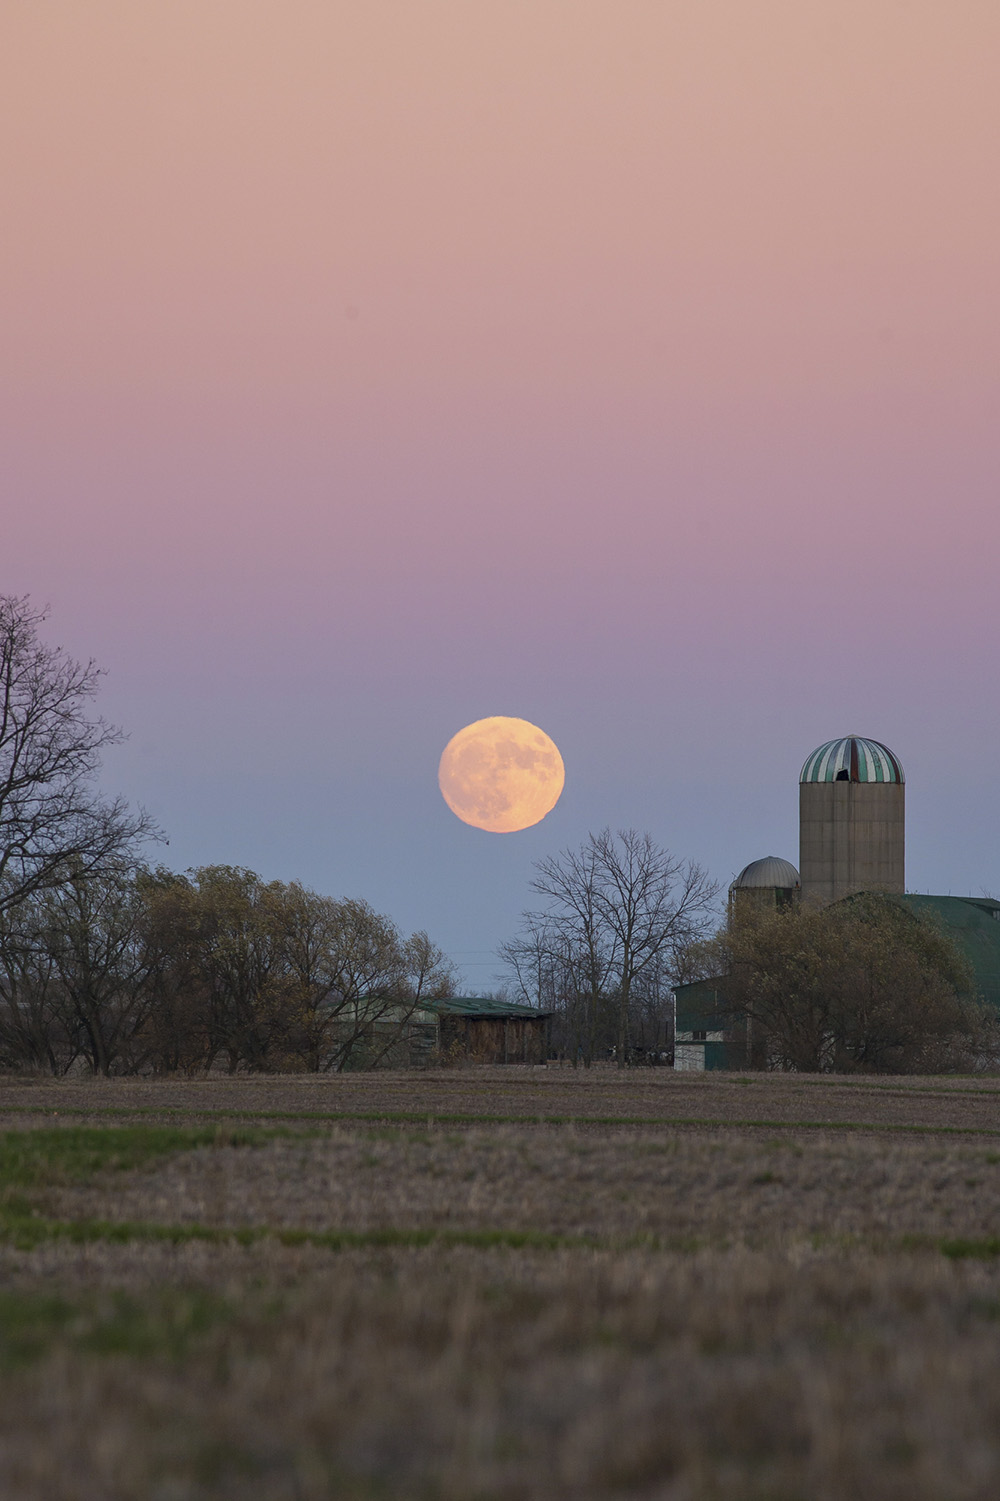
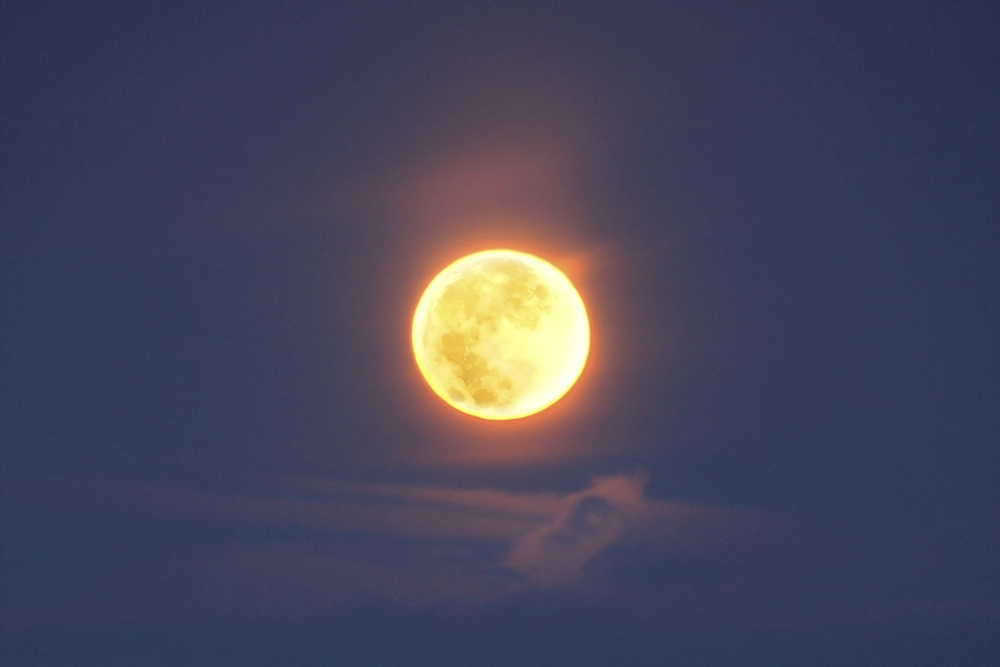
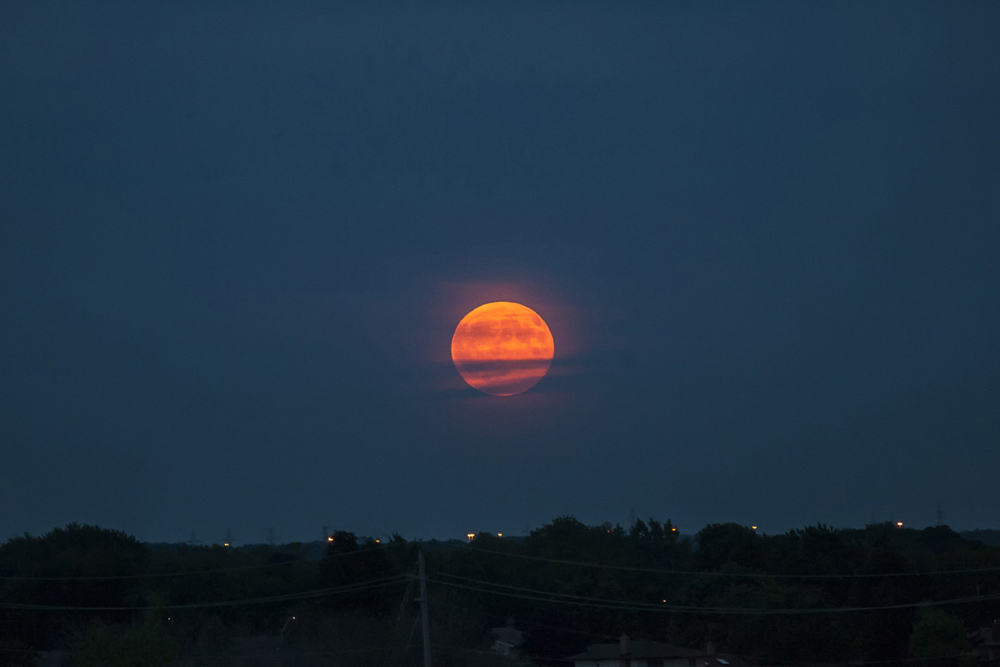
Supermoon Rising over a Farmer’s Field:
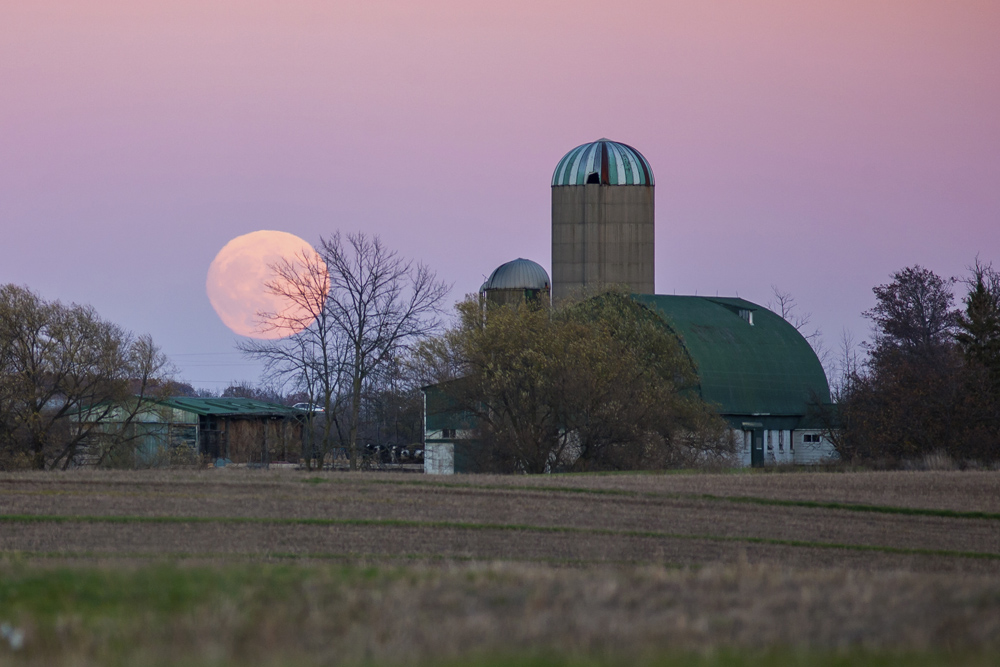
I was extremely happy with the way this landscape scene came together. On the night of the “Supermoon” in November 2016, I once again got in the car and drove around looking for an interesting location to capture the moonrise.
At the same time, I spotted the beautiful orange disc of the moon on the horizon, and I noticed a photogenic farm in Pelham, Ontario. I set up my Canon 5D and 300mm F/4 lens on a tripod for this photo.
The moon appears “wavy” when it is this low to the horizon. This is because we are seeing the moon through a lot of atmospheric disturbances from the Earth.
The moon will appear sharper and lose its orange/pink color as it rises higher and higher into the night sky. If you’ve ever seen a photo of the moon breaking the horizon with razor-sharp lunar surface details, it has been photoshopped!
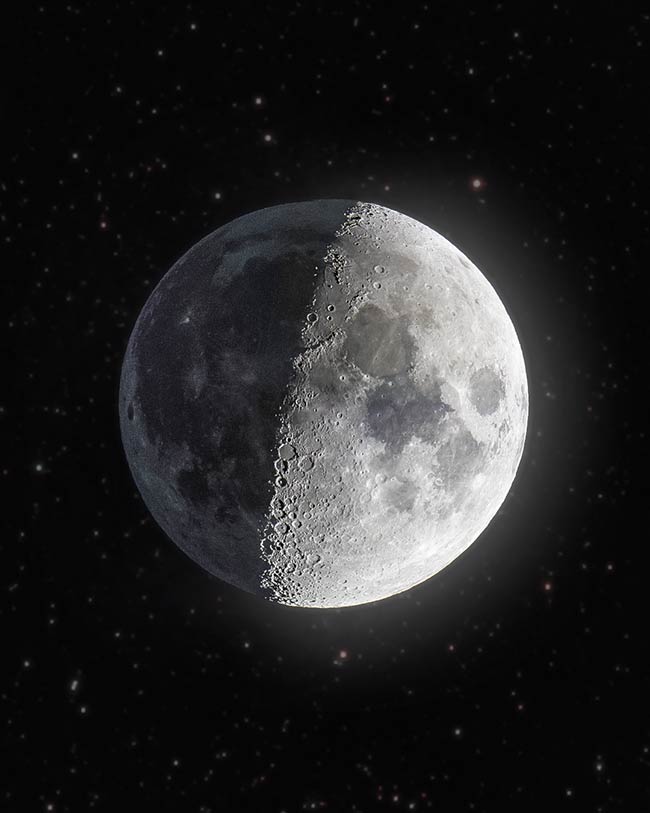
Waxing Crescent Moon with Earthshine:
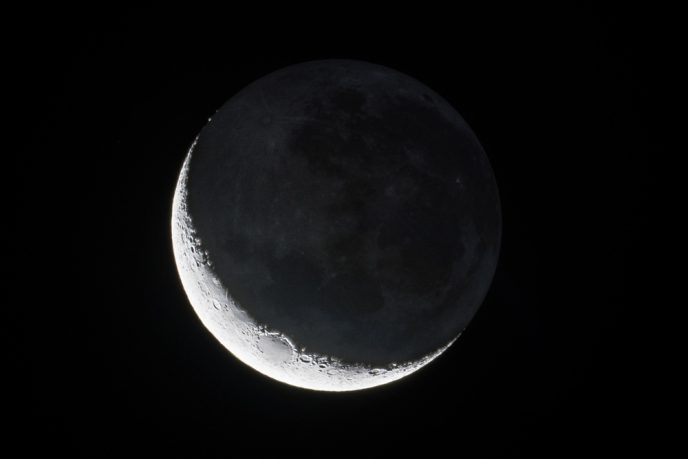
Here is another example of the kind of photo you can expect to capture with a DSLR camera connected directly to a telescope. In this photo, you can clearly see the Earthshine visible on the thin waxing crescent moon.
The photo above combines 2 separate exposures to reveal the detail on the surface of the moon and to capture the faint glow on the unlit portion of the waxing crescent moon.
You may have noticed the moon looking this way in the night sky, usually during the first few nights after the new moon phase.
Light is reflected off the Earth onto the unlit area of the moon, allowing you to see the entire disc of the moon. For a look at the moon in this phase, view it in real-time in my video: AstroBackyard – A Night in my Backyard
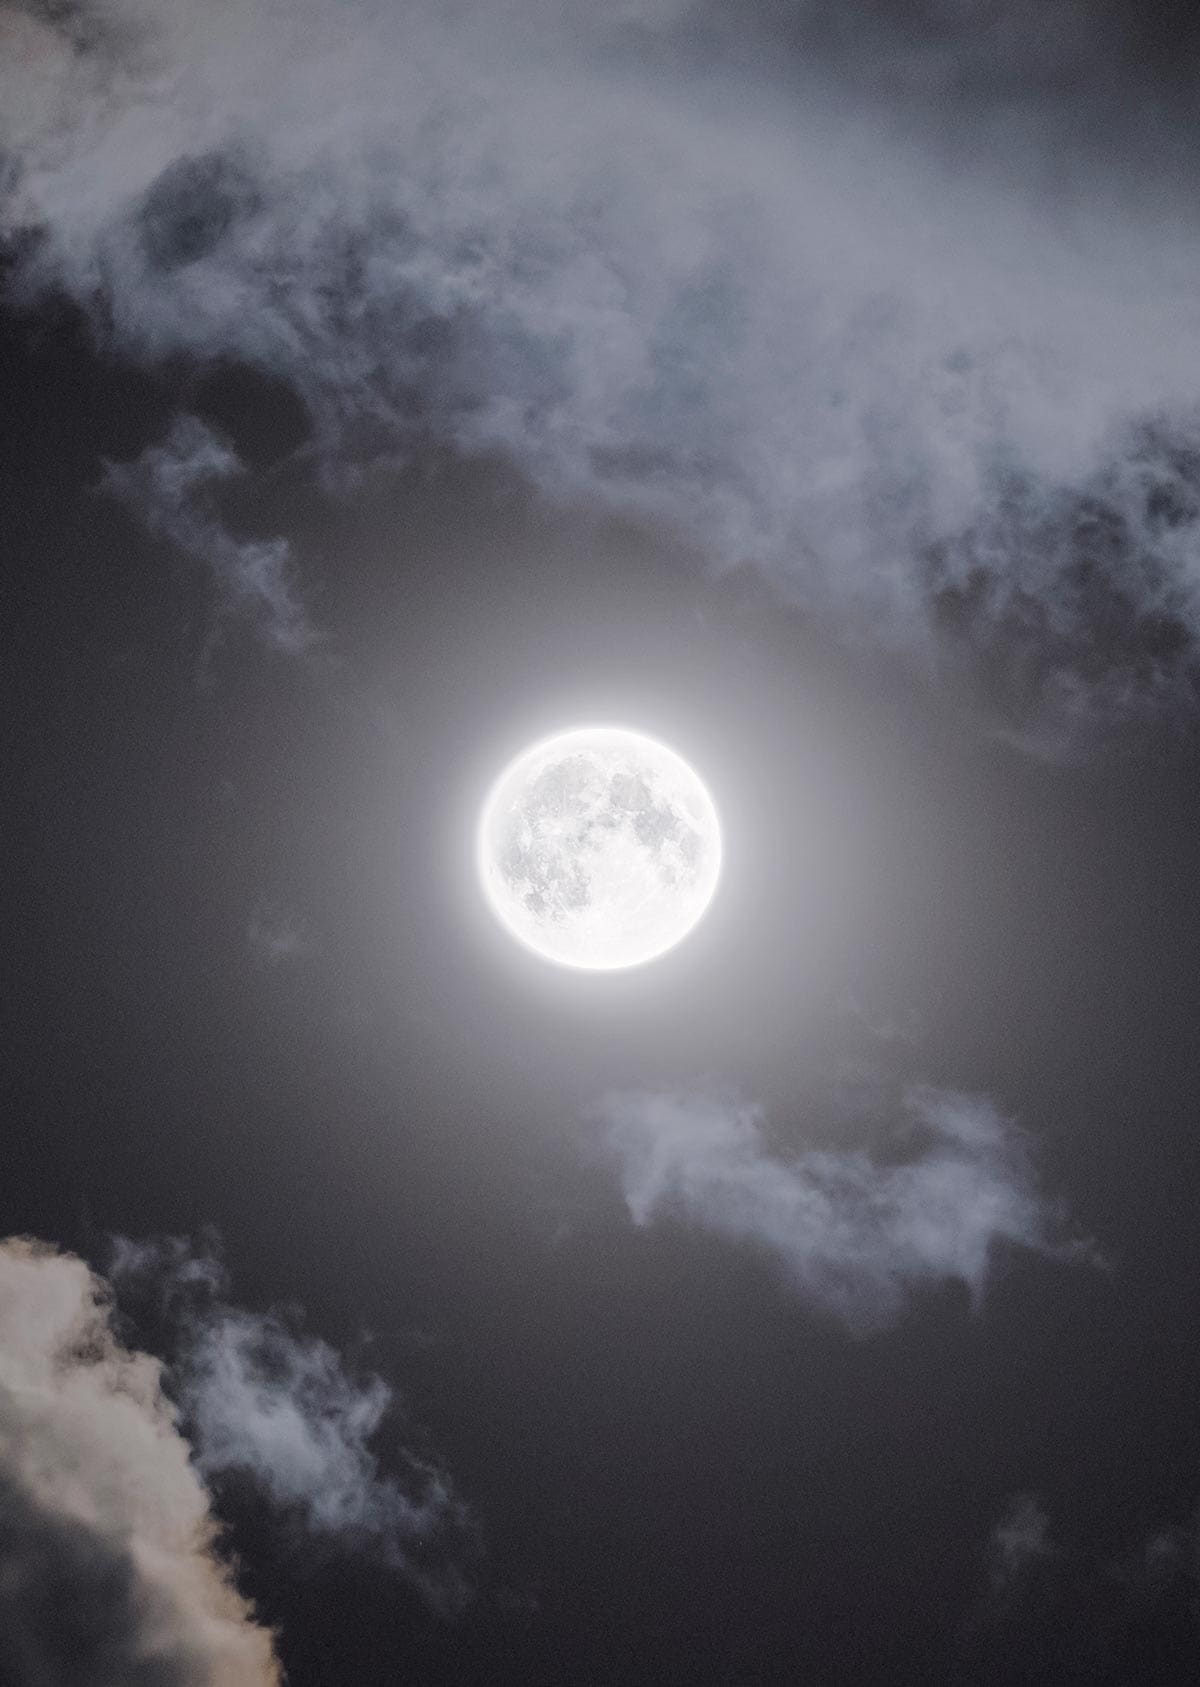
Full Moon in a Colorful Sunset Sky:
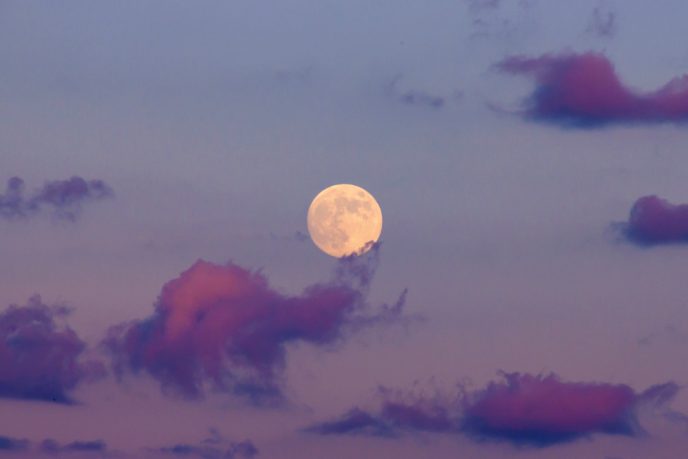
There is nothing quite like a full moon appearing from behind scattered clouds. The added weather conditions can add to a more memorable landscape scene.
The full moon photo above was shot with a Canon XSi and 18-200mm lens on a tripod in Jordan, Ontario. As with most of my landscape moon photography images, this was a combination of exposures taken at different lengths to show details on the surface of the moon.
The 2016 Harvest Moon:
On September 16th, I set out to shoot Harvest Moon, but I doubted whether I would be able to view the event.
The sky was almost completely overcast, yet I proceeded to shoot a video about the moon photoshoot anyway.
I was rewarded with my perseverance with a stunning orange harvest moon rising over the city of St. Catharines. This dramatic scene was shot using a Canon 5D DSLR with a hand-held Canon 300mm F/4 lens.
Shooting the moon through a 300mm lens hand-held is tricky, especially in low-light conditions.
Bumping up the ISO and using a wider aperture on your digital camera will give you the best chance at a sharp shot. The moon will always appear larger than normal when it is low on the horizon; this phenomenon is known as the Moon Illusion.
A thin waxing crescent moon over the trees:

The ultra-thin crescent moon that occurs for the 3 days following the new moon is always a real treat to observe and photograph if you can find it!
A thin, 1 or 2-day-old crescent moon will get easier to spot as it drops deeper into the horizon, as the sky becomes darker.
The crescent moon against a purple sky in the photo above was captured at the RASC Niagara Centre Observatory in Wellandport, Ontario. This is another photo taken using a Canon 18-200mm zoom lens at 200mm.
Total Lunar Eclipse:

On September 27, 2015, the Northern Hemisphere experienced an incredible total lunar eclipse. A widely publicized event such as this offers the perfect chance to try moon photography for yourself.
This total lunar eclipse was extra special because it was labeled a Supermoon or Super Blood Moon. I was lucky enough to have clear skies in my backyard that night and attached a Canon 70D to my telescope to record the event.
The most interesting aspect of this photo is the inclusion of stars in the background sky. This phenomenon was easily captured due to the moon’s low surface brightness during the eclipse.