Adjusting White balance for Astrophotography
If you are new to the world of photography, you may not know exactly what the term white balance is referring to. When it comes to astrophotography, this camera setting still has its place but becomes less important as you learn how to capture RAW images and edit your images in post.
In photography, white balance (also known as color balance) refers to adjusting the colors in your photos to reflect how the object appears in real life. These adjustments can be made using preset settings on your camera or they can be done manually based on your location and lighting.

Adjusting the white balance of a RAW image in Adobe Camera Raw.
The main idea is that the white balance setting you use for astrophotography is not very important, as long as you are capturing your images in RAW image format. Use the daylight or auto white balance settings for astrophotography.
Adjusting White Balance for Astrophotography
If an object is white in real life but has a red or purple tint in your photo, you are going to want to adjust the white balance in order to have the correct color in the photo.
To achieve the correct white balance, the warmth or coolness of the light source must be taken into account.
What this means for wide-field astrophotography is that shoot location and sky conditions will dictate the white balance selection in your images, which it’s why it’s essential to know how to set the white balance manually.
Cameras come with various white balance presets, which are only fine to use when shooting RAW.
For example, I typically leave the white balance setting on “auto” when taking images in RAW file format for a deep-sky image. This is because the white balance can easily be changed in post-production if you shoot RAW
If you’re shooting in JPEG instead (which I don’t recommend for astrophotography), you must select the correct white balance while shooting.
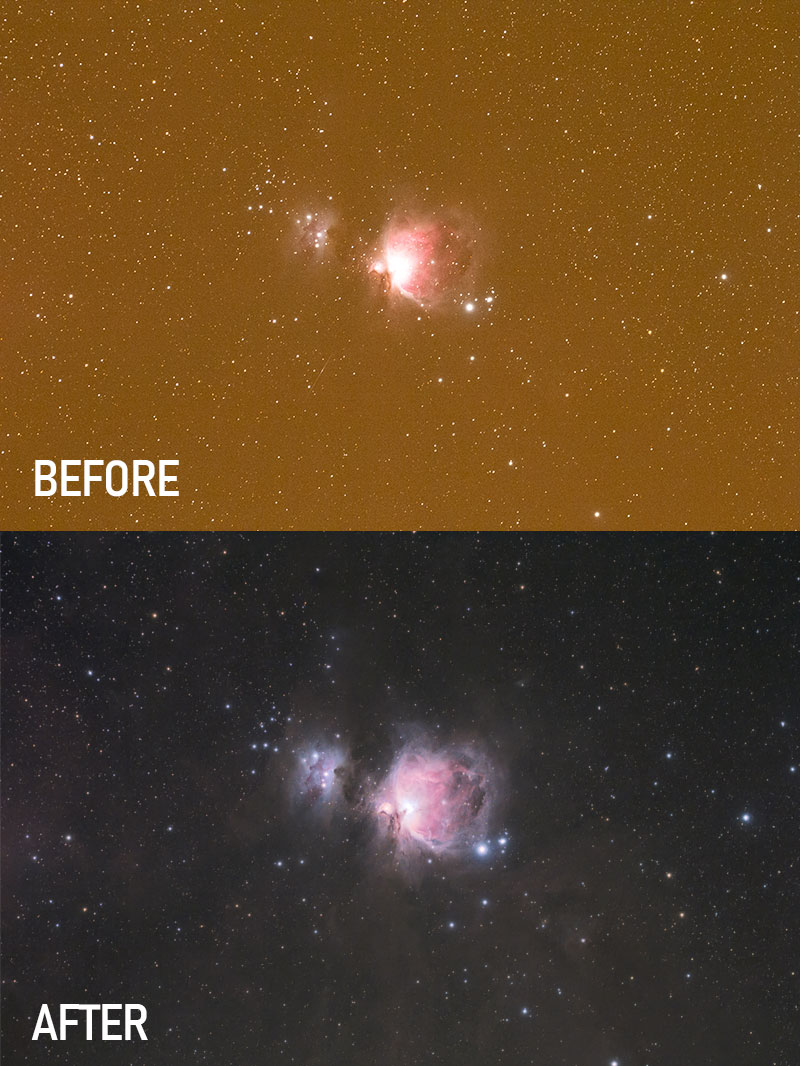
The original image shows the frame out of the camera vs. the stacked, color adjusted final.
White Balancing for Night Photography:
A daylight white balance is usually too warm for night sky photos, but I often find this to be the most natural “general” setting to use when shooting in RAW.
Generally, cooler settings are used for astrophotos, depending on location and environment. I enjoy my photos of the night sky to have a cooler blue look, rather than a red/brown feel to it.
Here is an example of a wide-angle astrophotography shot using a cooler white balance. The photo was shot using the daylight white balance but was “cooled-down” in post-processing.
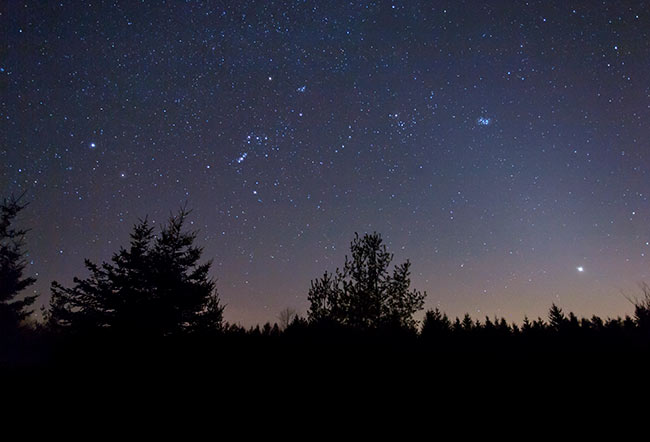
This photo was shot at dusk using daylight white balance but was adjusted to look cooler.
The image above was shot from a Bortle Scale Class 4 site, which is why it appeared naturally cool, straight out of the camera. From my light-polluted backyard in the city, shots appear much warmer with a reddish-brown hue to them.
This is not a great look, and I always adjust the color balance of the wide-angle shots I take from home. I find that manually adjusting the blue channel of your image using curves can make a big difference to the image.

The light pollution from the city gives all of my shots from home a warm feel.
To find the best white balance for your photo, start with the suggestions above and shoot test photos in increments of 100. Adjust your white balance to a cooler or warmer setting, depending on your location and the desired look of the image.

The above photo was captured using a (full spectrum) modified DSLR camera and appeared very red before adjusting the white balance.
Related: Choosing a Camera for Astrophotography
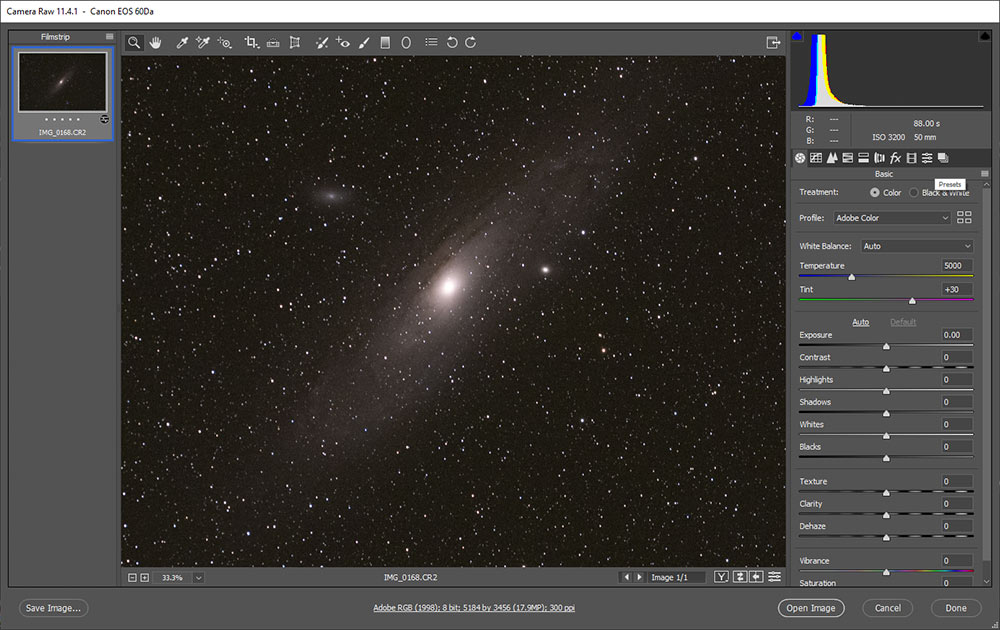
For my final image of the Andromeda Galaxy, I left all of the subframes as “auto” white balance.
One type of astrophotography that you may really want to adjust to the white balance for is Milky Way Photography. Achieving natural colors in a wide-angle image can be quite challenging, especially if there are gradients in the sky due to light pollution or ‘airglow‘. In the photo below, you’ll see many different colors in the sky emitted by several different sources.
A great starting point is to simply use daylight or auto white balance, and adjust the RAW image exposures before the pre-processing stage. In the photo below, I did not realize how much green airglow there was in the sky until I manually adjusted the white balance in Adobe Camera Raw.
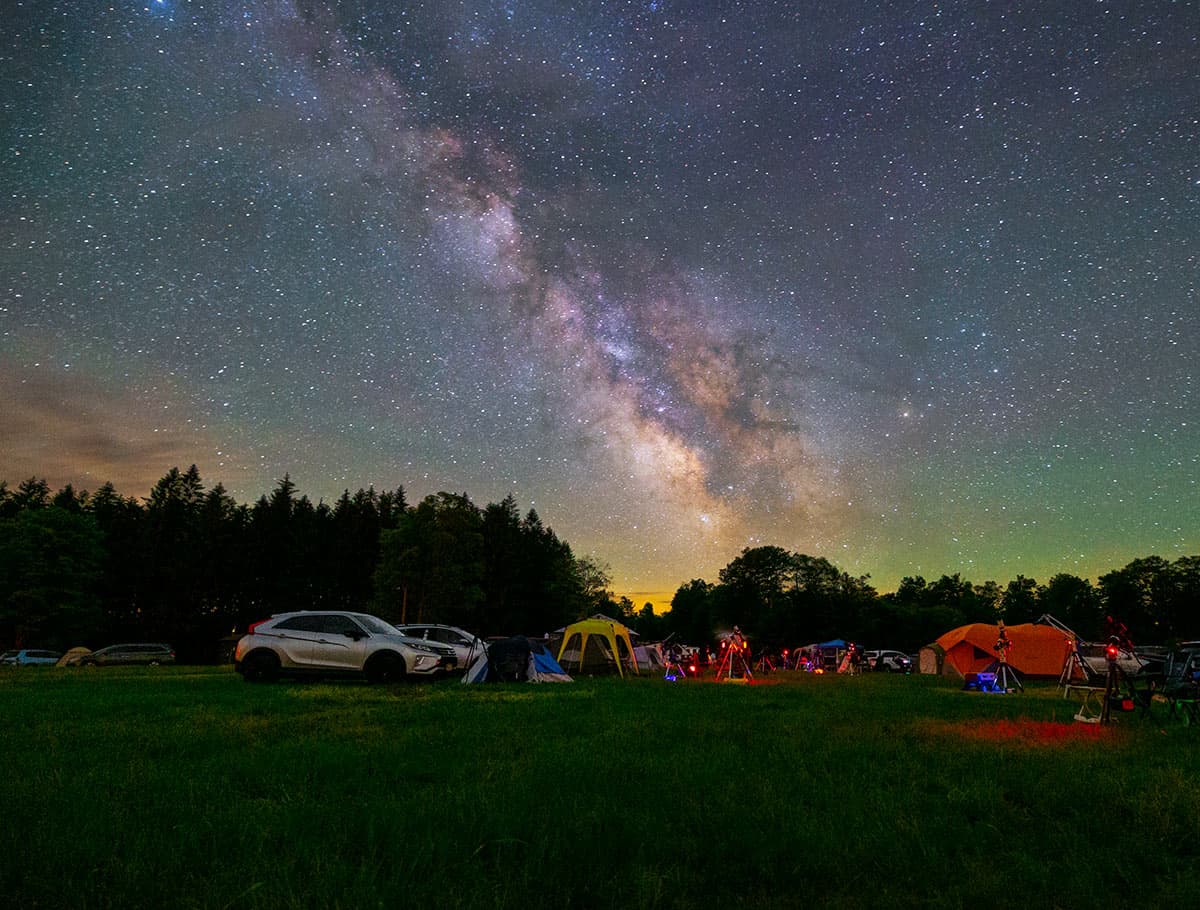
The Milky Way in the night sky with distant light pollution and green airglow.
Shooting a Custom White Balance
Jerry Lodriguss has discussed this subject in detail on his website. He is a professional photographer who understands the importance of white balance, and its relevance in astrophotography today.
Setting the White Balance on a Star like our Sun
You can create a natural color balance in your image by setting the “white point” of your image on a G-type main-sequence star (G2V) in Adobe Photoshop. This is because the way we perceive white light is based on the spectral characteristics of the Sun.
In Adobe Photoshop, you have the option of using the “set white point” eyedropper in the Levels dialog box. The difficult thing about this method is actually confirming that you are sampling an actual G-type main-sequence star (that is not oversaturated).
Software such as PixInsight has features to identify and adjust your images from a database of star types, but you can manually adjust your images if you can confirm that you’ve found a yellow dwarf like our Sun. Jerry Lodriguss has listed a link to suitable G2V stars for this technique on his website, although I have never gone to these links myself.
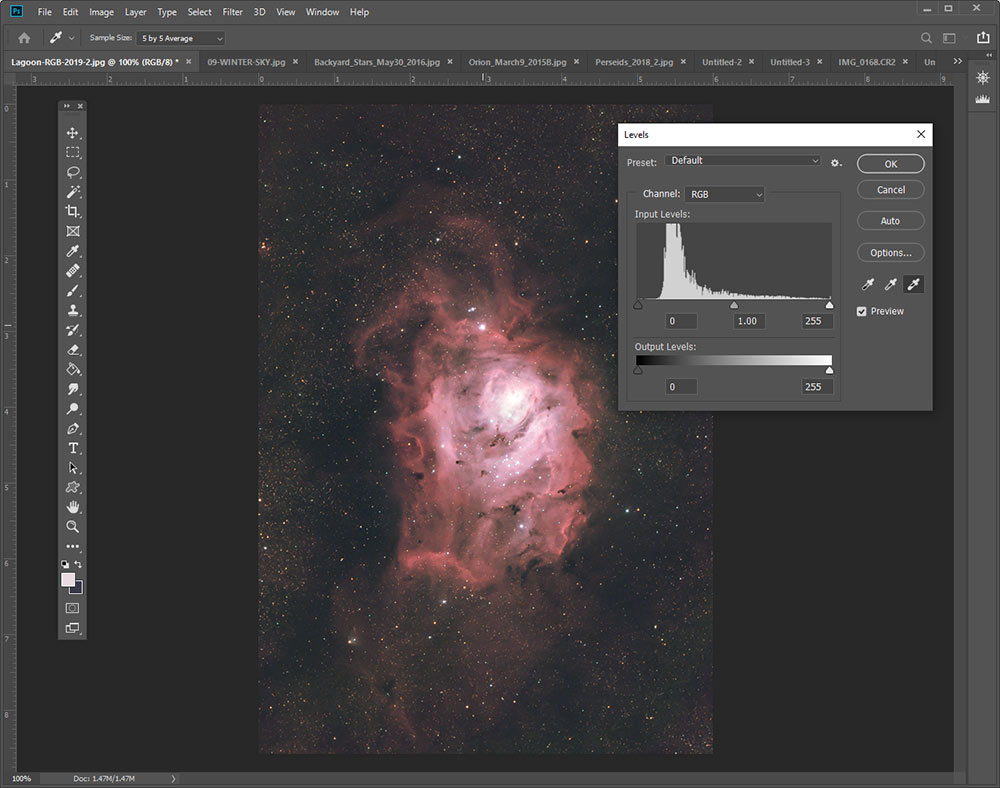
Setting the white balance of a deep-sky image using a G2V star.
PixInsight Color Calibration
Photometry-based color calibration is an easy way to achieve the correct white balance of your astronomy image.
In PixInisght version 1.8.5, the PhotometricColorCalibration (PCC) tool was introduced. This tool applies a white balance to deep-sky images based on photometry measurements of stars.
The goal of this tool is to achieve the look of “natural color” based on the characteristics of the human, daytime vision.
PhotometricColorCalibration uses the default white reference based on the average spectra of Sb, Sc, and Sd galaxies. The average of these galaxies is considered to be a true white reference of the observed deep sky.
You can read more about how the PhotometricColorCalibration implements standard color calibration procedures used in astronomy on the PixInsight website.
Related Content:
- Selective Color Boosting in Adobe Photoshop
- Astronomy Tools Action Set Review
- The Best Astrophotography Image Processing Software