The Crescent Nebula
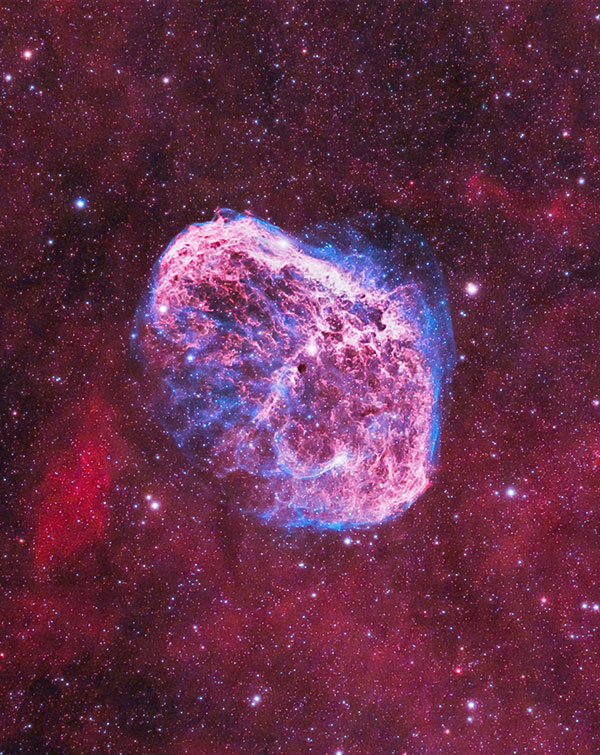
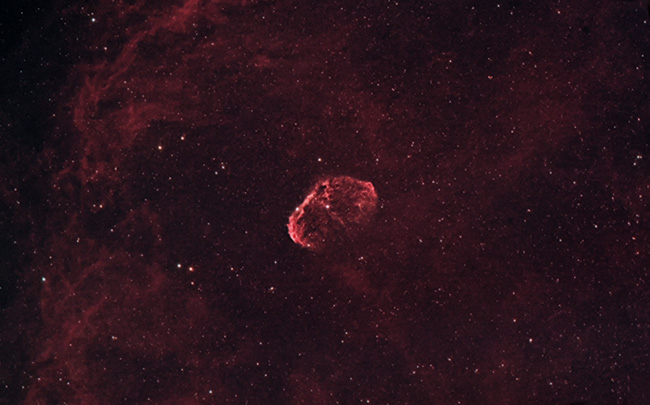
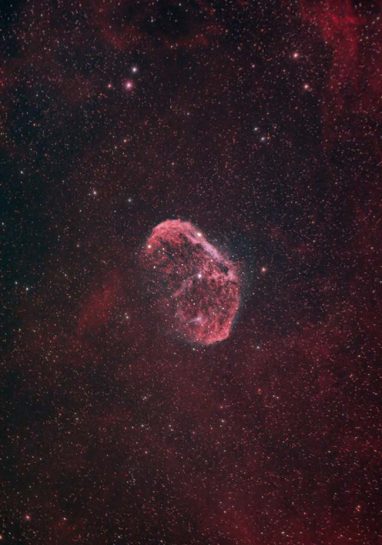
The Crescent Nebula (NGC 6888) is a 25 light-year-wide emission nebula in the constellation Cygnus. This “cosmic bubble” in space owes its striking appearance to a central Wolf-Rayet star (WR 136) that pushes the hydrogen and oxygen atoms outward.
It has an apparent magnitude of 7.4, is 18 x 12 arc minutes in size, and lies about 5000 light-years away from Earth. The Crescent Nebula is also known as Caldwell 27, and Sharpless 105, and was first cataloged by William Herschel in 1792.
The Crescent Nebula in Cygnus. Trevor Jones.
In this article, I’ll share what I’ve learned about photographing the Crescent Nebula using my camera and telescope. If you’re looking to capture a similar image, be sure to have a look at the best astrophotography telescopes available for photographing deep-sky objects, planets, the moon, and more.
Photograph the Crescent Nebula
Although the Crescent Nebula is bright, it is notoriously hard to capture a detailed portrait of the area for many amateurs. There is a lot of light emitted from the hydrogen gas in the area, but this feature is largely missed when using a stock DSLR camera and a broad spectrum filter.
First off, a DSLR camera that has been modified for astrophotography, or a dedicated astronomy camera is best. These cameras will do a much better job of recording the light in the 656nm wavelength, which is precisely where the bulk of the details lie in NGC 6888.
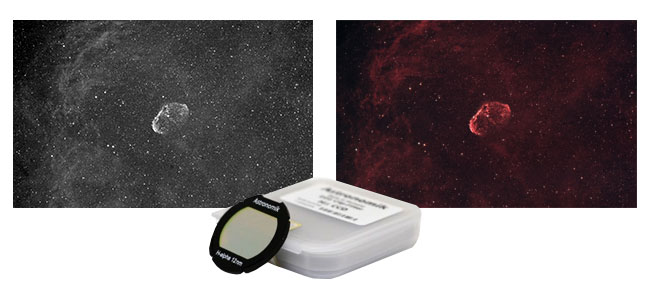
For deep-sky nebulae that are rich in hydrogen gas, a narrowband filter designed to isolate this feature is recommended. There are many astrophotography filters available, but an h-alpha filter is arguably the most important. (For DSLR cameras, I recommend the Astronomik clip-in model)
A DSLR h-alpha filter comes in handy when shooting objects like the Crescent Nebula
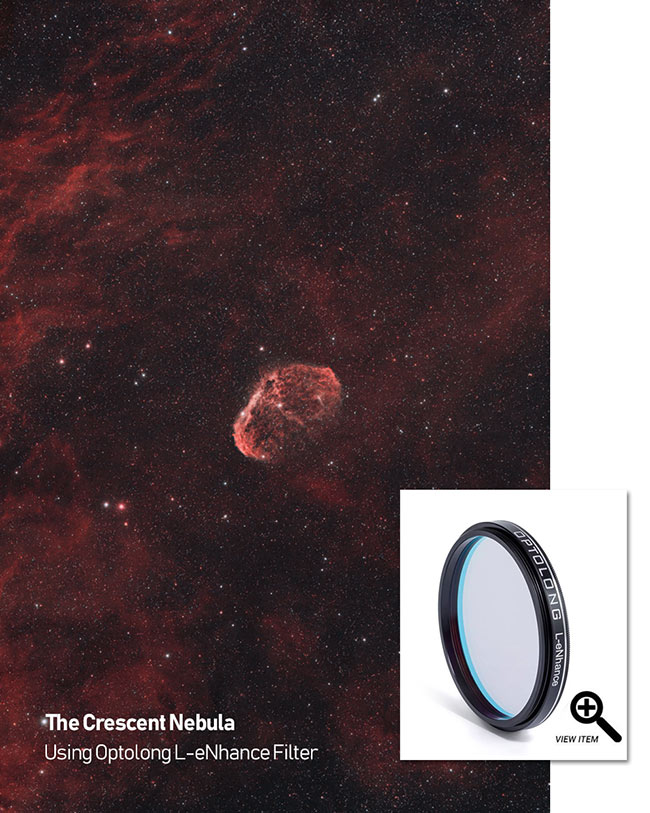
Alternatively, you could photograph the Crescent Nebula using a filter that isolates multiple wavelengths of narrowband emission lines at once. The Optolong L-eNHance filter is one such filter and the exact one used for the image of NGC 6888 at the top of this page.
Dual band-pass filters that have the ability to collect powerful Ha and OIII details in a single shot were meant for targets like the Crescent Nebula. The image below used only 15 x 5-minute exposures to collect an impressive amount of detail on this target.
Along with impressive isolation of specific gases, images shot using a narrowband filter also benefit from smaller, sharper stars than a traditional broadband image. They also do an amazing job of separating the target from a light-polluted city sky.
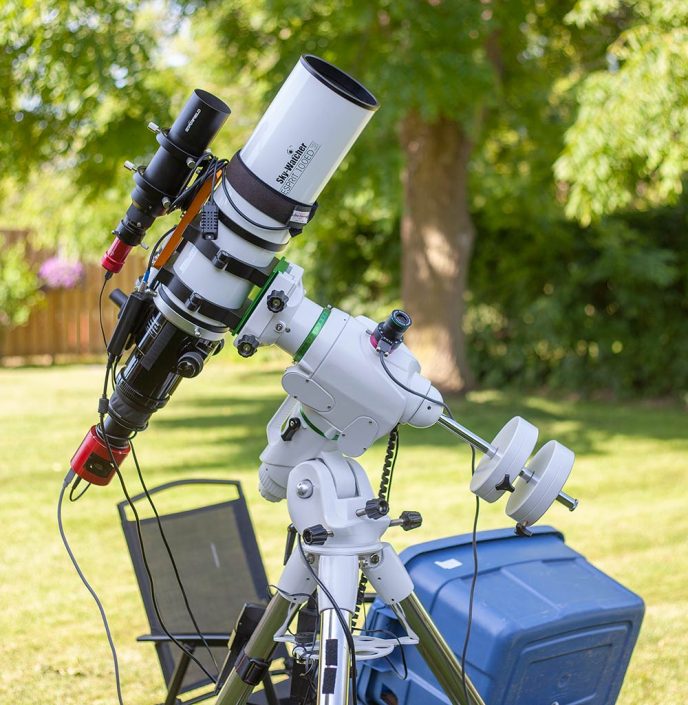
My backyard is considered to be a class 6/7 on the Bortle Scale, and I rely on light pollution filters to capture images from home. Below, you’ll find an image of the equatorial telescope mount I use for astrophotography, with my complete imaging payload attached.
A setup like this is a versatile configuration for capturing deep-sky objects of all sizes. With a telescope focal length of 550mm, it’s considered a wide-field rig, although it is more of a mid-range field of view when combined with the 4/3 sensor CMOS camera I use (ZWO ASI294MC Pro).
The camera and telescope used to capture the image of the Crescent Nebula shown above.
Combining H-Alpha with RGB (Color)
In my early images using a DSLR camera, I found that a combination of narrowband H-Alpha data and color image data was needed to truly capture the beauty of this emission nebula. The black and white images that were captured using an h-alpha filter were blended into a more traditional image captured in broadband light.
Essentially, the h-alpha image is added to the red channel of the color image, and as a luminance layer. If you would like to try this method of image processing for yourself, please see my HaRGB Photoshop Tutorial.
If you plan on shooting the Crescent Nebula with a DSLR camera, consider using a Ha filter as I mentioned above. Aside from capturing the h-alpha wavelength of light found in certain nebulae, a narrowband Ha filter also ignores unwanted city light pollution and renders the stars in your image much smaller.
I used an Astronomik H-alpha 12nm CCD Clip-Filter inside of my Canon EOS Rebel T3i for the image of NGC 6888 shown below.
The Crescent Nebula using a DSLR Camera and Telescope.
Capturing the Crescent Nebula (Video)
For a behind-the-scenes look at capturing the Crescent Nebula with a DSLR camera, have a look at the video below.
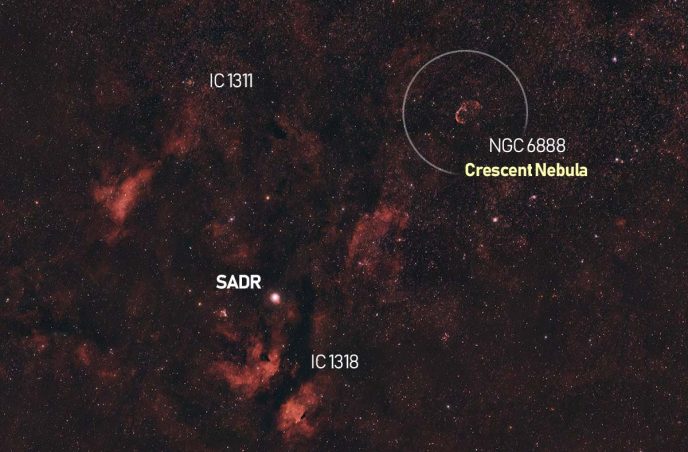
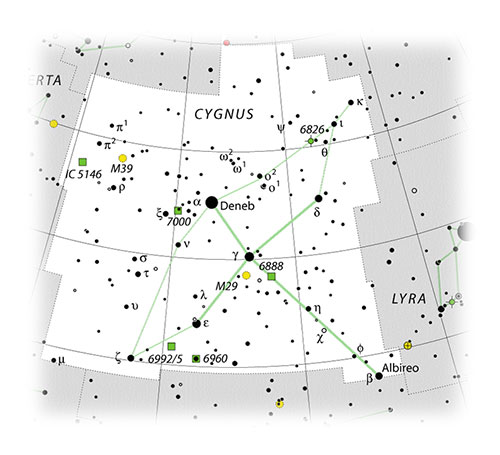
To locate the Crescent Nebula, look no further than the Swan in the sky. The constellation Cygnus is home to many astrophotography treasures including the massive North America Nebula, and the delicate Veil Nebula. (NGC 7000 and NGC 6960, respectively)
NGC 6888 is easy to locate by star-hopping from Deneb in Cygnus.
Through a 140mm Refractor
In early June 2018, I photographed the Crescent Nebula using a cooled CMOS camera and a large apochromatic refractor. The focal length of the Explore Scientific ED140 (910mm focal length) was a perfect fit for the target. The resolution of the ASI294MC-Pro camera sensor produced a large image of the nebula in the center of the field with room to spare on all sides.
First, I captured 4 and 5-minute subs using a 2″ narrowband filter. The STC Optical duo-narrowband filter collects both Ha and OIII wavelengths of light at the same time. These gases are prominent in the Crescent nebula, so it turned out to be a fantastic filter to use on this DSO.
The hydrogen alpha structure and tendrils of this nebula were dynamic and bold right away, while the subtle OIII shell this object is famous for began to take shape over time. In total, I collected 9.5 hours on the Crescent Nebula in Ha and OIII using the duo-narrowband filter.
A mono astrophotography camera would have captured more detail in the Crescent in a shorter period of time, but using this filter with a color camera meant no filter changes or building channels in post-processing. I think this filter has some exciting capabilities with both cooled one-shot-color CMOS cameras and Astro-modified DSLRs.
Once the structure of NGC 6888 was captured in narrowband, I decided to capture some true-color RGB images to create a more natural-looking final image. My primary goal here was to capture more natural-looking star colors that were not too red. I used a 2″ Baader Moon and Skyglow on the ASI294 for these images under a moonless June sky.
The create the composite image using both narrowband and true-color RGB images, I’ll leverage the HaRGB Photoshop technique outlined in this processing tutorial. Basically, the intense narrowband details will be blended into the color image as a luminance layer to get the best of both worlds.
This way, I can produce an image that captures the natural beauty of the Crescent Nebula, while getting some help from the isolated wavelengths of light in Ha and OIII.
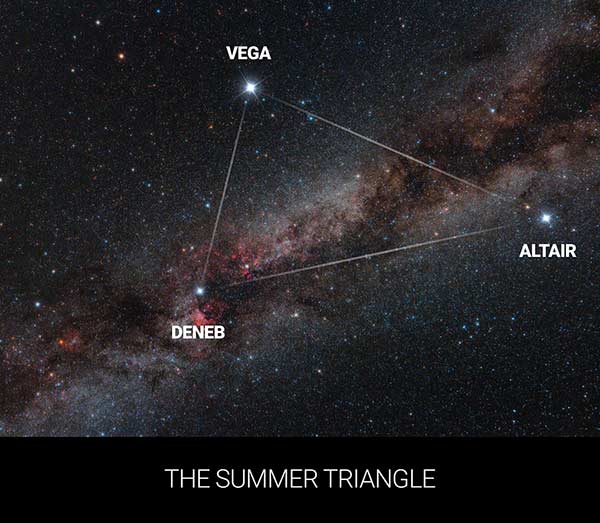
Deneb in Cygnus, part of the Summer Triangle
The constellation where this nebula resides is absolutely full of deep-sky targets. Cygnus the swan rises high into the Eastern sky in July and contains one of the 3 stars that make up the Summer Triangle.
Deneb is the brightest star in Cygnus, with Vega and Altair in nearby constellations Lyra and Aquila to complete the asterism.
An advantage of shooting deep sky objects in Cygnus rather than further South in the Milky Way is the elevation this region gets. There is less turbulence in the air pointing straight up, so the images are usually sharper overall. As an added benefit to photographers, gradients in the image are less severe due to the distance from the city glow that rises from the horizon.
Deneb proved to be a convenient star for focusing my camera during my Crescent Nebula project. Focusing can be difficult when using a Ha filter with a DSLR, so ultra-bright stars like Deneb come in handy for live-view focusing.
Astrophotography Details:
For DSLR camera owners
For those of you who plan to image NGC 6888 using an unmodified DSLR, do not expect to see much more than the western outer arm of the structure in a single exposure. A modified camera will start to pick up the fainter eastern arm, but the central tendrils will not likely be visible until adding Ha data.
Like most targets, both of these issues can be overcome by capturing more data. Expect to soak in at least 4+ hours worth of exposure time before attempting to process your image. This value will change depending on your imaging location.
Much of the data for this project was acquired with varying amounts of moon glow present. The additional imaging time is another huge advantage of owning a 12nm h-alpha filter for your DSLR camera.
Imaging Notes
This was a surprisingly challenging target from the city. Even after 3 hours worth of combined Ha and RGB data, the resulting HaRGB was still rather unimpressive and noisy. This dilemma was caused not so much by the light pollution, but by the extremely warm night I was imaging on.
The average ambient temperature throughout this process was roughly about 22-25 degrees Celcius. With the camera capturing long 300-second exposures, the poor sensor in my Canon 600D consistently toppled the 30 degrees Celcius mark.
