Astrophotography | 14 Must-Know Starting Tips
If you’re getting started in astrophotography, I am here to save you some time and frustration by learning from the mistakes of myself and others.
Whether you’re looking into a full-blown deep-sky camera and telescope setup, or just getting started with a DSLR and tripod, I think this article will come in handy.
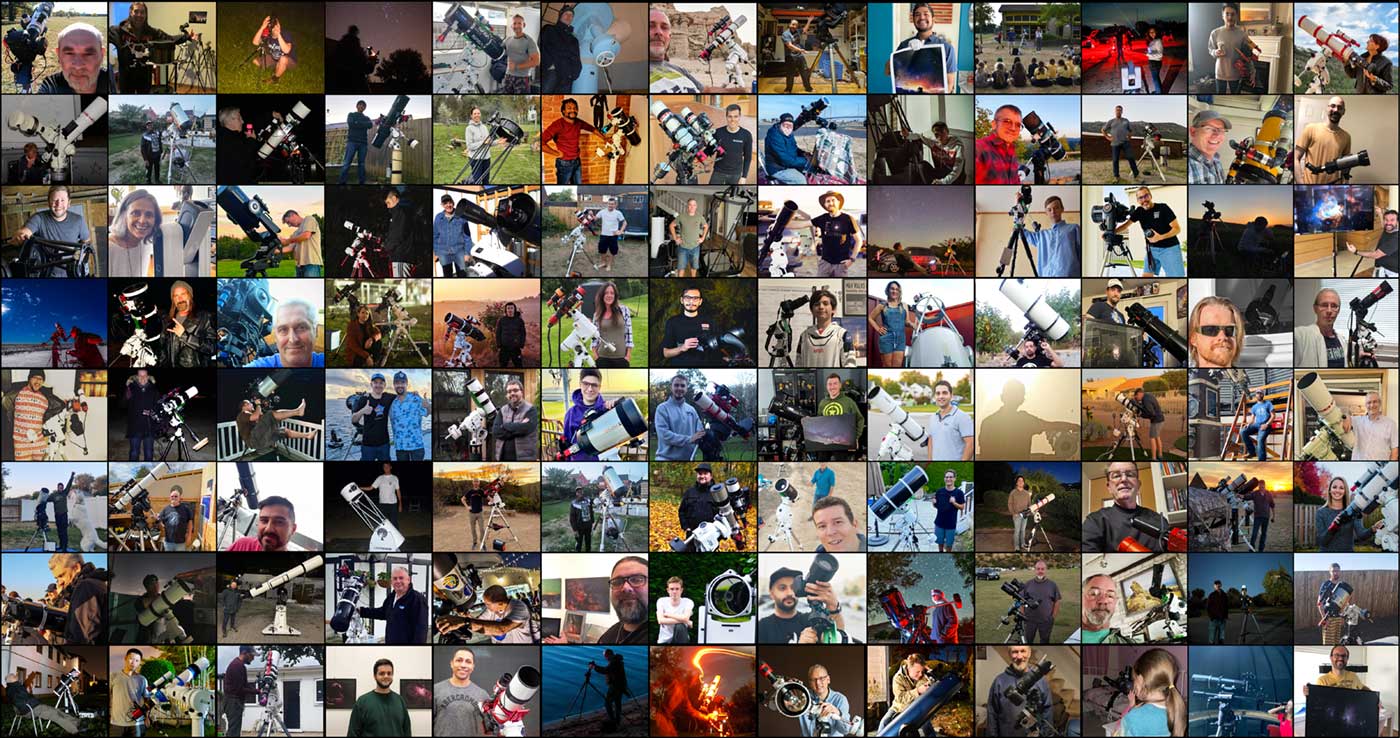
The following advice and tips were compiled by myself and the hundreds of responses I received when I asked the AstroBackyard community: “What’s the most important piece of advice you’d like to give to beginners?”
So get ready, because the advice I have may surprise you.
1) Astrophotography is more than deep-sky imaging
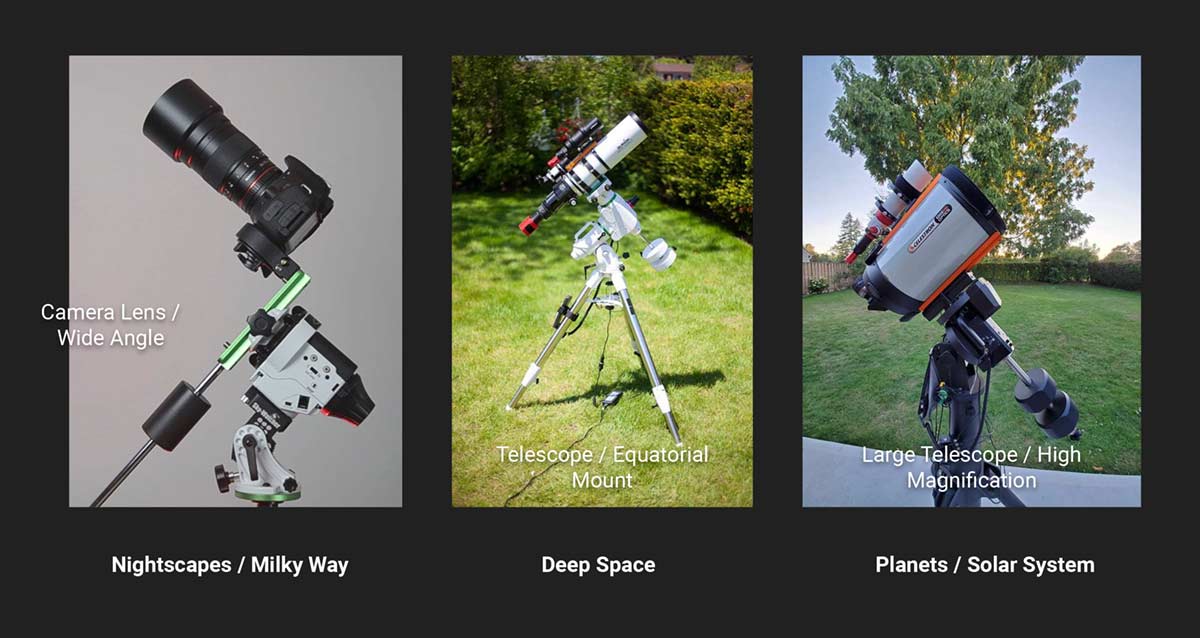
You need to choose an area of interest. I know you want to do it all. Planets, meteor shower time-lapses, galaxies, and nightscapes, but you should narrow down your interests to focus on the equipment and techniques that are most important for your goals.
To me, astrophotography usually means deep-sky images of galaxies and nebulae. To others, it’s a nightscape of the winter constellations rising above a snow-covered mountain.
Astrophotography is a close-up of the surface of Mars, a wide-angle photo of the Milky Way, and everything in between. This is why it is difficult to provide broad astrophotography tips that cover all aspects of the hobby.
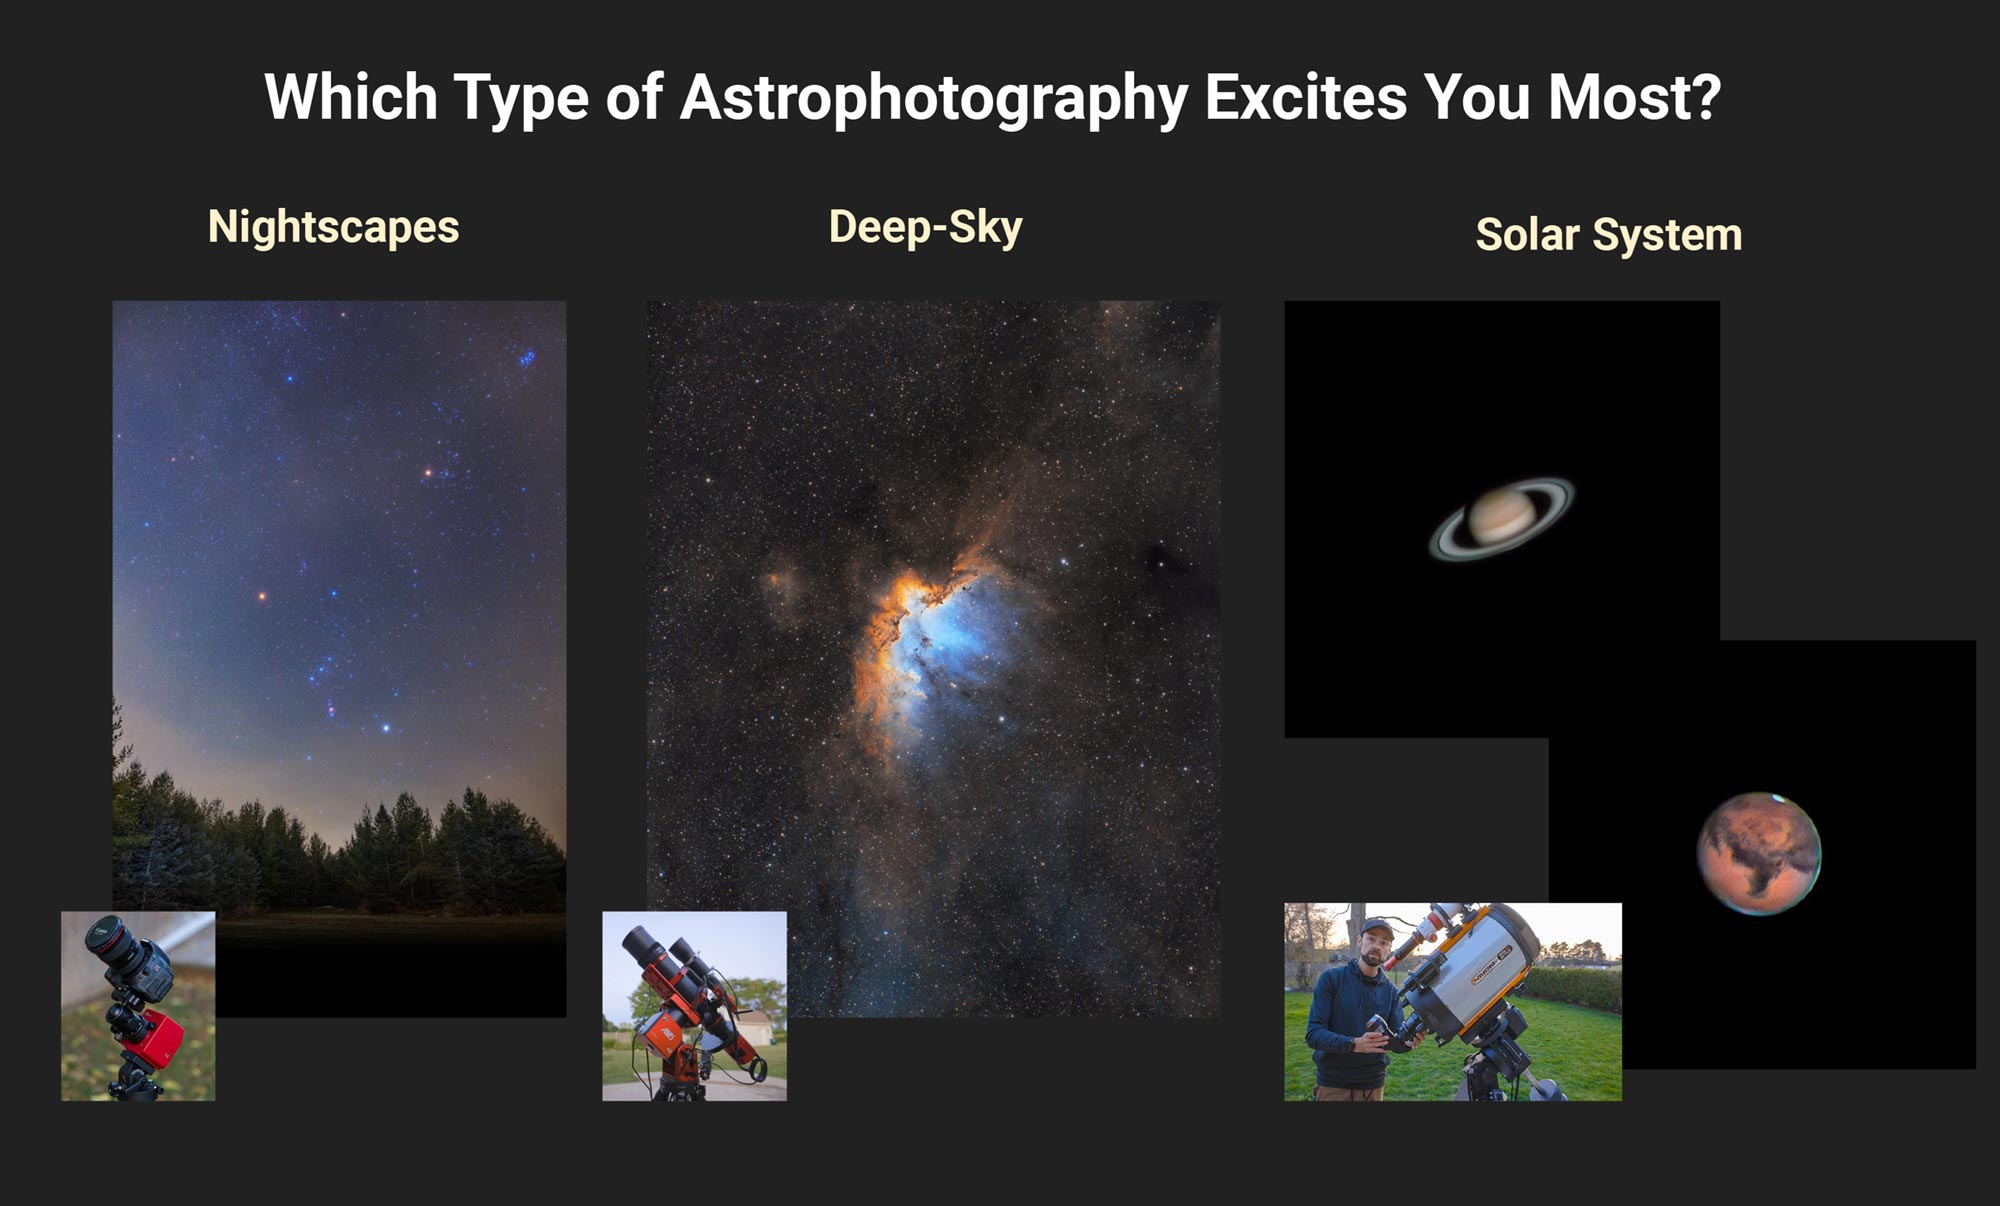
You need to decide which area of the hobby interests you most because the necessary equipment varies wildly depending on the one you choose. I generally stick to tracked, long-exposure images through a telescope, but for others, it’s a wide-angle lens and a hike through the mountains.
A pet peeve of mine is when people generalize “astrophotography” into one aspect, and make ‘rules’ that confuse beginners. Taking a photo of the moon with your phone through a manual Dobsonian telescope is still astrophotography, just in its simplest form.
So pick an area of interest early on and don’t try to do it all. For me, that’s deep-sky imaging through a telescope in the backyard because it’s the most practical way for me to enjoy the hobby. For you, a lighter travel-friendly system may make more sense.
2) Become obsessed with your progress
If you’re like me, all it takes to stay motivated is to make progress toward your goal. It’s a simple concept, but it’s difficult to sustain at times. They can be very small steps, but always forward, not back.
The reason I say this is that you need to appreciate your own personal progress (not someone else’s) to stay excited about astrophotography. The game of astrophotography is best enjoyed on the court, not the sidelines. Only you will truly know the meaning and pride behind each photo.
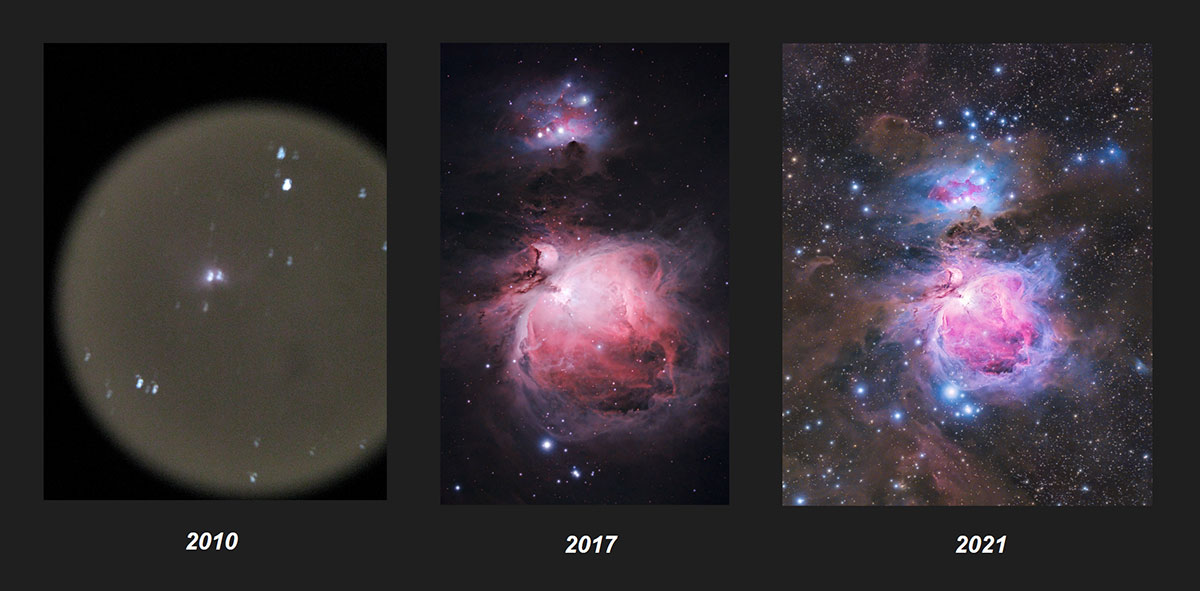
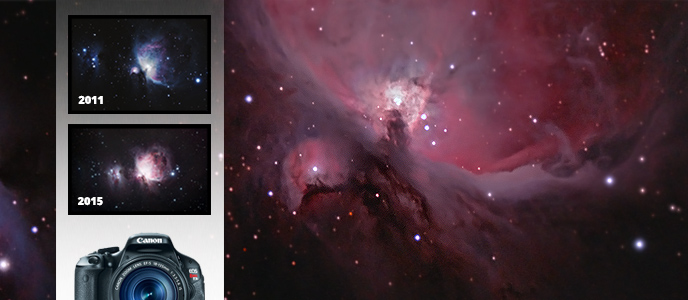
My progress on the Orion Nebula from 2010 to 2021
Will the average Joe see your image and say “that’s unbelievable”? Lots will, but others may say “I’ve seen better”, or “you could have just found a better picture online”. The difference is, this image was captured by you, the person who didn’t even know how to use a telescope just a few months ago.
You spent the time perfecting your craft to capture and share an image of an object you chose. You watched the image get better and better over time as you patiently gathered light on it.
Comparing your latest version of a deep-sky target with your previous attempt is a real eye-opener, and you should be very proud of the progress you’ve made. Astrophotography is not for the dabblers. It takes grit to get to the finish line.
3) If it were easy, everyone would do it
Astrophotography, in all aspects, is hard. Expect to fail several times and to get frustrated and discouraged. This is not a hobby you walk into and get immediate results. If that’s the game you’re playing, you will need to adjust your expectations accordingly.
Celebrate any amount of progress, because it truly is an amazing feat. You balanced your rig, you focused your camera. Maybe you set everything up and didn’t get a single picture but you will next time because you learned a pivotal step of the process through the experience that you now know forever.
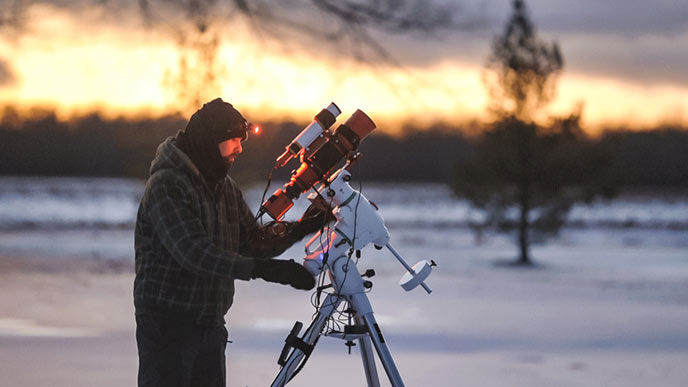
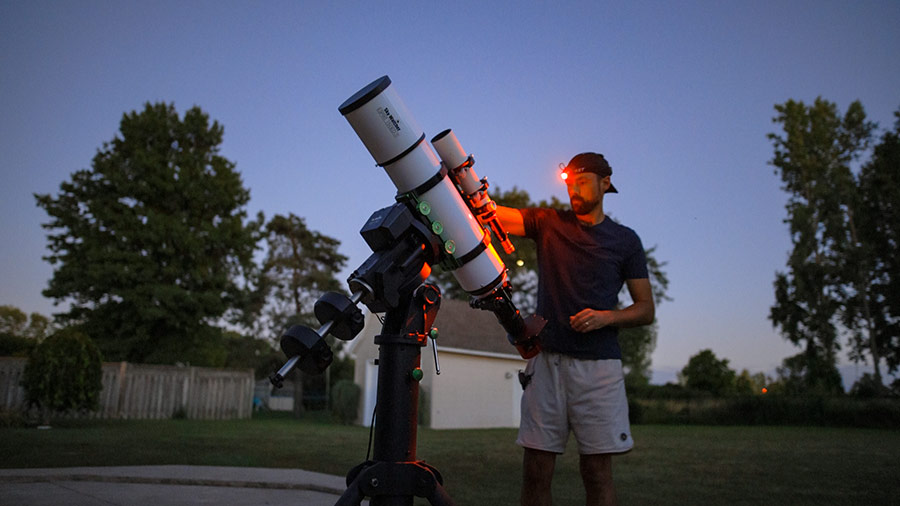
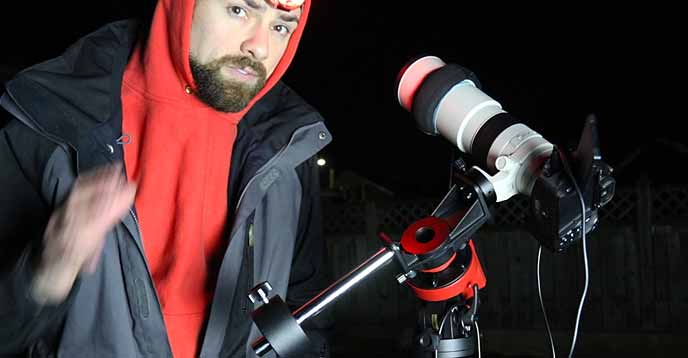
Setting up my telescope on a cold winter night.
The steep learning curve of astrophotography is the barrier to entry, and why I respect anyone that has chosen to take the challenge on. We are a different breed, and that’s why what we do is extraordinary. At some point, you may even run into people that claim your images are fake, but I believe it is because they just don’t understand the process.
4) Take online advice with a grain of salt
There are some amazing resources out there to learn astrophotography on your own. YouTube, Facebook Groups, Reddit, and Forums. The problem is, there is a lot of conflicting advice, and the people that like to hang out there can be a little opinionated.
My wife Ashley recently got started in astrophotography, and I cringe at the idea of her posting a question in a forum about her Sky-Watcher mount and someone saying “you got the belt mod done right? You re-greased the worm gear? Don’t even bother using it before you do that or your guiding will be terrible. Throw out all of your subs that aren’t 0.3 arc seconds per pixel or less.”
That’s the kind of information that scares people away from our hobby for good. The scary part is, many people read the hive-mind expert advice, and start telling others about it as if it were true. I’ve even read outrageous stories about me written by a stranger. The internet can be a strange place.
So like I said, take everything with a grain of salt and understand that the advice or opinions there aren’t always true. Instead, reach out to an individual astrophotographer who’s around your skill level (or better yet, just ahead of you) and kick ideas off of them.
Unlike the faceless keyboard warriors, they do not have the incentive of manufacturing drama for attention or boast about their extensive knowledge. There’s a good chance you will make some lifetime friends through these authentic connections, too.
If you can’t find a mentor yet, try replicating the exact process you have watched on YouTube. Look at the results they are achieving, so you have a realistic expectation of what you could potentially accomplish.
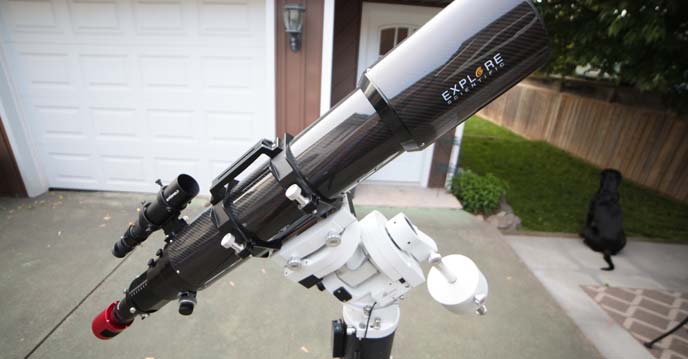
5) Your mount is really important, get a good one
Beginners like to focus on the camera and telescope used for an astrophoto they see shared online. “What telescope did you use” is the most common question I get when newcomers see my photos on Twitter and Instagram.
The telescope is essential, yes, but it’s the equatorial tracking mount that makes it all possible. Whether it’s a star tracker or a full-blown goto system, you can make your life easier by choosing one that’s been proven to be reliable.
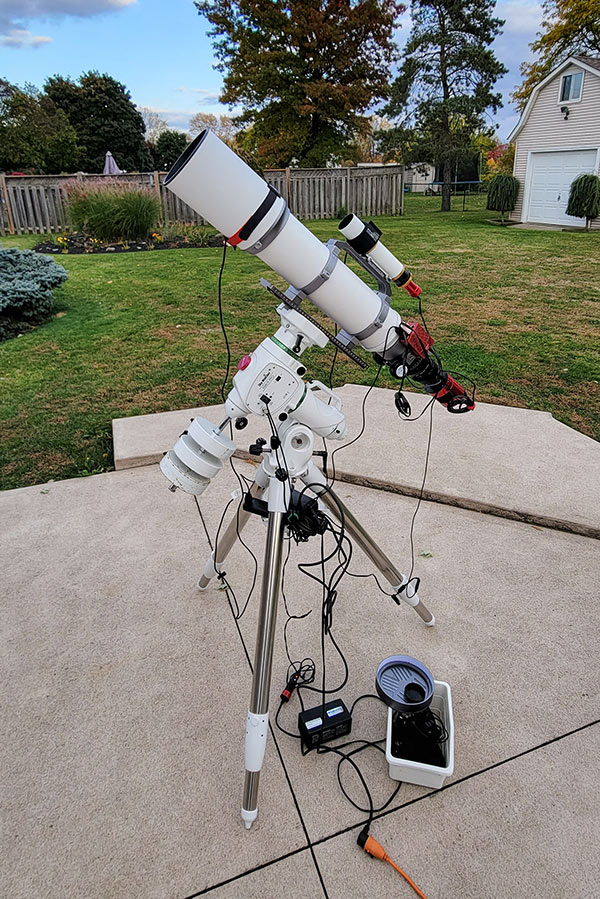
Sky-Watcher EQ6-R Pro
The basics like polar alignment and balance may seem obvious, but I still see beginners getting this wrong early on and blaming their equipment. Take the time to understand how your tracking mount works and its limitations.
This will be your platform for almost every type of astrophotography you do. Once you are comfortable with consistently setting it up properly and polar aligning it, you are free to experiment with new camera settings, filters, and techniques.
Aim for a motorized equatorial mount (not an alt-az), that has a listed maximum payload capacity that is well over the weight of your imaging gear. If that’s only 11 pounds, no problem, there are still plenty of configuration possibilities on there.
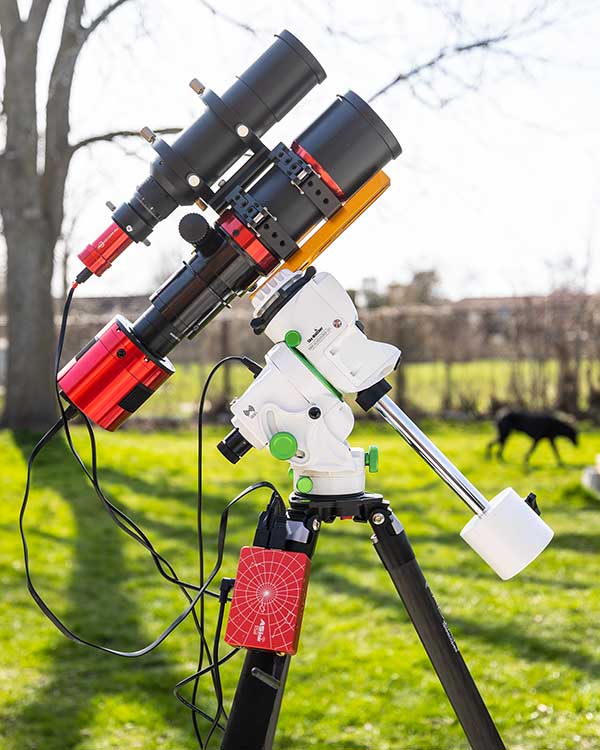
Sky-Watcher Star Adventurer GTi Mount
I really like the Sky-Watcher Star Adventurer GTi, the EQ6-R Pro, and most recently, the super portable ZWO AM5 harmonic drive mount. Look at what others are using, and the imaging system they have riding on top. If they consistently pump out great images with it, that’s a pretty good sign.
6) Don’t start with a long focal length telescope!
A long focal length (anything over 1000mm) means a higher native magnification. So, when you attach a camera, this is the field of view you will get.
If you are used to a camera lens, 300mm is considered a long telephoto lens, but in the telescope world, this is taken to the extreme. A popular telescope package choice for astrophotographers starting out is a Celestron CGEM II 800 at over 2000mm.
Don’t get me wrong, this is a great telescope package, but I believe it will make that first tracked, long-exposure image of a nebula or galaxy harder to achieve.
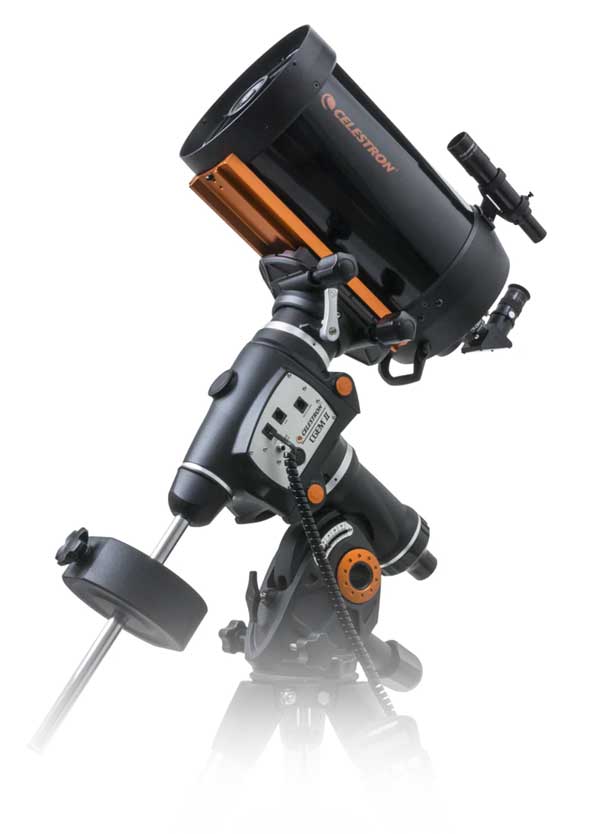
A high-magnification SCT is less forgiving than a wide-field refractor.
But high magnification is good, right? We want to see and photograph small galaxies and the planets right up close, don’t we? Well, we do, but the learning curve goes way up when you are pointing at a tiny area of the sky.
It makes alignment, finding objects, and accurate tracking more difficult simply because it literarily magnifies any tiny error you’ve made along the way. Instead, start wide, to give yourself a break.
A compact refractor in the 400mm range is ideal, it will make everything easier. No matter which camera you use, you should now be able to find and focus on the brightest stars and begin your first tracked, long-exposure image.
The William Optics RedCat 51 is a solid choice for beginners and shoots at a beginner-friendly focal length of 250mm. This telescope is also compact and lightweight enough to be used with a star tracker mount.
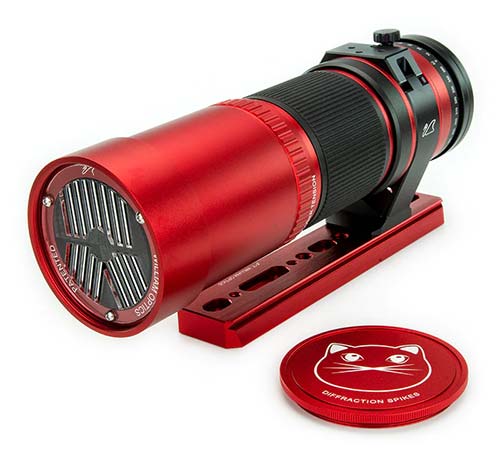
The William Optics RedCat 51. 250mm at F/4.9.
Once you have mastered the process with your wide-field setup, increasing focal length is a lot more approachable.
7) Get ready for image processing
If you are already a daytime photographer and know your way around Adobe Photoshop or Lightroom, great. But even then, you will have to make a massive shift in the way you edit photos.
The process of creating an astro-image is more than just creative edits to enhance color and clarity. It’s image stacking, it’s hours of integration, calibration frames, and learning the art of pre-processing.

Performing a curve stretch in Adobe Photoshop
I know that a lot of beginners have very little experience with image editing going in, and it’s going to require a lot of time and energy to get up to speed. Just like the image acquisition portion, this experience will be a lot more enjoyable with realistic expectations.
I personally love the image processing side of things, and I think eventually beginners will too. There is something about spending a few hours really digging into your data and bringing it out the hidden beauty that is both satisfying and rewarding.
There are many great tutorials here on YouTube, no matter which software you are using. I’ve created a beginner-friendly Image Processing Guide that aims to help you save a lot of time and frustration.
Just remember that you will need to make a choice in terms of the software you use, and stick with it. I recommend starting with Adobe Photoshop, and gradually applying a few techniques from PixInsight over time. That’s what I did.
8) Weather is cruel, and you will obsess over it
I check 3-4 weather apps multiple times per day. I’ve been doing this for 10 years, and it is not healthy.
Clear Outside, the Clear Sky Chart, Astrospheric: they’re all pretty good. But unless you live in the desert, and/or shoot remotely, you are going to experience lots of cloudy nights. They often are timed out exactly when a new piece of gear arrives, or when you are particularly excited to start or continue a new project.
It is probably the most devastatingly helpless part of astrophotography, and it will hurt. Even worse, is when a clear night is coming up, and you have ‘real life’ plans you can’t get out of. Work nights, birthday parties, sporting events, etc. These will all be clear nights.
Out of all the abuse we take as an astrophotographer, I think the weather is probably the worst. However, it gets a little easier to stomach when you commit to astrophotography as a lifelong journey.
So you missed Orion this winter, he will be back next year, I can promise you that. And you’ll be ready.
9) It’s expensive – there is no way around it
Photography in general is expensive but astrophotography takes it one step further. Telescopes can be expensive, even if you have a budget in mind, you will go over it. And over, and over again.
As a full-time astrophotographer, it’s a little easier to justify expenses now. But when I started, I purchased my telescope mount on the old credit card and said “If I don’t get this to work, I’m out almost a grand.” It’s a nice incentive to get it to work.
Now, I don’t want to scare you away if your budget is limited, and you want to get in the game. Used gear, smaller setups, older cameras – you can do so much with this type of equipment. And I bet it will be a lot more rewarding than someone who buys their way to the top.
If you’re looking for a number, I am going to say that it will be tough to build a deep-sky astrophotography rig for under $2000. And this will be a smaller-scale system for wide-field targets. But, if you are thrifty and hungry, I bet you could get in for even less.

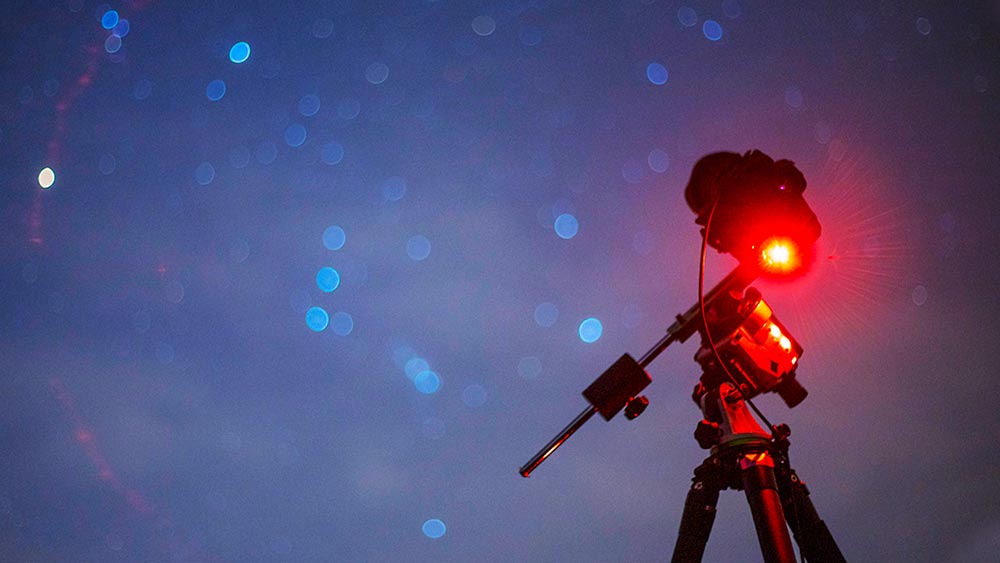
Astrophotography with a camera lens and star tracker
10) Social media sharing joys and letdowns…
Now, I don’t know what your plans are for your images when they are done, but chances are you want someone to see them. You can print them out to hang on your wall, you can post them on your website, or you can share them on social media and watch the likes come rolling in, right? Well, sometimes.
The social media landscape has changed over the last few years and astrophotographers are using “feed the algorithm’ tactics to get more eyeballs on their work. This is all cool with me, but just remember that hitting an arbitrary number of likes on your image has nothing to do with how good it is. Yeah, it feels good when others appreciate your work, but if that’s what you need to enjoy the hobby, it’s not going to work.
Follow astrophotographers that have a particular style you enjoy for inspiration, and don’t get too hung up on likes and views. It sounds obvious, but it can really get in your head, and it’s not why you got started.
I have recently gotten into printing large, high-resolution astrophotos to display in my home, and eventually offer for sale. The process has been refreshingly different than how I dress up an image to share on a phone screen.
11) Get out there and shoot
I can’t believe I have to say this one, but Alan Dyer is right – spend less time watching YouTube videos (wait a minute), and just get outside and practice.
Don’t try to over-prepare yourself with too much information, and try to nail your first attempt – it just won’t happen. When you’re out there in the moment, you’d be surprised at how different things become and what sticks and what doesn’t.
If your expectations are set to just have a night of experimentation and learning, you will enjoy every minute of it. This is exactly the way I got hooked on astrophotography, through trial and error and having fun experimenting with camera settings in my backyard.
I have found that a lot of the ‘experts’ in the astrophotography Facebook groups and forums take very few (if any) actual photos.
You can have all the answers but until you are executing what you’ve learned, you really haven’t even started.
12) Dark skies make a big difference
If you’ve only ever shot from a light-polluted city, you may be surprised at just how much of a difference dark skies make. It’s not just that the quality and detail of your images will be better, but the entire process seems to become easier and more enjoyable.
You are no longer fighting against the light dome of a washed-out sky, and you can actually focus on collecting quality data (and as much of it as possible).
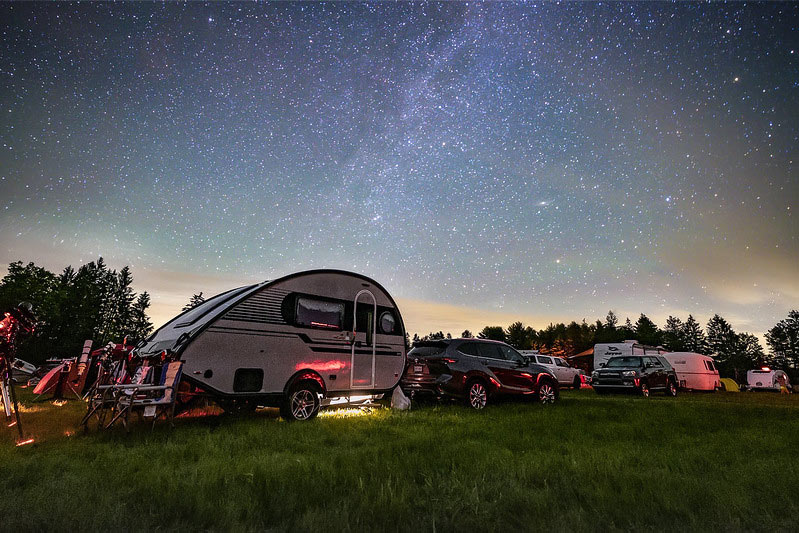
Milky Way under Bortle 2 skies at the Cherry Springs Star Party
You can see more stars and even deep-sky objects in the sky. The images you capture there will be easier to process, and you will need less overall integration time to create an amazing image.
Any chance you get to set up your camera and telescope under dark skies, take it!
I like to go on an astro-adventure on new moon weekends. I look for Airbnb’s in dark sky locations using a light pollution map, and book a last-minute trip once I am certain it will be clear.
Make those dark-sky trips count, and go after the fainter targets while you’re there.
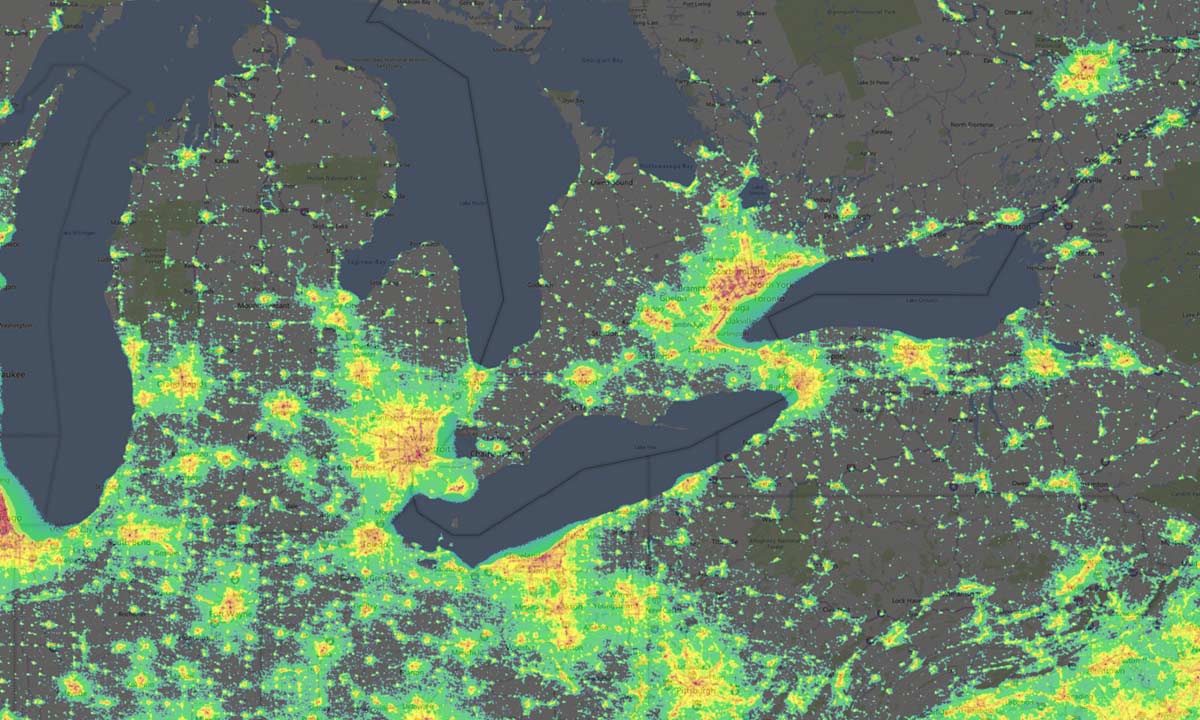
Use a light pollution map to decide where your next dark-sky astrophotography trip will take place. lightpollutionmap.info
13) Don’t be afraid of the dark…
This one sounds like a joke, but it’s seriously something to consider if you’re new to the hobby.
If you aren’t used to spending a night outside alone in the dark (most of us aren’t, right?), it can be a little freaky out there. Seriously, if you’ve set up at the dark-sky spot away from home and it’s truly dark (which is exactly what you want), you will hear every stick break, every rustle in the bushes, and question why every car that drives by is out so late.
You need to be in the right mindset to stick it out, or you’ll completely freak out and pack up. A word to the wise here, a small stereo playing some classic rock can really help ease the tension. That’s my routine, anyway. And if I’m at home, my pal Rudy helps keep me company.
14) Join your local astronomy club
I know, I know, you’re a lone wolf who likes to figure things out on your own. You’re resourceful and you can learn anything online. That’s me too, I hear you.
But you will save a year’s worth of struggle by hanging around the astrophotographers at your local astronomy club. Trust me, there will be a die-hard pack of them in the club.
I’m talking in-person hangouts with a group of people that geek out just as hard about space as you do. One-on-one advice based on the gear you currently own, from people that have been there.
This is precisely how I managed to escape the complete the incredible, rare accomplishment of taking my first tracked, guided long exposure image through a telescope.
Sometimes you need a responsive guide or mentor to help you through the key steps, and this is something that I, through the screen on YouTube or this website, cannot do for you.

Final Thoughts
Astrophotography is a hobby you can enjoy for a lifetime. Don’t rush the early stages because you are impatient for a result. Some of my favorite memories involving this hobby are from the summer I got started, and the early victories I achieved.
Photographing the night sky in any form is a challenge, and it’s something most people will never get to experience. Enjoy the process – the crushing lows, the short-lived highs, the pictures that leave you speechless, and the ones that make you want to sell your ‘scope.
It’s the journey to the image that makes it fun. Life is too short to spend on the sidelines, watching and critiquing others. Get out there. Capture. Create. Inspire. This is where the true joy of astrophotography lies, trust me.

Hi Trevor,
A great article, nothing could be further from the truth. I have read this article three times now, and I have just referred back to it again because it all makes sense. After almost two years of constant studying I’m Hooked and 74 years of age. I have only taken images of the moon and the Atmosphere, albeit we have been struggling with extreme bad weather conditions down here in Melbourne AU over the last 2 years and it’s still ongoing. I check the weather maps regularly and are constantly peering at the night sky in the hope of a chance to practice. My wife of 55 years thinks I am a lunatic. Although I haven’t responded to many of your articles and Youtube Videos I enjoy reading and watching each and everyone of them and still have a long way to go.
Keep up the great work, you are true Ambassador of the Hobby/profession.
Best regards and Clear Nights.
Billy
Trevor, this posting is very encouraging and right on the money. Of all the people posting out there, your writings have helped me the most. I mean this sincerely. I am in your debt.
Mitch Linneman
Hey there, Billy. I was confused a bit with the comment, because I agree and relate to the feelings you’re expressing, but you began with “nothing could be further from the truth”, meaning something is completely false/wrong. After reading your post a few times, I think you meant to say something along the lines of “nothing could be truer”, meaning it rings true to you and you relate to it. just wanted to put that here in case anyone else got confused, as well. I too love the work on Trevor’s YouTube channel, and actually bought my first full frame mirrorless camera today (Canon R 6) to finally see my dream hobby become a reality. Cheers, Billy!
is there a homepage where ” Trevor”introduces himself